


Timelines are visual representations of a series of events in chronological order. They are widely used for educational purposes like highlighting historical events, and for financial forecasting like showcasing past trends and future predictions. The diagrams are equally effective in project management for highlighting milestones with deadlines.
Microsoft PowerPoint is one of the most commonly used timeline generators. Still, it could be time-consuming to create a timeline in PowerPoint due to its limited resources. If you are indeed struggling to build a delicate timeline in PowerPoint. EdrawMax might be worth a try! It is a professional diagramming tool trusted by over 30 million users across the globe with tons of free timeline templates available that you can quickly get started with. And there’s no need to worry about the price. You can try the free online version without downloading it and design professional timelines faster than in PowerPoint.
Part 1: Steps of using PowerPoint to Draw a Timeline
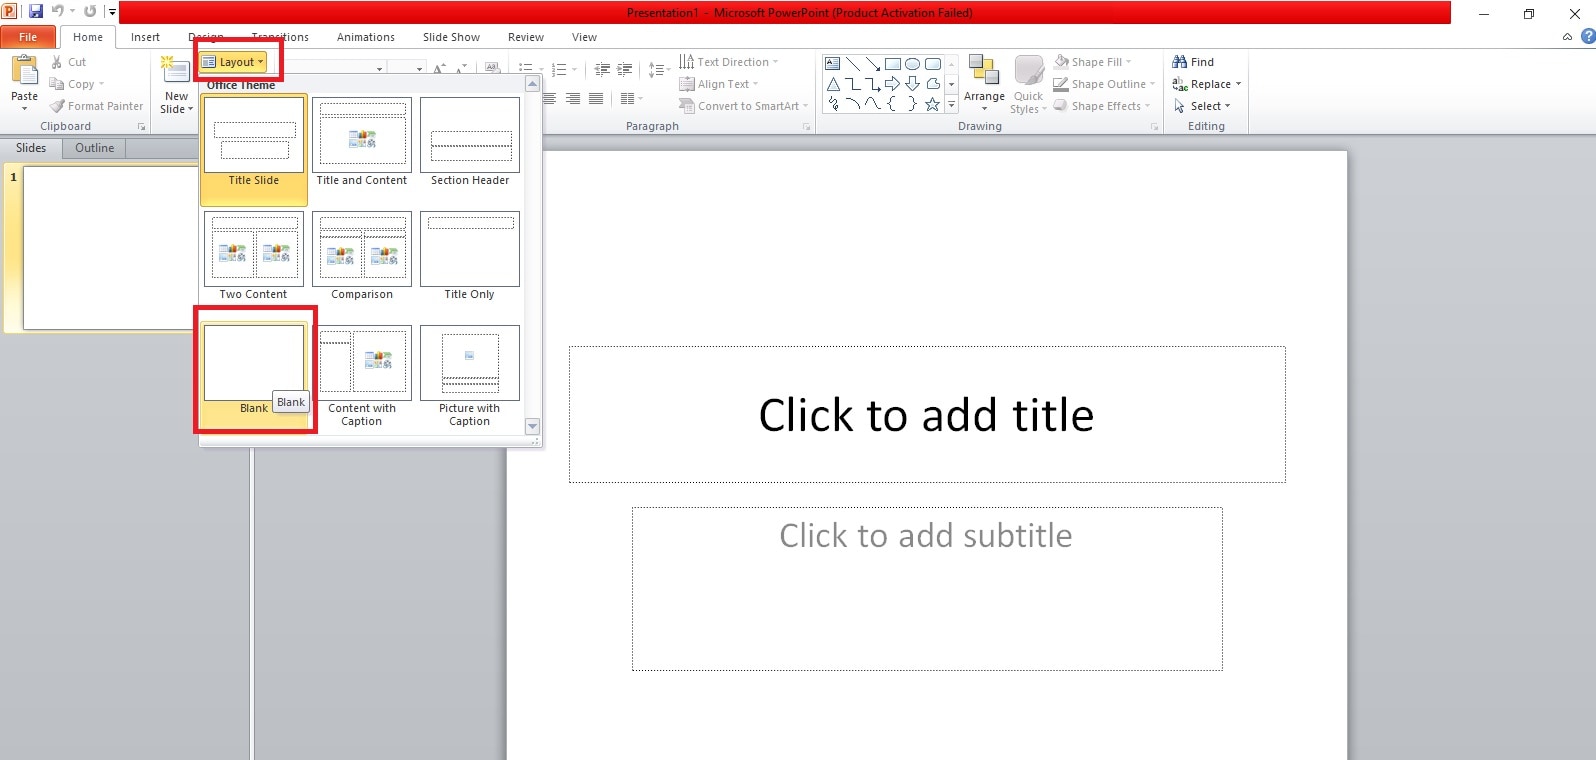
1. Select a Blank Layout
Launch Microsoft PowerPoint on your computer. Under the Home tab, go to the Slides section. Click on the Layout option and select Blank from the drop-down menu. A black slide will get added to your presentation file for building a timeline in PowerPoint from scratch.
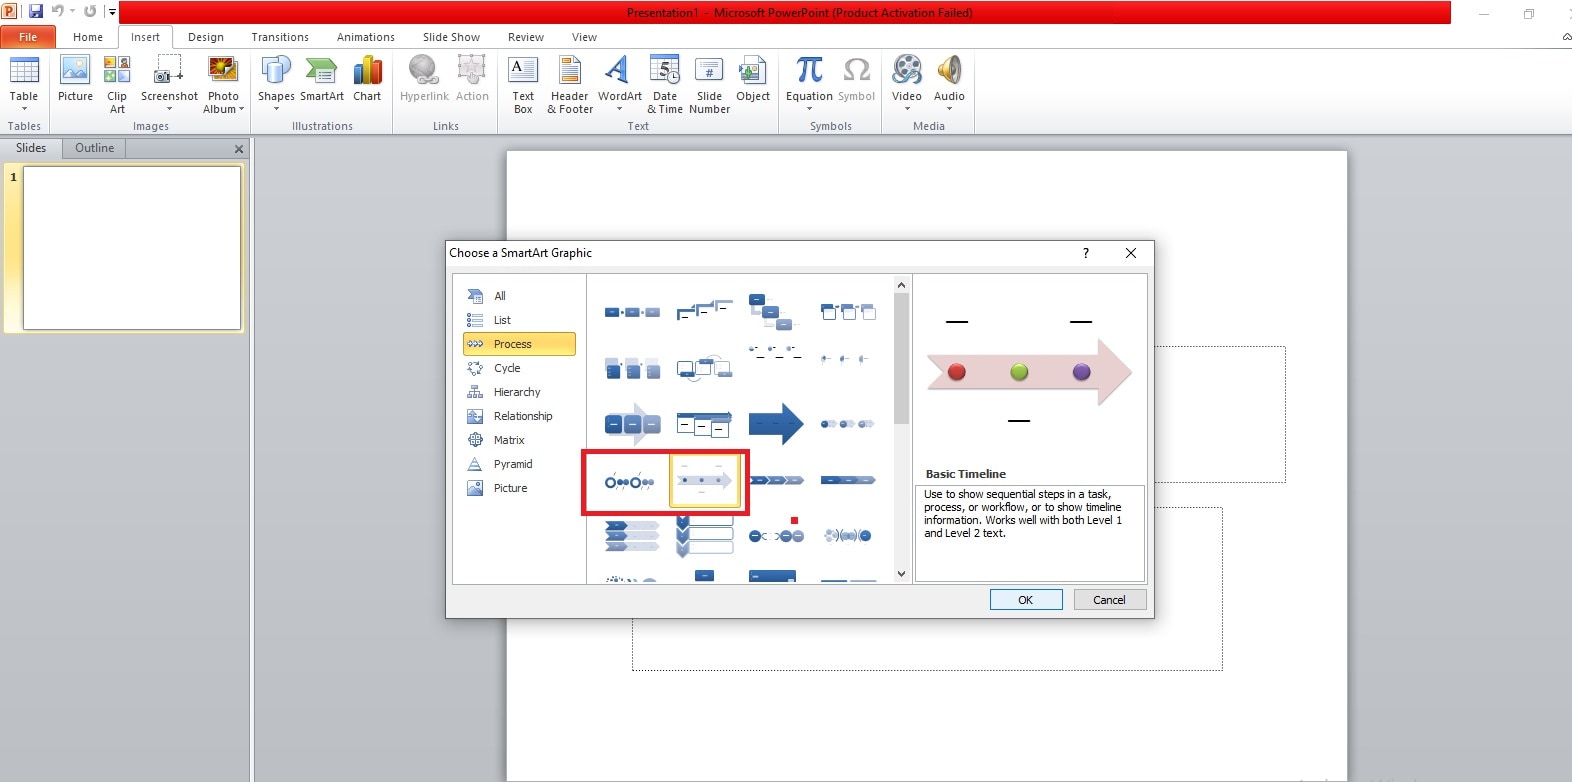
2. Insert a Favorite Timeline Graphic
Under the Insert Tab, go to the Illustrations section. Click the SmartArt option, and this will open the Choose a SmartArt Graphic window.
From the left panel, select the Process category, and you can select anyone from Basic Timeline and Circle Accent Timeline for inserting timeline in PowerPoint.
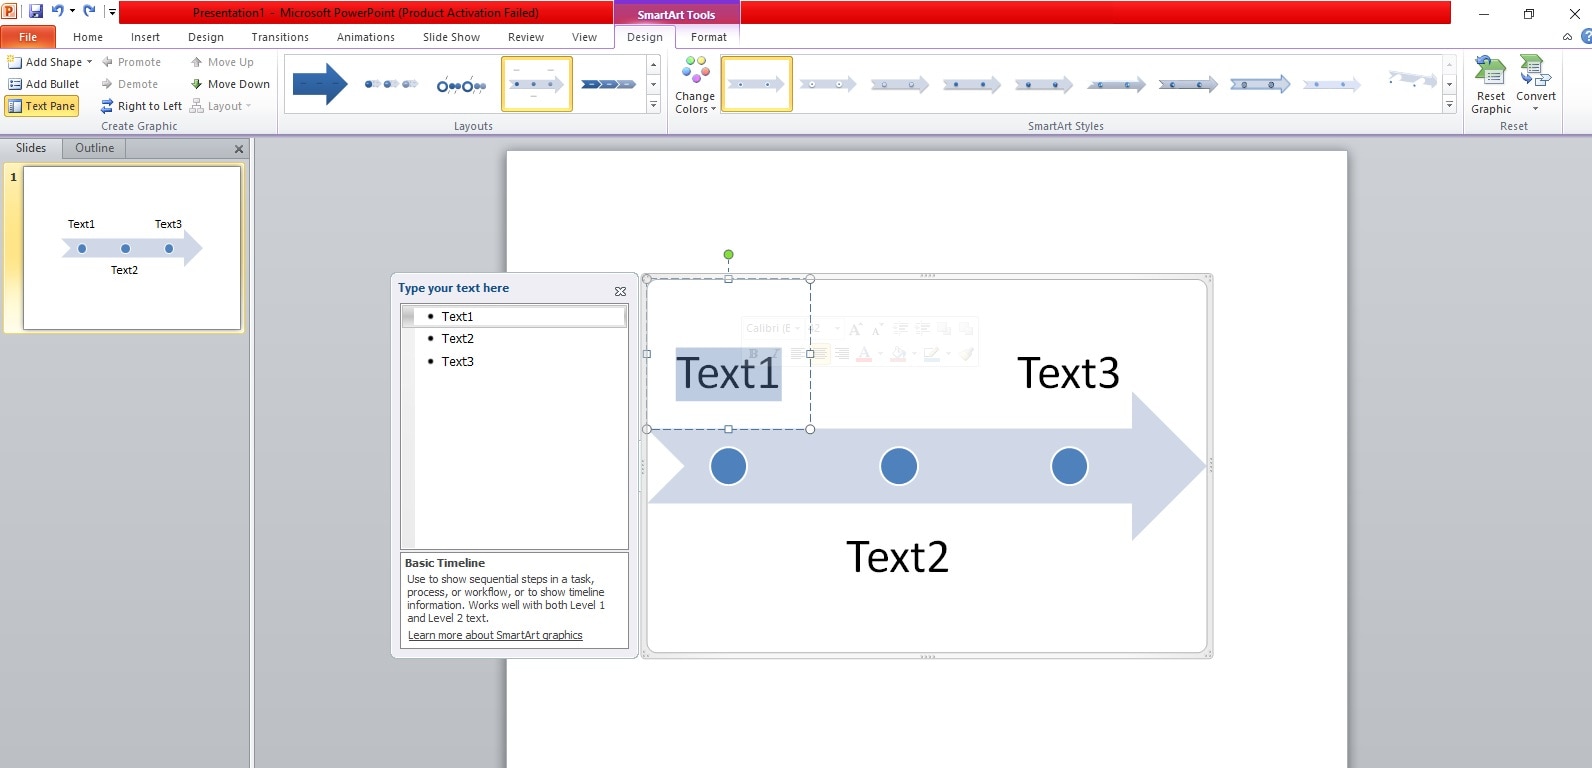
3. Edit Text
We have selected the Basic Timeline and clicked on the Ok button for inserting timeline in PowerPoint. After adding the timeline to PowerPoint, click on the Text labels to edit the sample texts and insert your data and information as per your project.
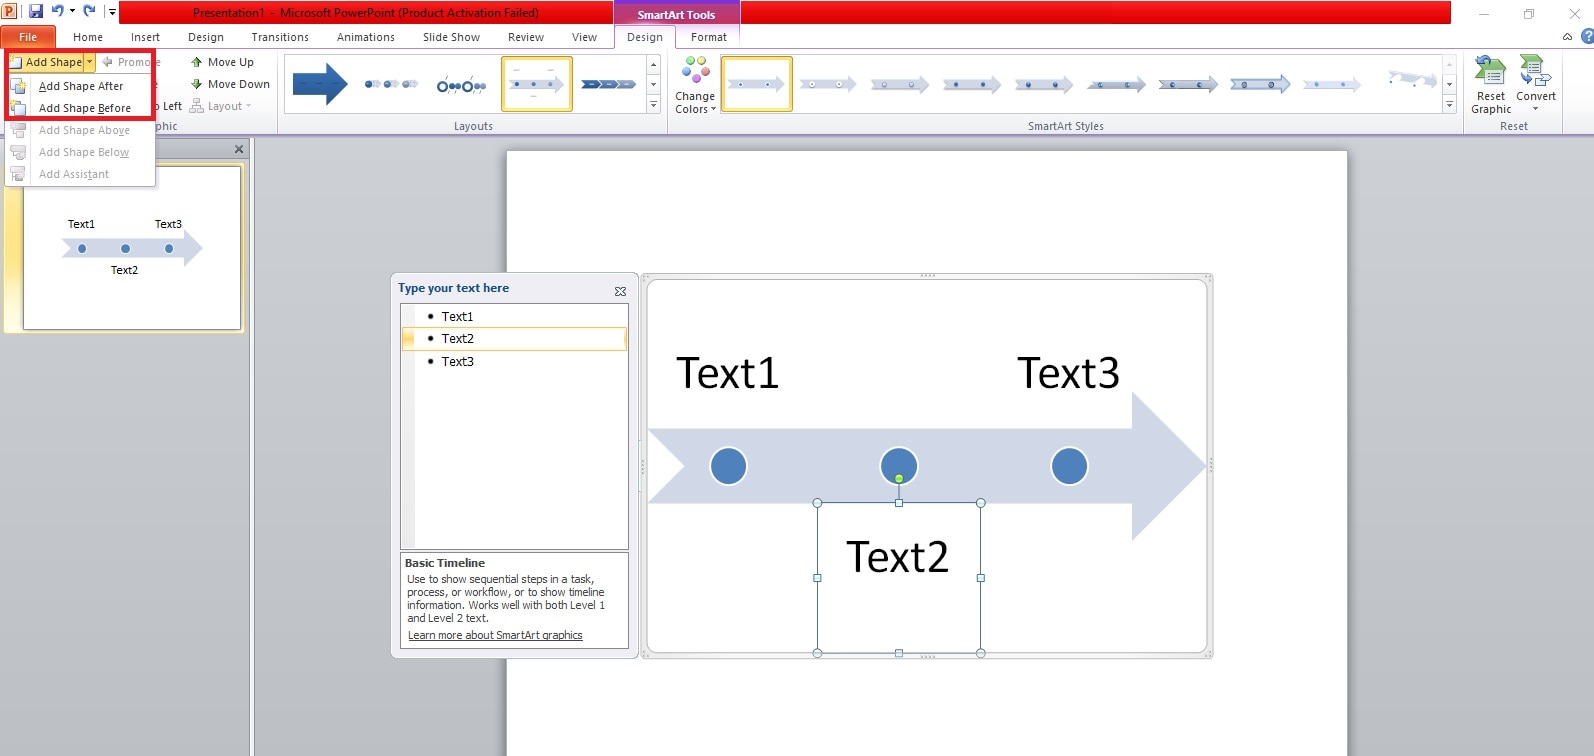
4. Add or Delete Shapes
Adding shaping in a timeline means inserting an additional circle or node to represent a new milestone. Currently, we have three circles representing three texts. If you want to add a new circle after Text2, here are the steps to follow.
· Click on the Circle representing Text2.
· Under the Design tab, go to the Create Graphic section and click on the Add Shape option.
· Click on the Add Shape After option from the drop-down menu.
You will see a new circle after Text2 on the timeline. On the Text Pane, add a text label for the new node.
If you want to delete a circle, select the Text representing the node from the Text Pane. Press the Del key, and that circle will get deleted from the timeline.
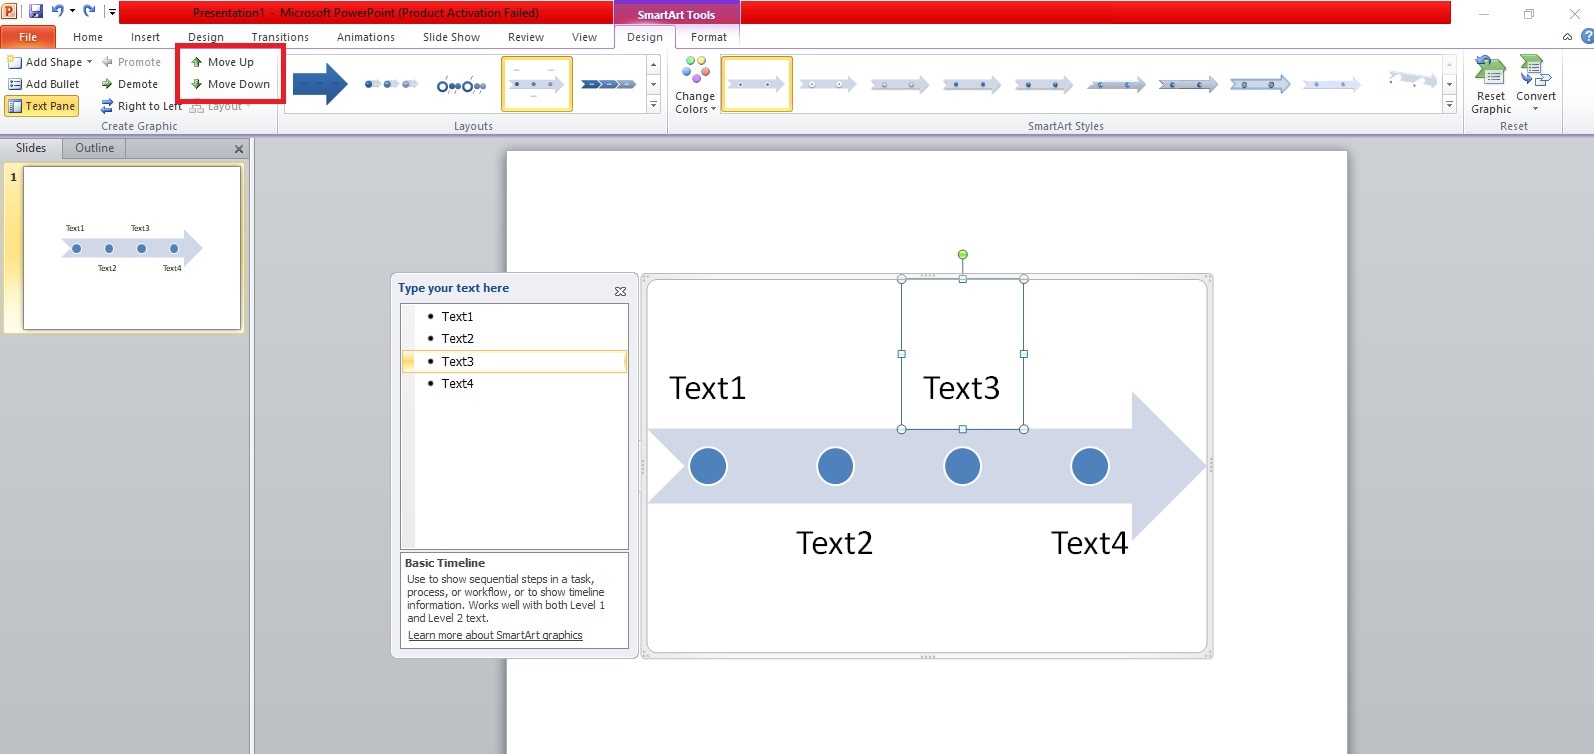
5. Move a Shape on the Timeline
Select the corresponding Text of the shape that you want to move on the timeline. For example, if you want to move down the third circle on the timeline, you should select Text3 from the Text Pane.
Under the Design tab, go to the Create Graphic section. Click on the Move Up or Move Down option as required. If you choose Move Up, the circle corresponding to Text3 will move ahead of Text2. This is useful when you want to change the order of the events on the timeline.
6. Add and Customize the Timeline Bar
After inserting a timeline in PowerPoint, you can change the timeline if you want. Under the Design tab, go to the Layouts section, and you will see different timelines to choose from.
You can place your mouse pointer on them to get a preview. Click on the selected one for drawing a timeline in PowerPoint and replacing the previously inserted one.
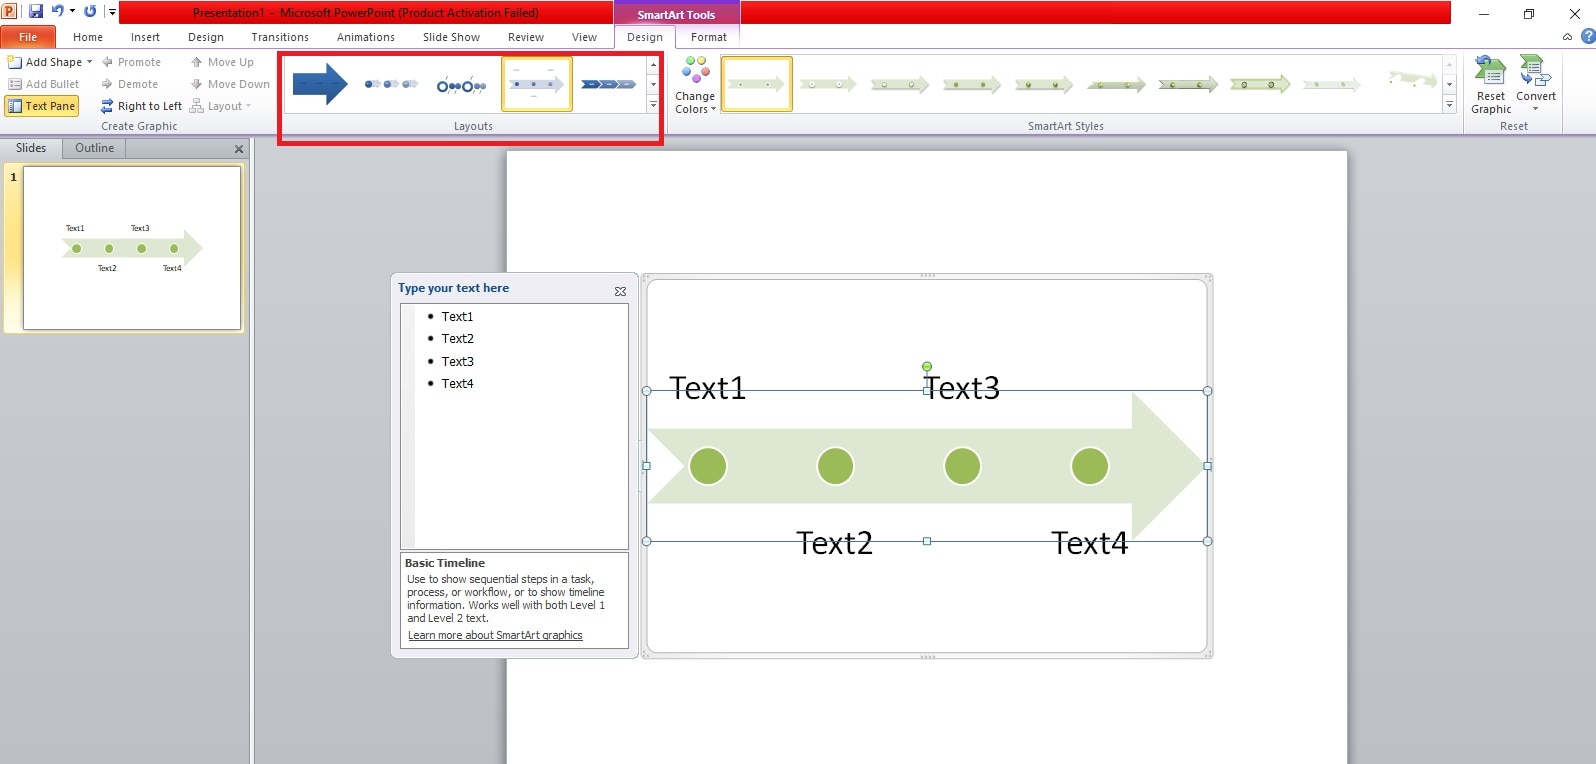
If you want to change the color scheme of the timeline, go to the Design tab. Click on the Change Colors option and select any color scheme from the drop-down option to preview and apply it.

Part 2. How to Create a Timeline in EdrawMax
1. Software Introduction
EdrawMax is the best alternative to PowerPoint to create any type of timeline. You get to choose from different timeline templates that you can customize instantly and get the final timeline exactly how you want.
EdrawMax is available for computer users (Windows, Mac, Linux) and mobile users (Android and iOS). The software has an overwhelming 4.3/5 G2 rating which ensures the quality of the product. In addition, EdrawMax is trusted by over 30 million users for any diagramming needs. The tool is suitable for engineers, project managers, public speakers, researchers, mathematicians, and likewise.
Instead of creating and showing a timeline in PowerPoint, many professionals have chosen to use a timeline template and customize it with a few clicks in EdrawMax. And Here is why.
Free Online Tool: EdrawMax web platform is completely free to use, and you get access to all the features and functionalities without any restrictions. There are over 200 types of diagrams available to meet everyone’s diagramming needs. Besides, you get access to its libraries of unlimited shapes and symbols that are very useful in diagramming.
Built-in Templates: EdrawMax stands out for its vast collection of templates. There are more than 15,000 templates available for every category of diagrams. You can get visually appealing yet professional timeline templates to customize to create your own timeline in a few minutes. There is a proper blend of free and premium templates in every category to fulfill the requirements of every user.
AI-based Tools: EdrawMax outshines PowerPoint by making artificial intelligence tools available for every user. AI tools help in designing timelines faster through accurate automation, quicker execution of commands, and providing better suggestions for improvement. You can ask Edraw AI to insert shapes, add labels, and generate tables and lists for your timeline.
EdrawMax helps you to overcome the limitations of exporting PowerPoint timelines in limited file formats. You can now export timelines in different file formats like Visio, JPG, PDF, HTML, and much more for broader compatibility.
2. Steps of creating a timeline with EdrawMax
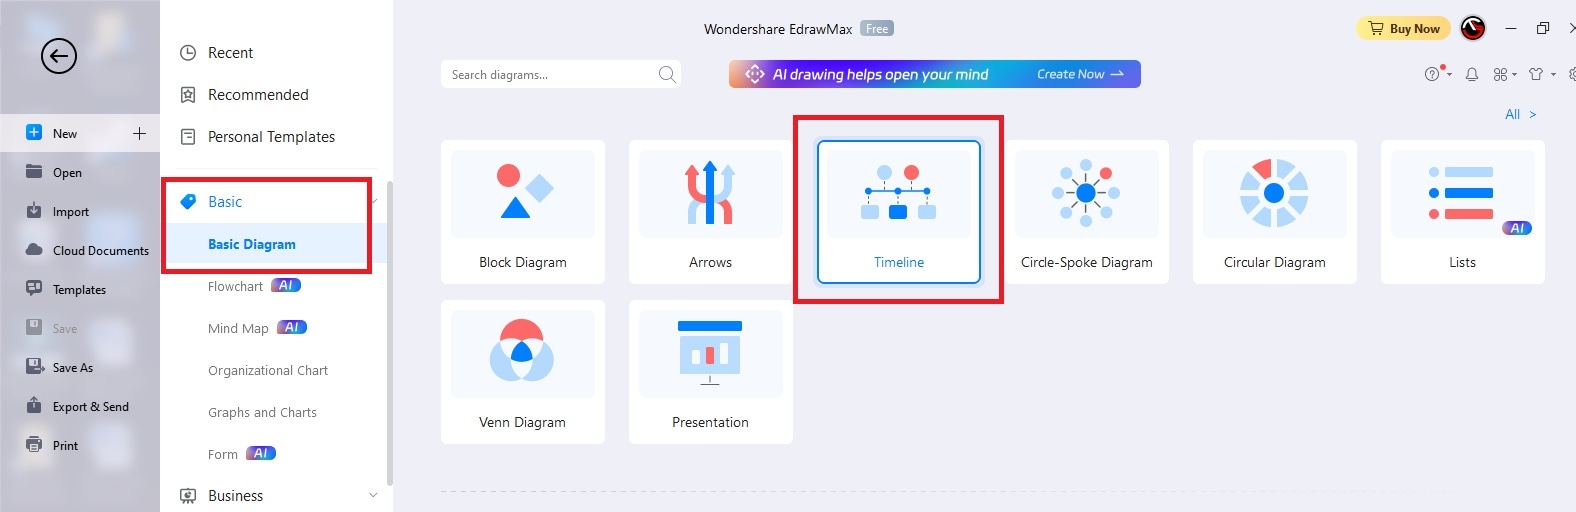
Step 1: Create a file
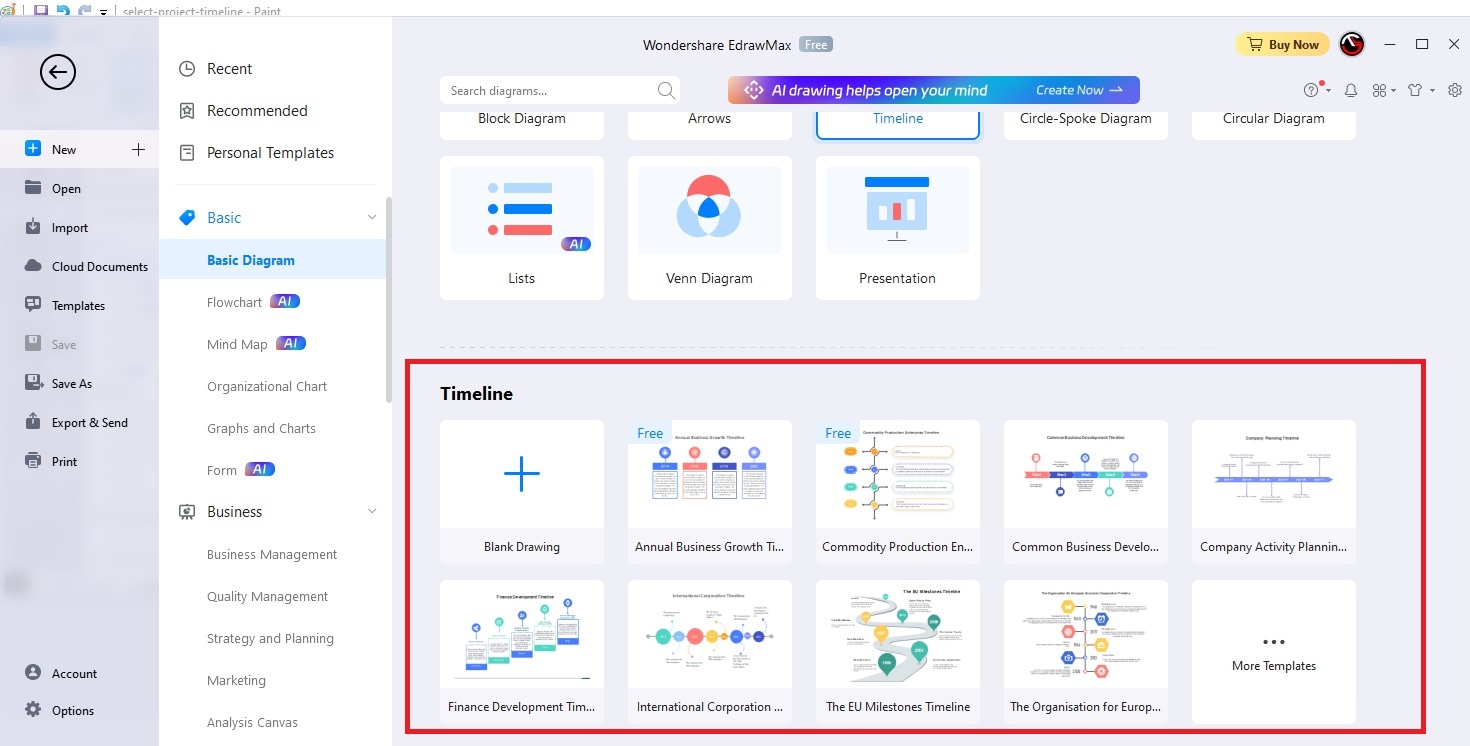
Download EdrawMax on your computer and install the software. Open the software and create an account. Sign into your account and go to New> Basic> Basic Diagram. Click on the Timeline option.
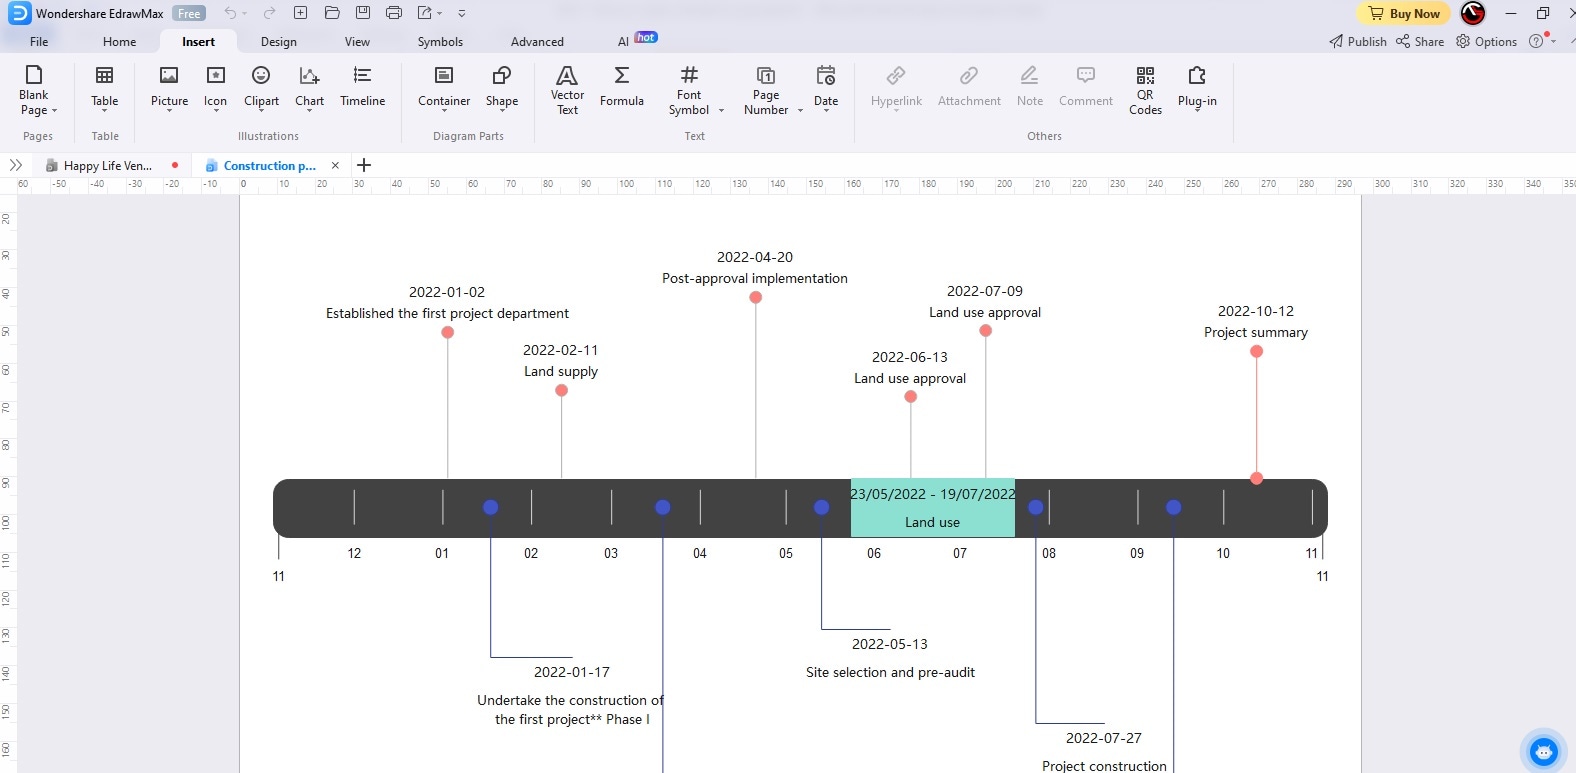
Step 2: Select a Template from Gallery
Once you click the Timeline option, you will see a wide range of timeline templates below. You can choose any of them, but if you want more options, click on More Templates. Double-click on the template you want to customize and create your own timeline.
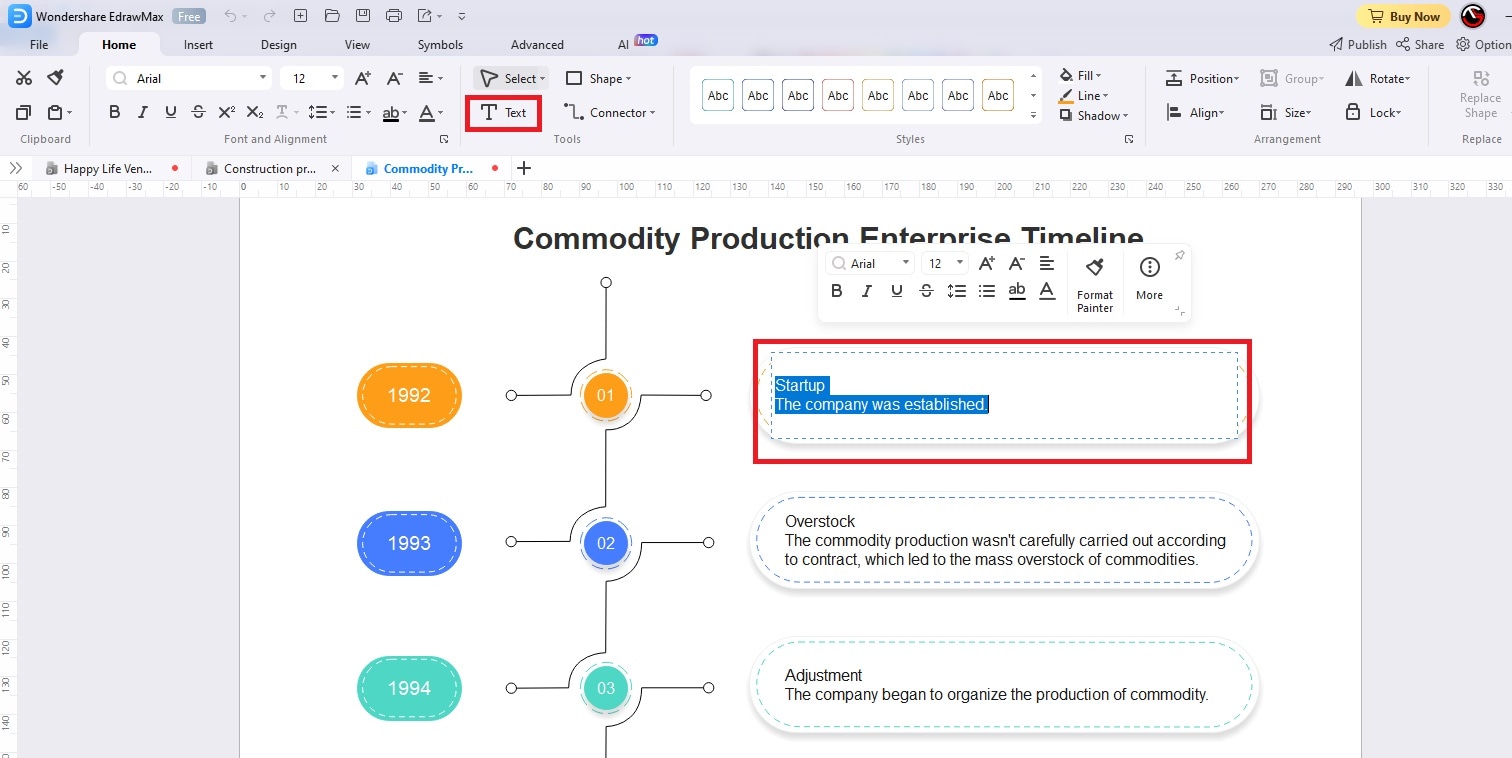
Step 3: Customize the template
Double-click on the text labels to edit them and insert the text as per your project. To change the style of the labels, single-click on them, and you will get options on the floating widget. If you want to add additional text labels, go to Home> Tools> Text.
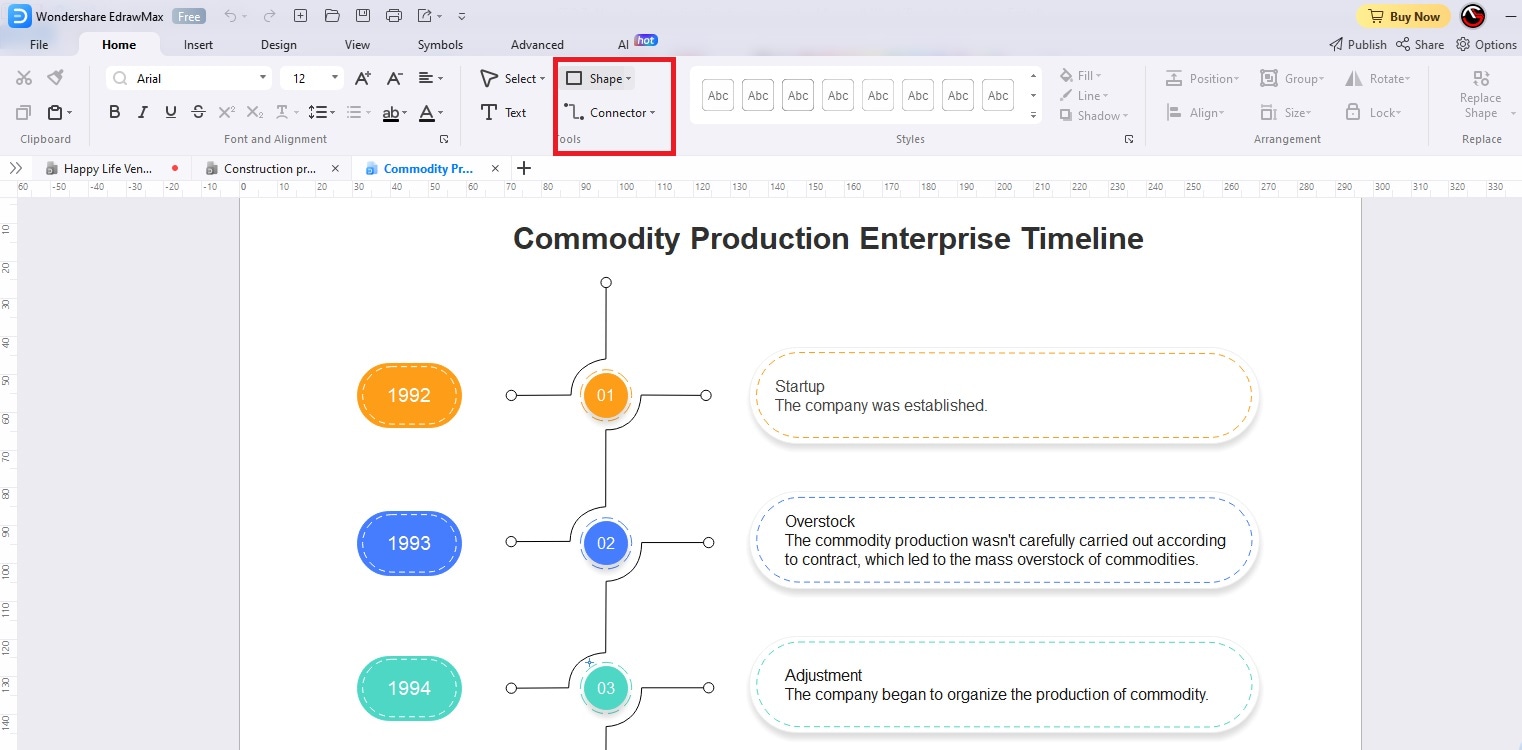
Go to Home> Tools> Shape if you want to insert basic shapes. Go to Home>Tools> Connector if you need to insert connectors to relate different objects in the timeline.
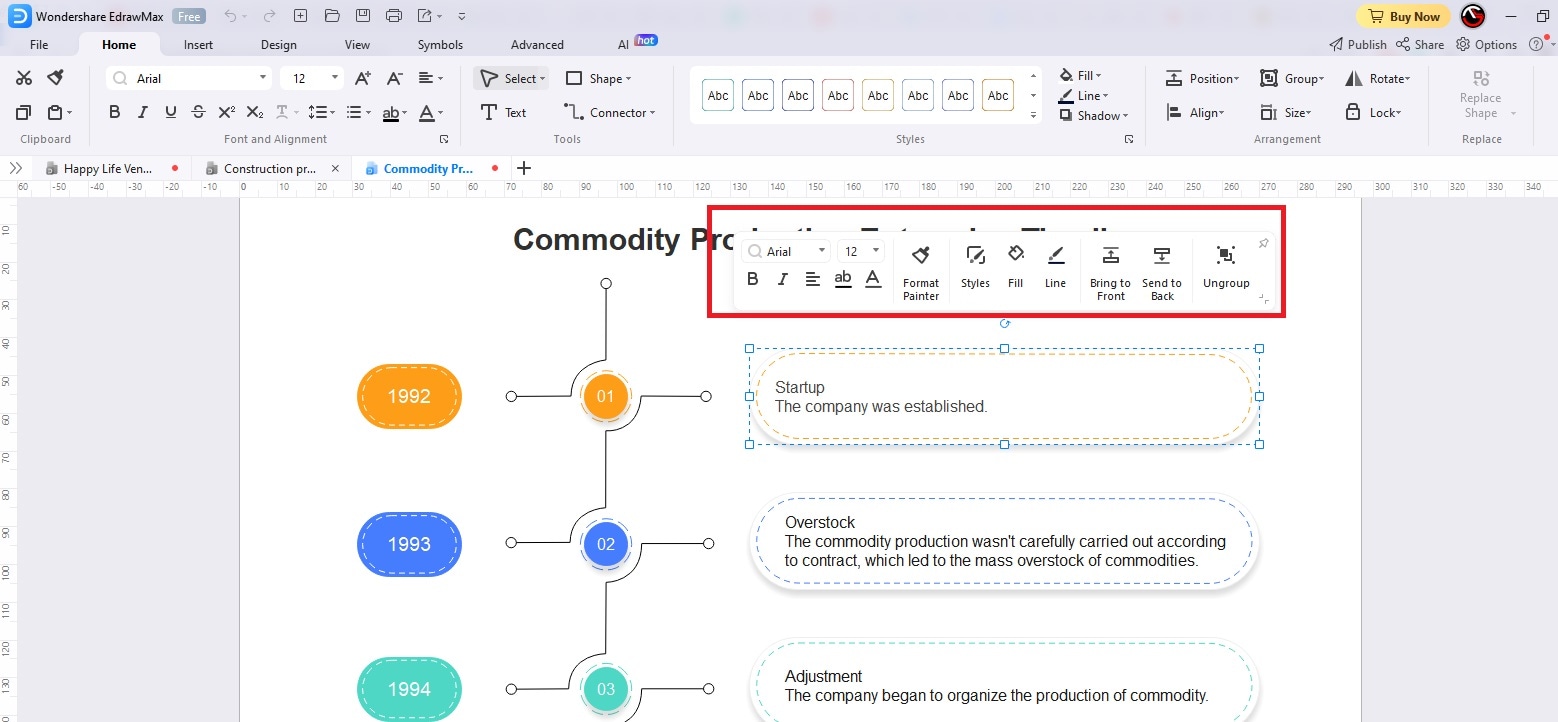
To change the color scheme of the shapes, click on the shape, and you will get to see a floating widget. You can use Styles and Fill to select any style and fill the shape with a color. The Line option lets you change the color of the outline.
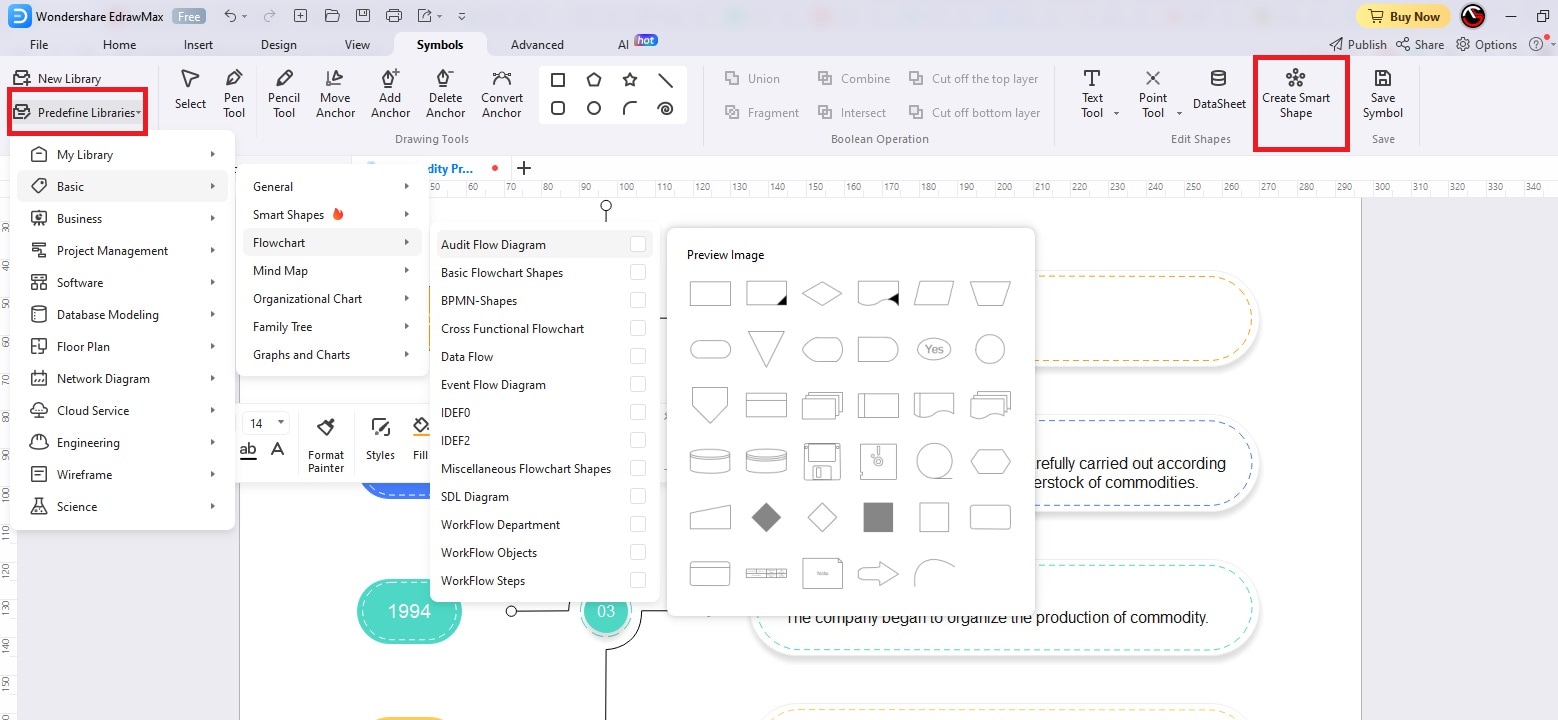
Go to Symbol> Predefine Libraries and select any symbol from the available categories that you may want to add to the timeline. If you want similar shapes as in the template, click on that shape in the timeline and click on Create Smart Shape. EdrawMax will insert exactly the same shapes that you can edit out.
Step 4: Export template and share
If you have completed customizing the template and you are satisfied with the final timeline, you need to export the timeline. EdrawMax offers you all the popular file formats to export the timeline. You can control the export quality and add a watermark for copyright.
Go to File> Export & Send. Select the Save Directory, FileName, Export Format, and Export Quality. Click the Export button to save the timeline on your hard drive. You can use the Send Email option to share the timeline with anyone you want via email.

3. Conclusion
Timelines have become an integral part of the educational and professional fields. If you find yourself struggling to build a timeline with PowerPoint that satisfies your needs, try EdrawMax, which is more of a professional diagram maker with rich templates, libraries, AI tools, and various file export formats. You can choose from various timeline templates and edit them intuitively to create the desired timeline within minutes. Go ahead and download EdrawMax now and start creating timelines like a pro.
AI Diagram Generator
Enter your prompt. Upload files if needed. Generate diagrams, charts, or slides instantly.


