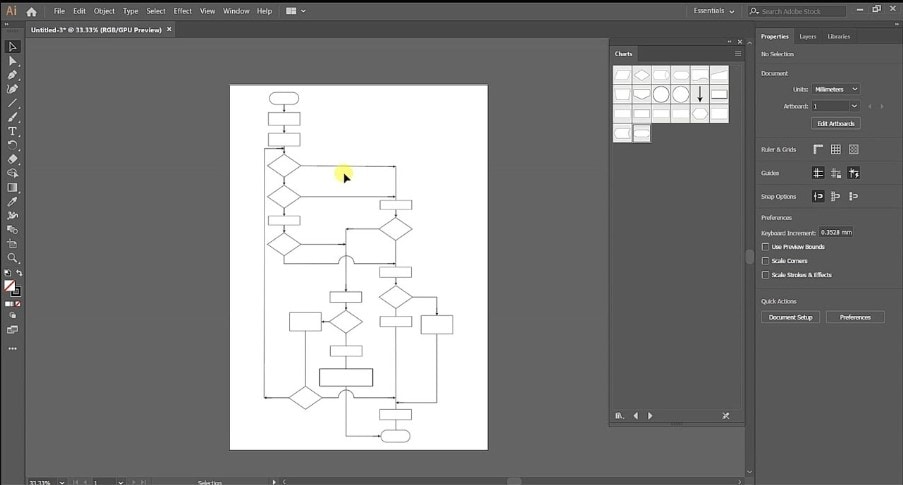
A professional-looking business flowchart can act as a powerful weapon for any organization, visualizing complex business processes straightforwardly, attractively, and concisely. When designed correctly, a project workflow diagram can improve the performance ratio, increase productivity, augment workers' interest, and reduce costs. Additionally, a proficient swimlane or document chart can help you identify discrepancies and bottlenecks in your business processes, identifying redundancy & eliminate it to streamline the flow.
Most business experts employ flowchart Adobe tools to generate and customize their business flowcharts because of their quality & feature diversity. Thus, we have presented a top-notch Adobe flowchart maker – Illustrator, to help you sort out your diagramming needs and craft your business flows accordingly.
1. Introduction to Adobe Flowchart Program
Adobe is an international software corporation that has been a market leader because of launching innovation-inspired tools and services. Founded in 1982, Adobe has established dozens of instrumental tools that have revolutionized the way people create and share visual content. From graphic designing to video editing to file management, Adobe encompasses a comprehensive suite of applications that fulfill a wide range of user needs and never comes slow at surprising you with its brilliant software toolkits.
Adobe Flowchart Maker
Adobe helps you bring your creative notions to life by offering a state-of-the-art vector graphic diagramming tool: Adobe Illustrator. Generally, Adobe Illustrator is a multipurpose platform employed for designing logos, typographies, icons, vector art, presentations, graphic pictures, posters, and more.
However, you can exploit this valuable tool to construct your personal or enterprise-based flow diagrams, whether you want to delegate information, develop business strategies & action plans, foster communication, execute workflows, standardize a business SOP, or train your staff. Its avant-garde features, precision, diversity, and compatibility make it a go-to choice for individuals, teams, and businesses that want to communicate their ideas engagingly.
We will employ Illustrator for creating Adobe flowcharts, but before diving into the actual flowchart creation procedure, let's learn & explore the basic interface of Adobe Illustrator.
The Menu Bar
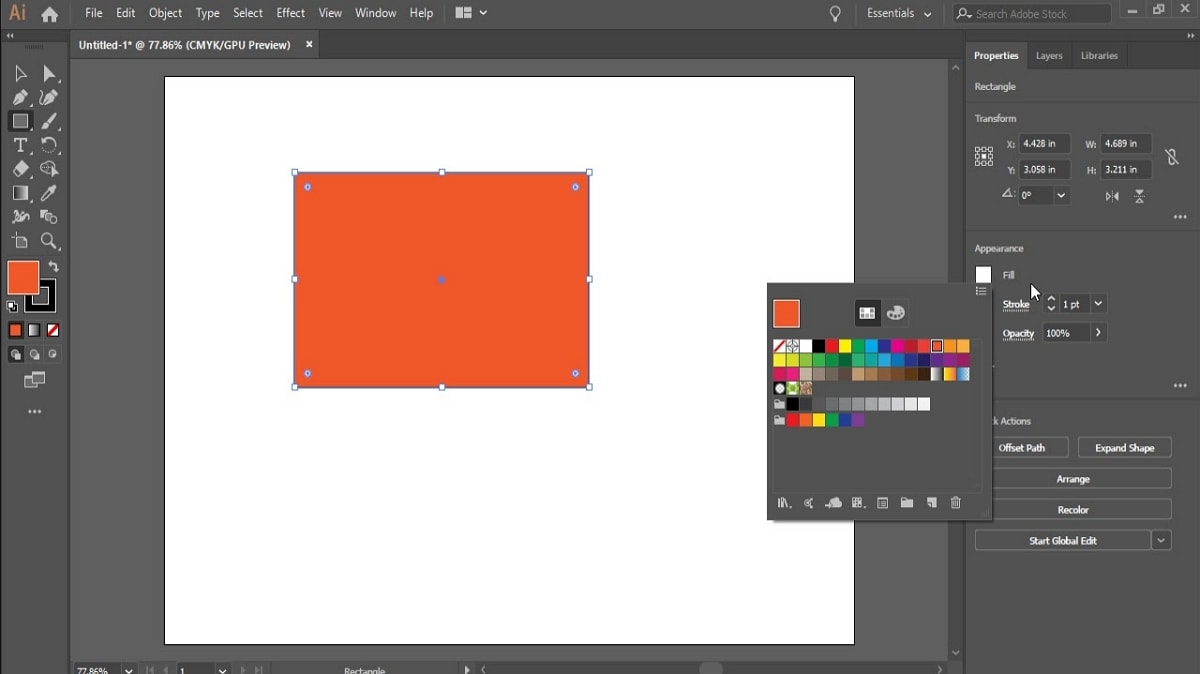
The menu bar contains several menus, including File, Edit, Object, Type, Select, Effect, View, Window, and Help; all these menus grant you access to certain commands, controls, panels, adjustments, and settings.
The Left Panel
Also called the Tool Panel, the left contains functionalities to create and customize the artwork; similar functionalities are grouped together as one toolkit. Thus, if you want to use a feature from the left panel, you need to navigate to that specific toolkit or feature category.
The Right Panel
The right panel comprises element attributes, layers, and other customization panels, allowing you to configure your artwork in multiple ways. You can allow and restrict the options displayed in the right panel by navigating to the Windows tab.
Document Window
Document Window is the central portion of Illustrator's interface that contains the artwork you are working on. You can adjust your document window size through drag-and-drop according to your page requirement. Additionally, if you open multiple project files, they would be displayed as tabs in the working window.
2. How To Create an Adobe Flowchart?
Now that you possess an in-depth knowledge of Adobe Illustrator's working interface, the flowchart establishment process will never be a hassle for you. Let's delve deeper into the pivotal process of creating the intended Adobe flowchart diagram:
Step1
To use Adobe Illustrator, you need to create an Adobe Account and buy an Adobe Illustrator subscription by selecting a premium plan to acquire it.
Step2
After completing the account setup and billing procedure, launch the Adobe Illustrator application to access its working interface.
Step3
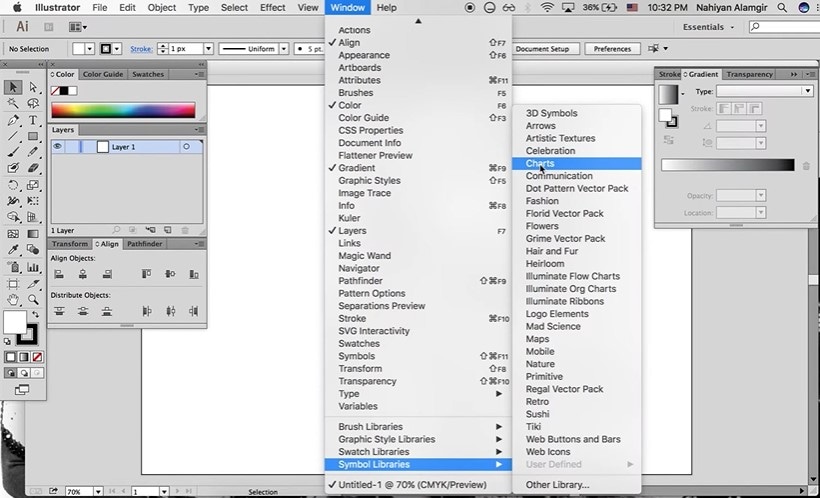
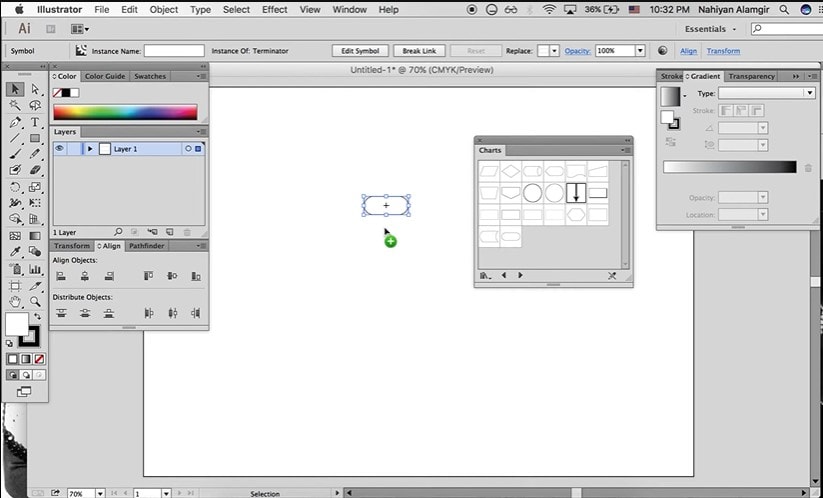
To import the flowchart shapes, go to the "Windows" tab, choose the "Symbol Libraries" option from the given list, and choose the "Charts" option.
Step4
To customize an individual or multiple elements, select those elements, navigate to the "Style" tab in the right panel, and perform your desired alterations.
Step5
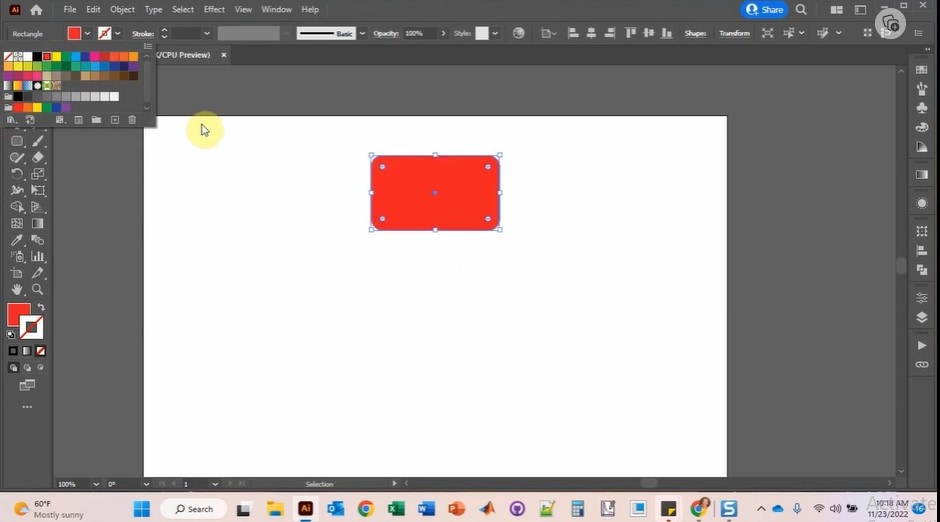
To add a fill color to your intended flowchart shape, select that shape, go to the "Color" tab on the top left panel, and choose your desired fill color.
Step6
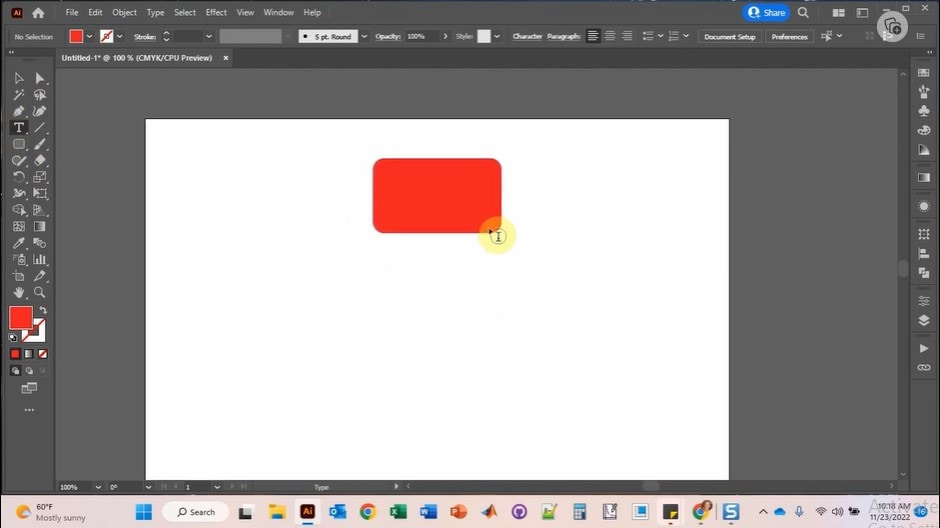
To add text in a particular shape or a textbox in your flow diagram, go to the "Text" icon in the left panel, and draw the textbox wherever you want.
Step7
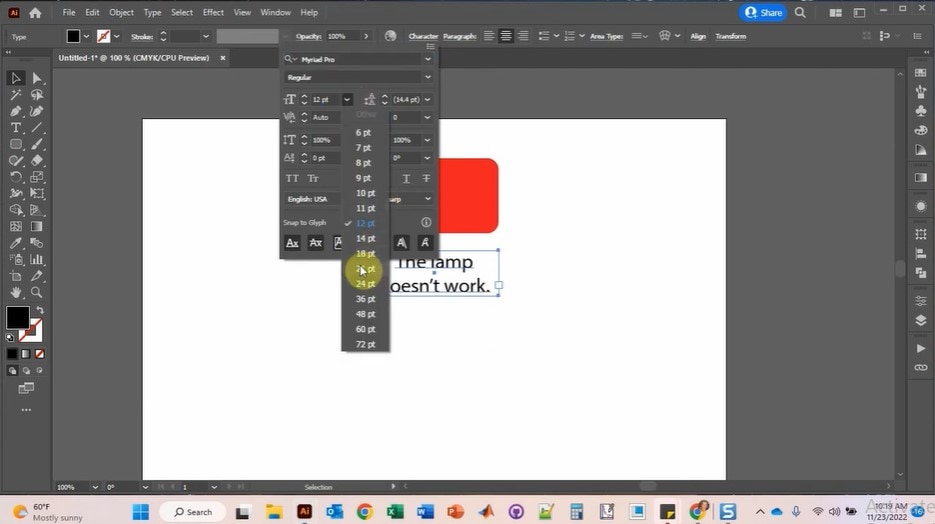
To adjust the size of the text, select that text, go to the "Character" option at the top bar, click the "Character Size" option, and choose your preferred text size from the dropdown.
Step8
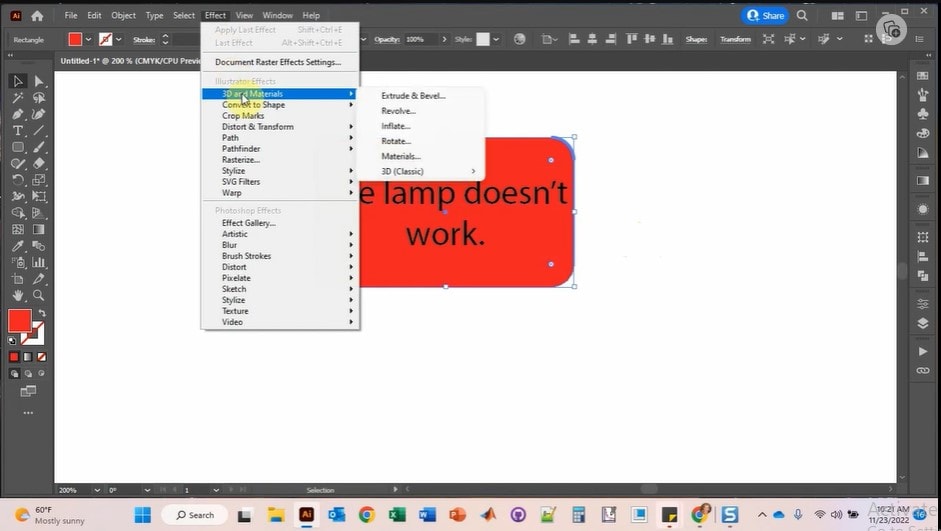
If you want to add effects to your text, navigate to the "Effects" menu, choose the "3D and Material" option from the dropdown, and click & choose your desired effect from the next list.
Step9
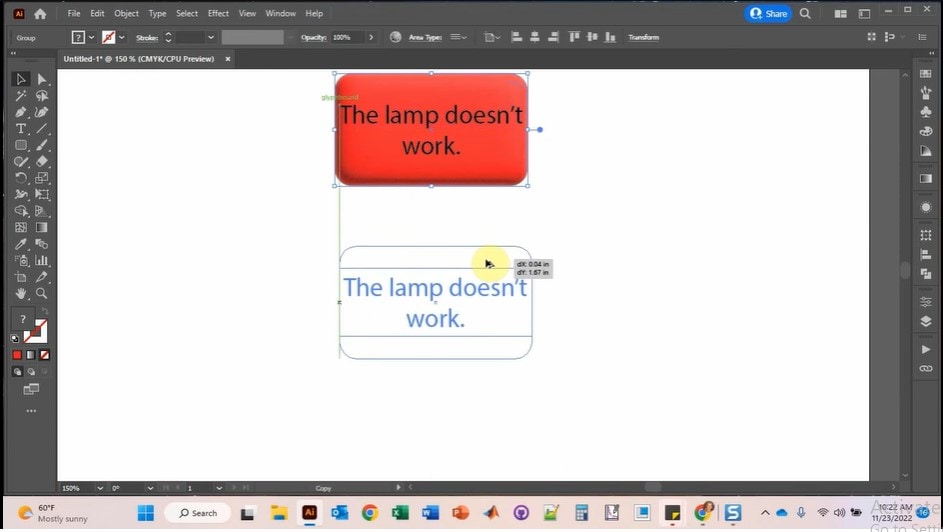
If you want to repeat a shape or create similar shapes in your flow diagram, select that particular shape, and drag it to make a copy; you can customize the new shape later by applying different fill color, text, and effects.
Step10
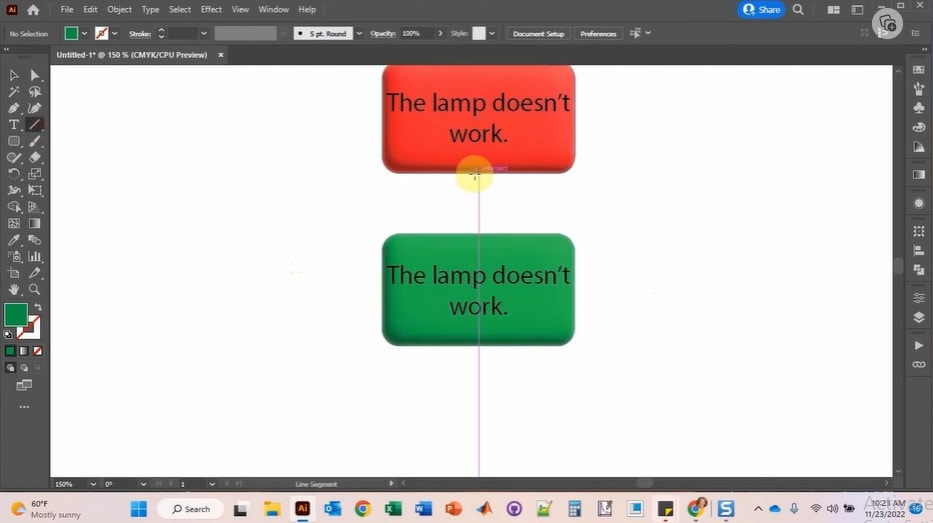
Draw arrows in your flowchart to develop a sequential connection between the shapes; to do so, click & choose the "Line" icon in the left panel and draw the arrow where you want it.
Step11
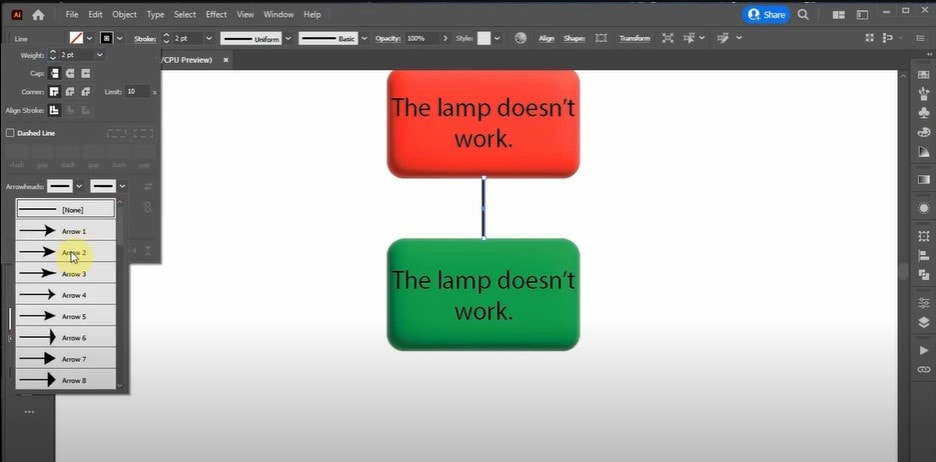
To select the arrow type, navigate to the "Stroke" option at the top bar, and choose your preferred arrow design. For defining the initiative and end points of the arrow, go to the top bar and adjust the start & end points of your flowchart connectors.
Step12
Complete making your flow diagram by adding all the remaining symbols and customizing them according to your preferences.
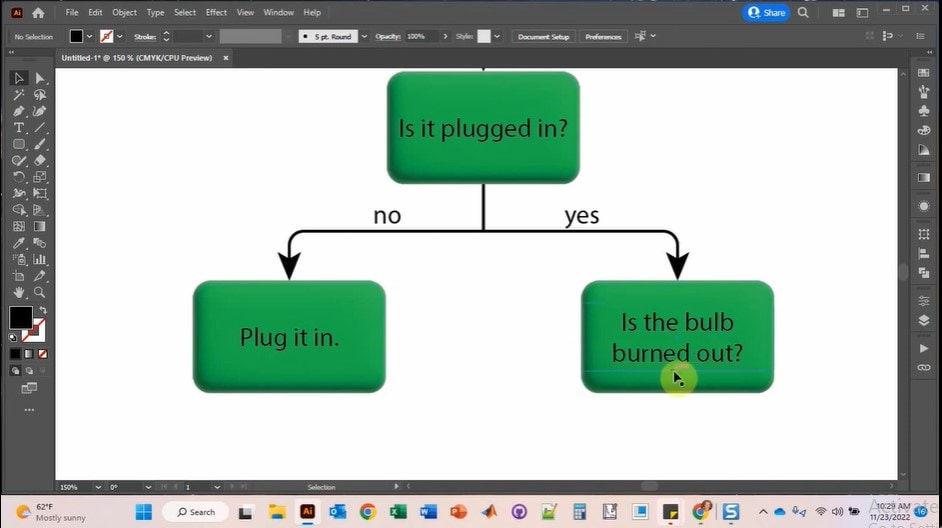
Step13
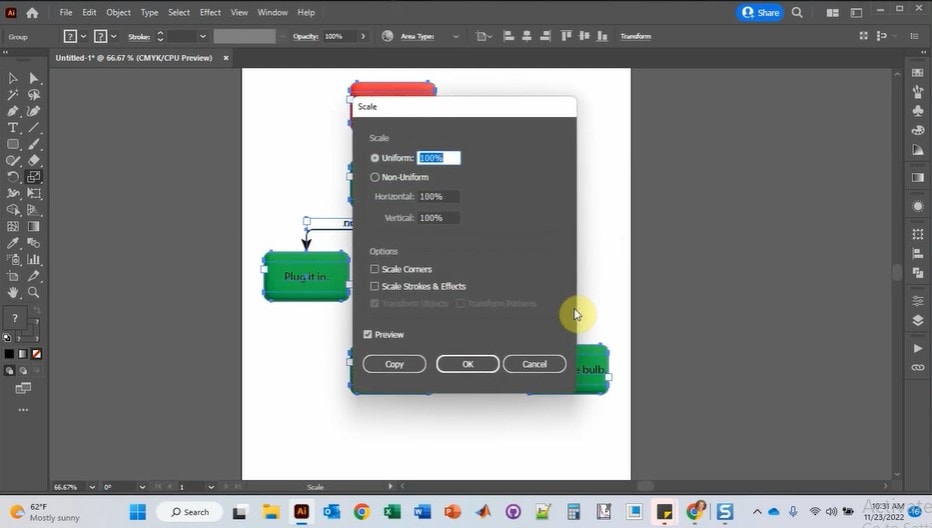
If you want to rescale the size of your flowchart, group all the flowchart elements, and press the "S" key from the keyboard, which will launch the "Scale" dialogue box. Define the size of your flowchart by typing it in the size box and clicking the "OK" button.
Step14
To export & save your file, go to the "File" menu, choose the "Save As" option, select your desired export format, rename the file, and click "OK".
3. Make Your Flowchart Designing More Convenient with EdrawMax!
Investing an extraneous budget in a premium diagramming tool is not a prudent decision, even if you are an opulent business owner necessitating a cutting-edge tool providing abundant features for establishing professional business diagrams. You must research the market for emerging innovative choices that not only deliver state-of-the-art features but also prove budget-friendly, helping you in artful monetary resources salvage.
We bring an ultimate solution, EdrawMax, a victory trademark in diagramming industry, to cater to your multi-aspect needs. Whether you are a novice flow diagram designer requiring a scalable application for personal use or a seasoned business professional who needs a high-end tool to configure his business workflows, EdrawMax will satisfy your diagramming needs.
EdrawMax's cost-effectiveness, ready-to-use templates gallery, all-inclusive symbols library, incredible customization features, presentation creation capabilities, and multiple export choices are what entice every user. Furthermore, EdrawMax allows you to co-edit your flowcharts to foster teamwork and enhance productivity, providing unbroken real-time collaboration session opportunities.
How To Design a Flowchart Using EdrawMax?
The intuitive interface of EdrawMax facilitates effortless flowchart creation without acquiring tech-specific or design knowledge. Thus, if you want to exploit the EdrawMax platform to create a logical and attention-grabbing flowchart, follow the below-described tutorial:
Step1
Download and run the "EdrawMax" application on your device to access its interface.
Step2
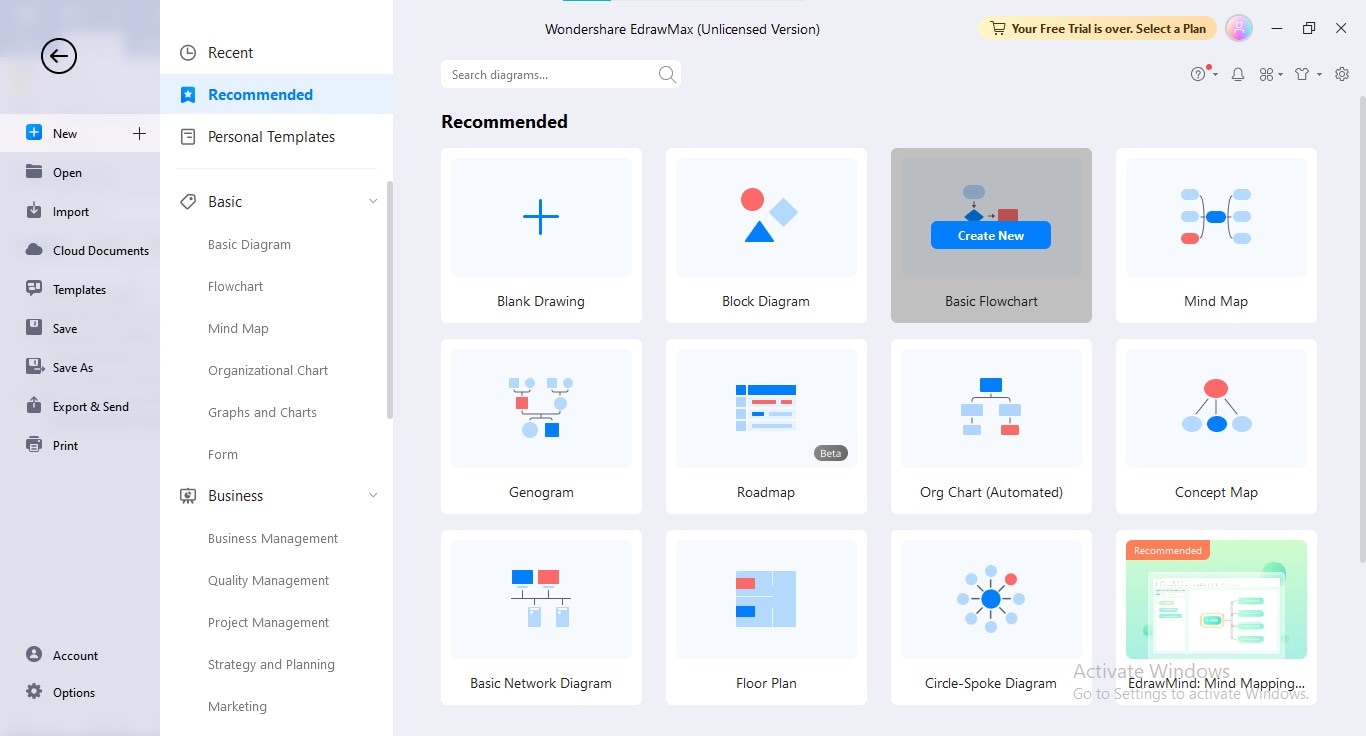
Go to the "New" tab in the left panel, hover over the "Basic Flowchart" option, and click the "Create New" button.
Step3
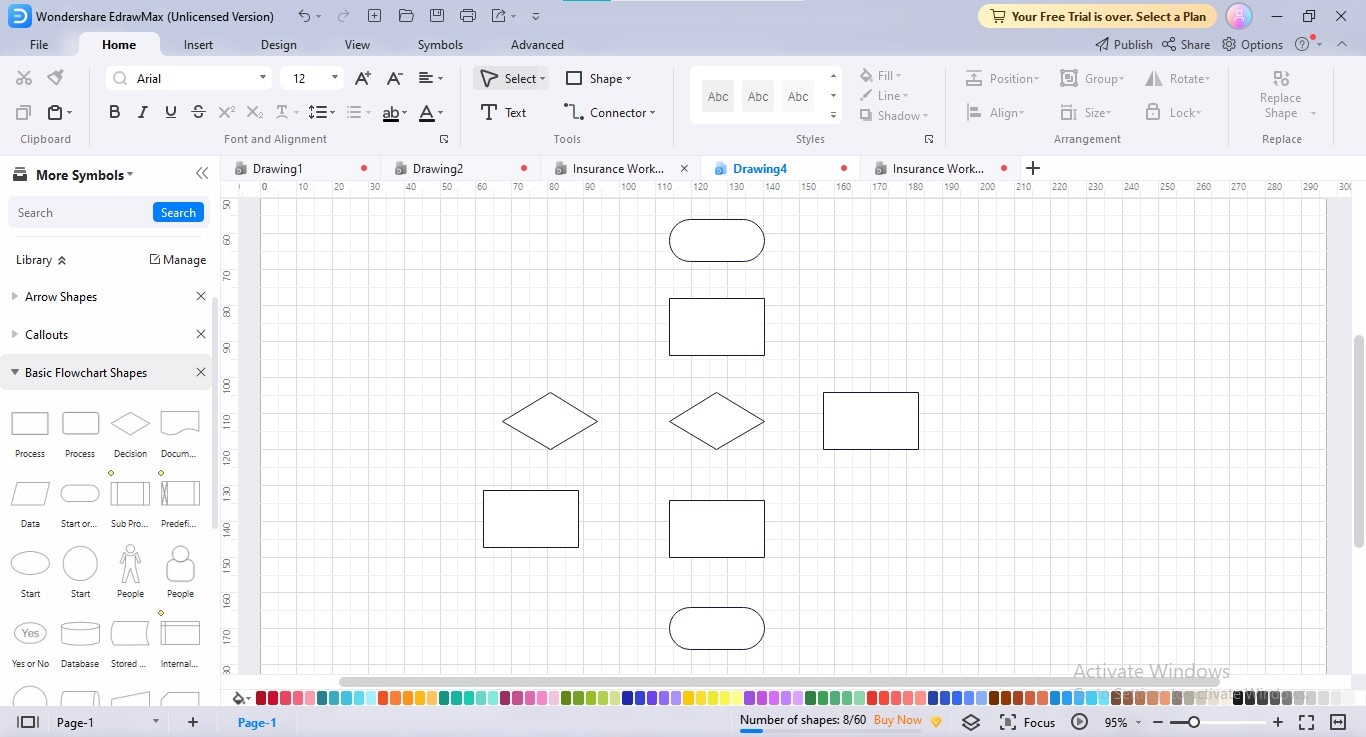
Start your flowchart creation procedure by inserting all the necessary shapes on the canvas through drag-and-drop from the symbols library.
Step4
Attach the shapes using flowchart connectors to develop an articulated flow in your diagram; to add connectors, navigate to the "Connectors" option in the "Home" menu.
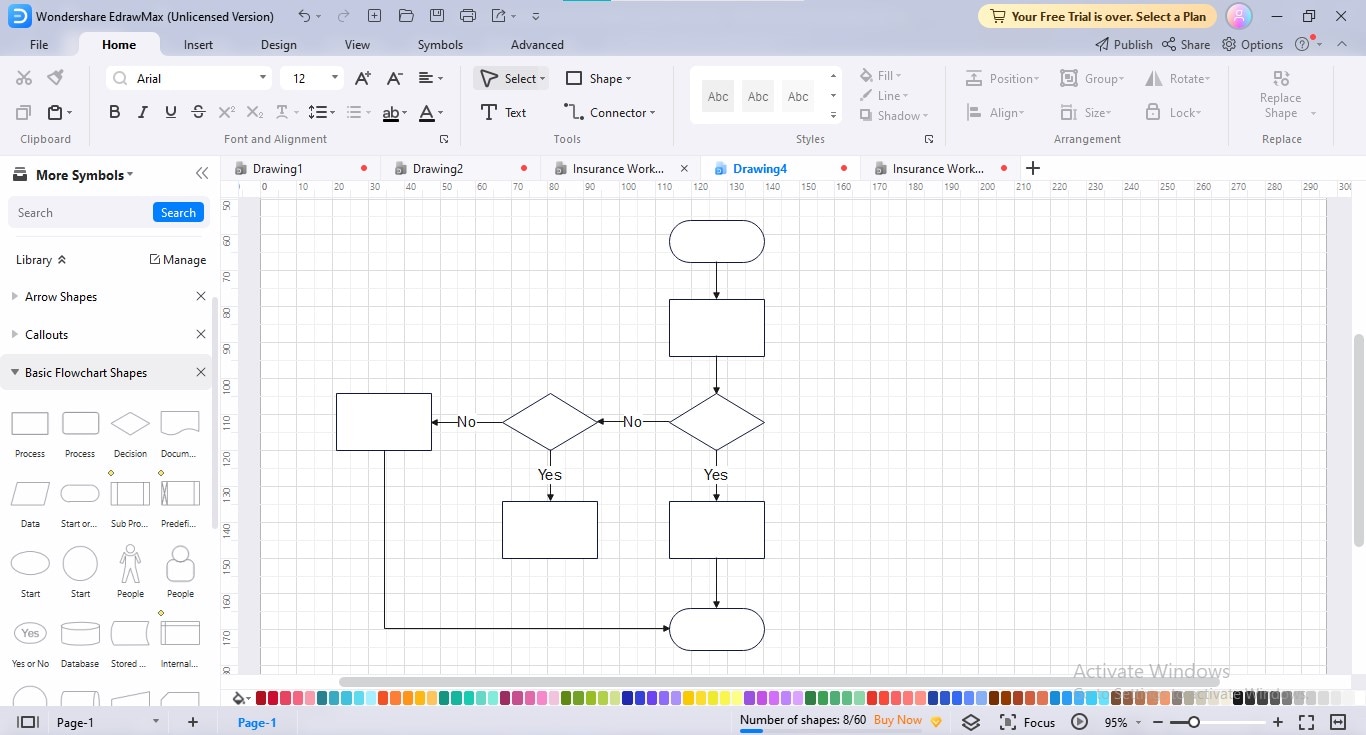
Step5
Enter the relevant information in textual form within and outside the shapes to complete your flowcharting process.
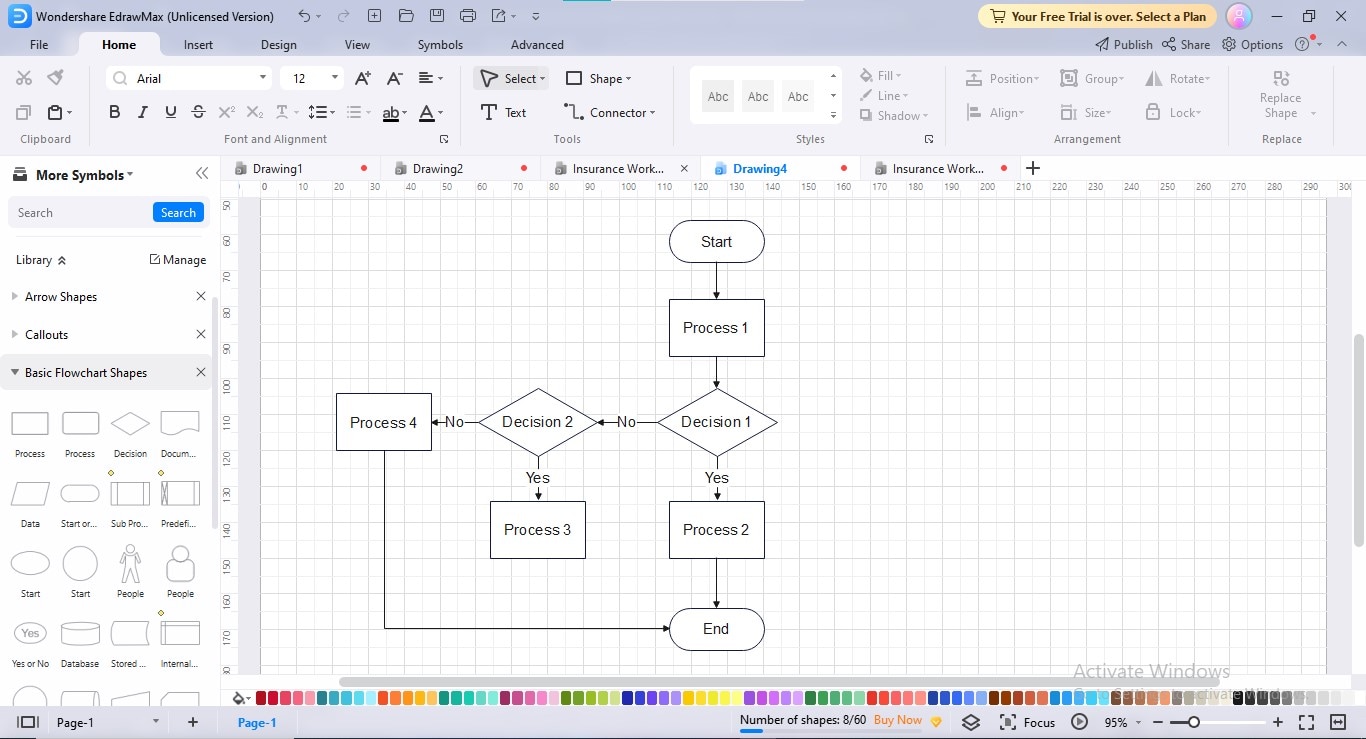
Step6
Personalize the outlook of your flow diagram by navigating to the "Design" tab and applying your desired theme, fonts, connectors, and shading modifications.

Step7
To export your flow diagram, click the "Export" option at the top and choose your preferred export format.
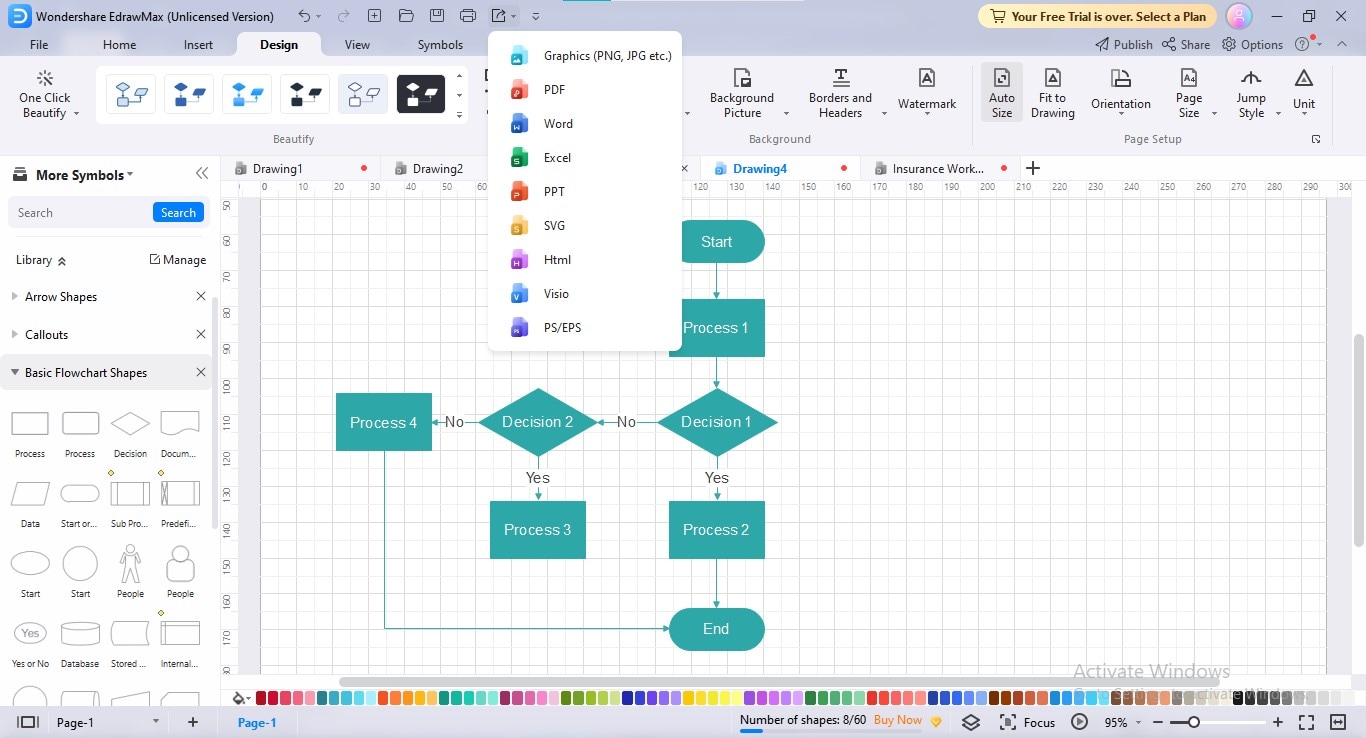
4. Conclusion
Using a prebuilt flow chart template doc for Word flow diagram creation brings several benefits to your work regime, including time and effort salvage, cost-effectiveness, professional outlook, consistency, and heterogeneity.
We have profoundly explained the three best flow chart template Word websites to let you discover the ideal flow diagram Word template for your necessitations. You can also explore the EdrawMax templates community to choose and configure your desired Word template flow chart.


