3-Way switch wiring diagram
Customize this free circuit template for wiring 3-way switches.

- Templates
- Wiring diagram templates
- 3-Way switch wiring diagram
About the 3-Way switch wiring diagram
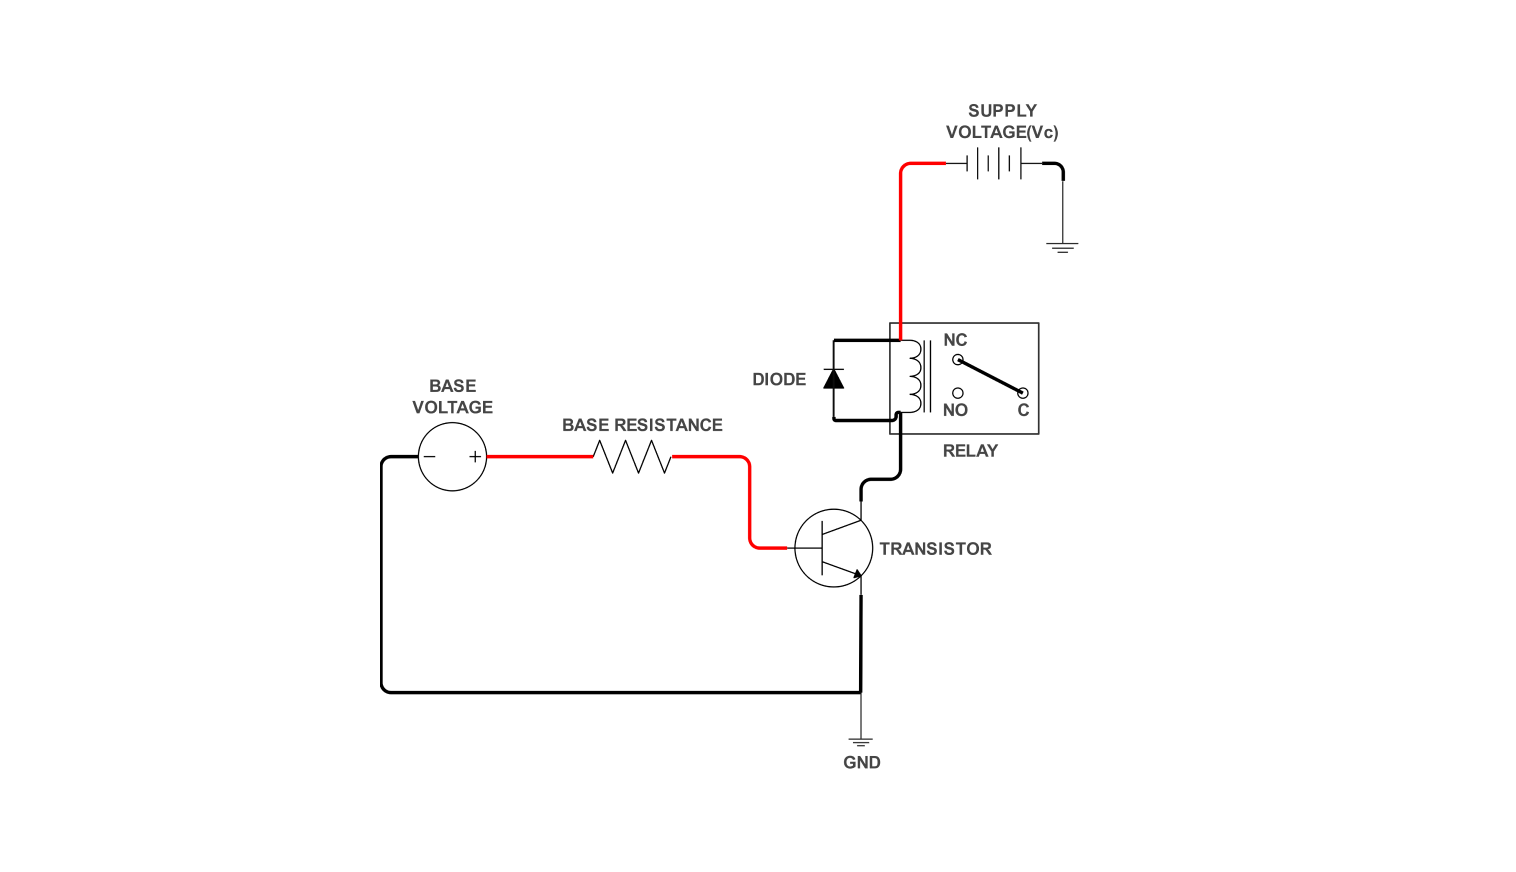
The 3-way switch wiring diagram as shown, controls a motor that can be operated from two different locations by two 3-way switches. The 3-way switch has three terminals:
- One common terminal on both the 3-way switch goes either towards the power source or towards the motor, depending upon the configuration required.
- Two terminals called the traveler. The traveler terminal of the common terminal of one 3-way switch is joined to the traveler terminal of the third terminal of another 3-way switch. This makes it possible to communicate between the two switches.
The purpose is to be able to control the motor from two different switch points in the electrical circuit. When either one of the 3-way switches is switched “on” it reverses the electrical connection, either allowing power to the motor or interrupting the power.
How to use the template
Click on Use this template to access the diagram for editing. Once the template is opened, look for the Libraries panel on the left side. There you can find all the electrical components that you might want to add in. Drag and drop the needed symbols onto your canvas.
You can customize the diagram by swapping components, adjusting values, and even adding labels to tailor the circuit. You can also change line styles, colors, and text fonts for better clarity.
Once you are satisfied with your hearing aid circuit diagram, click File > Export and choose your preferred format (e.g., image file, PDF, SVG), and click Export to export your diagram.
Benefits of the template
Here’s how a 3-way switch wiring diagram helps in electrical design:
- Visualizes the circuit: A 3-way switch wiring diagram illustrates the electrical connections between two switches and a light fixture. This visual representation makes it easier for electricians and designers to understand how the circuit works and how the switches control the light from two different locations.
- Reduces errors: By following a clear and concise wiring diagram, electricians can reduce the chances of making errors during installation. This can save time and money on troubleshooting and rework.
- Diagnose problems: If there’s an issue with the circuit, a wiring diagram can be used to help diagnose the problem. By tracing the connections, electricians can identify where the fault might lie.
-
Standardization: Wiring diagrams use universal symbols and conventions, allowing different electricians to understand the circuit regardless of their background or experience.
FAQs about this template
-
Can I use a 3-way switch as a single?
Yes, you can repurpose a 3-way switch to function as a single-pole switch. A 3-way switch has three terminals, while a single-pole switch has two. Here's how to make it work:
- You'll see one screw on one side of the switch and two screws on the other. The single screw is the "common" terminal.
- Choose either side with the two screws (doesn't matter which).
- Connect the hot power wire (usually black or red) to the common screw.
- Then, connect the wire going to your light fixture (usually black or white) to one of the two remaining screws on the chosen side.
-
Does a 3-way switch need a neutral?
No, a 3-way switch typically doesn't require a neutral wire. It controls the flow of hot power to the light fixture. Neutral wires are usually used for the return path of current in circuits that don't involve switching.
-
Does it matter how you wire a 3-way switch?
When using a 3-way switch for controlling a light from two locations, the wiring order between the two 3-way switches does matter. There will be a "common" screw on each switch and a "traveler" screw on each side.
You need to connect the common screws together with one cable, and the traveler screws together with another cable. If you get these wires mixed up, the light won't function correctly from both switch locations.
Related templates


Get started with EdrawMax today
Create 210 types of diagrams online for free.
Free Download Free Download Draw a diagram free Draw a diagram free Draw a diagram free