Flowcharts simplify your complicated business tasks by presenting them in a well-organized and succinct manner. In this digital business world, communication has become an inseparable component of every operational task and project management strategy; project managers and workers collaborate using web-based collaboration platforms, such as Jira. Although conveying your message in textual form is an effective technique, flowcharts can assist in amplifying your digital audience's understanding by exhibiting the process stream in a logical and illustrative way.
This article highlights how you can effectively convey your topic conceptualization using Jira flowcharts, where everyone has less time to read chunks of textual information.
1. Overview of Jira Flow Charts
Jira, a project management tool developed by Atlassian, is primarily employed by project-driven teams to track issues, bugs, and bottlenecks throughout the completion of ongoing projects. The tool is designed to help teams work more efficiently by offering a consolidated platform for collaboration, remote task management, and project tracking.
Offering a range of features, such as customizable Kanban boards, Scrum boards, project management, reporting, and integration with other software tools, Jira has emerged as the most agile software widely used in remote businesses. Workflows can be custom-designed in Jira to include different stages and project needs, configuring the operations to automatically trigger specific actions, such as sending notifications or moving tasks to mounting stages.
Jira Flowcharts
Jira flow charts can be an effective approach to showcase your project highlights, operational procedures, work patterns, and action strategies to your team members. Using Jira flowcharts can also help elevate communication among team members through visual representation of workflows. Additionally, if you want to standardize processes in teamwork and ensure that everyone is following the same procedures, you can employ Jira flowcharts in Jira Cloud Instance. It will help reduce errors & discrepancies, improving the overall quality of work.
The Jira platform provides several app integrations allowing users to create Jira flowcharts directly within the platform; some Jira integrations include Lucidchart, draw.io, Gliffy Diagrams, Creately, PlantUML, and more. However, you can pick the most suitable integration based on your project needs, personal preferences, and number of team members.
2. How To Create a Jira Flowchart?
Using Jira diagramming add-ons, you can establish and embed a Jira flow chart in your team workspace. We have exploited the Draw.io integration for Jira flowchart creation because Draw.io is one of the top-rated and well-performing free integration available for Jira. Additionally, Draw.io is Cloud fortified and saves your files on the Cloud to provide you with the most updated version of your file.
Observe the given-below steps to install Draw.io, create Jira flow charts on it, and upload them on Jira project boards:
Step1
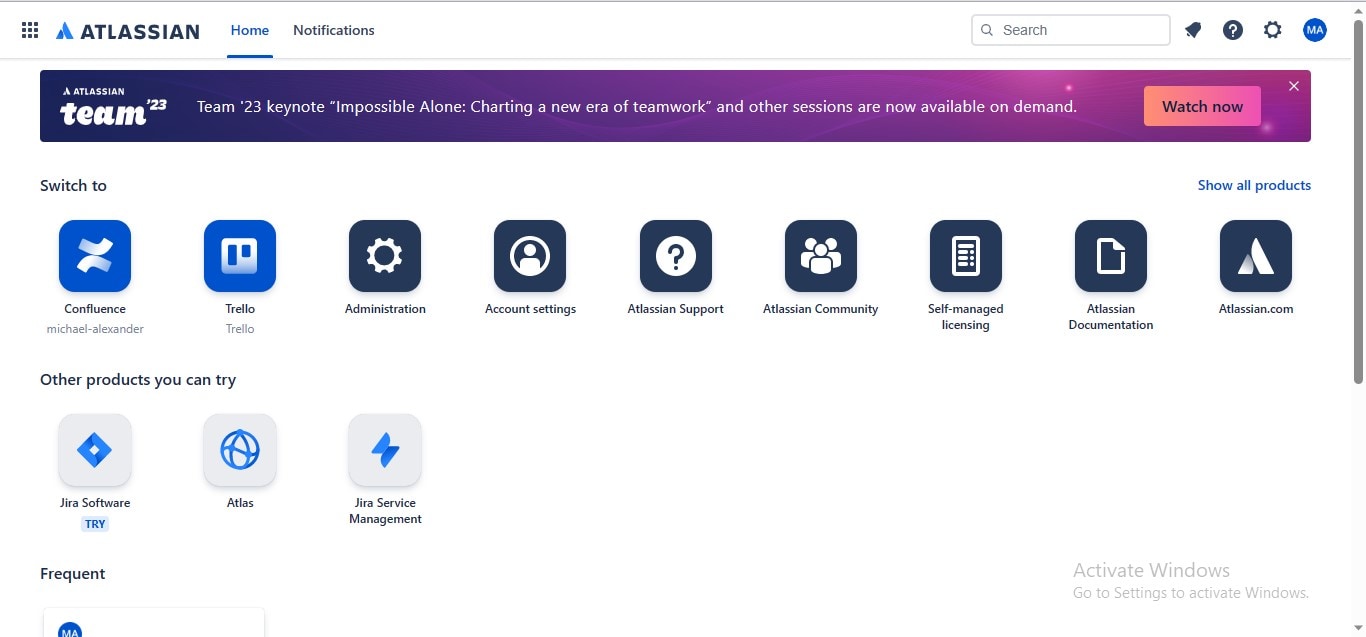
Sign up to create an Atlassian account for using Jira; if you already have one, Log in and click the "Try Jira Software" option in the main interface.
Step2
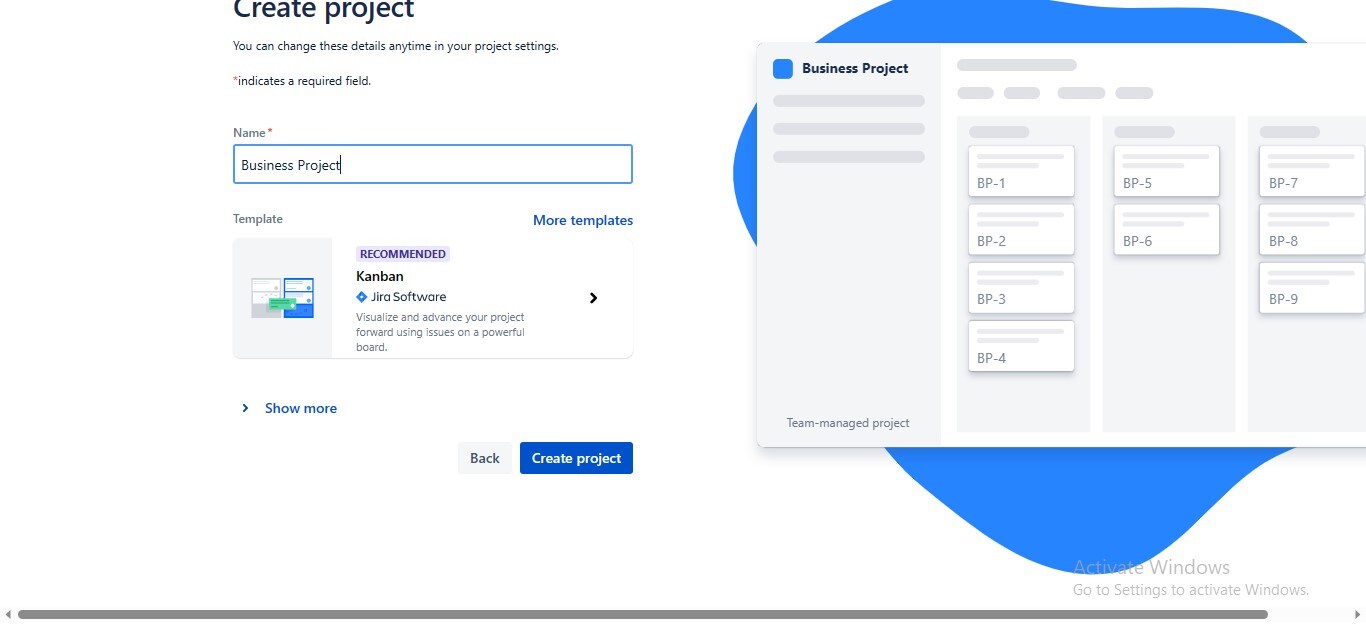
Create a new task by renaming your Jira project and clicking the "Create Project" button.
Step3
Go to the "Apps" tab in the working interface and choose the "Explore More Apps" option from the dropdown.

Step4
Jira will take you to the Marketplace Apps; type "Draw.io" in the search bar, and click the official Draw.io app shown in the first row.

Step5
Click the "Try It Free" button to install the Draw.io app on your Jira workspace.

Step6
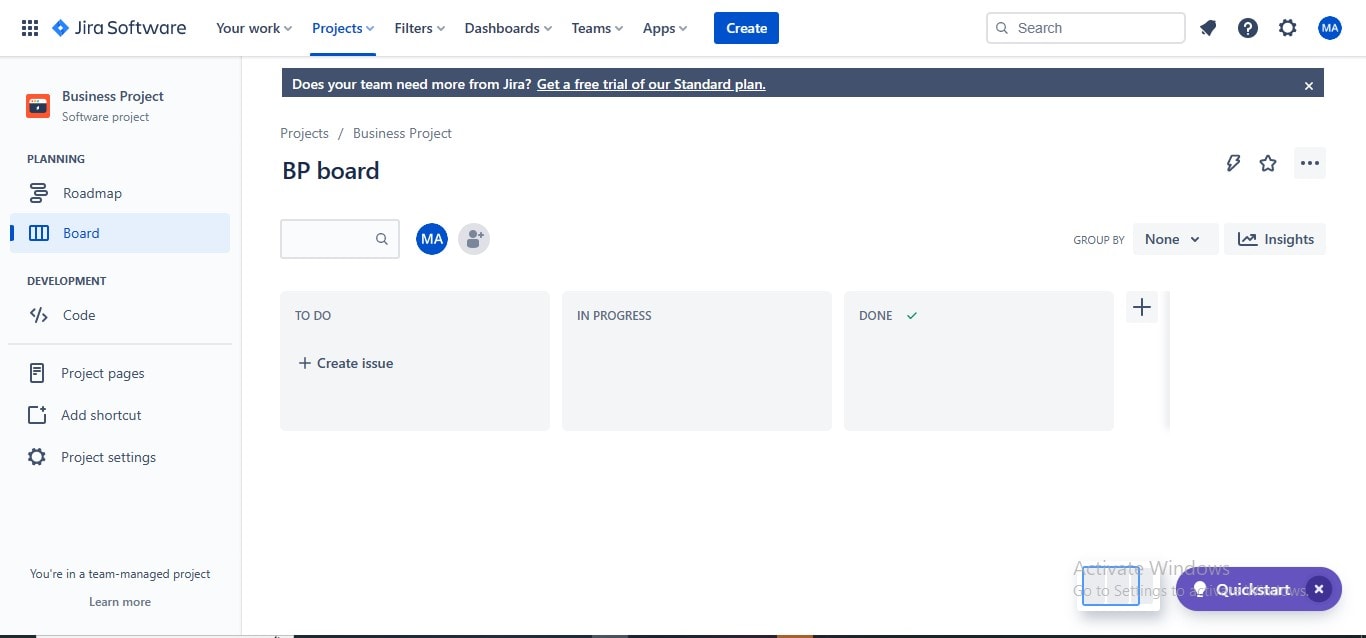
Create a new "Issue" (Issue represents a to-do task in Jira) in your Jira workspace by navigating to the "Create" button at the menu bar.
Step7
A popup will show up asking you to add the required information to your Jira issue; click the three-dotted icon, and choose the "Add draw.io diagram" from the dropdown menu.
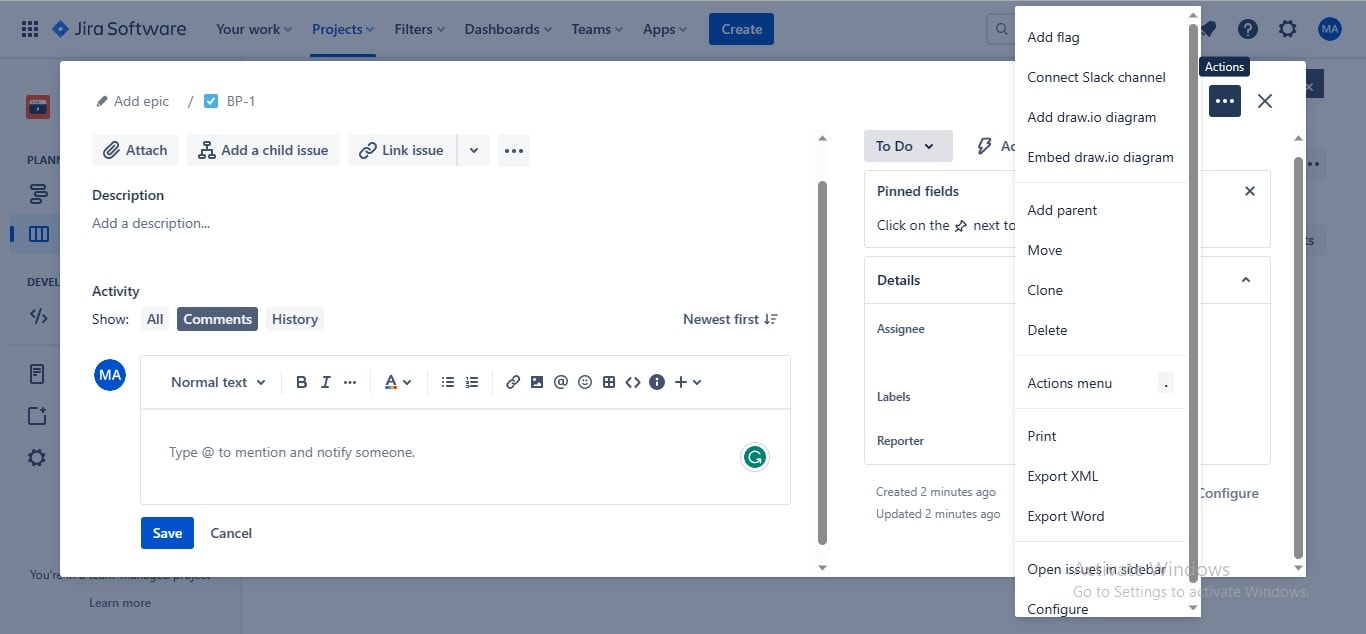
Step8
Draw.io will launch its working interface; choose the "Flowchart" tab from the given diagram types, and click the "Create" button.
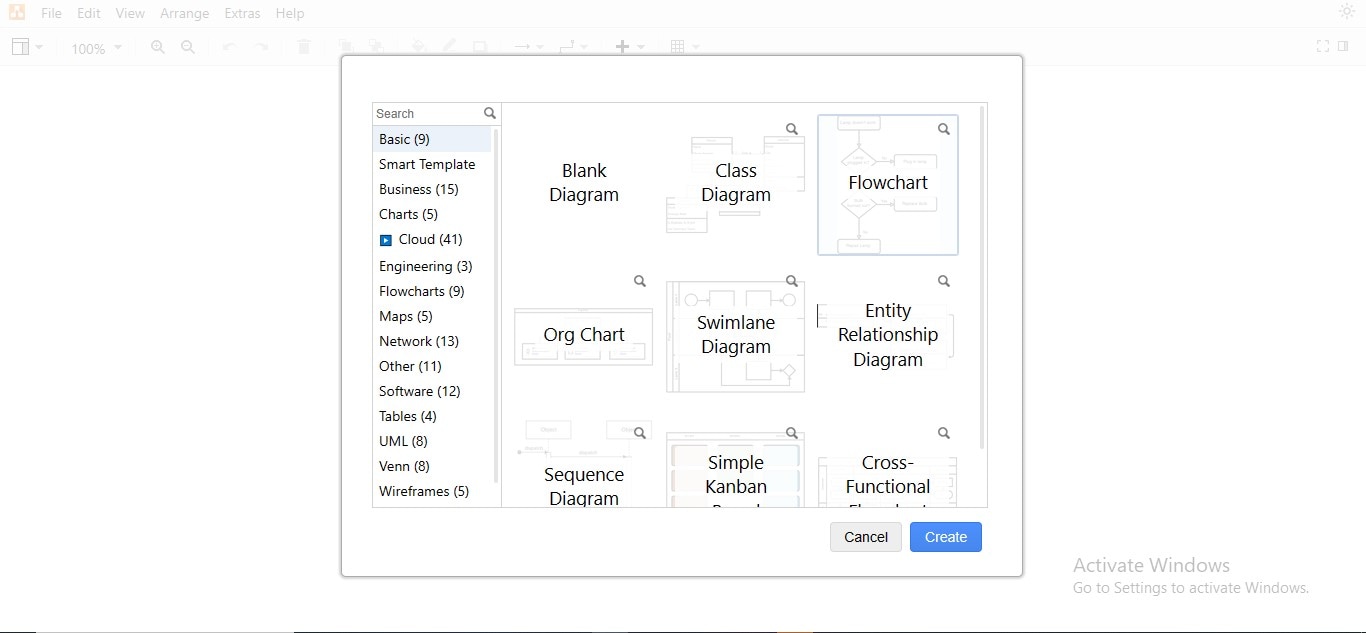
Step9
Initiate your flow diagram by dragging and dropping all the necessary shapes from the symbols library in the left panel.
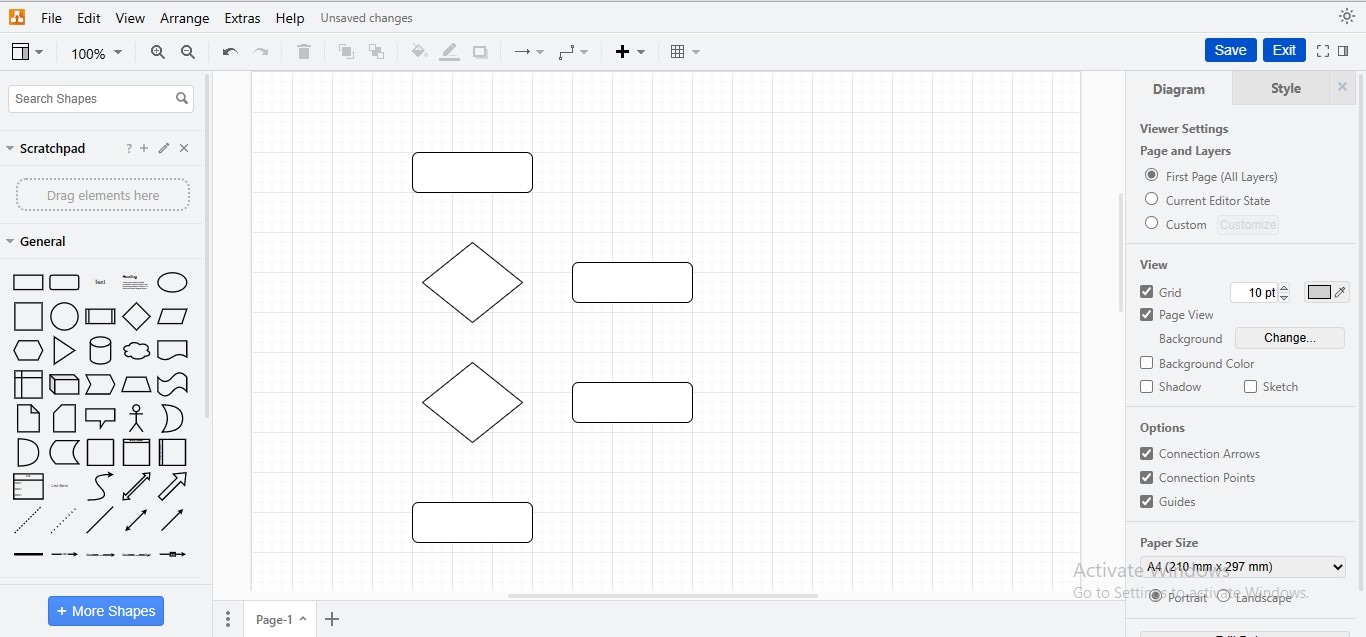
Step10
Connect your shapes by adding connectors to establish a flow in your diagram.
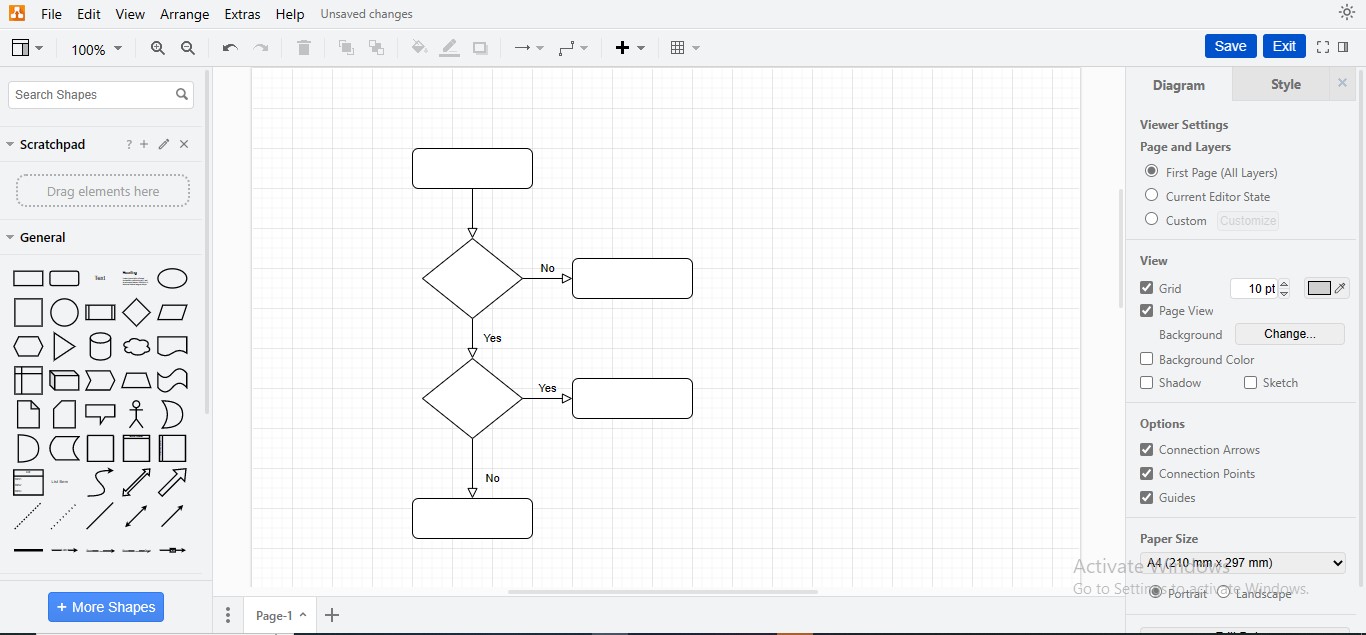
Step11
Insert relevant text in your flowchart shapes to complete the creation procedure.
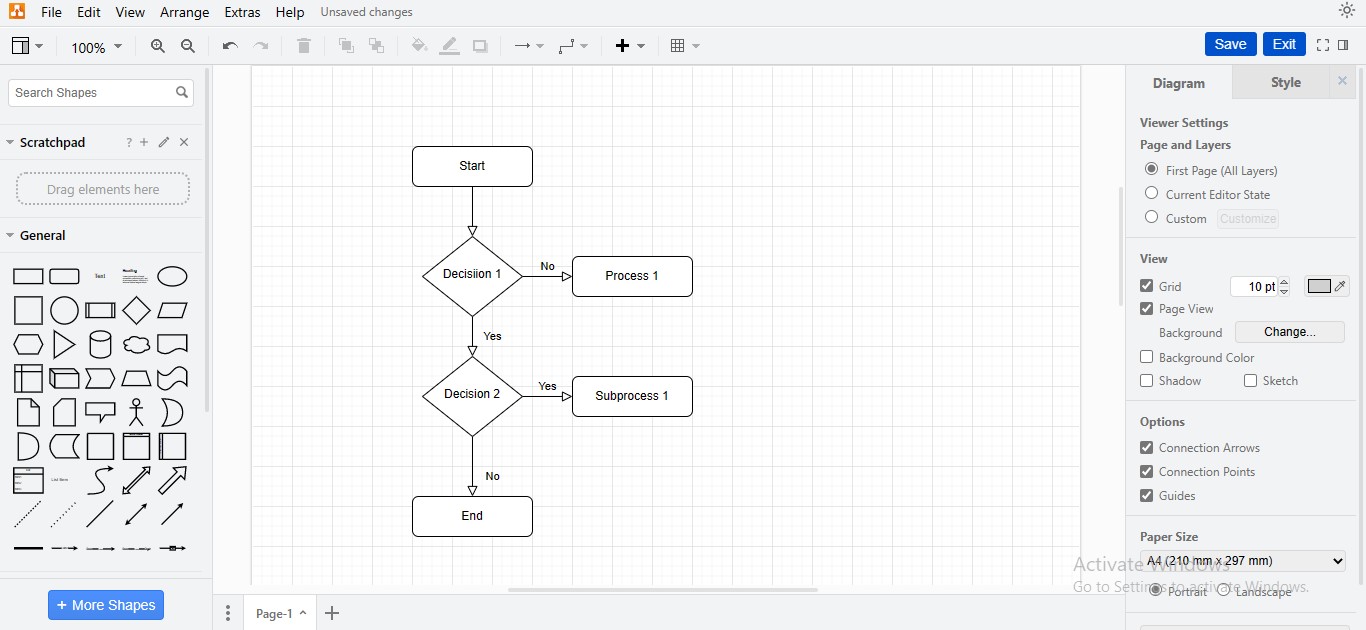
Step12
To customize an individual element, select a shape, go to the right panel, and make your desired modifications.
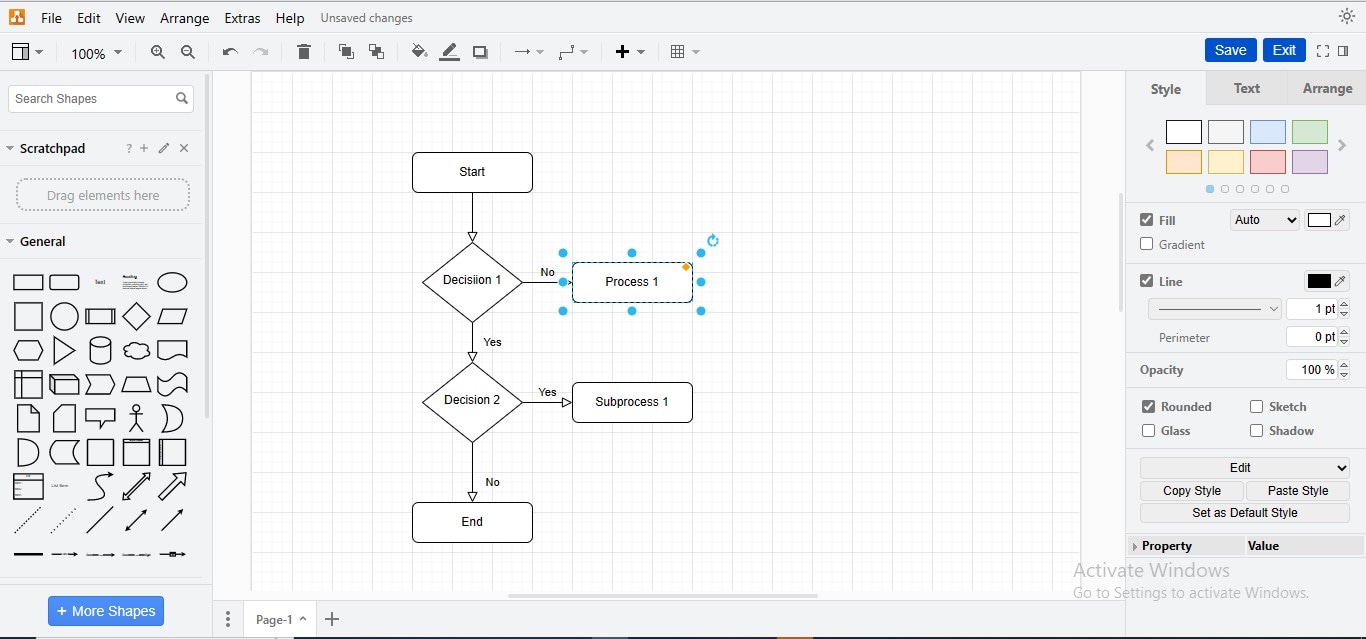
Step13
To customize the theme of your Draw.io flowchart, go to the "Styles" tab in the right panel and choose your desired theme.
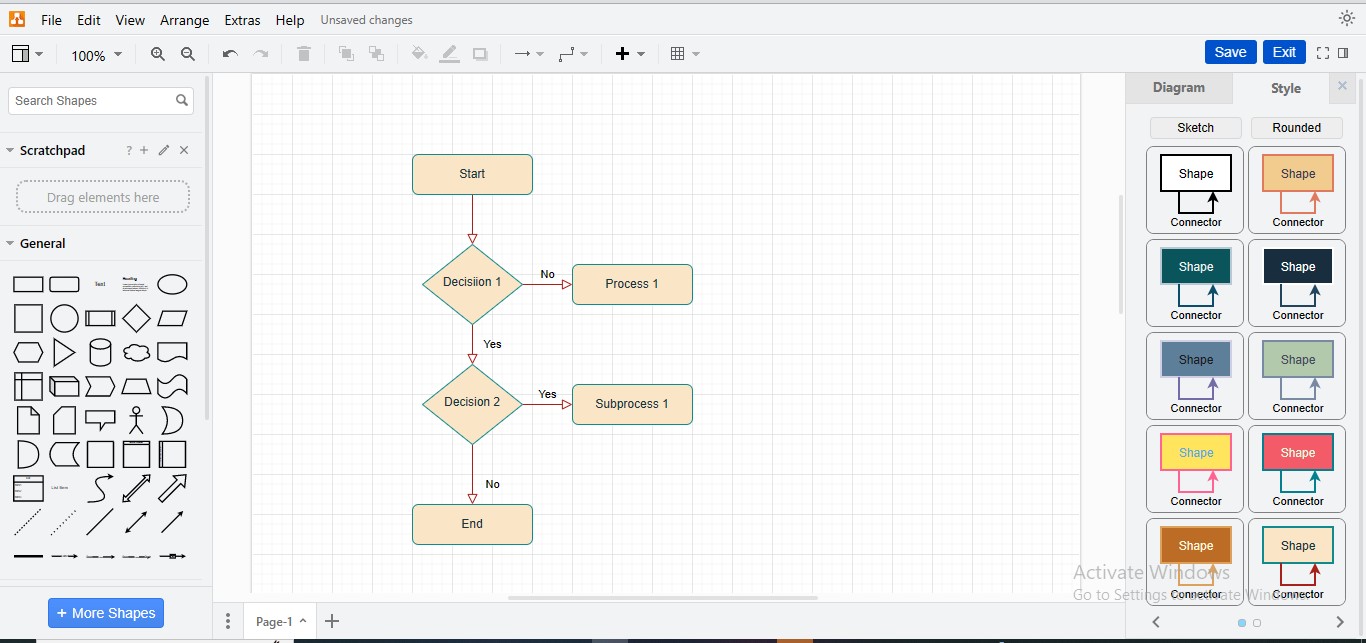
Step14
Click the "Exit" button above to navigate back to the Jira interface and upload your diagram.
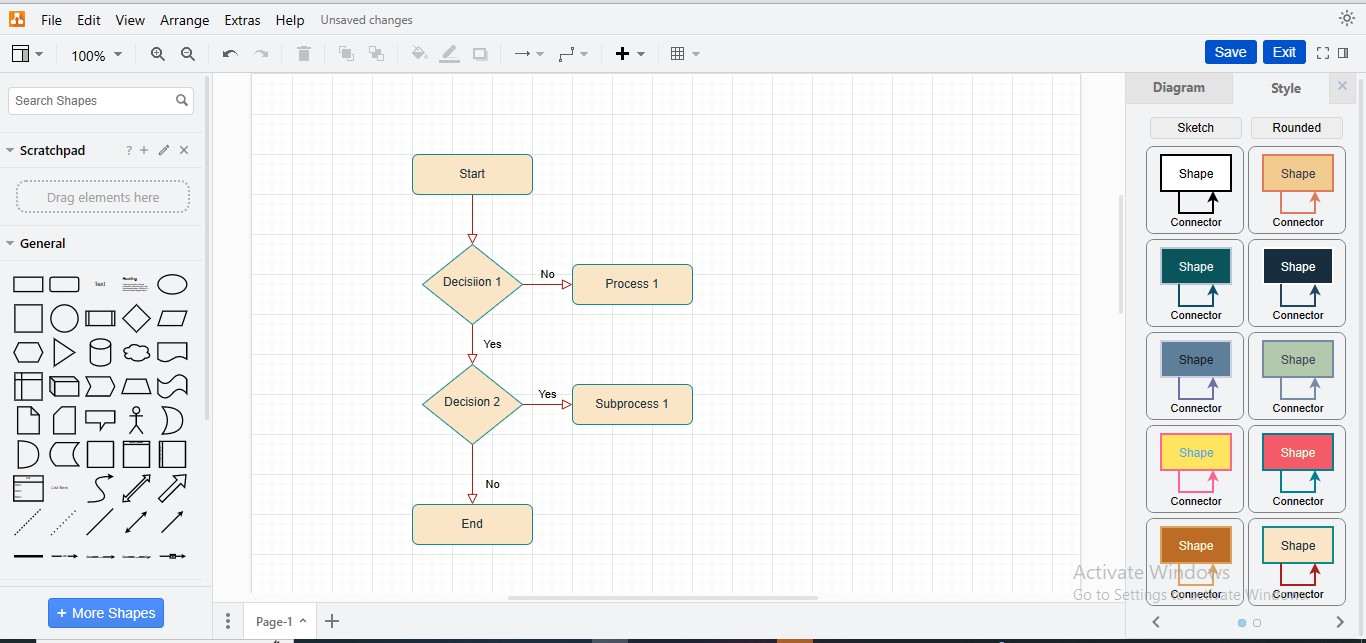
Step15
Your draw.io-created flowchart will be embedded in the Jira issue.
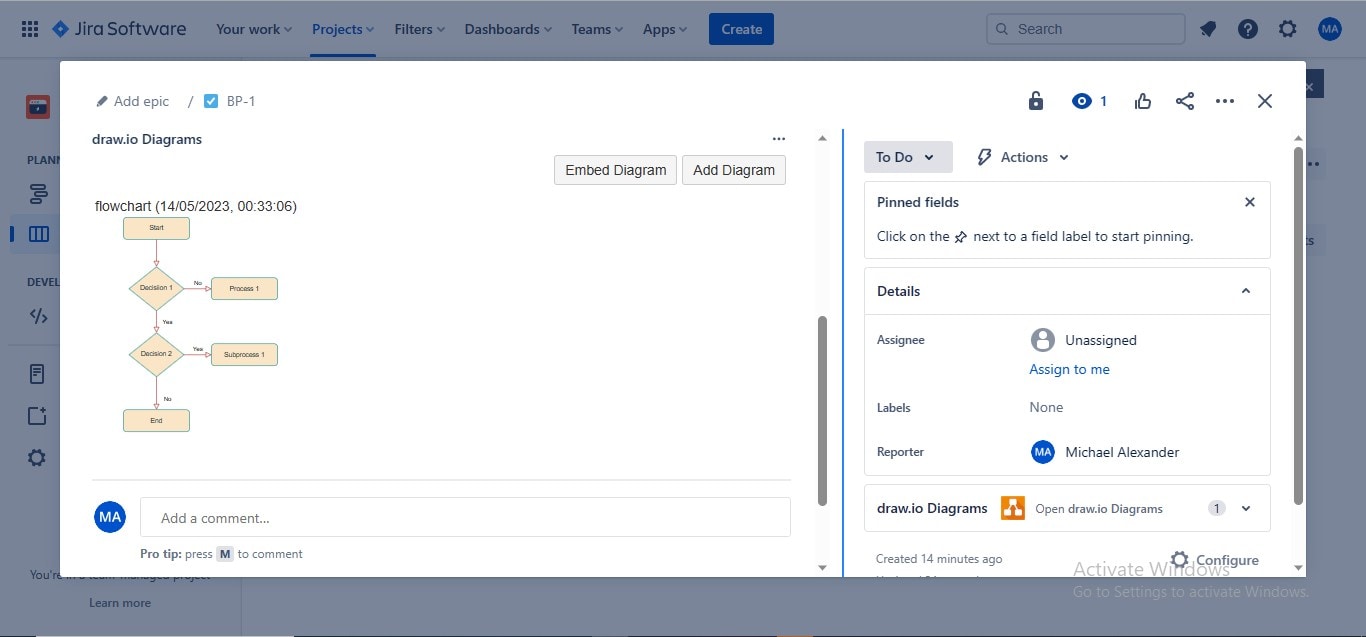
3. Best Alternative Jira Flowcharting Tool – EdrawMax
Creating and embedding flow diagrams in Jira via diagramming integrations is a long-winded process involving extra time & effort. Additionally, most Jira drawing apps provide limited features regarding theme customization, shape layouts, and font customizability, which may be considered a significant drawback in their feature line. Thus, if you're a professional business holder or project manager who daily supervises operational responsibilities, you must scrutinize for an accomplished diagramming solution that not only saves your time but also enable you to demonstrate your workflow more expressively for a productive work atmosphere.
Don't worry; we bring EdrawMax - a top-of-the-line diagramming platform for multifarious diagrams for personal or professional needs. EdrawMax meets the expectations of its users by offering state-of-the-art drawing features, transforming their cluttered ideas into well-articulated flow diagrams. Furthermore, the tool enables you to export your flowcharts in high-definition graphic formats for embedding them in your Jira to-dos, eliminating the need to purchase expensive add-ons.
How To Design a Flowchart Using EdrawMax?
Use the below-presented procedure to use EdrawMax for your intended flowchart construction:
Step1
Download and launch the "EdrawMax" application on your device to access its main interface.
Step2
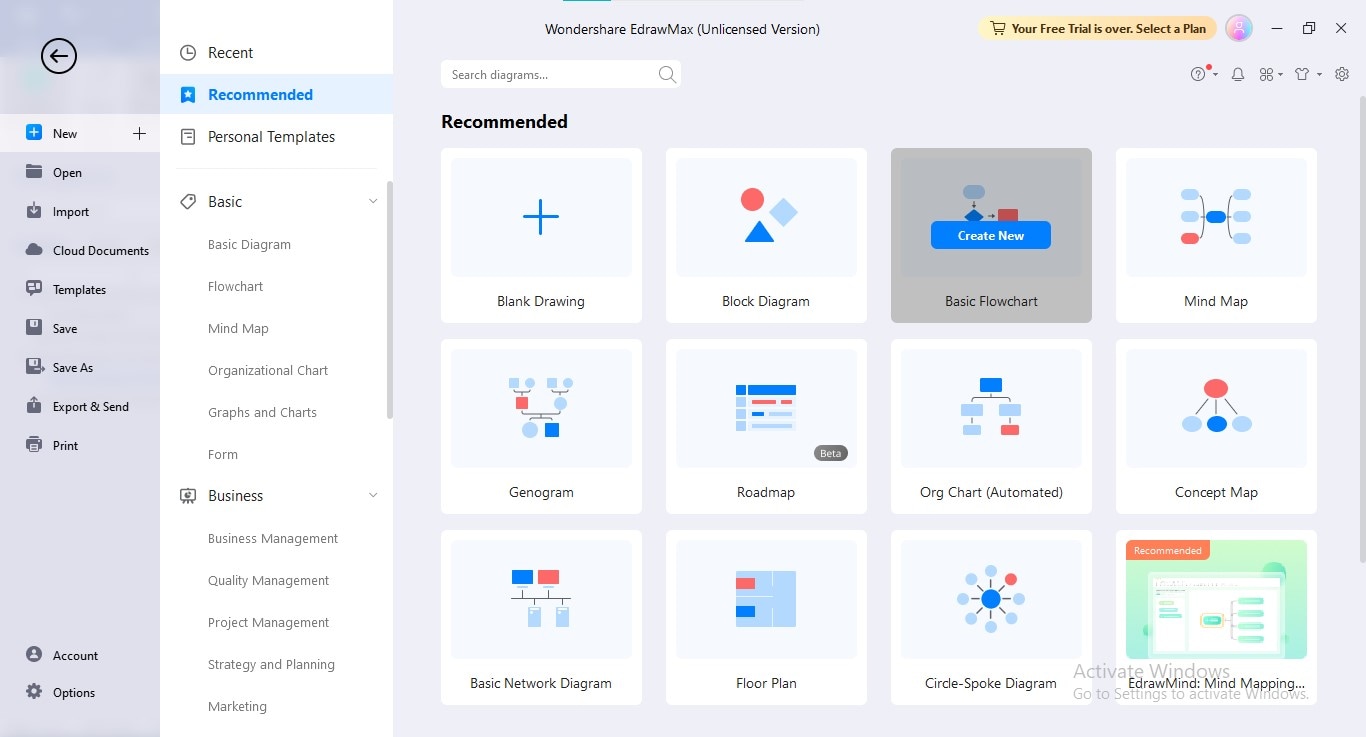
Go to the right panel, choose the "New" option, and click the "Basic Flowchart" tab from the main widget.
Step3
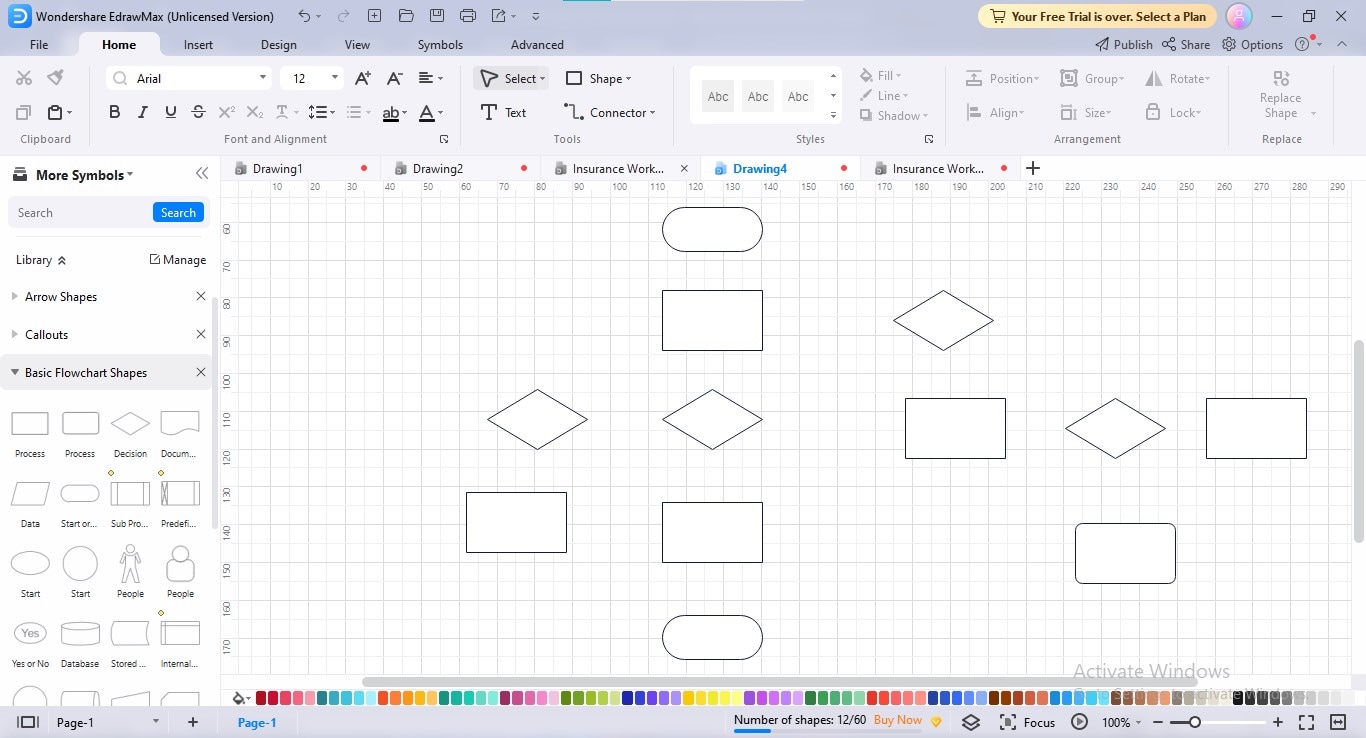
Sketching all the required shapes through drag-and-drop from the Symbols Library.
Step4
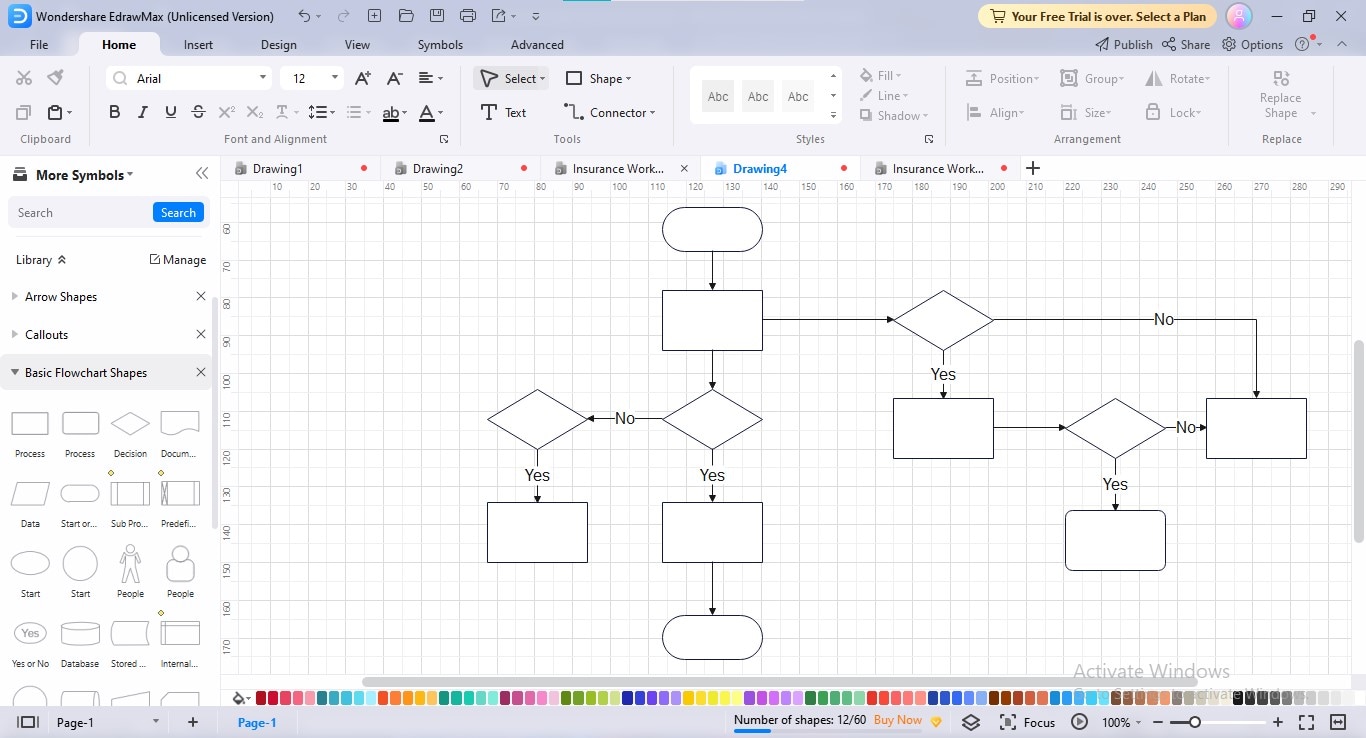
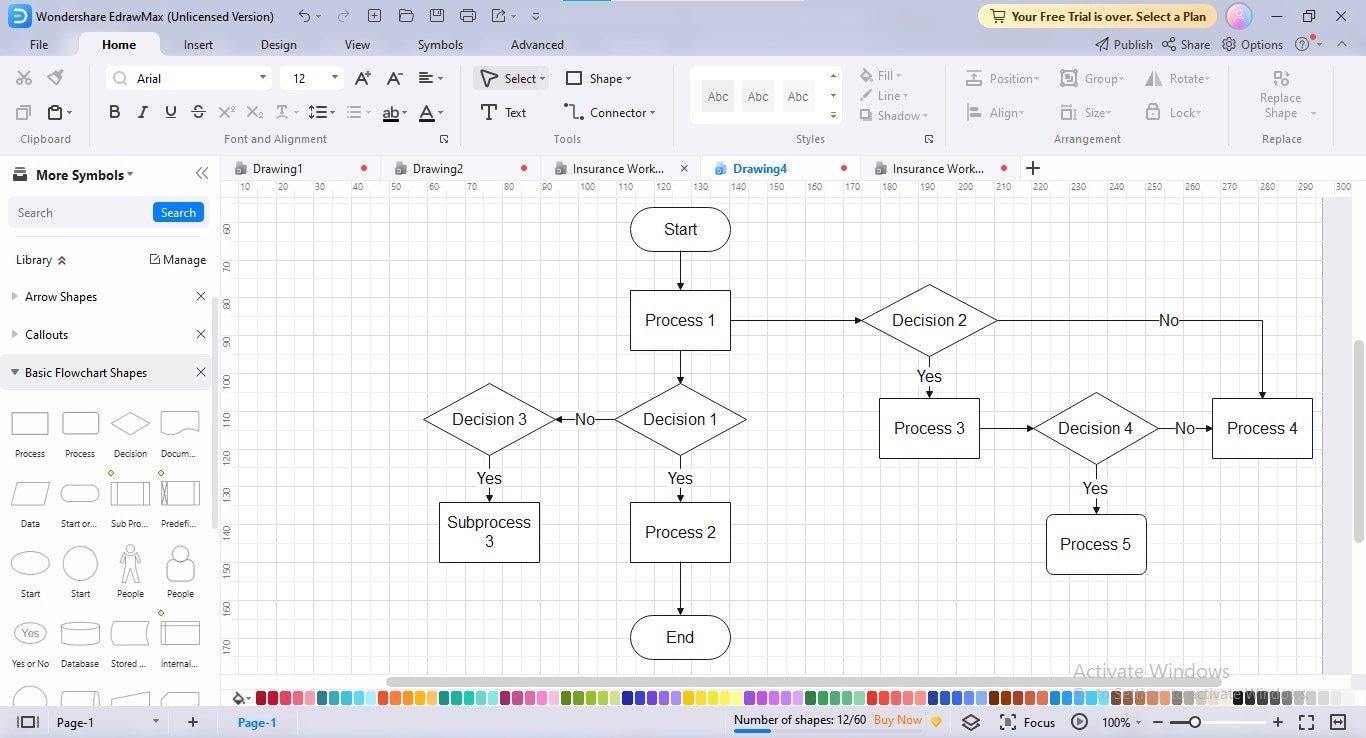
Join all the shapes together in the correct sequence using connectors; to add connectors, navigate to the "Connectors" option in the "Home" menu.
Step5
Add appropriate text in your shapes to complete your flowchart creation process.
Step6
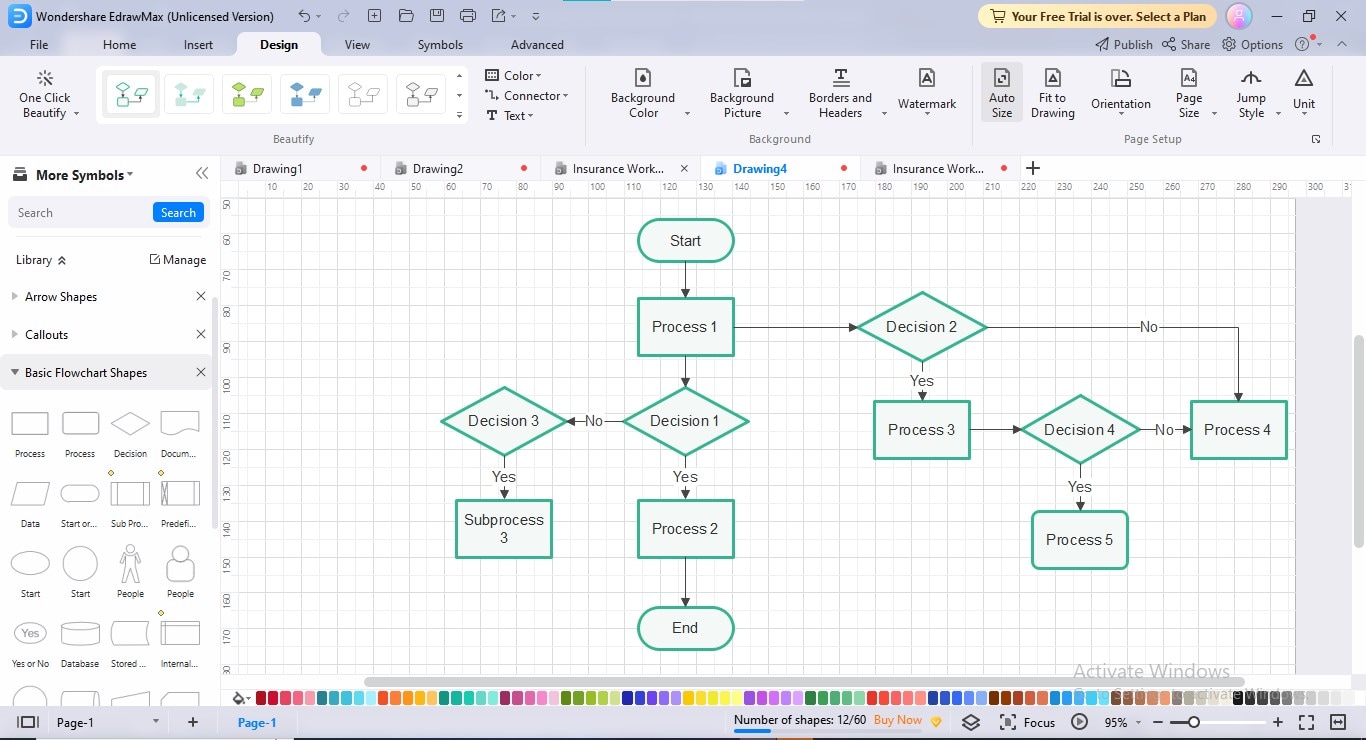
Personalize your flow diagram by implementing your preferred theme, color combination, font, connector style, background, and other customizable options; for this, navigate to the "Design" tab and apply your desired changes.
Step7
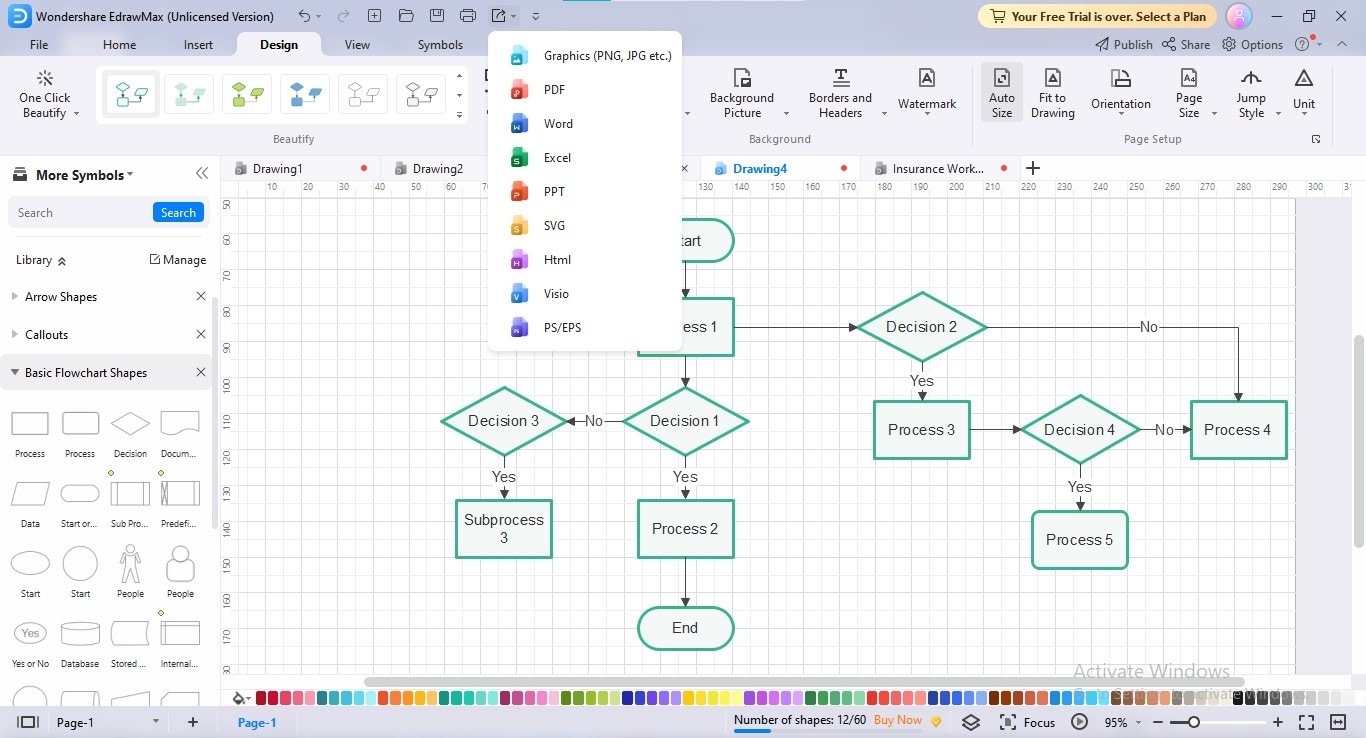
Export your flowchart by clicking the "Export" icon at the top bar and choosing your desired export format.
4. How Is EdrawMax Better than Jira?
EdrawMax and Jira are two different types of software designed for different purposes; EdrawMax is a diagramming solution, while Jira is a project management tool which employs different integrations to enable flowchart creation in its workspace. However, here are a few reasons why EdrawMax should be prioritized over Jira diagramming integrations:
- The tool presents an unending assortment of professionally-built templates to simplify your diagramming journey, taking you away from the trouble of starting from scratch.
- EdrawMax contains a vast Symbols Library encompassing symbols for almost all industries, fields, and life spheres to help you create whatever kind of flow diagram you need.
- The customization possibilities provided by EdrawMax are interminable, ranging from choosing the fill & border color to setting transparency and shadowing.
- The software presents built-in color schemes, themes, SmartArt, clipart, icons, and equations to make your charts more expressive and attention-grabbing.
- EdrawMax will auto-align your diagram shapes via in-app rulers & gridlines since shape alignment is a major time-consuming activity in flowchart creation.
- The application allows you to create multiple pages within a project to extend your diagrams to the next page to avoid complexities and confusion.
- You can export your project file in several formats, including PDF, PNG, SVG, JPG, Word, Excel, PowerPoint, Visio, HTML, and more, to utilize & modify it wherever you want.
5. Conclusion
Jira is a platform developed by Atlassian, an Australian company, to manage teamwork, track progress in collective workload, and assist workers in on-time task completion. You can utilize one of the Jira app integrations to establish flowcharts for streamlining workflows, developing new action plans & project strategies, identifying work regime bottlenecks, and standardizing a repetitive process in teamwork.
This article provided a step-by-step procedure for creating and uploading a Jira flow chart on Jira Cloud Instance; if you want to switch to the alternative diagramming solution, there is no better option than EdrawMax.


