
The business world is expanding because of work opportunities available to both small and high-level enterprises in this highly interactive era. However, with more teams switching to remote work, managing business operational activities, such as hiring new workers across continents, confining workload only to face-to-face communication, developing action plans through distant collaboration, and conducting group discussions & meetings, have become fairly challenging.
Confluence, a well-known team collaboration tool, enables businesses to interact at a collective threshold, share project updates, carry out technical documentation, create project reports, and make informed decisions, defying spatial barriers. Pursuing these benefits, this article attempts to define how to make a flowchart in Confluence, highlighting some Confluence flowchart integrations.
1. Basics of Confluence Flowchart
Visualized scenarios make intelligibility smoother, giving team members an opportunity to showcase the framework of their ongoing tasks or showcase the mechanism for their future projects.
Confluence is a tool that is not only restricted to text-based information, but it also diversifies its horizons by providing templates, structured projects, premade customer review pages, diagrams & flowchart Confluence integrations, and image editing functionalities. A flow diagram may speak a thousand words, but only through a well-suited Confluence add-on.
Introducing Confluence Flowchart Add-ons
Basically, Confluence itself is a collaboration platform and does not possess its own feature for building flowcharts or other diagrams. Creating a flow chart in Confluence necessitates installing an appropriate diagramming add-on; although the platform is brimming with countless diagramming app integrations, choosing the most befitting application for the Confluence flow diagram is the primary concern. A well-opted Confluence add-on cannot only make your flowchart creation easy but also render your interactive group sessions streamlined, well-managed, and fun.
Confluence diagramming add-ons are available at several price points, ranging from free to premium integrated platforms. However, price is not the sole parameter to evaluate a Confluence add-on; you must consider features diversity, usability, and the ability of the add-on to share flowcharts synchronically & externally. It is because not everyone in your work circle may have a Confluence account to view or access your flowchart files.
2. How To Make a Flowchart in Confluence?
Using a proficient Confluence flow chart app integration, you can construct an unbeatable flow chart in your Confluence workspace. We have illustrated two of the most outstanding diagramming add-ons and a detailed procedure to make Confluence flow diagrams using those add-ons. These integrated diagramming applications have been selected on the basis of their rating, number of total downloads, features, pricing, and customer reviews.
Confluence Account Setup
The first step to creating a flowchart macro-Confluence is creating an Atlassian account, which enables you to use the Confluence workspace for collaboration and flowchart creation. Follow the given steps to establish your Confluence account:
Step1
Sign up to create an Atlassian workspace account and verify it through the verification email.
Step2
Atlassian will take you to a new window, asking you to create a Confluence site, rename your site, and click “Agree.”

Step3
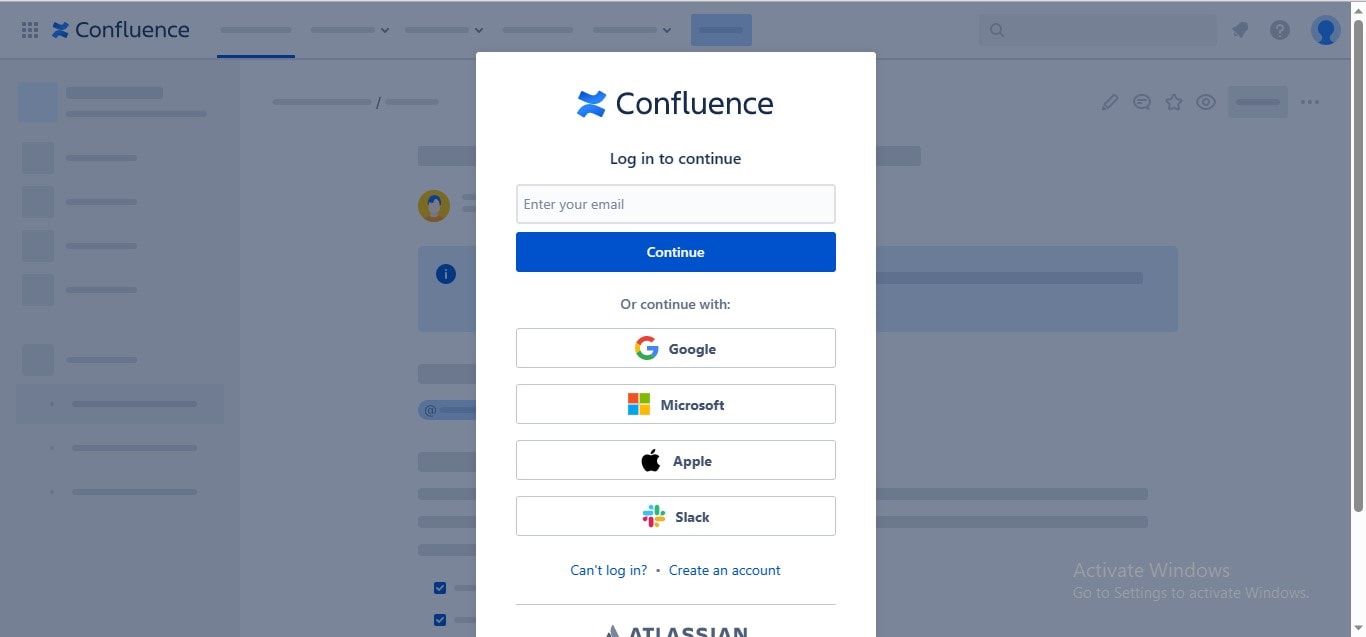
Log in to your Confluence account by adding your login credentials to access its interface.
Confluence Flowchart Creation Using Gliffy Diagrams Add-on
Once you complete the account creation procedure, you can readily install any Confluence diagramming add-on on your site. Follow the given procedure to pick and install your preferred add-on on your Confluence site:
Step1
Navigate to the “Apps” tab in the menu, and choose the “Find New Apps” option from the dropdown.

Step2
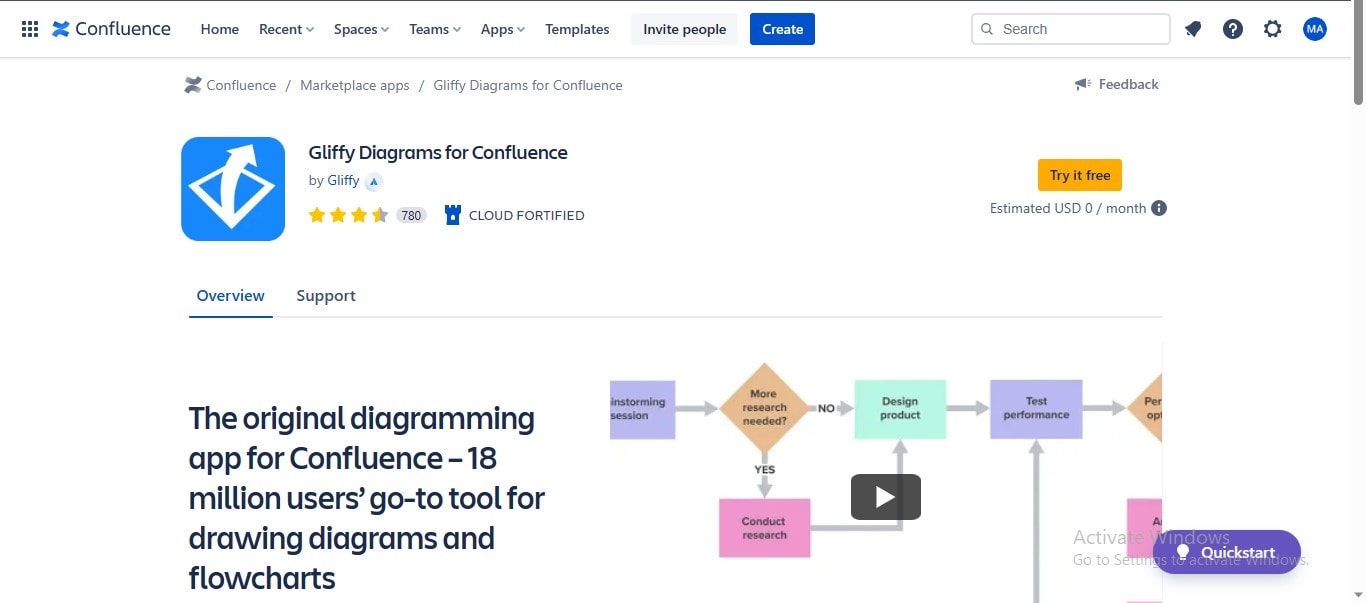
You will be traversed to the Gliffy app integration page; click the “Try It Free” button to install the add-on on your Confluence site.
Step3
Navigate to the “Home” tab, and click the “Create” button to initiate a new team project.

Step4
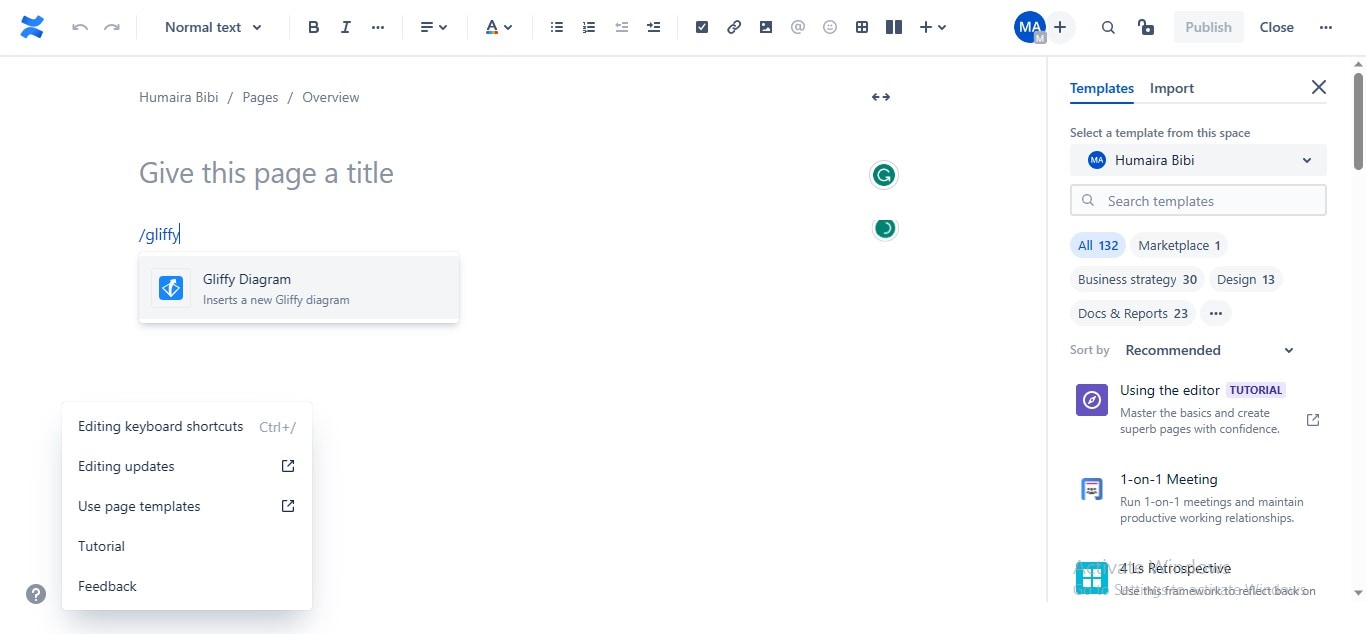
The slash mark (/) in Confluence is used to search whatever service you want to employ; type “/gliffy,” and Confluence will show a suggestion of the Gliffy Diagram add-on.
Step5
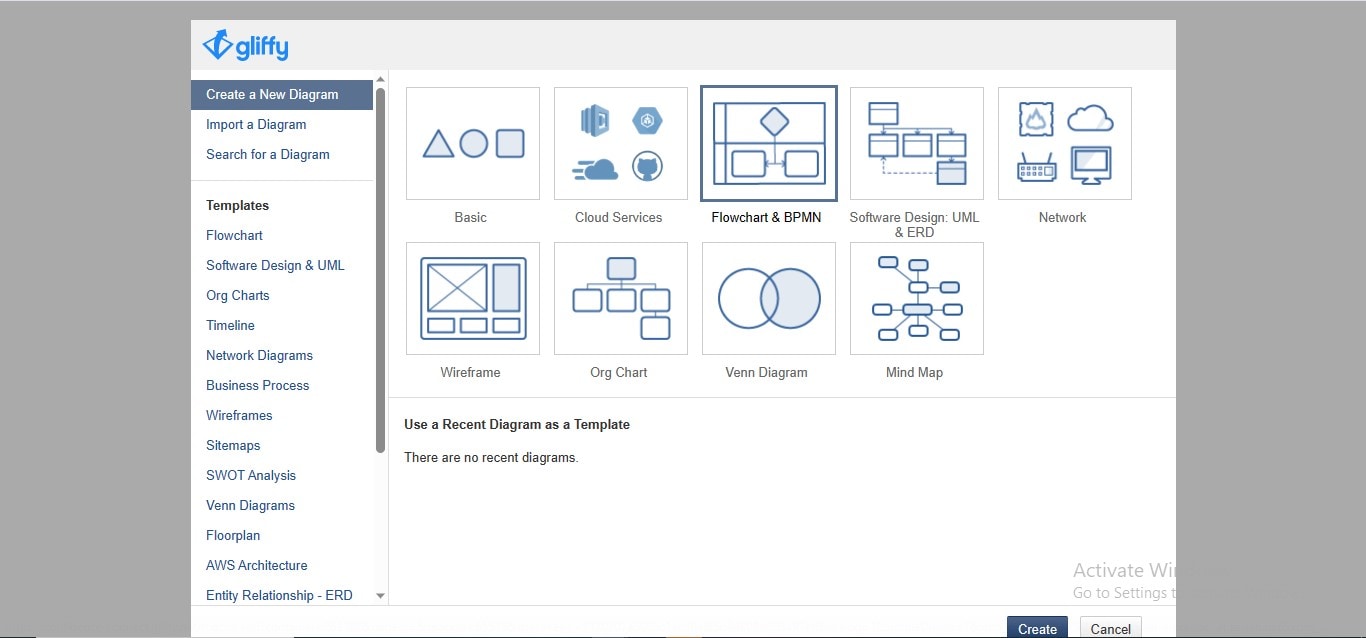
Once you click the suggested app icon, a new window will launch; choose the “Flowchart & BPMN” tab, and click the “Create” button to create a new flowchart.
Step6
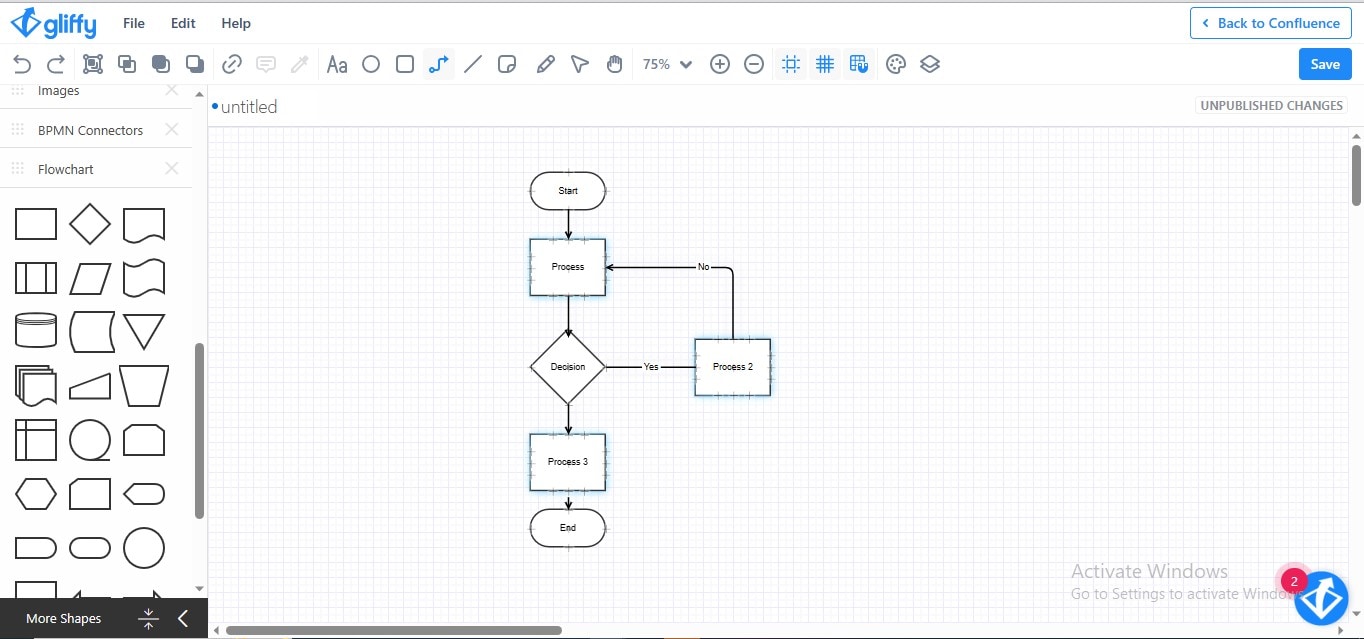
Accomplish the flowchart-making process by adding shapes, text, and connectors to your flowchart; click the “Save” option at the top right to upload the flowchart on Confluence.
Step7
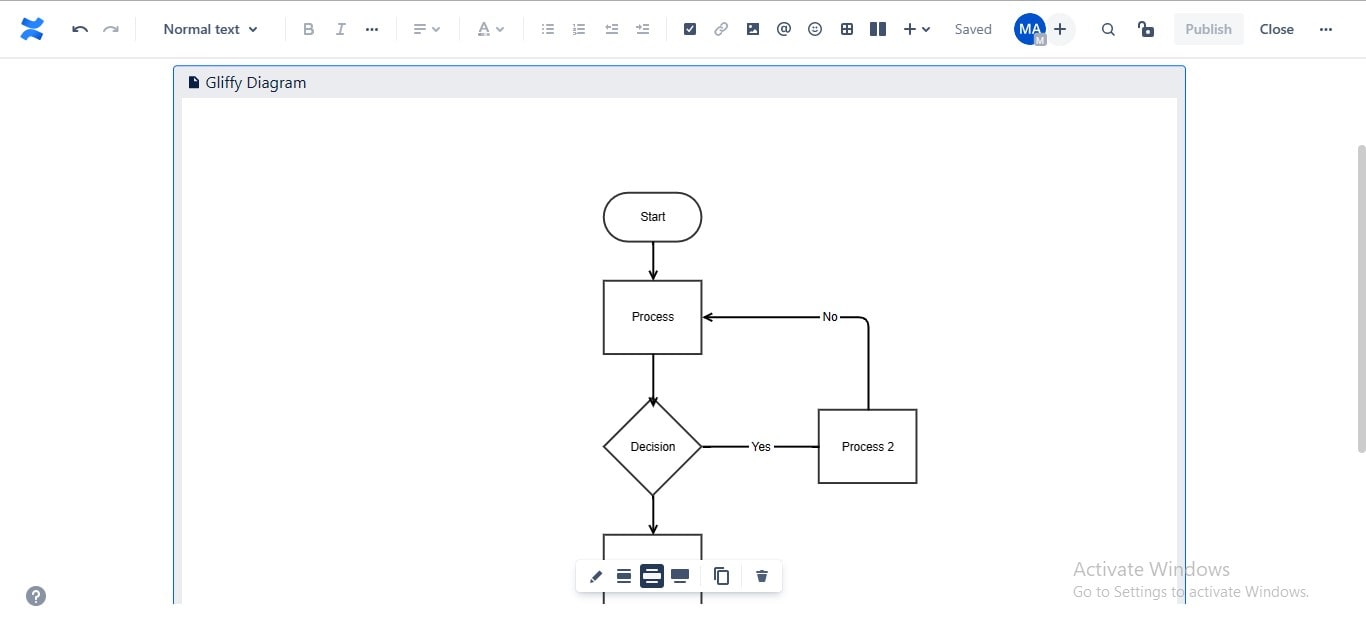
Your Gliffy Diagram flowchart will be embedded in the Confluence project file.
Using Draw.io Add-on for Making Flowcharts in Confluence
Step1
Go to the “Apps” tab and choose the “Find New Apps” option from the dropdown menu.

Step2
Click the “Try it Free” option from the Draw.io Diagrams add-on interface to install it on your Confluence site.

Step3
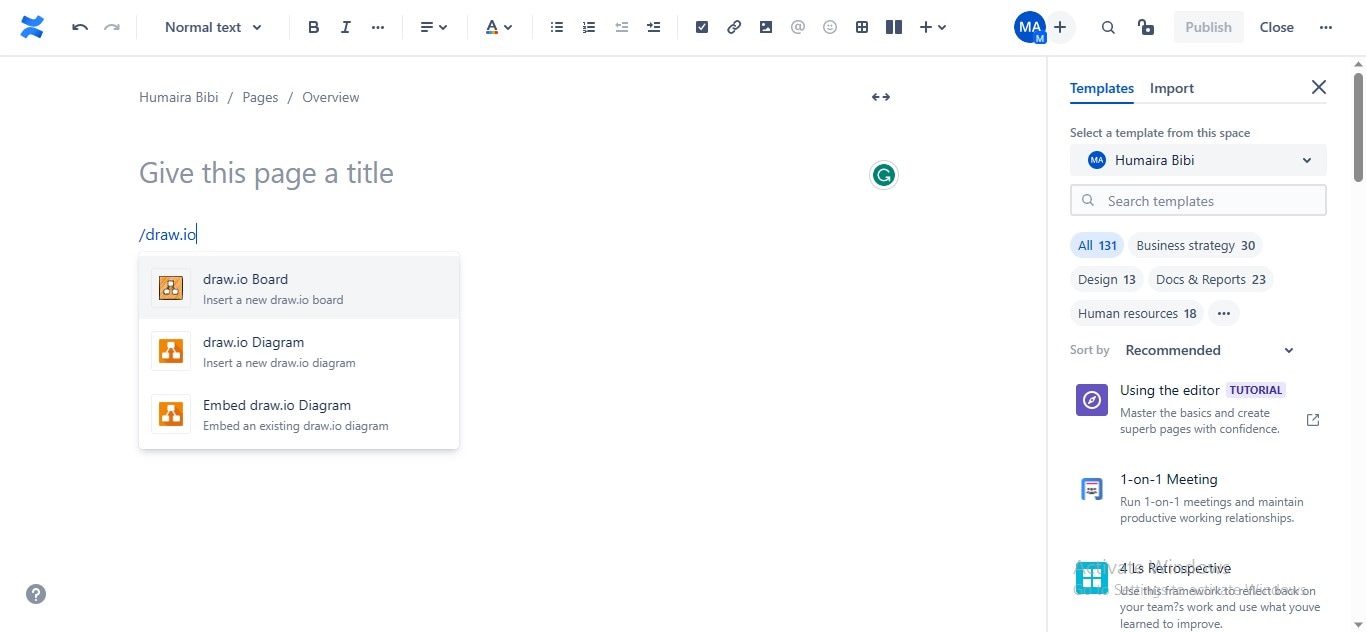
Type “/draw.io,” and Confluence will suggest the Draw.io Diagram add-on thumbnail; choose the “Insert a New Draw.io Diagram” option if you want to create an afresh flowchart.
Step4
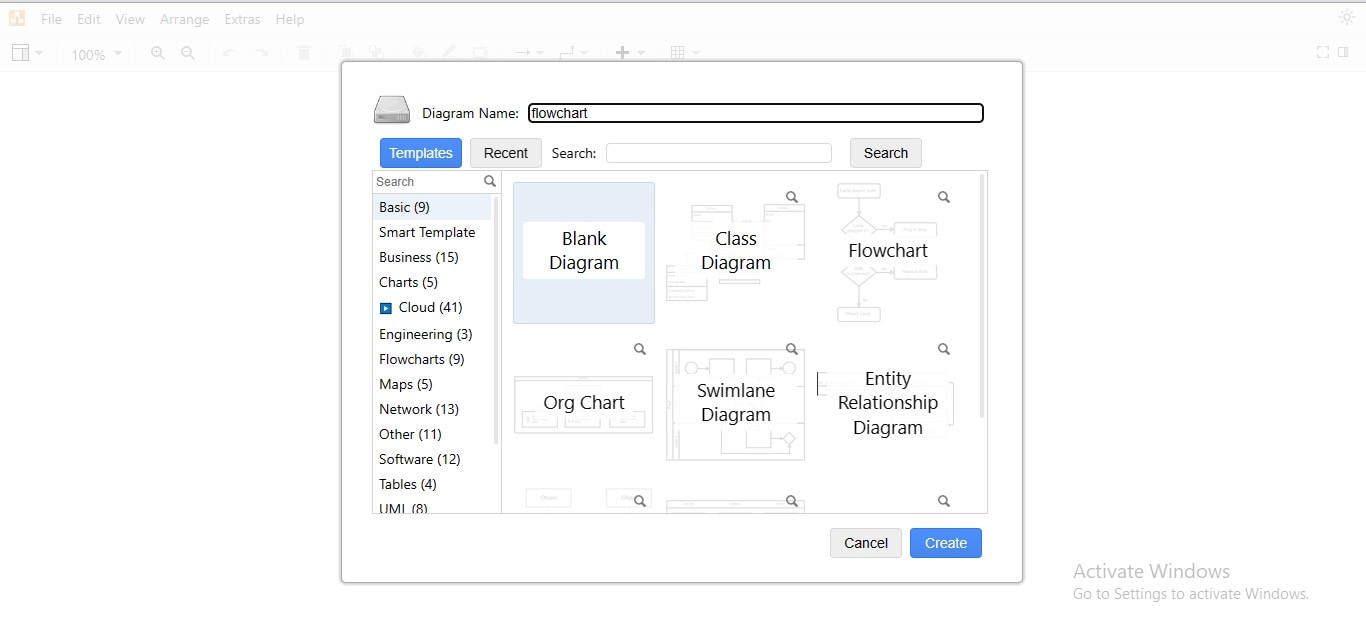
Choose the “Flowchart” option from the given options, and click “Create” to start creating your flowchart Confluence.
Step5
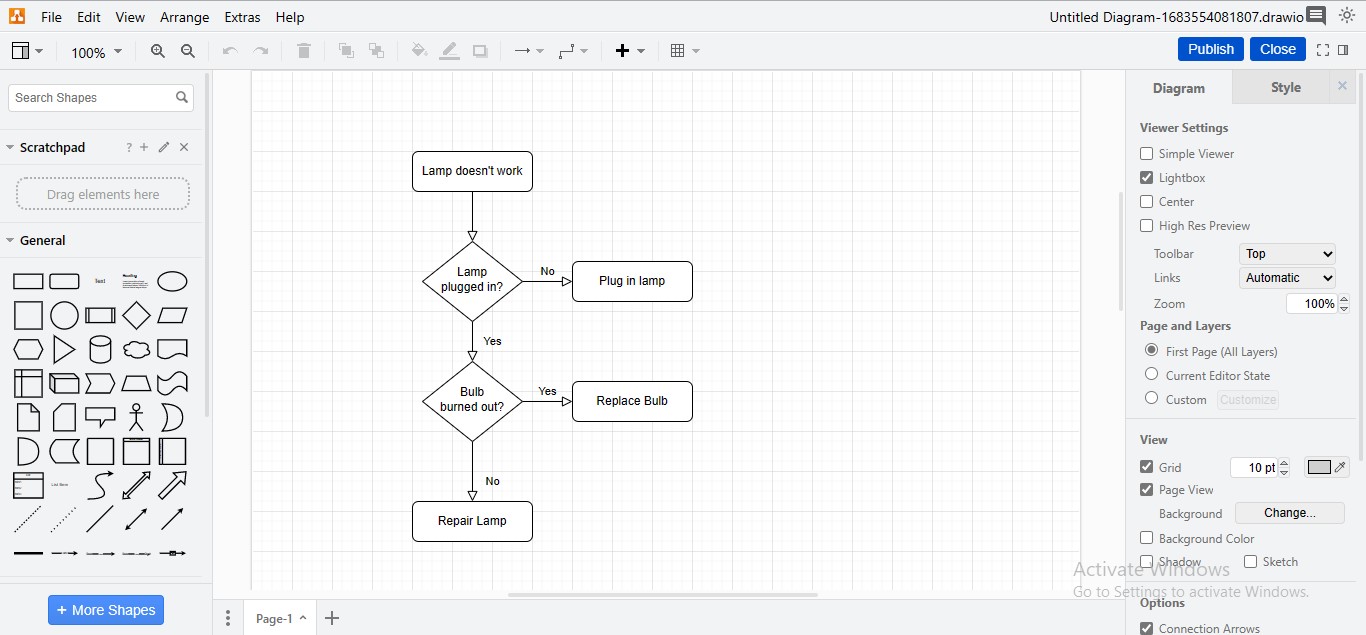
Establish your flowchart in Draw.io by adding the required shapes, & text, and connecting them through the connectors.
Step6
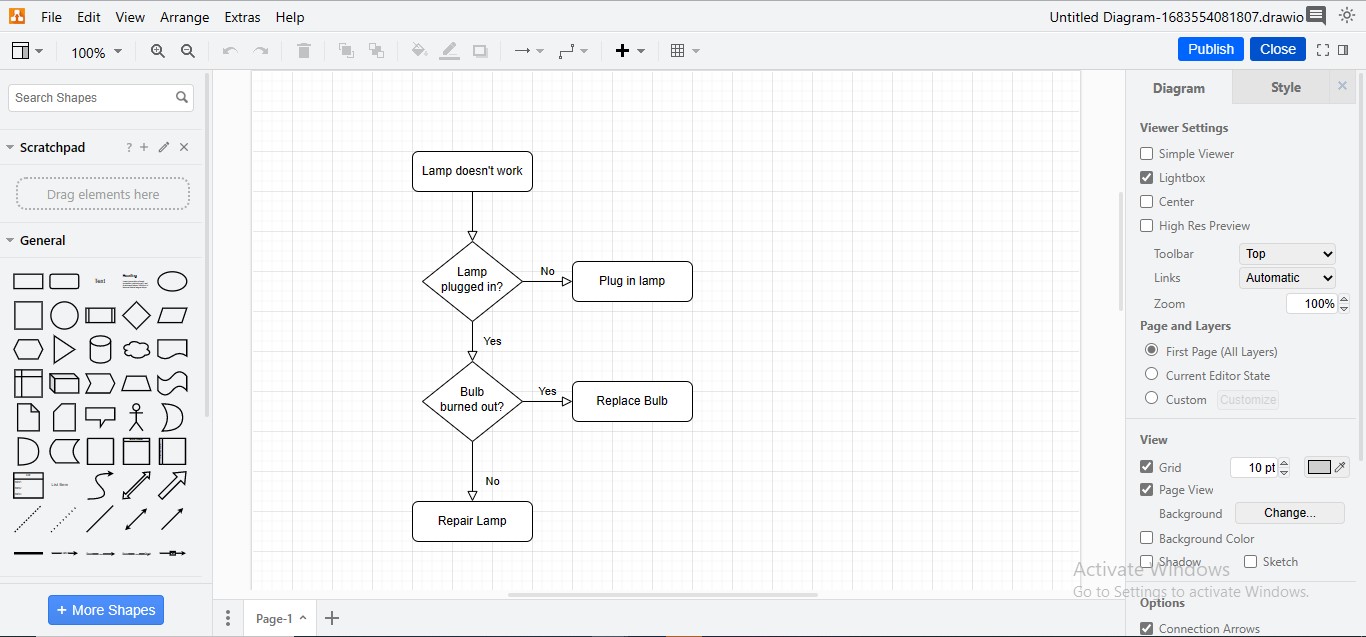
Click the “Publish” button to upload the recently-created flowchart on your Confluence project file.
Step7
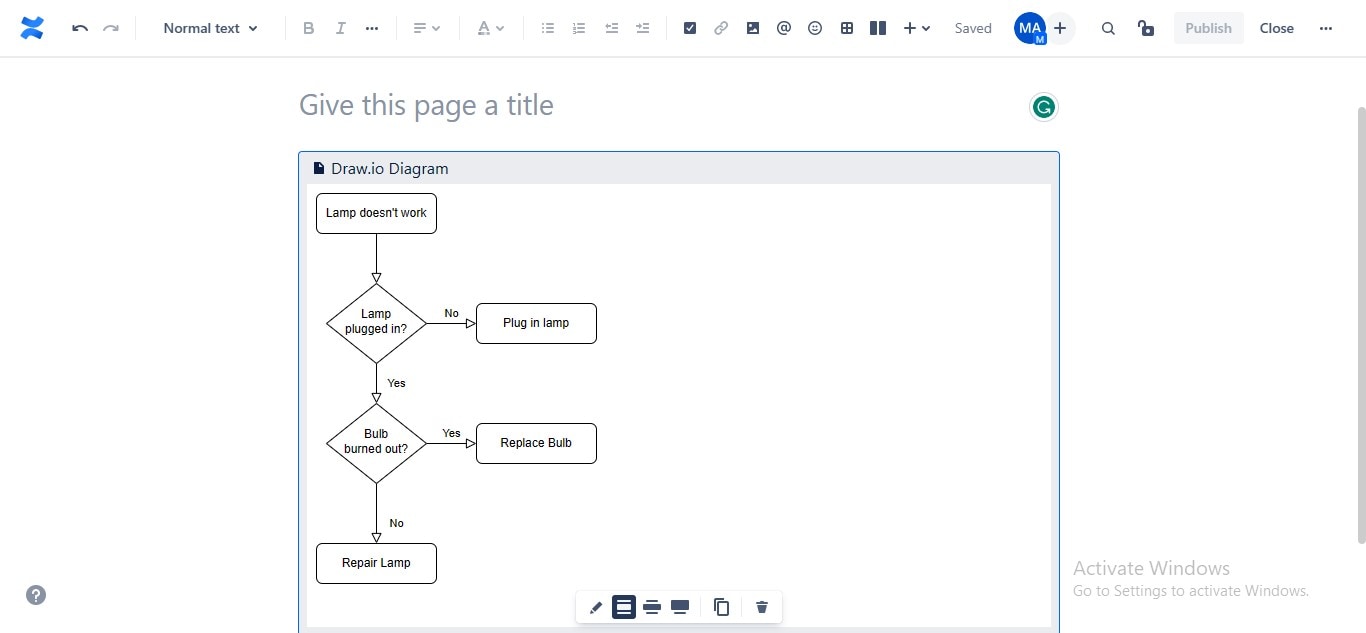
Your Draw.io flowchart will be embedded in your Confluence workspace.
3. EdrawMax- The Ultimate Solution to All Your Flowchart Designing Needs!
Downloading, installing, and using a third-party application to formulate flowcharts can be a tedious task. Additionally, most Confluence app integrations for diagramming and chart-making are paid, which can be only accessed by acquiring their premium version. Thus, you need a solution that not only offers drawing proficiency in its free version but also allows you to collaborate on your diagrams for effective teamwork, eliminating the trouble of back-and-forth navigation into tools.
EdrawMax is an innovative platform to transform your creative thoughts into visualized drawings; the tool enables you to collaborate in real-time with your teammates to share project details, contrive professional flowcharts, and impart feedback on your diagrams. Moreover, using EdrawMax, you can build, customize, & export your intended flowcharts to paste them into your Confluence site as images (PNG, JPG, SVG, etc.) or files (PDF, Word, PowerPoint, and more).
How To Create Flowcharts More Efficiently With EdrawMax?
Step1
Download the “EdrawMax” application and launch it to access its working interface.
Step2
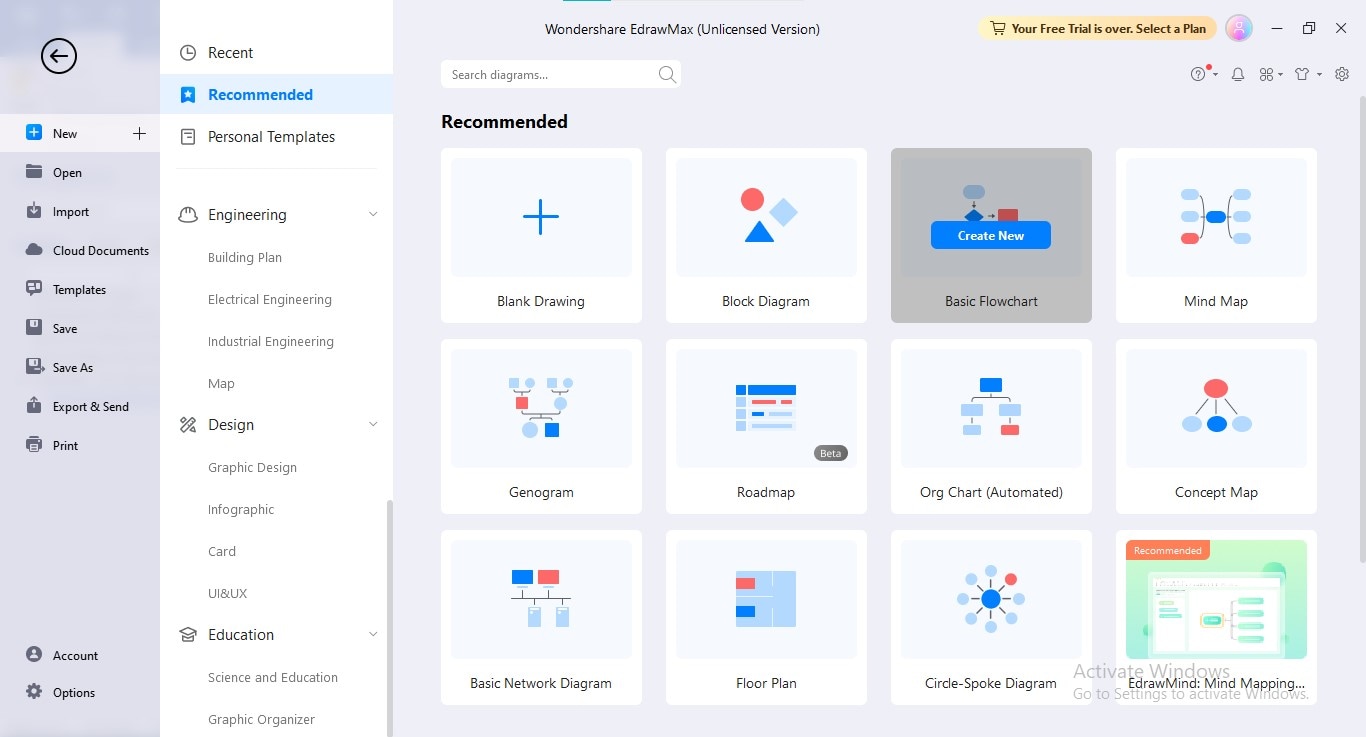
Go to the “New” tab in the left panel, hover over the “Basic Flowchart” option, and click the “Create New” button.
Step3
Draw all the shapes required in your prospective flowchart by dragging and dropping the shapes from the Symbols Library in the left panel.
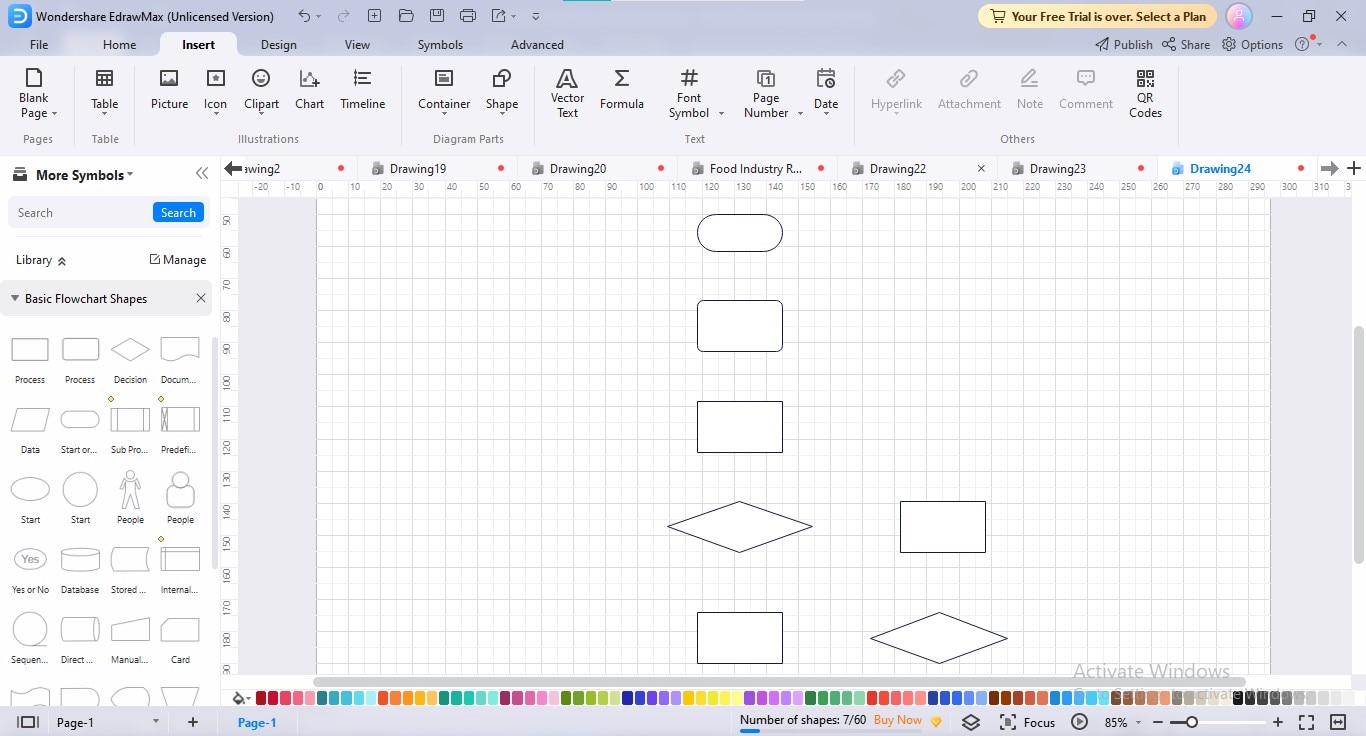
Step4
Embed the relevant text in each box by double-clicking to forge your diagram into a flowchart.
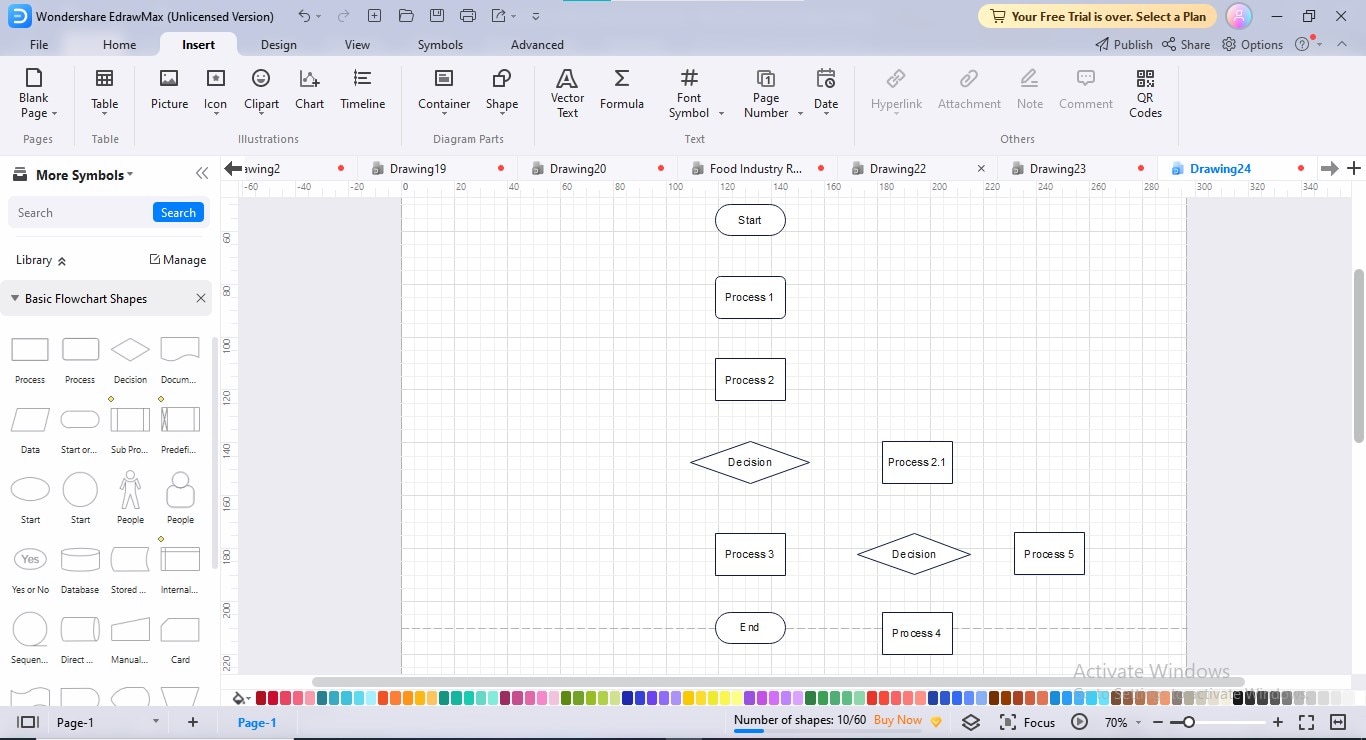
Step5
Now, join all the shapes using the connectors; to add connectors, click the “Connector” option under the “Home” menu, and move the cursor towards the shape to which you want to add connector.
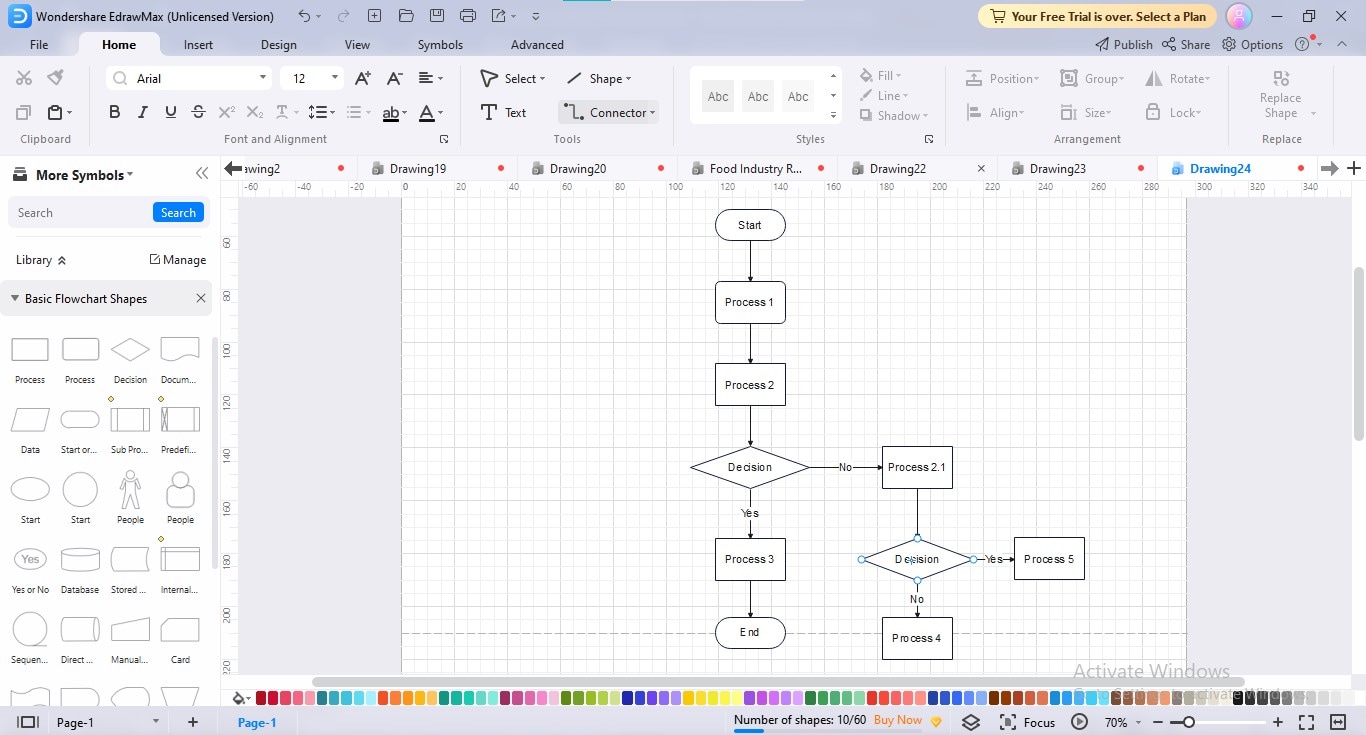
Step6
Align your flowchart shapes by moving them here and there, placing them where the alignment ruler makes a straight line.
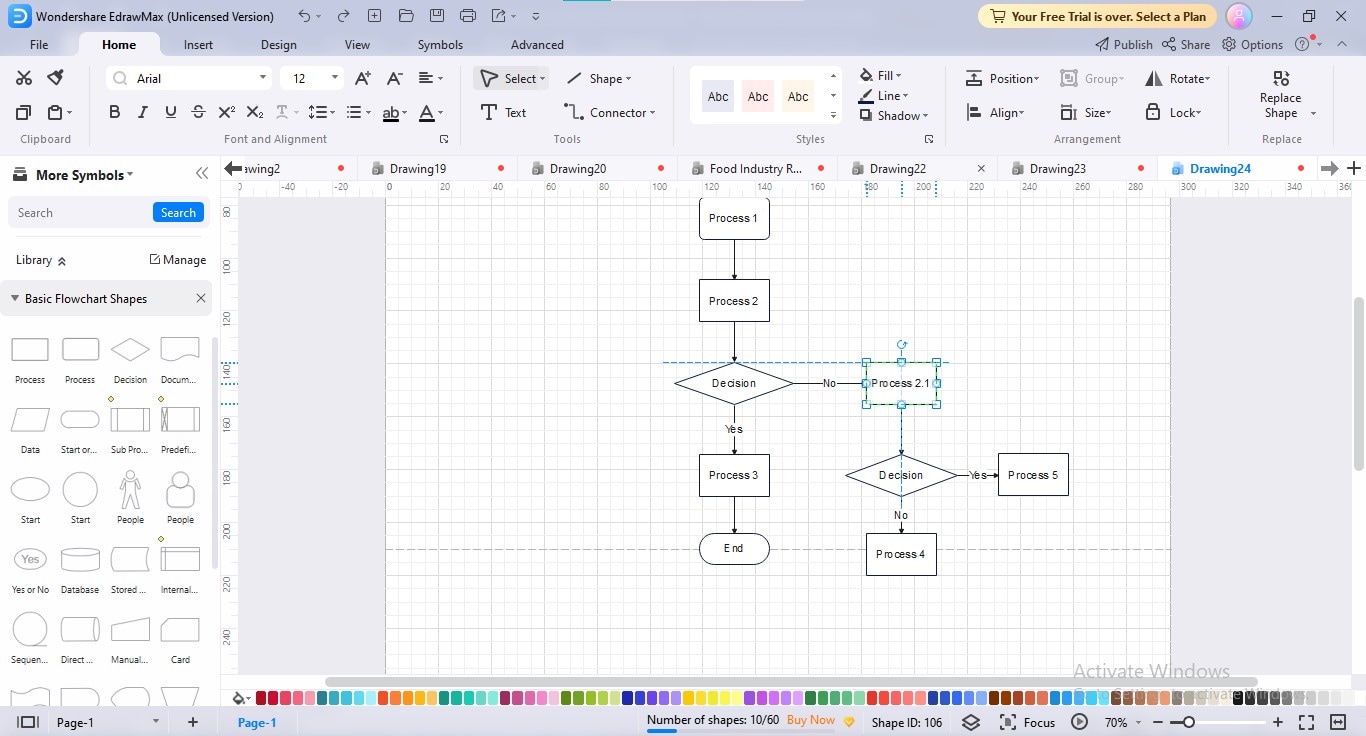
Step7
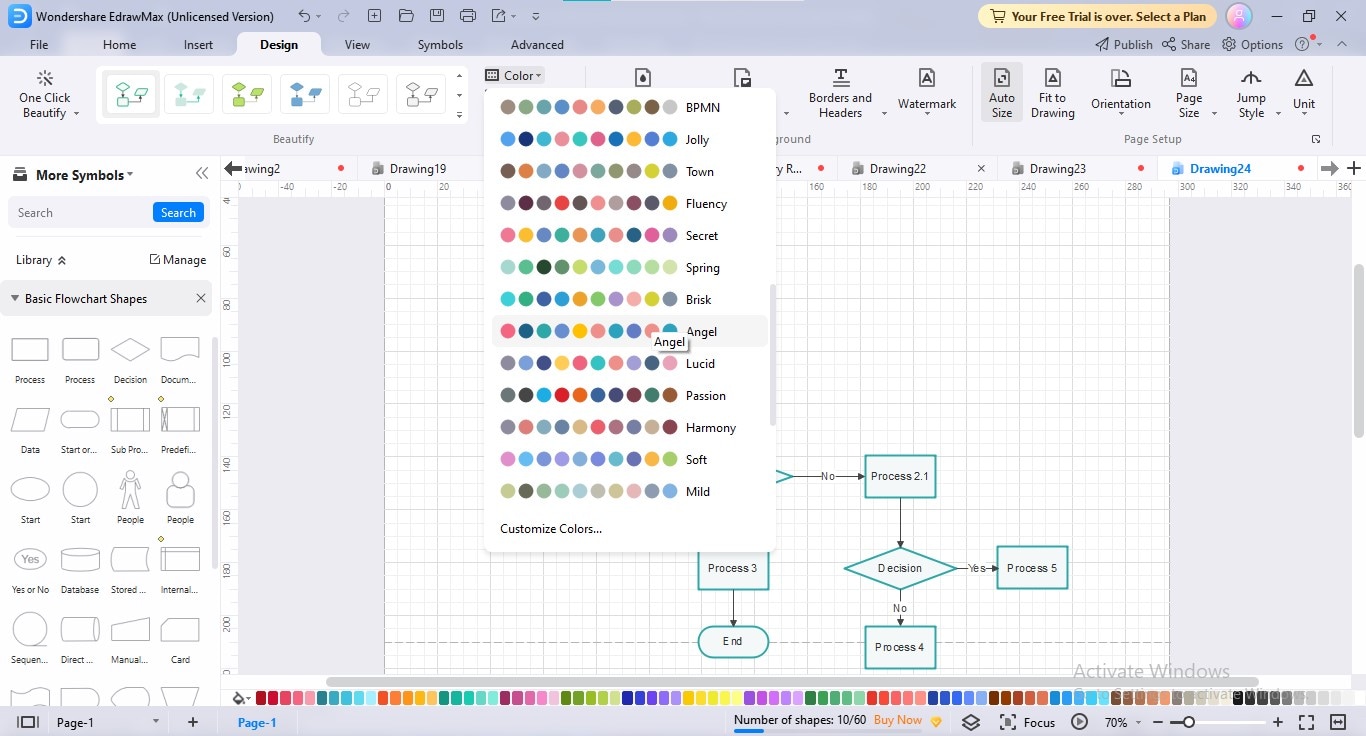
Personalize your flowchart appearance by implementing your favorite theme, layout, color scheme, and background; navigate to the “Design” tab in the main menu, and perform your desirable modifications.
Step8
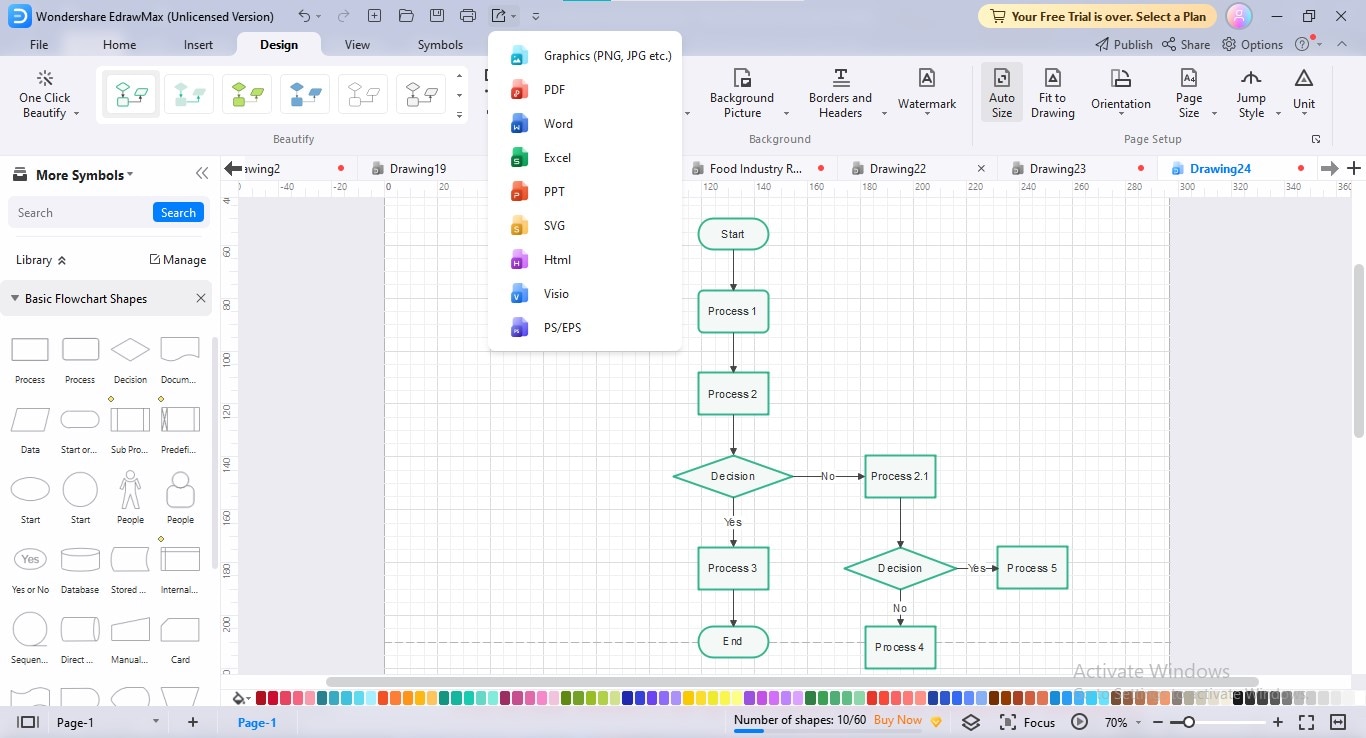
To export your flowchart, click the “Export” button in the title bar and choose your preferred export format.
4. Conclusion
Confluence is a collaborative platform that not only allows you to upload documents and disseminate knowledge but also empowers you to establish well-looking flowcharts for visualizing your workflow. To use Confluence for flowchart creation, you need to install a diagramming add-on, depending on your project needs & budget. Prefer to choose an add-on that provides a scalable feature range, affordable price point, ability to share diagrams externally, and synchronized sharing functionality.
In this article, we have profoundly described which add-ons are best for flowchart Confluence and how you can create a Confluence flowchart macro using these add-ons. Additionally, we have provided a reliable drawing solution, EdrawMax, to construct, export, and add flowcharts to your Confluence workspace.


