Think Bigger From EdrawMax User Guide
How to Add and Edit Images in EdrawMax Diagrams
Images enhance diagrams by making them more visually engaging and informative. Whether you're creating flowcharts, timelines, or mind maps, adding relevant images can significantly improve comprehension. Follow these steps to incorporate images into your EdrawMax projects.
Step ❶ Access Image Options
- Locate and select the Image tab on the bottom toolbar
- This opens the image insertion panel
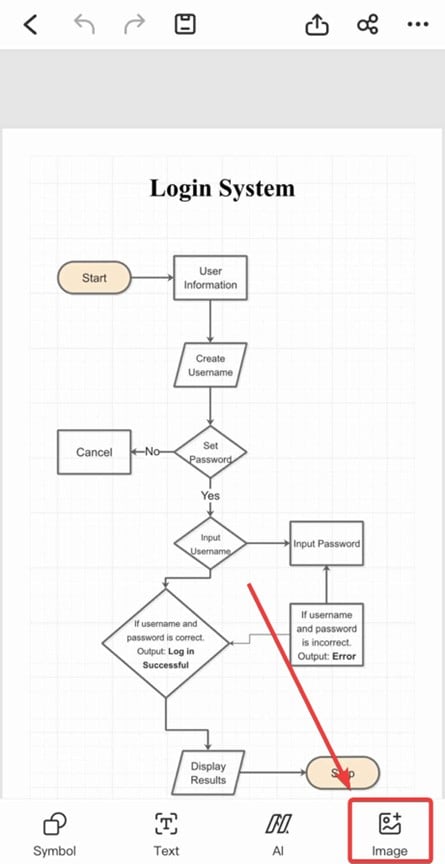
Image tab location on the toolbar
Step ❷ Insert Images
- Choose your image source:
- Camera: Take a new photo directly
- Album: Select from your device's gallery
- For album images, browse and select your desired picture
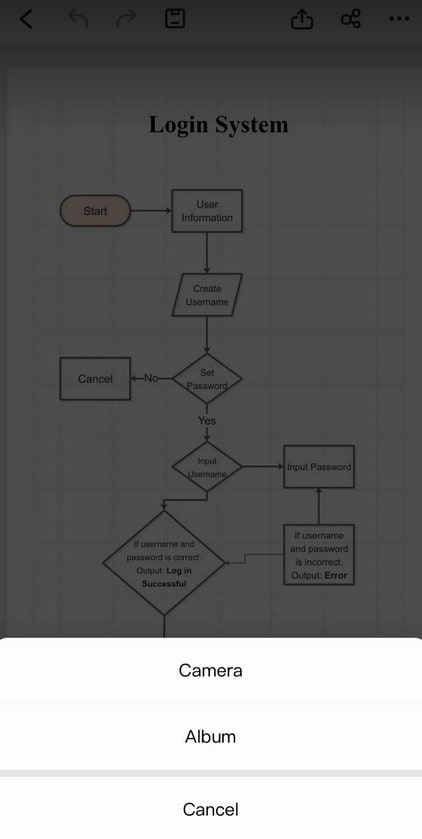
Image source selection options
Tip:
Prepare relevant images in your album beforehand for quicker insertion.
Step ❸ Edit and Customize Images
- Resize: Drag the corner handles to adjust dimensions
- Rotate: Use the rotation handle to change orientation
- Copy: Duplicate images for consistent styling
- Delete: Remove unwanted images
- Replace: Swap images while maintaining formatting
- Lock: Prevent accidental modifications
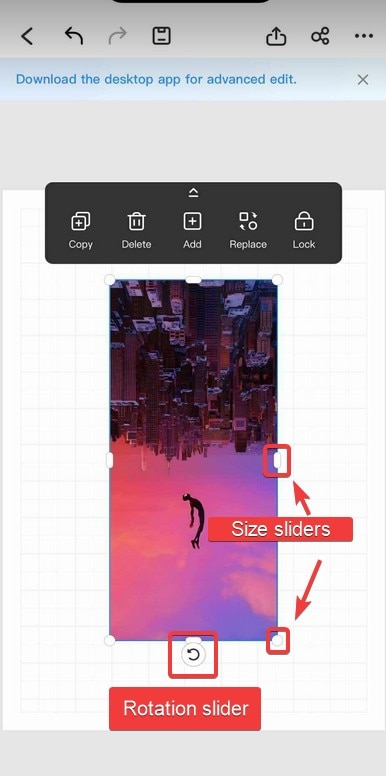
Image editing tools and controls
Advanced Image Options
- Right-click images for additional formatting:
- Opacity: Adjust transparency levels
- Wrap Text: Control text flow around images
- Layer: Arrange images above/below other elements
- Use the Format panel for precise adjustments:
- Border styles and colors
- Shadow effects
- Color filters
Pro Tip:
Maintain consistent image styles (borders, shadows) throughout your diagram for a professional look.
Best Practices for Using Images
- Use high-quality images that maintain clarity when resized
- Keep images relevant to the diagram's purpose
- Balance text and visual elements appropriately
- Consider file size when exporting diagrams with multiple images