Think Bigger From EdrawMax User Guide
Comment
Adding comments in EdrawMax is a useful way to provide feedback, suggestions, or notes directly within your diagrams. No matter if you're collaborating with a team or organizing your own thoughts, comments help streamline communication and improve clarity. This feature allows you to annotate any element, making your design process more efficient and interactive. Follow these steps to insert a comment.
Step 1
- Open EdrawMax on your tablet
Step 2
- From the list of recent files, tap to open the diagram where you want to add a comment.
Step 3 Select an Element
- Tap the object or element you want to comment on. A blue highlight will appear around the selected element.
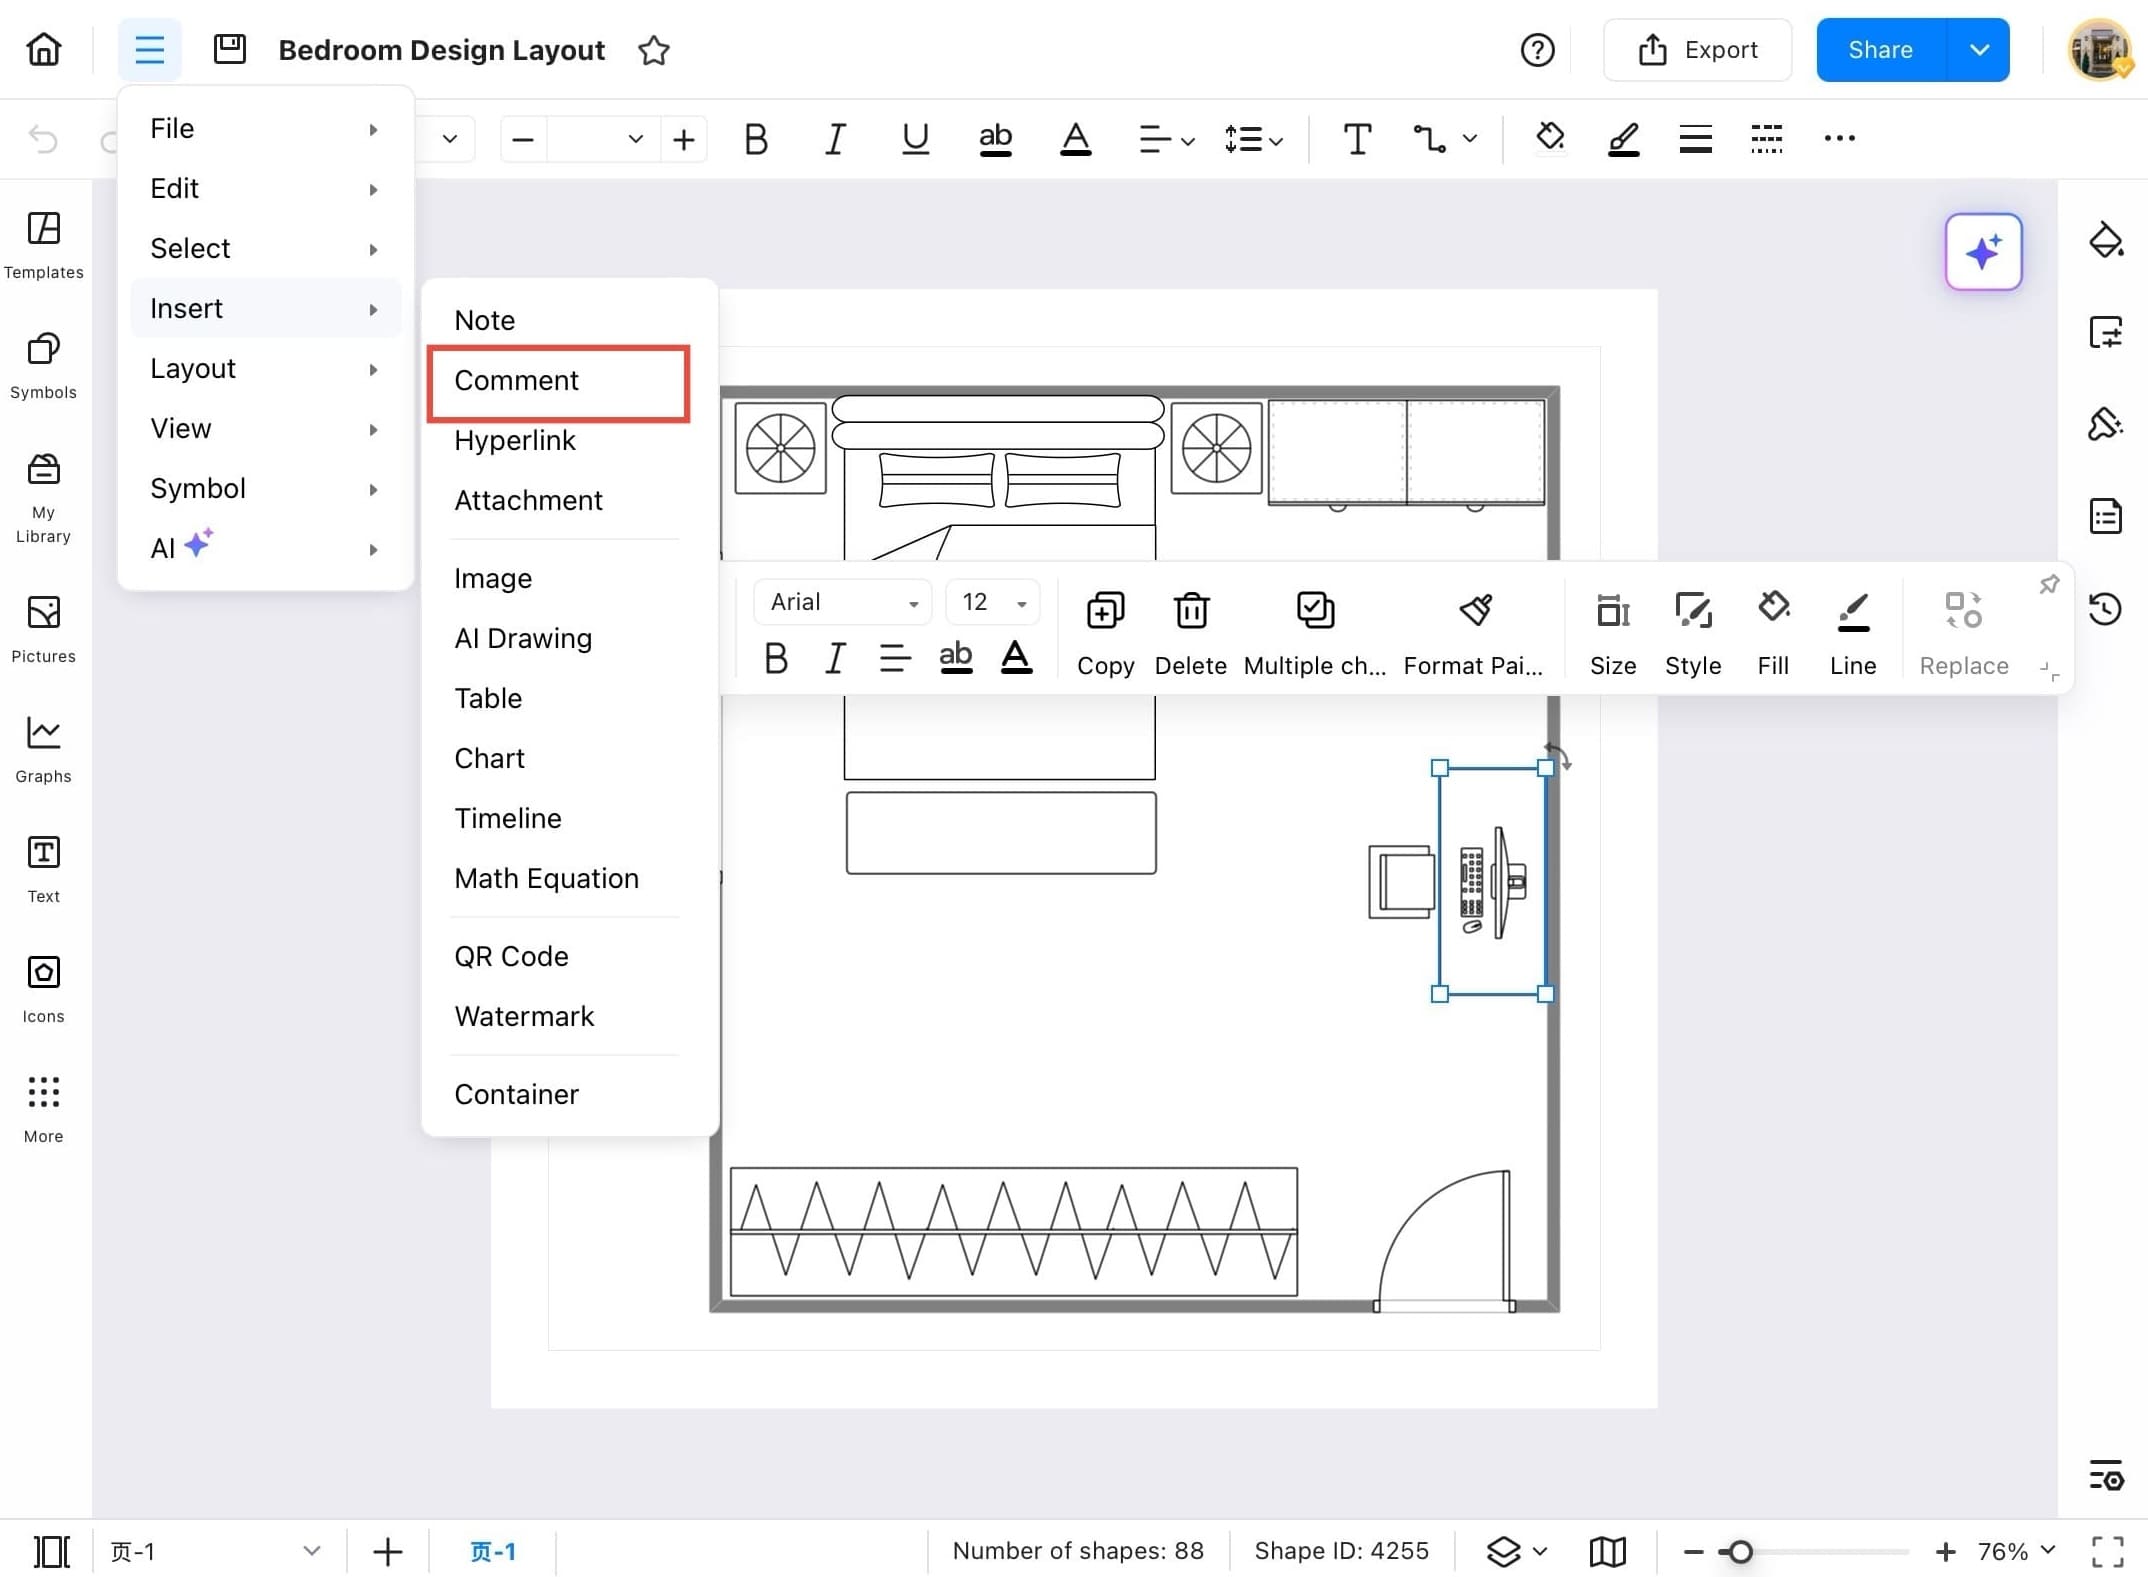
Step 4 Tap the Menu Icon
- After selecting the object you want to comment on, tap the three lines icon (hamburger menu).
Step 5 Go to Insert Option
- From the dropdown menu, tap the Insert option to access different types of elements you can add.
Step 6 Tap Comment
- Under the Insert menu, tap Comment. This will add a comment box linked to your selected object.
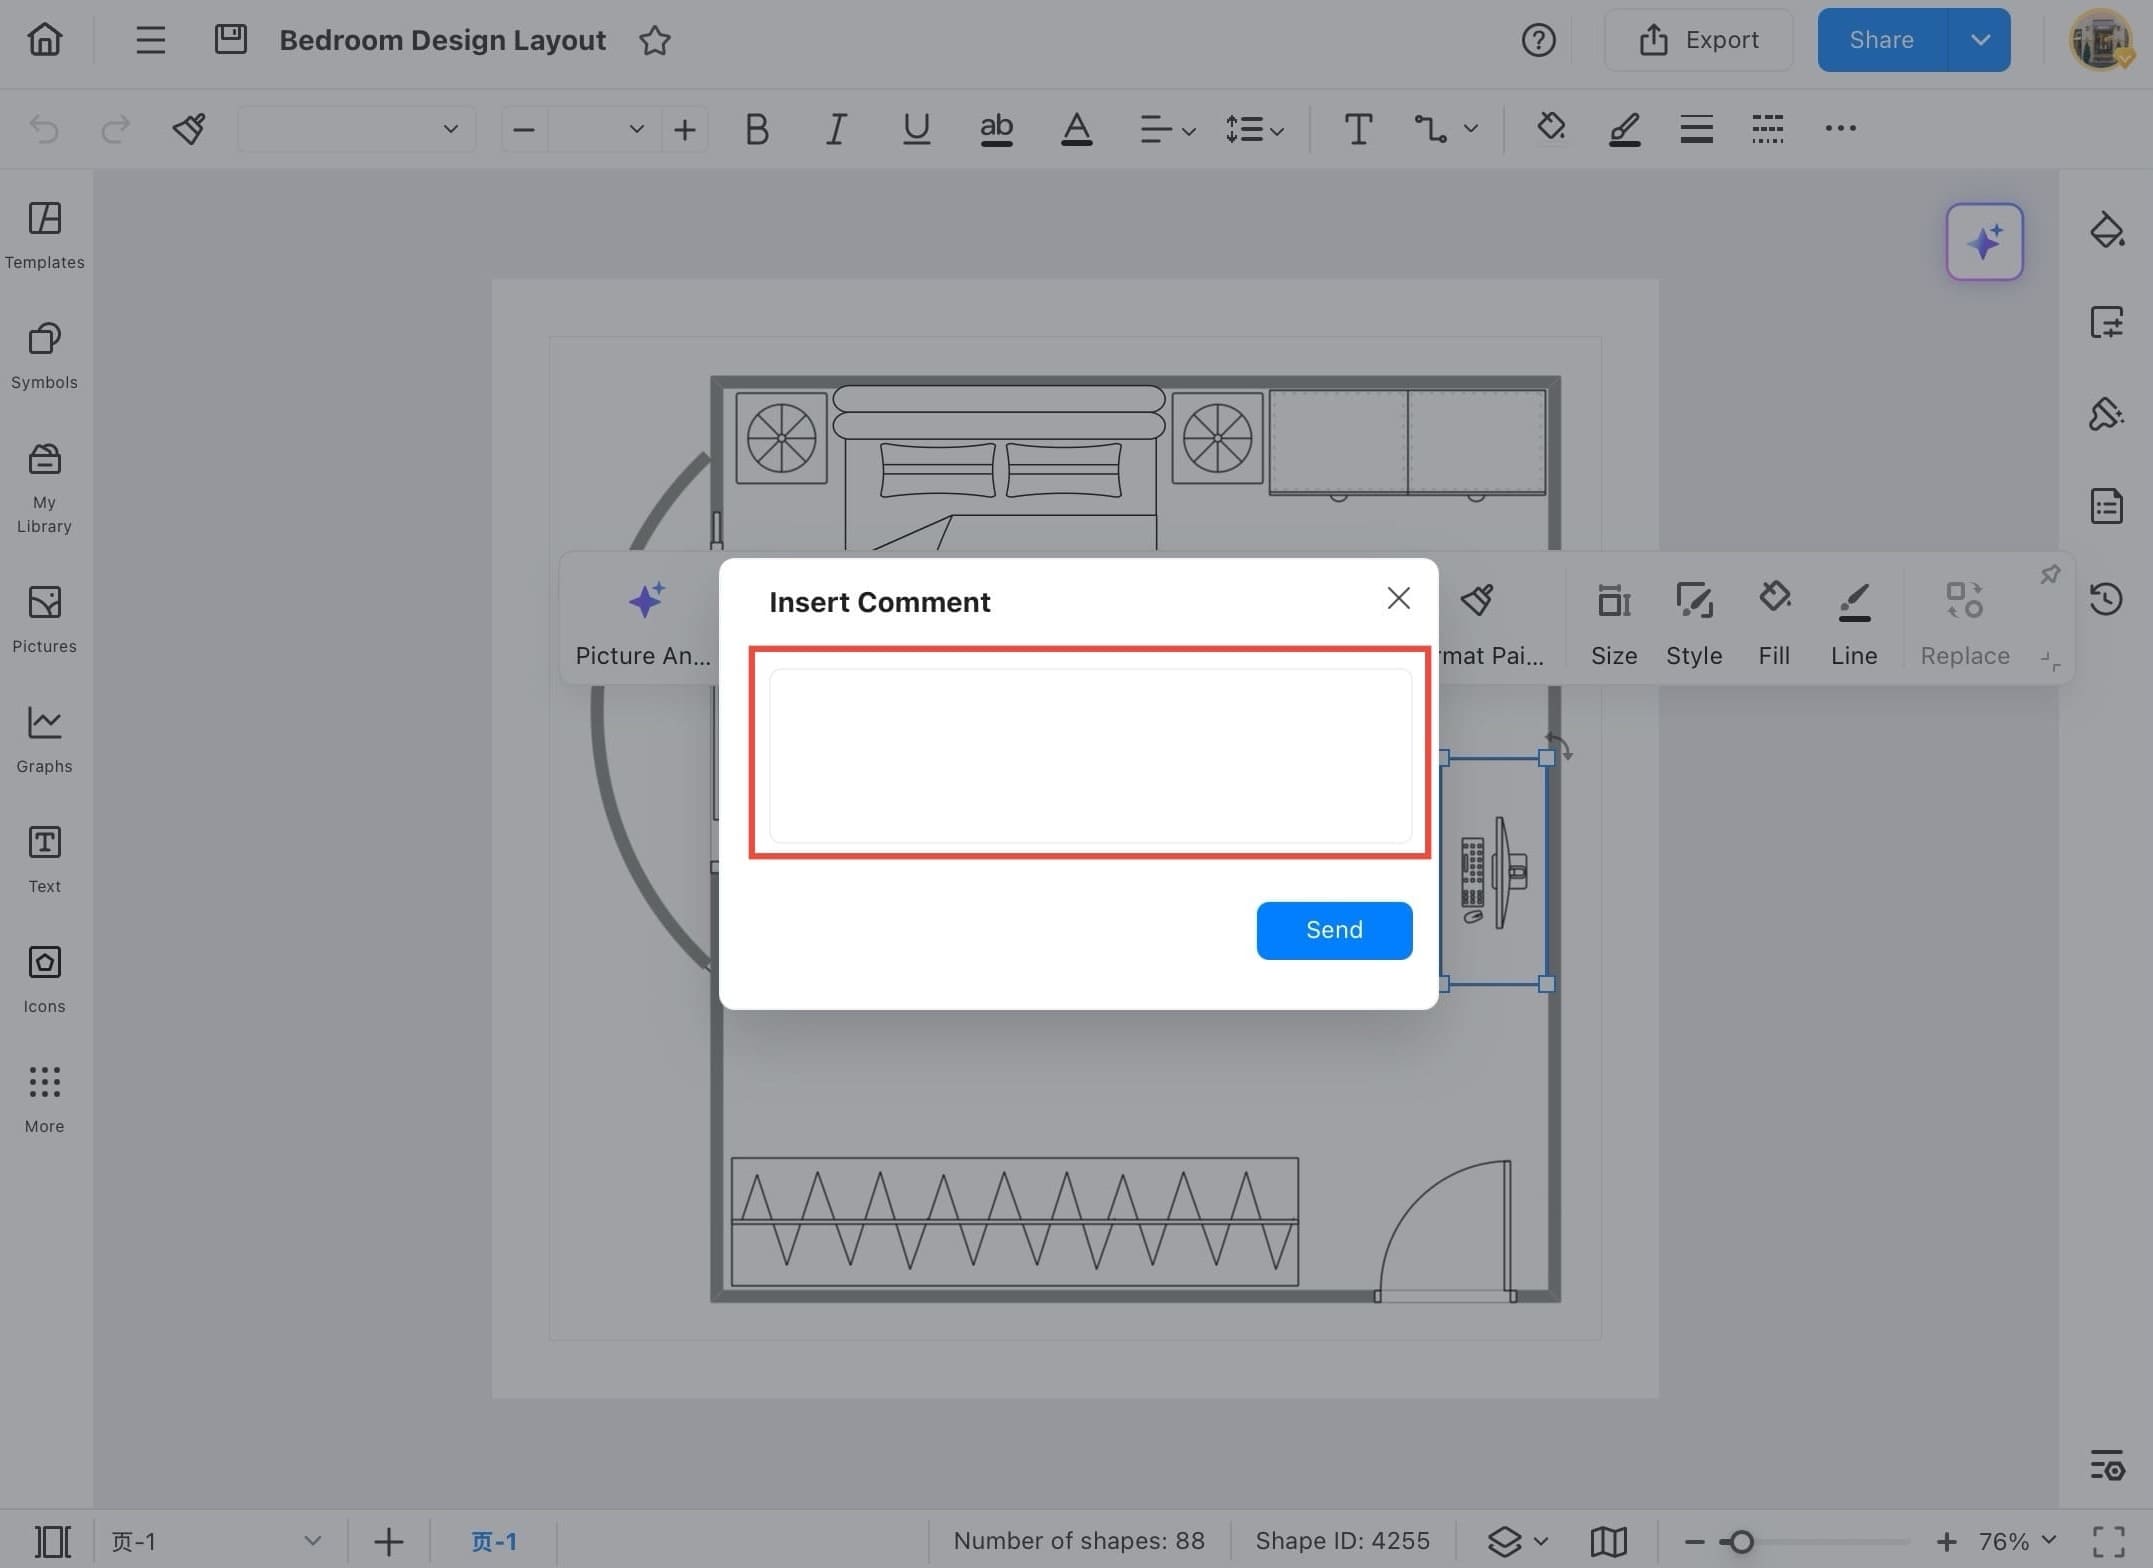
Step 7 Type Your Comment
- A comment box will pop up. Type your comment in the provided text field.
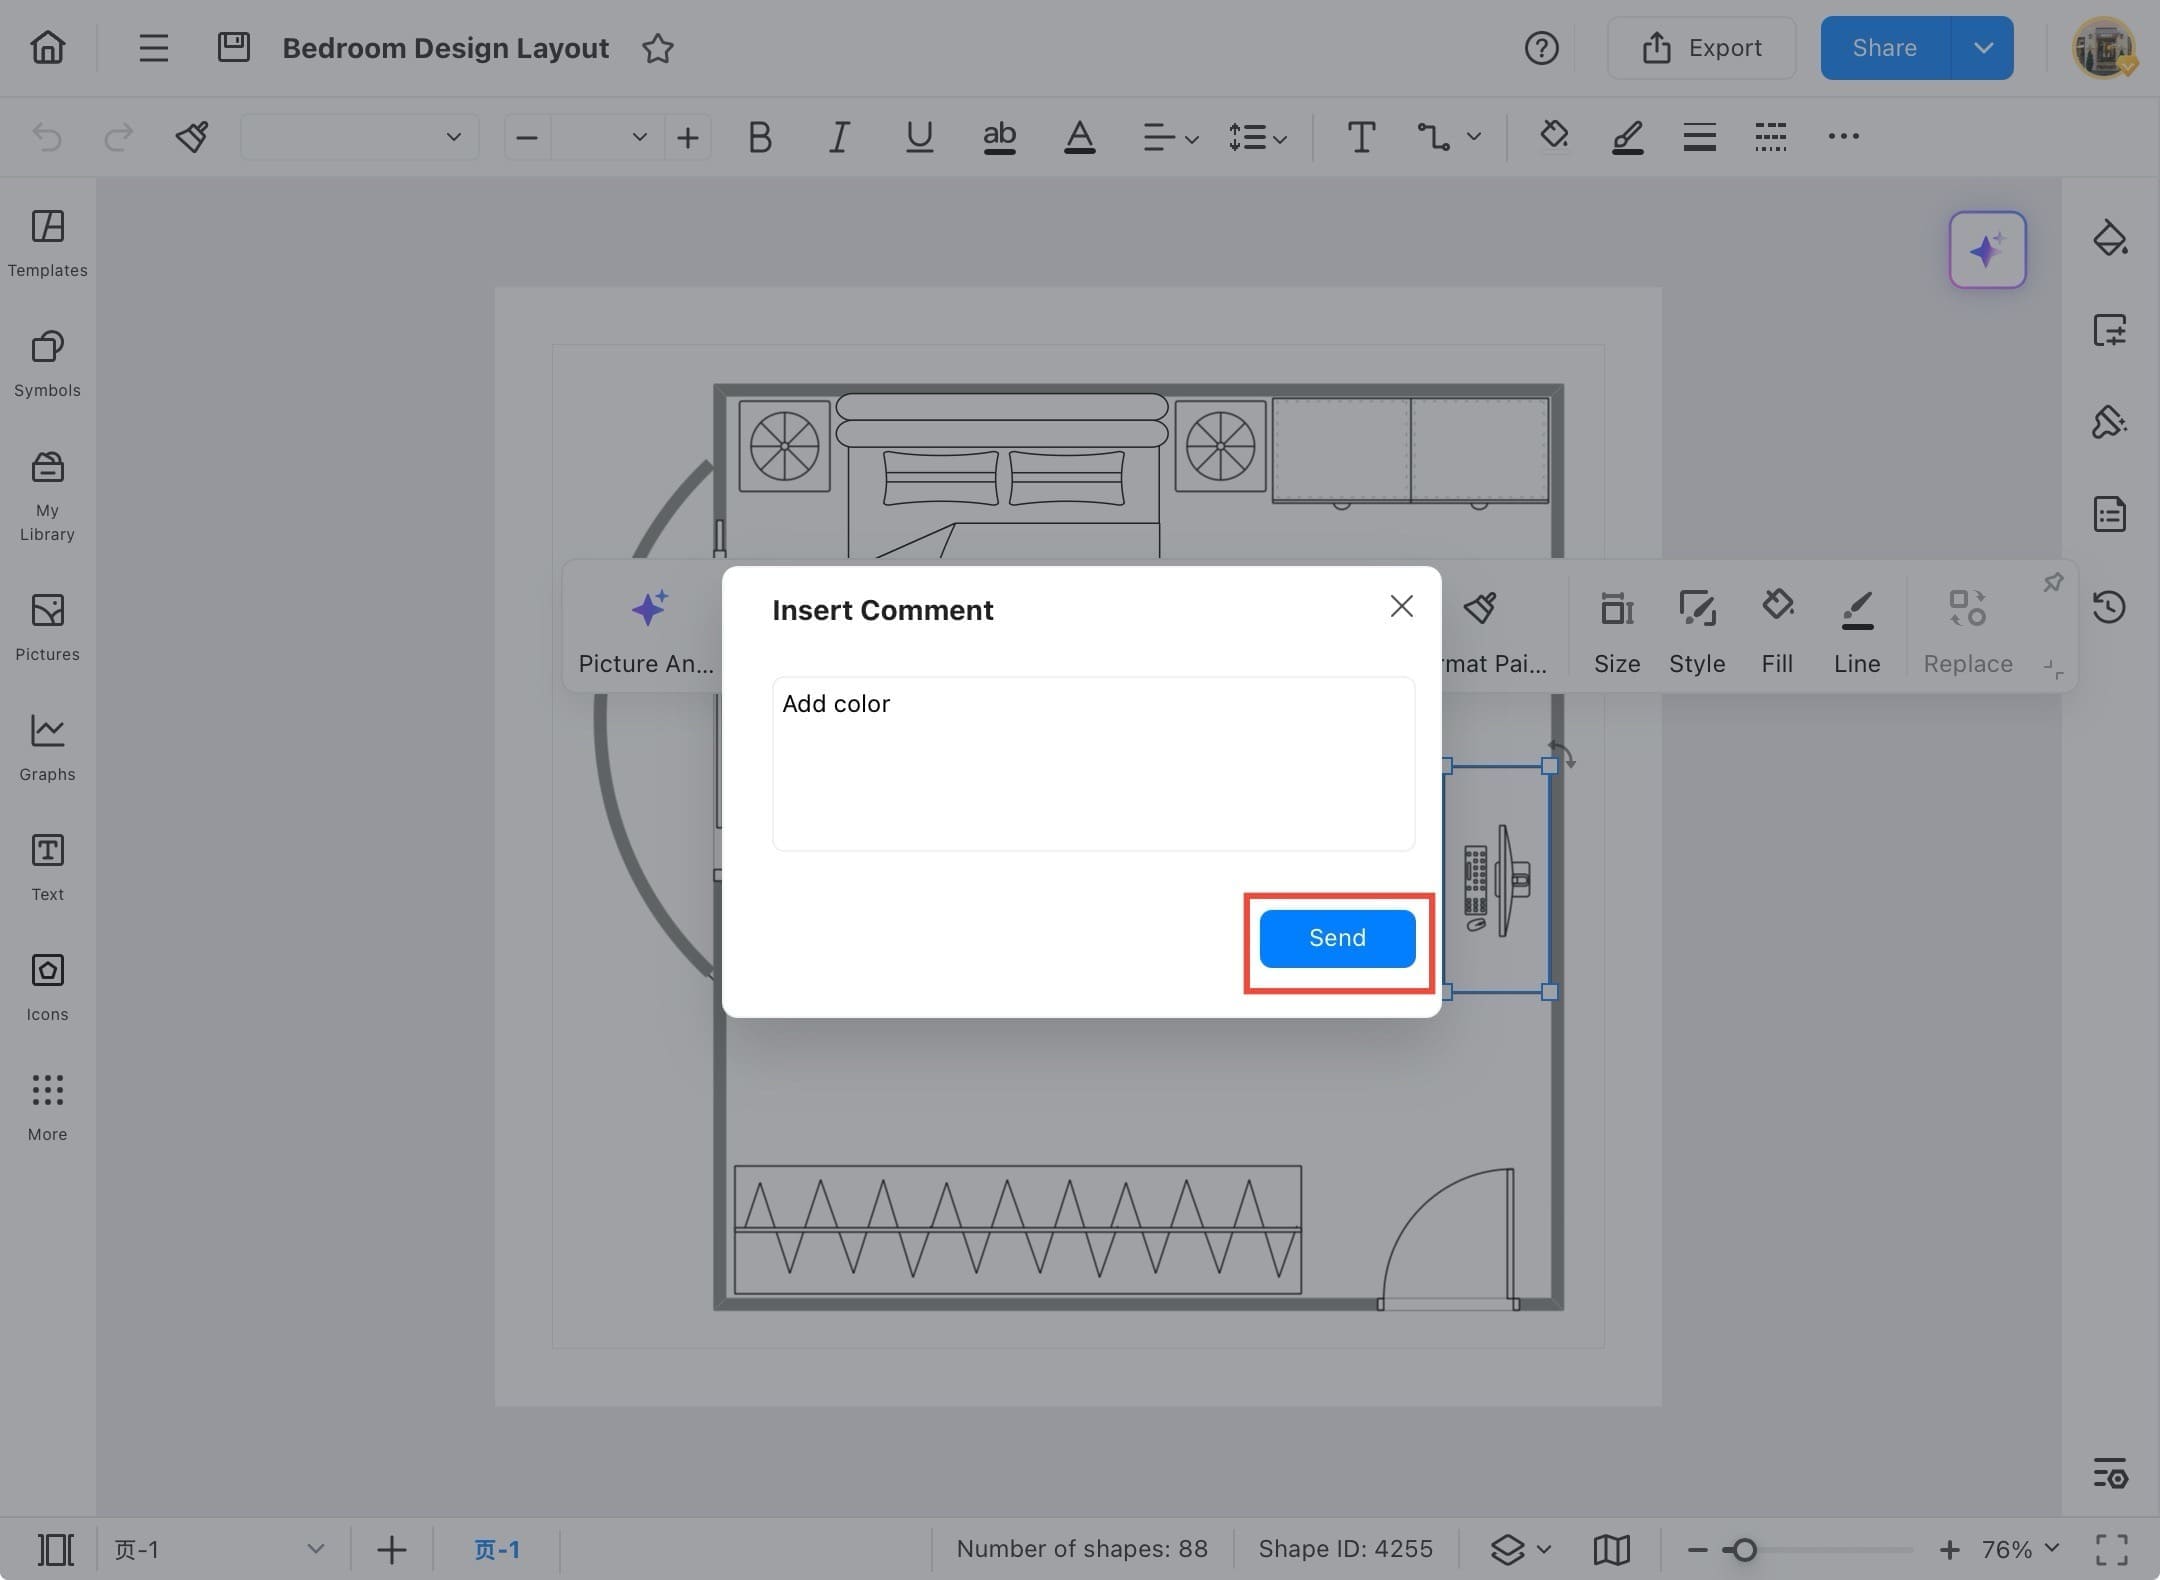
Step 8 Send the Comment
- Once you’ve written your comment, tap the Send button to save it.
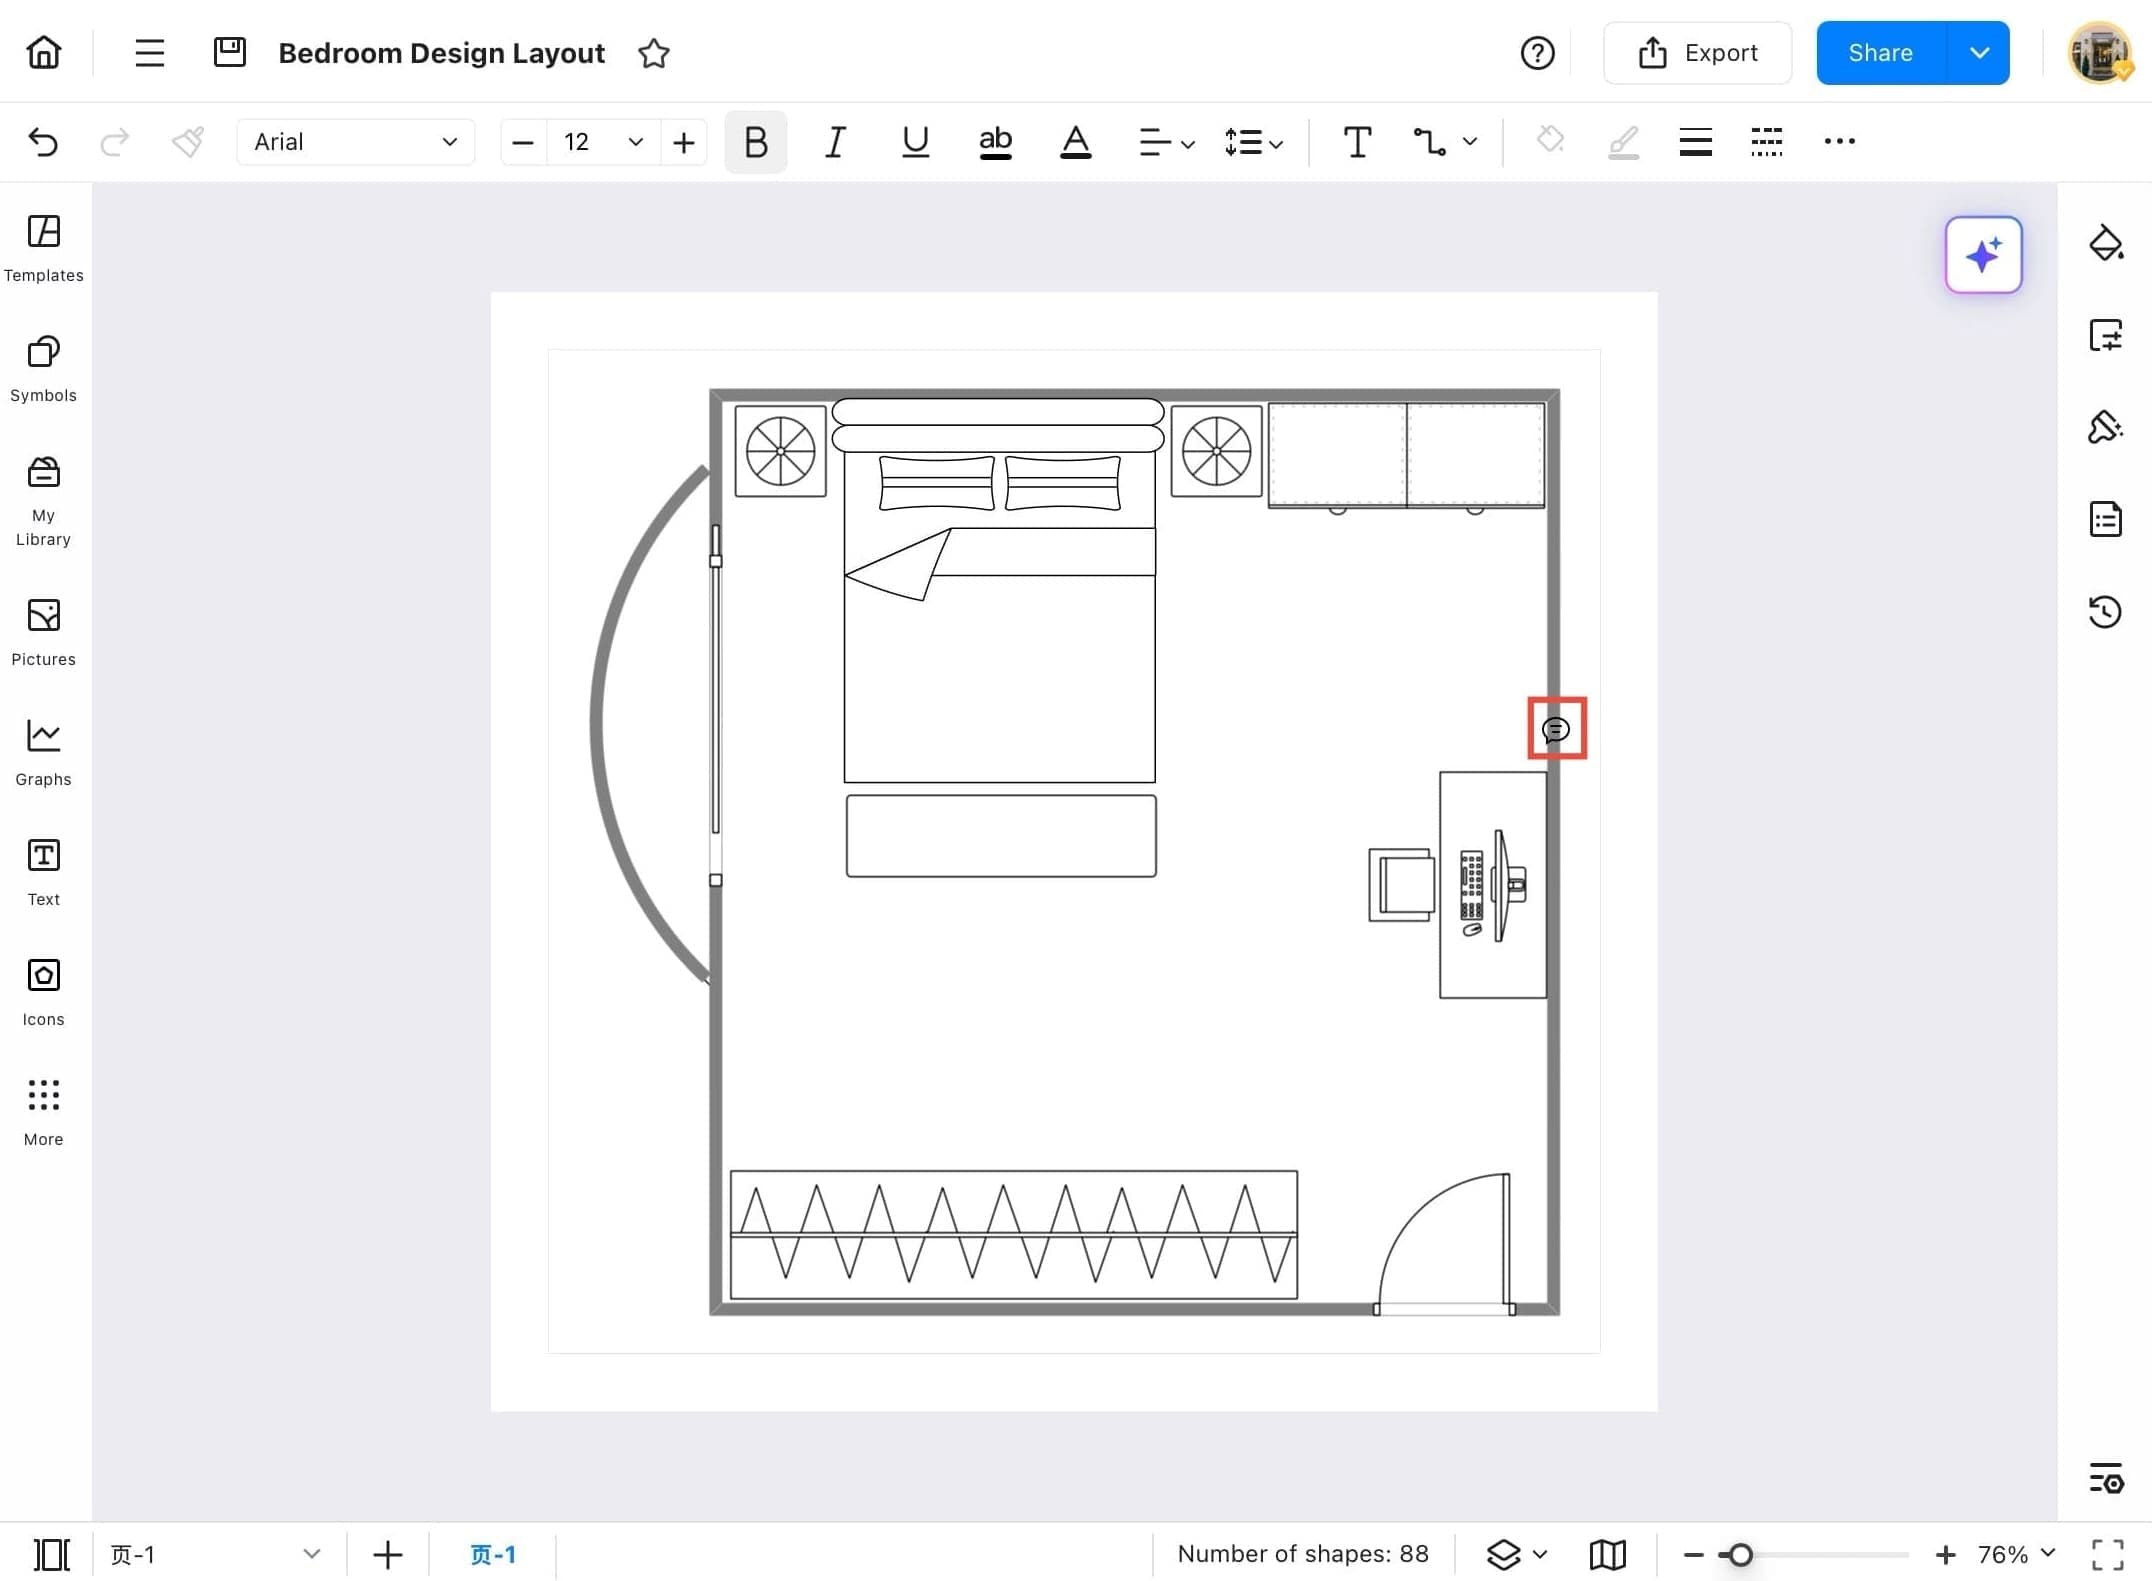
Step 9 View the Comment Icon
- Your comment will now appear as a comment icon on the selected object. You or your collaborators can tap on it anytime to view or reply.
Step 10 Edit or Delete Comment
- After submitting your comment, it will appear below the comment box. You can edit it using the pencil icon and view the comment indicator on the diagram itself.

Hyperlink
The Hyperlink feature in EdrawMax allows you to connect different parts of your diagram, external websites, files, or even other EdrawMax documents. This is especially helpful for creating interactive flowcharts, navigation-friendly mind maps, and reference-ready designs. Below are the steps to add a hyperlink to any element in your diagram.
Step 1
- Launch EdrawMax and Open Recent File
Step 2
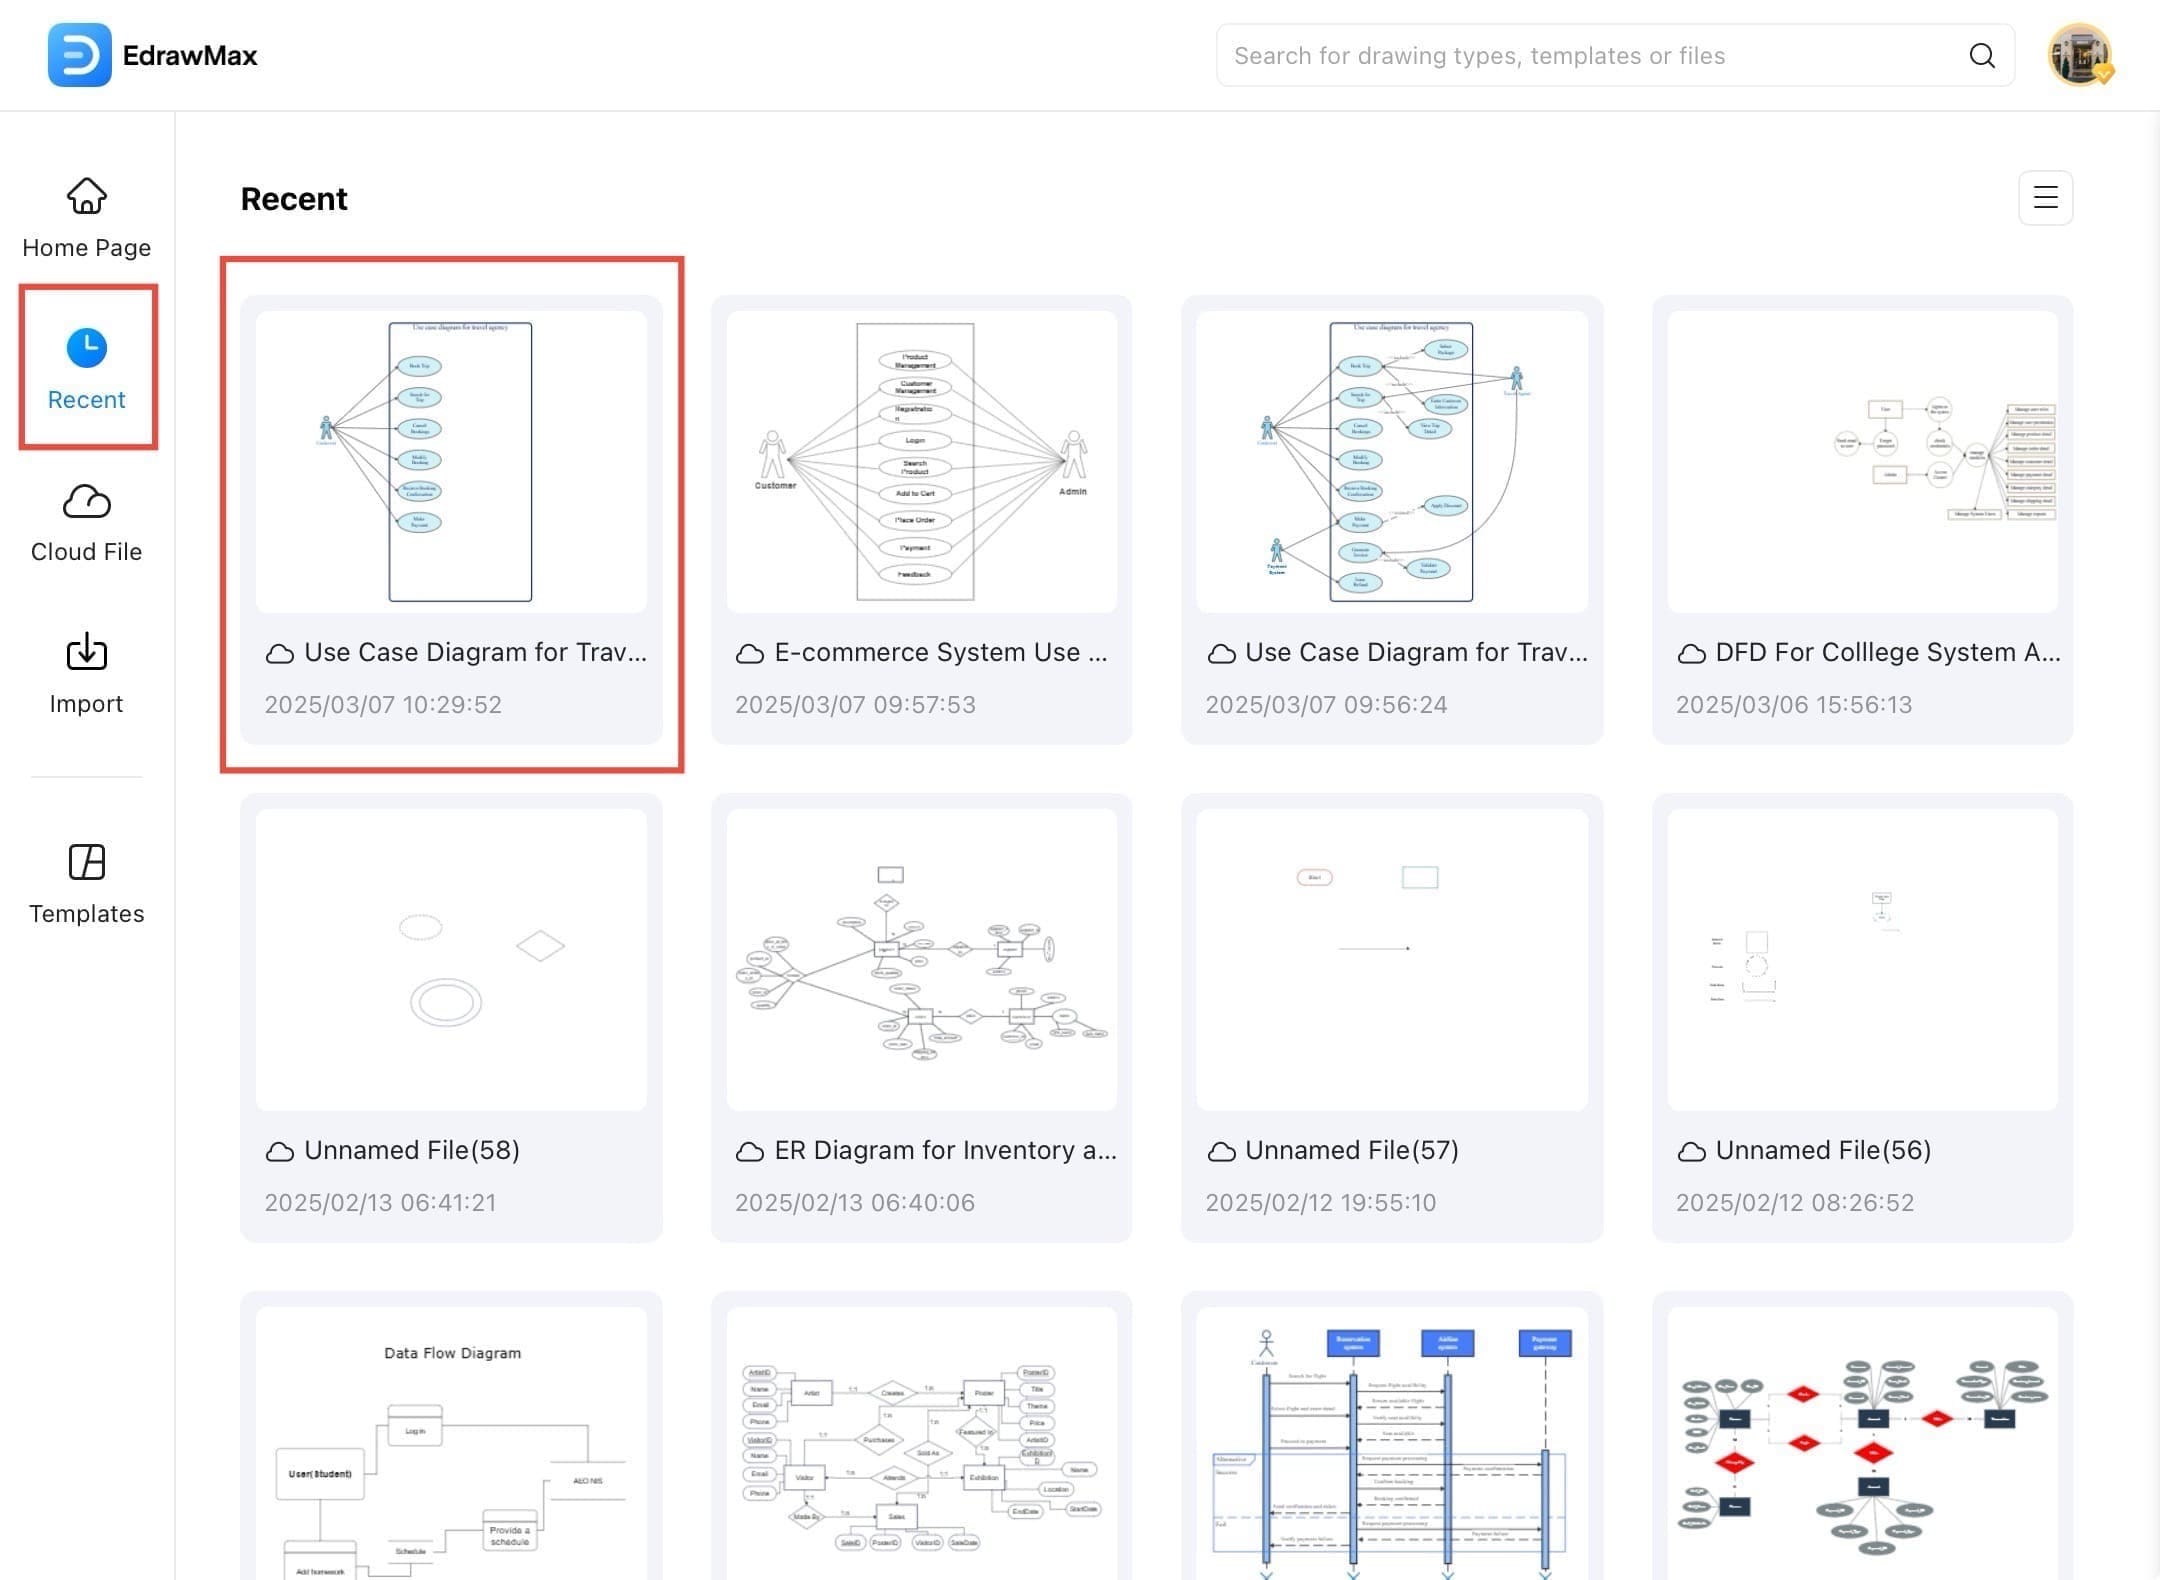
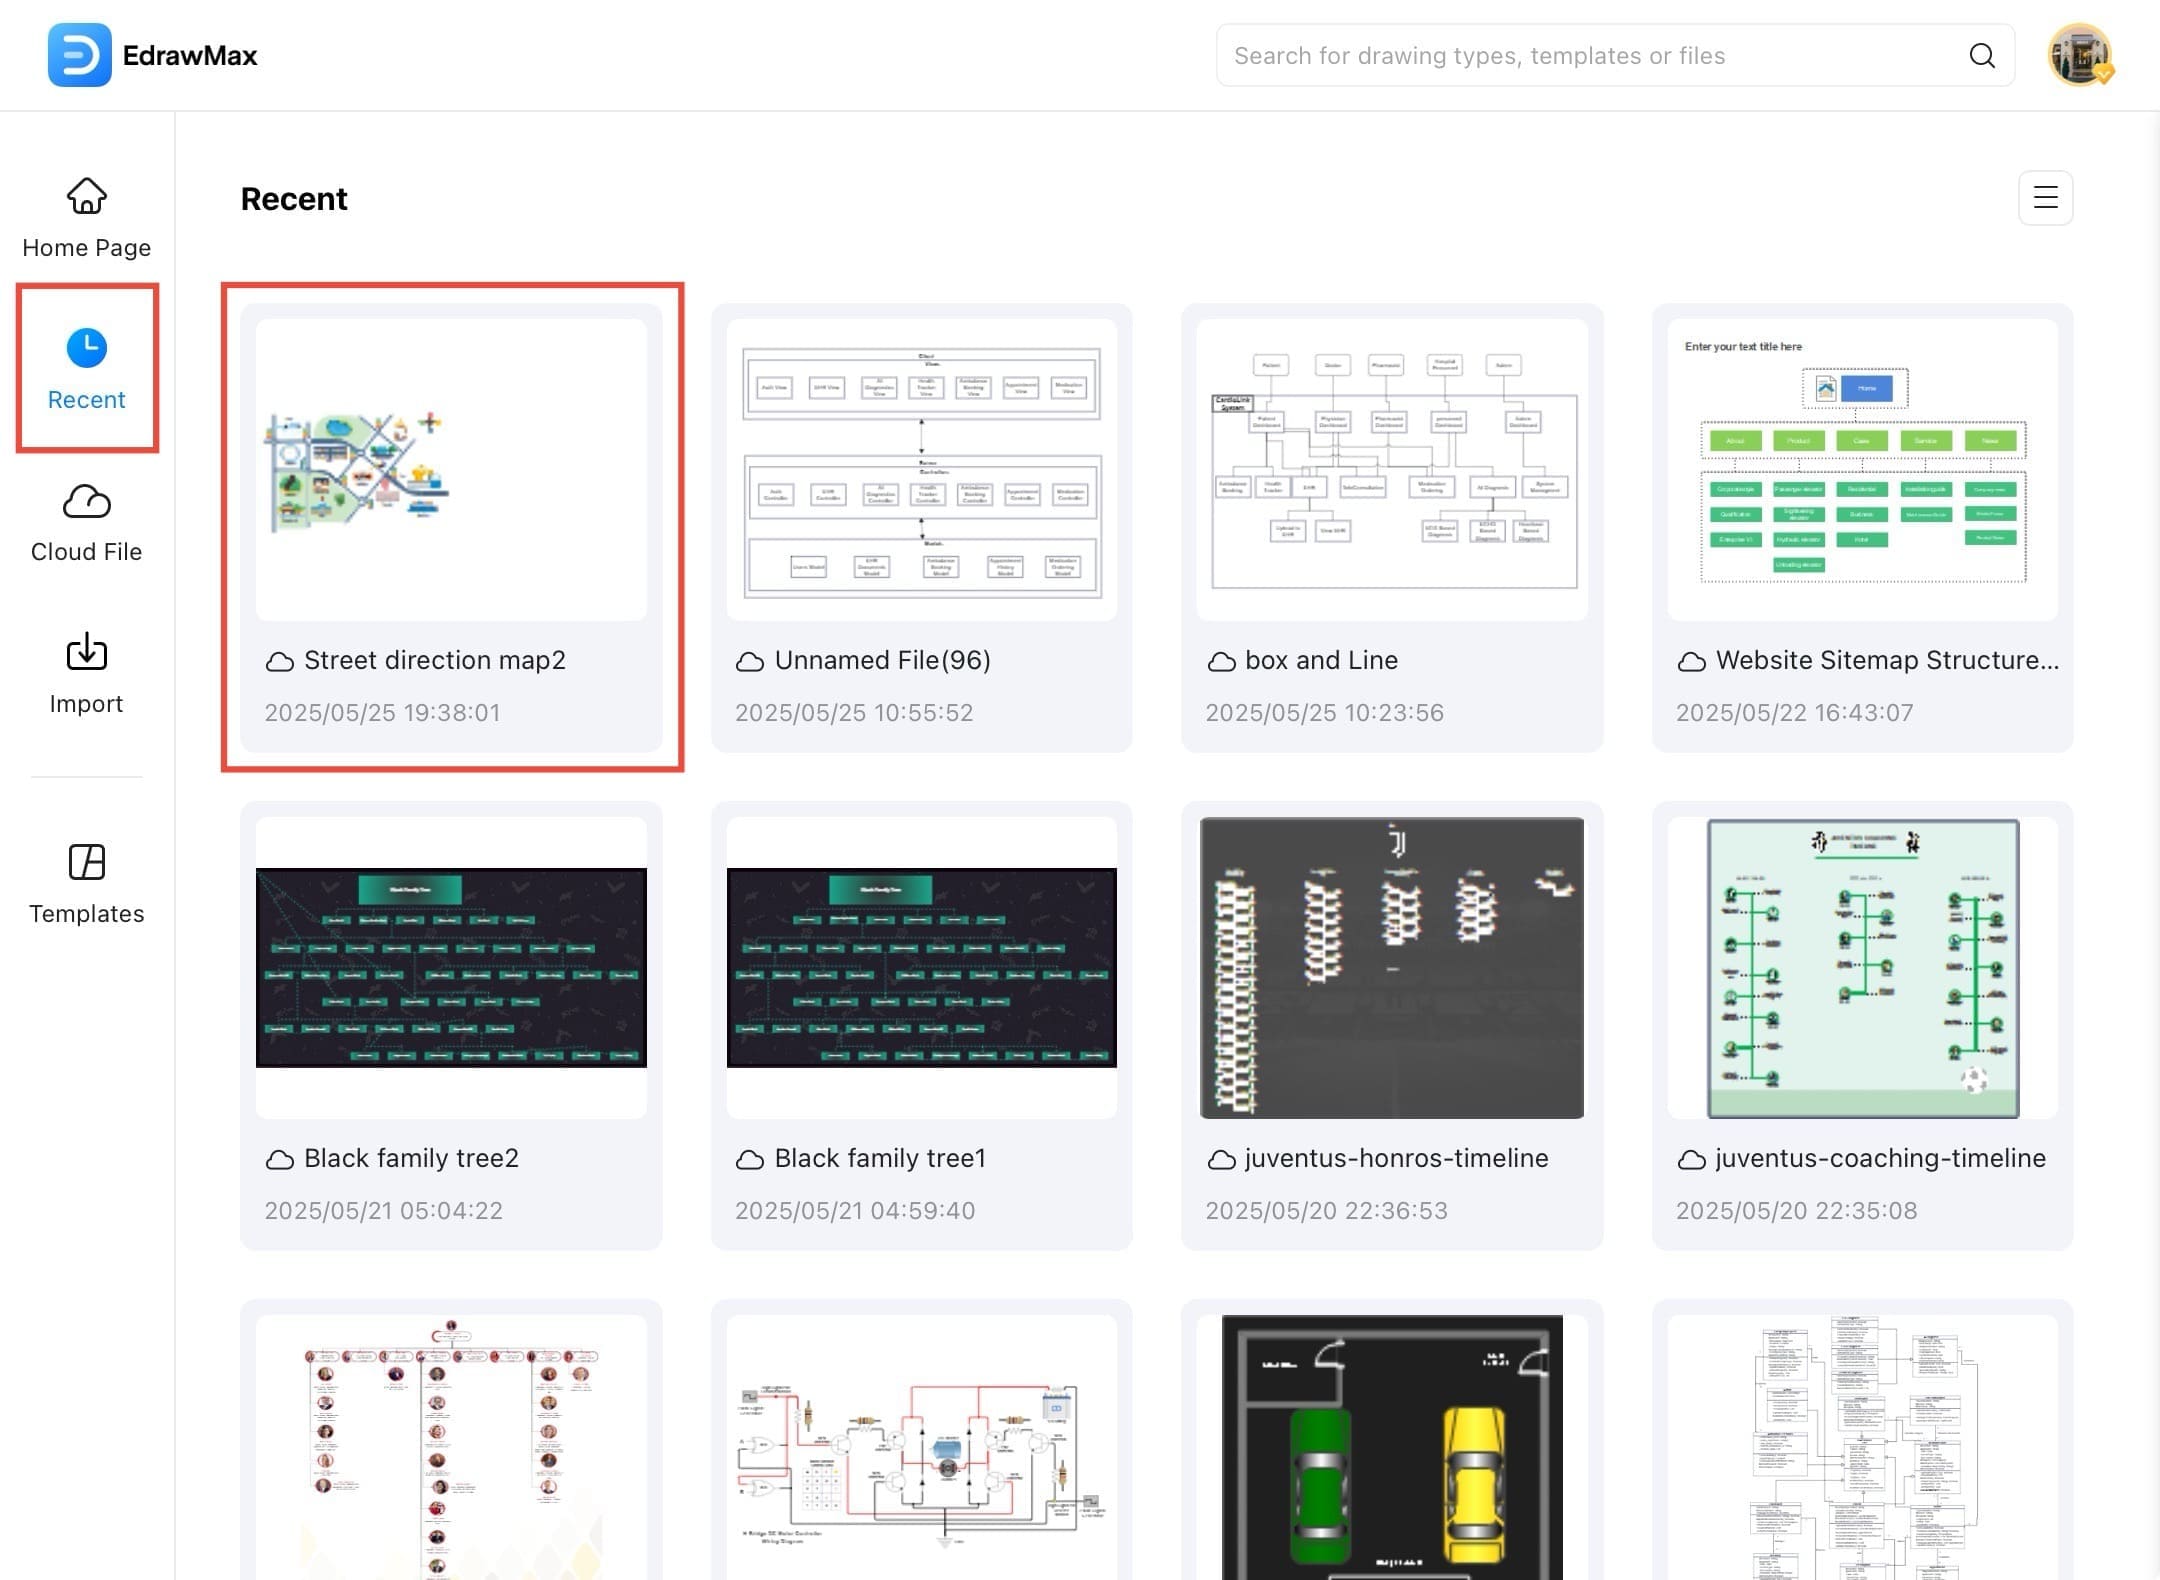
- From the EdrawMax home screen, tap Recent in the left sidebar, and choose the diagram.
Step 3 Select the Target Object
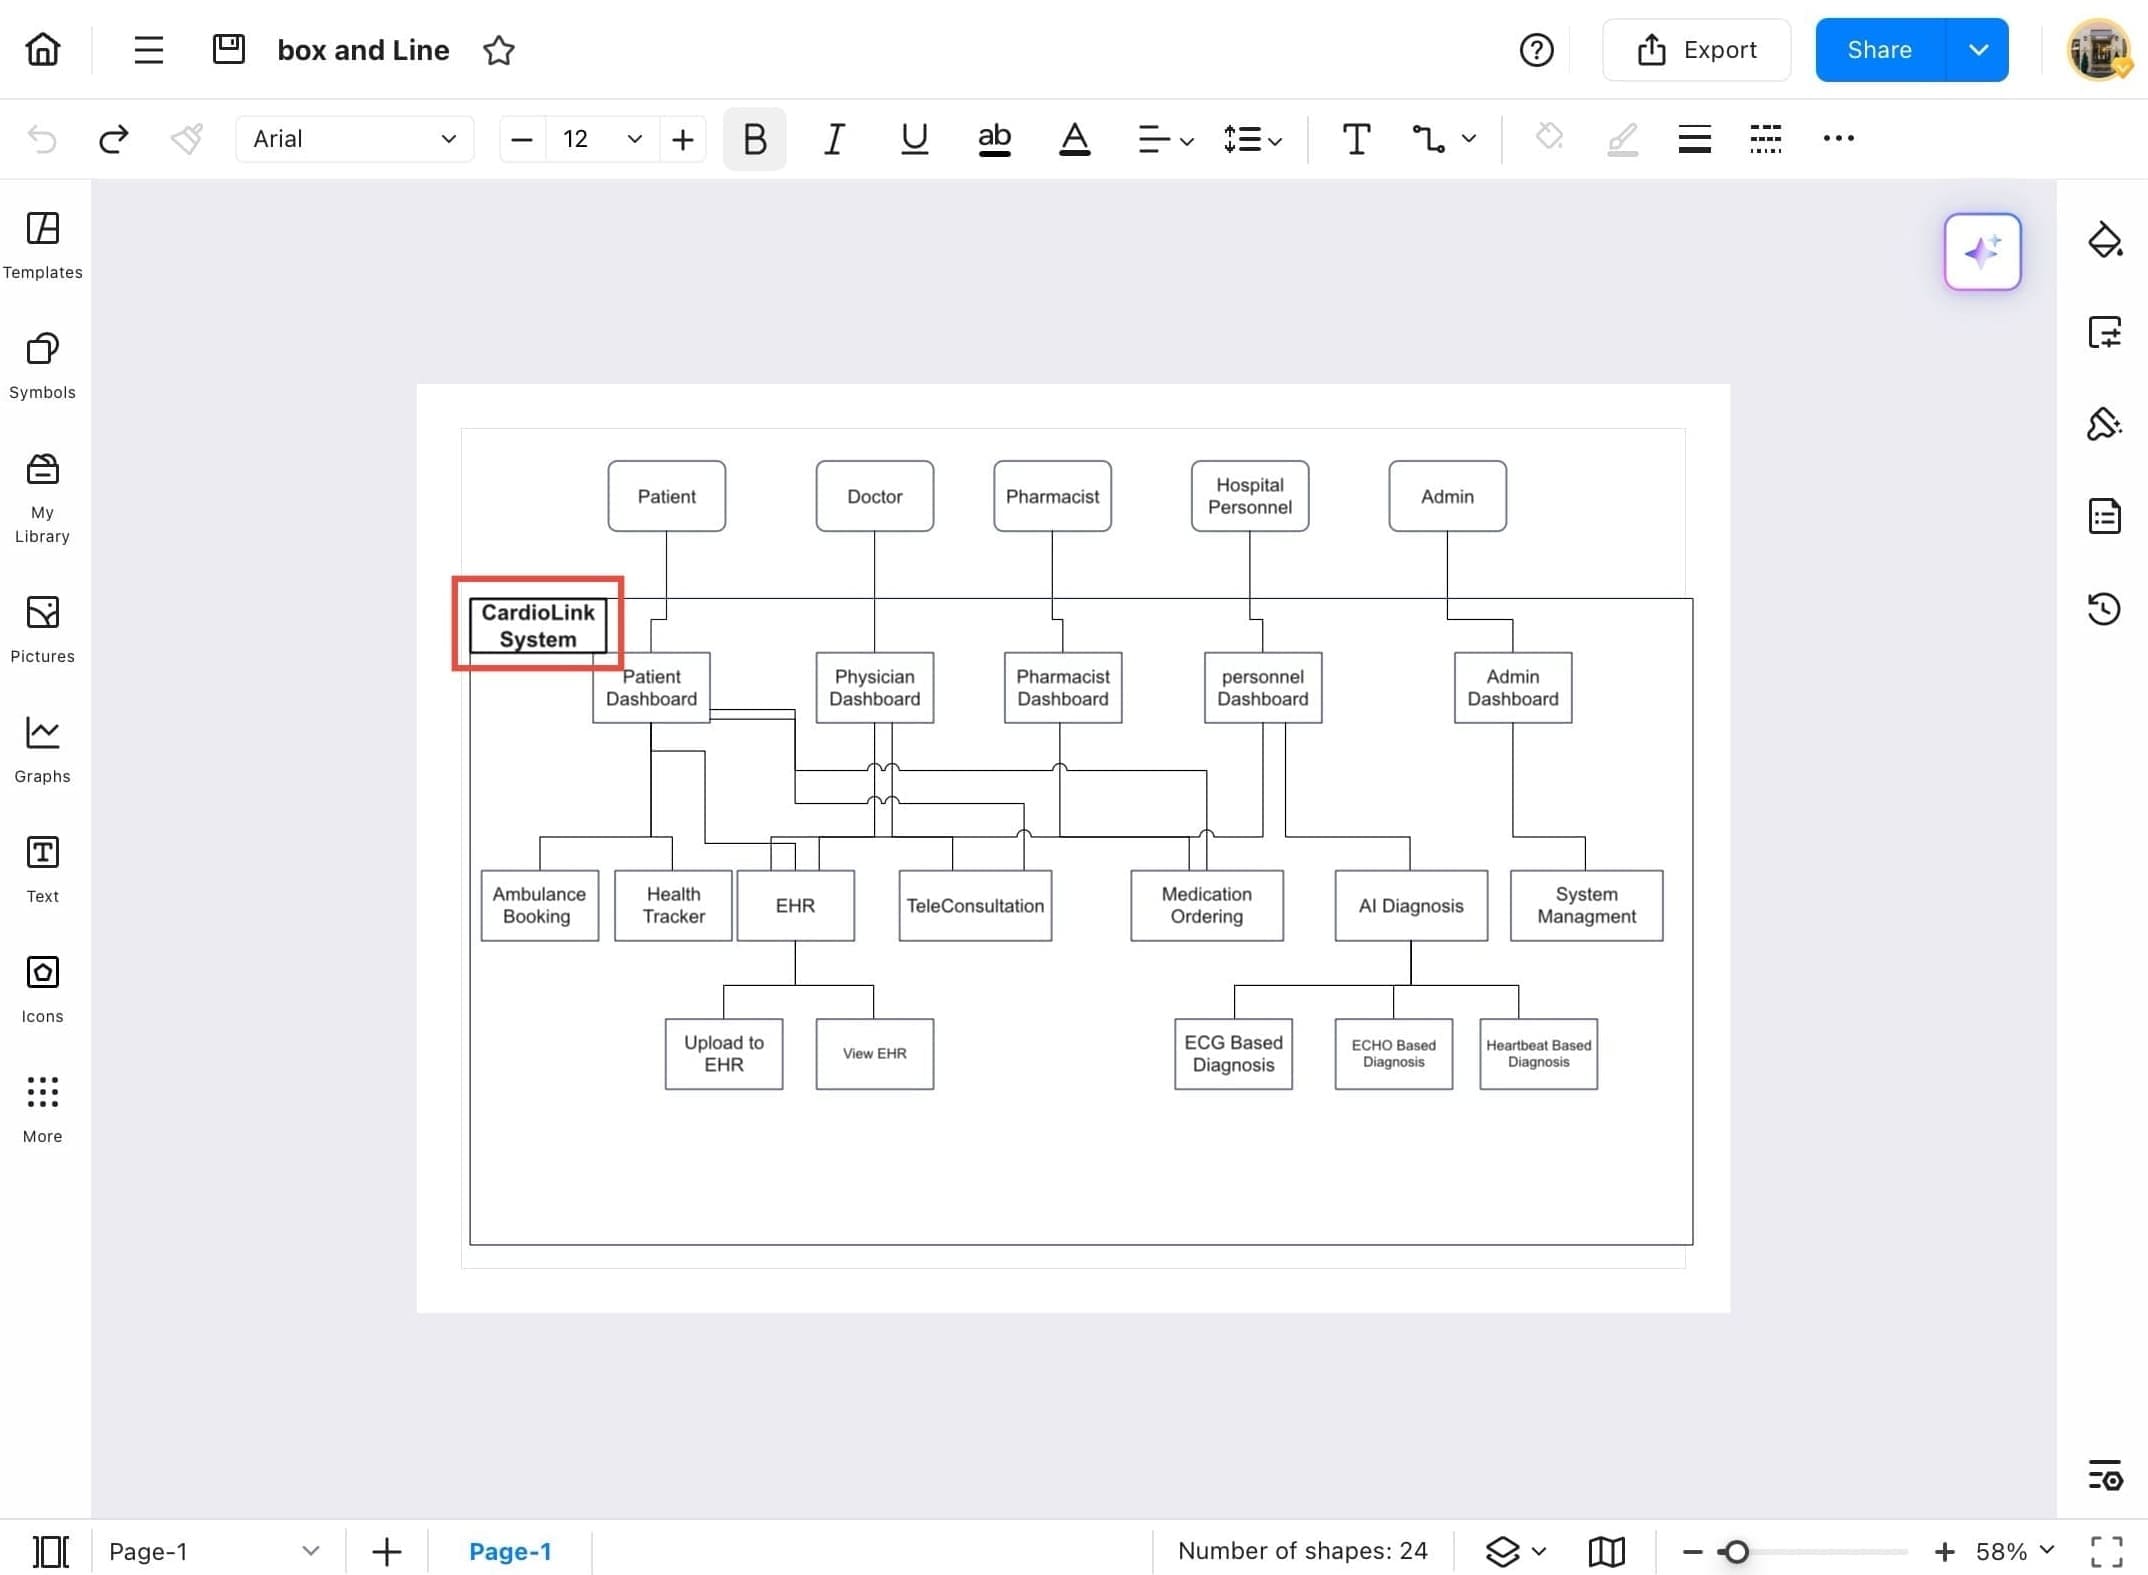
- Tap on the object where you want to add the hyperlink.
Step 4 Access the Menu Icon
- After selecting the object, a floating tool bar will pop up, then tap on the three lines icon.
Step 5 Go to Insert Option
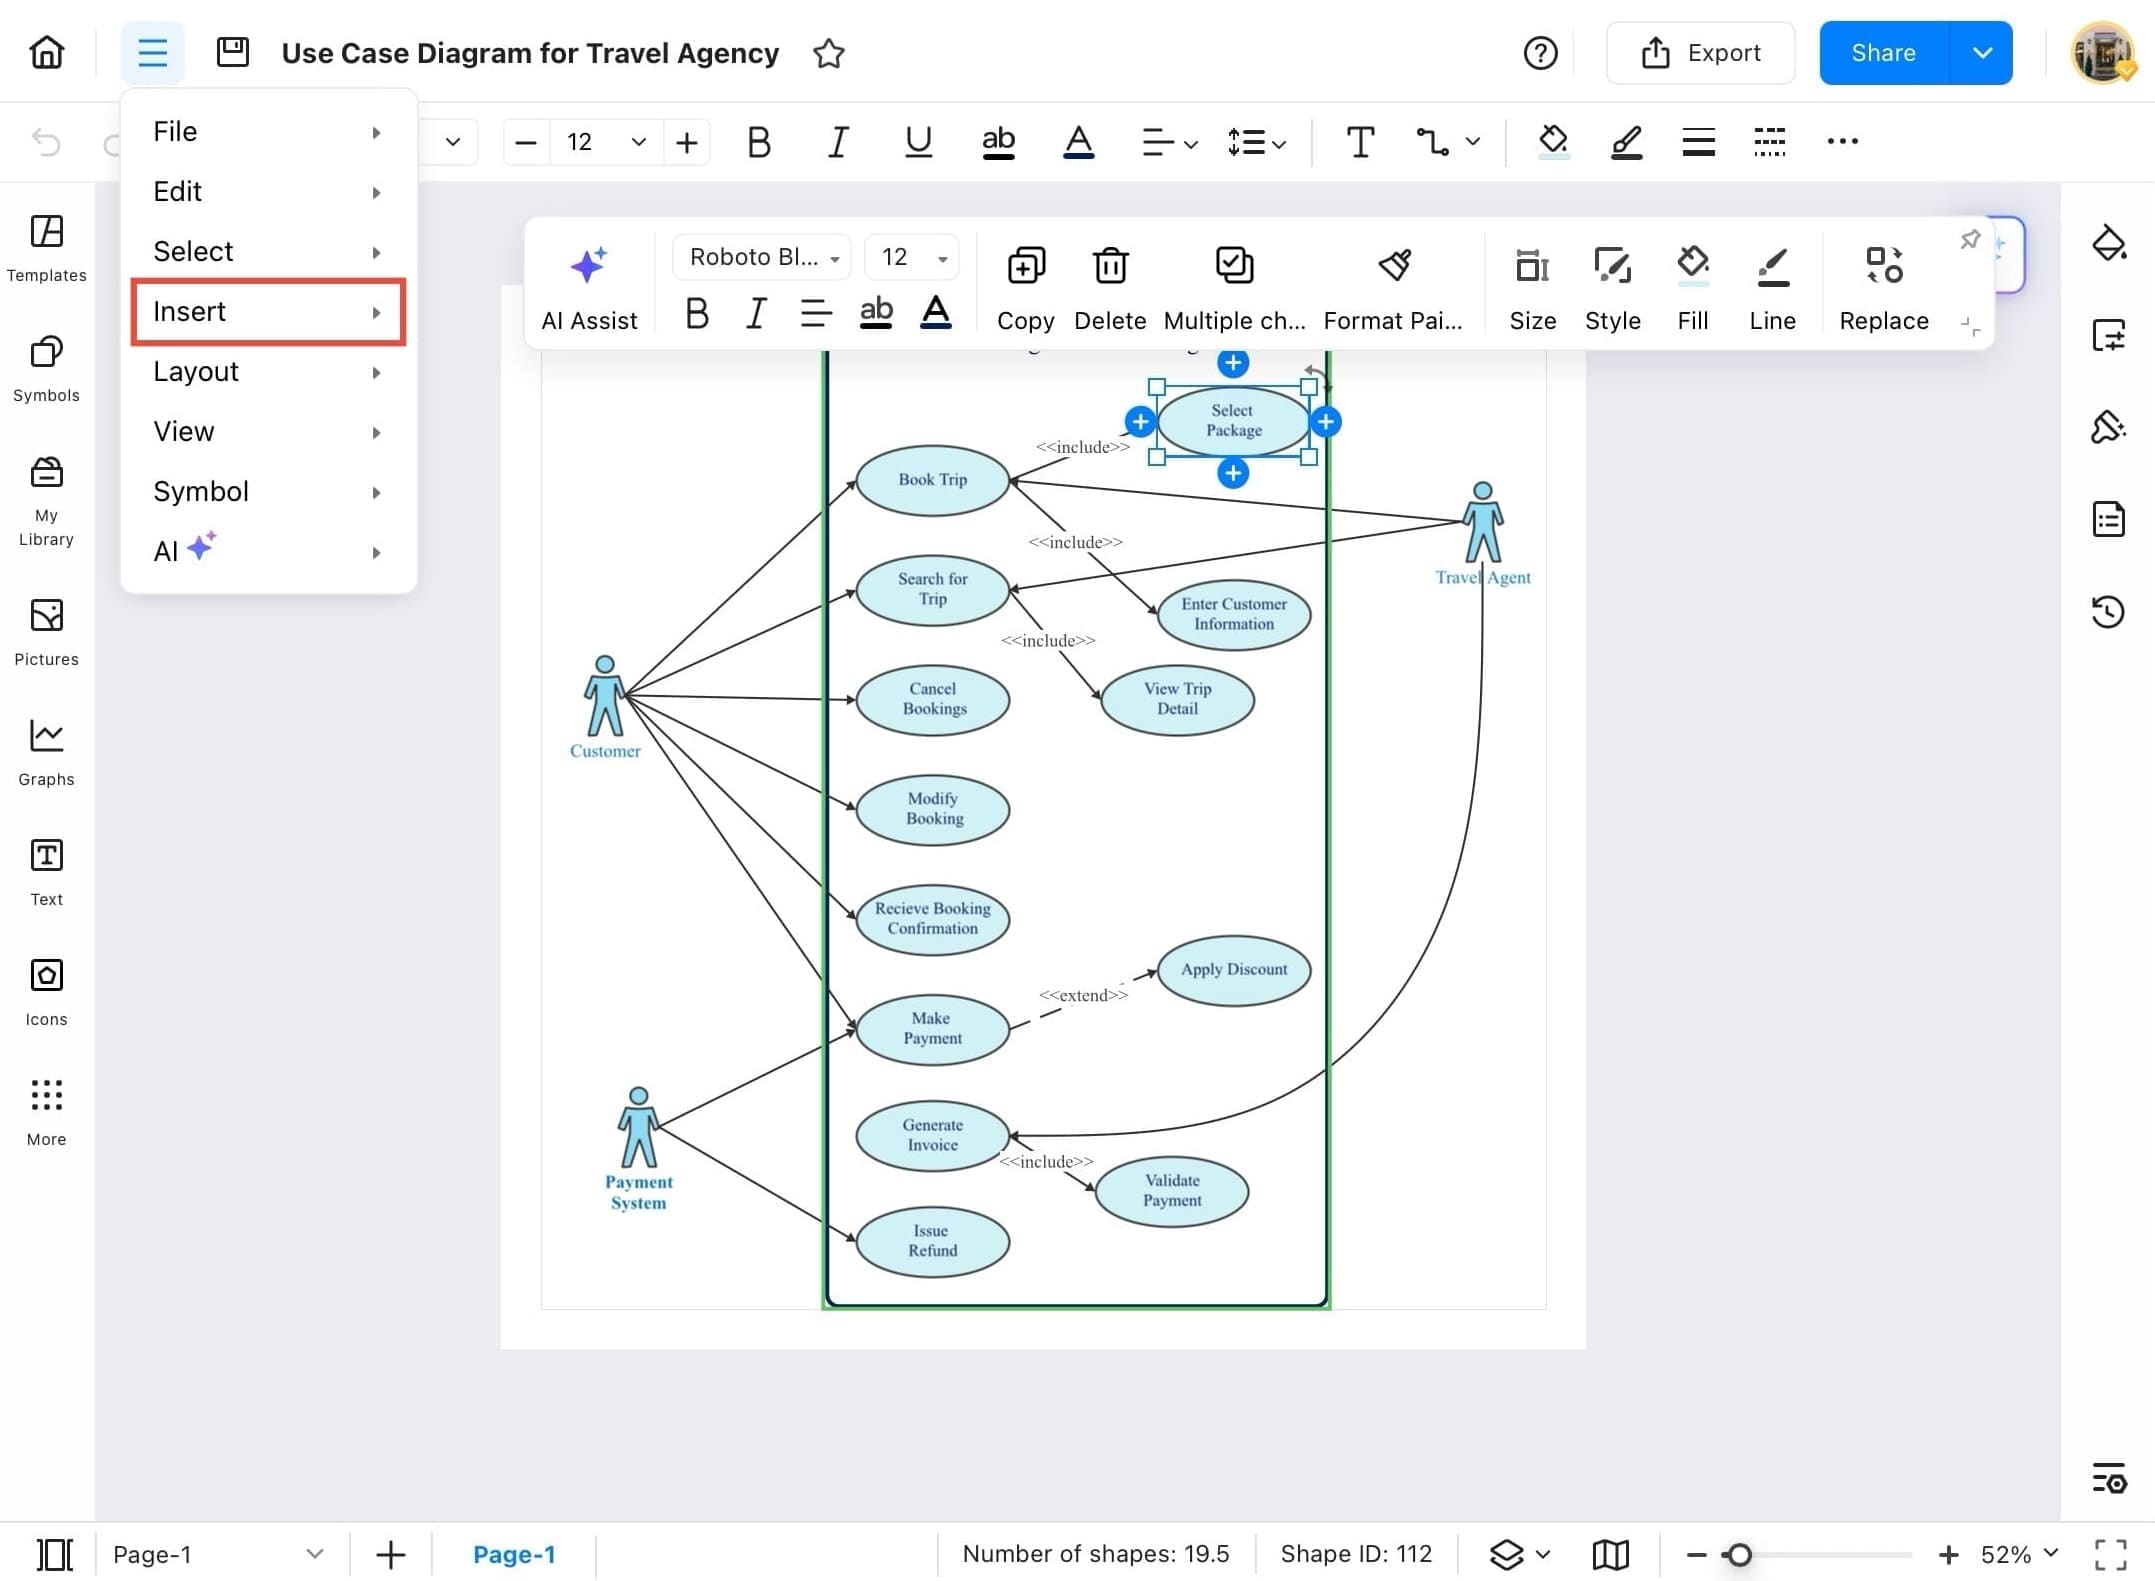
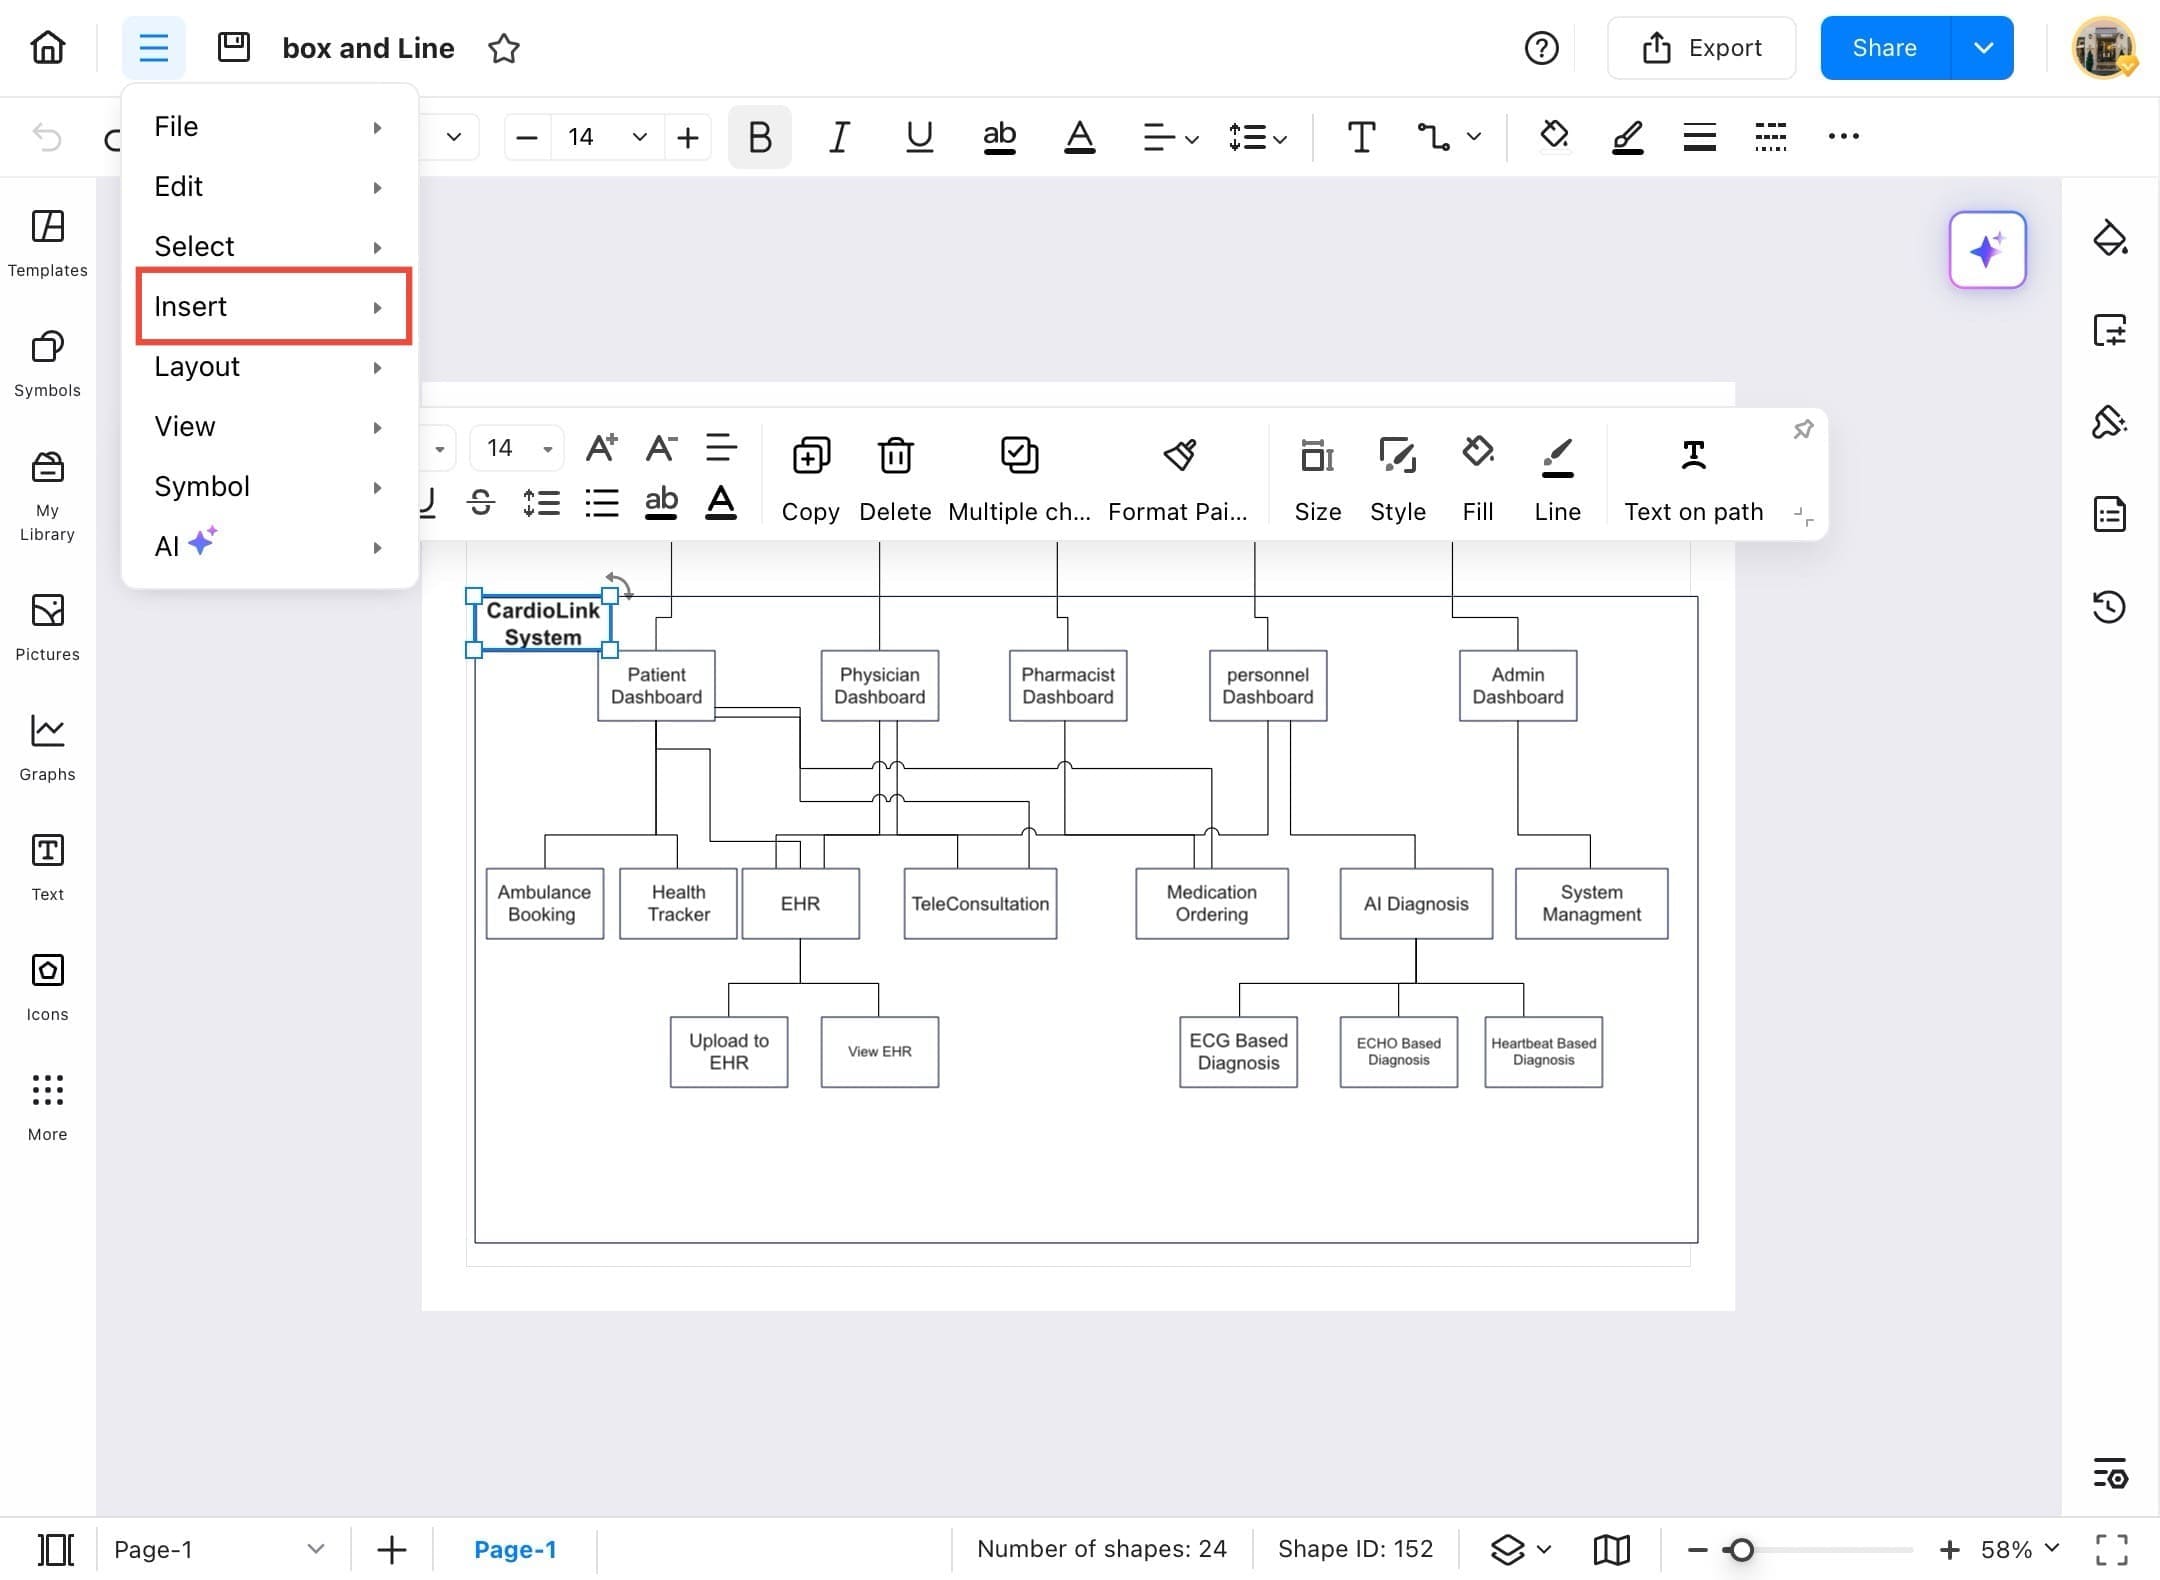
- Go to the top-left menu and tap the three-line icon (also known as the hamburger menu). Then hover over Insert.
Step 6 Tap Hyperlink
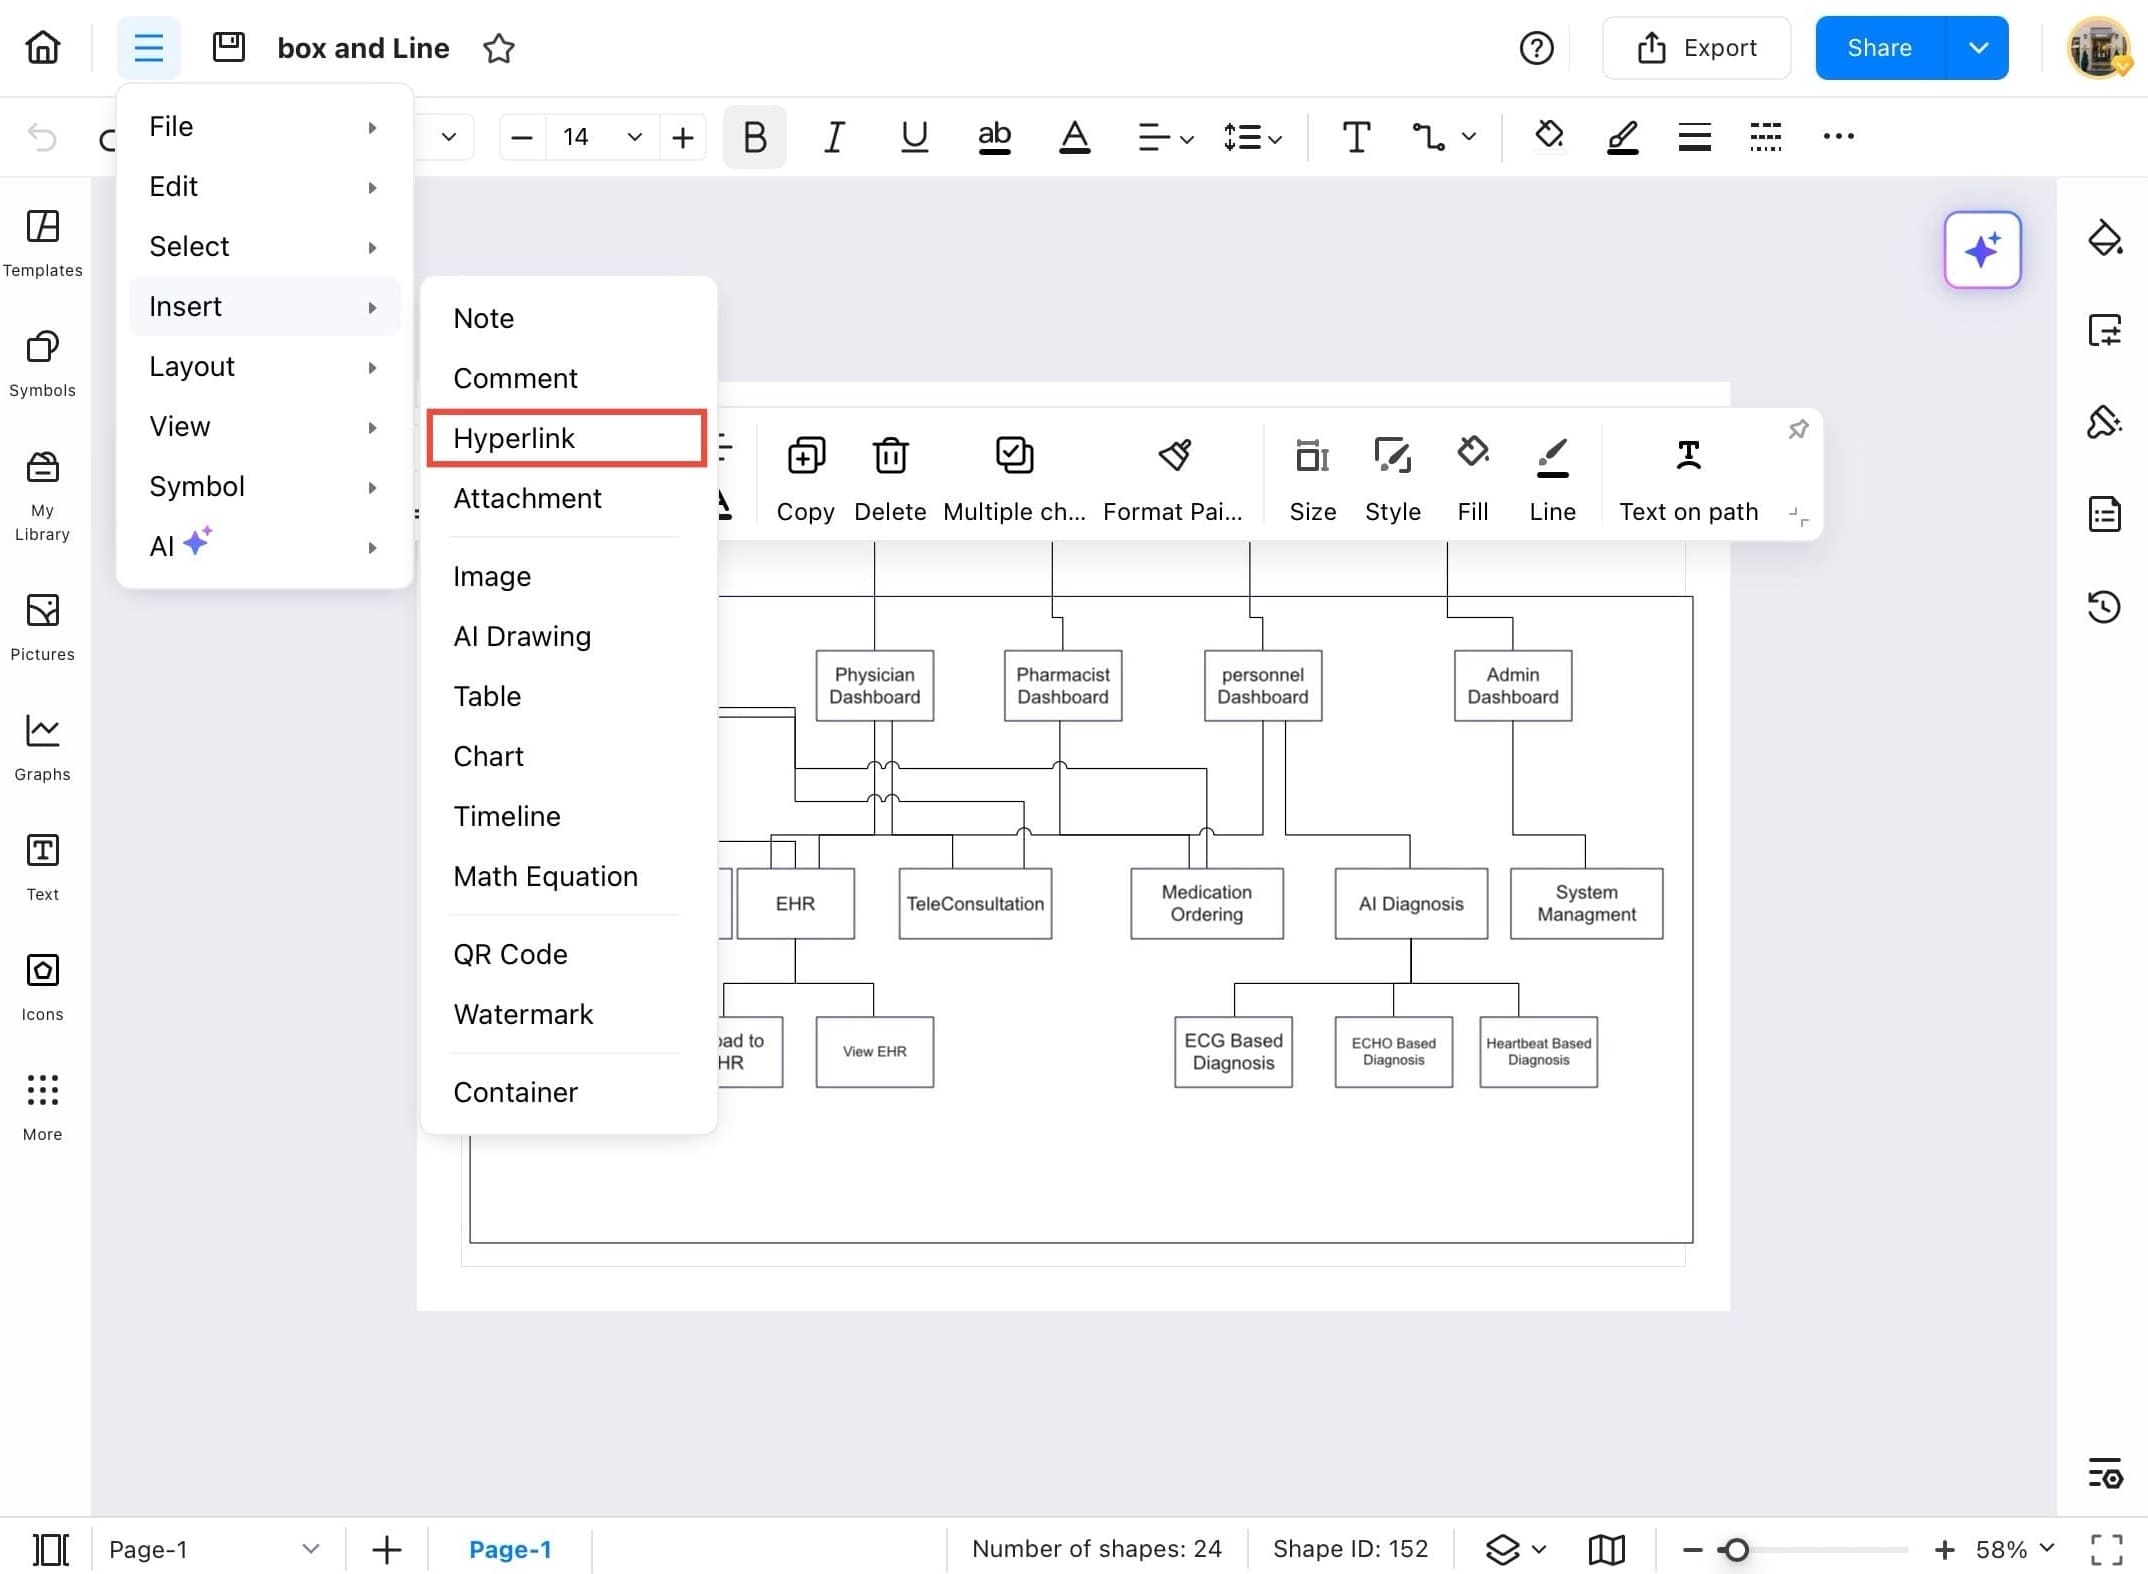
- From the dropdown under Insert, tap Hyperlink.
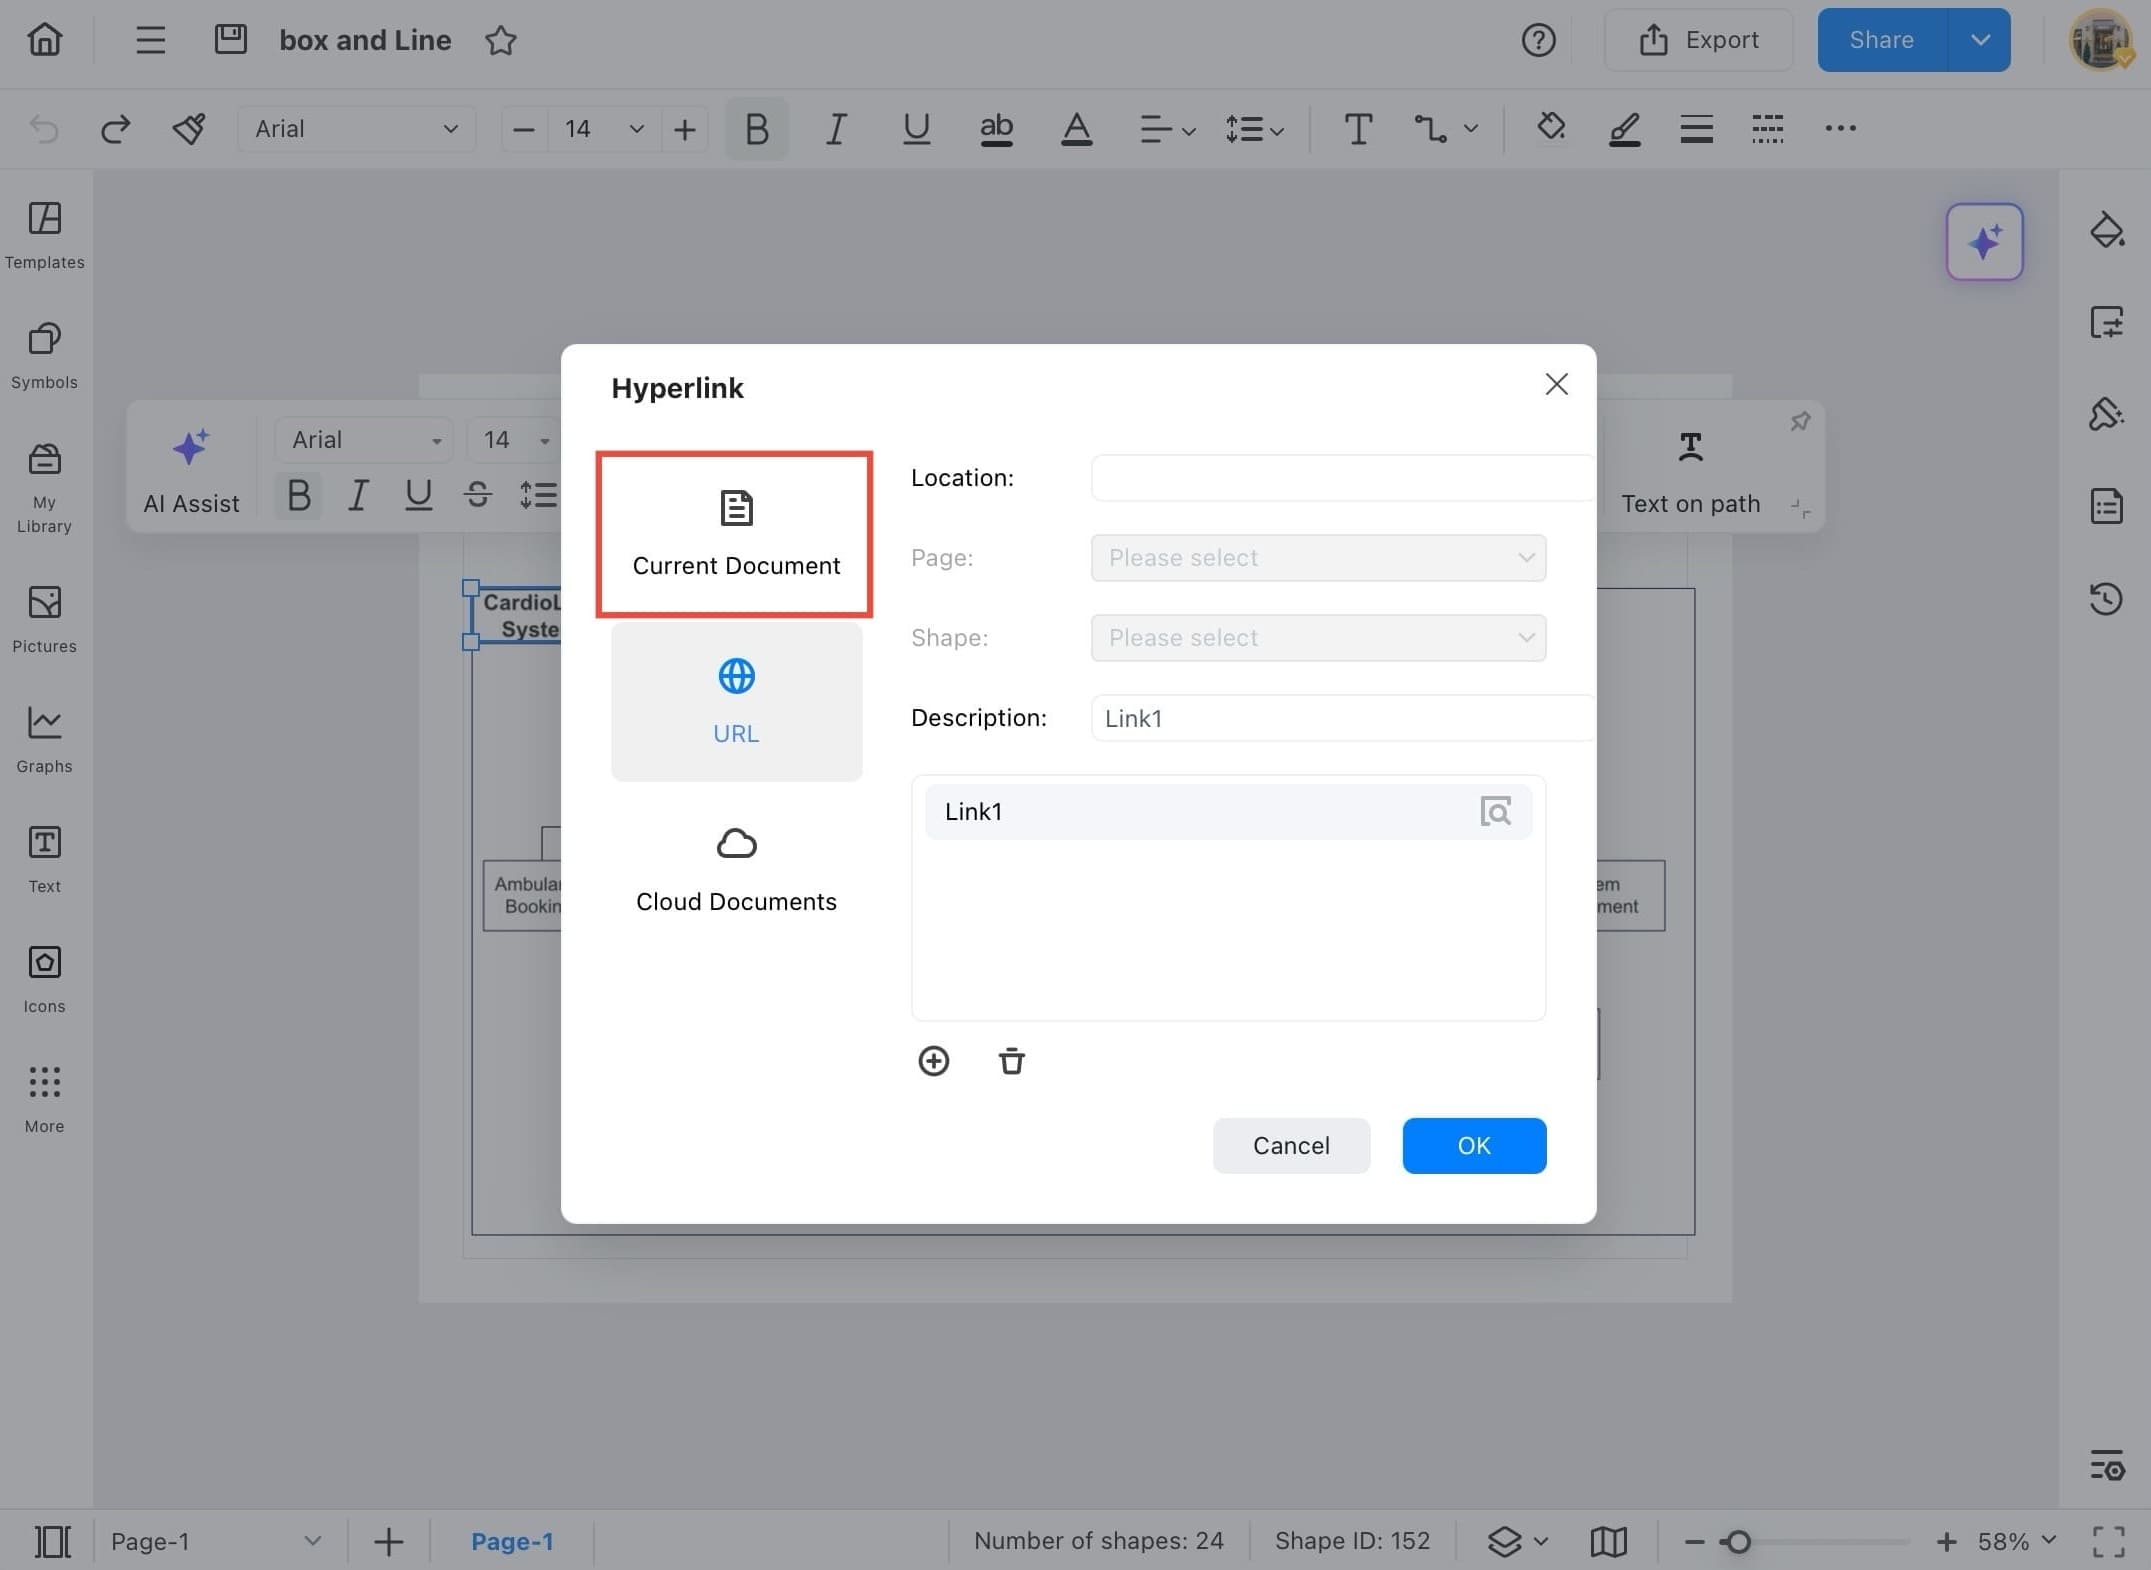
Step 7 Choose Link Type
- In the Hyperlink window, select the Current Document tab if you're linking to another part of the same file.
- (You can also choose a URL for a website, or Cloud Documents for other EdrawMax files saved online.)
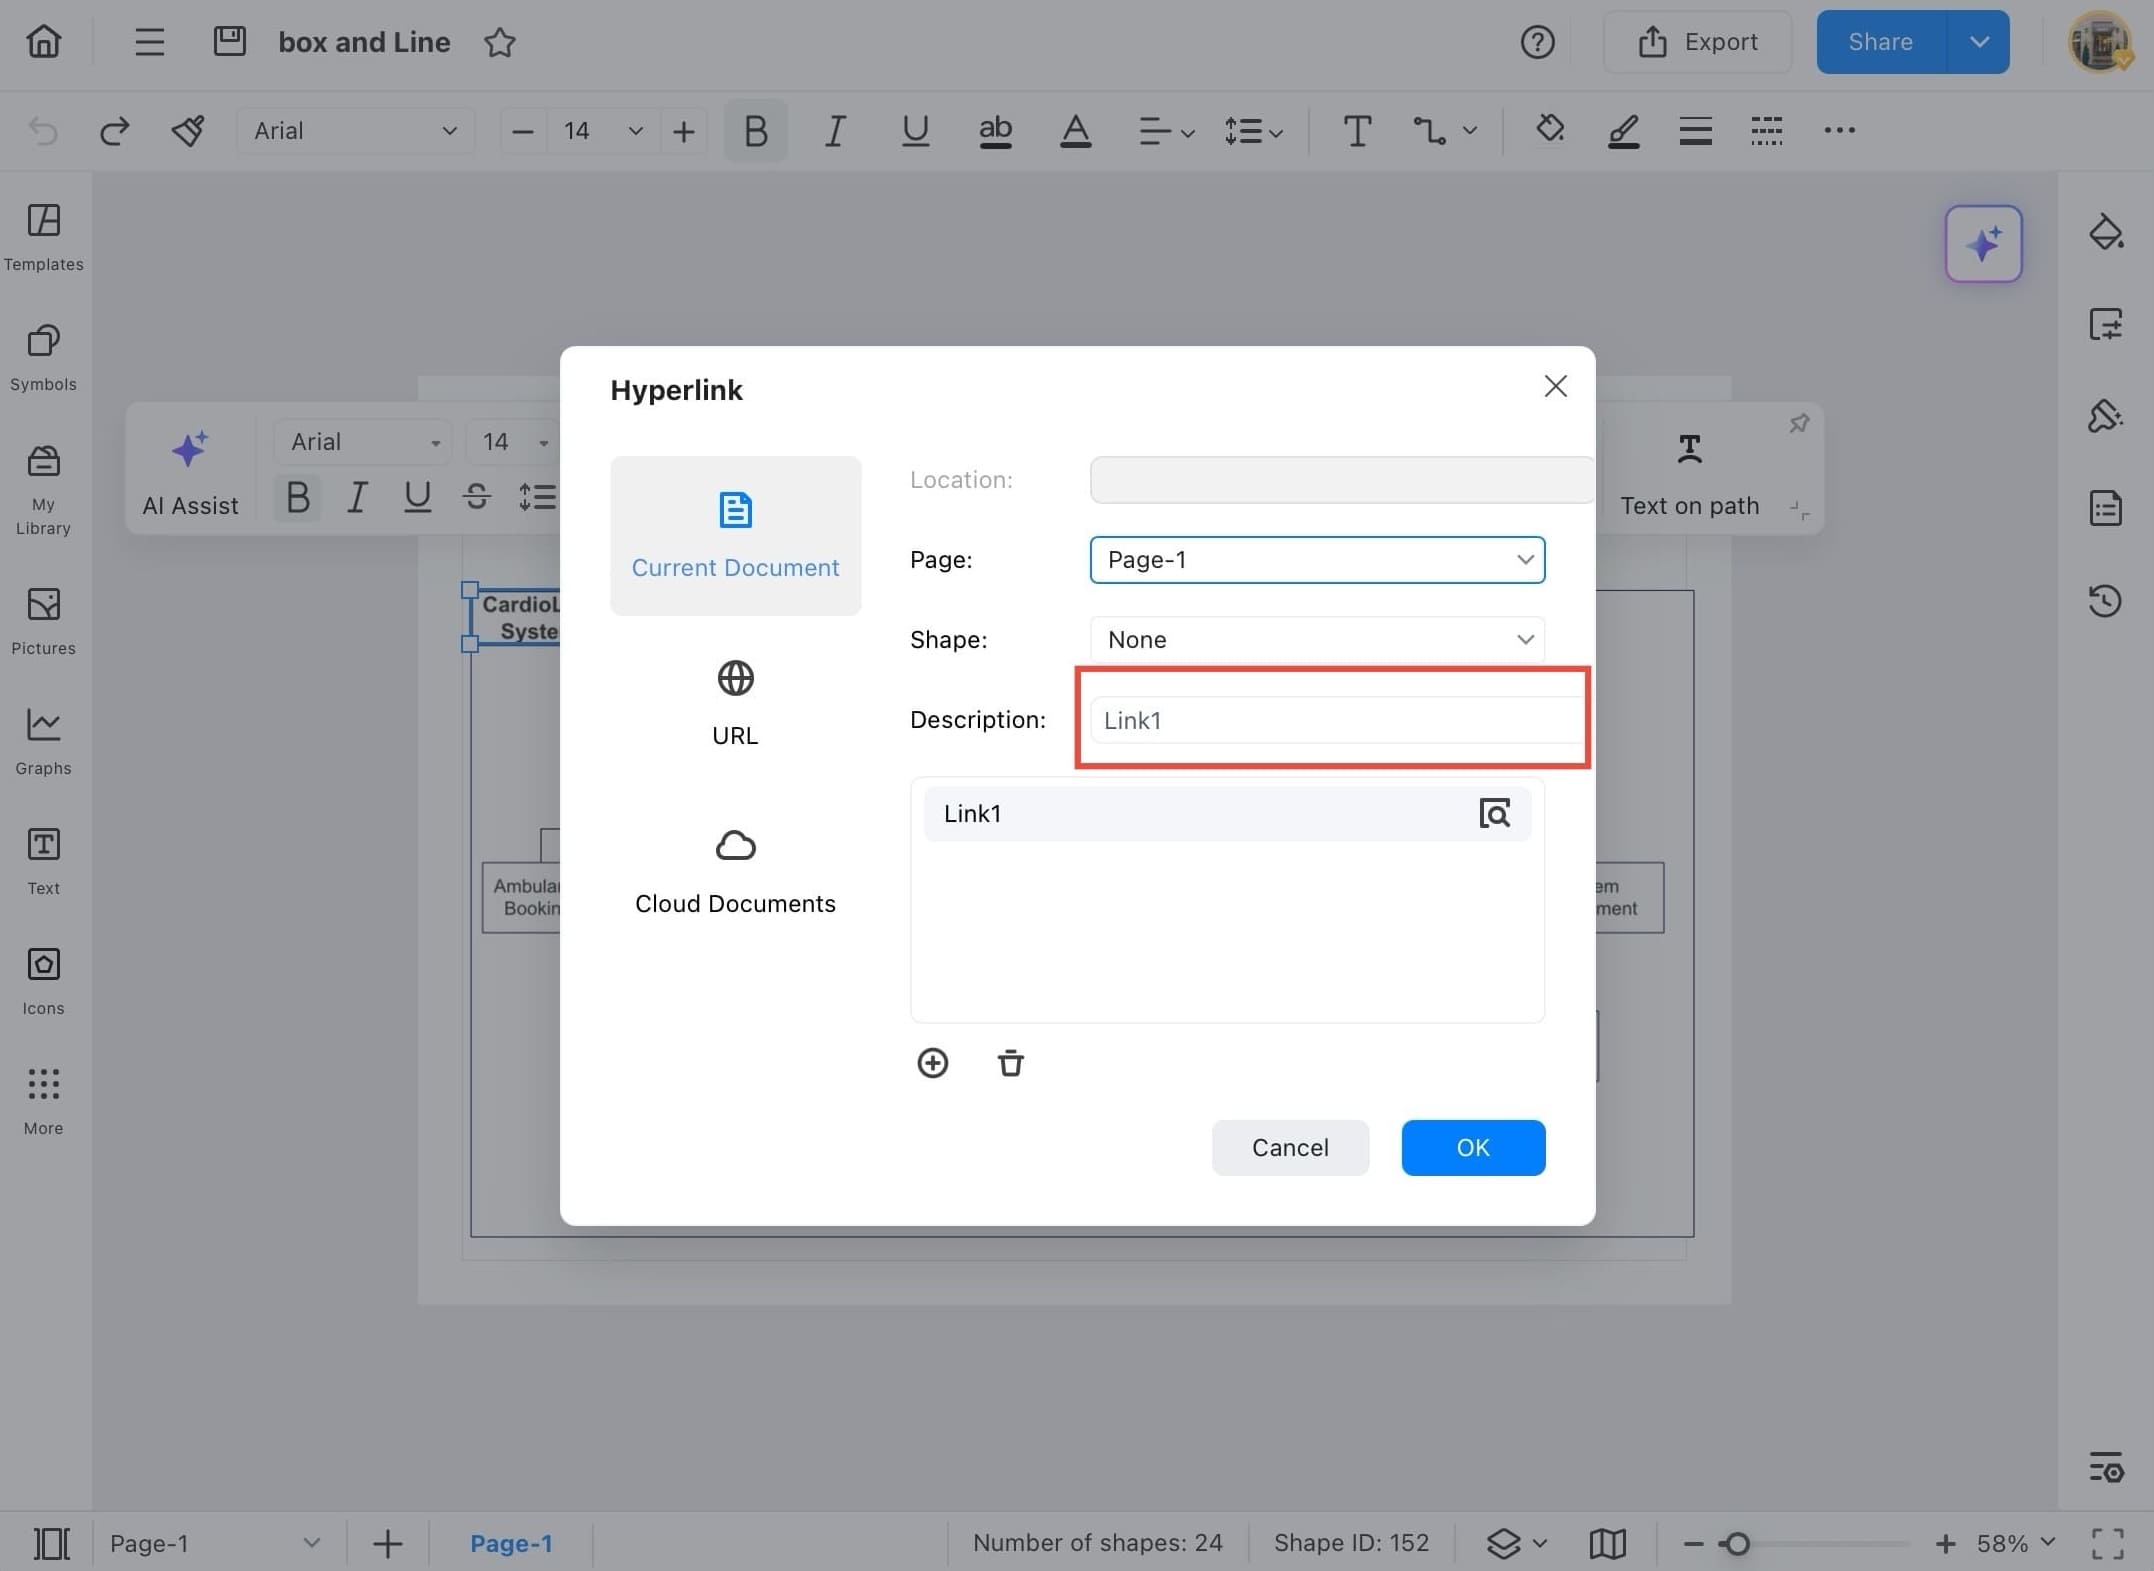
Step 8 Select Target and Add Description
- In the Page dropdown, choose the page you want the hyperlink to go to. Optionally, you can also select a specific Shape on that page.
- Then, in the Description field, type the name or purpose of the link (e.g., “Link1” or “Go to Diagram”).
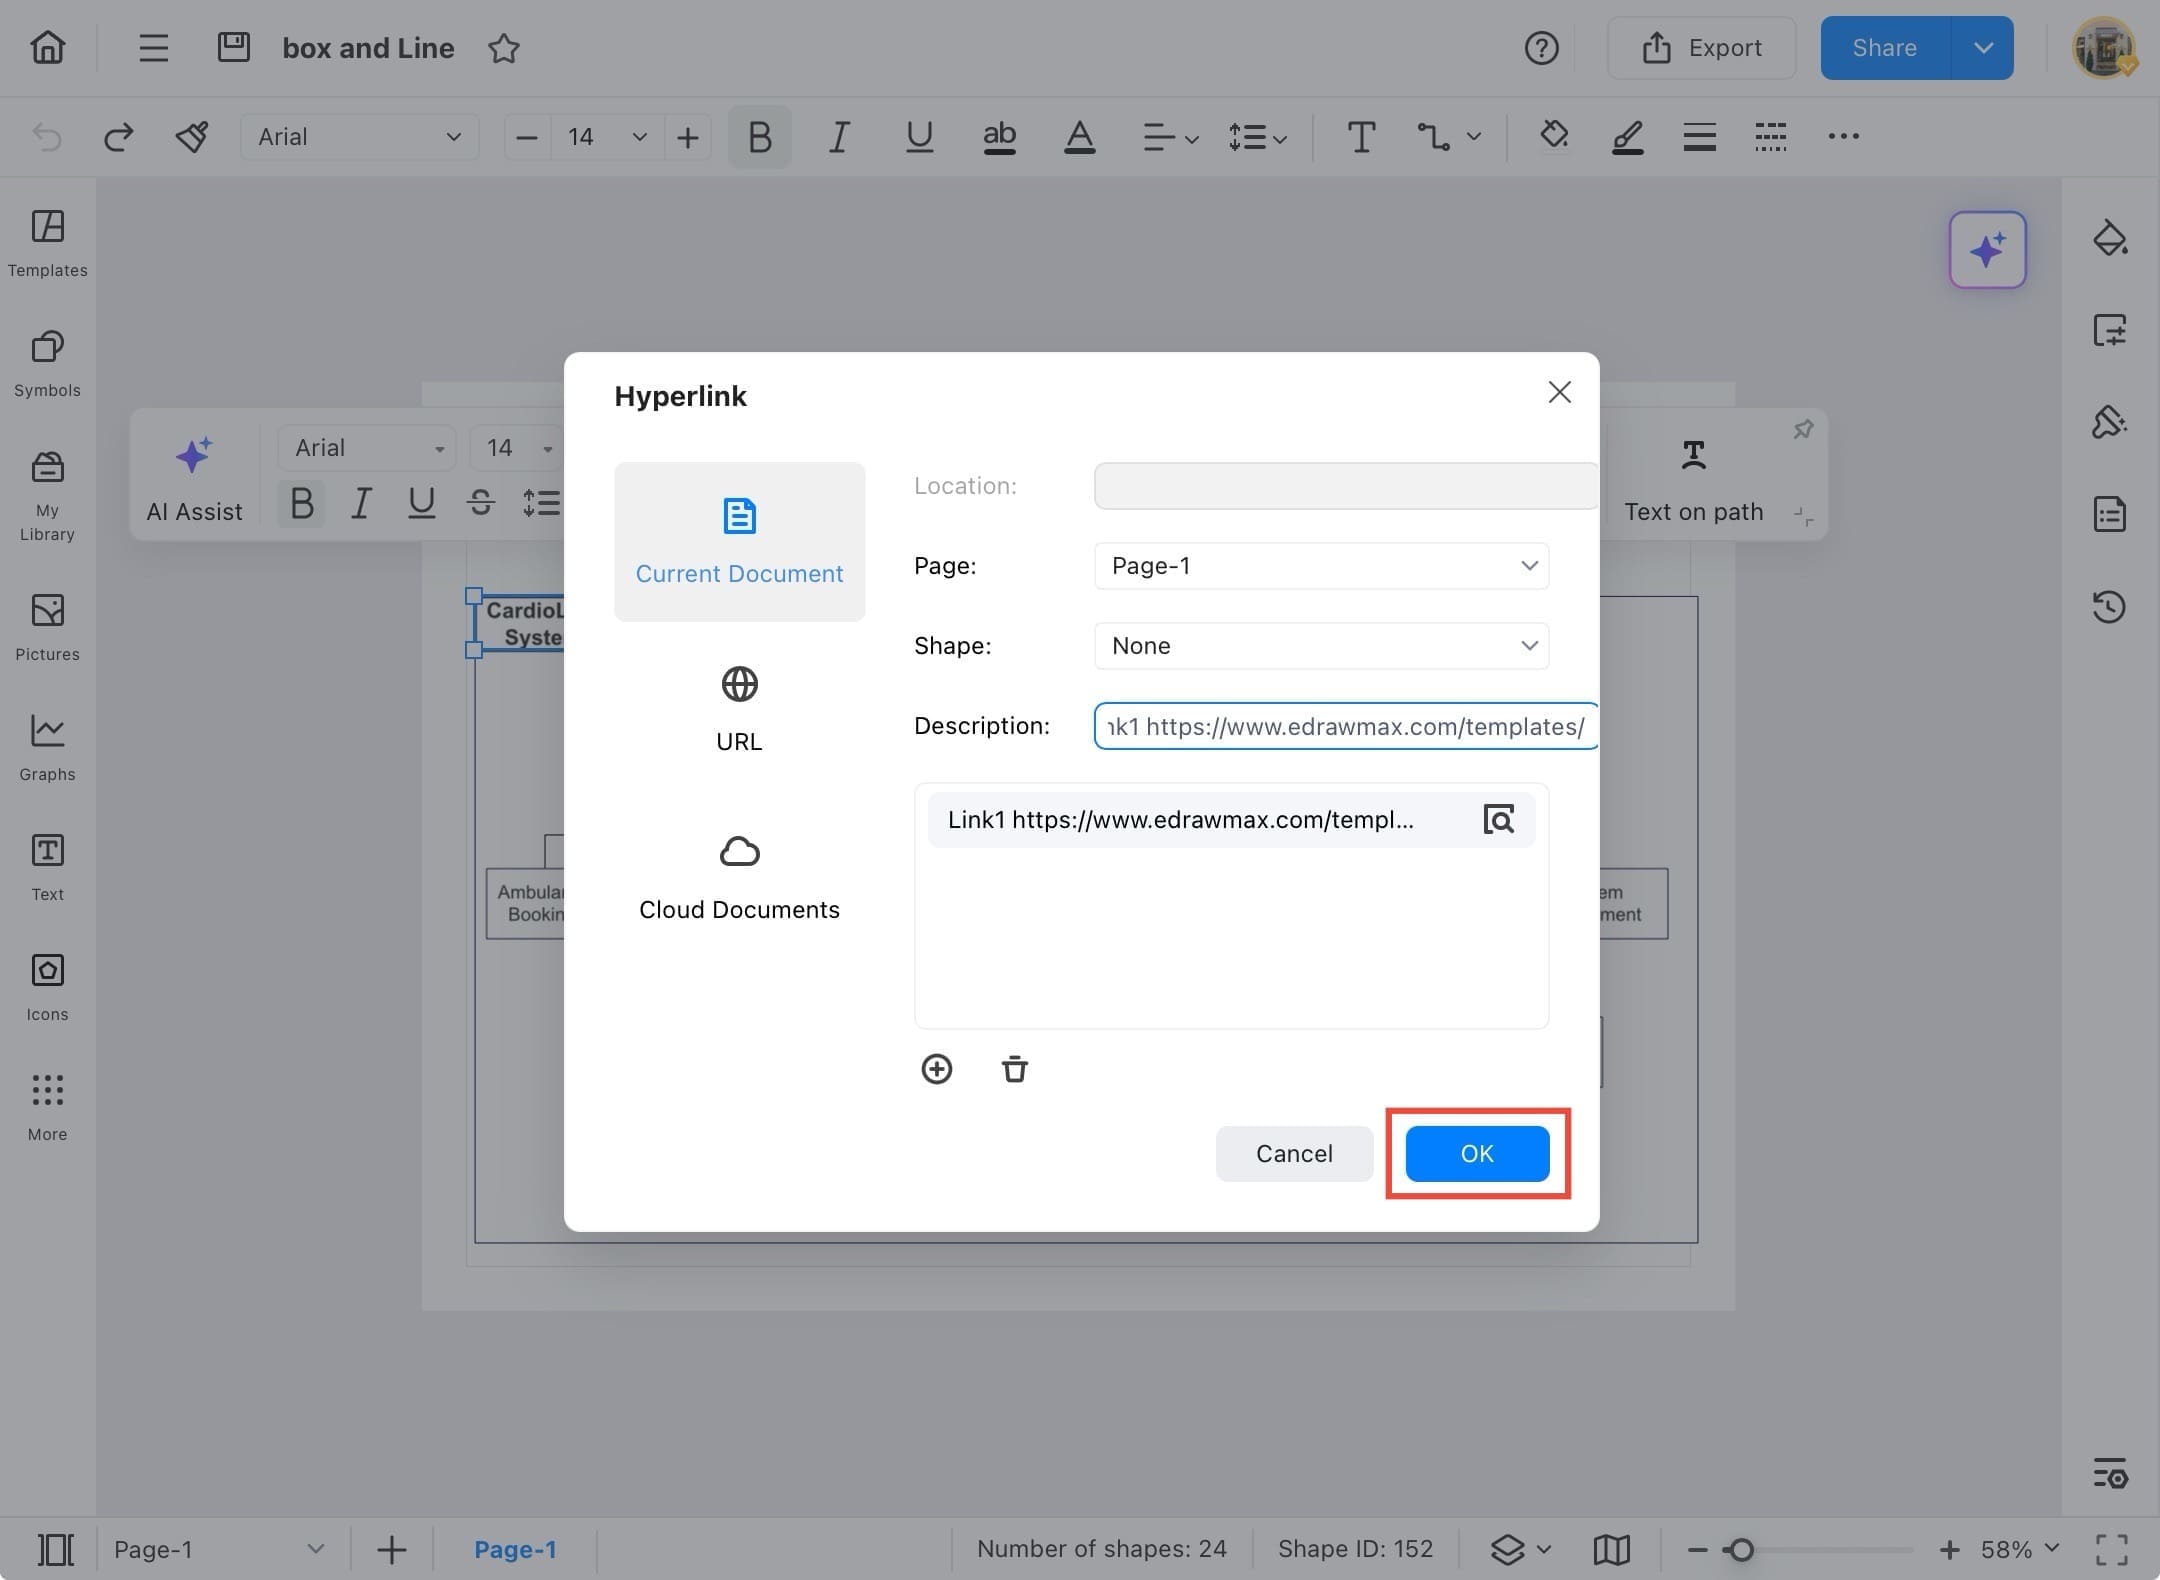
Step 9 Tap OK to Insert
- After entering the link details, tap the OK button to insert the hyperlink.
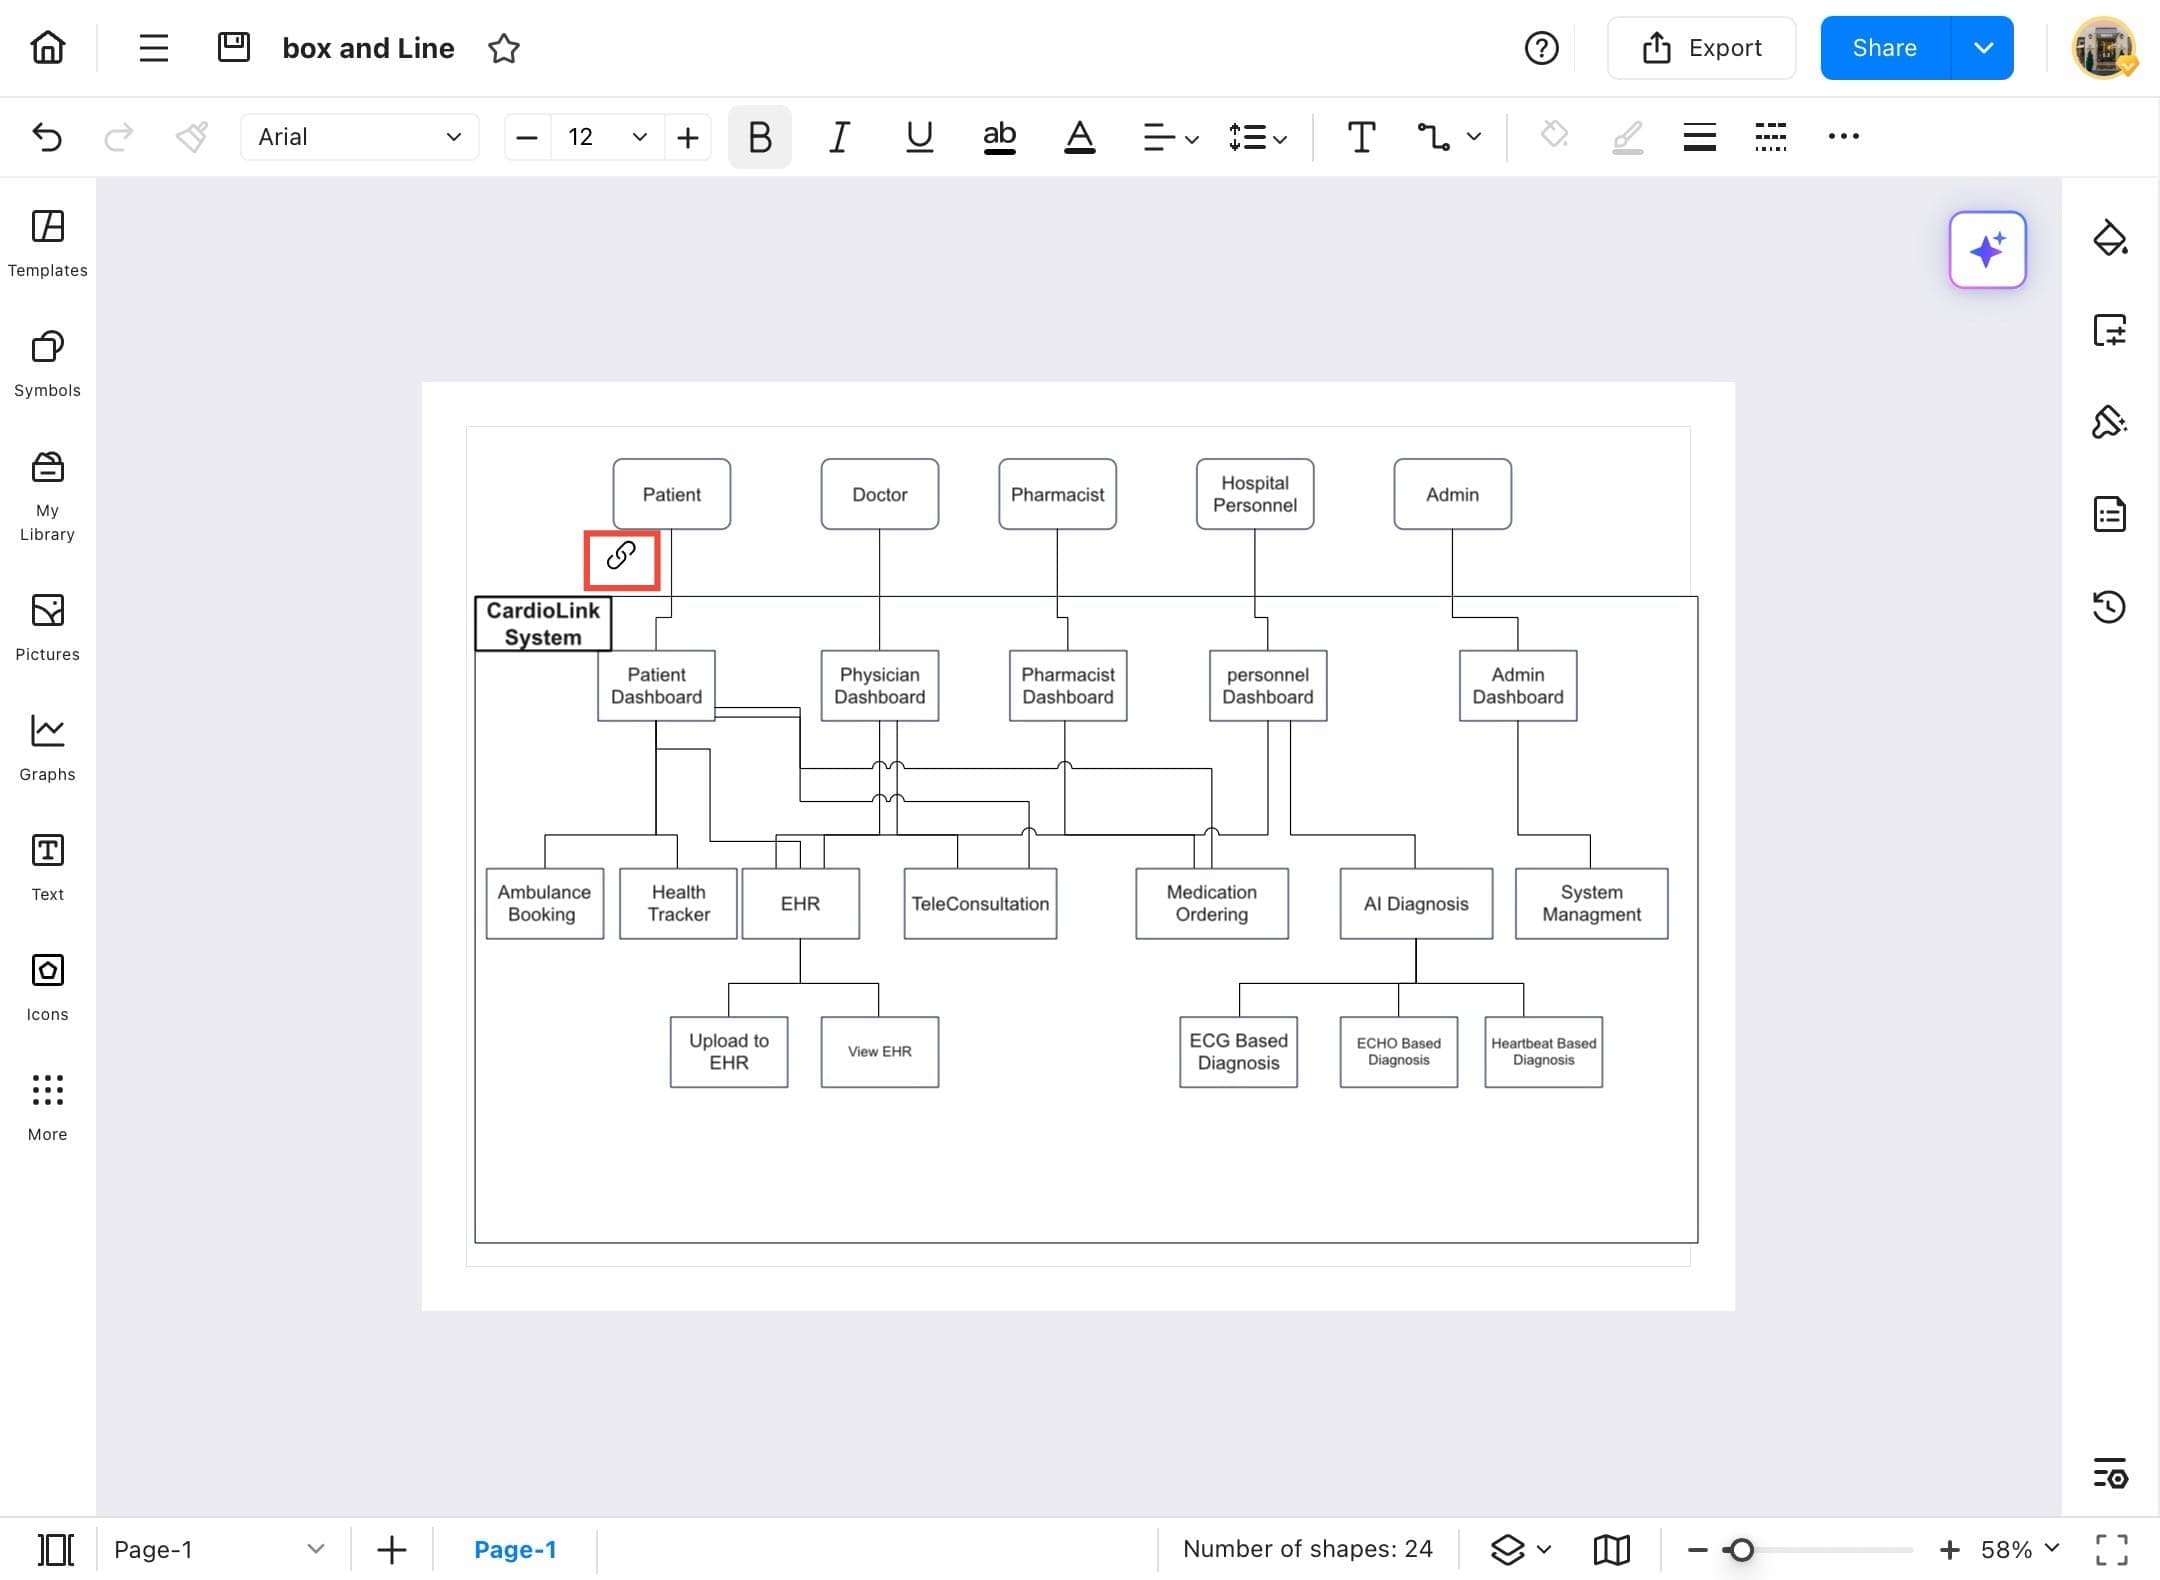
Step 10 View the Link Icon
- After entering the hyperlink details and tapping OK, a link icon will appear on the selected shape. This icon confirms that the hyperlink has been successfully added. You can now tap the icon to access the linked page or document.
Attachment
The Attachment feature in EdrawMax allows you to embed other files or diagrams directly into your current diagram elements. This is helpful when you want to provide supporting documentation, reference charts, or additional diagrams without overcrowding your workspace. Attached files can be opened with a tap from within the shape they're linked to. Here is how to do it:
Step 1
- Start EdrawMax on your tablet.
Step 2
- Tap Recent under the Home Page section in the left sidebar to view previously opened or saved files.
Step 3
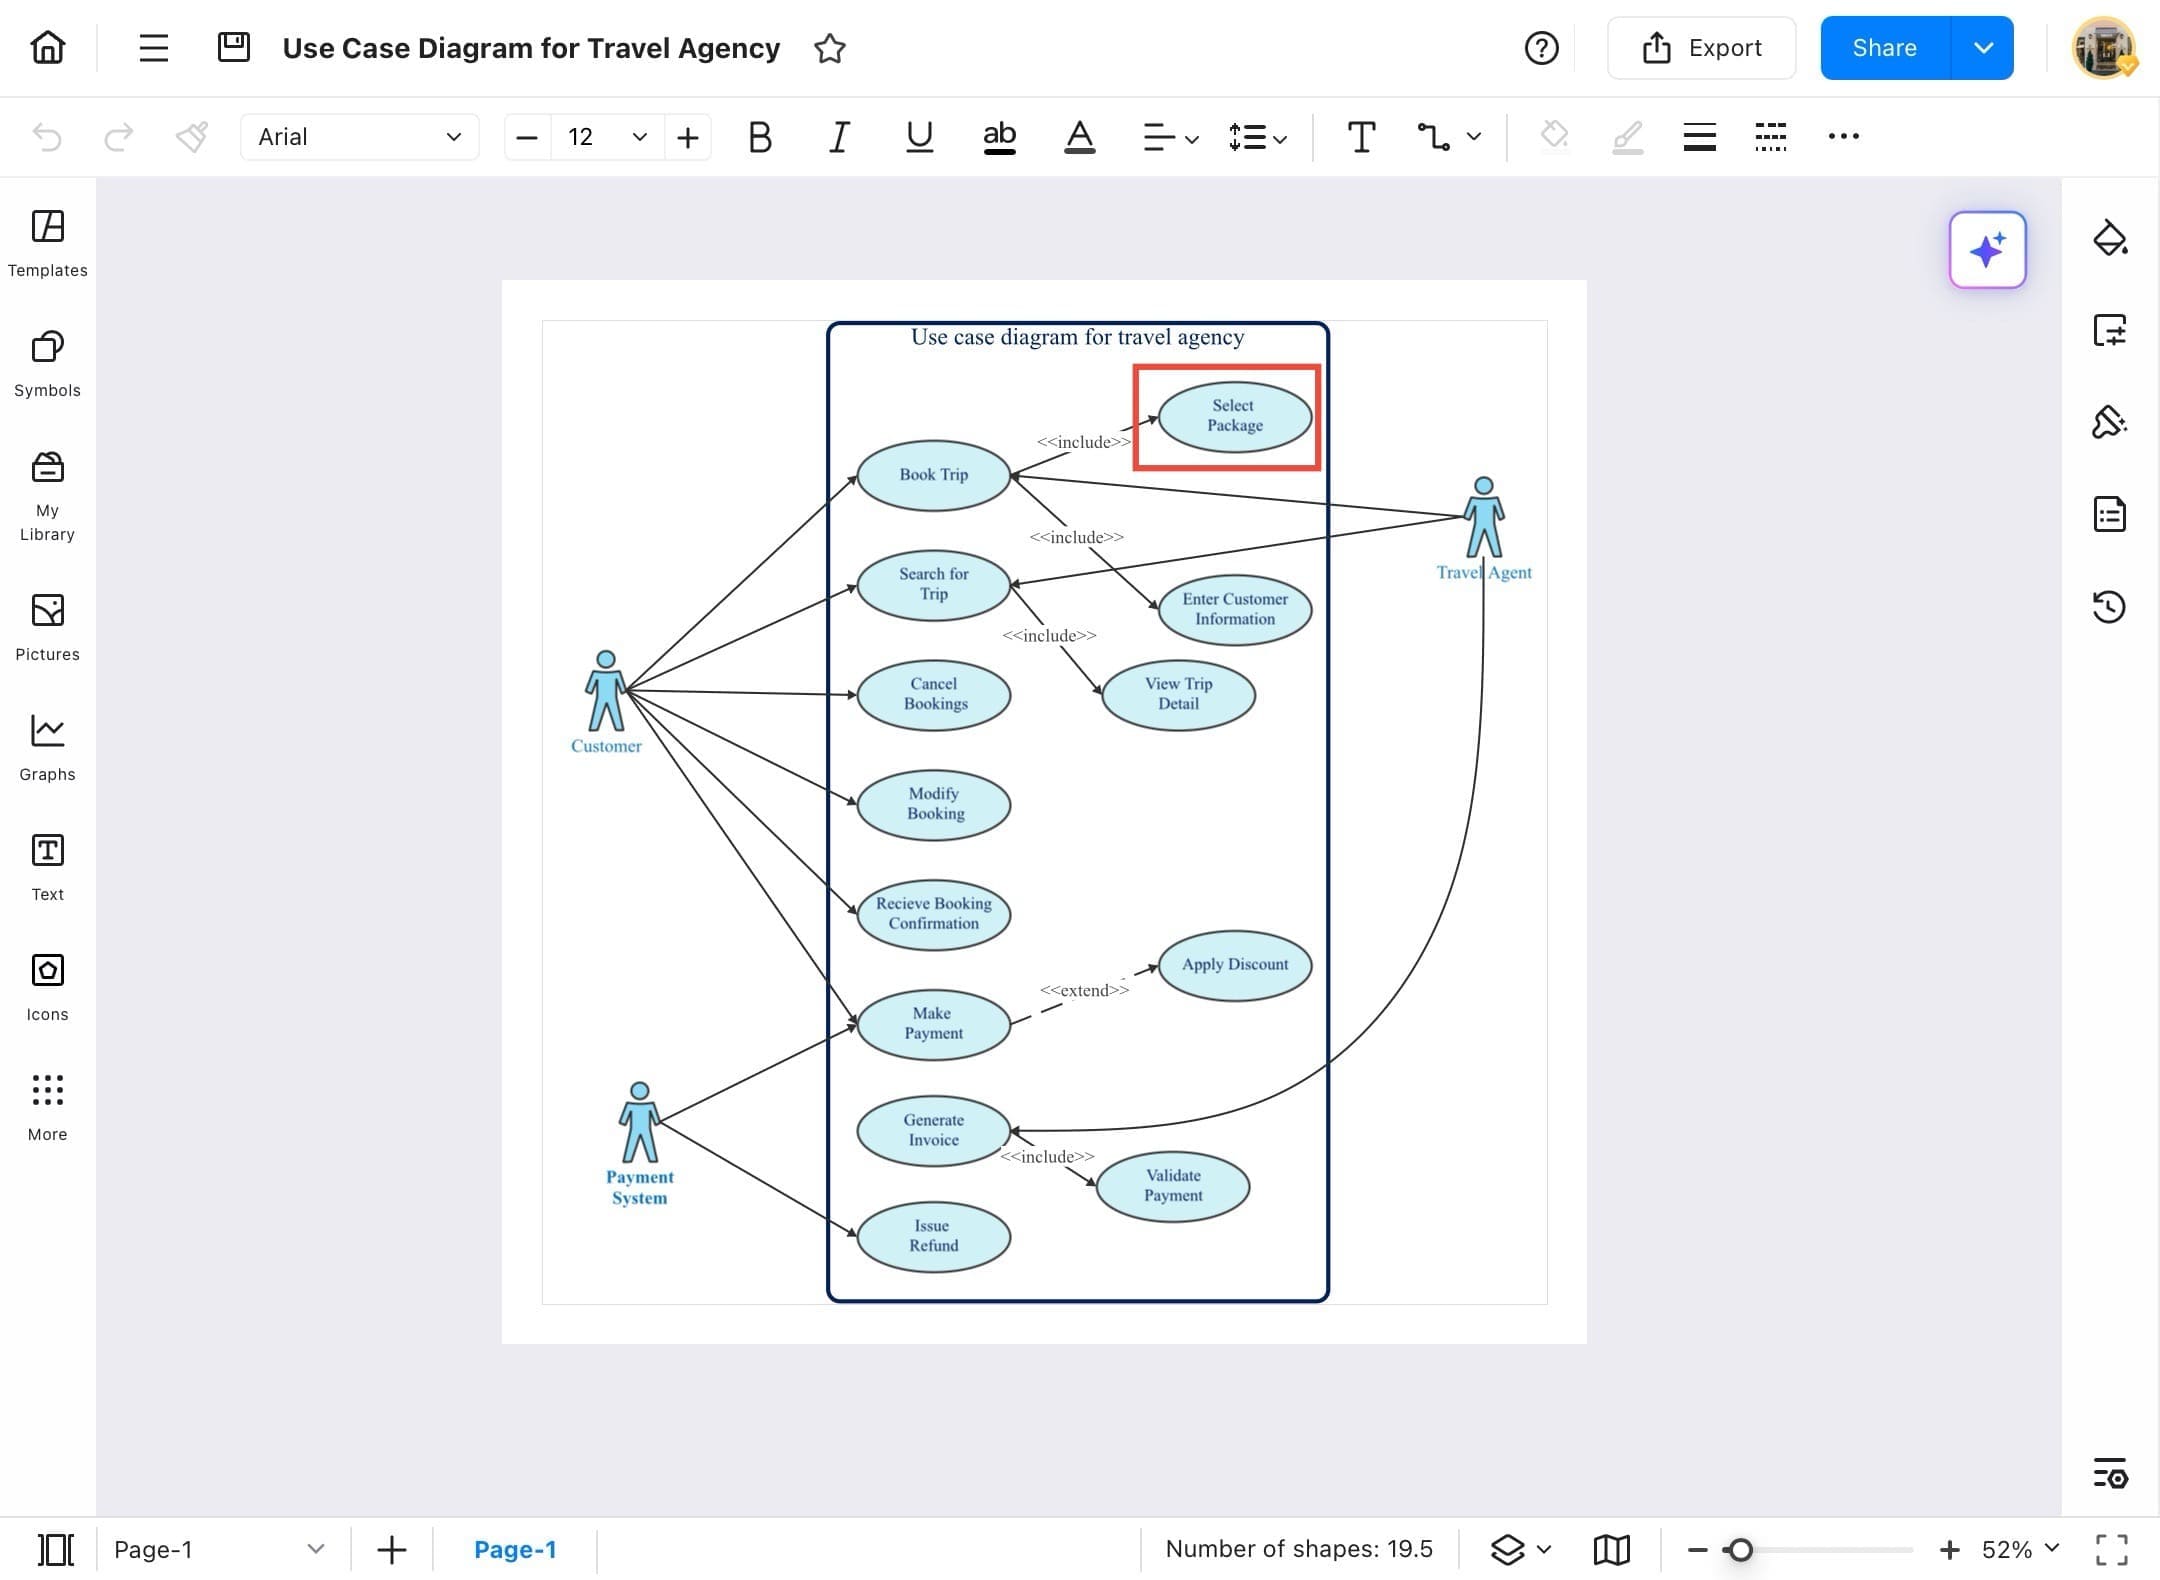
- After opening the selected file, tap on the target shape and use the attachment icon to link this document to it.
Step 4
- Open the diagram where you want to insert an attachment. Select the shape or object that you want to attach the file to.
Step 5
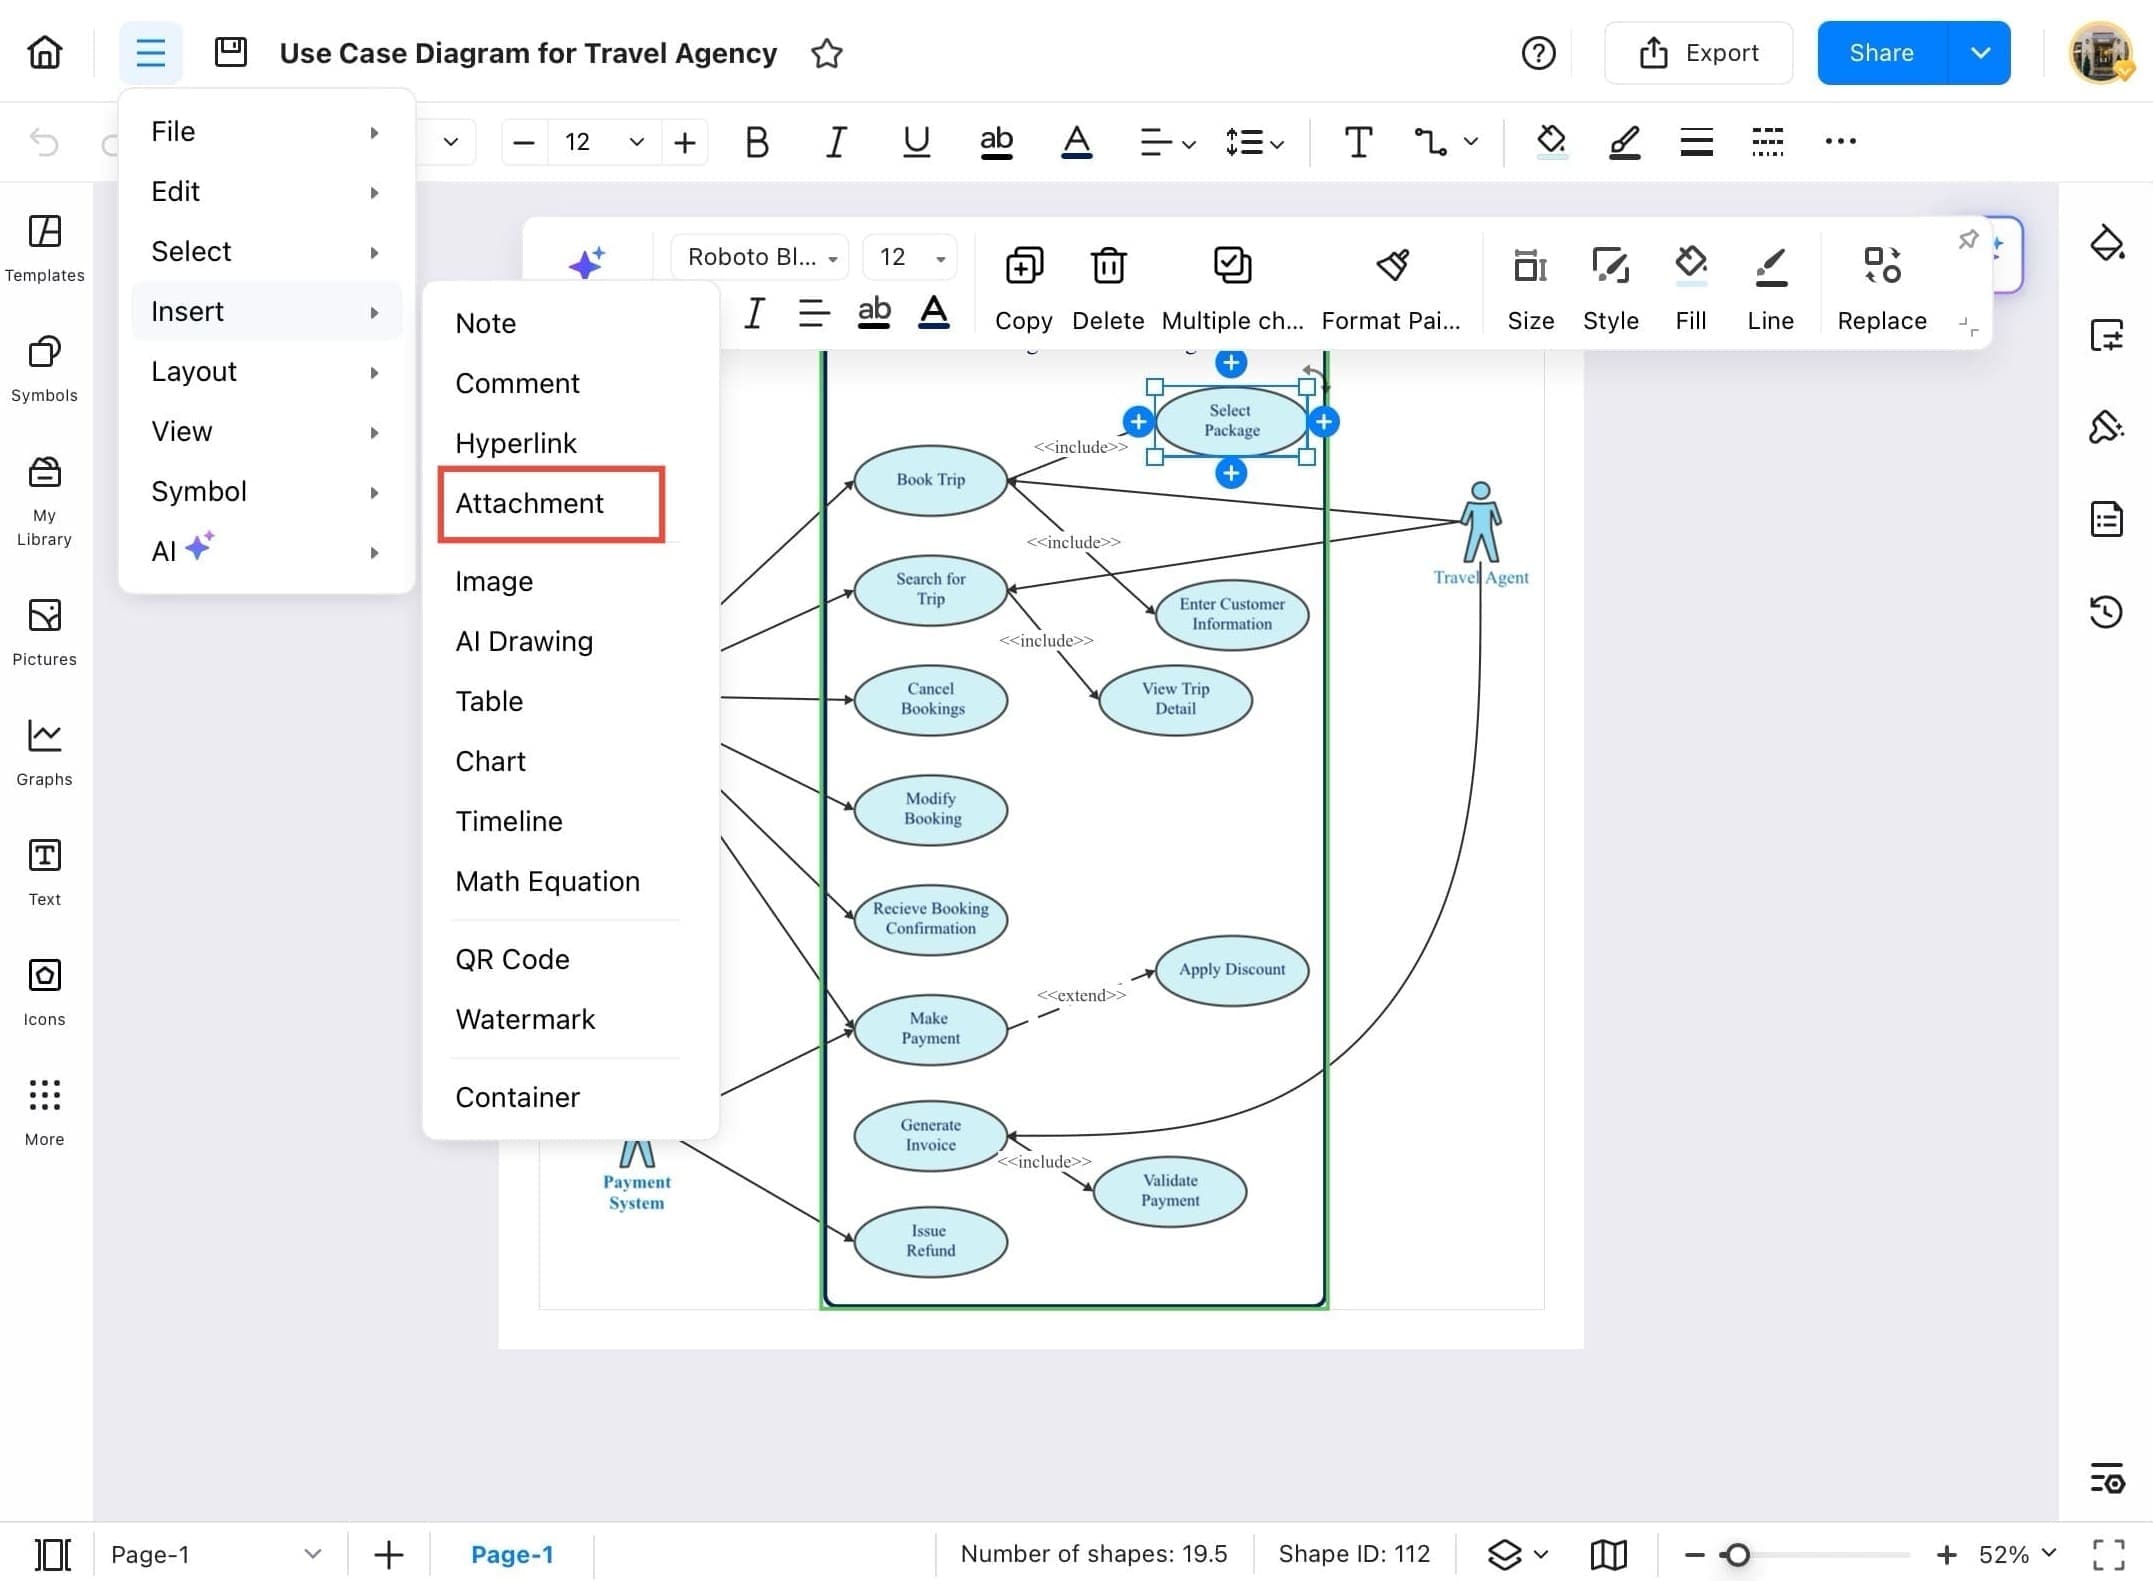
- Tap on the menu icon (three horizontal lines) at the top left of the screen.
- From the dropdown, hover over Insert.
Step 6
- In the Insert menu, tap on Attachment from the dropdown options. This will open the attachment window where you can link another EdrawMax file.
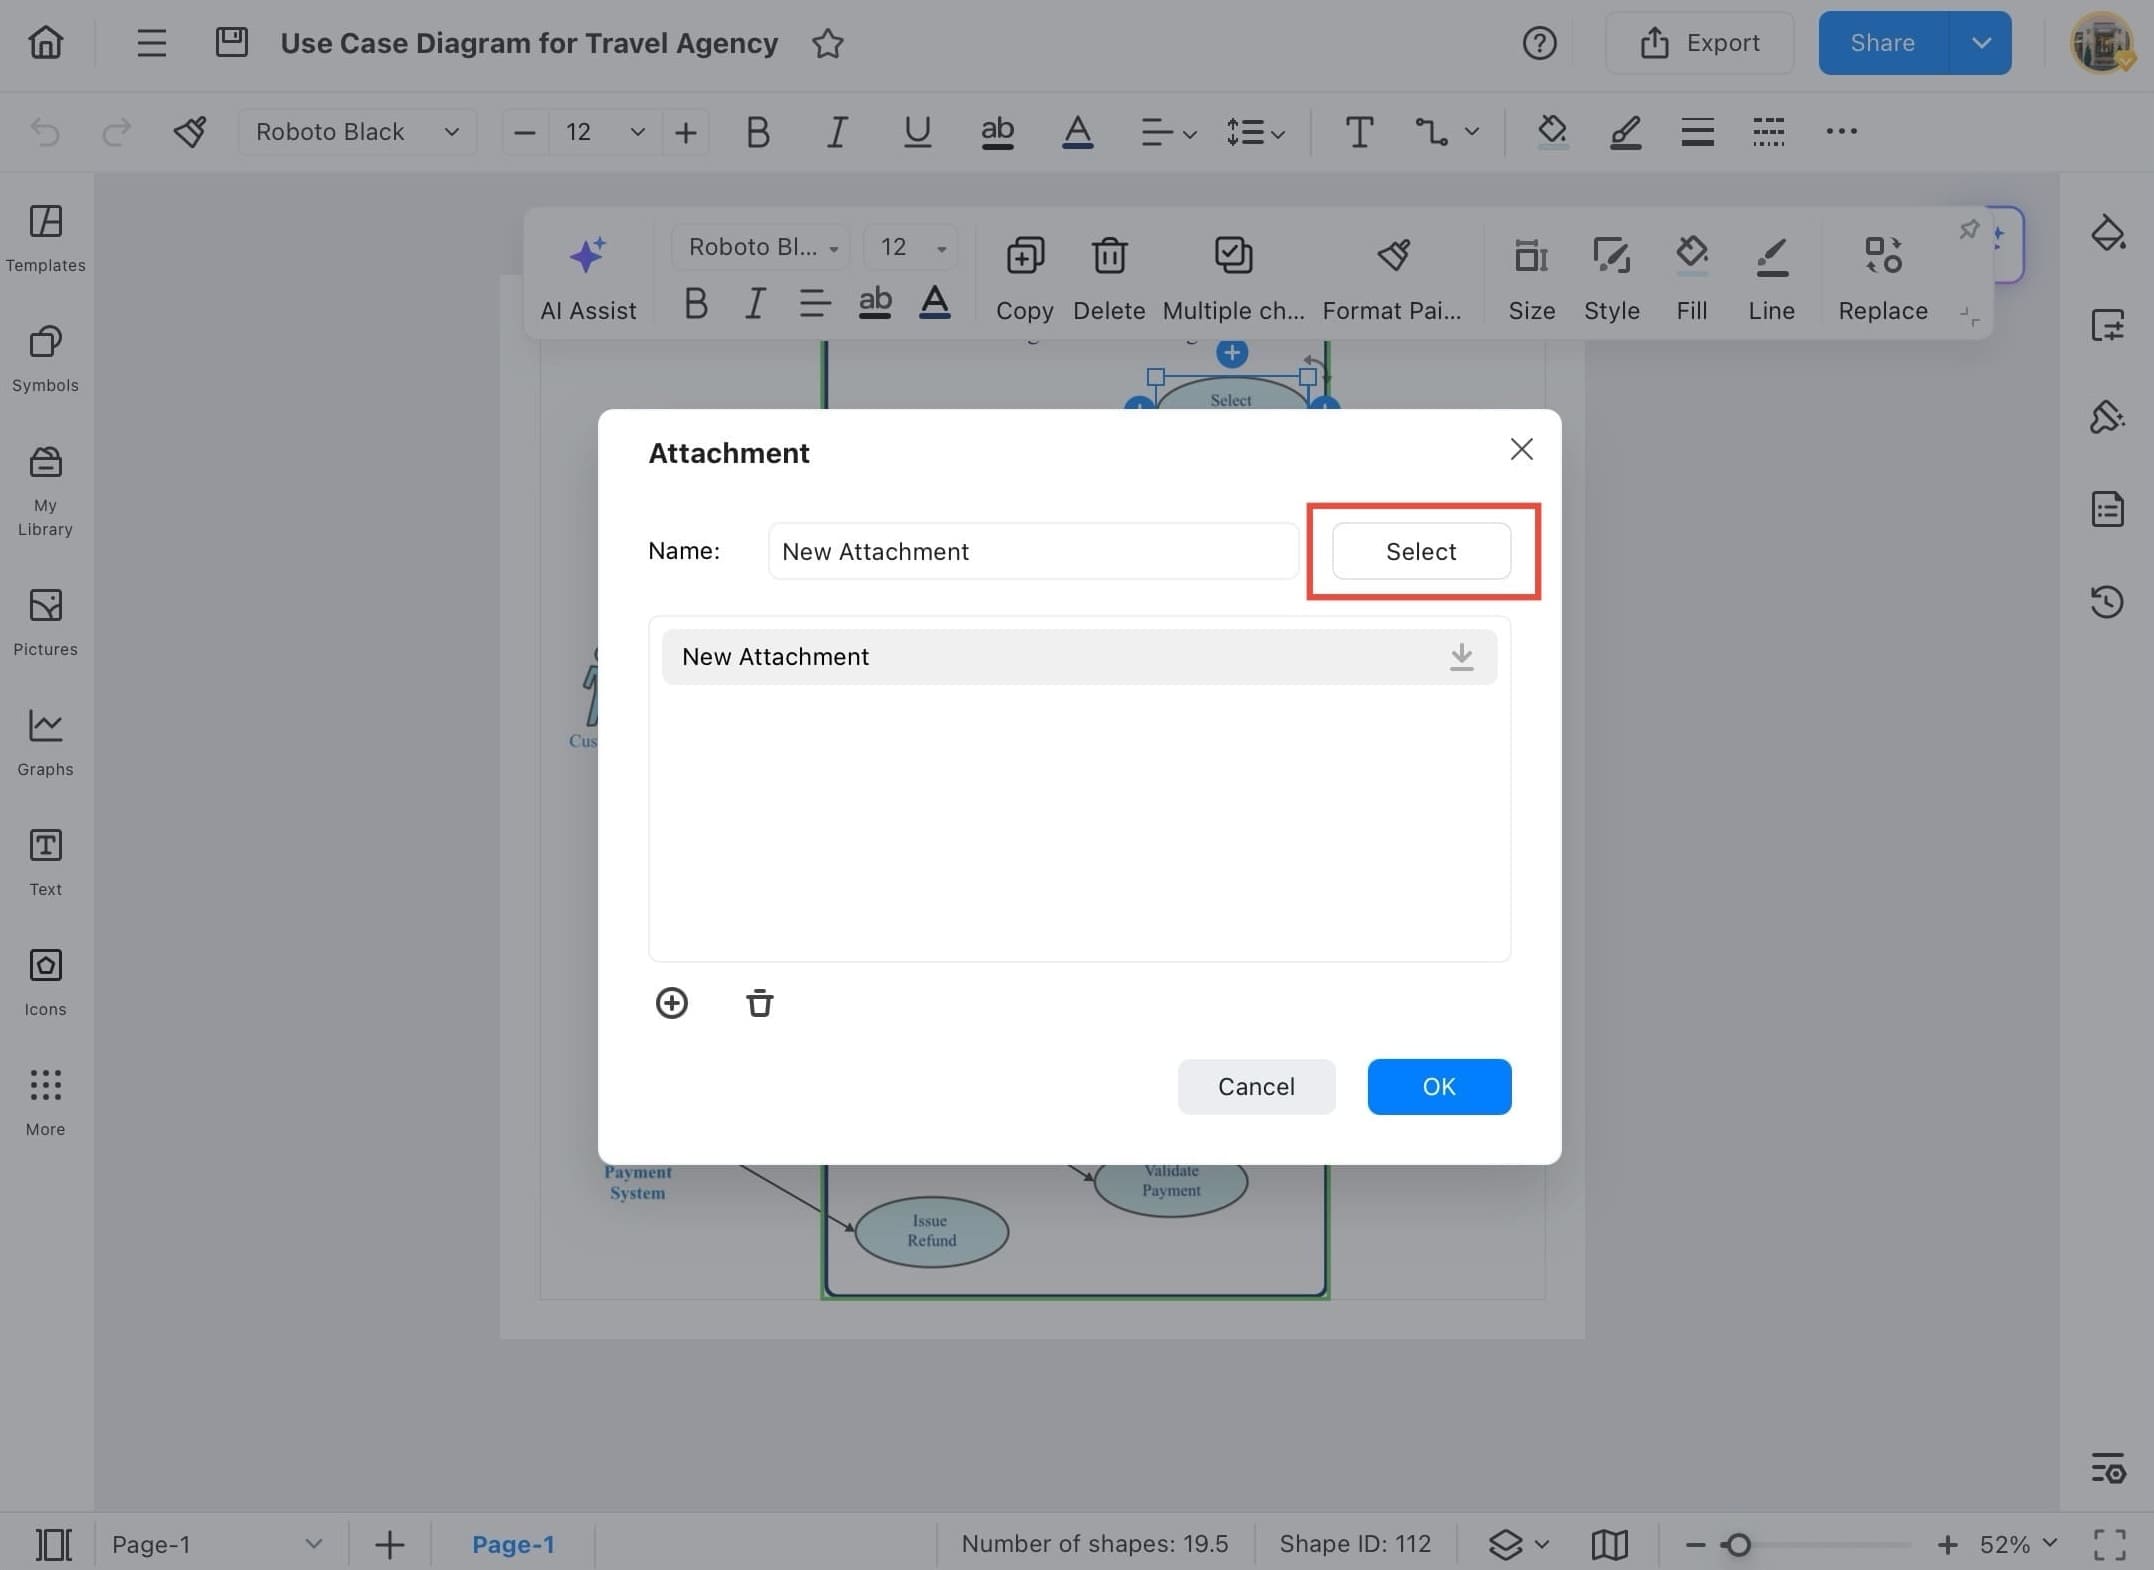
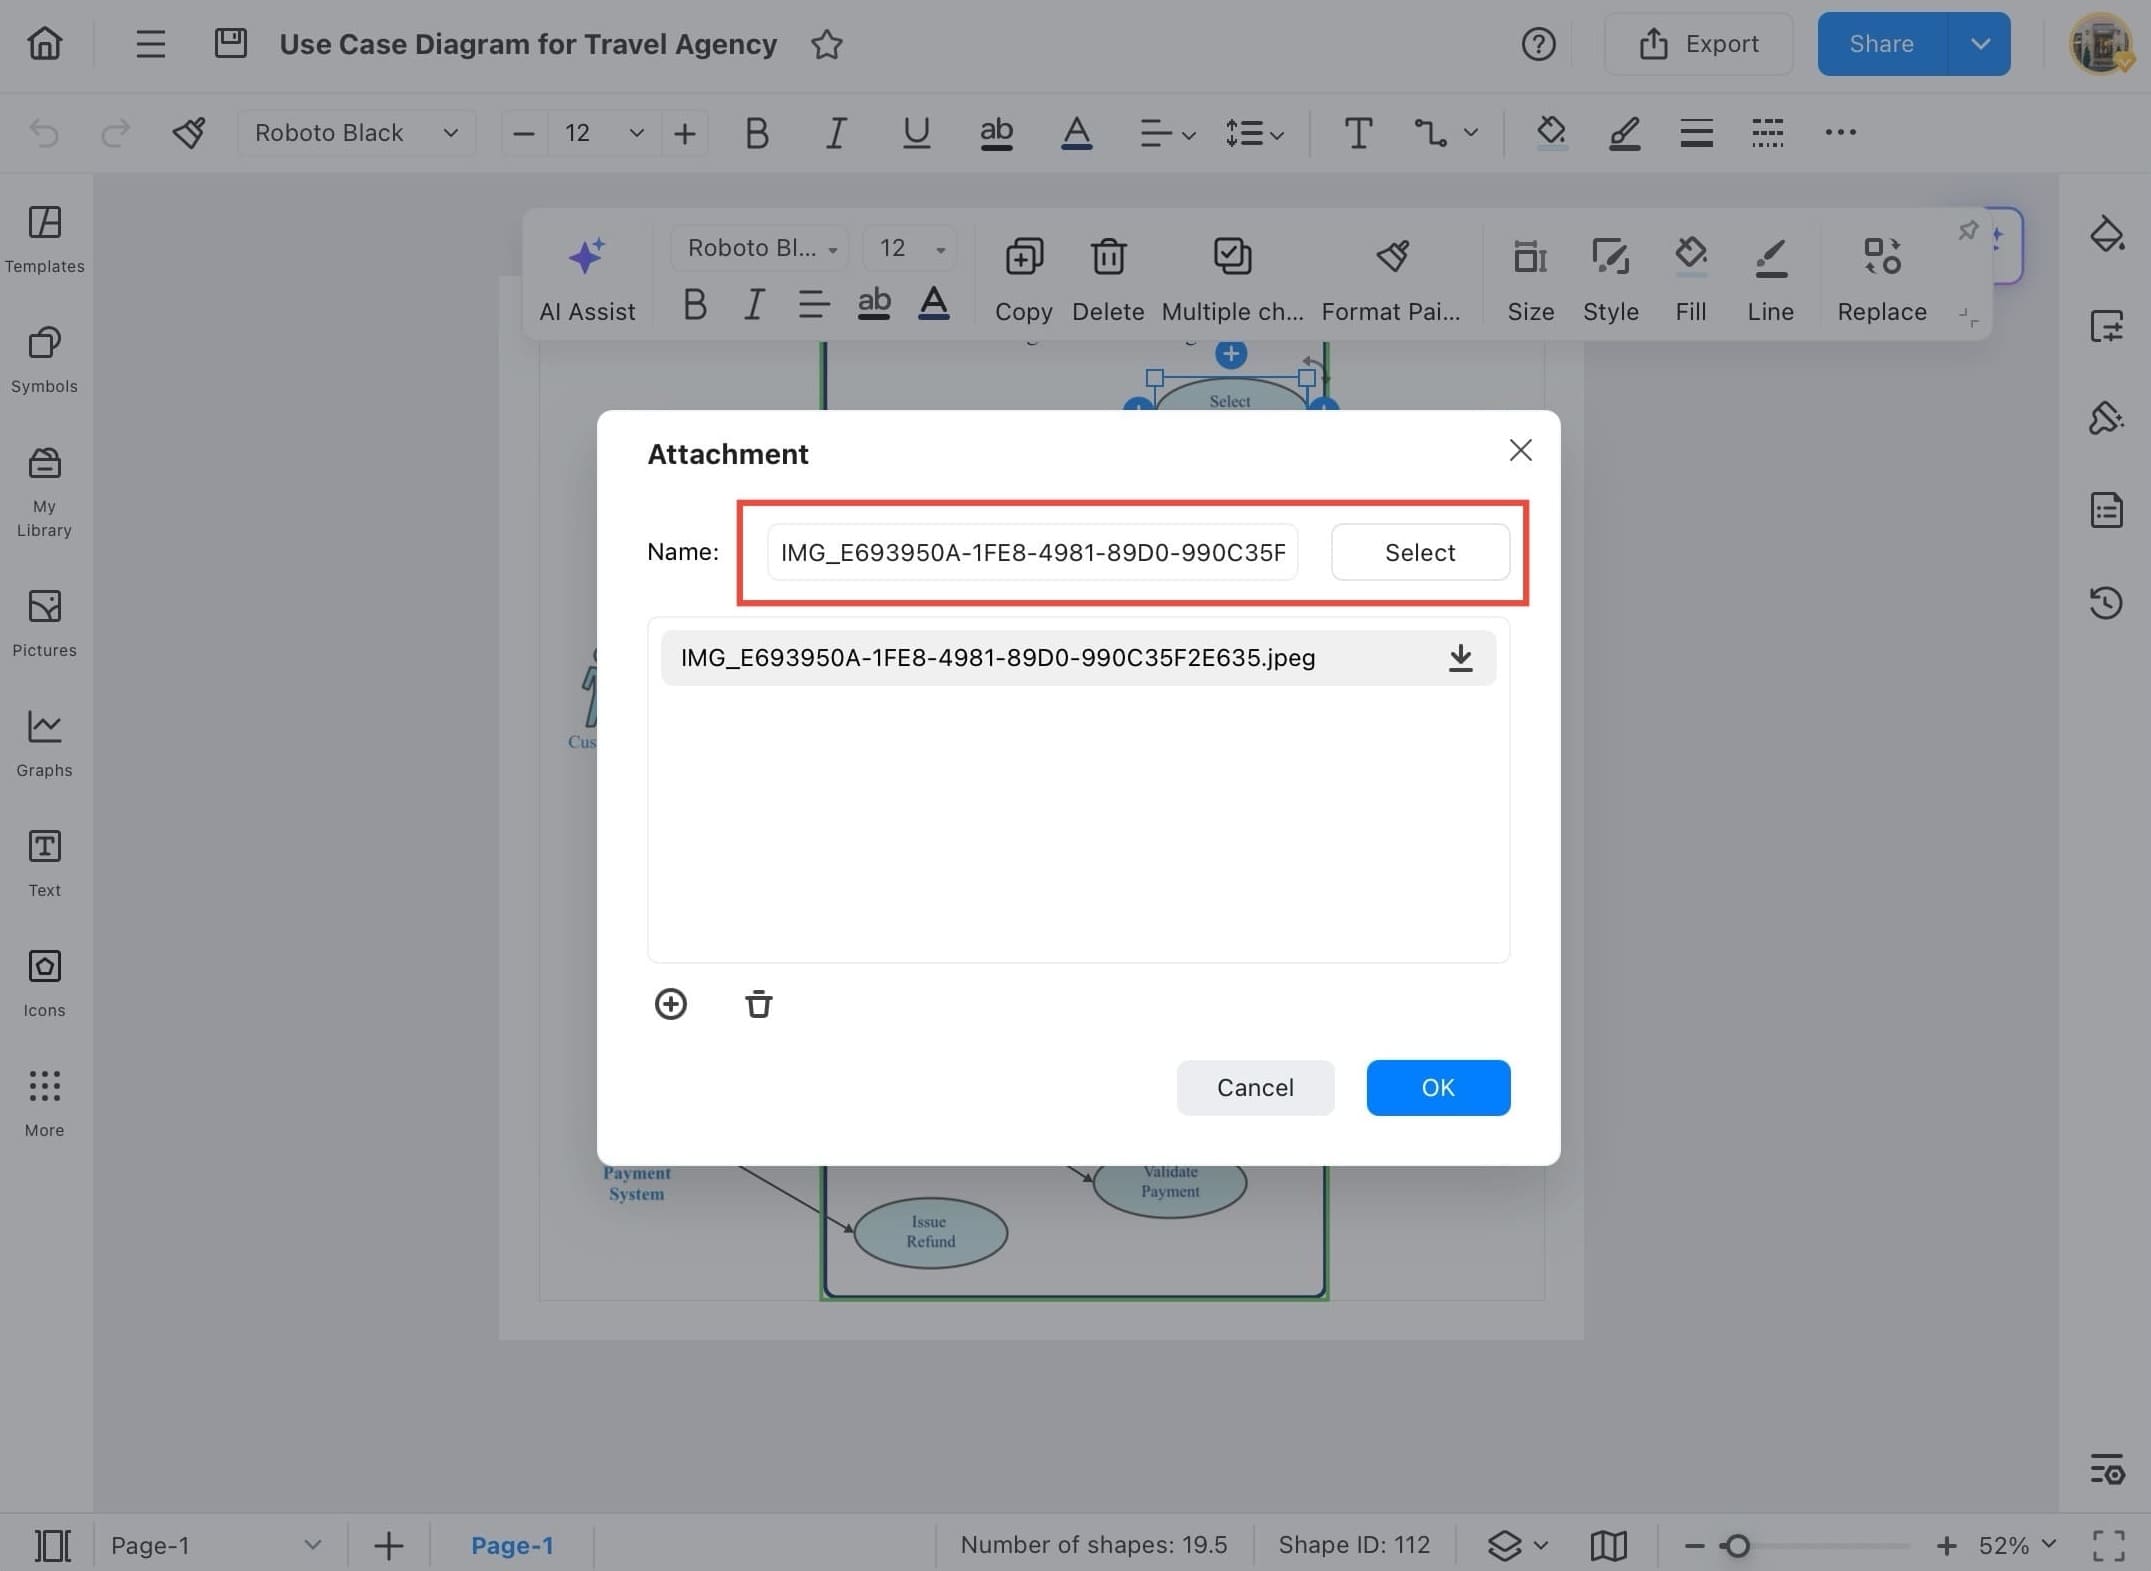
Step 7
- Tap the Select button in the Attachment dialog box to begin choosing the file you want to attach.
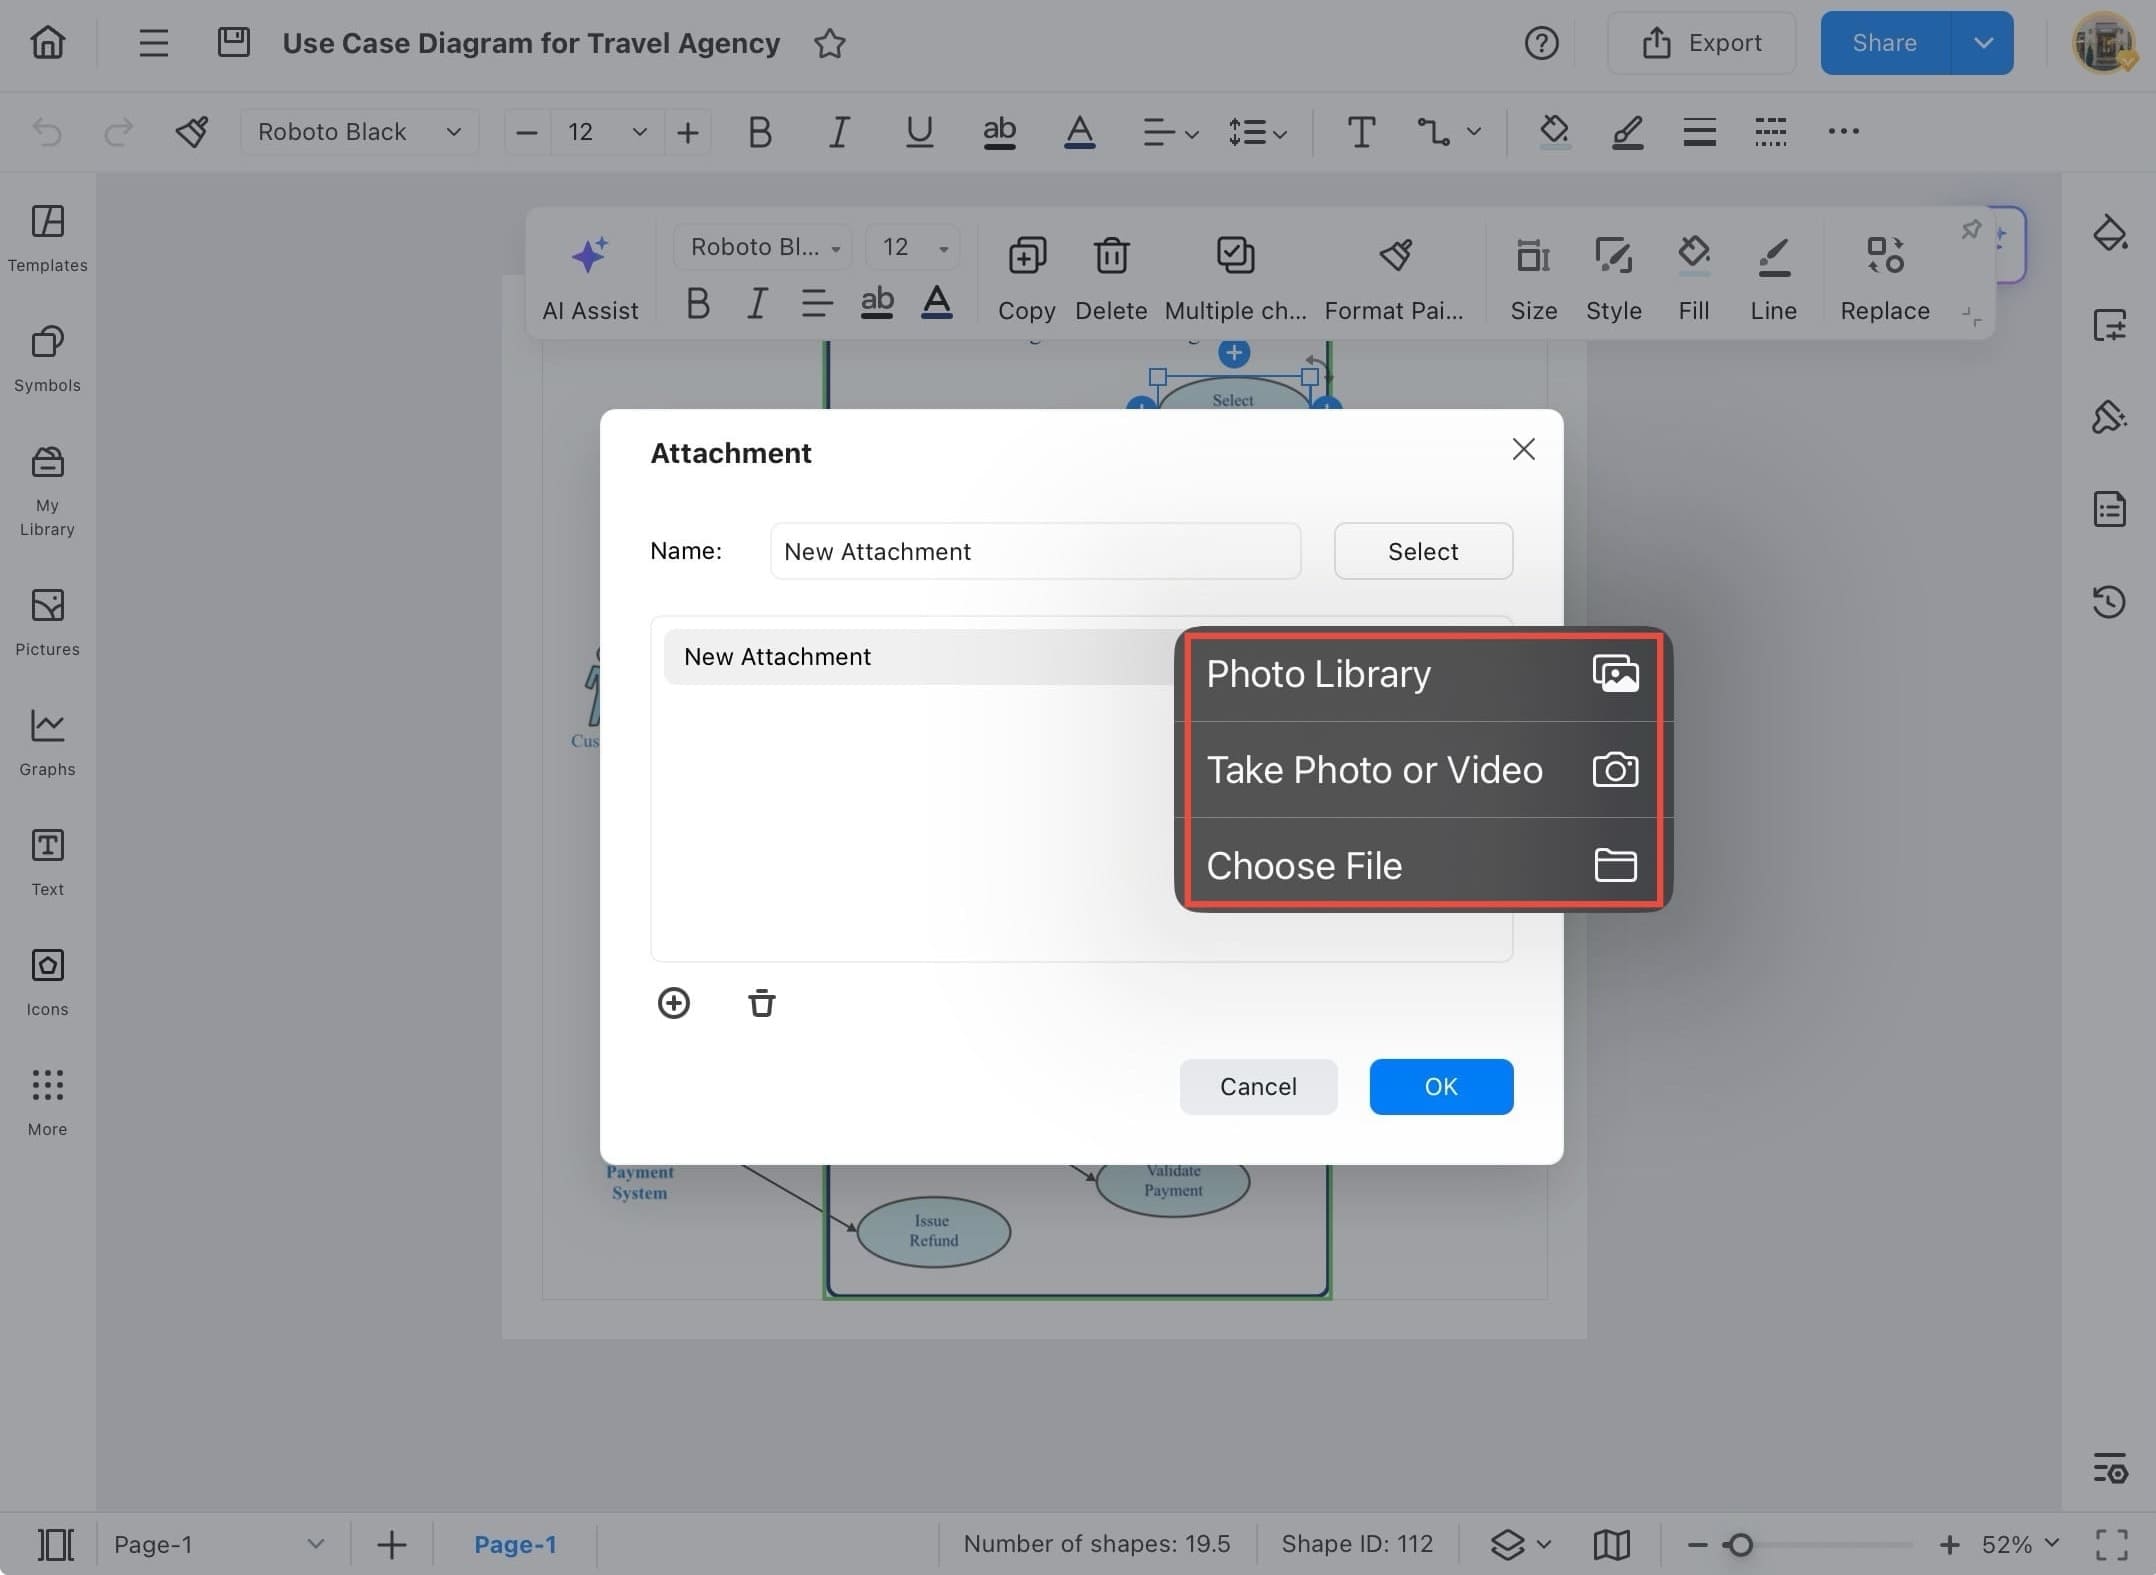
Step 8
- From the pop-up options, choose where to upload the file from: Photo Library, Take Photo or Video, or Choose File from your local storage.
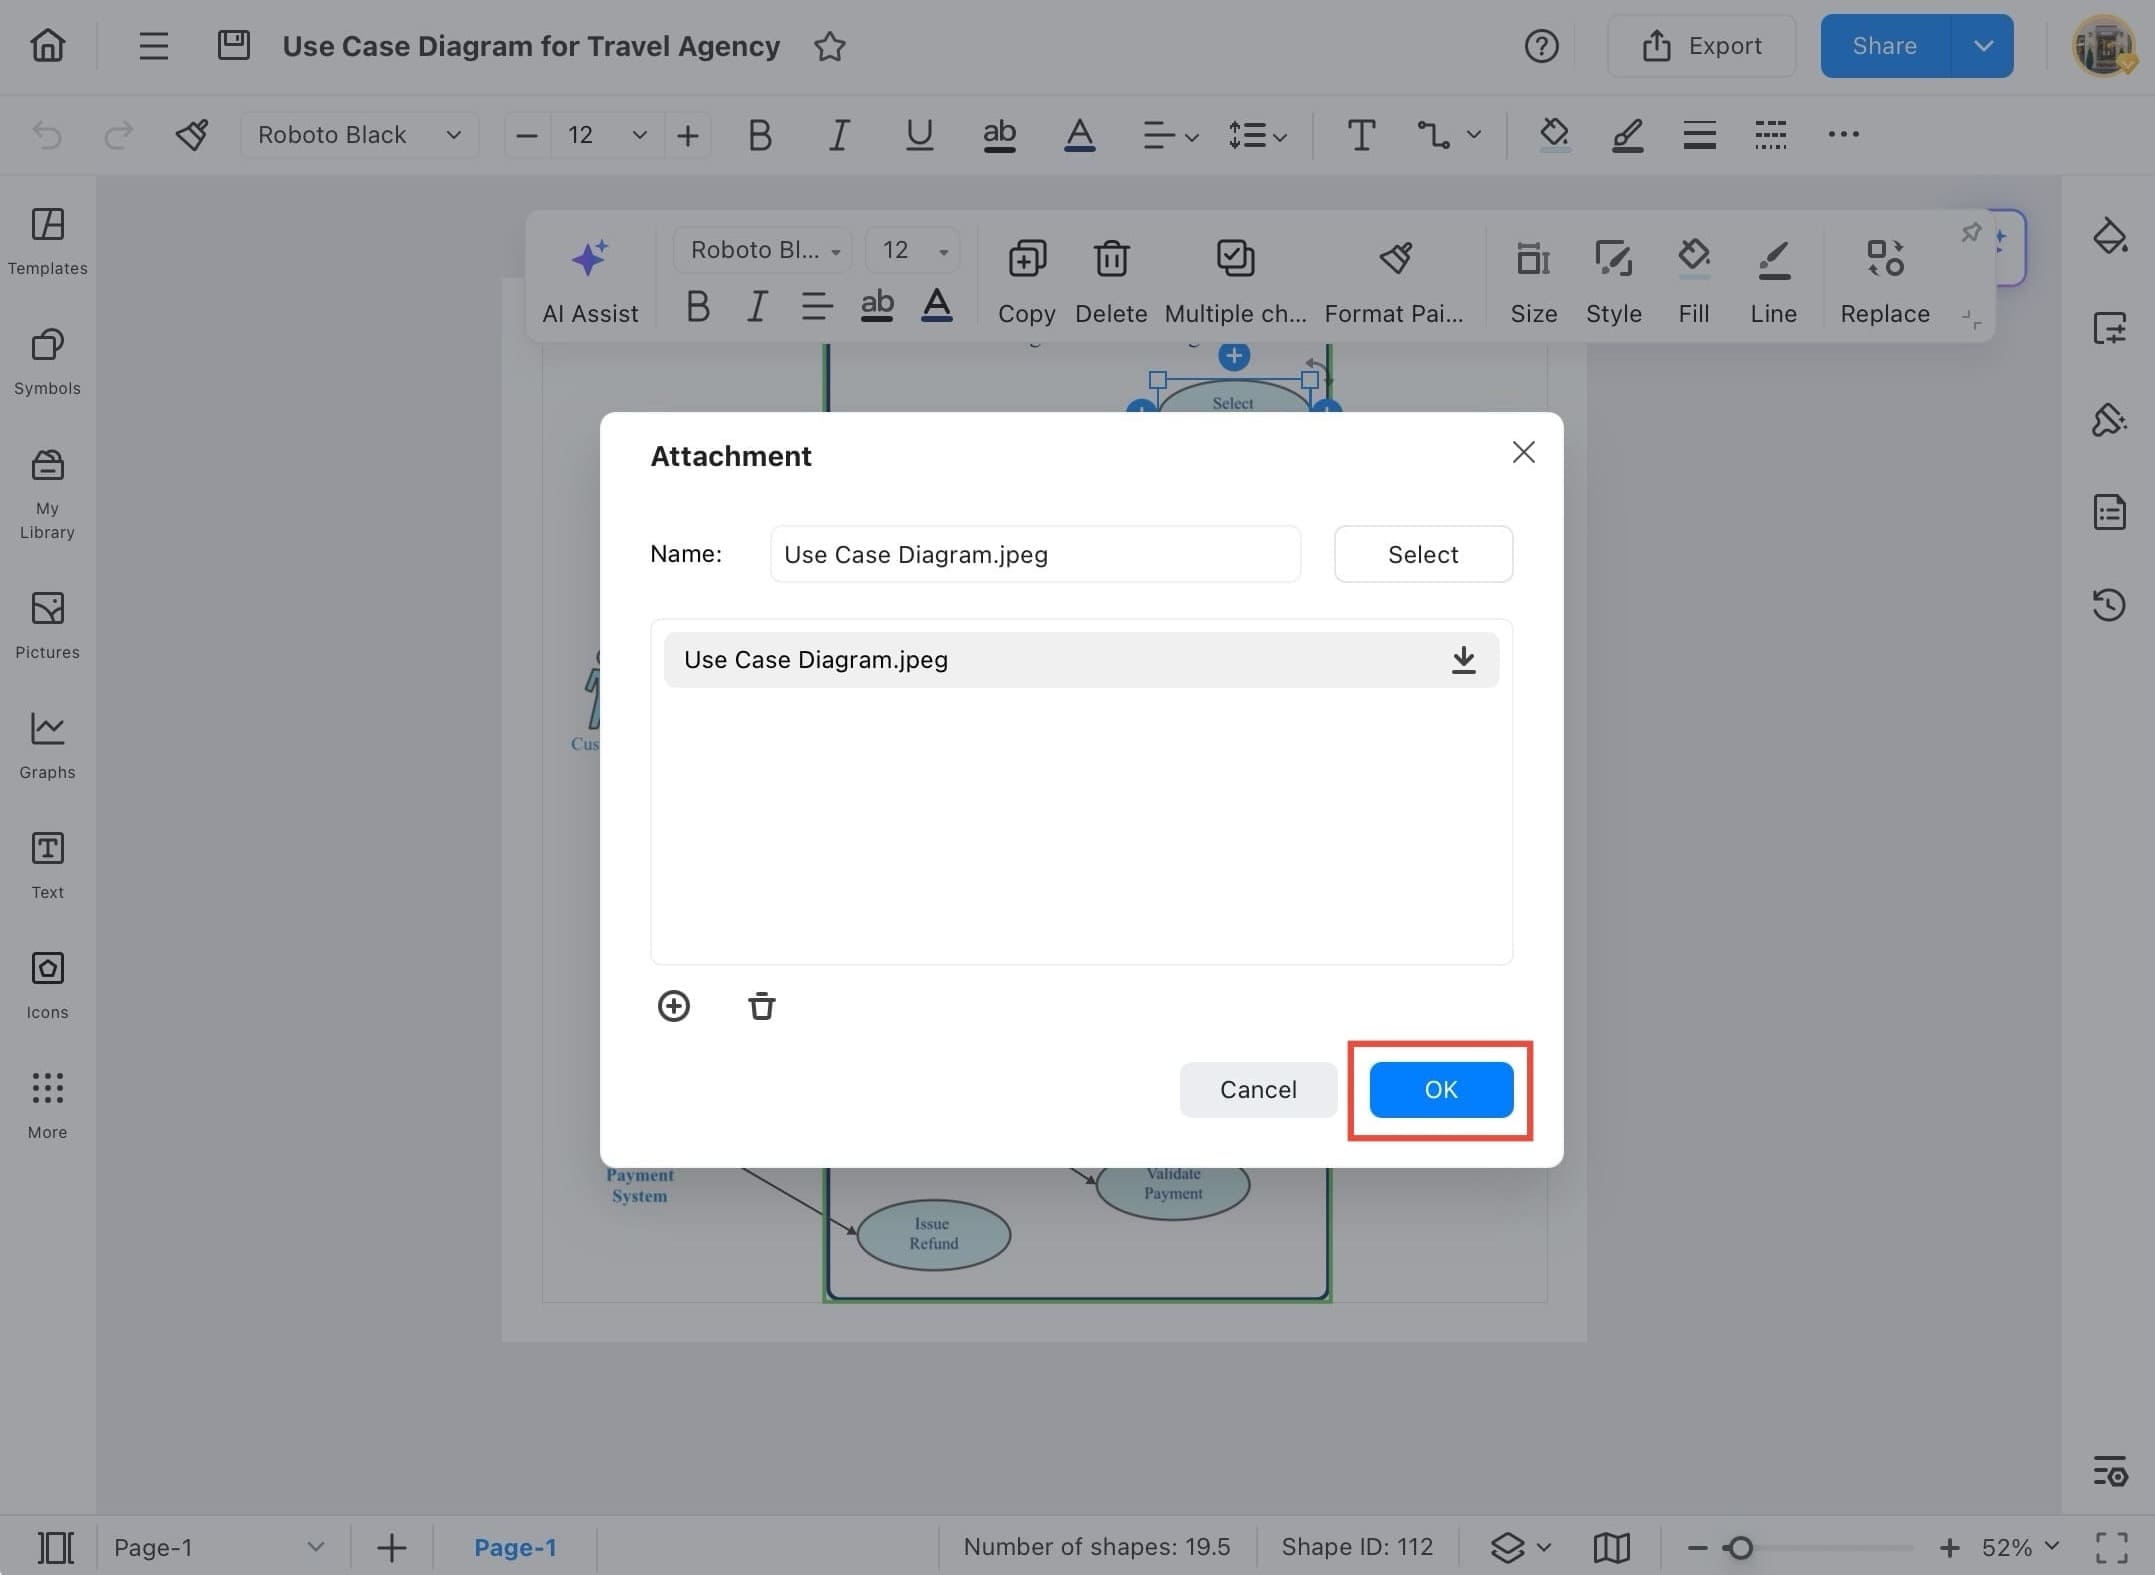
Step 9
- Once the file is selected, it will be shown under the Name field. You can now tap OK to attach it to the shape.
Step 10
- After selecting the file, tap the OK button to successfully attach it to your diagram.
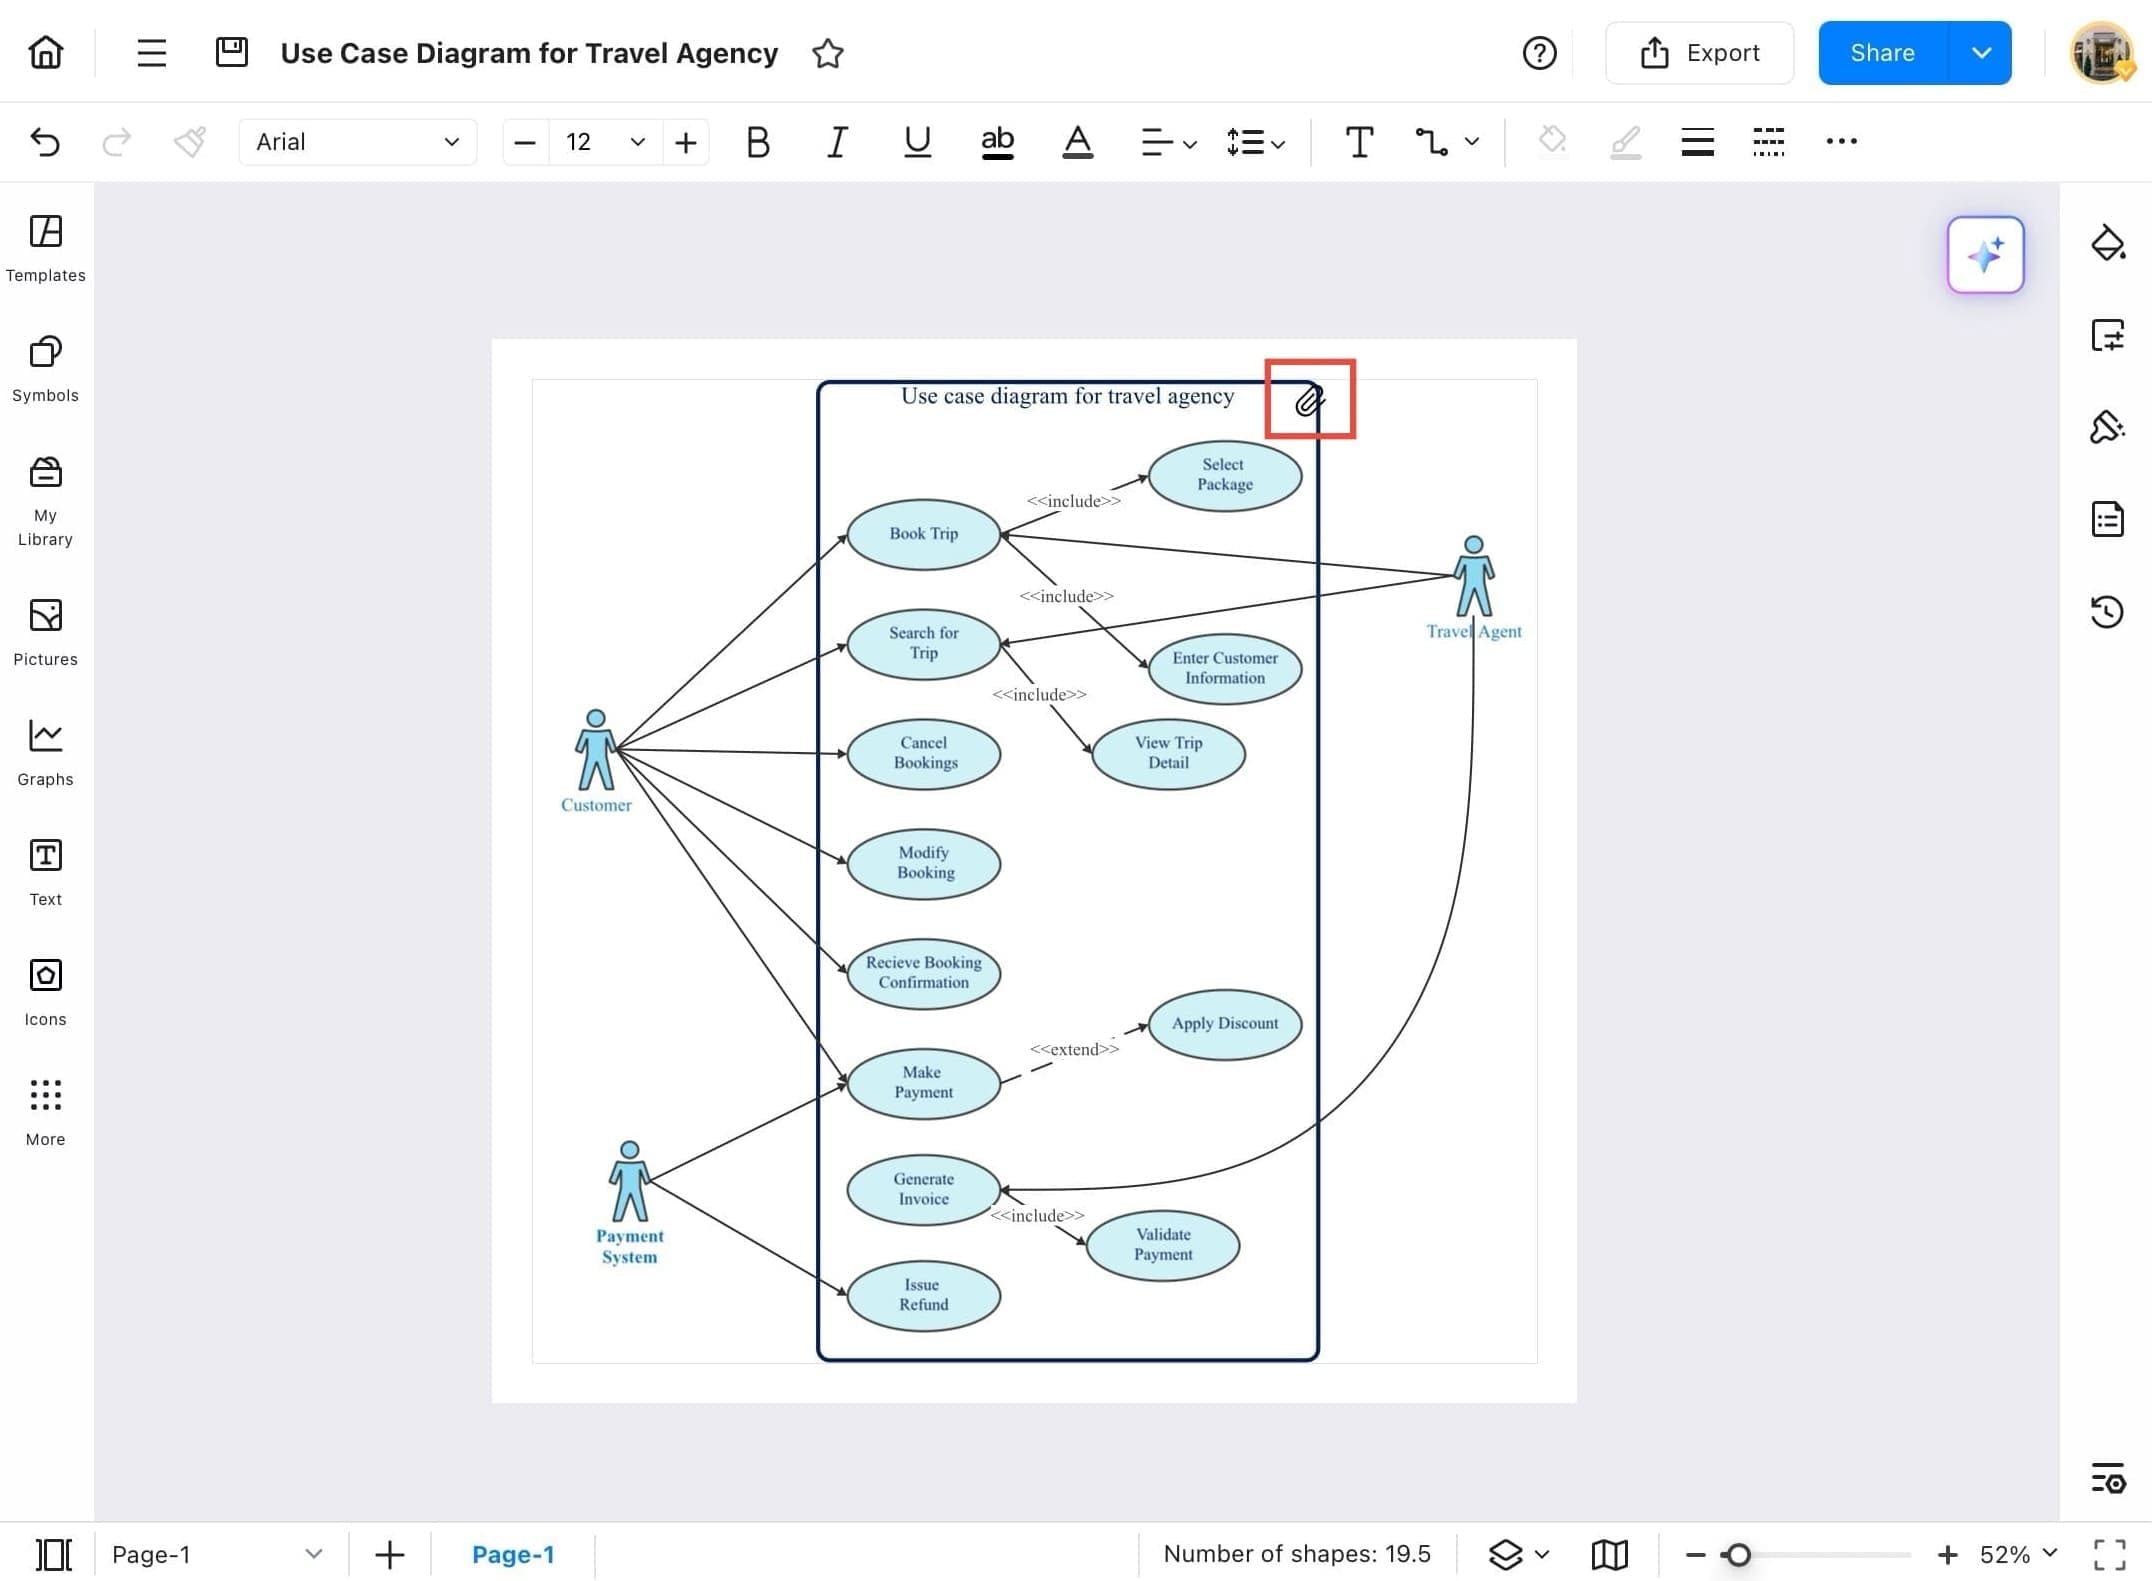
Step 11
- You will now see a small attachment icon appear on the shape, indicating that an attachment is successfully added.
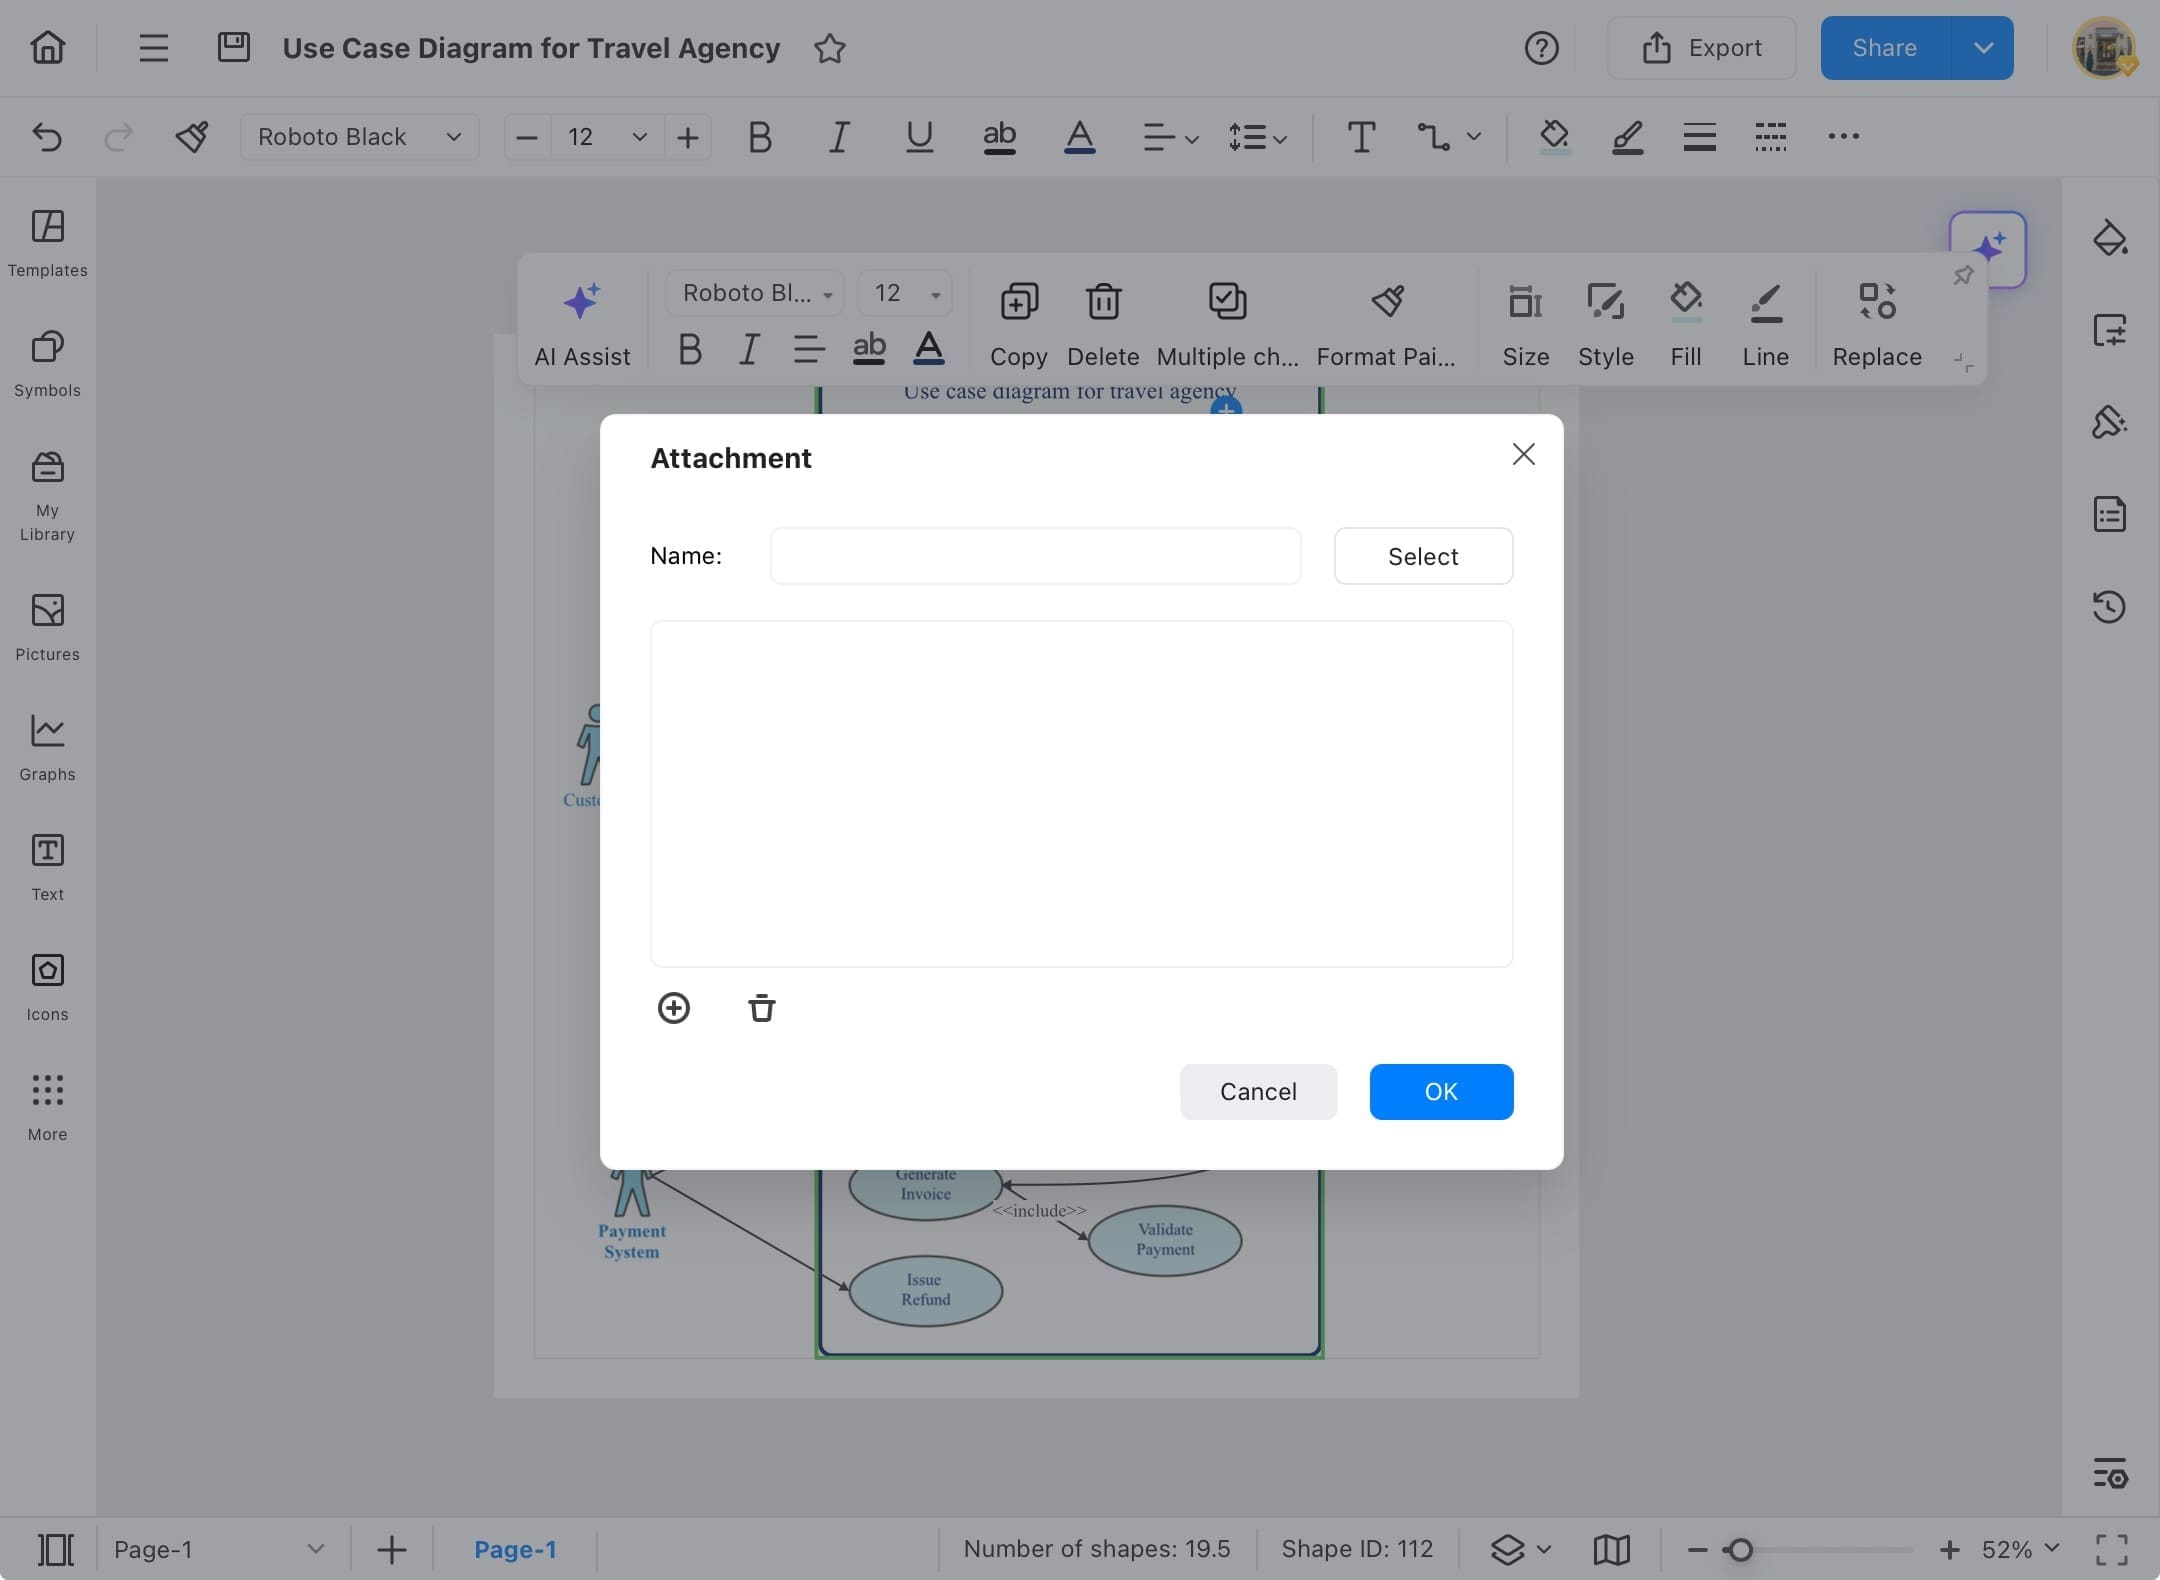
Step 12
- To delete or edit the attachment, tap on the attachment icon again. You’ll see options like the trash icon to remove the file.
Step 13
- You can now see that the file is removed, and the attachment field is blank again. You can repeat the process to add a new file.
Image
Images play a vital role in visual communication. EdrawMax allows you to add images easily to clarify ideas, support data, or personalize your design. The steps below guide you through inserting, adjusting, and organizing images to make your diagrams more dynamic and easier to understand.
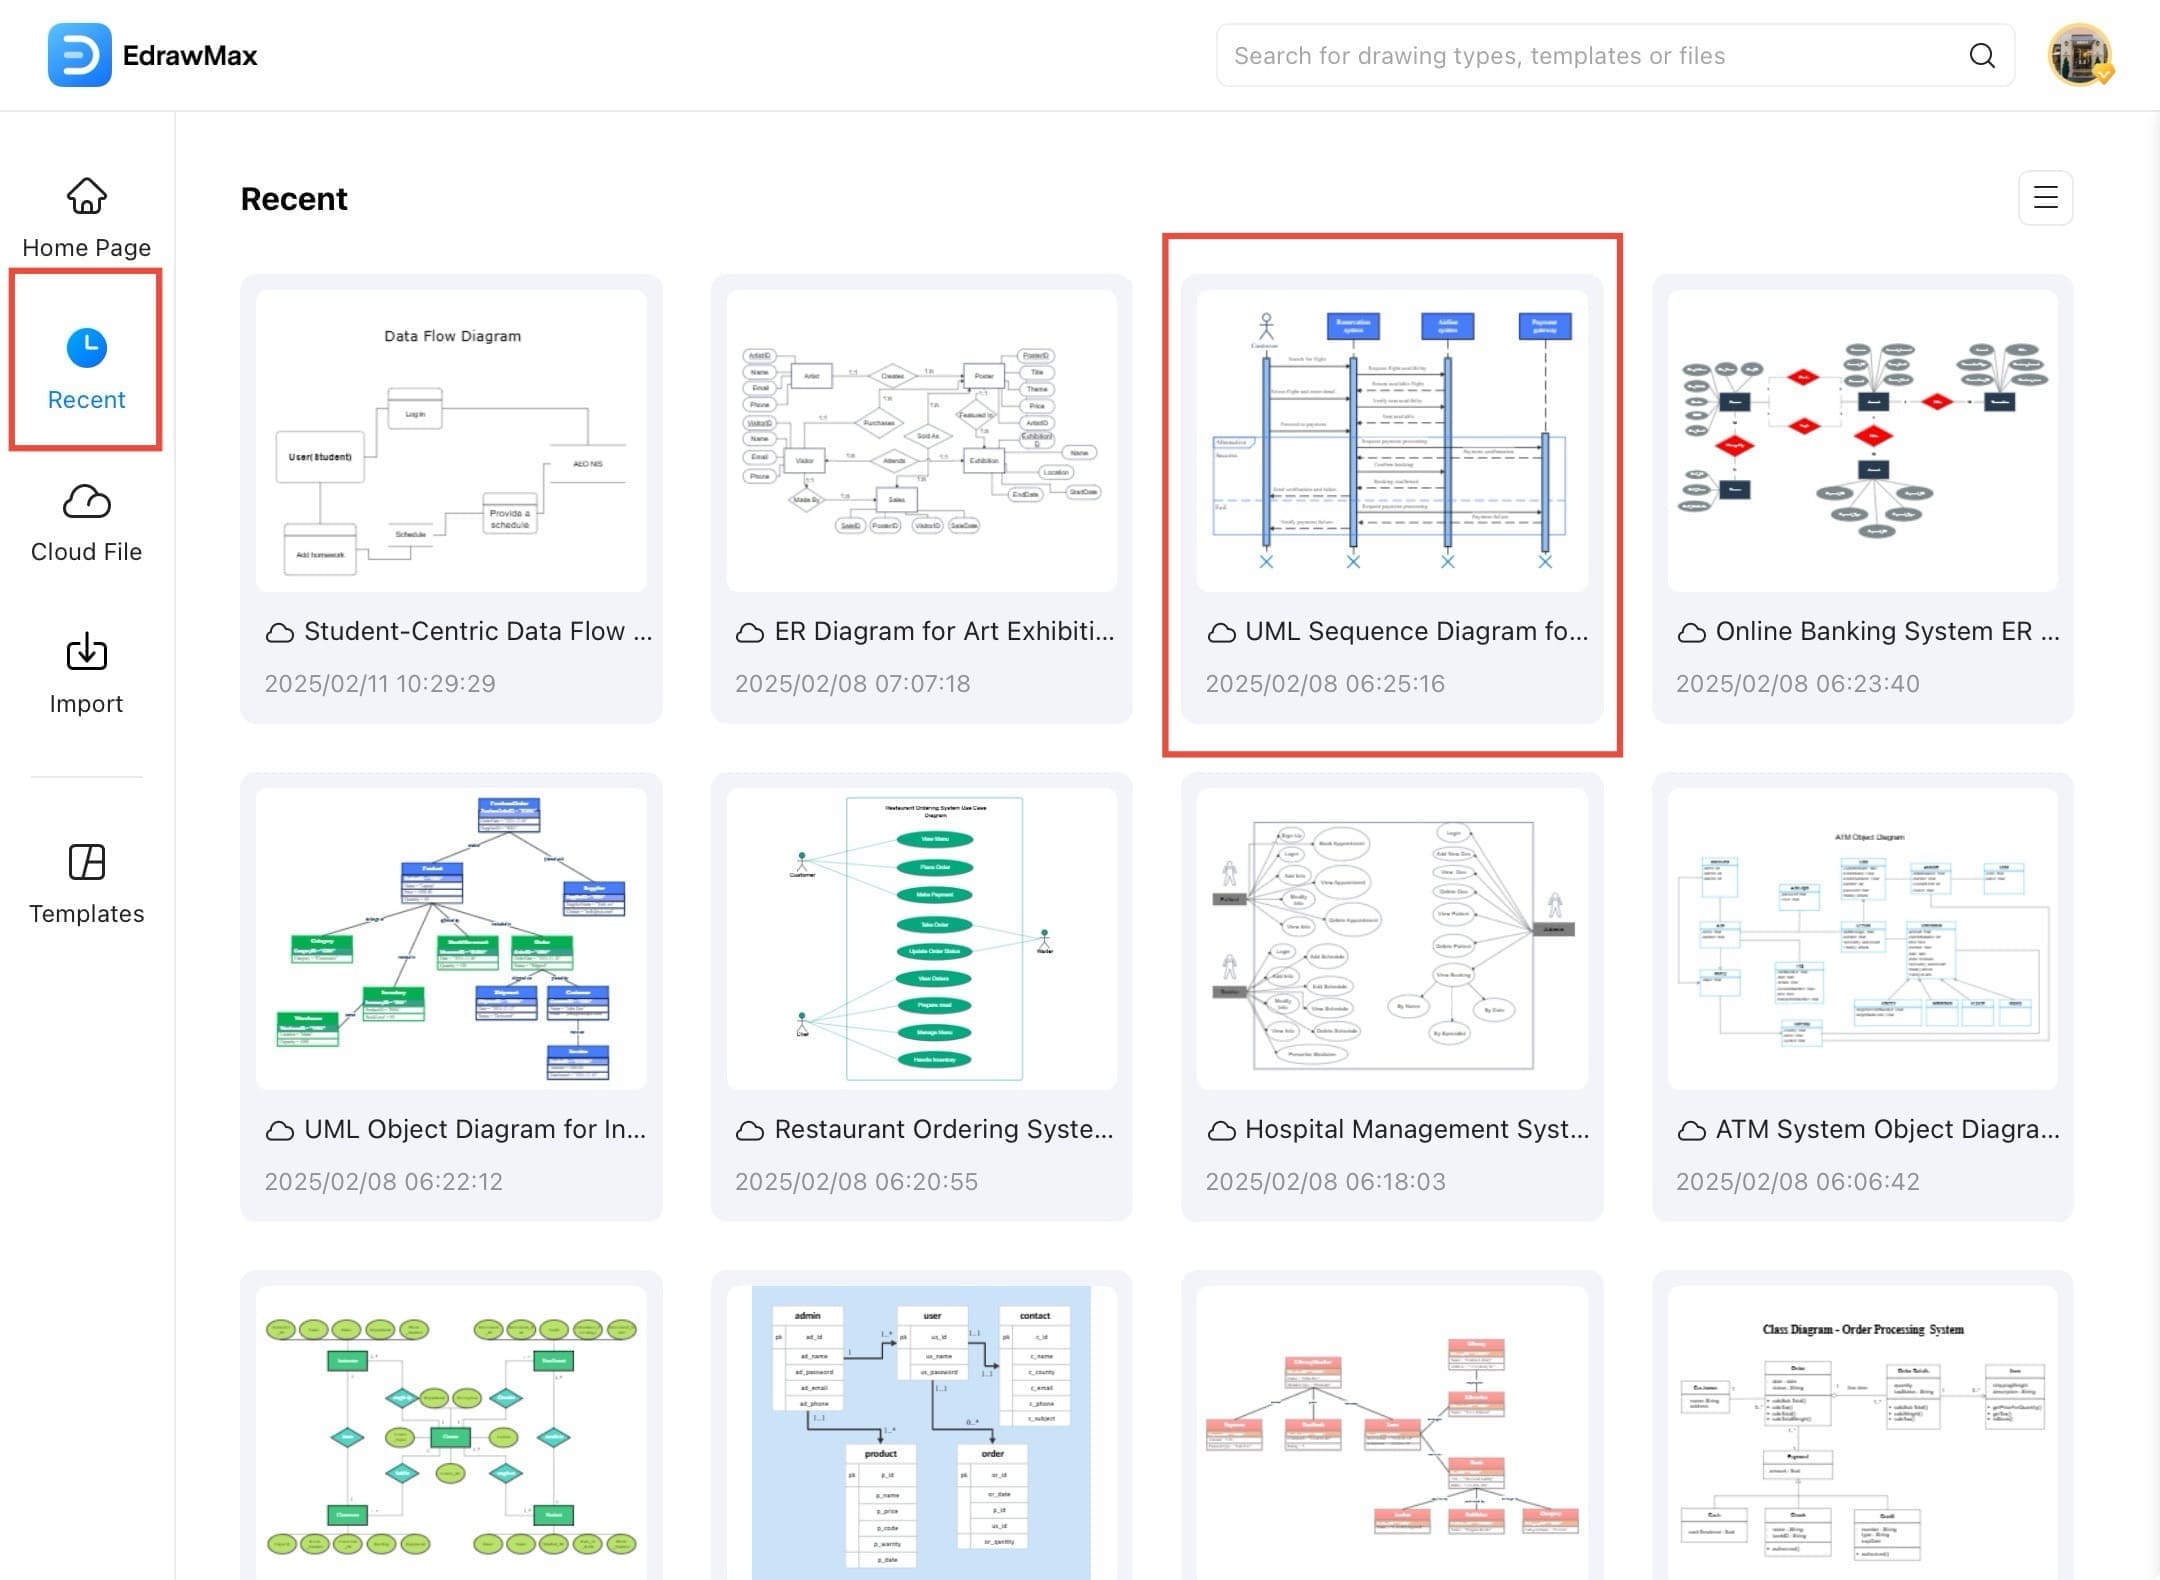
Step ❶ Launch EdrawMax and Open Recent File
- Launch the EdrawMax app on your tablet.
- From the EdrawMax home screen, tap Recent in the left panel, then select the diagram you want to open from the list.
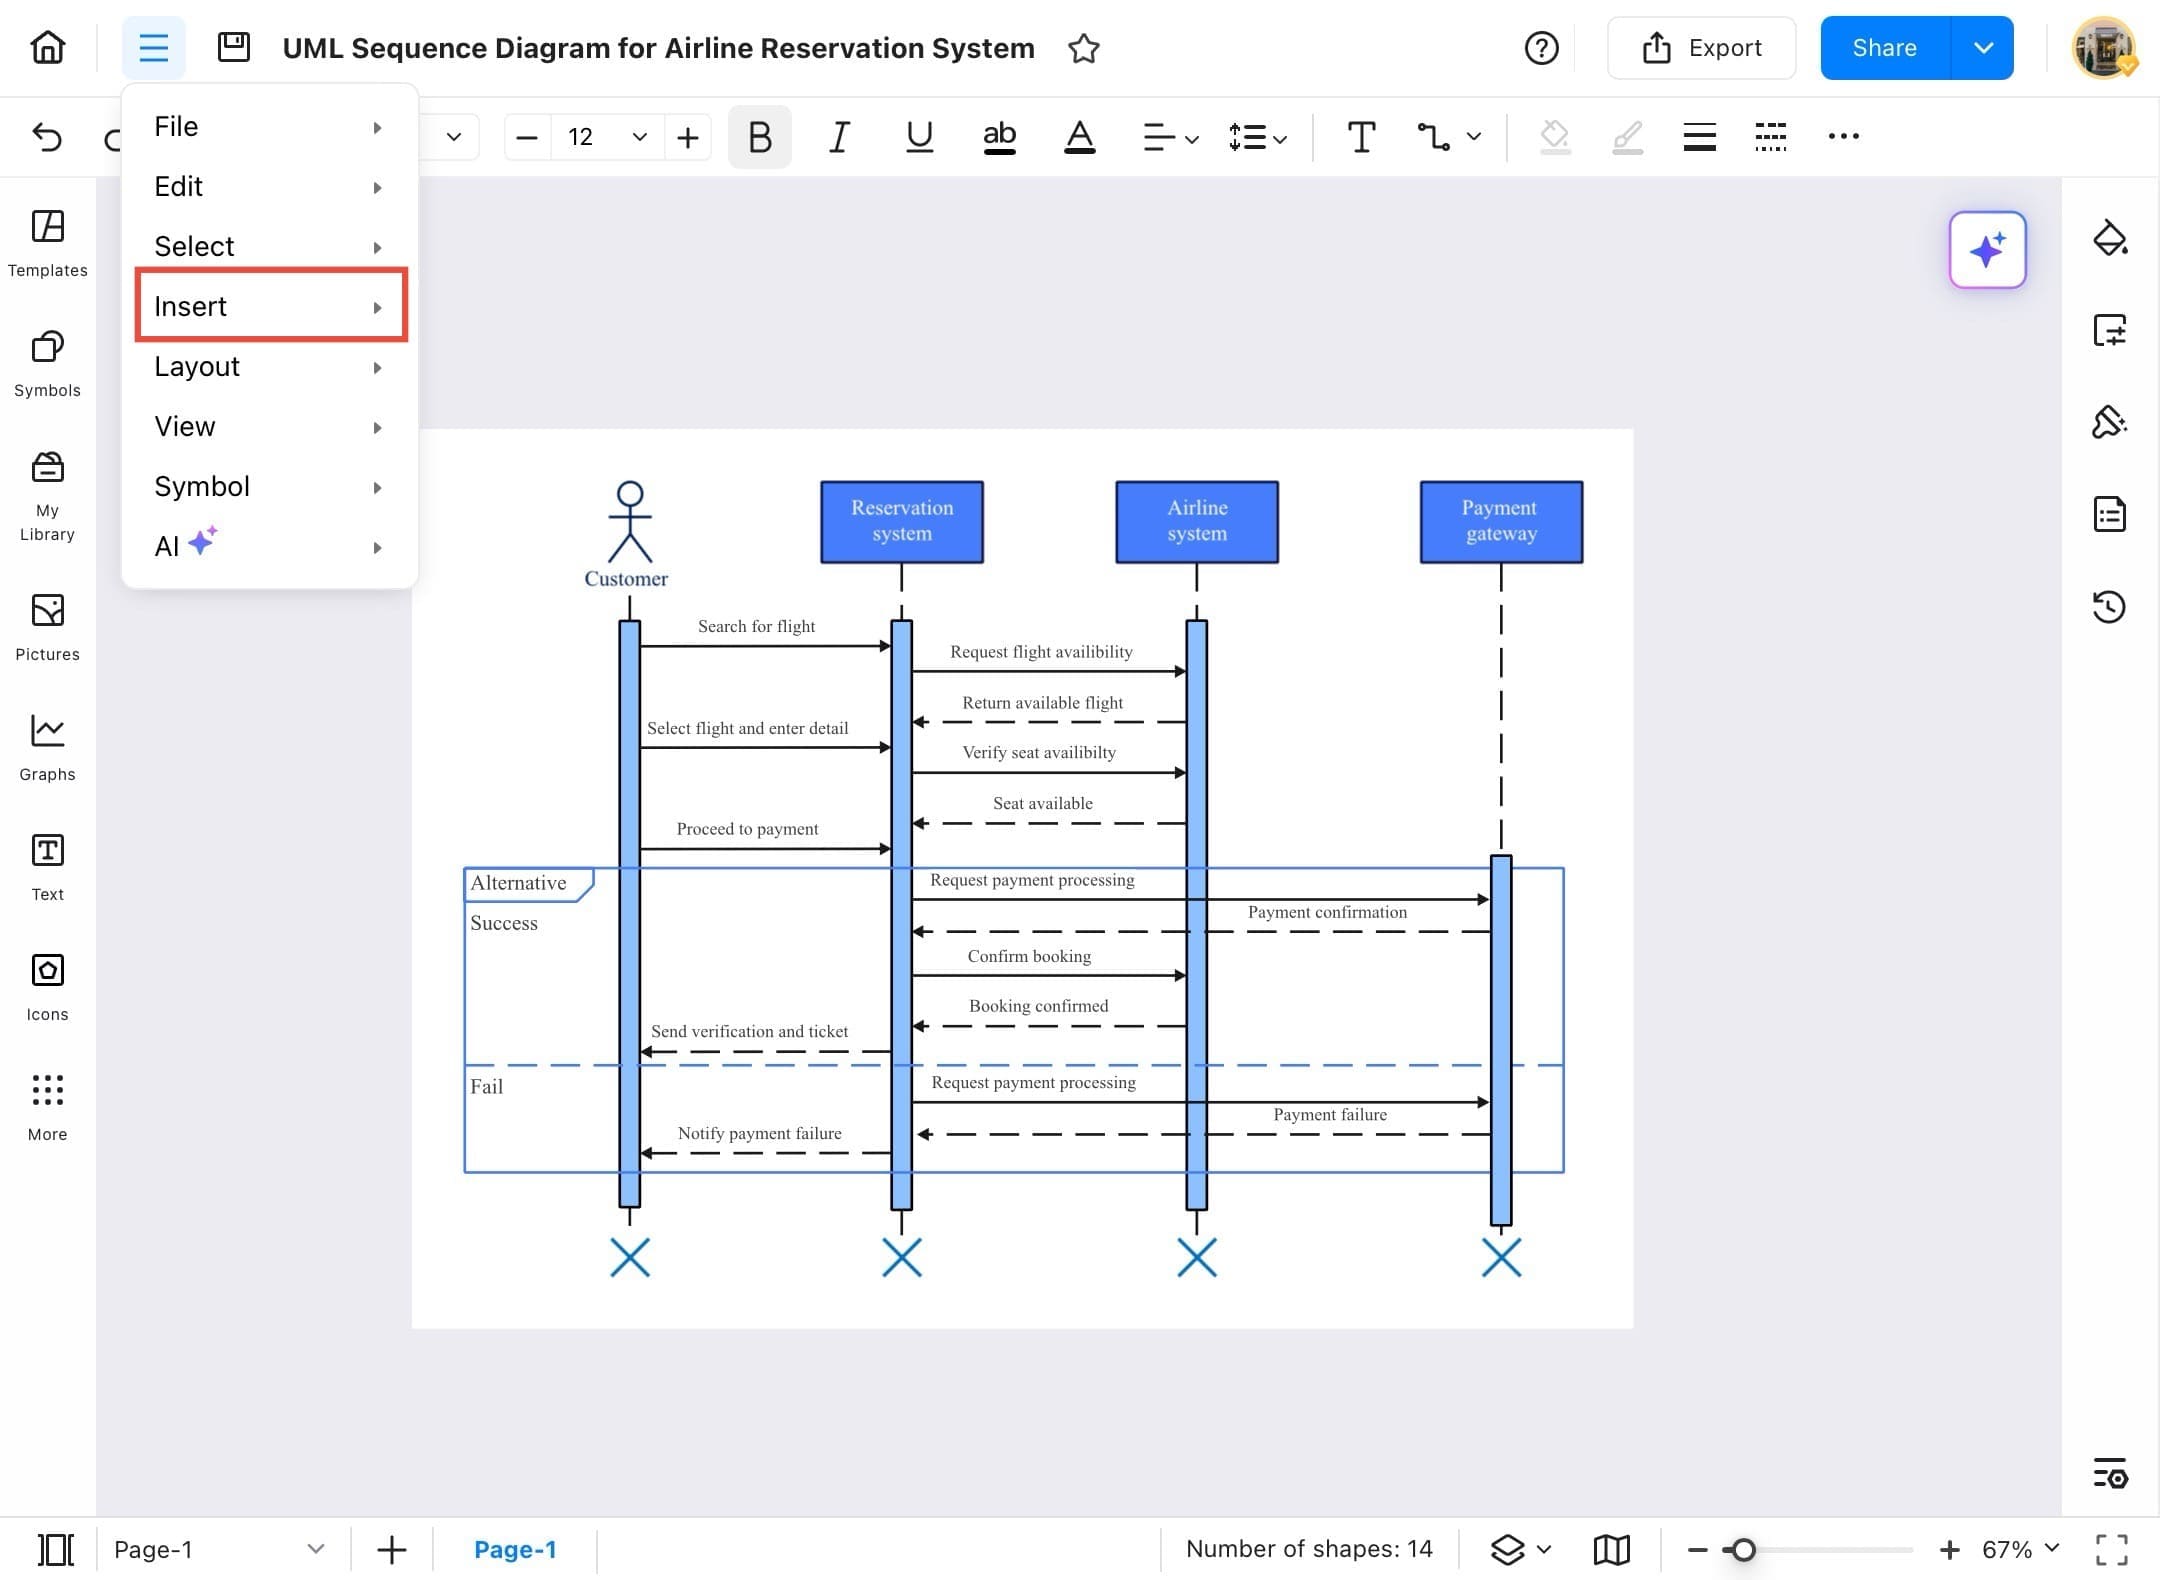
Step ❷ Access Menu Icon
- Once the diagram opens, you can begin editing or inserting content as needed. Tap the hamburger icon for options.
Step ❸ Tap Insert Option
- Tap the Insert option from the top menu to start the image insertion process.
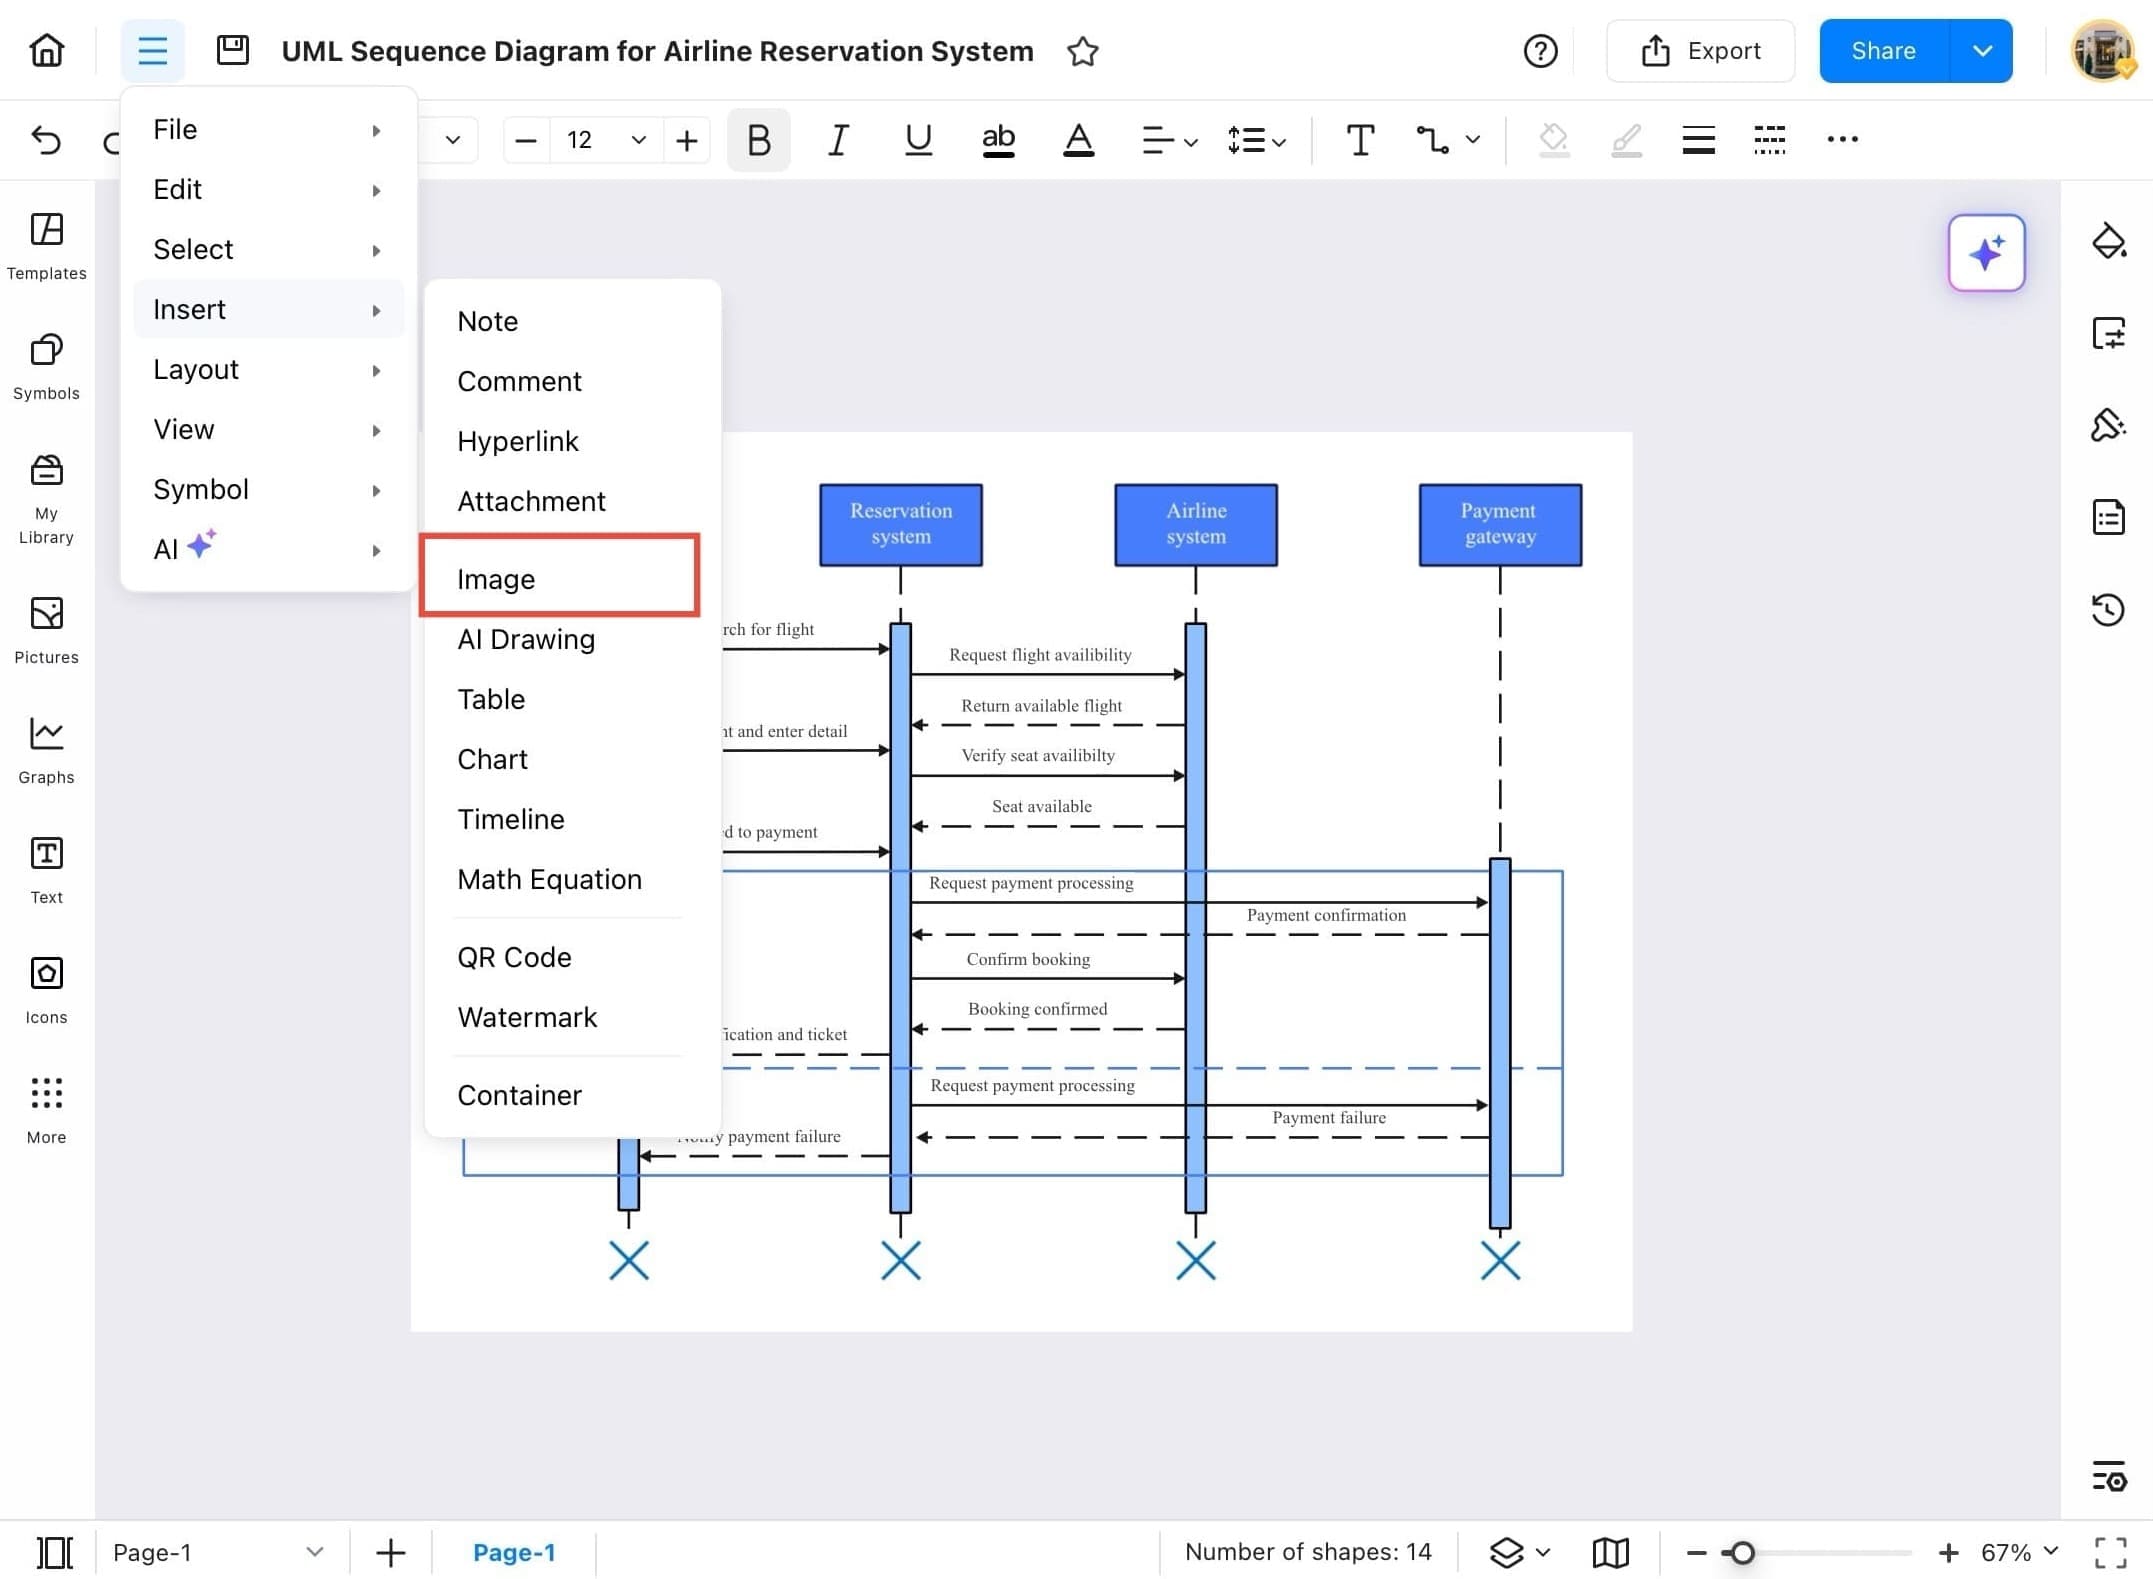
Step ❹ Tap Image
- From the Insert dropdown, tap Image to insert an image into your diagram.
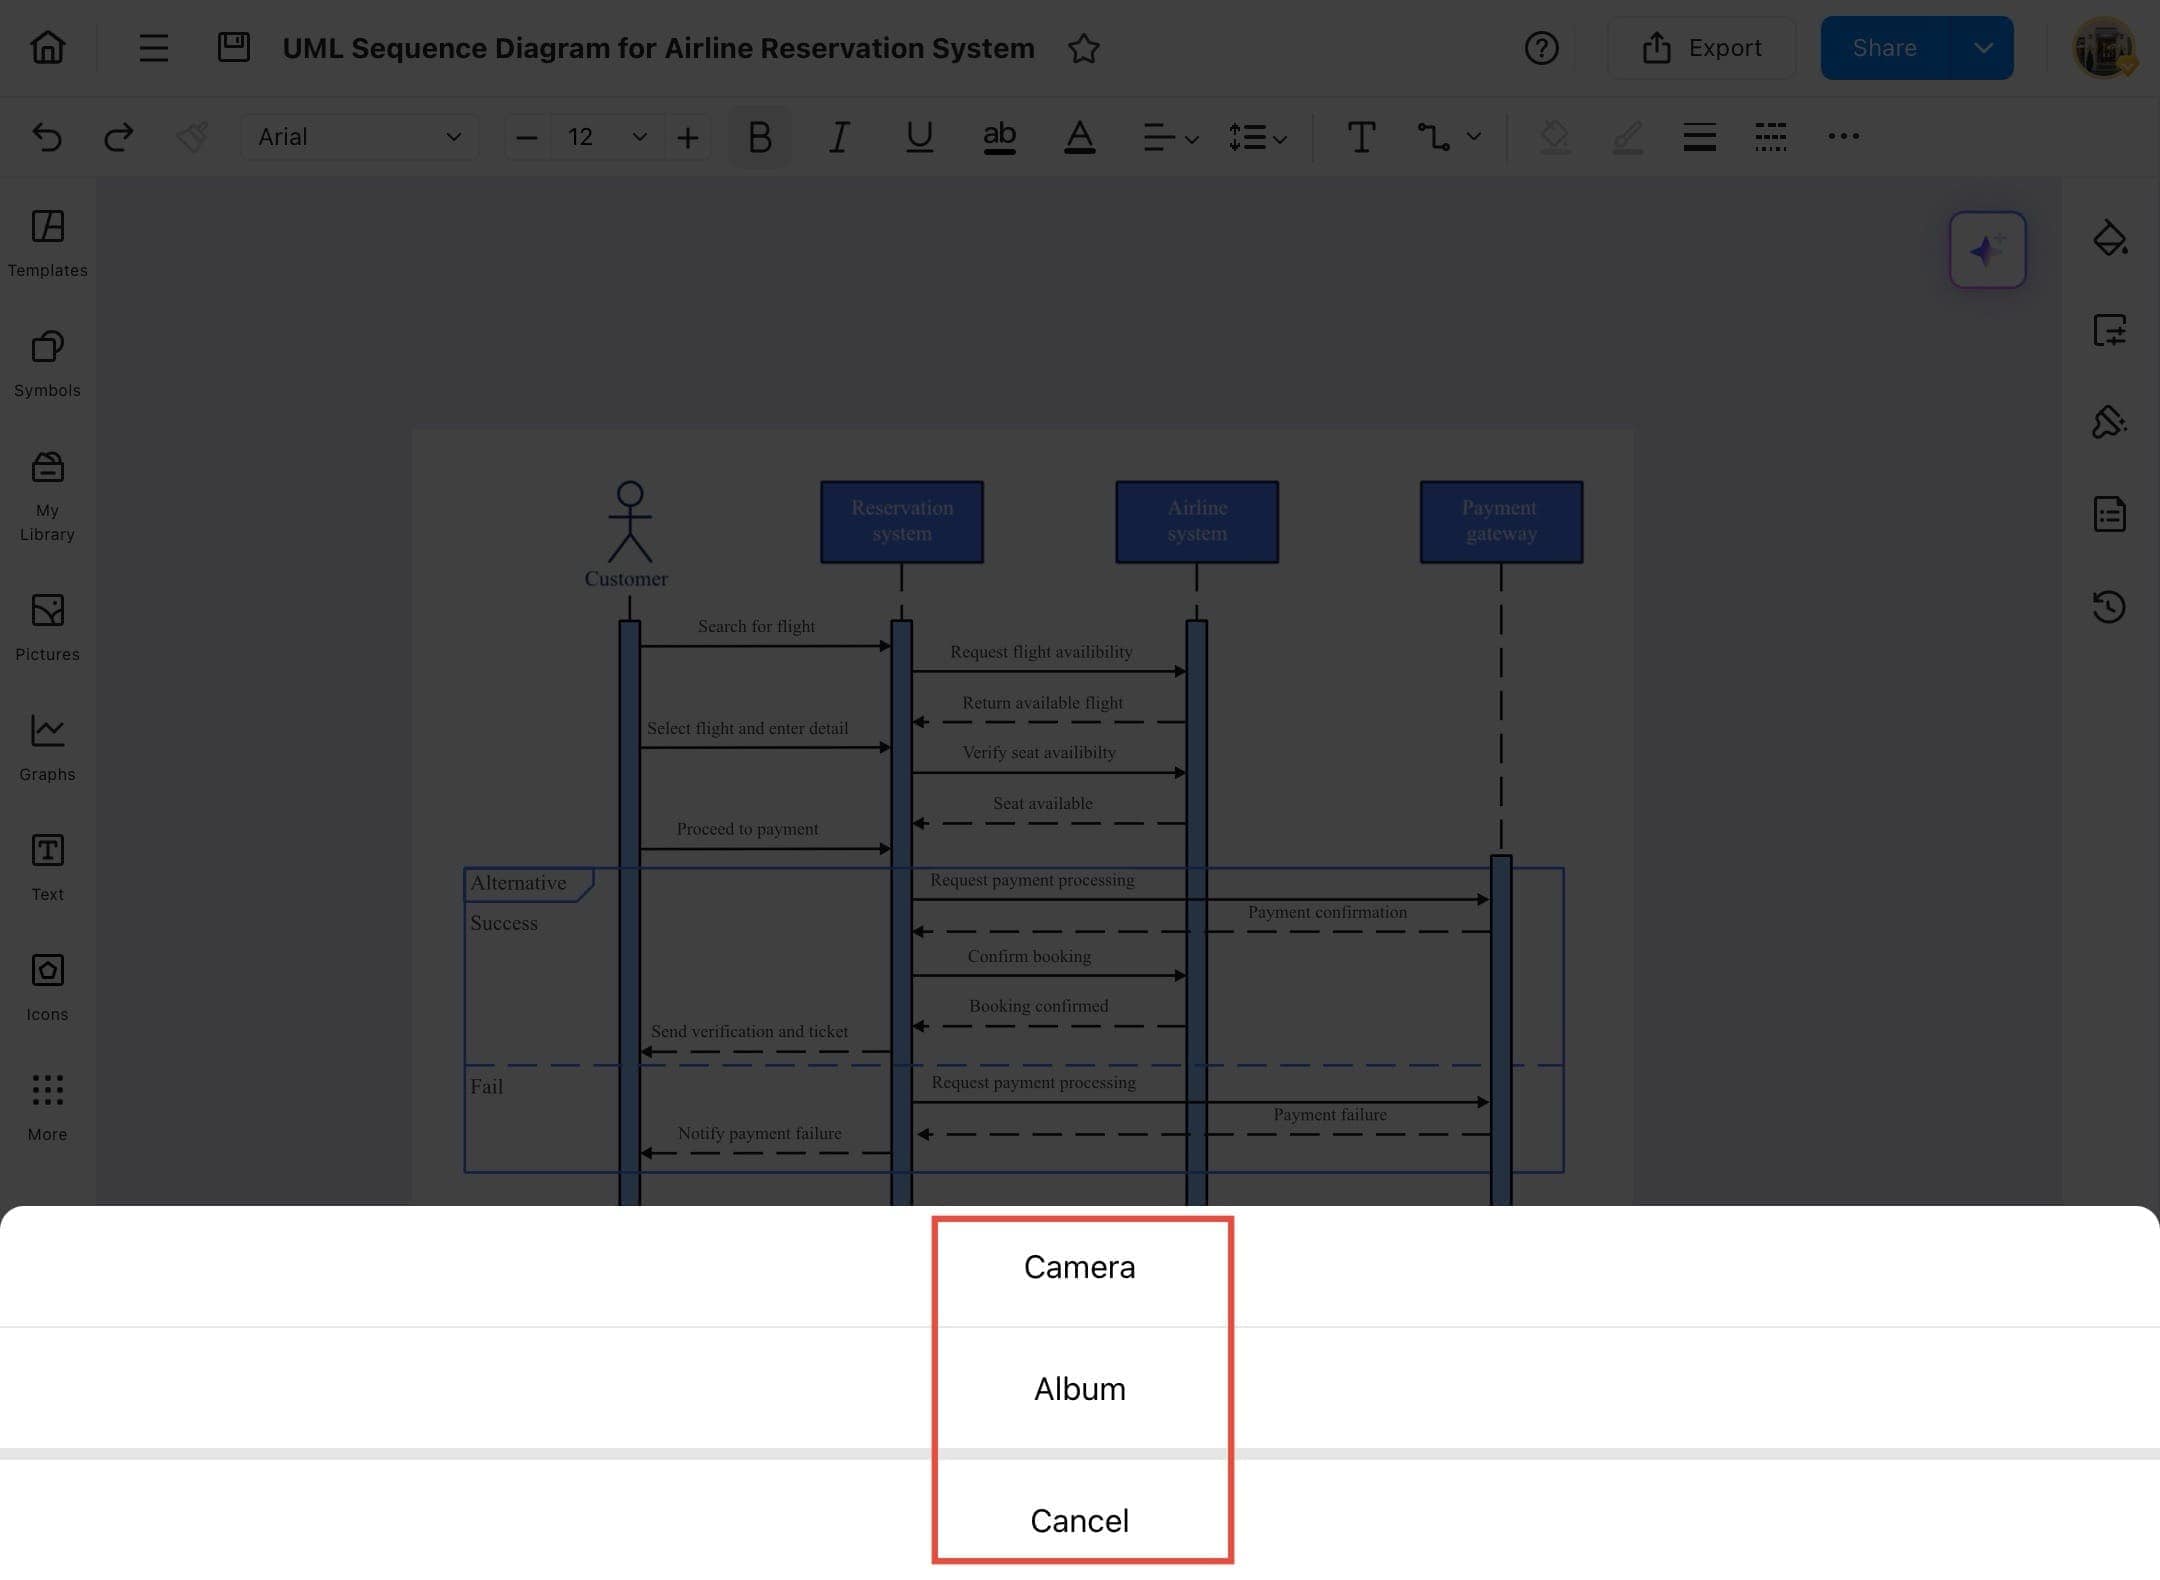
Step ❺ Choose Image Source
- Choose the image source:
- Camera to take a photo immediately
- Album to select from existing images
- Cancel if you want to exit
Step ❻ Adjust Image on Canvas
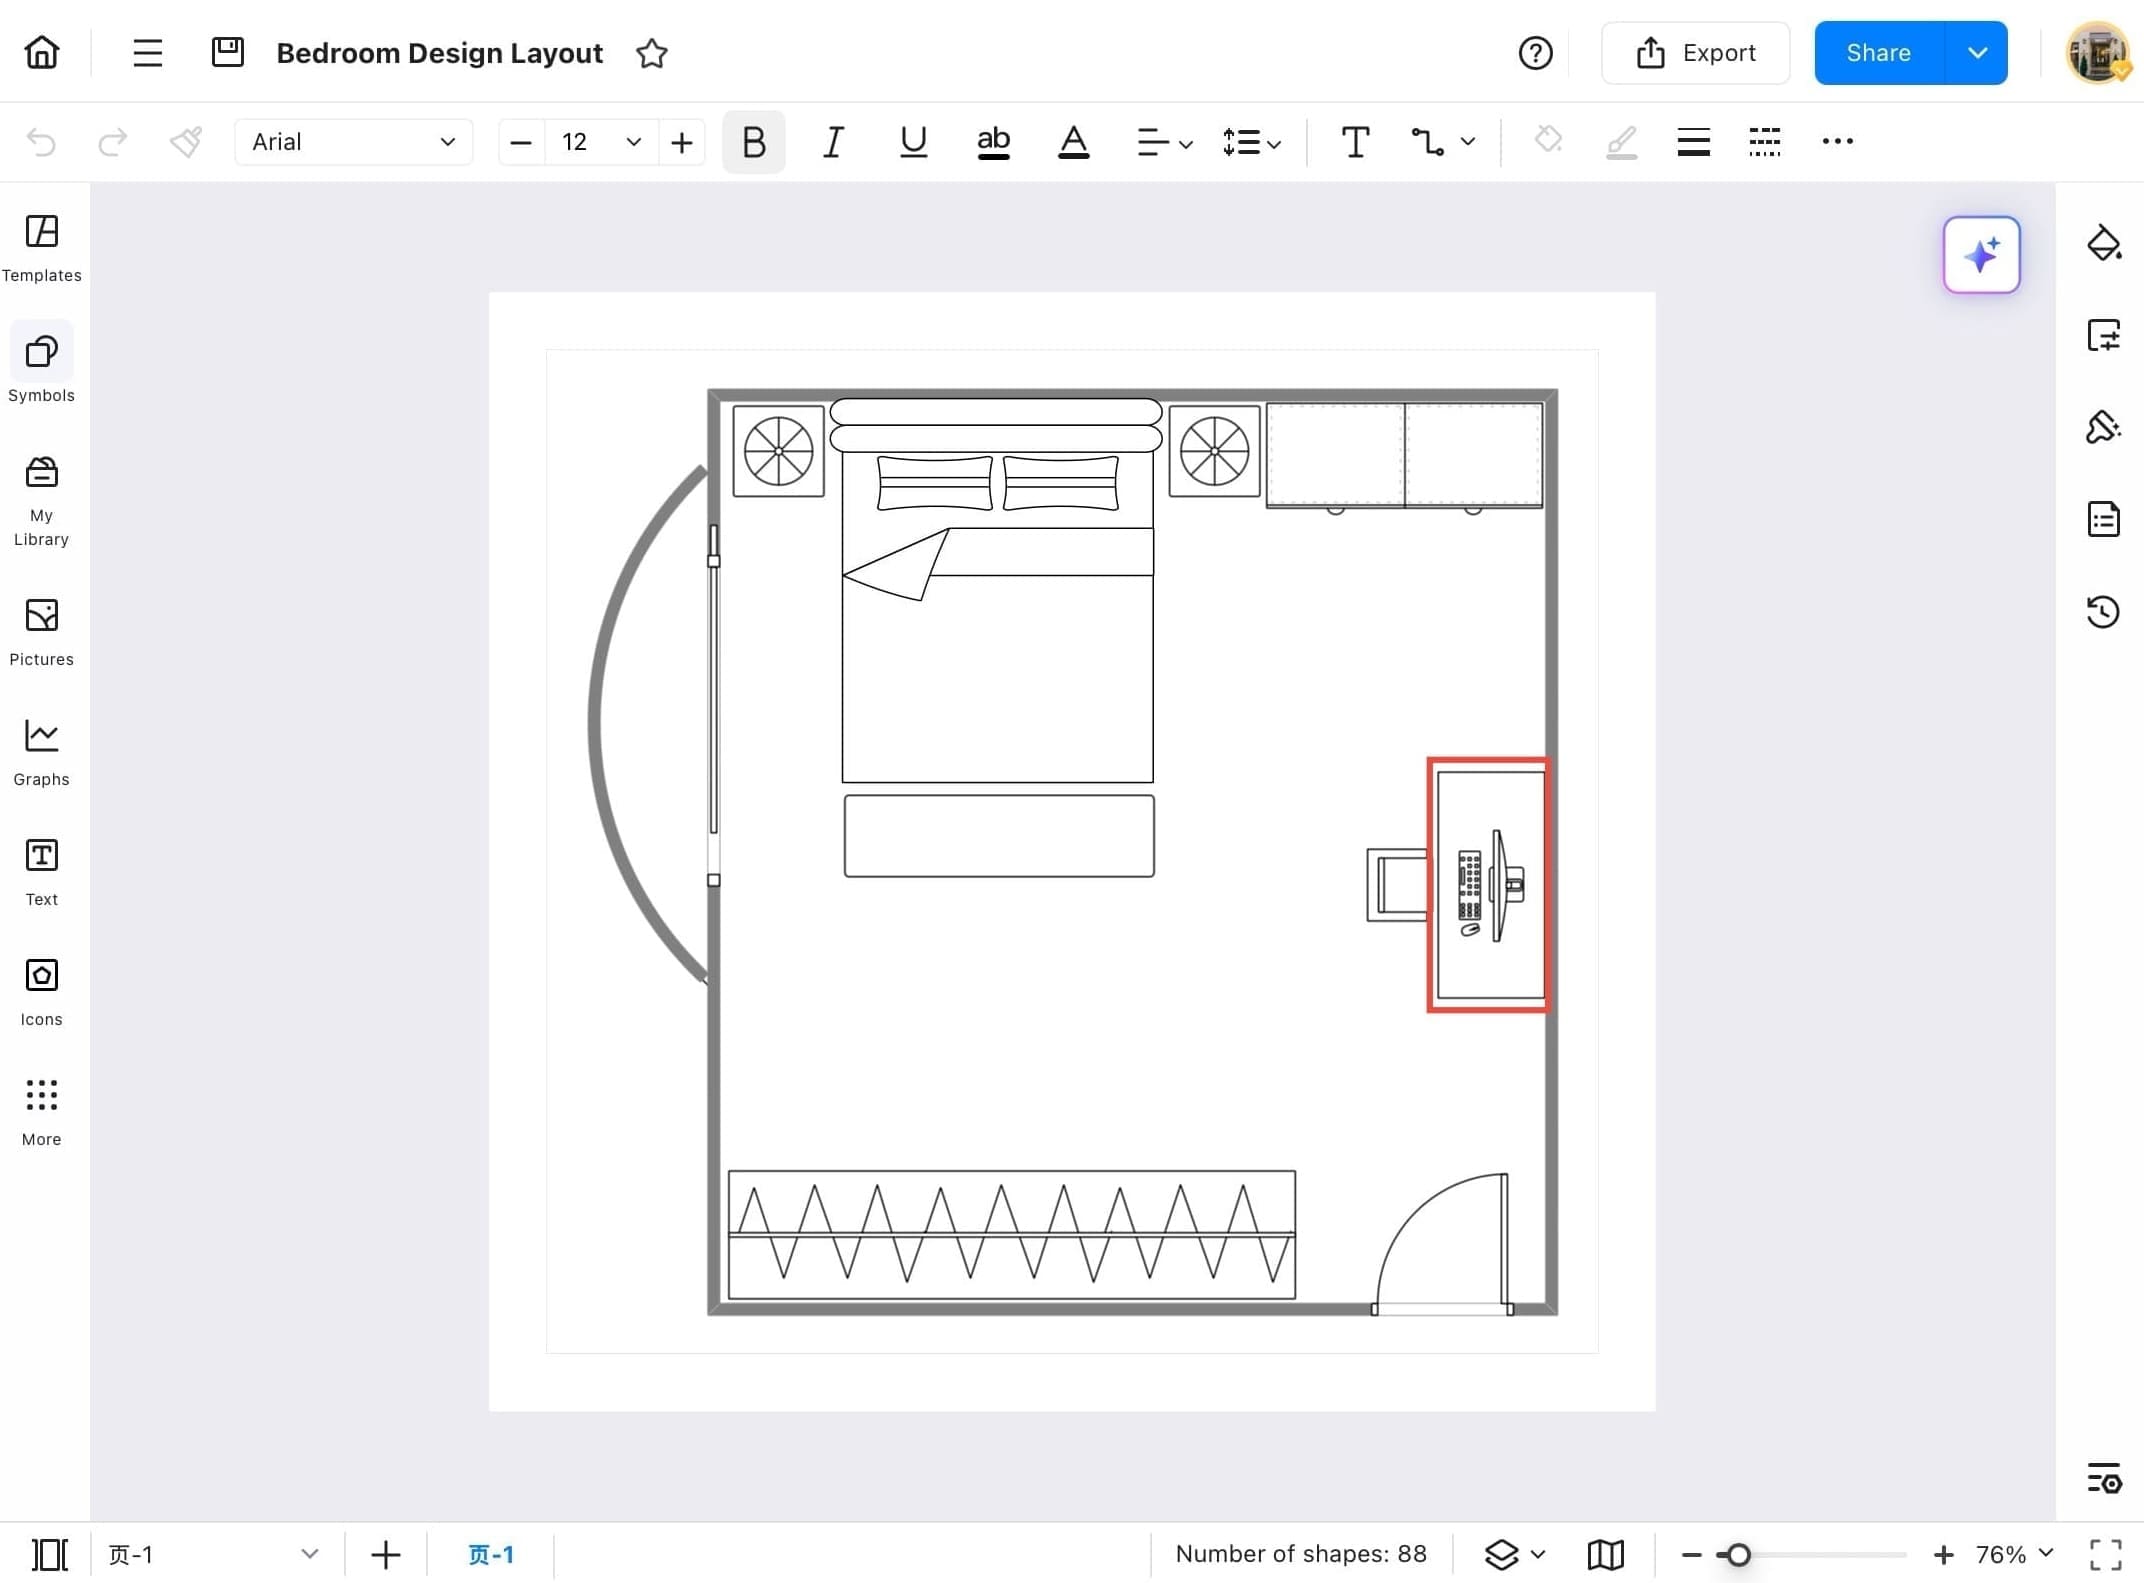
- Once the image is inserted, it will appear over your diagram. You can resize or move it as needed.
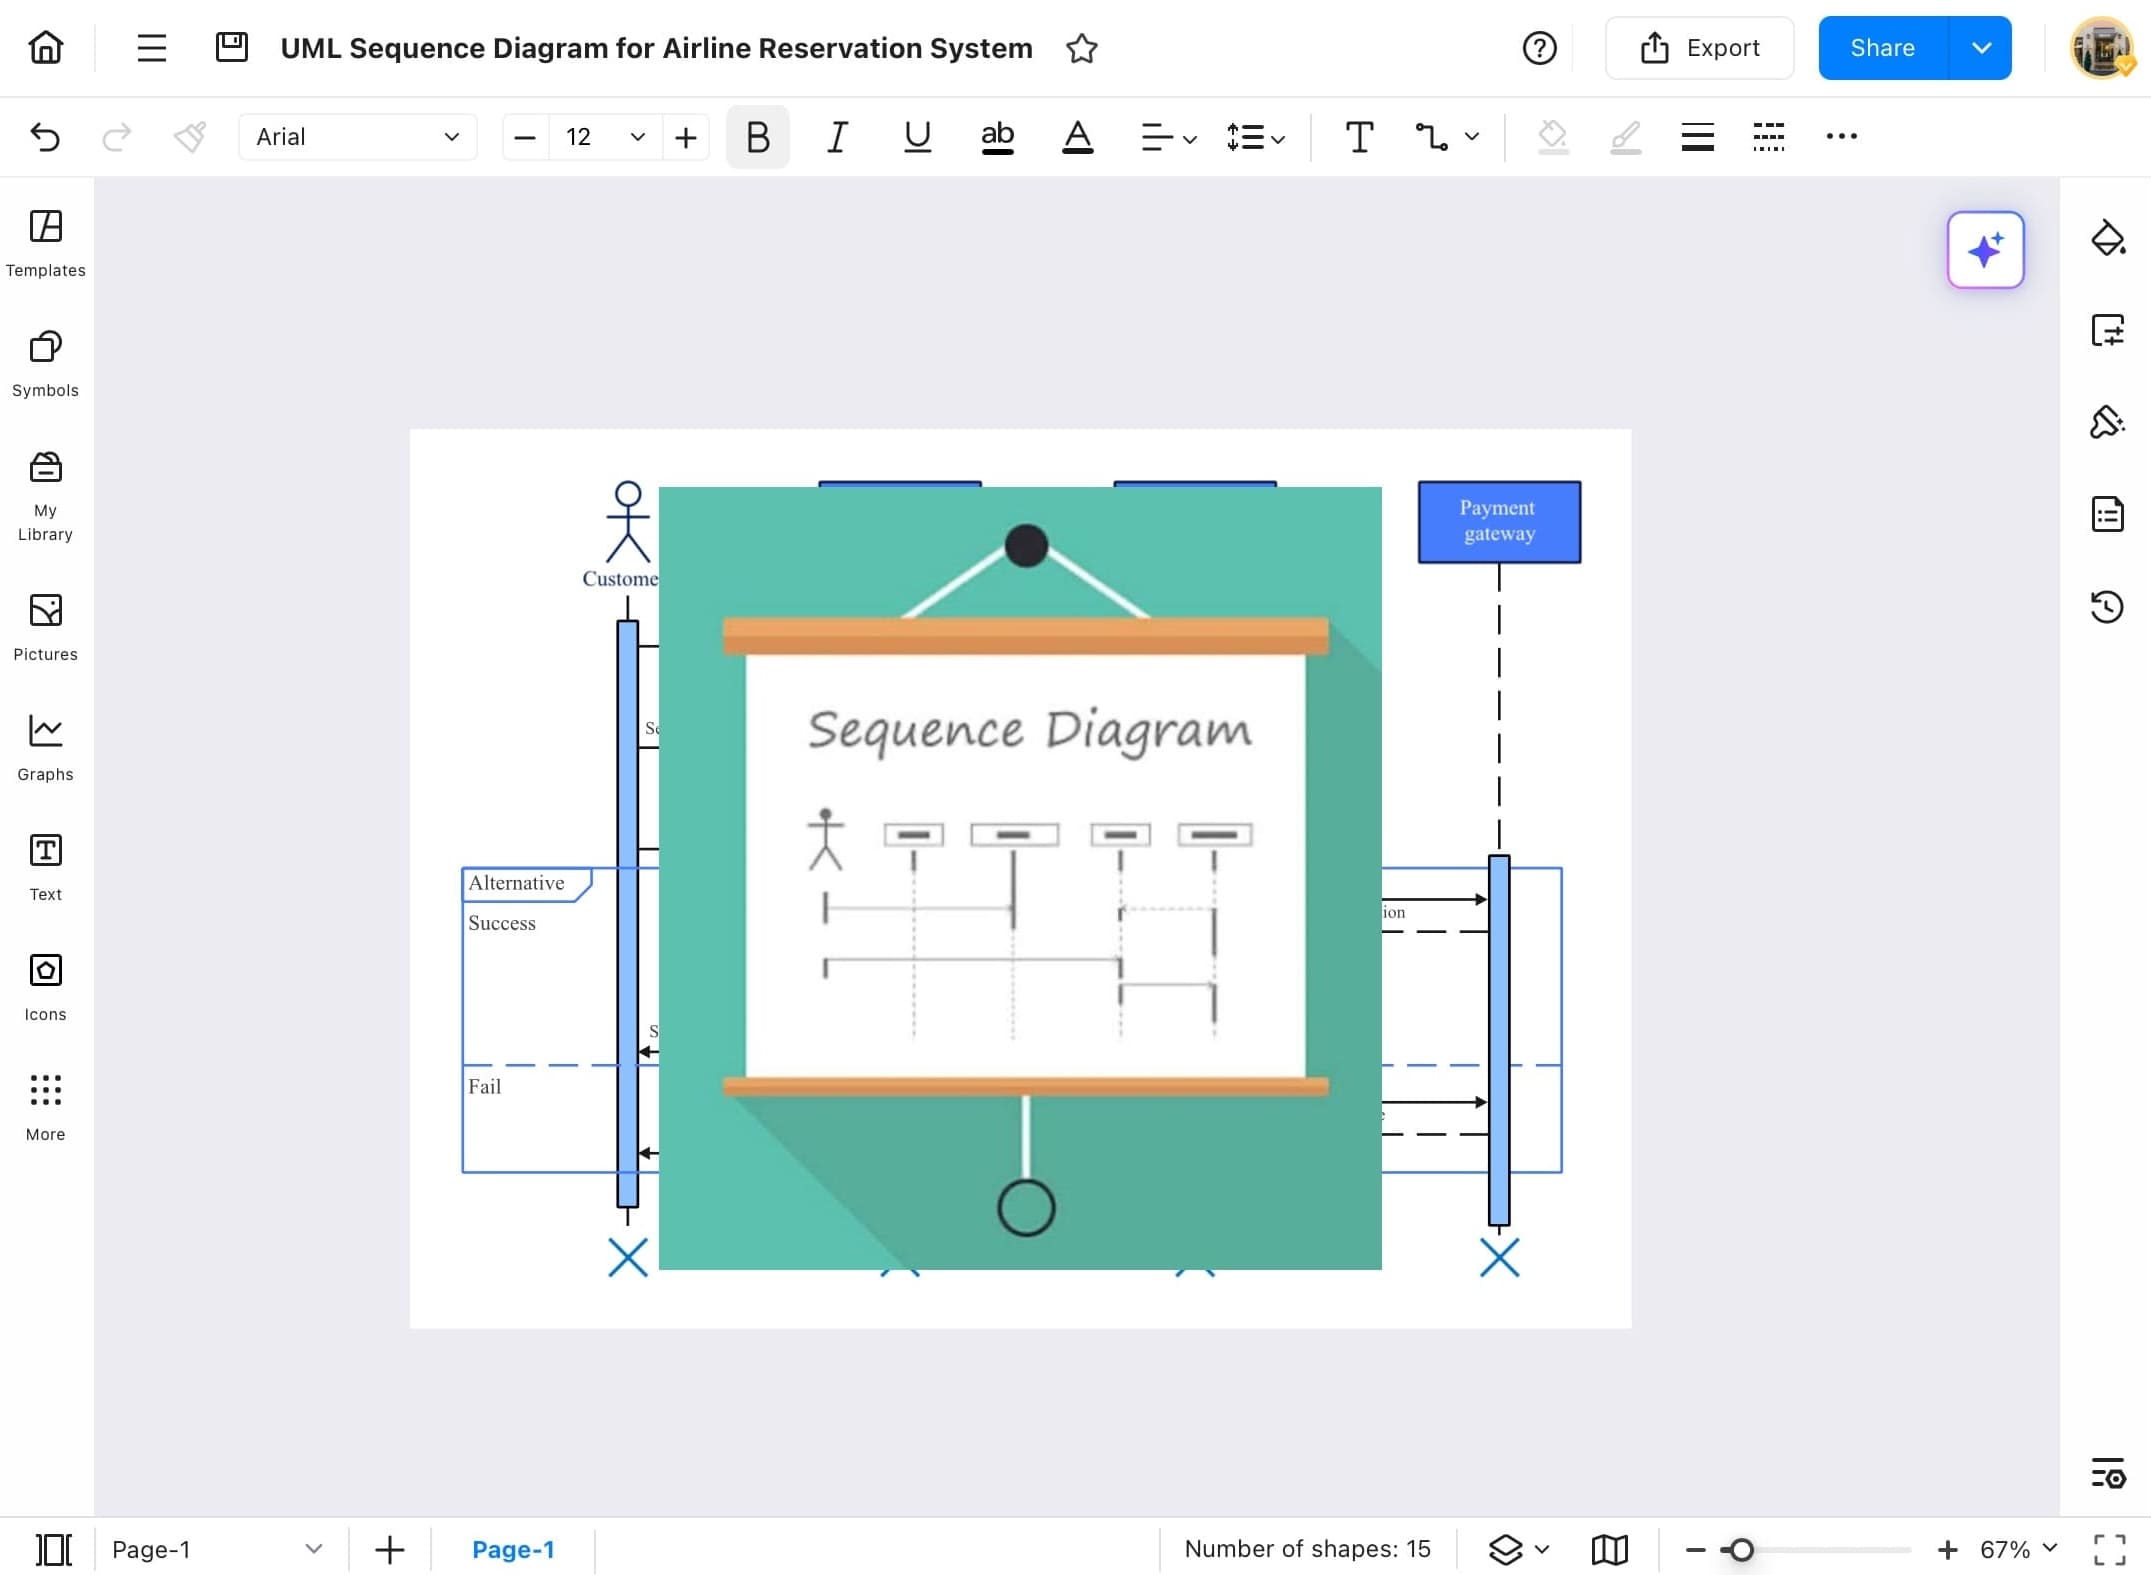
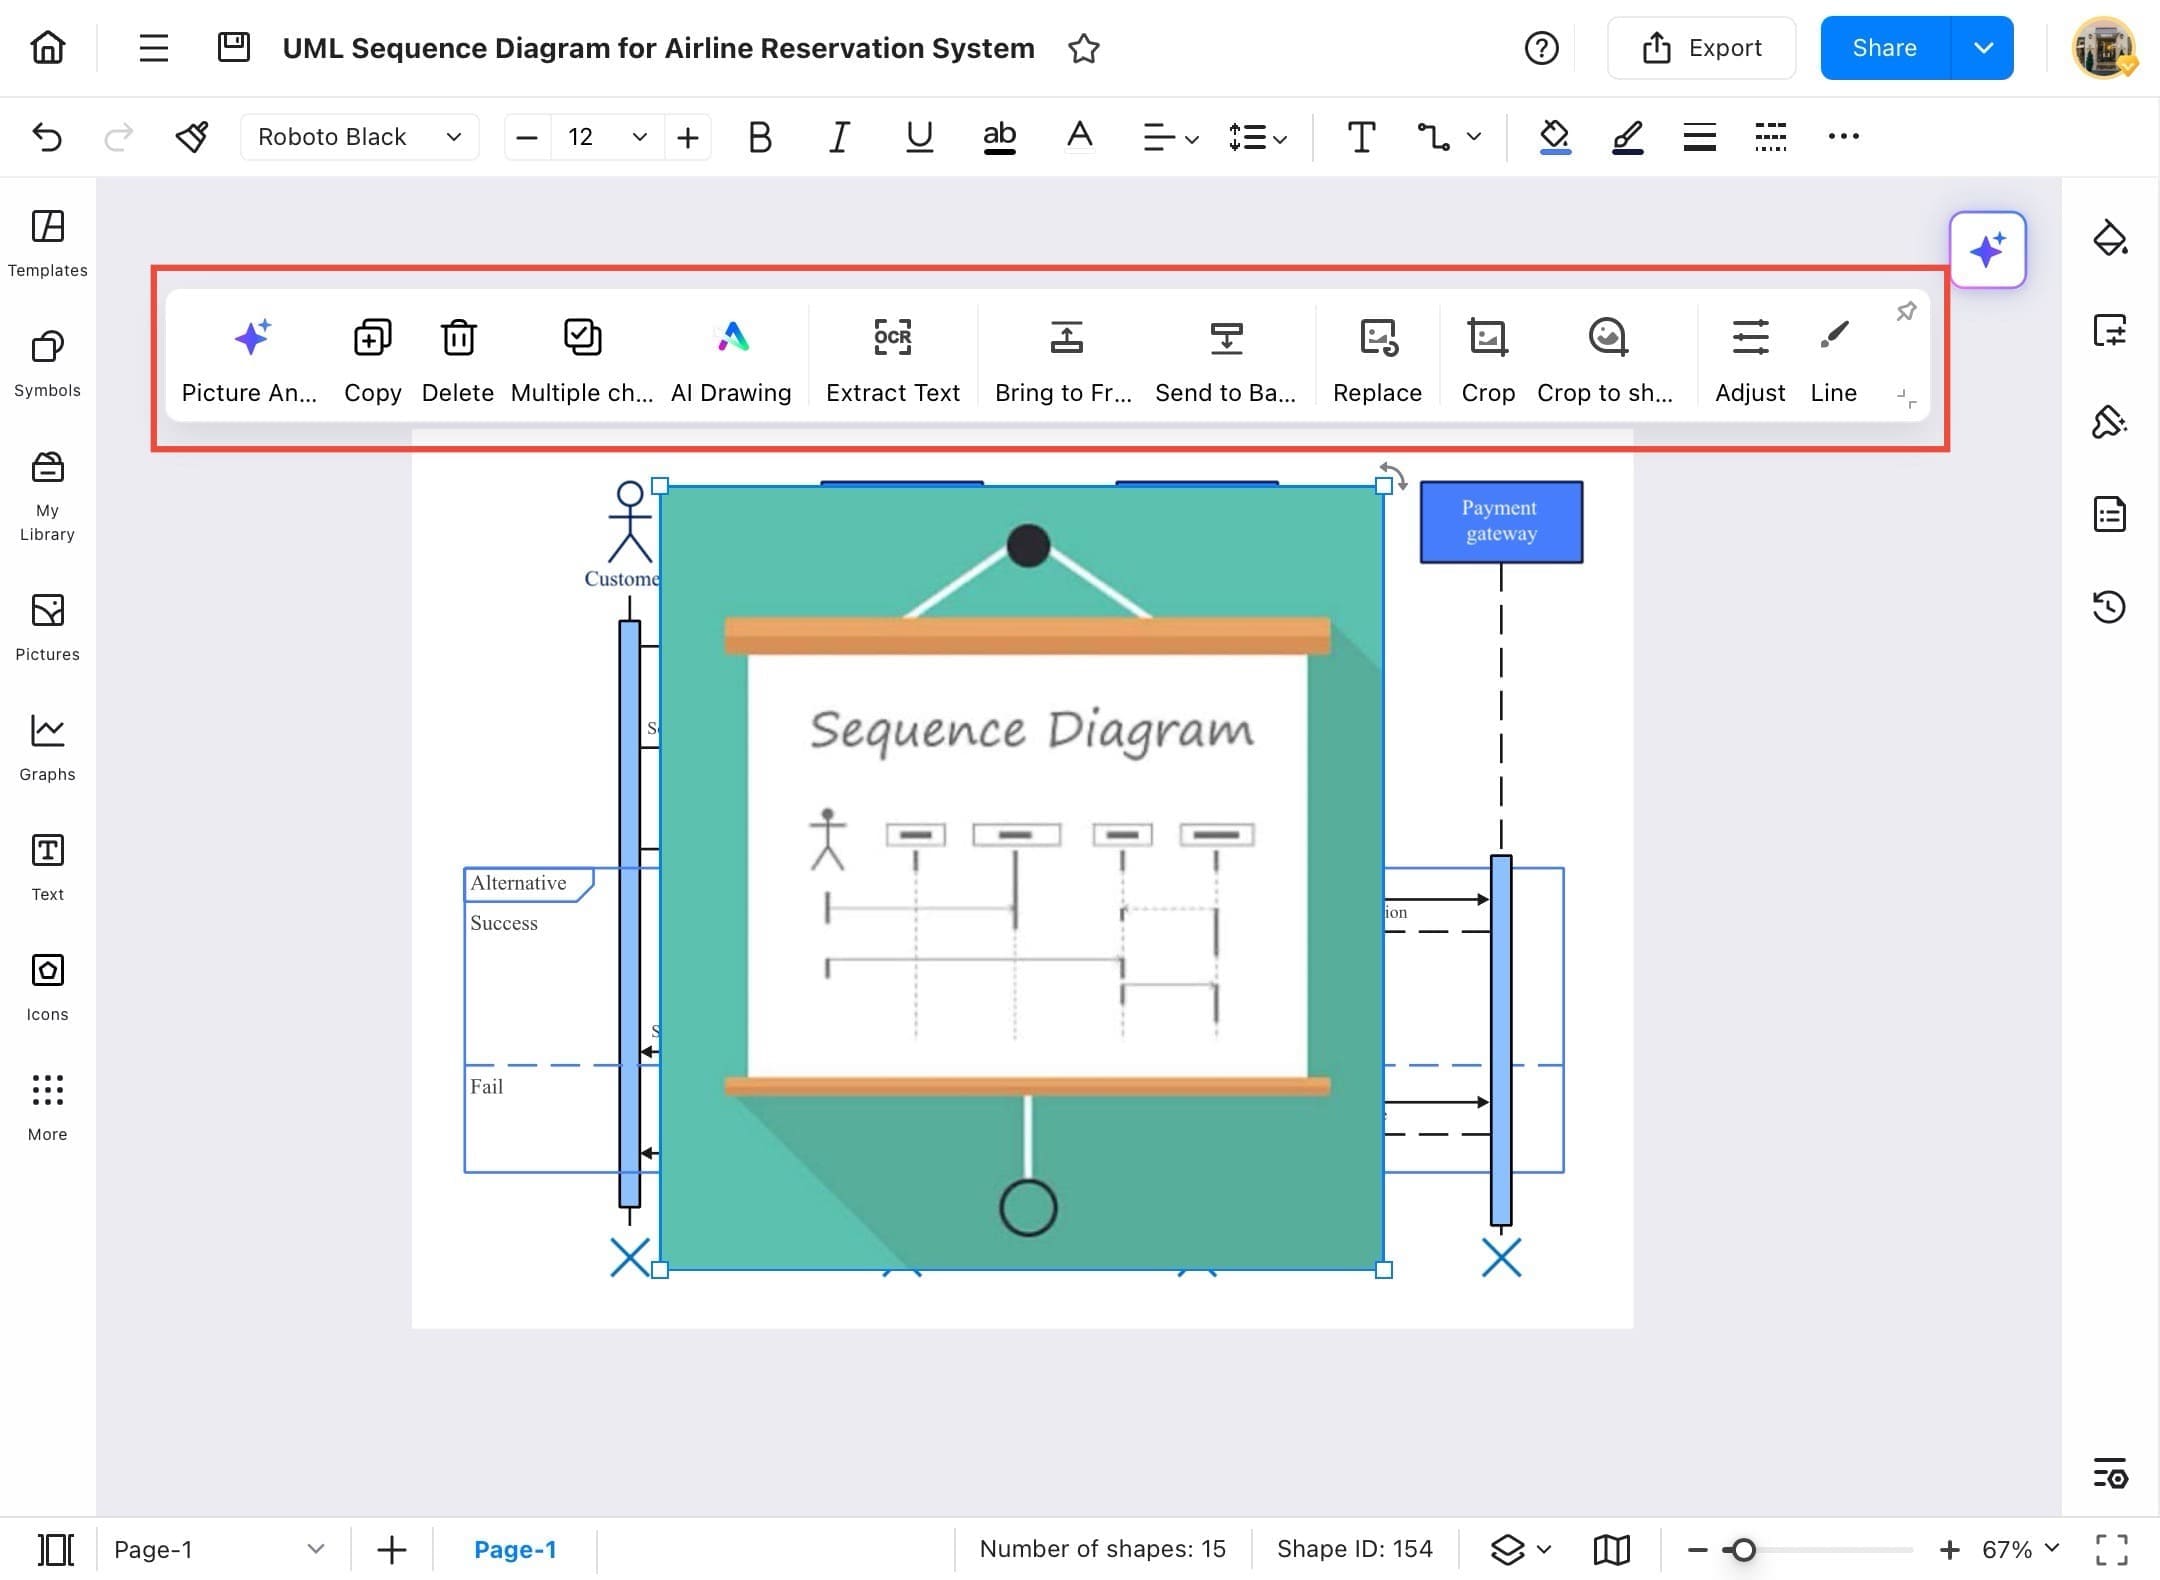
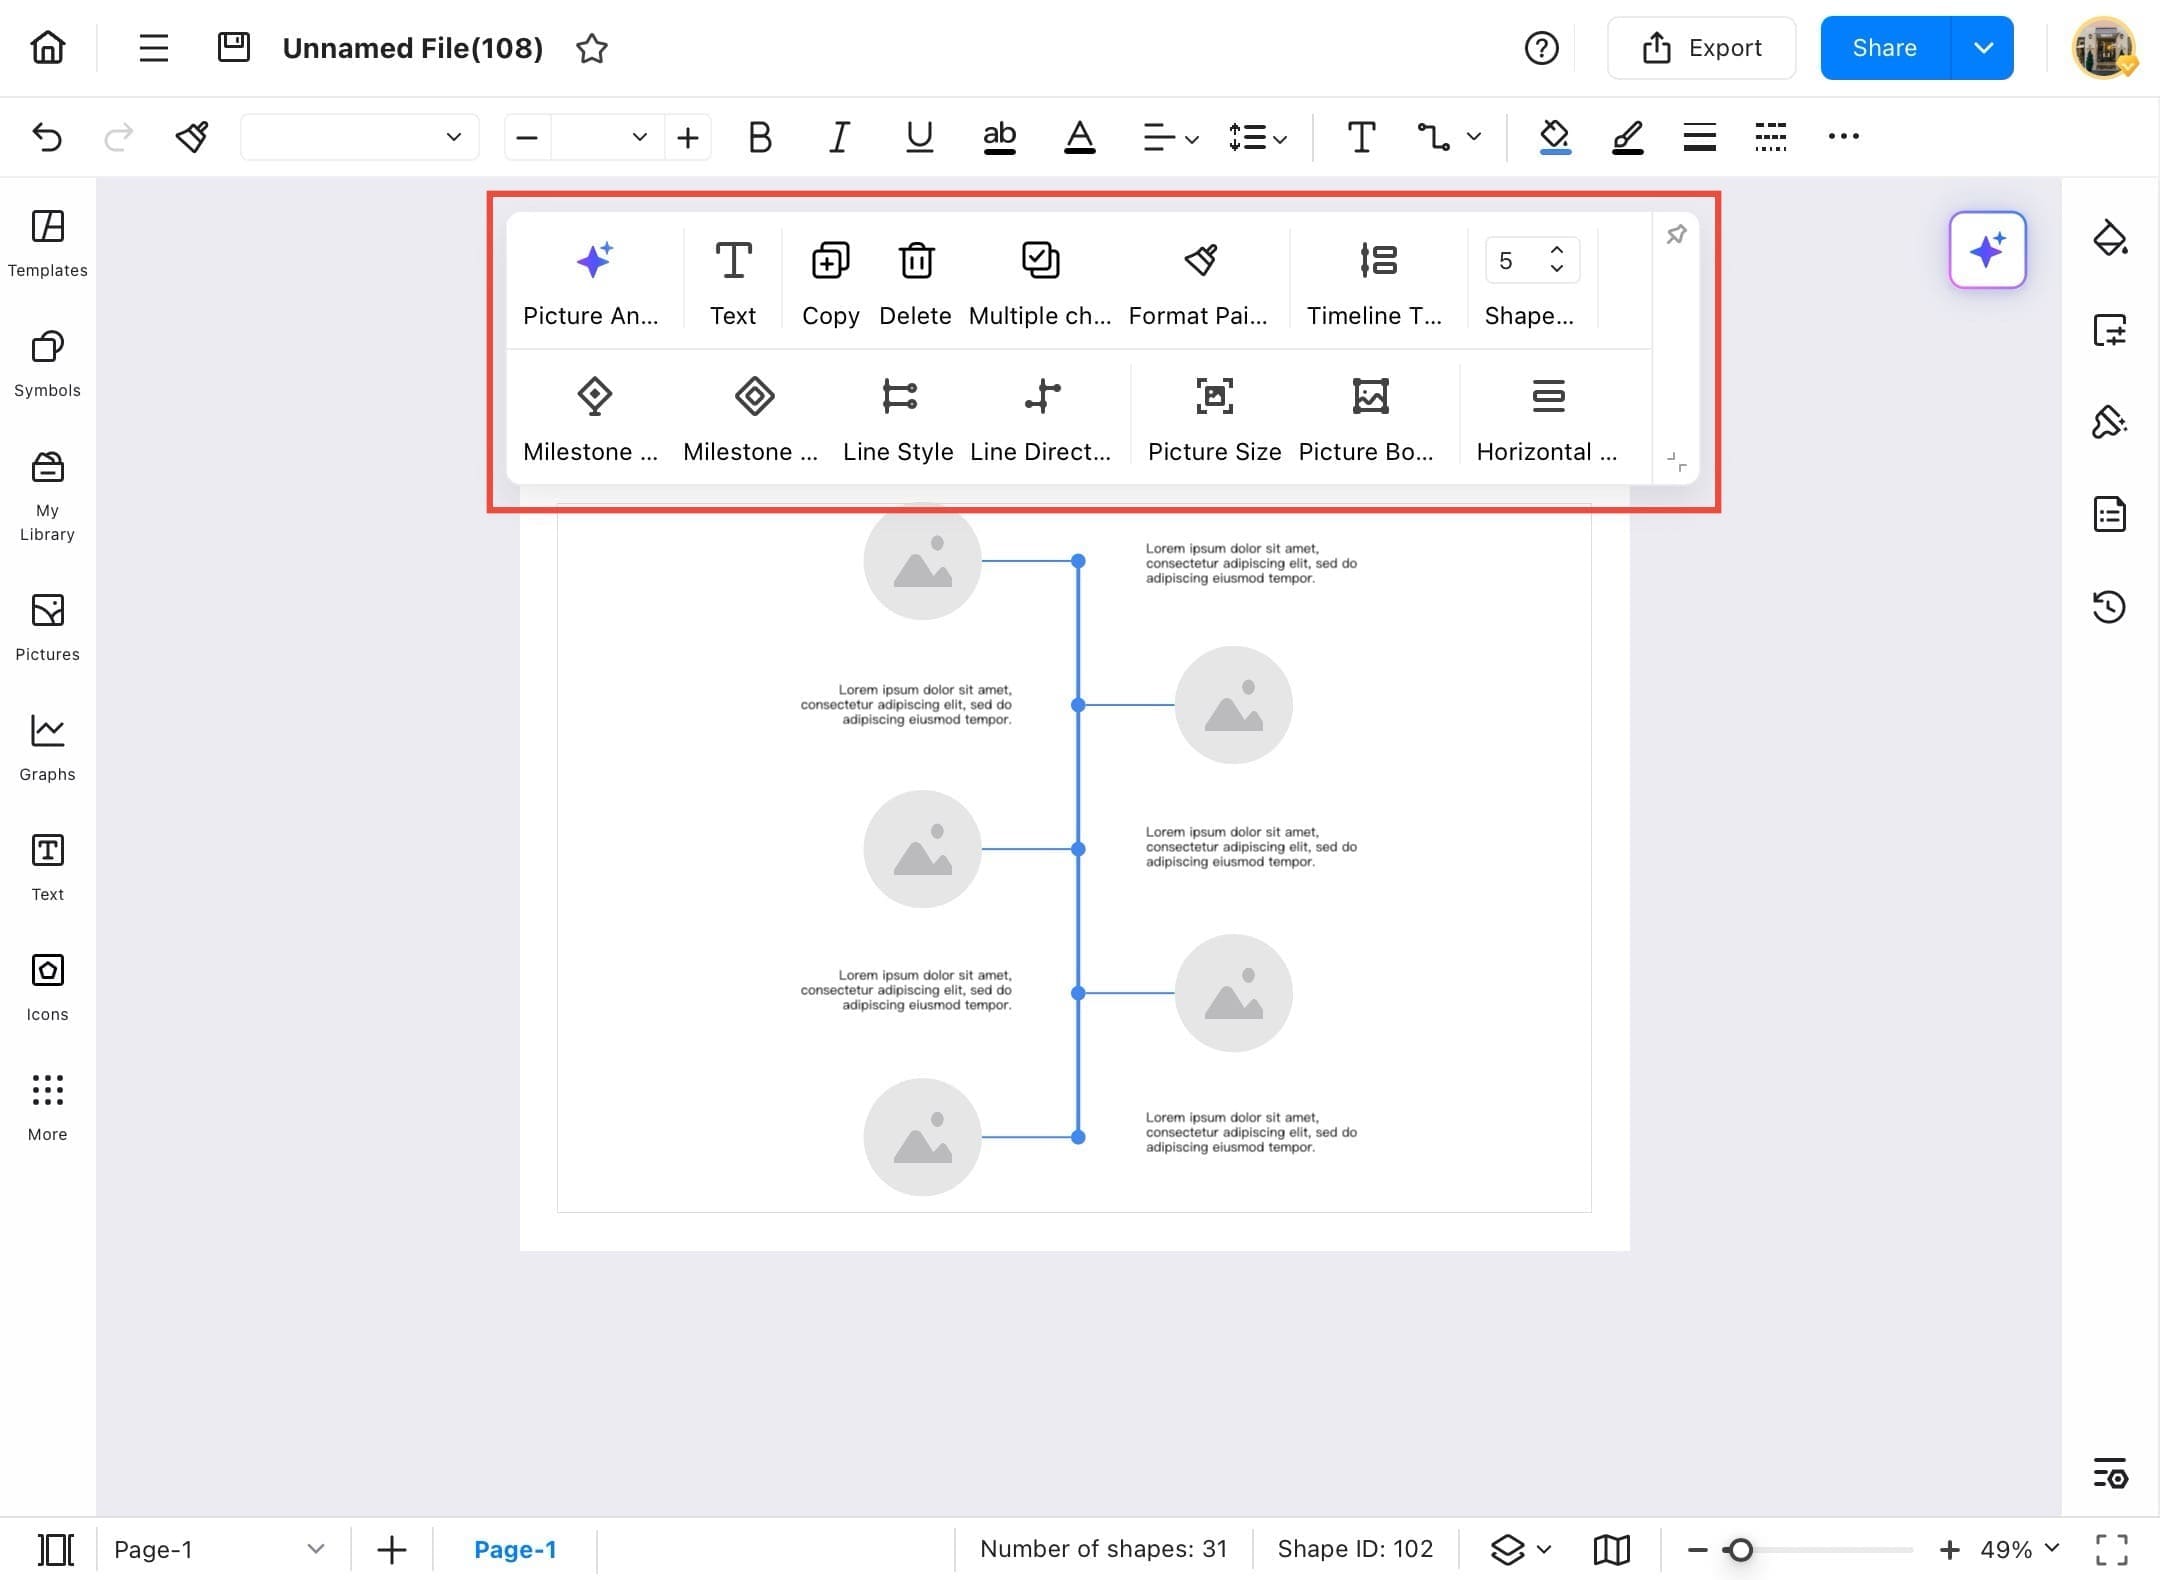
Step ❼ Use the Editing Toolbar
- A toolbar will appear above the selected image with several options. You can delete, replace, crop, or adjust the image here.
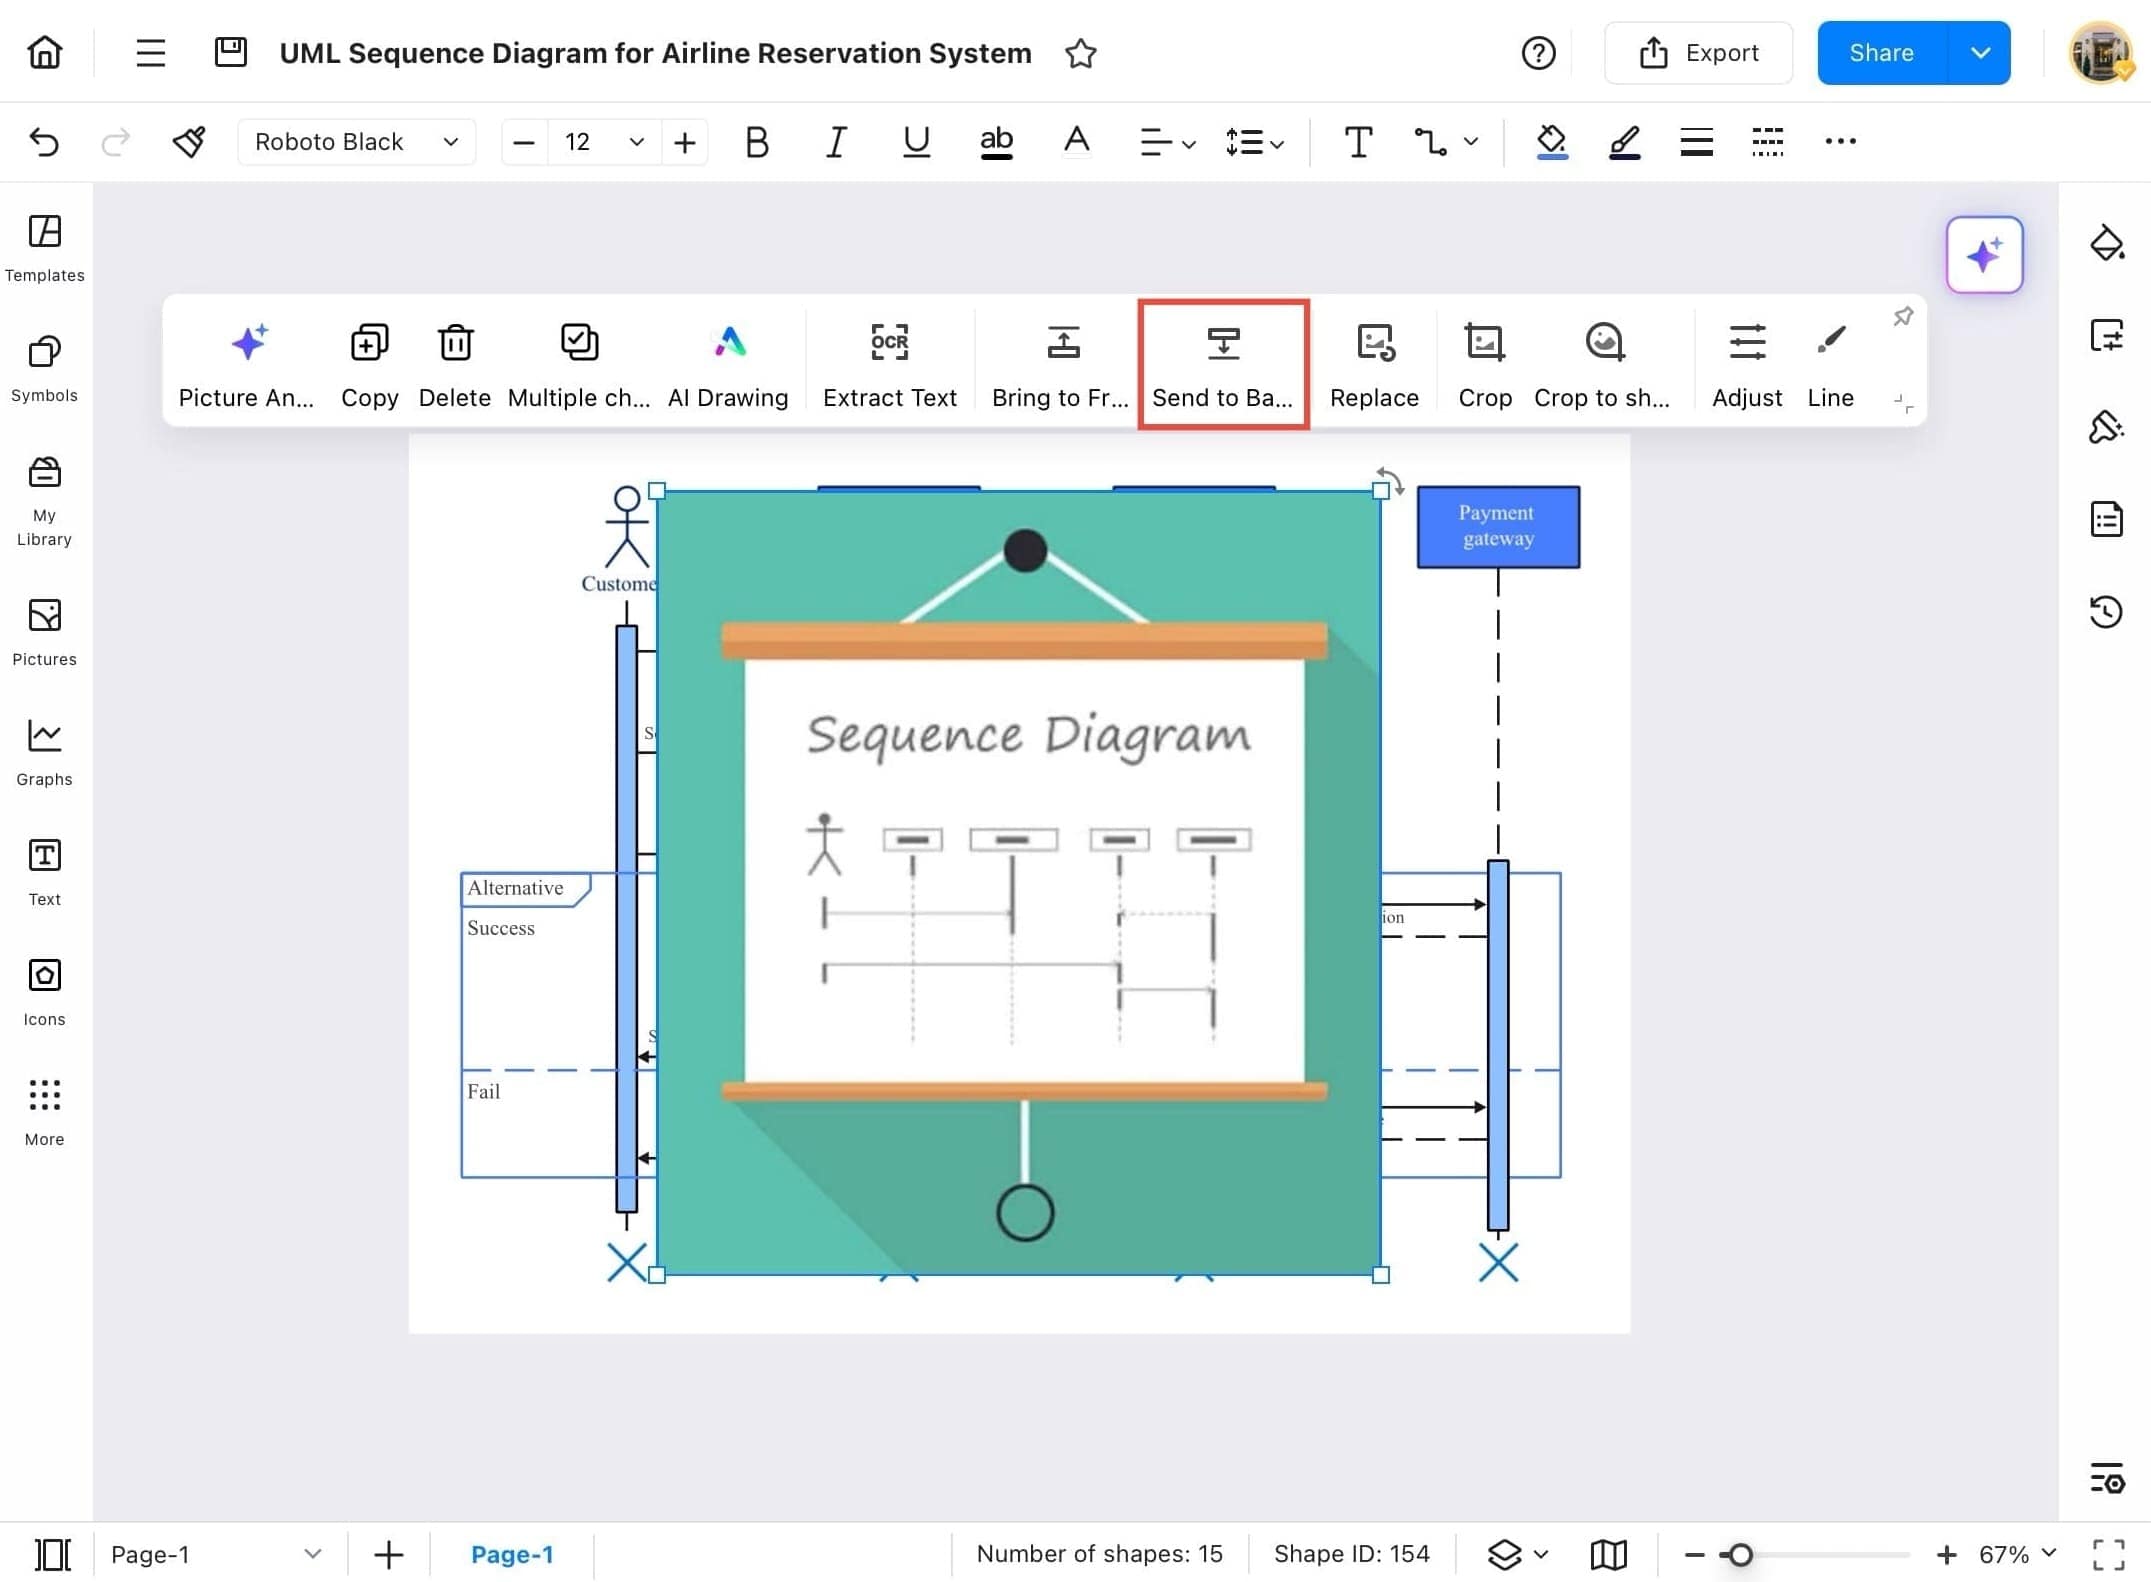
Step ❽ Send Image to Back (Optional)
- To send the image behind the diagram (so it doesn’t block elements), tap Send to Back from the toolbar.
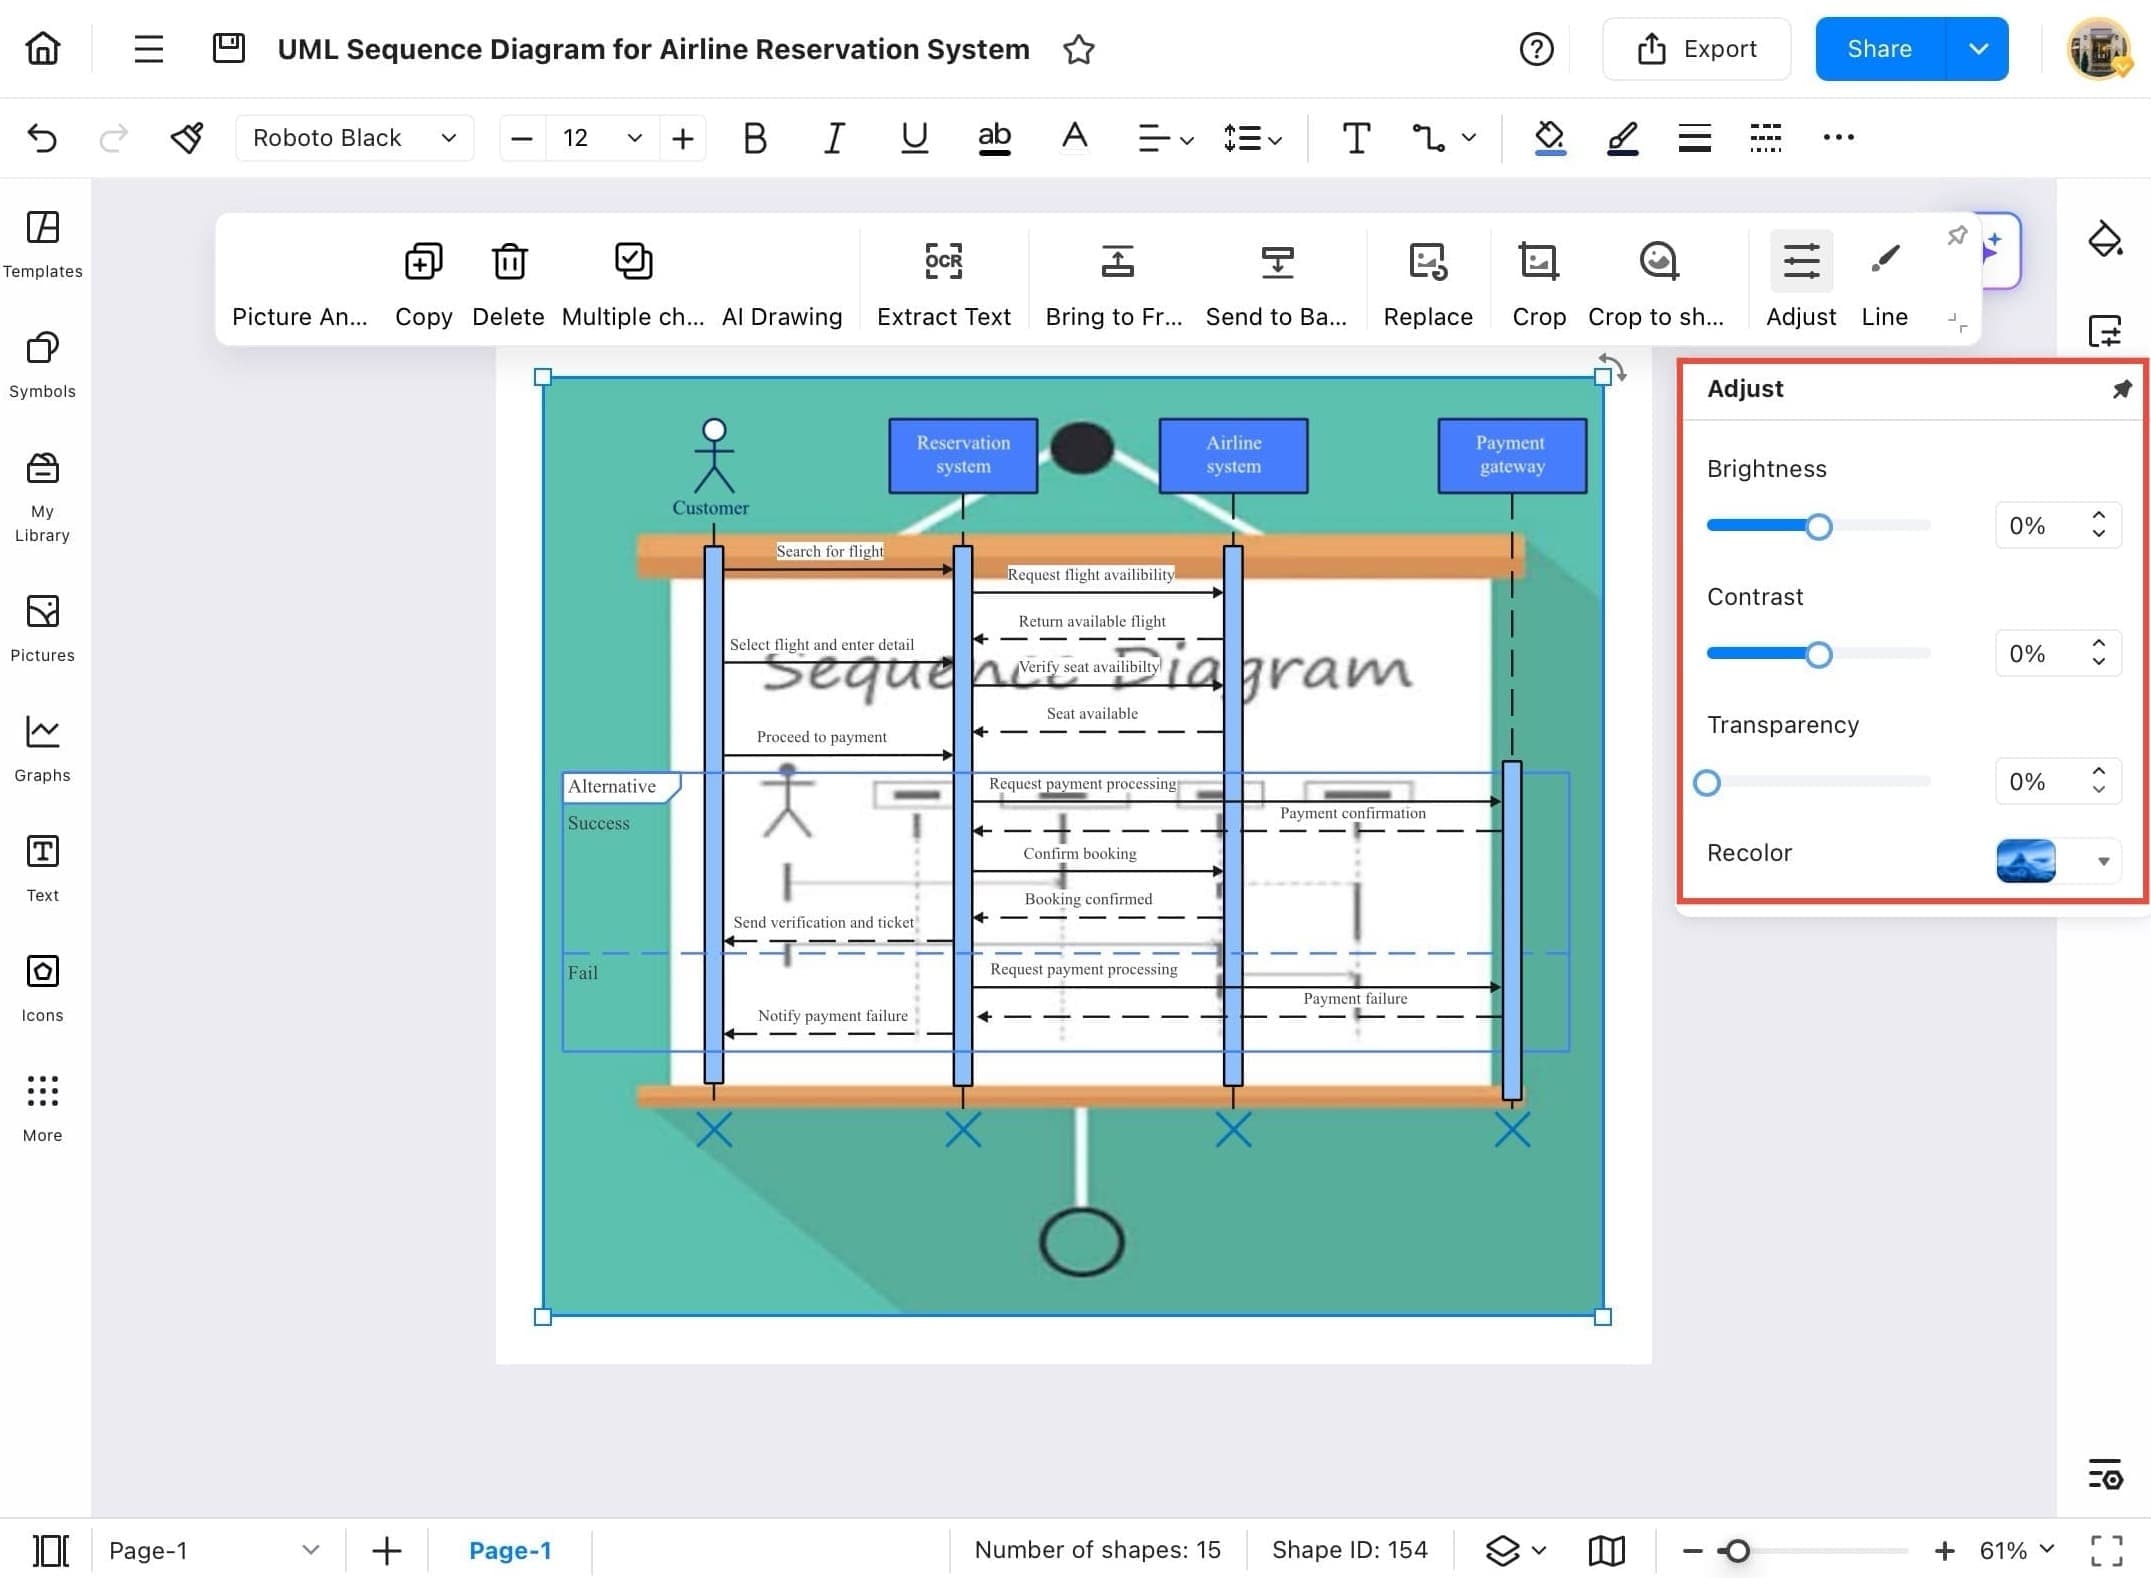
Step ❾ Access Adjust Settings
- Tap the Adjust icon (three lines with sliders) on the right end of the image toolbar to reveal image adjustment settings.
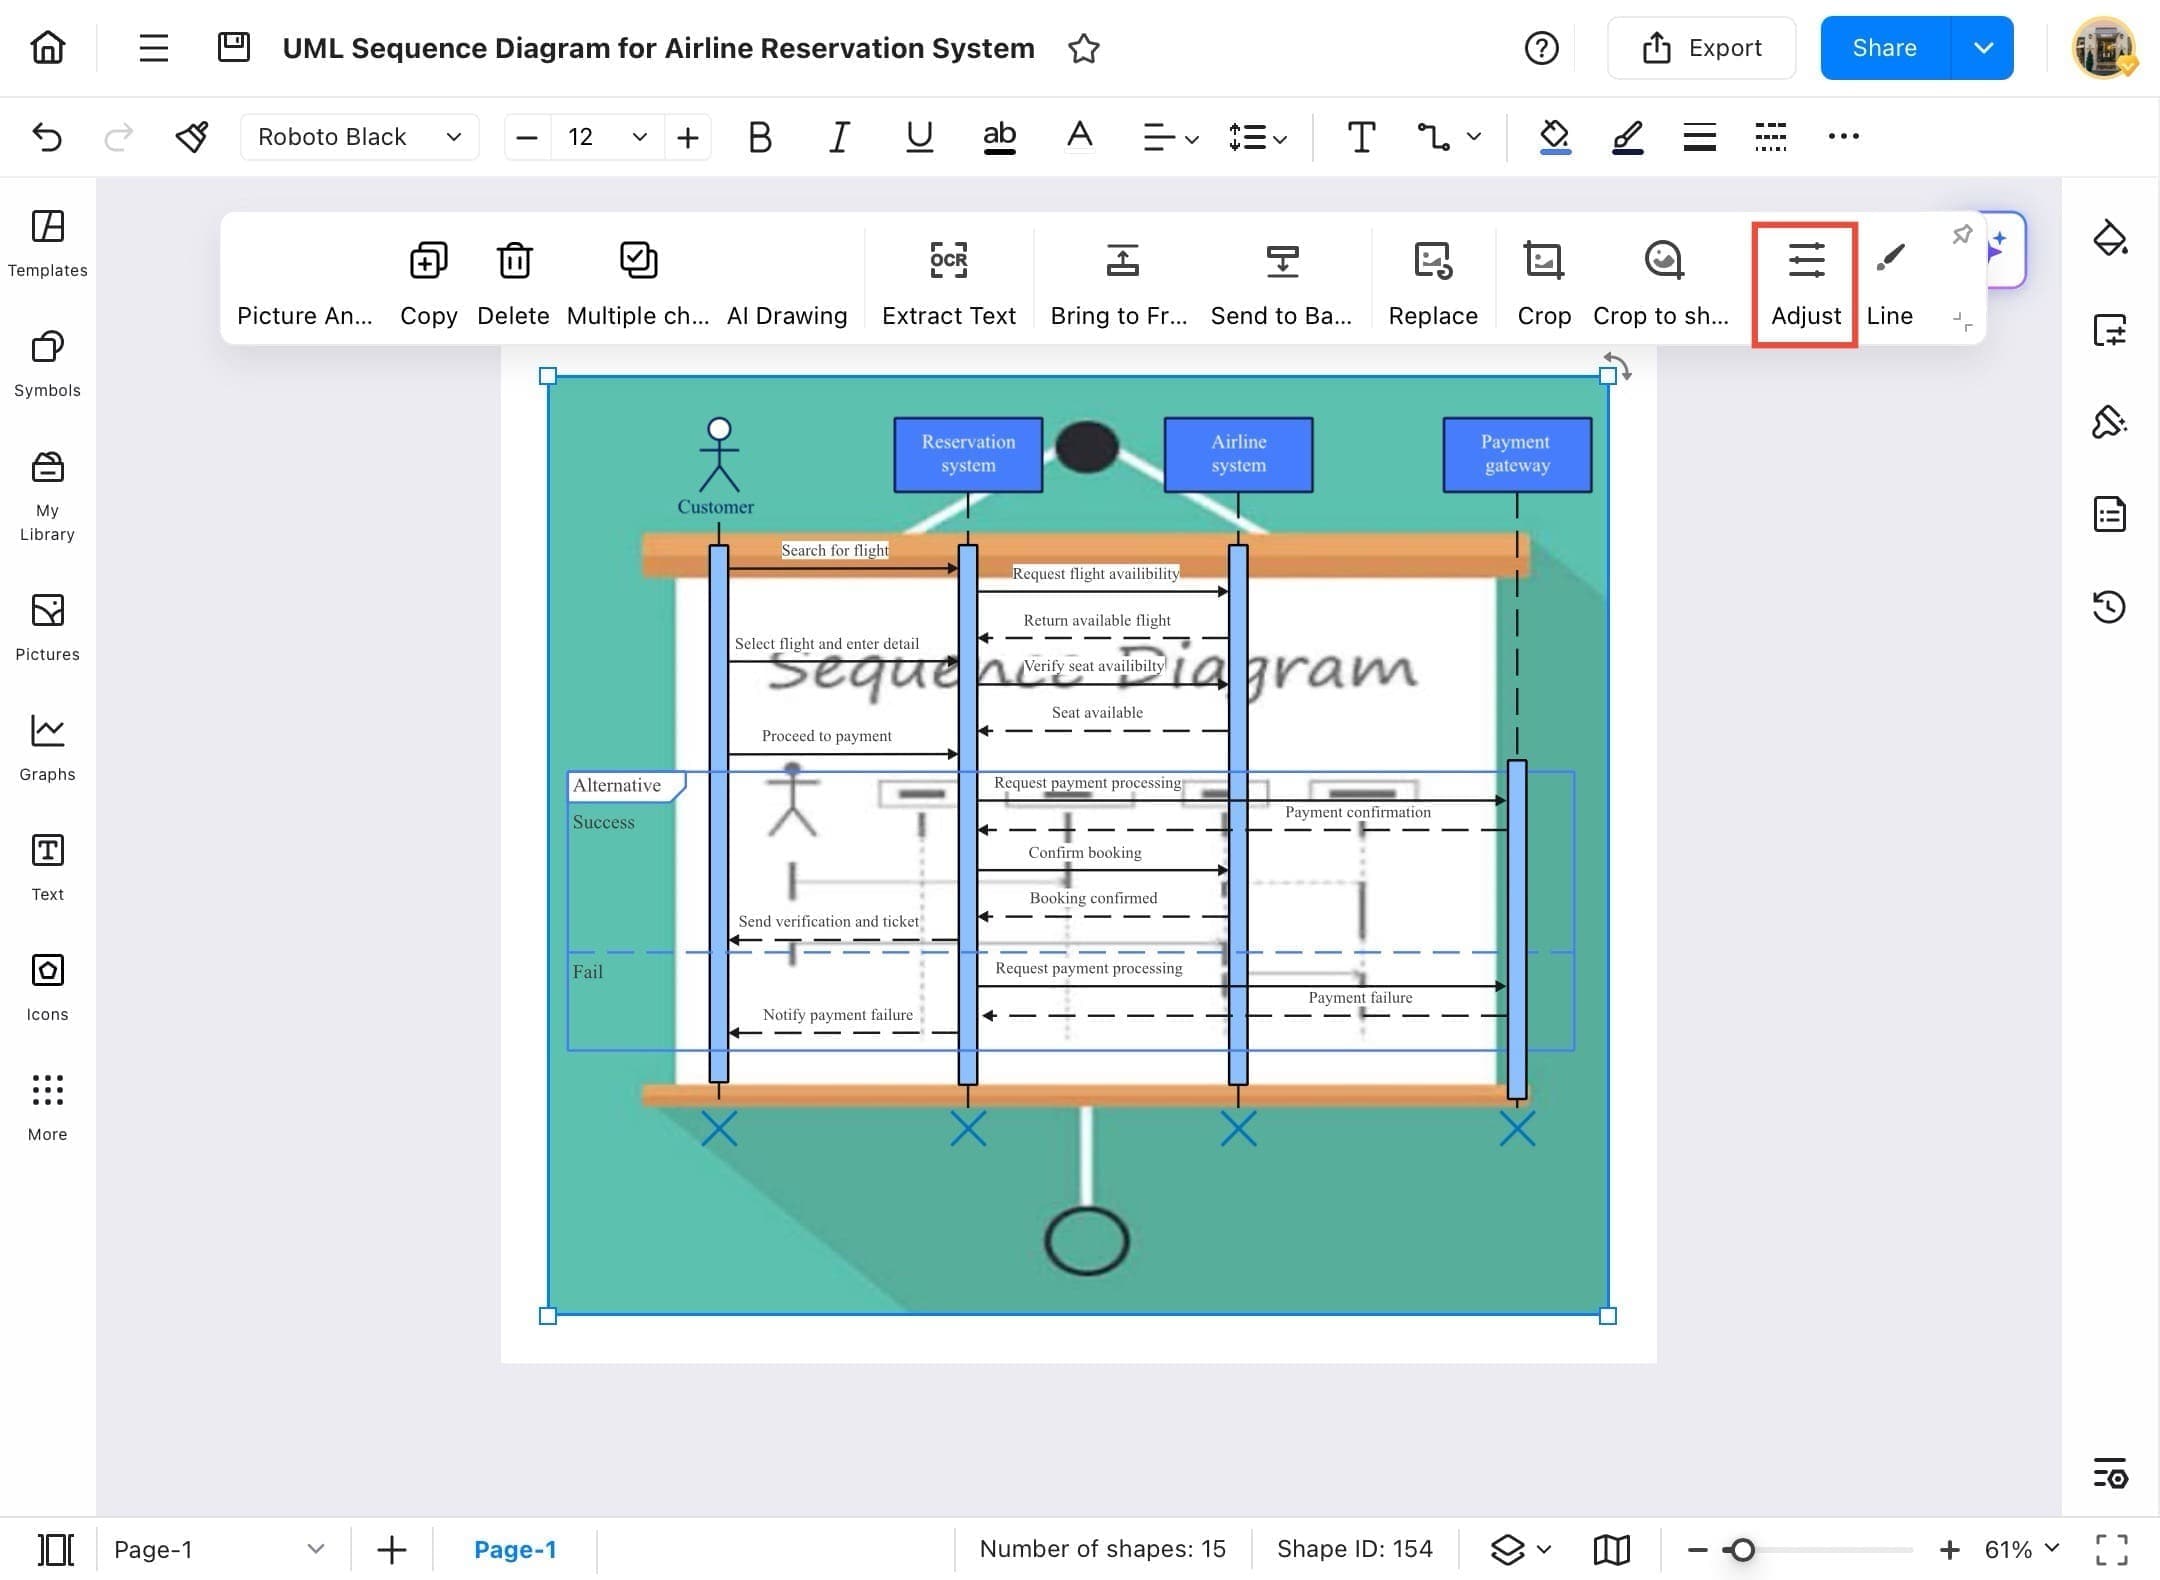
Step ❿ Modify Image Properties
- In the Adjust panel, you'll see sliders for Brightness, Contrast, Transparency, and Recolor. These control the visibility and blend of the image with the background.
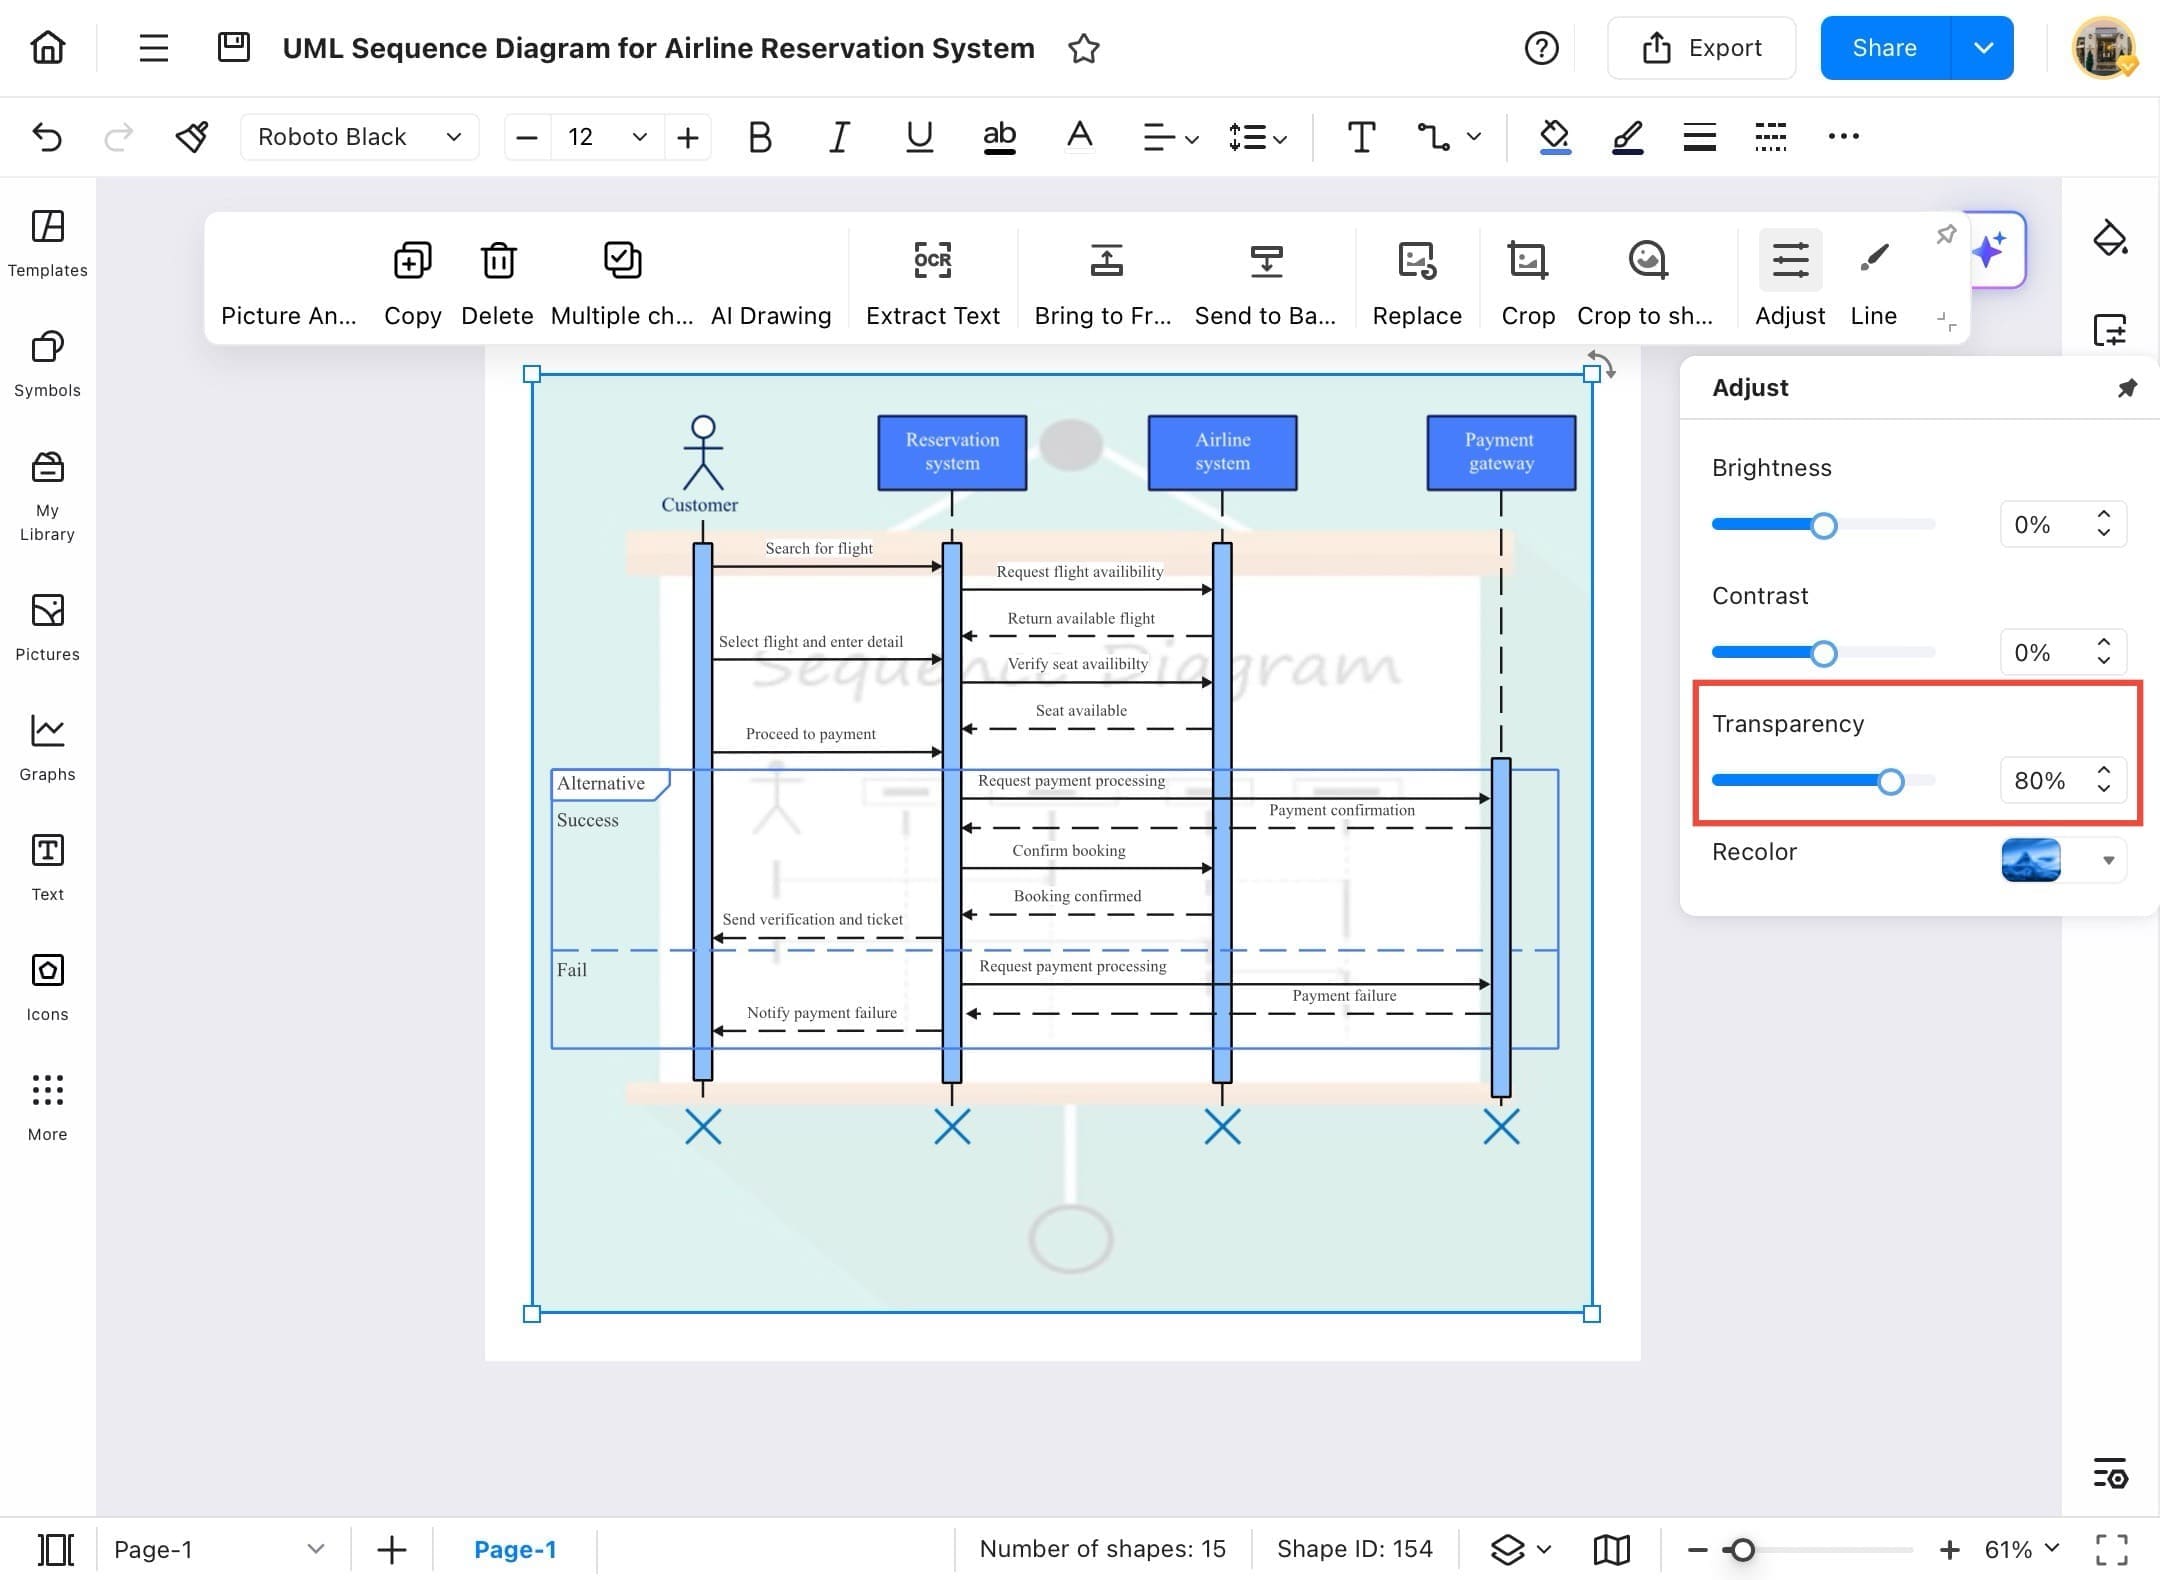
Step ⓫ Adjust Transparency
- Slide the Transparency setting up (e.g., to 80%) to make the inserted image less visible and ensure the main diagram elements remain clear and readable.
Table
Tables are a great way to organize and present data clearly within your diagrams. EdrawMax allows you to insert and customize tables easily to fit your design needs. Follow the steps below to add a table to your workspace and start structuring your information effectively.
Step ❶ Open EdrawMax
- Open EdrawMax to start your work.
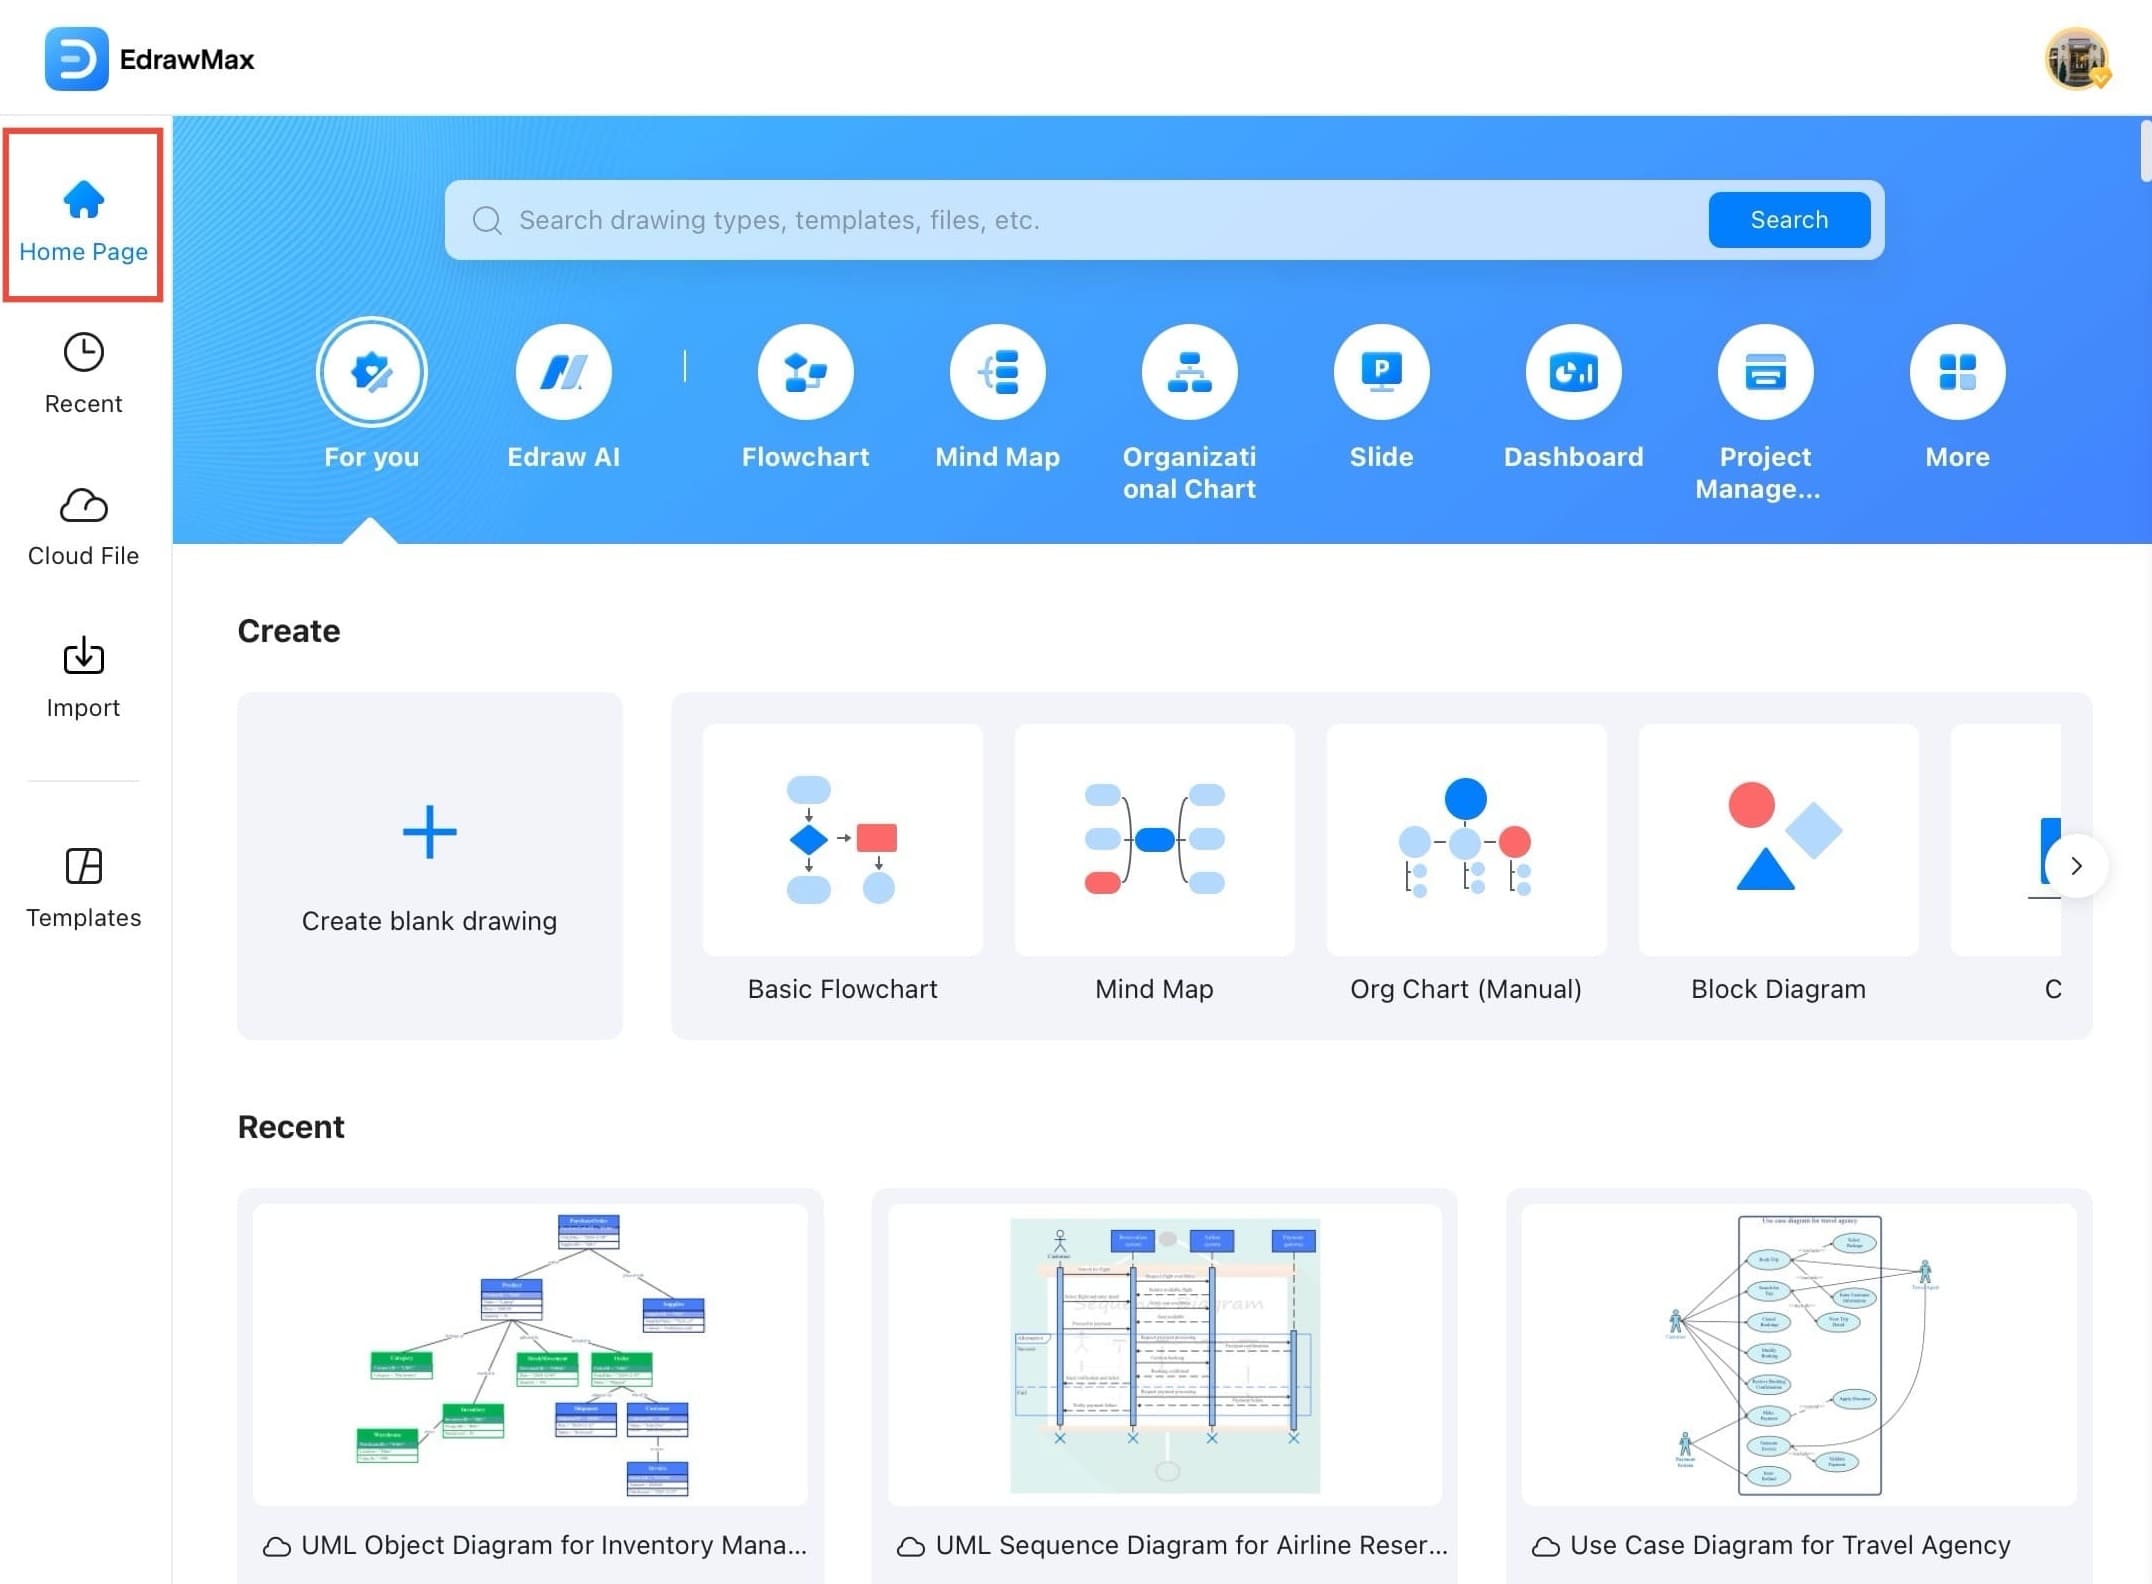
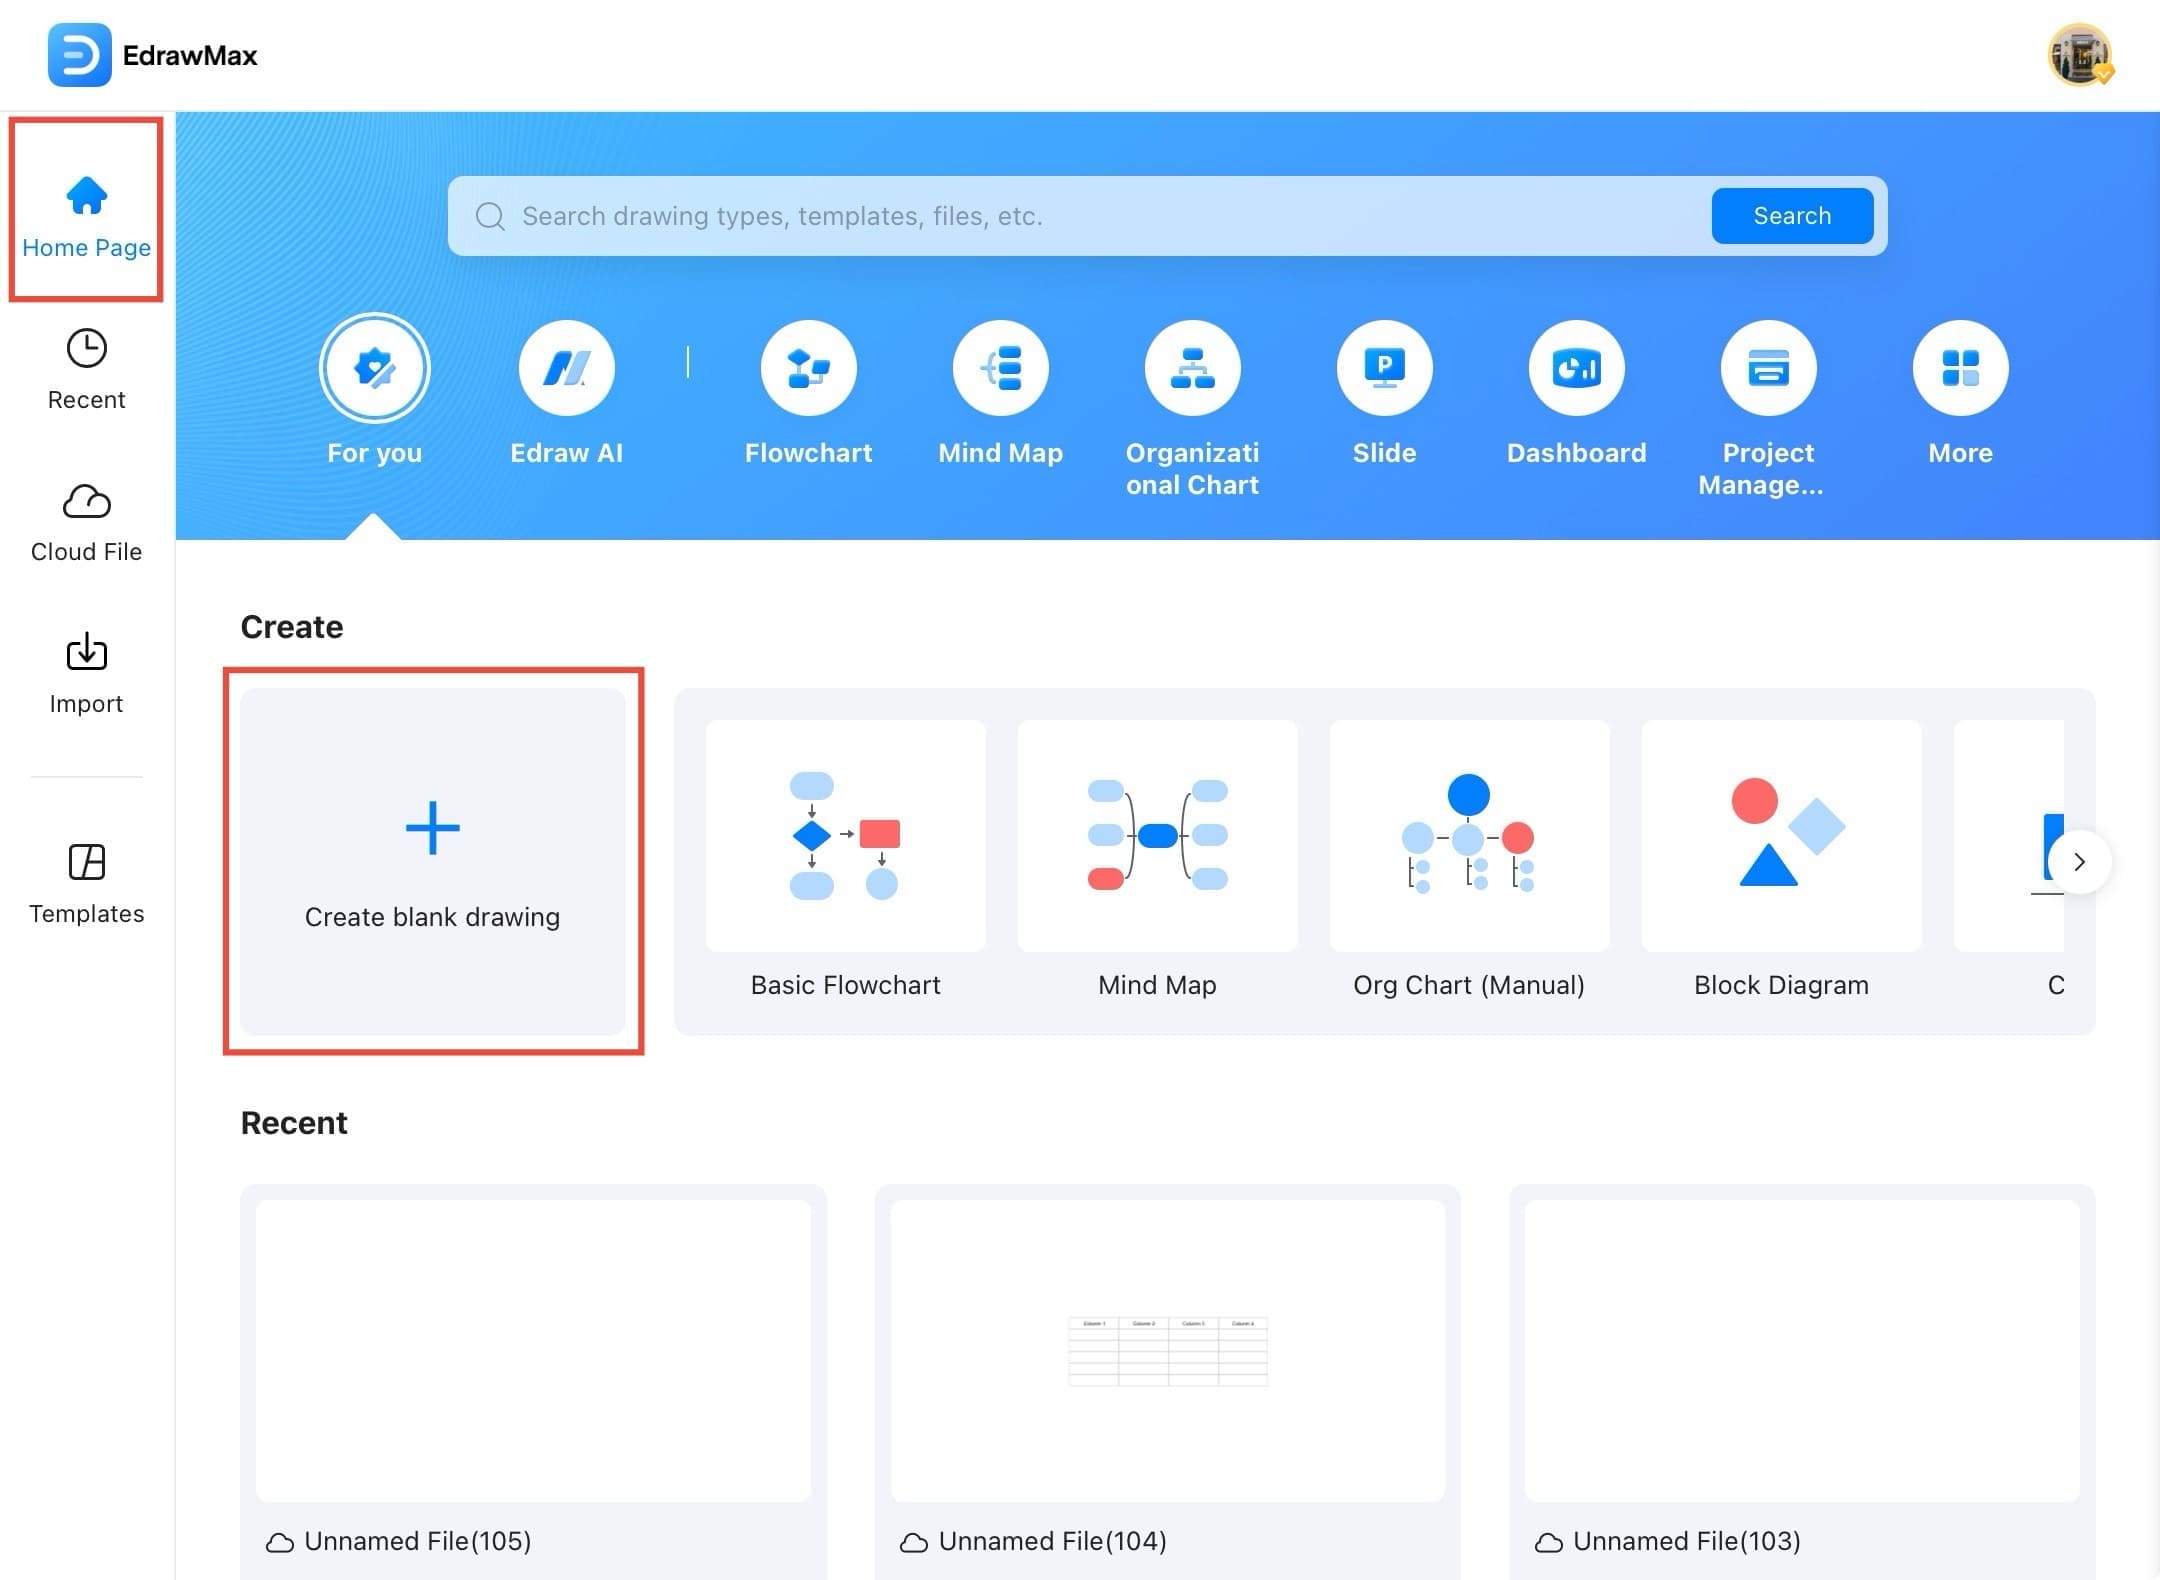
Step ❷ Start a Blank Drawing
- From the Home Page, tap Create blank drawing to start a new diagram.
Step ❸ Wait for New Canvas
- Wait for the new blank canvas to open. This is where you’ll insert your table.
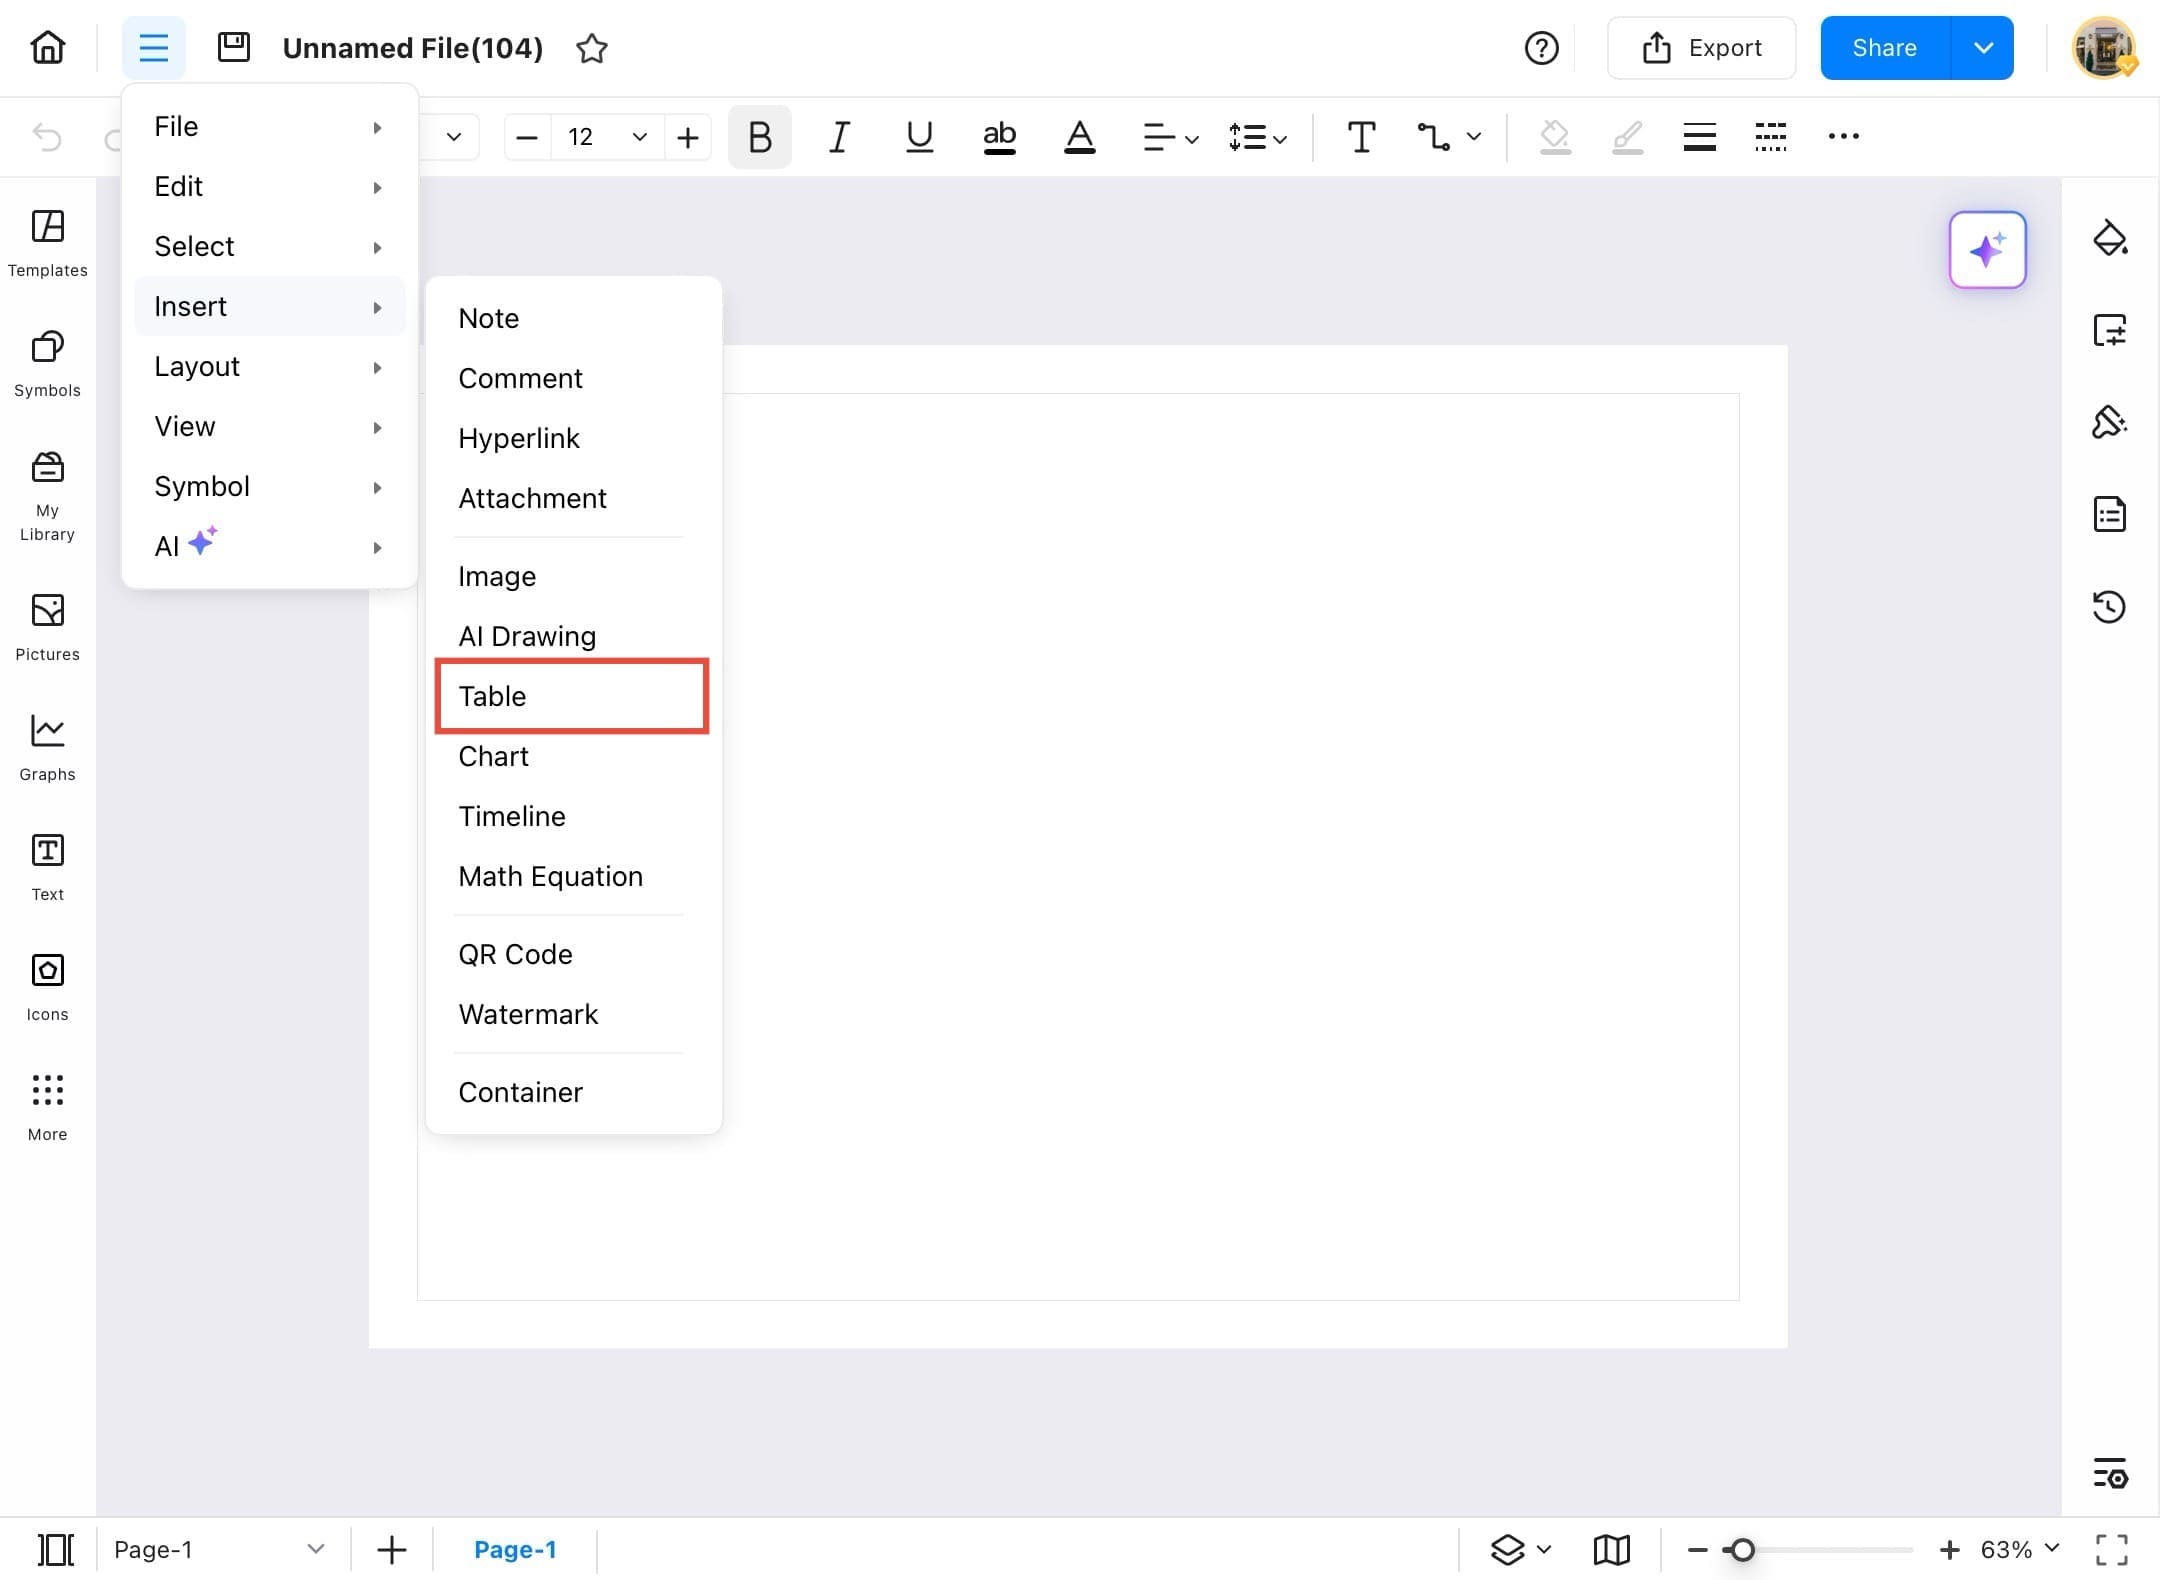
Step ❹ Tap Insert Option
- Tap Insert from the top left menu panel to access insertion options.

Step ❺ Tap Table
- Go to the Insert tab from the left toolbar, hover over it, and then choose Table from the dropdown list.
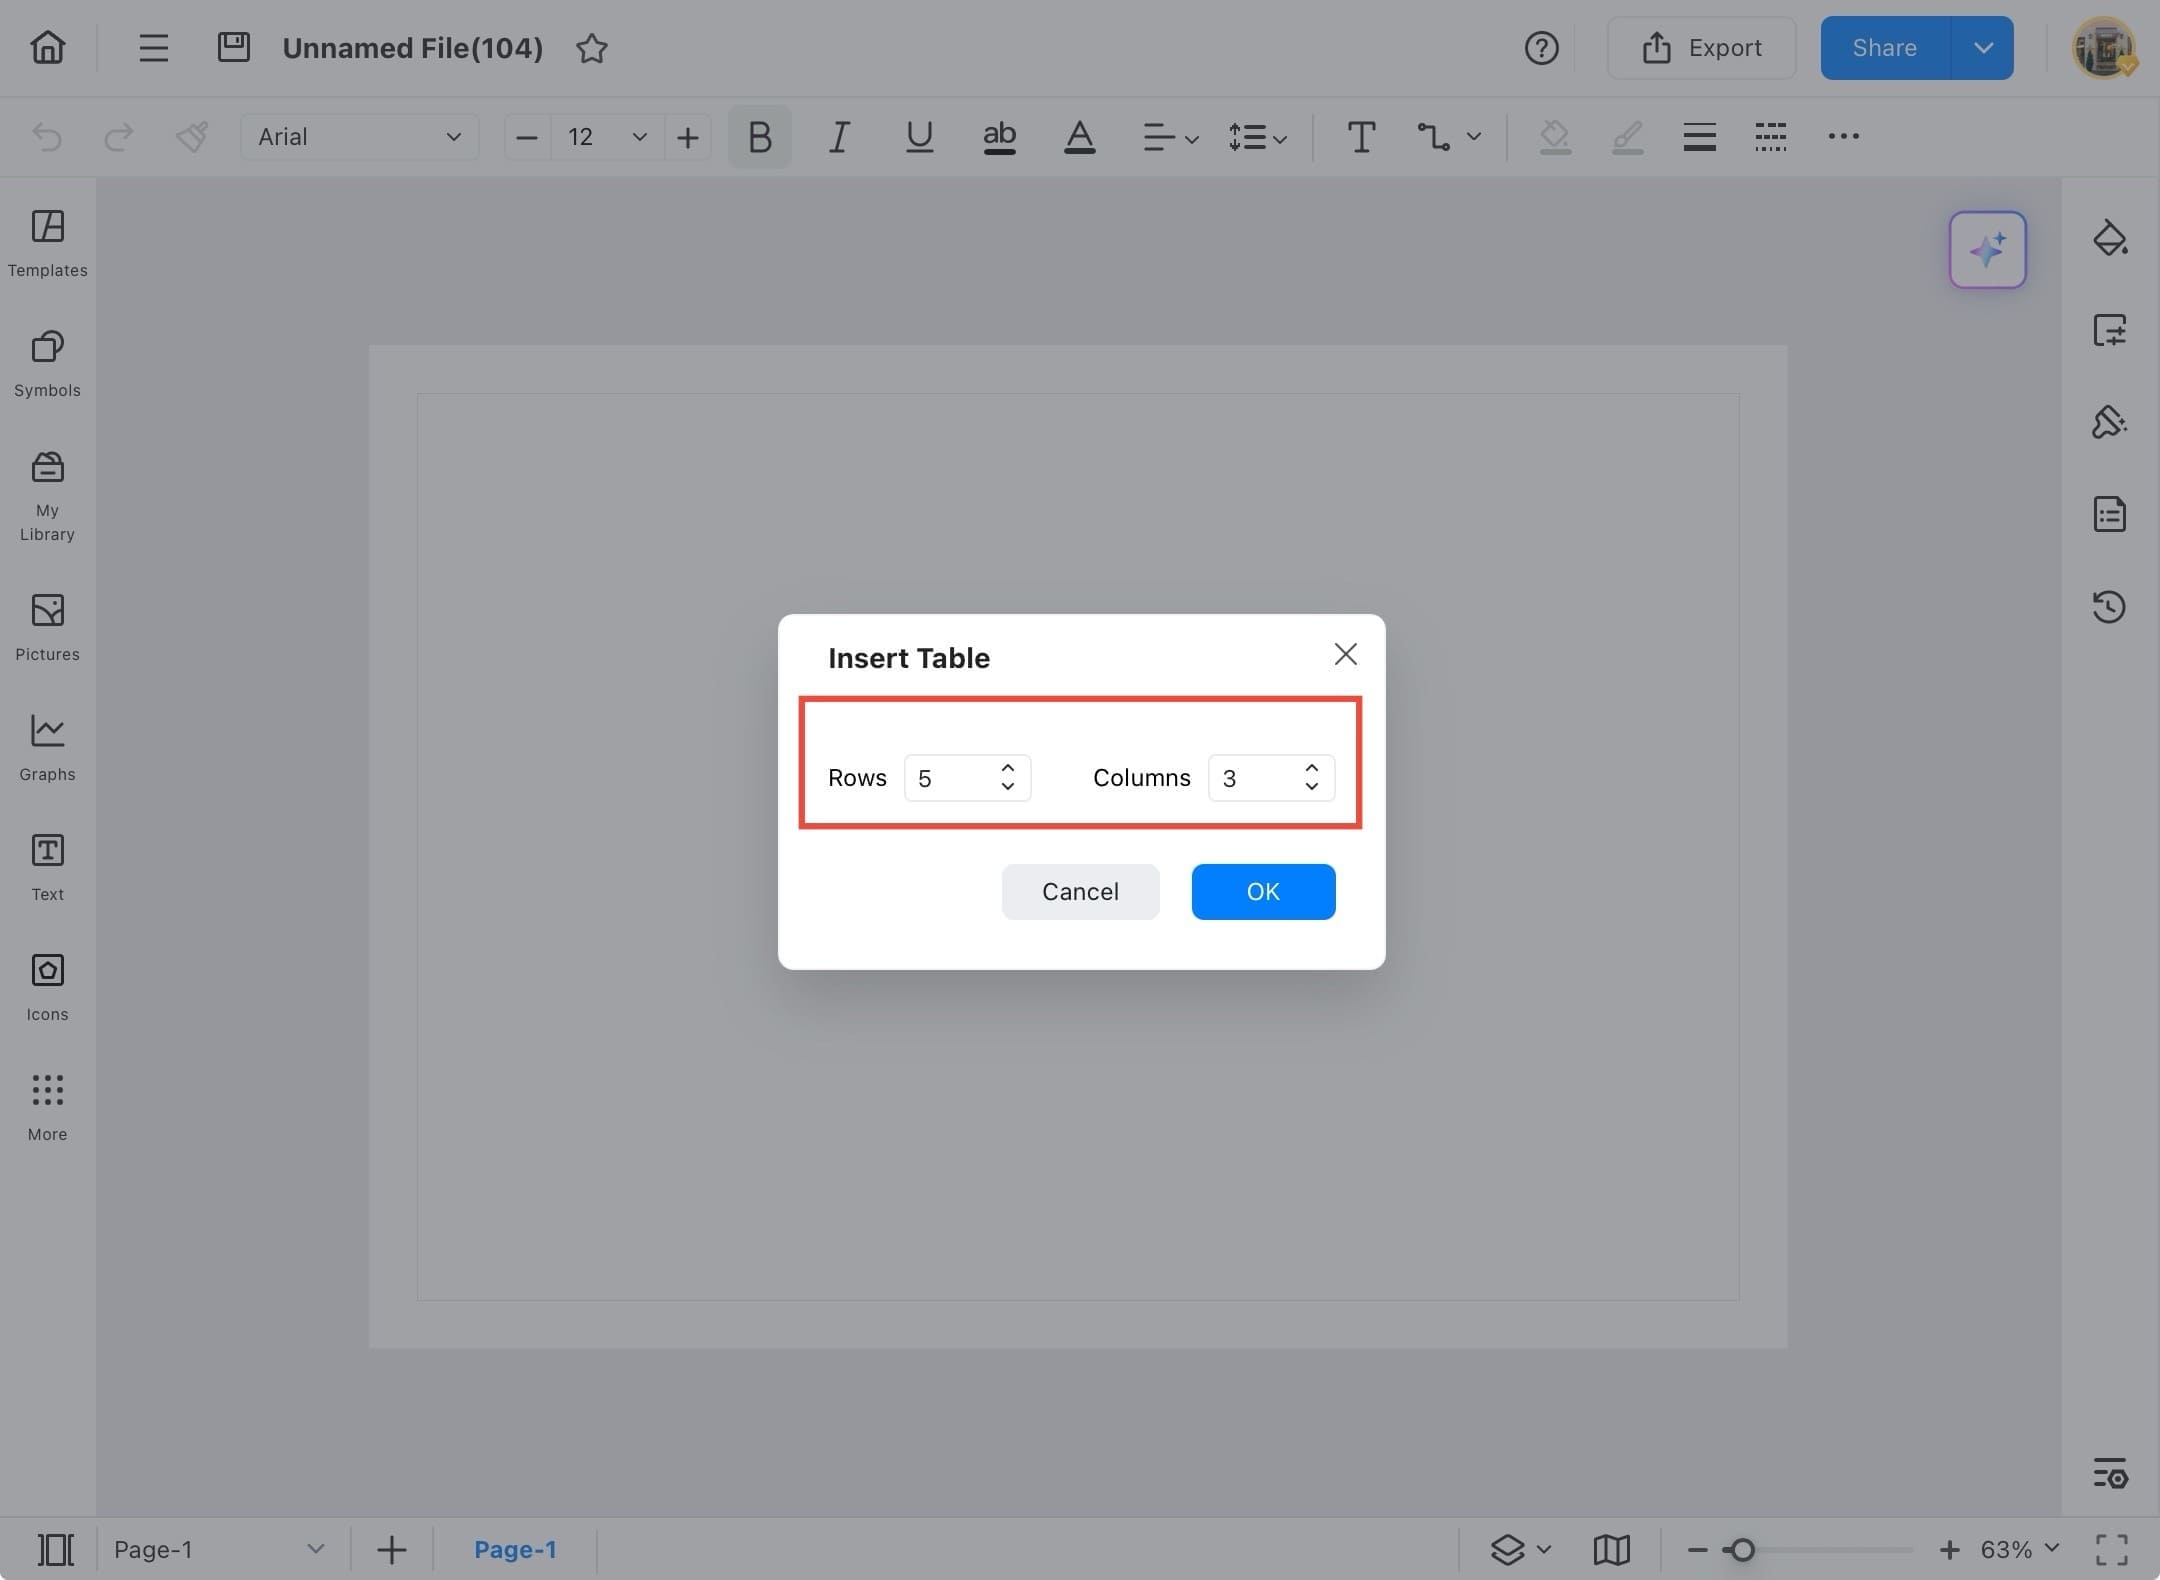
Step ❻ Set Rows and Columns
- In the Insert Table dialog box, set the number of rows and columns using the dropdowns.
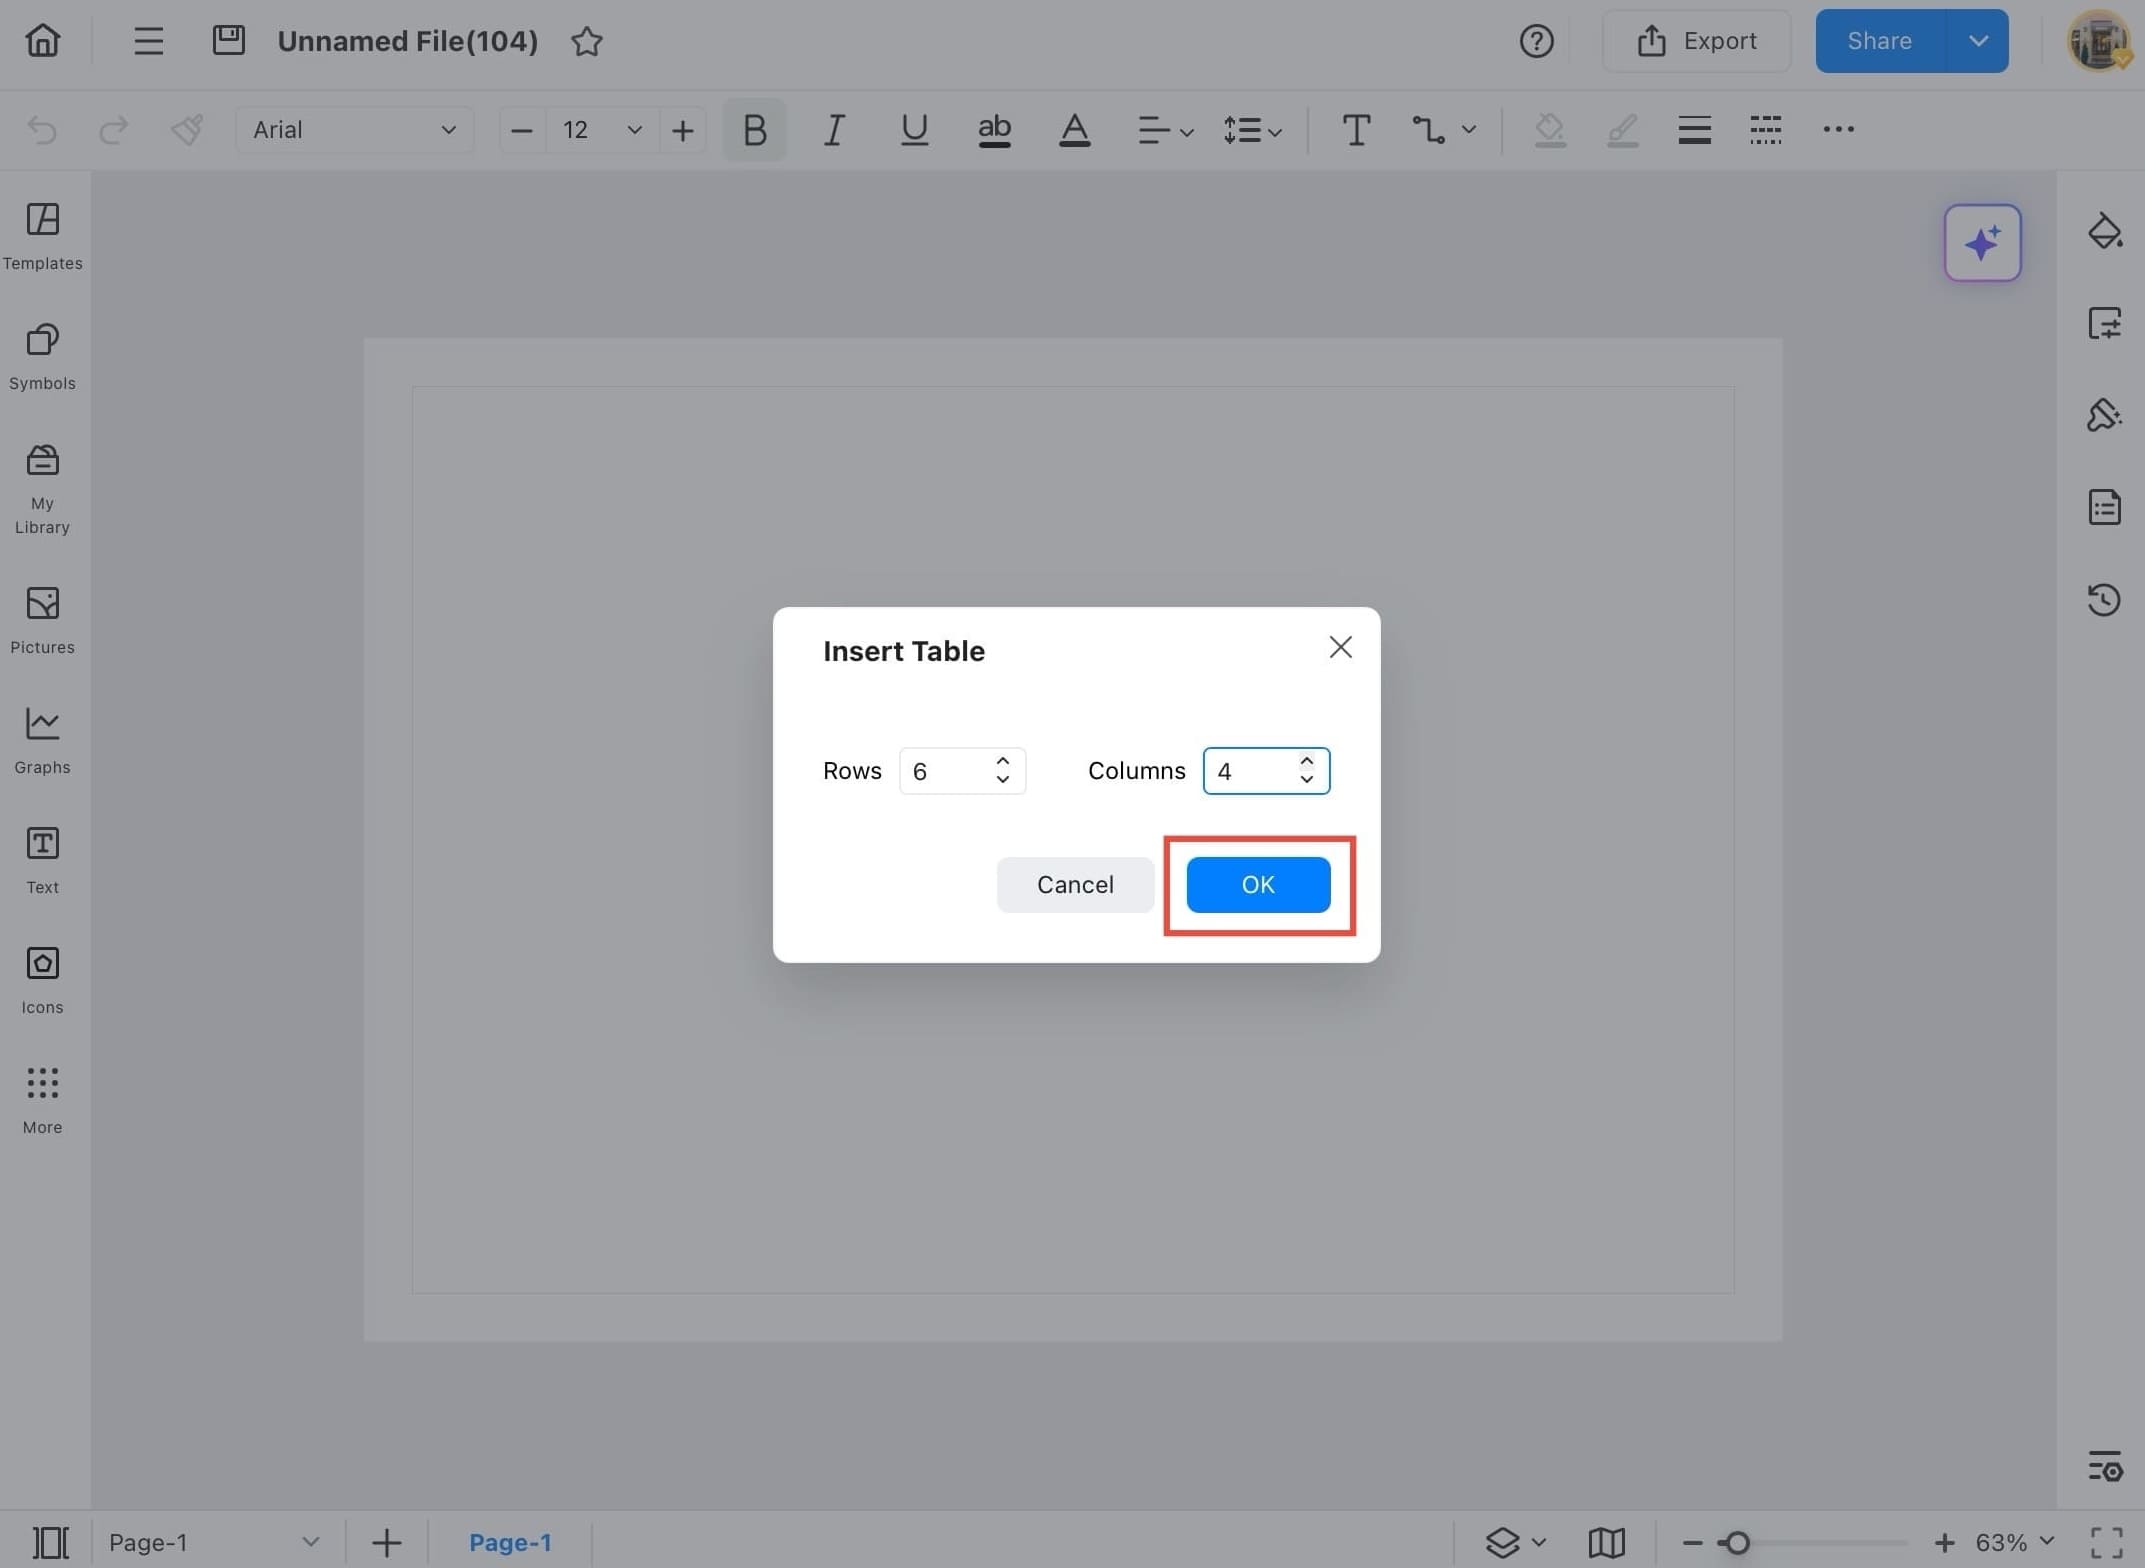
Step ❼ Tap OK to Insert Table
- Update the number of columns (if needed), then tap the OK button to insert the table onto the canvas.
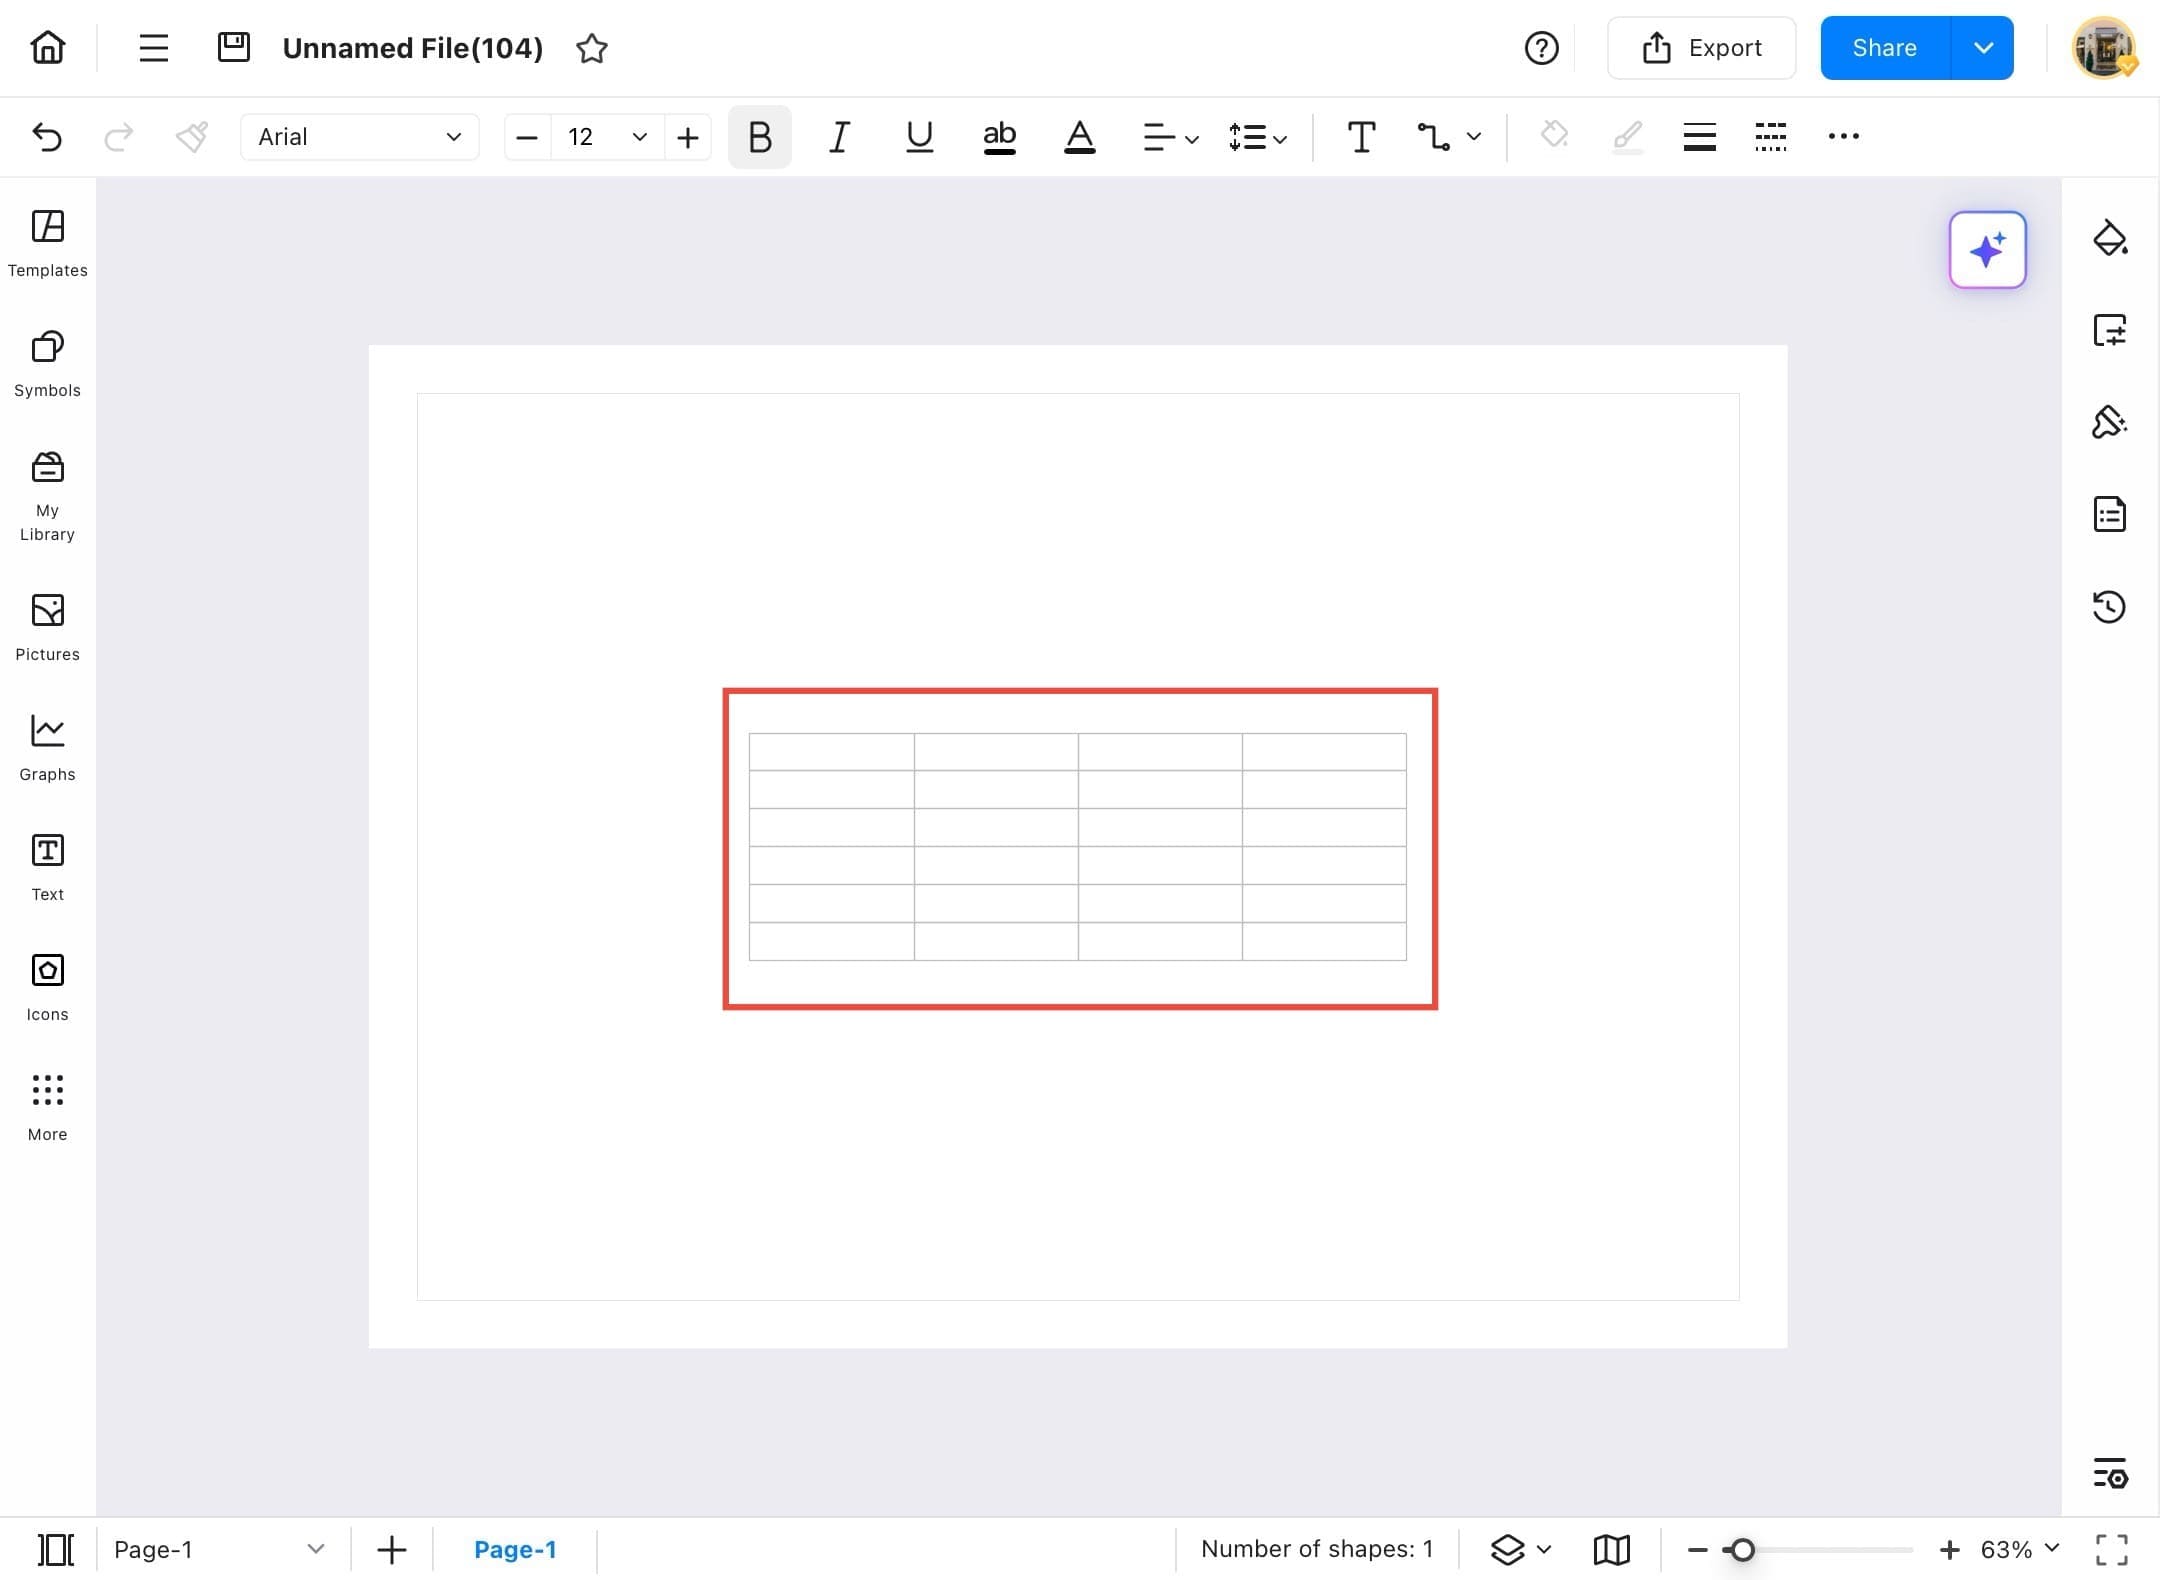
Step ❽ Enter Content
- The table is now inserted into the canvas. You can start typing content into the cells.
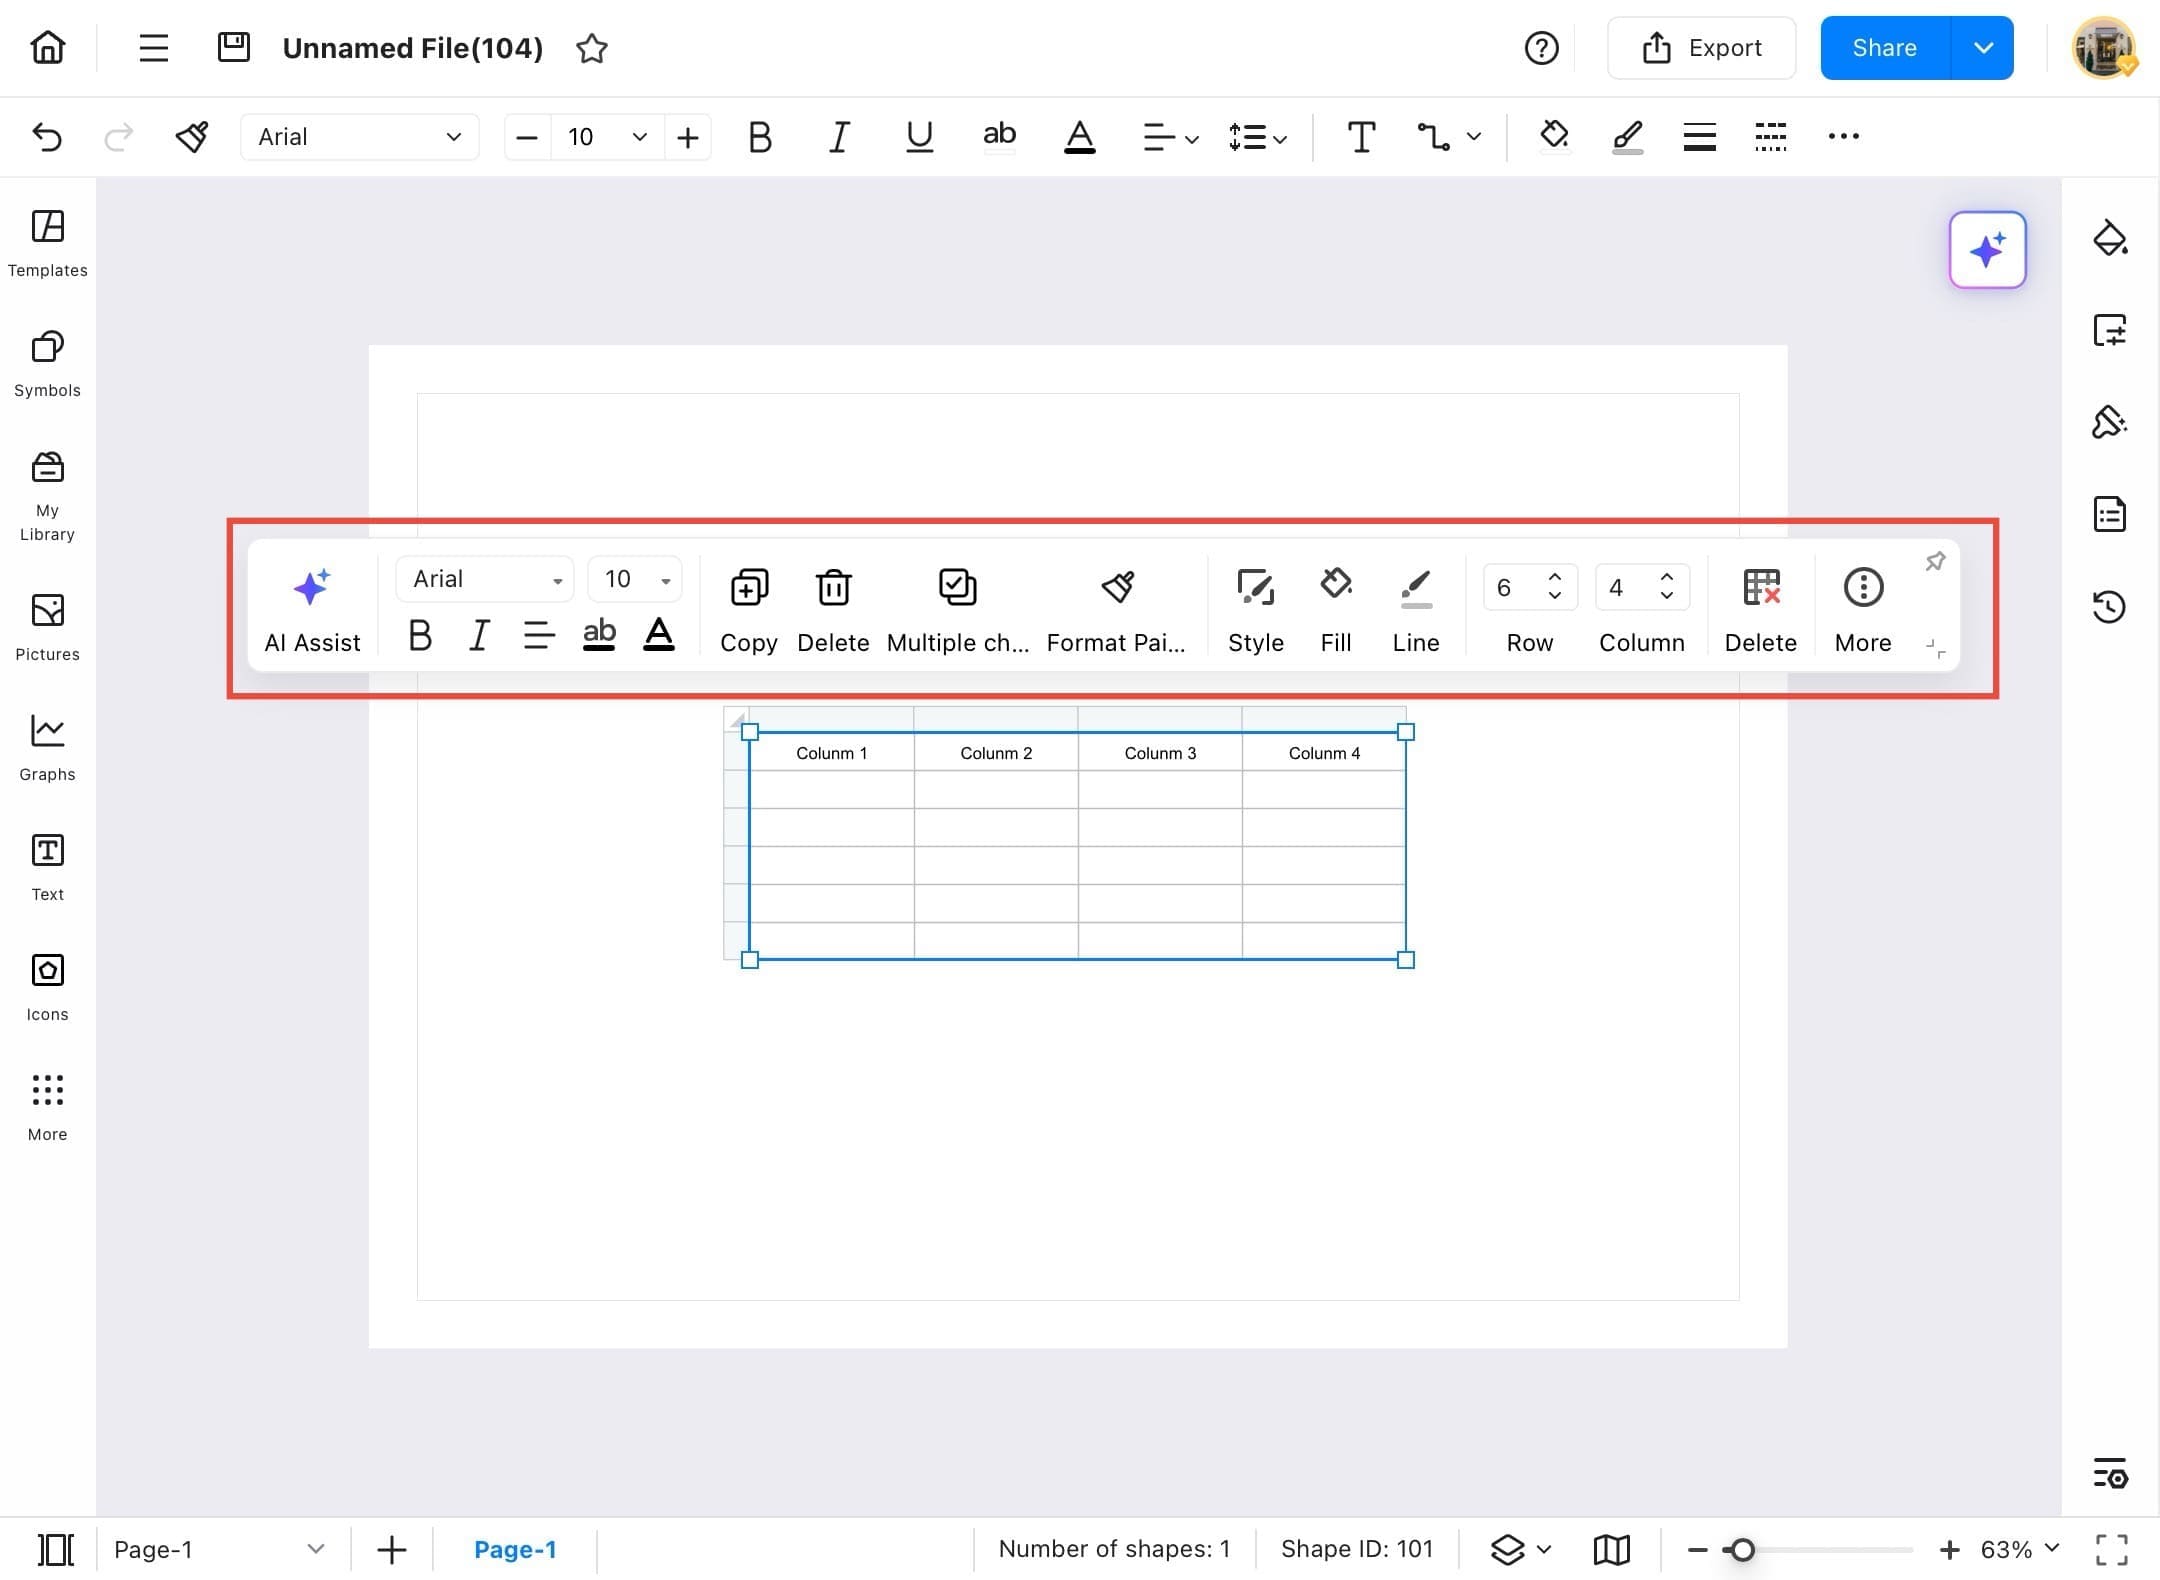
Step ❾ Format Table
- Use the toolbar above the table to format text, adjust column/row sizes, apply styles, and more.
Chart
Want to turn numbers into visuals? EdrawMax makes it easy to add charts like bar graphs, pie charts, and more. They help you explain your data clearly. In this section, we’ll show you how to quickly insert a chart and adjust it to fit your needs.
Step ❶ Open EdrawMax and Blank Drawing
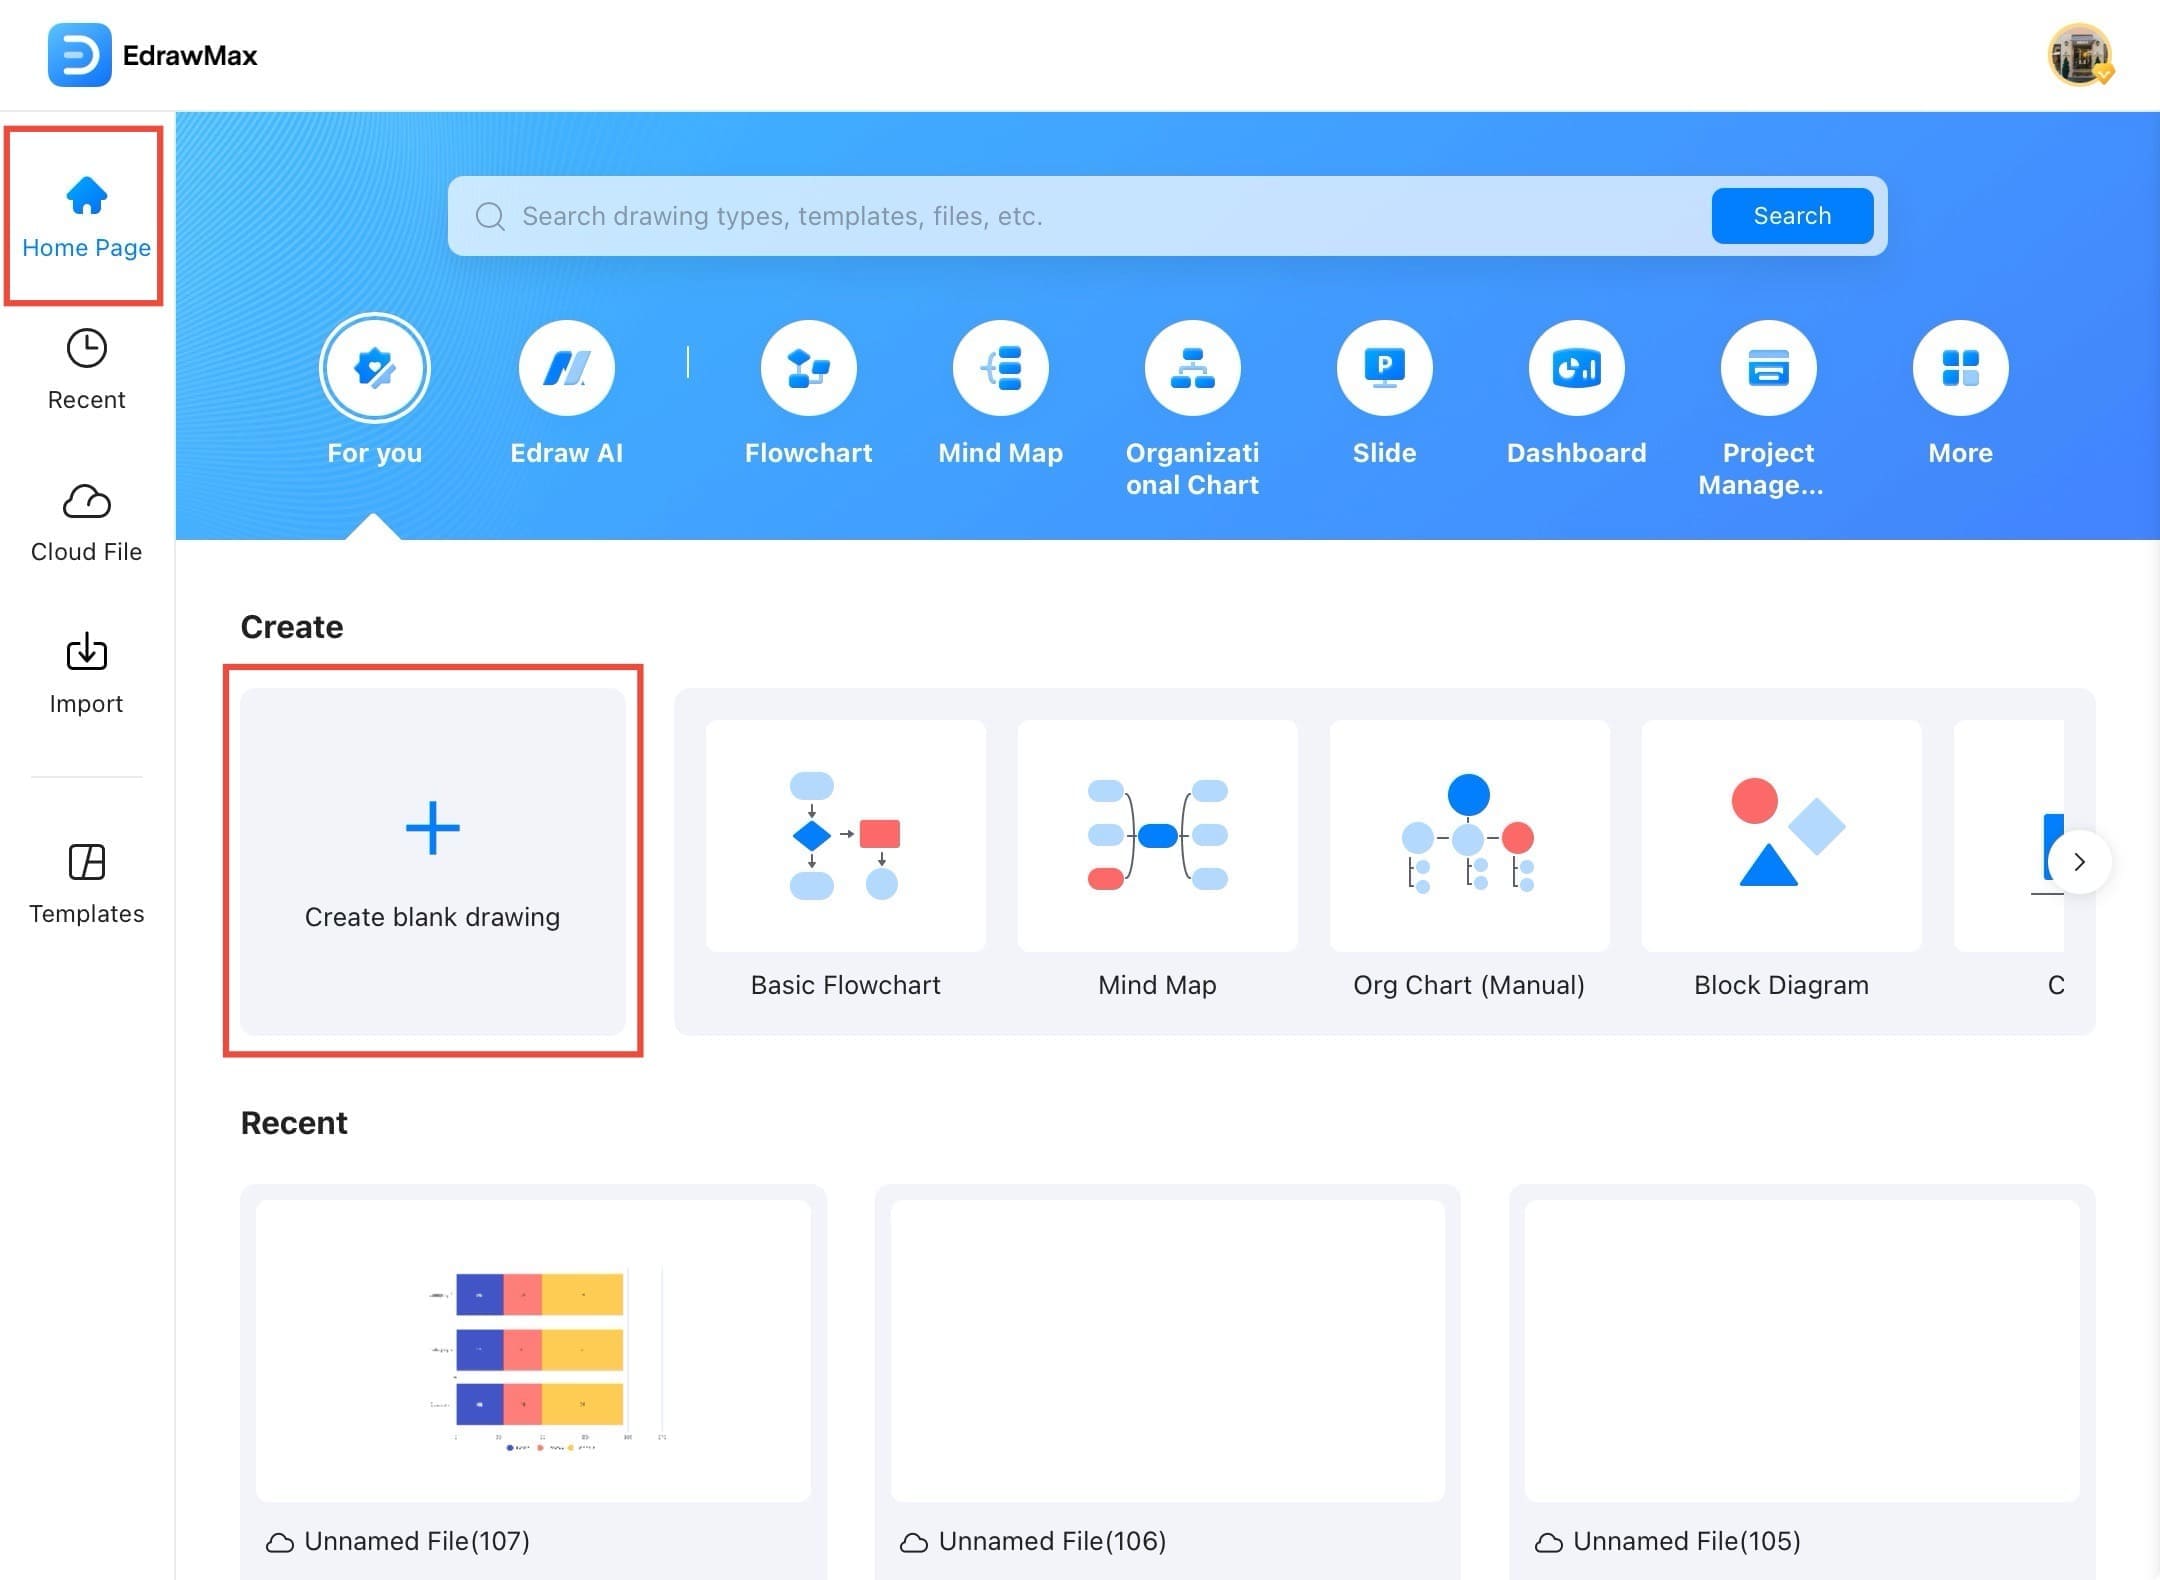
- Open EdrawMax, and go to the Home Page.
- Tap Create blank drawing to open a new canvas for your chart.
Step ❷ Access Menu Icon
- A new blank drawing page opens where you can insert elements. Then tap on the hamburger icon.
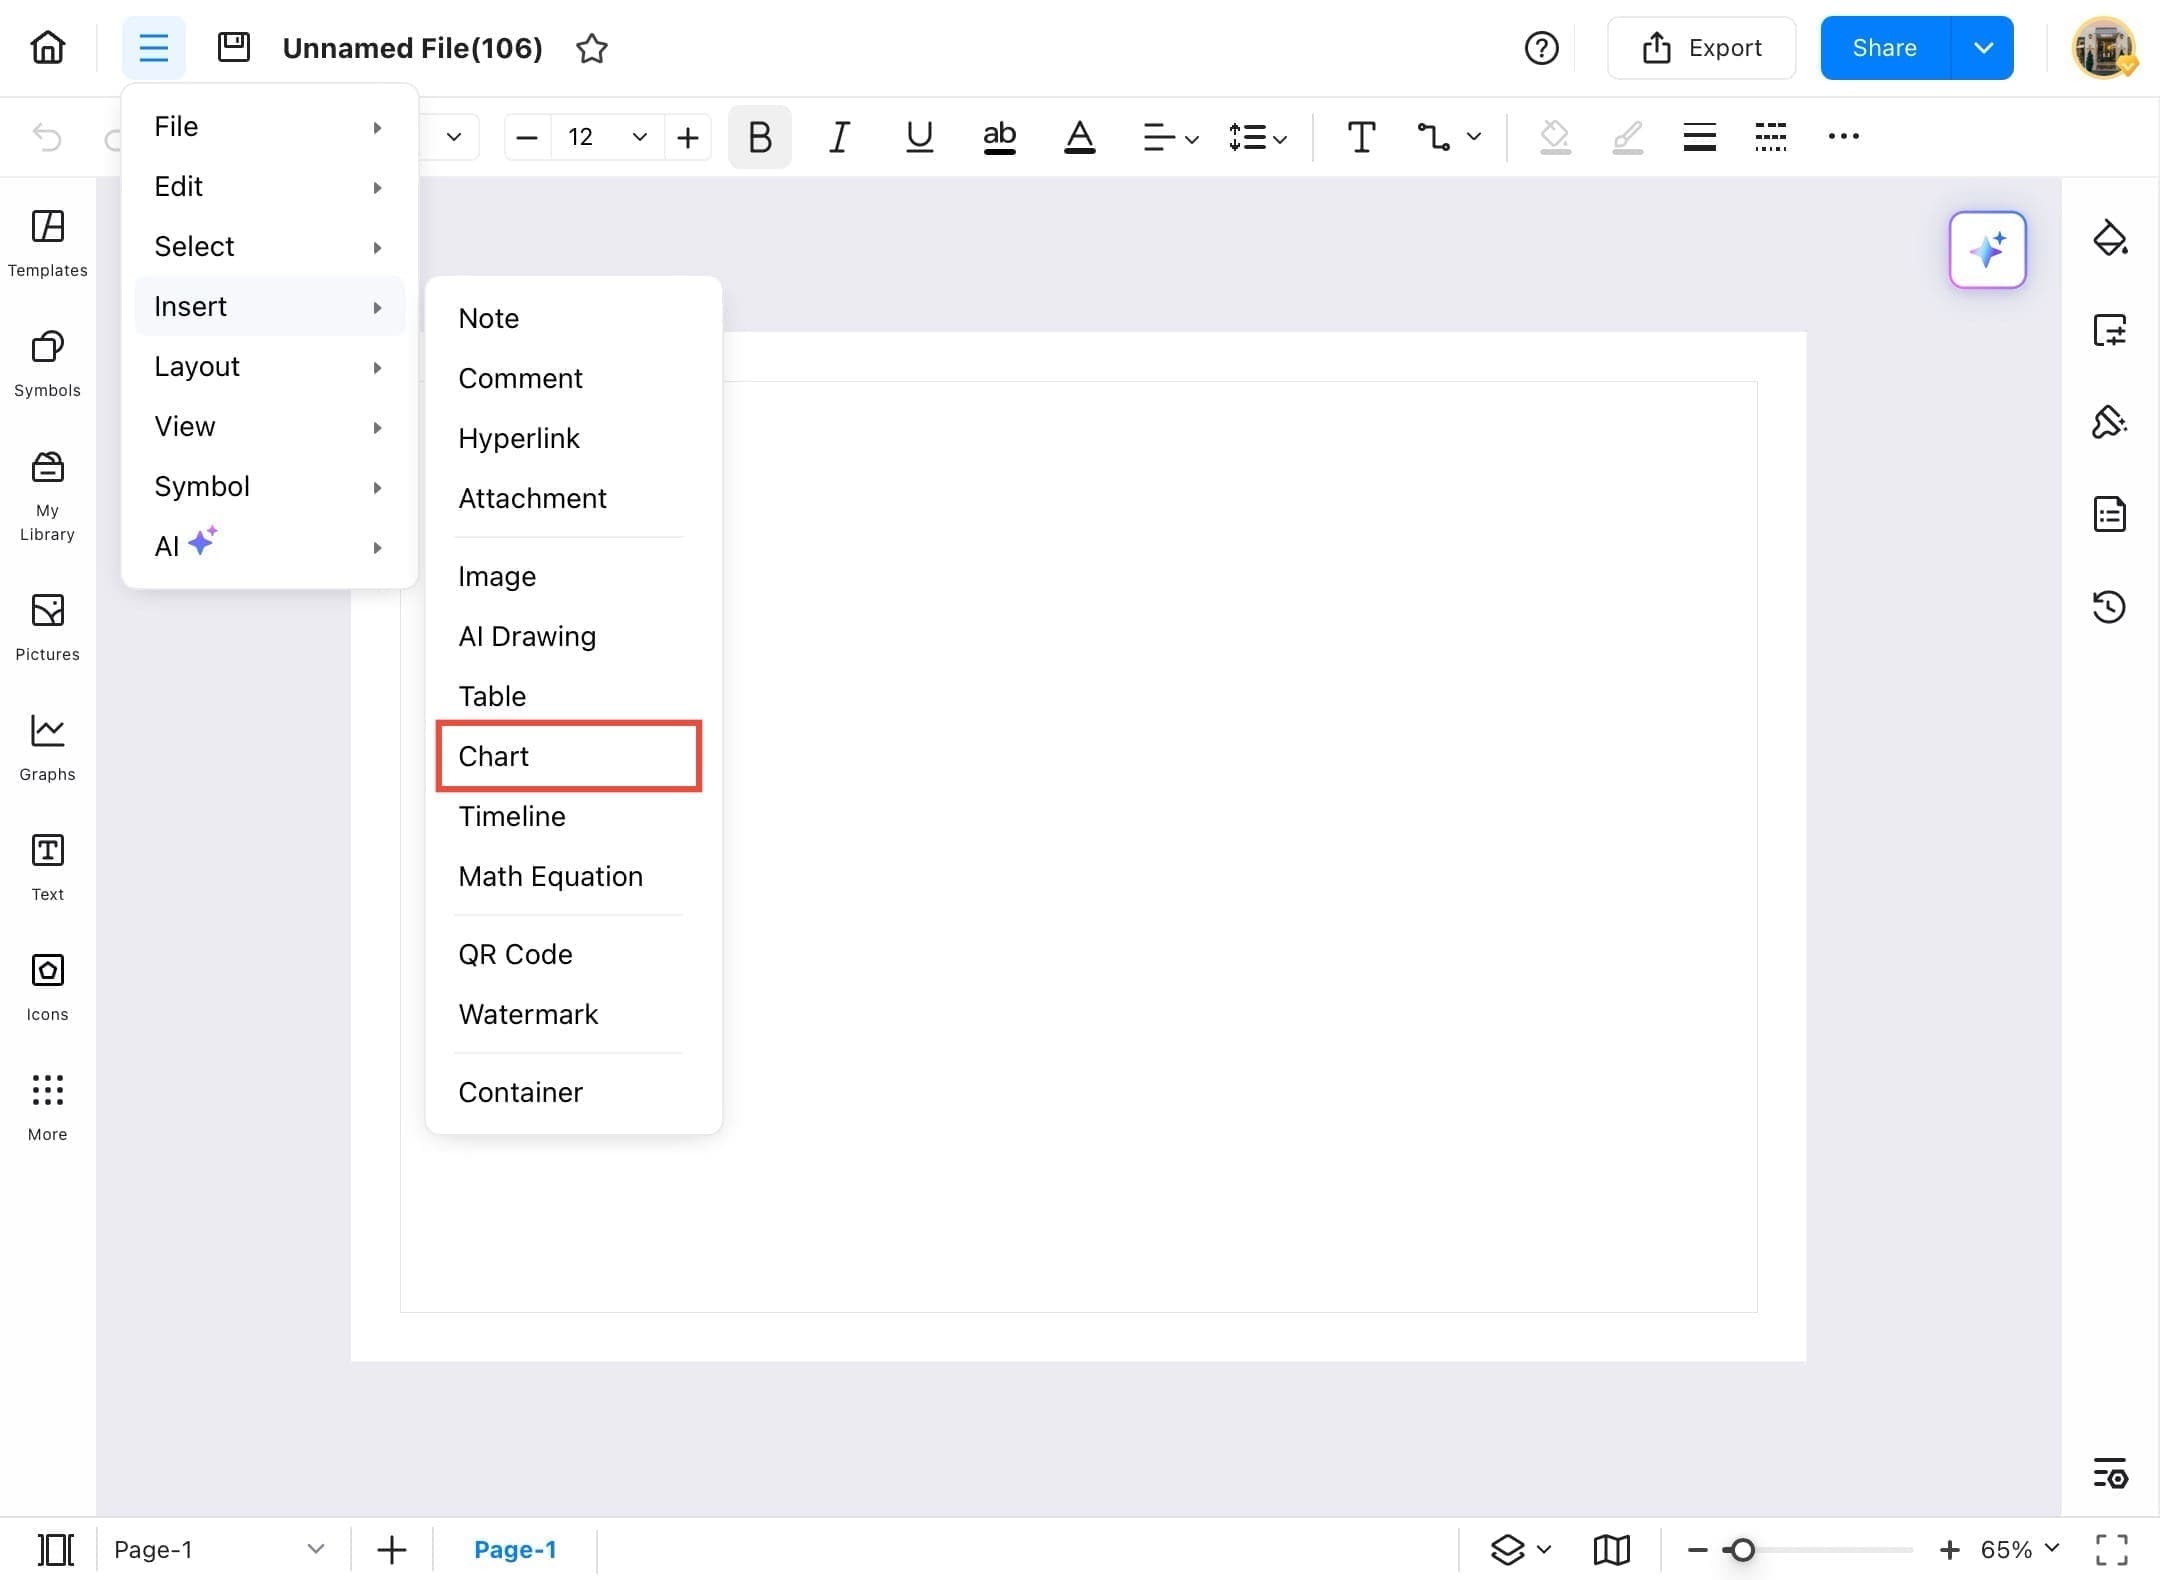
Step ❸ Tap Insert Option
- Go to the top menu and tap Insert.
Step ❹ Select Chart
- From the insert menu, select Chart.
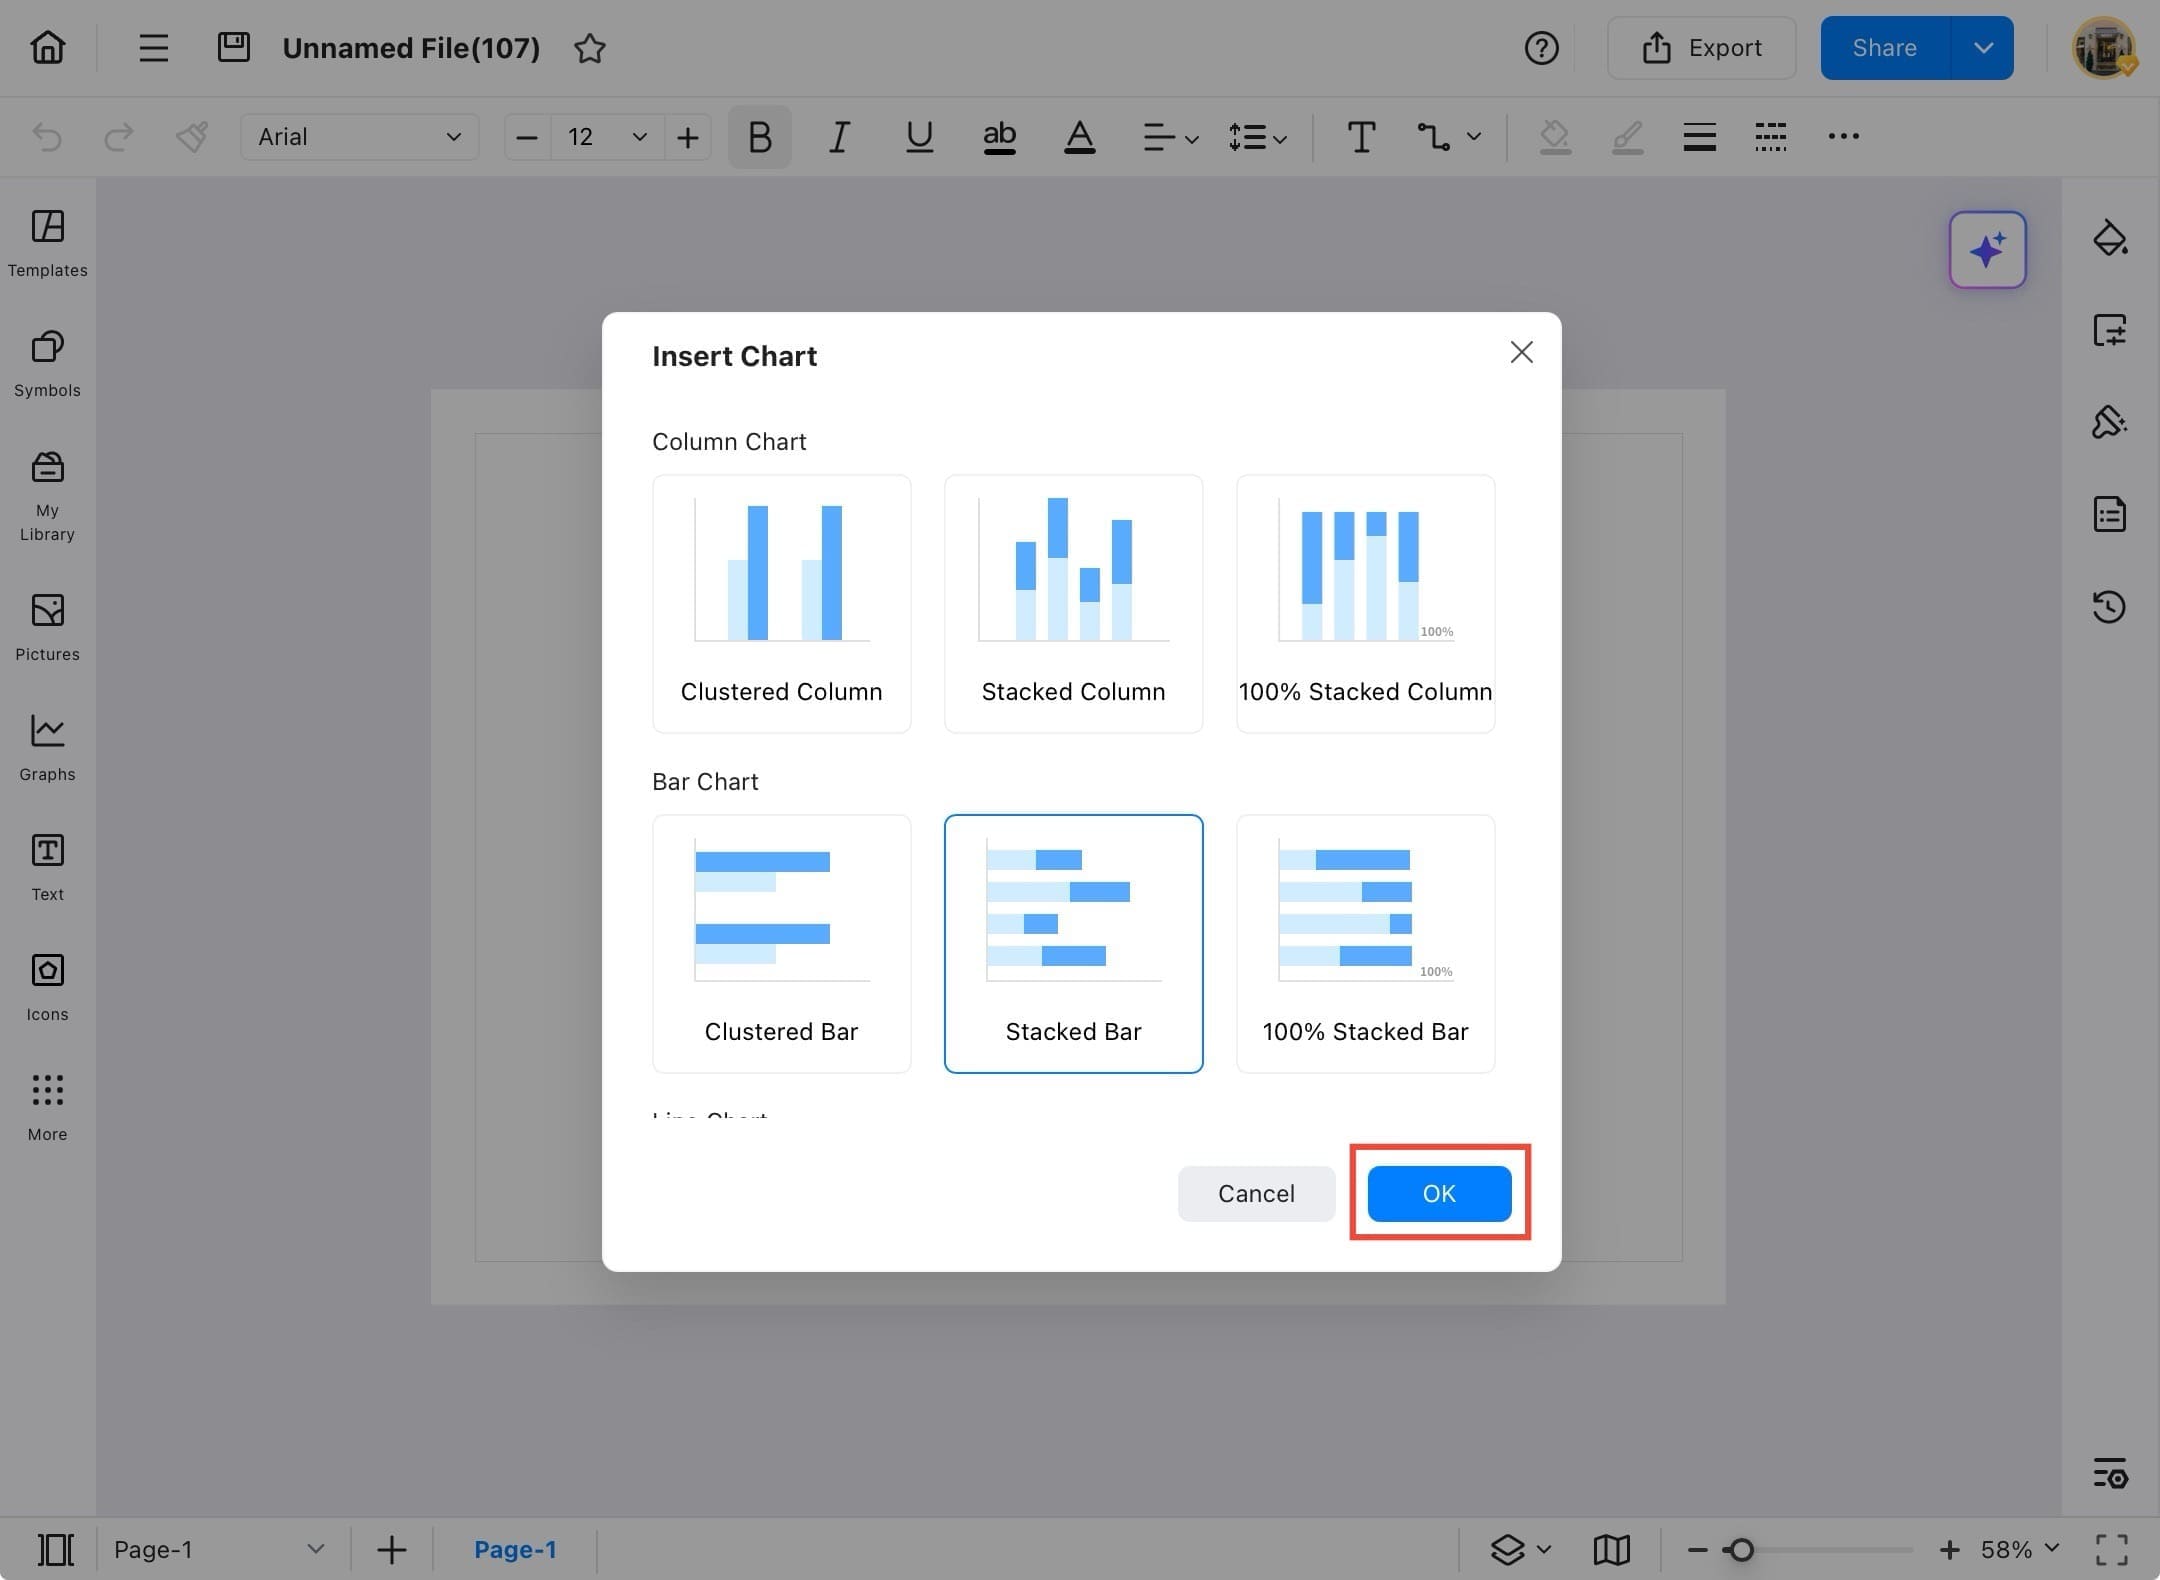
Step ❺ Choose Chart Type
- A pop-up appears showing different chart styles like Clustered Column, Stacked Bar, etc. Choose your desired chart type.
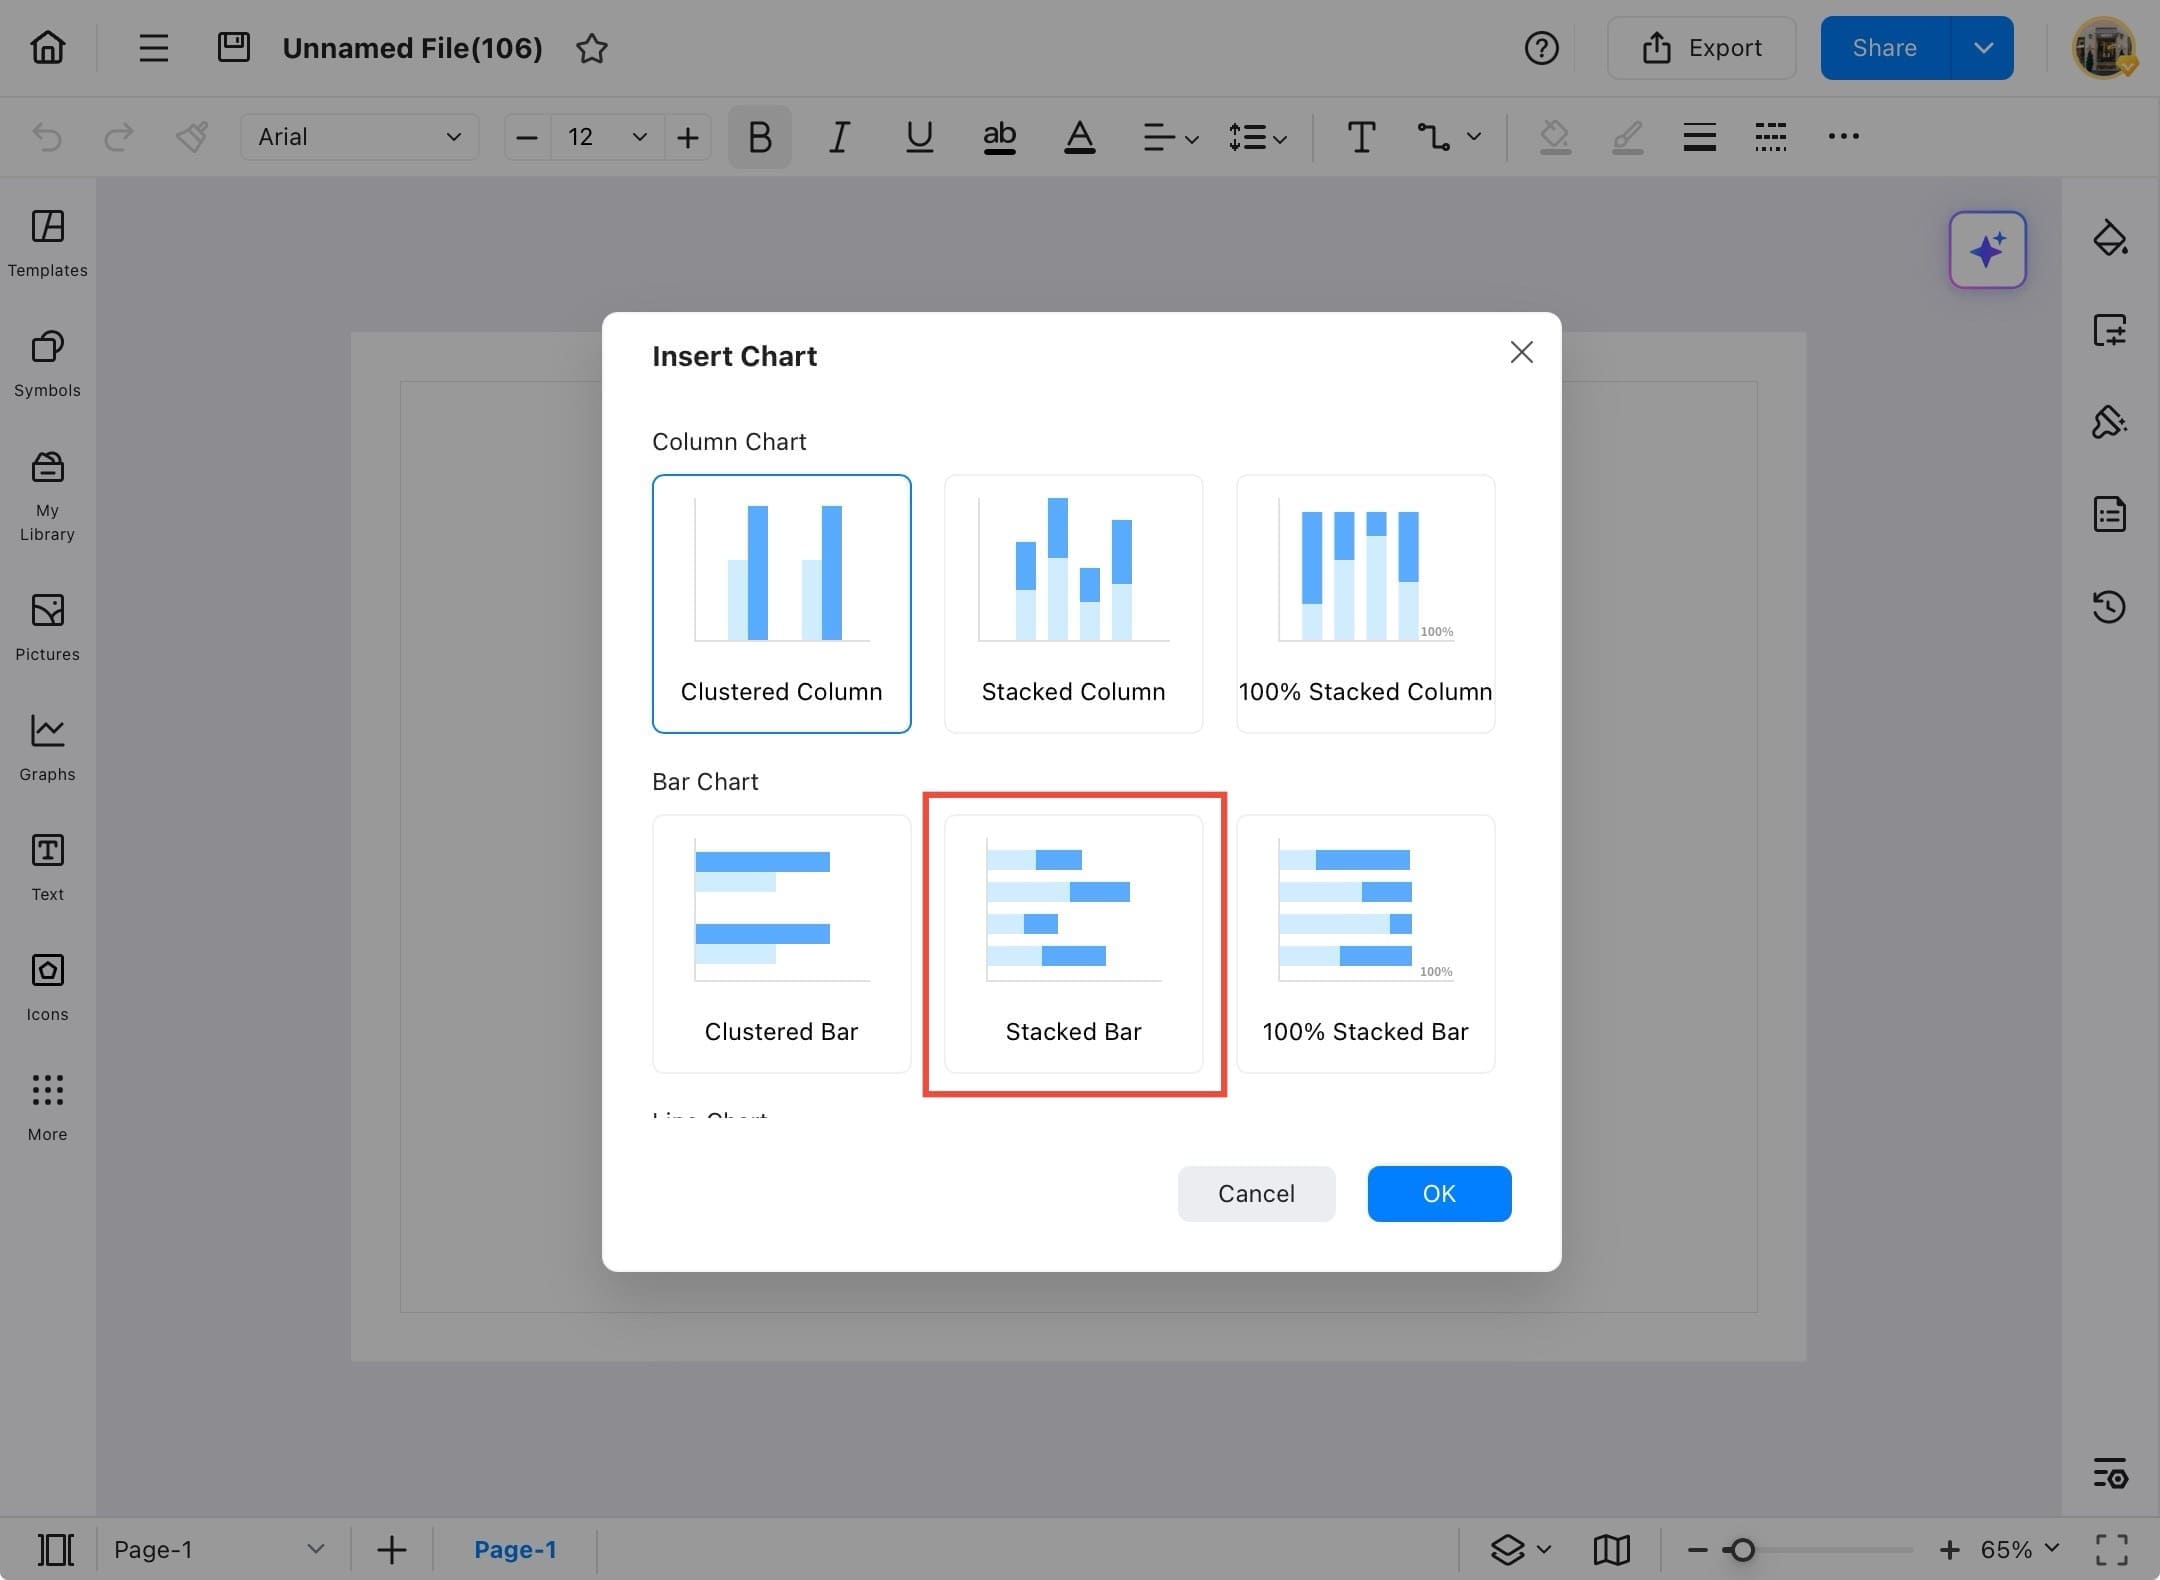
Step ❻ Tap OK to Insert Chart
- Select a chart style (e.g., Stacked Bar) and tap the OK button to insert it.
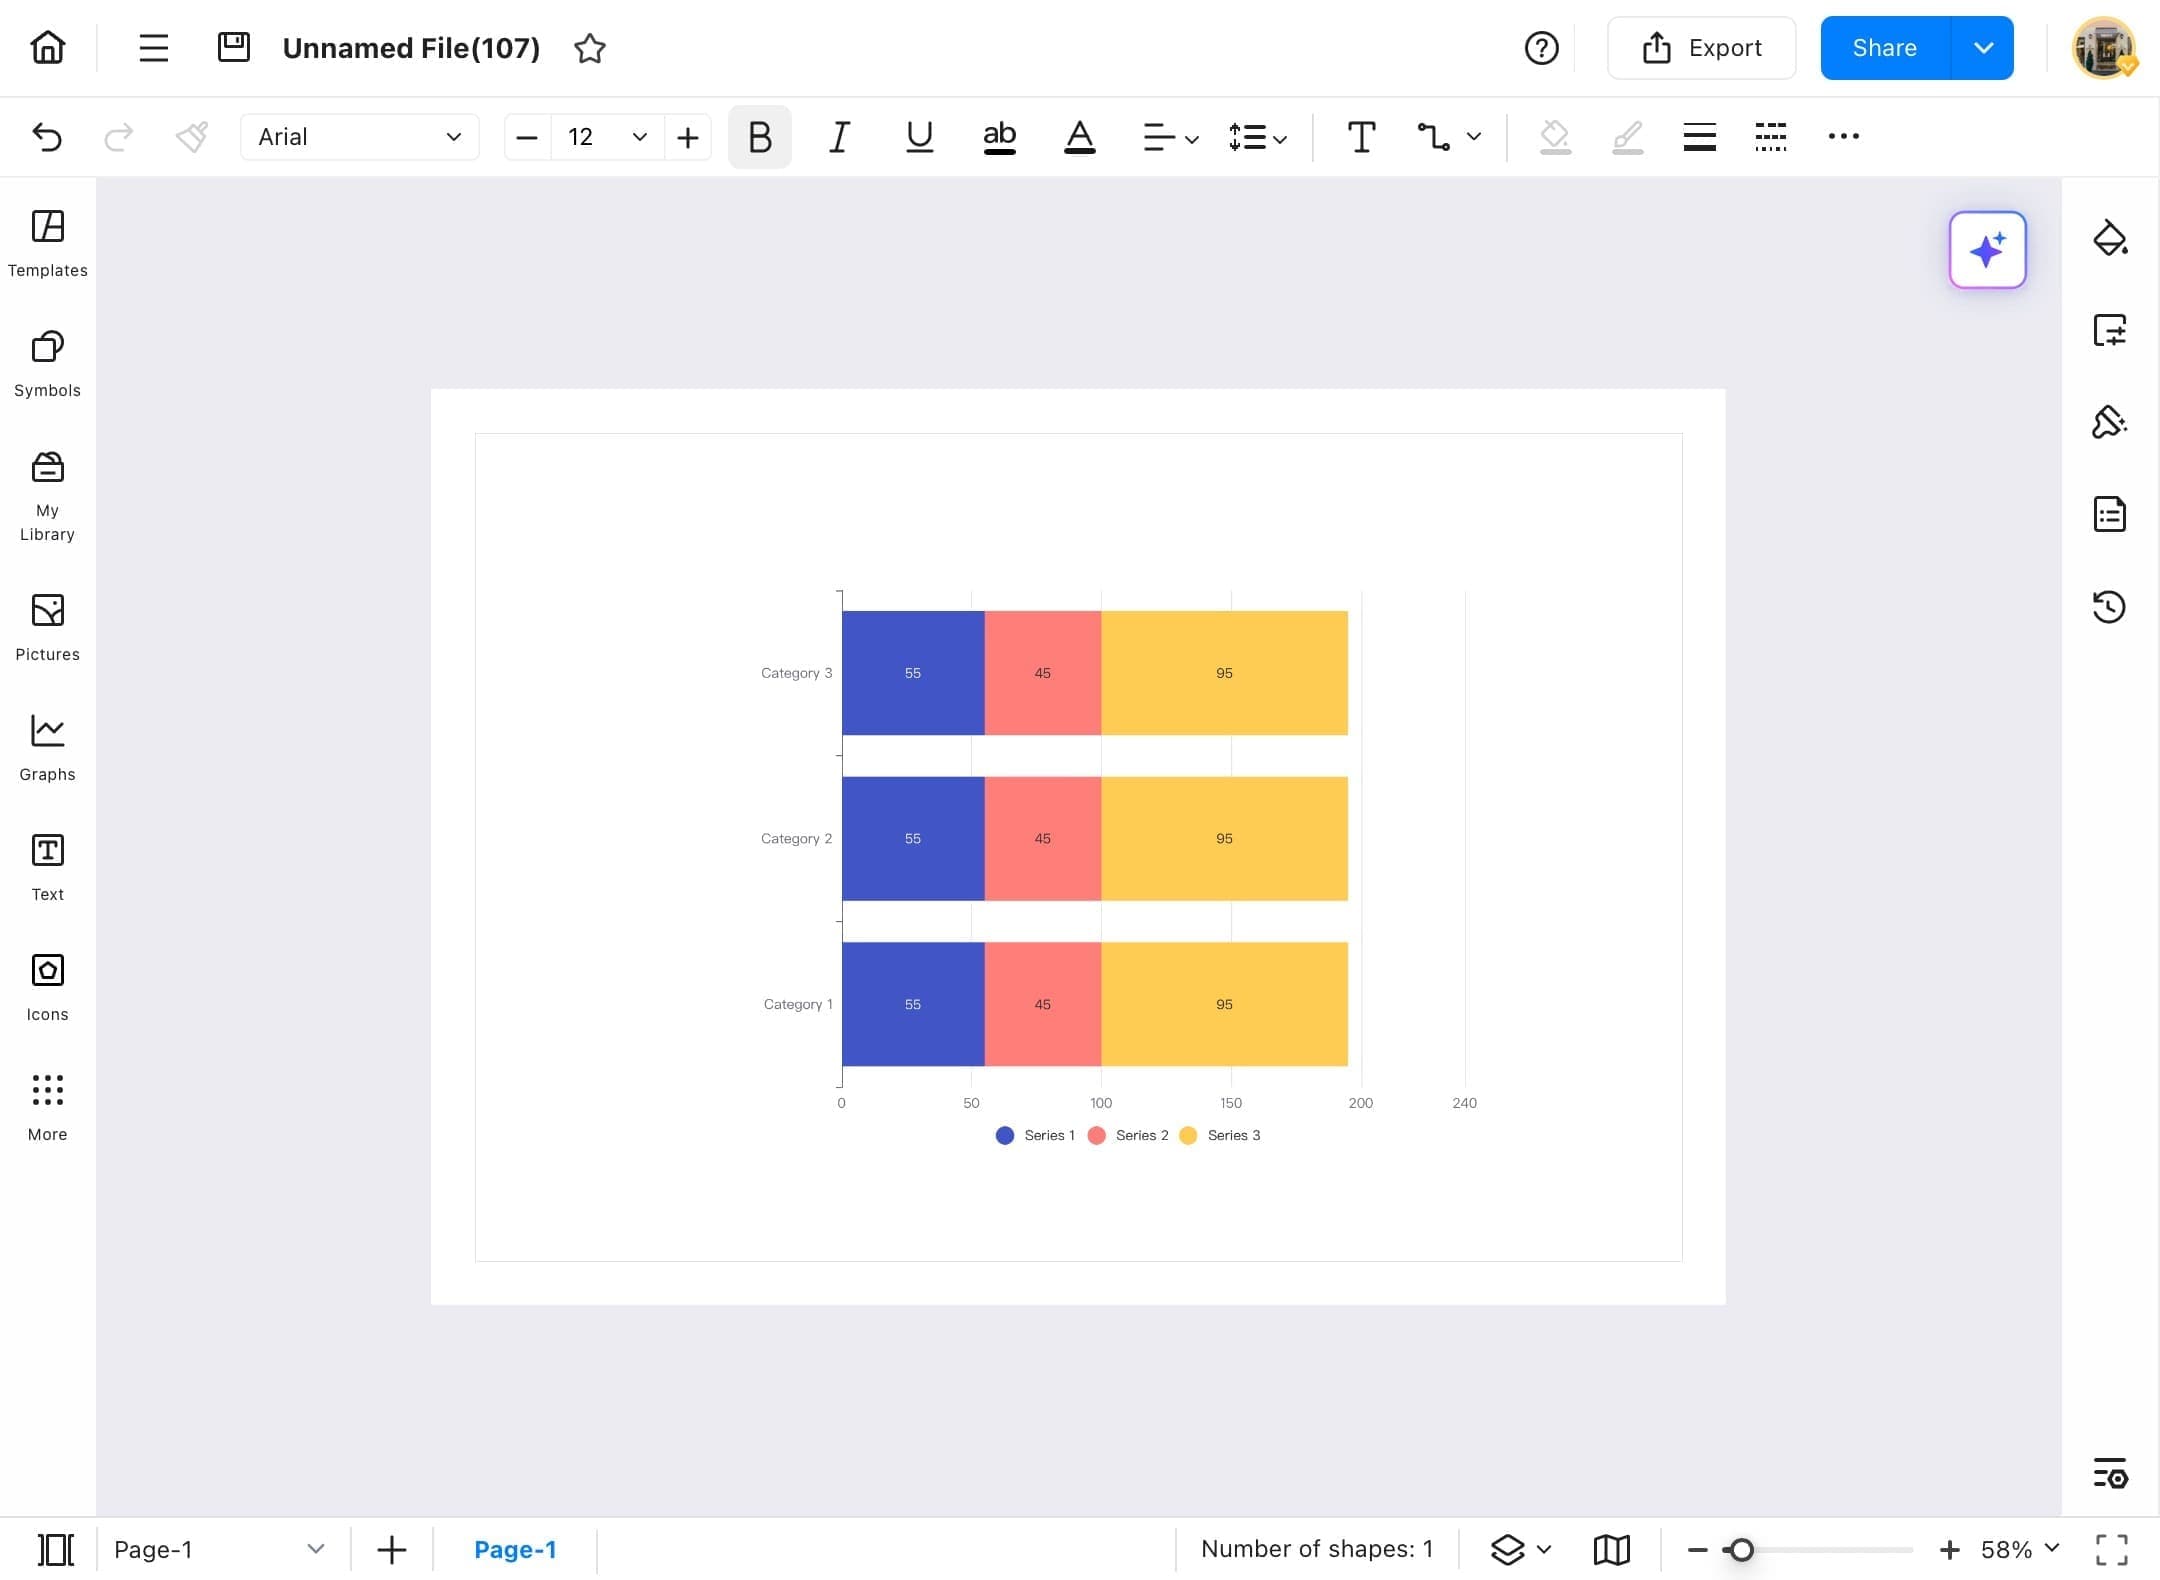
Step ❼ Chart Inserted
- The selected chart appears on your canvas, ready to be edited and customized.
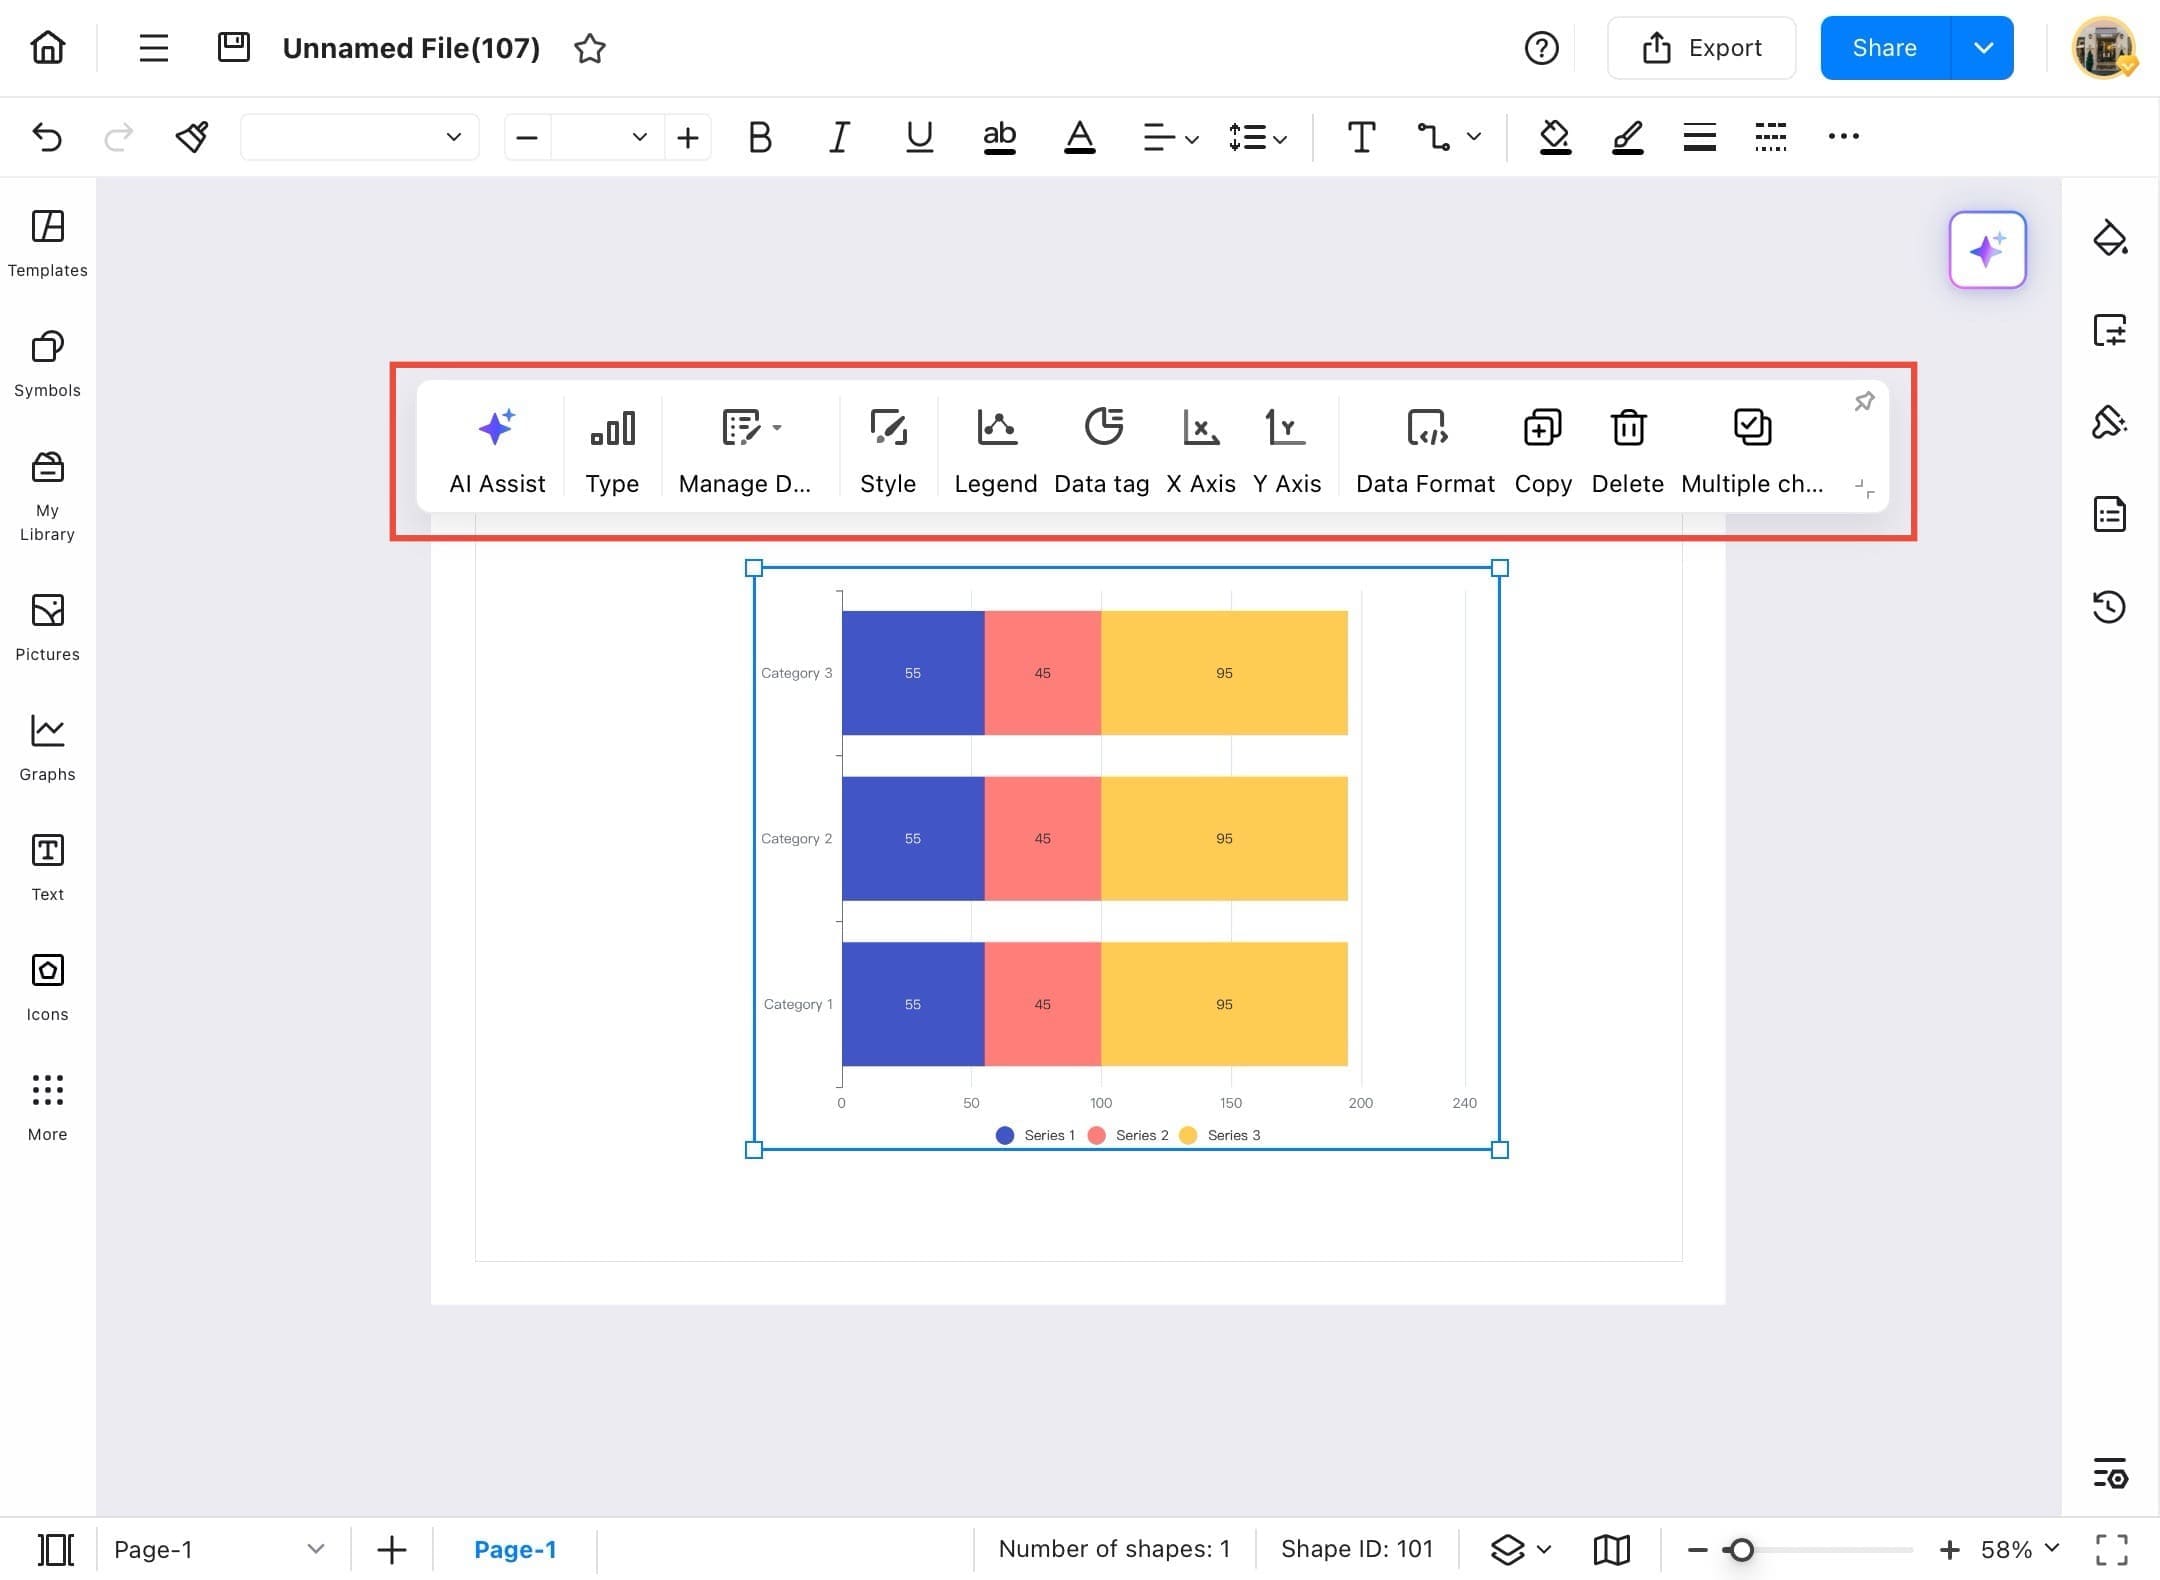
Step ❽ Edit Chart
- Tap on the chart to access formatting and editing options such as Style, Legend, Axis, Data Format, etc.
Timeline
Timelines make it easier to understand chronological events and historical developments. In EdrawMax, you can create engaging and informative timelines for educational projects or reports. Follow the steps below to add a timeline and personalize it for your subject or topic.
Step ❶ Open EdrawMax and Blank Drawing
- Open EdrawMax and go to the Home Page from the sidebar.
- Tap Create blank drawing to start a new project.
Step ❷ Access Menu Icon
- A new blank drawing canvas opens, ready for timeline creation. Tap on the three lines icon.
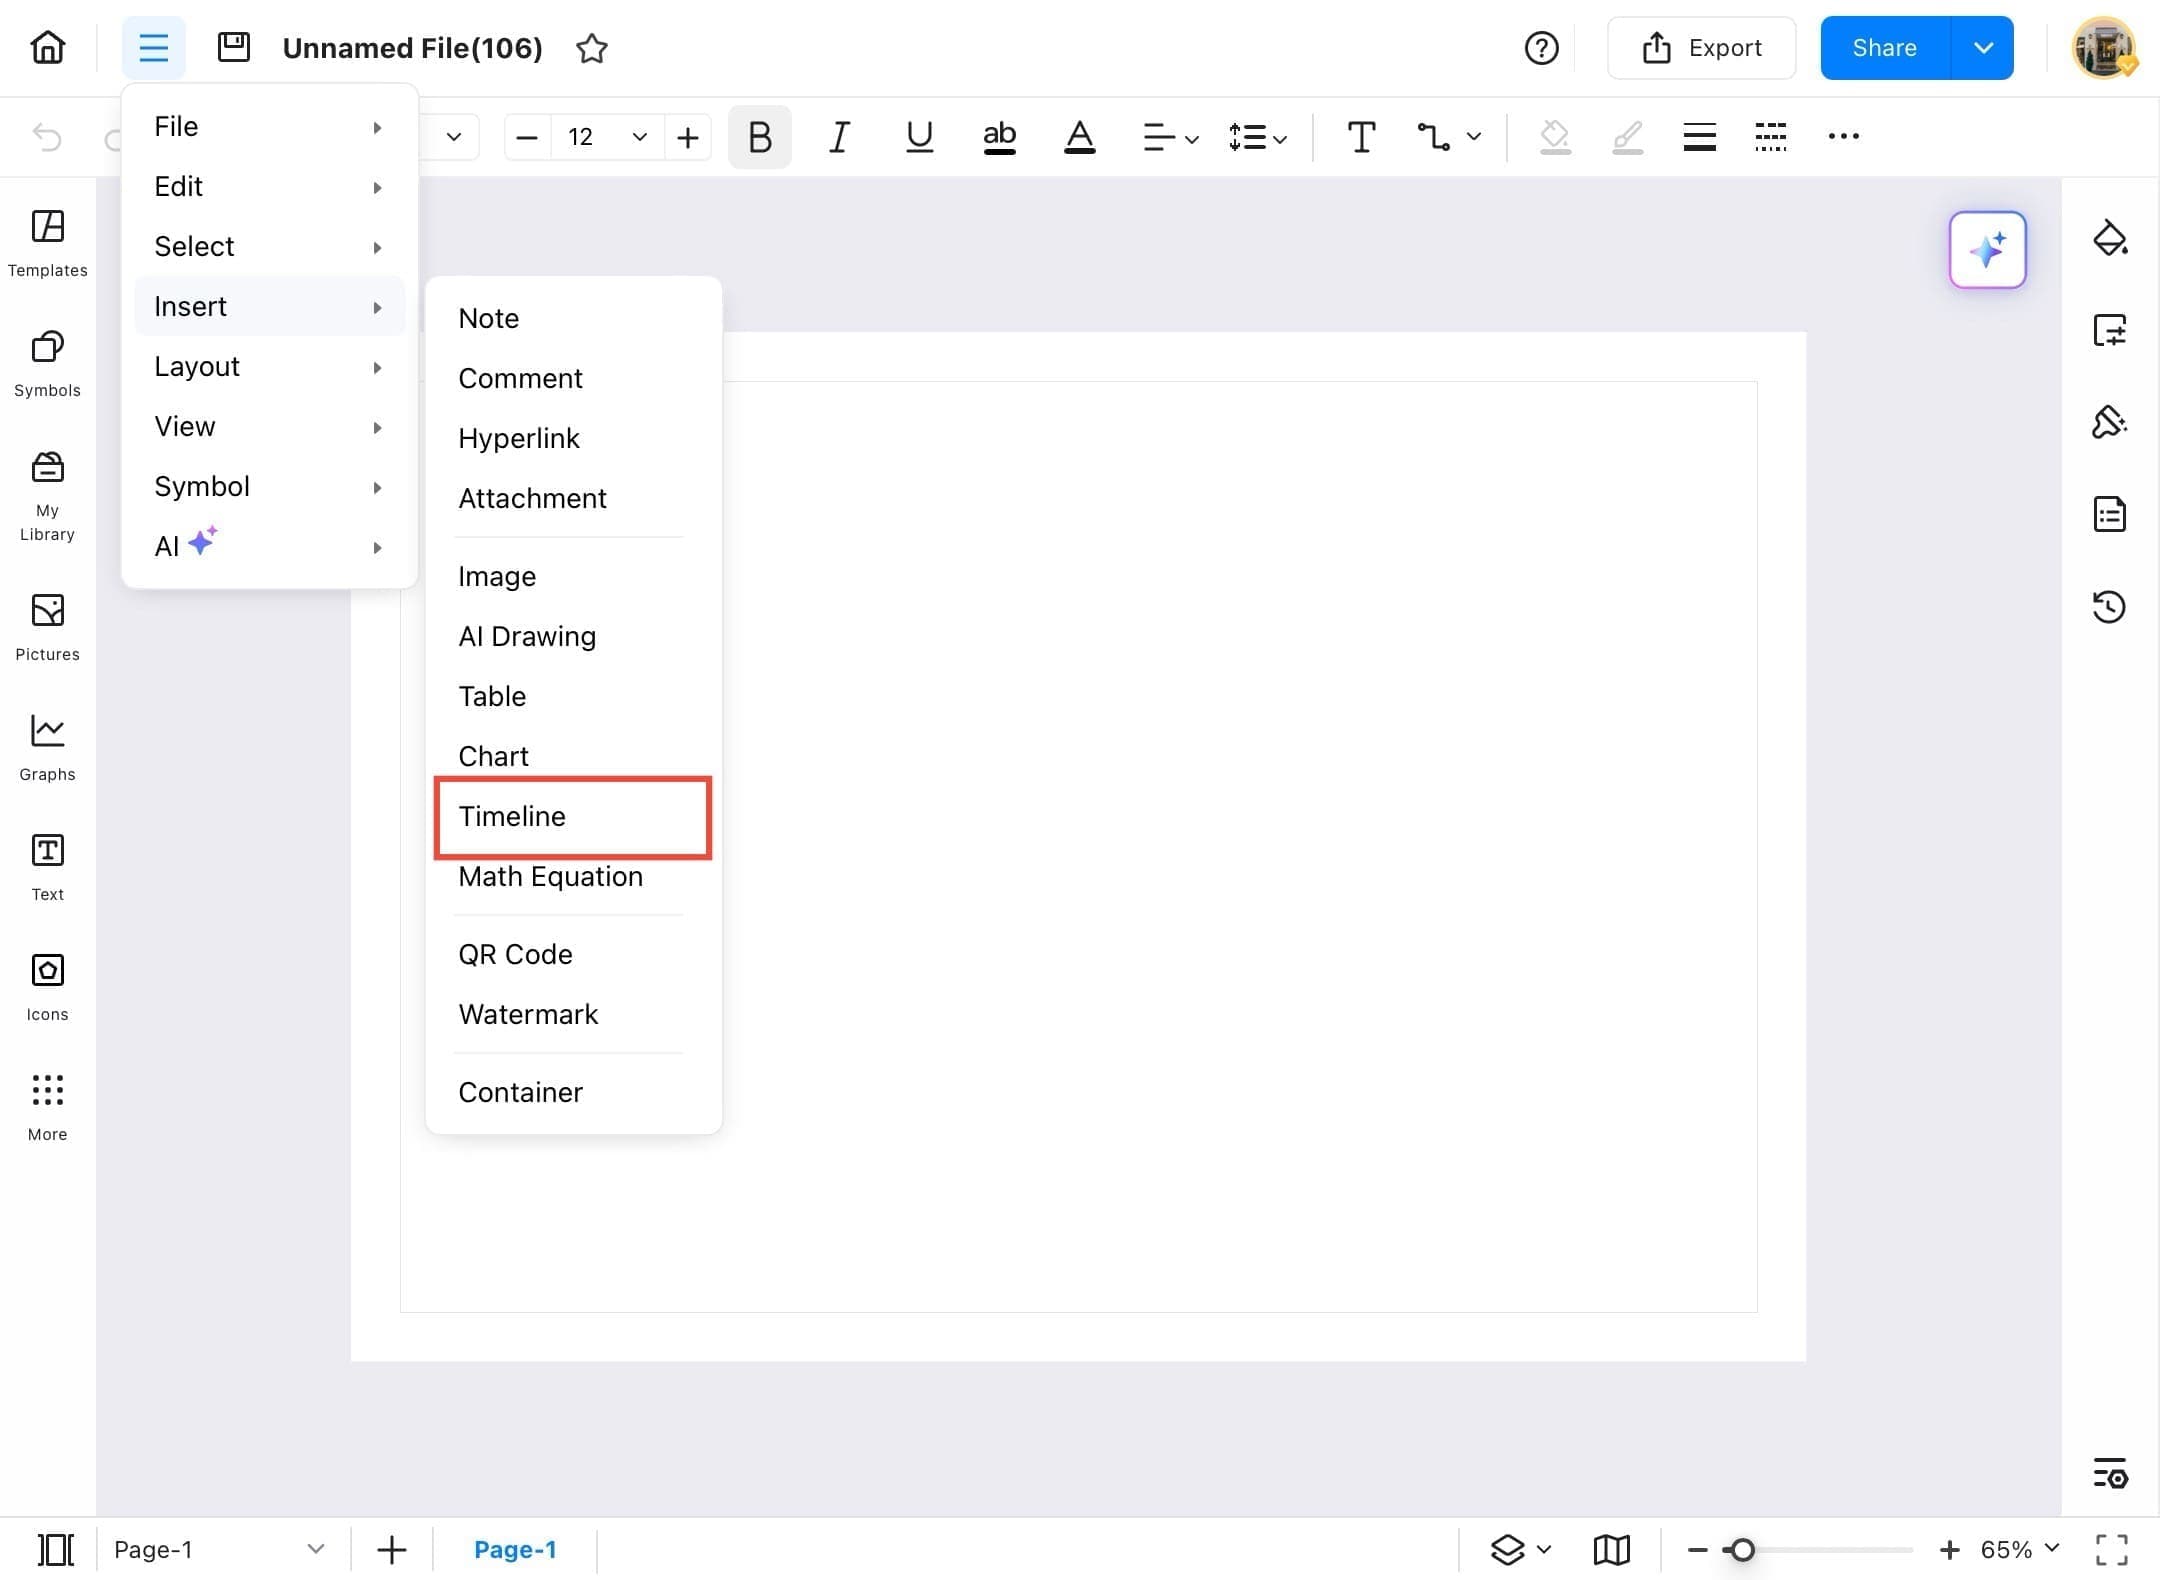
Step ❸ Tap Insert Option
- Tap the Insert option from the top menu.

Step ❹ Select Timeline
- From the dropdown, select Timeline to begin inserting a timeline chart.
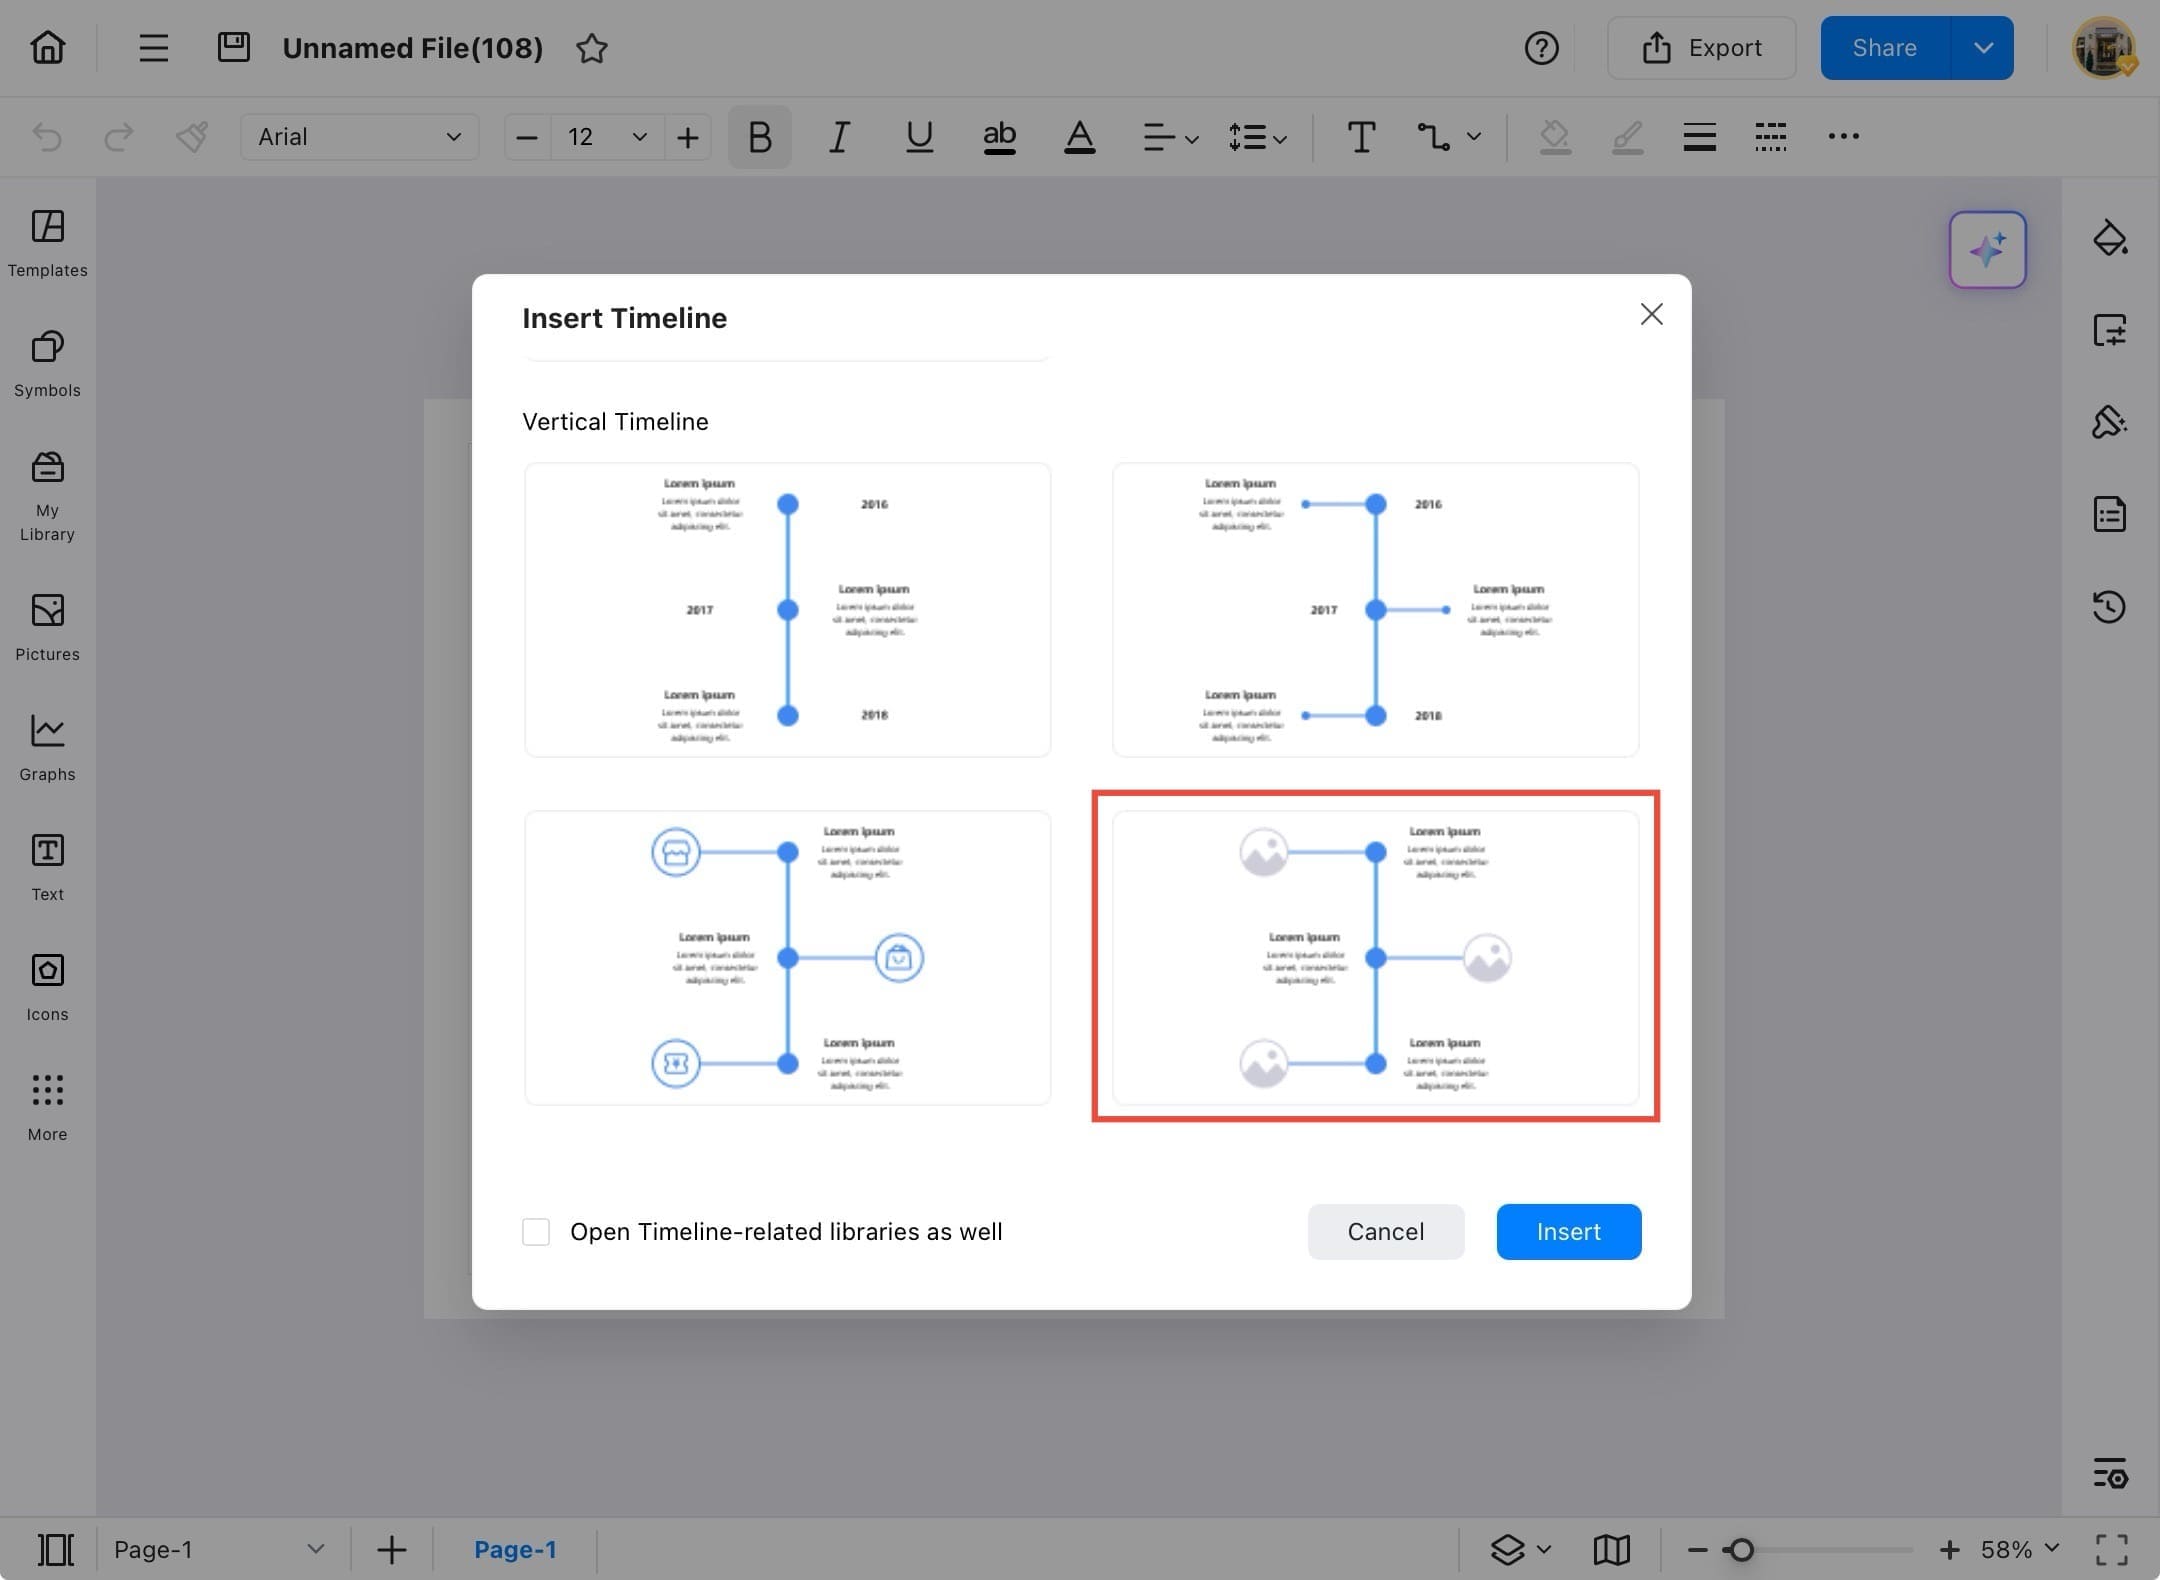
Step ❺ Choose Timeline Layout
- Choose a timeline layout (e.g., vertical or horizontal styles) from the Insert Timeline popup.
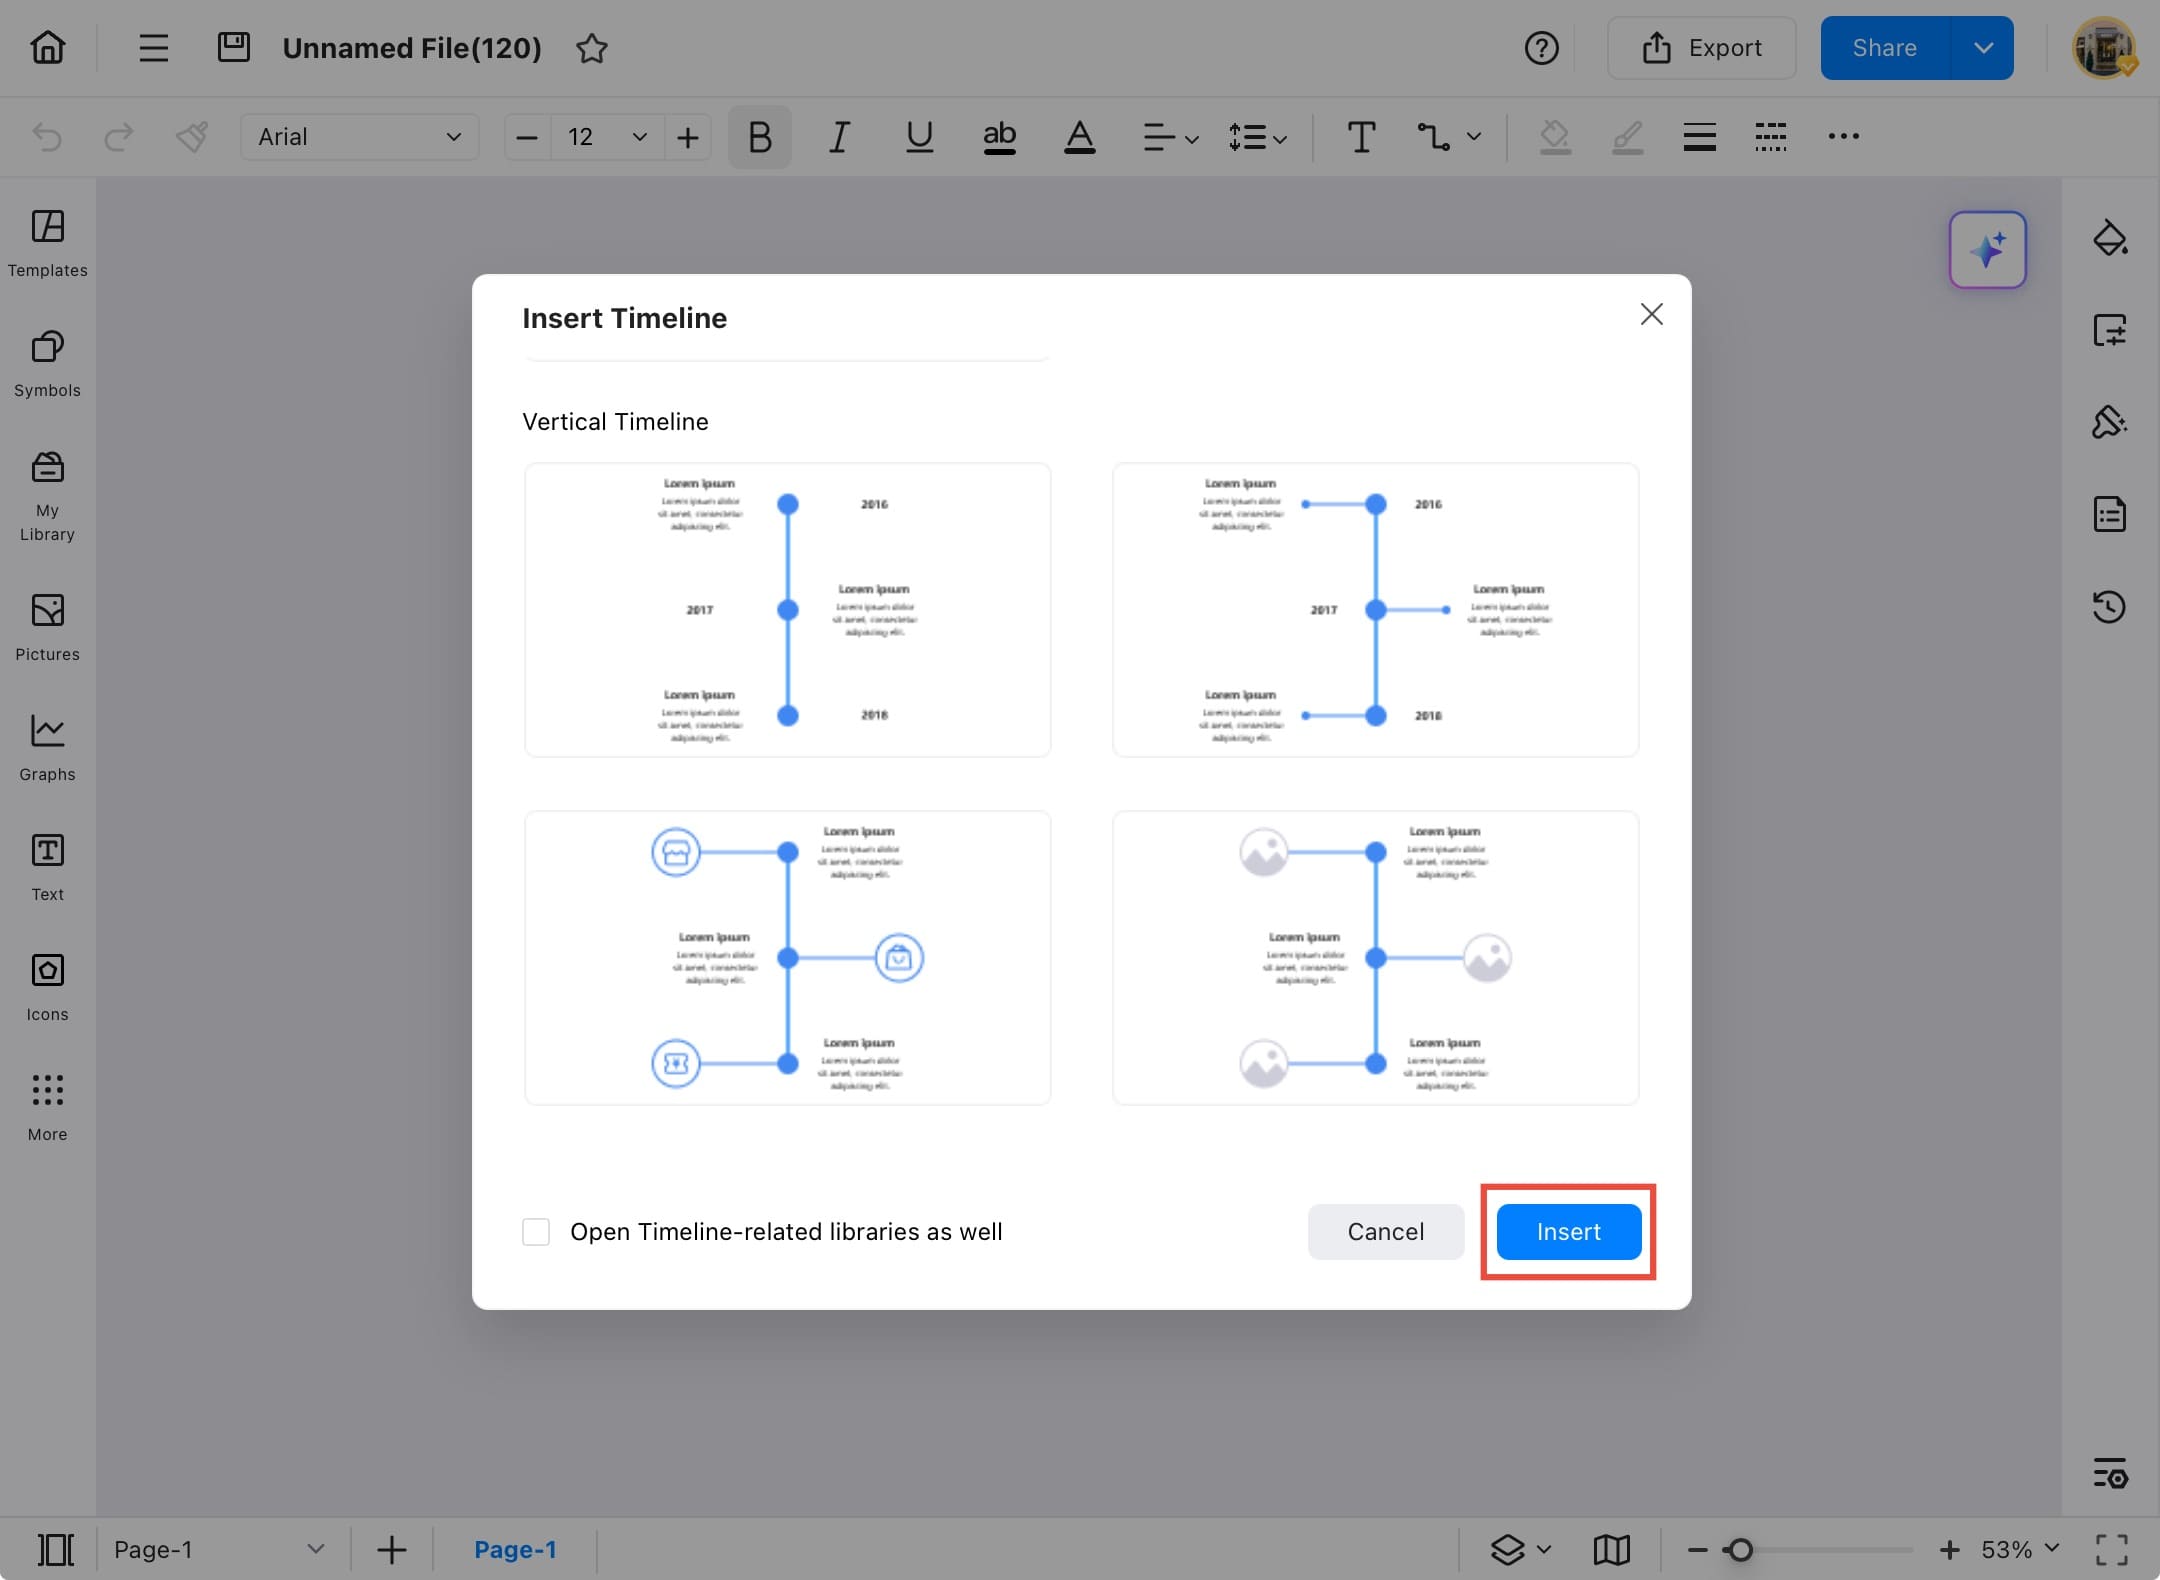
Step ❻ Tap Insert Button
- Tap the Insert button after selecting your preferred timeline layout.
Step ❼ Timeline Inserted
- The timeline is now inserted into your drawing. You can see the structure with placeholders for text and images.
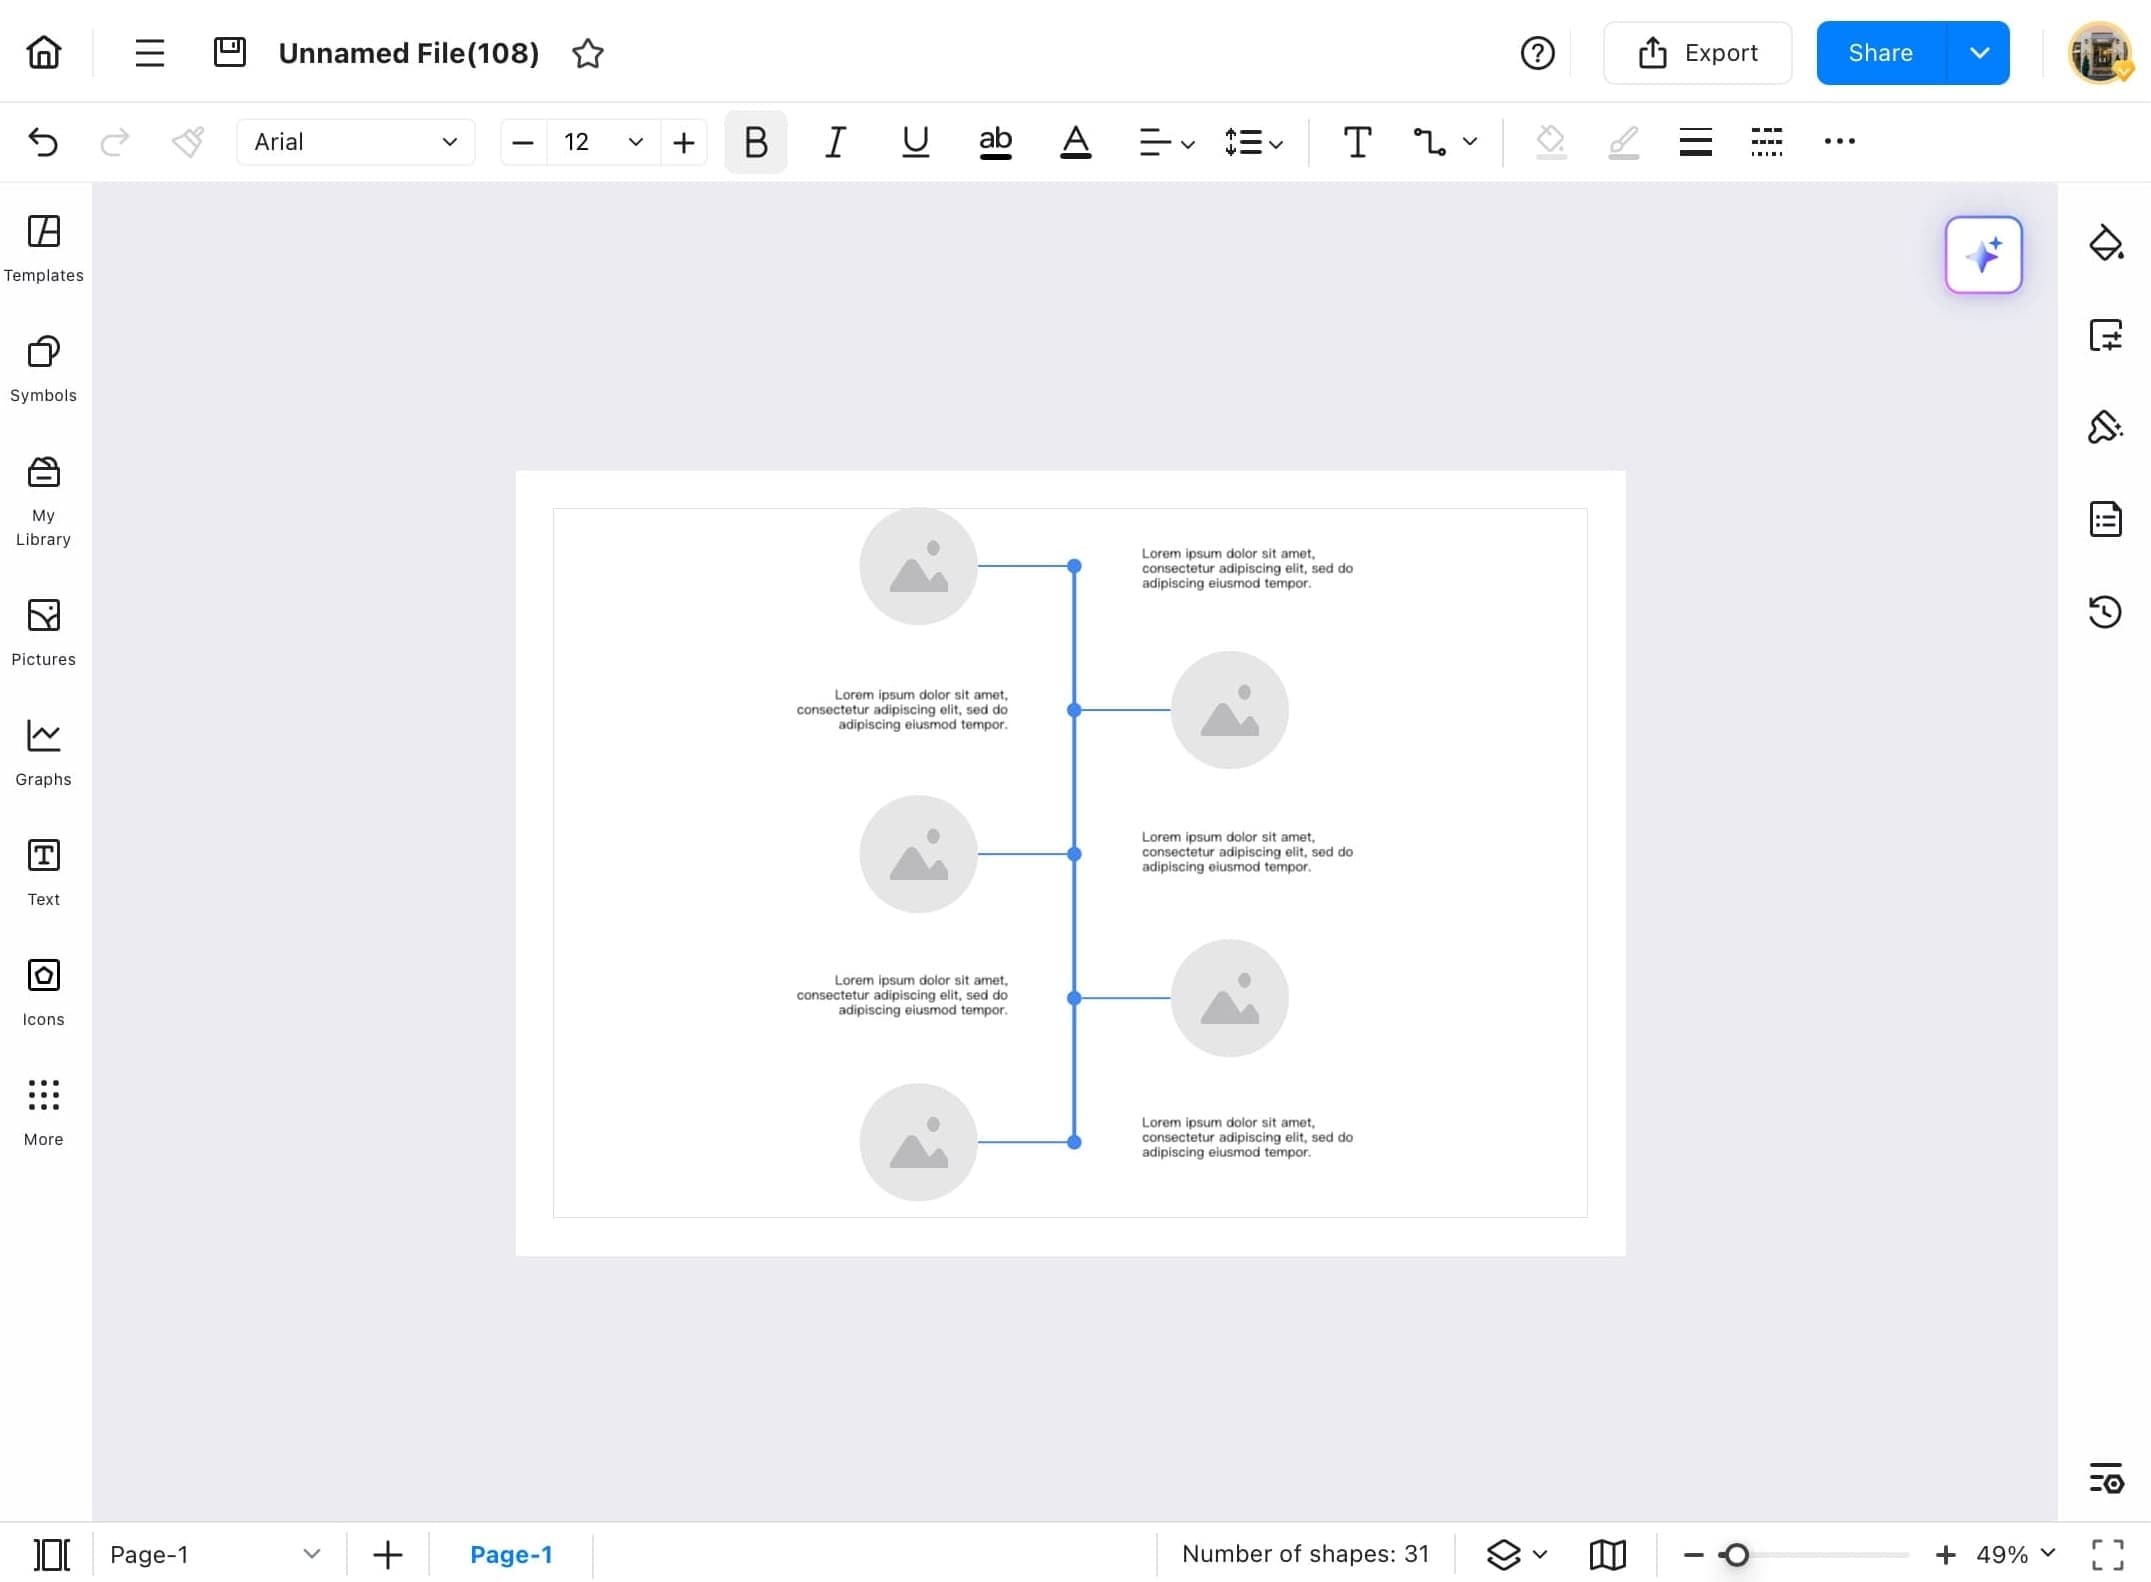
Step ❽ Customize Timeline
- Use the toolbar above the timeline to customize the chart. Options include adding pictures, editing text, changing shapes, and modifying layout and style.
Math Equation
Need to add a math formula to your diagram? EdrawMax makes it easy! You can insert equations for school, college, or any technical project. In this section, we’ll show you how to insert math equations step by step, even if you’re new to using formulas in diagrams.
Step ❶ Open EdrawMax and Blank Drawing
- Open EdrawMax on your tablet and go to the Home Page.
- Tap Create blank drawing to start a new project.

Step ❷ Access Menu Icon
- A blank canvas will open where you can insert elements. Then tap on the three lines in the top-left side.
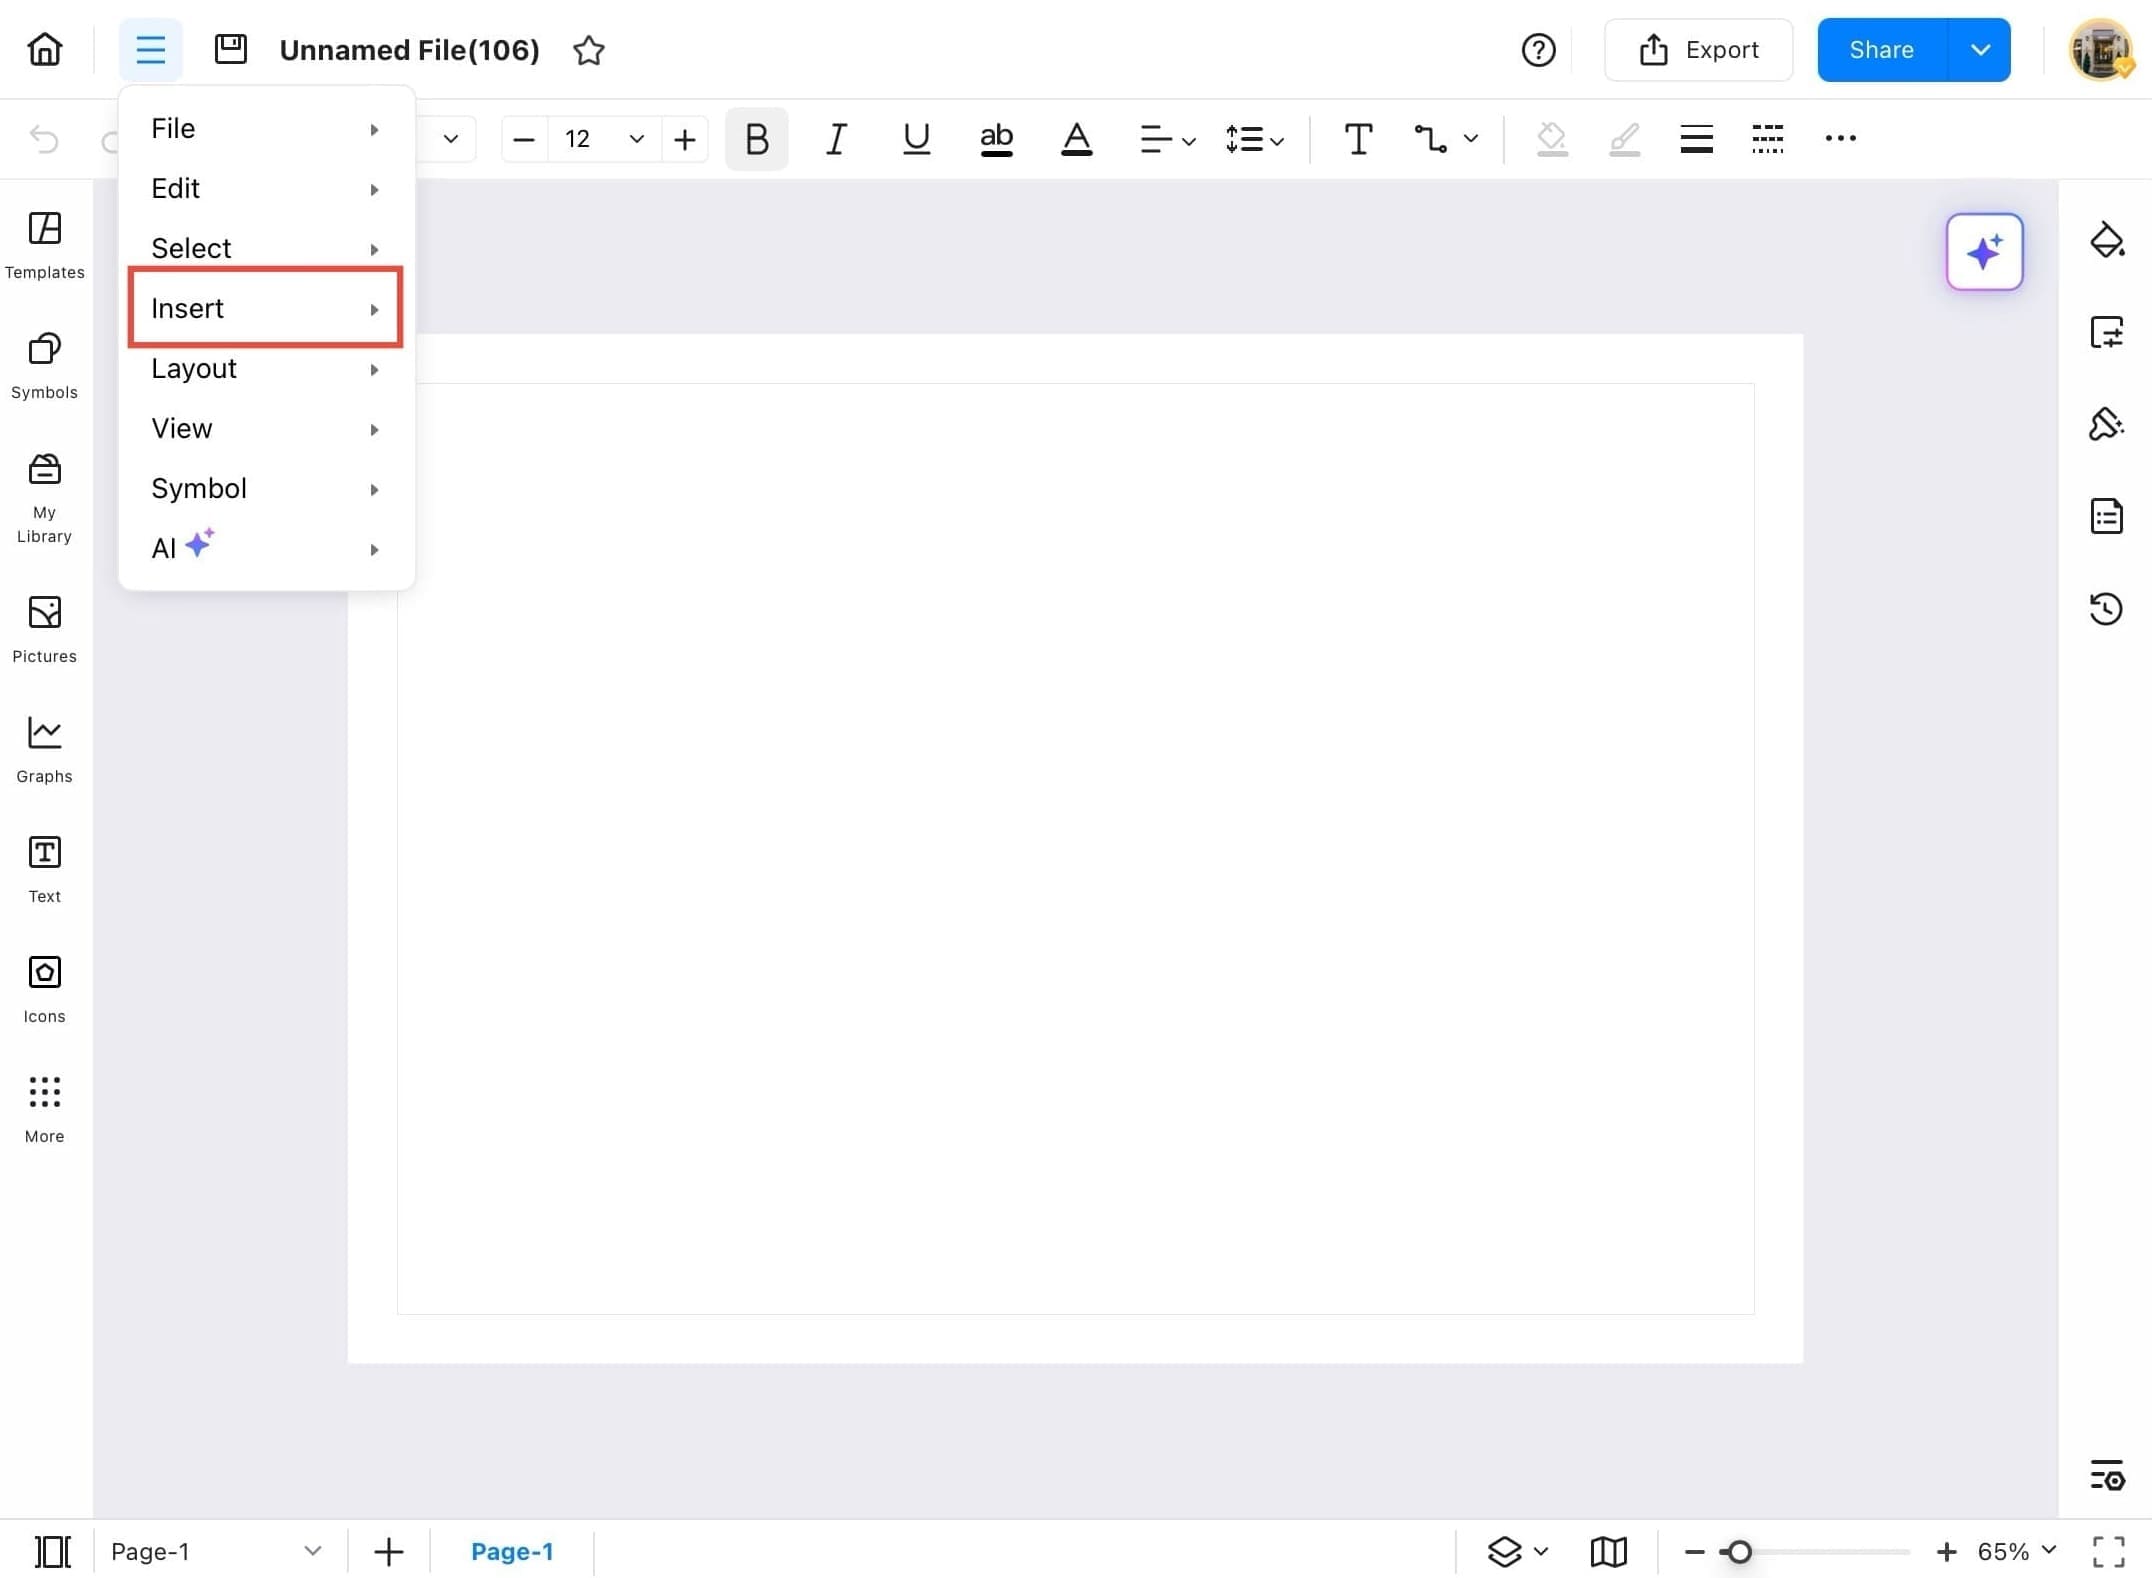
Step ❸ Tap Insert Option
- Tap the Insert menu from the top-left dropdown options.
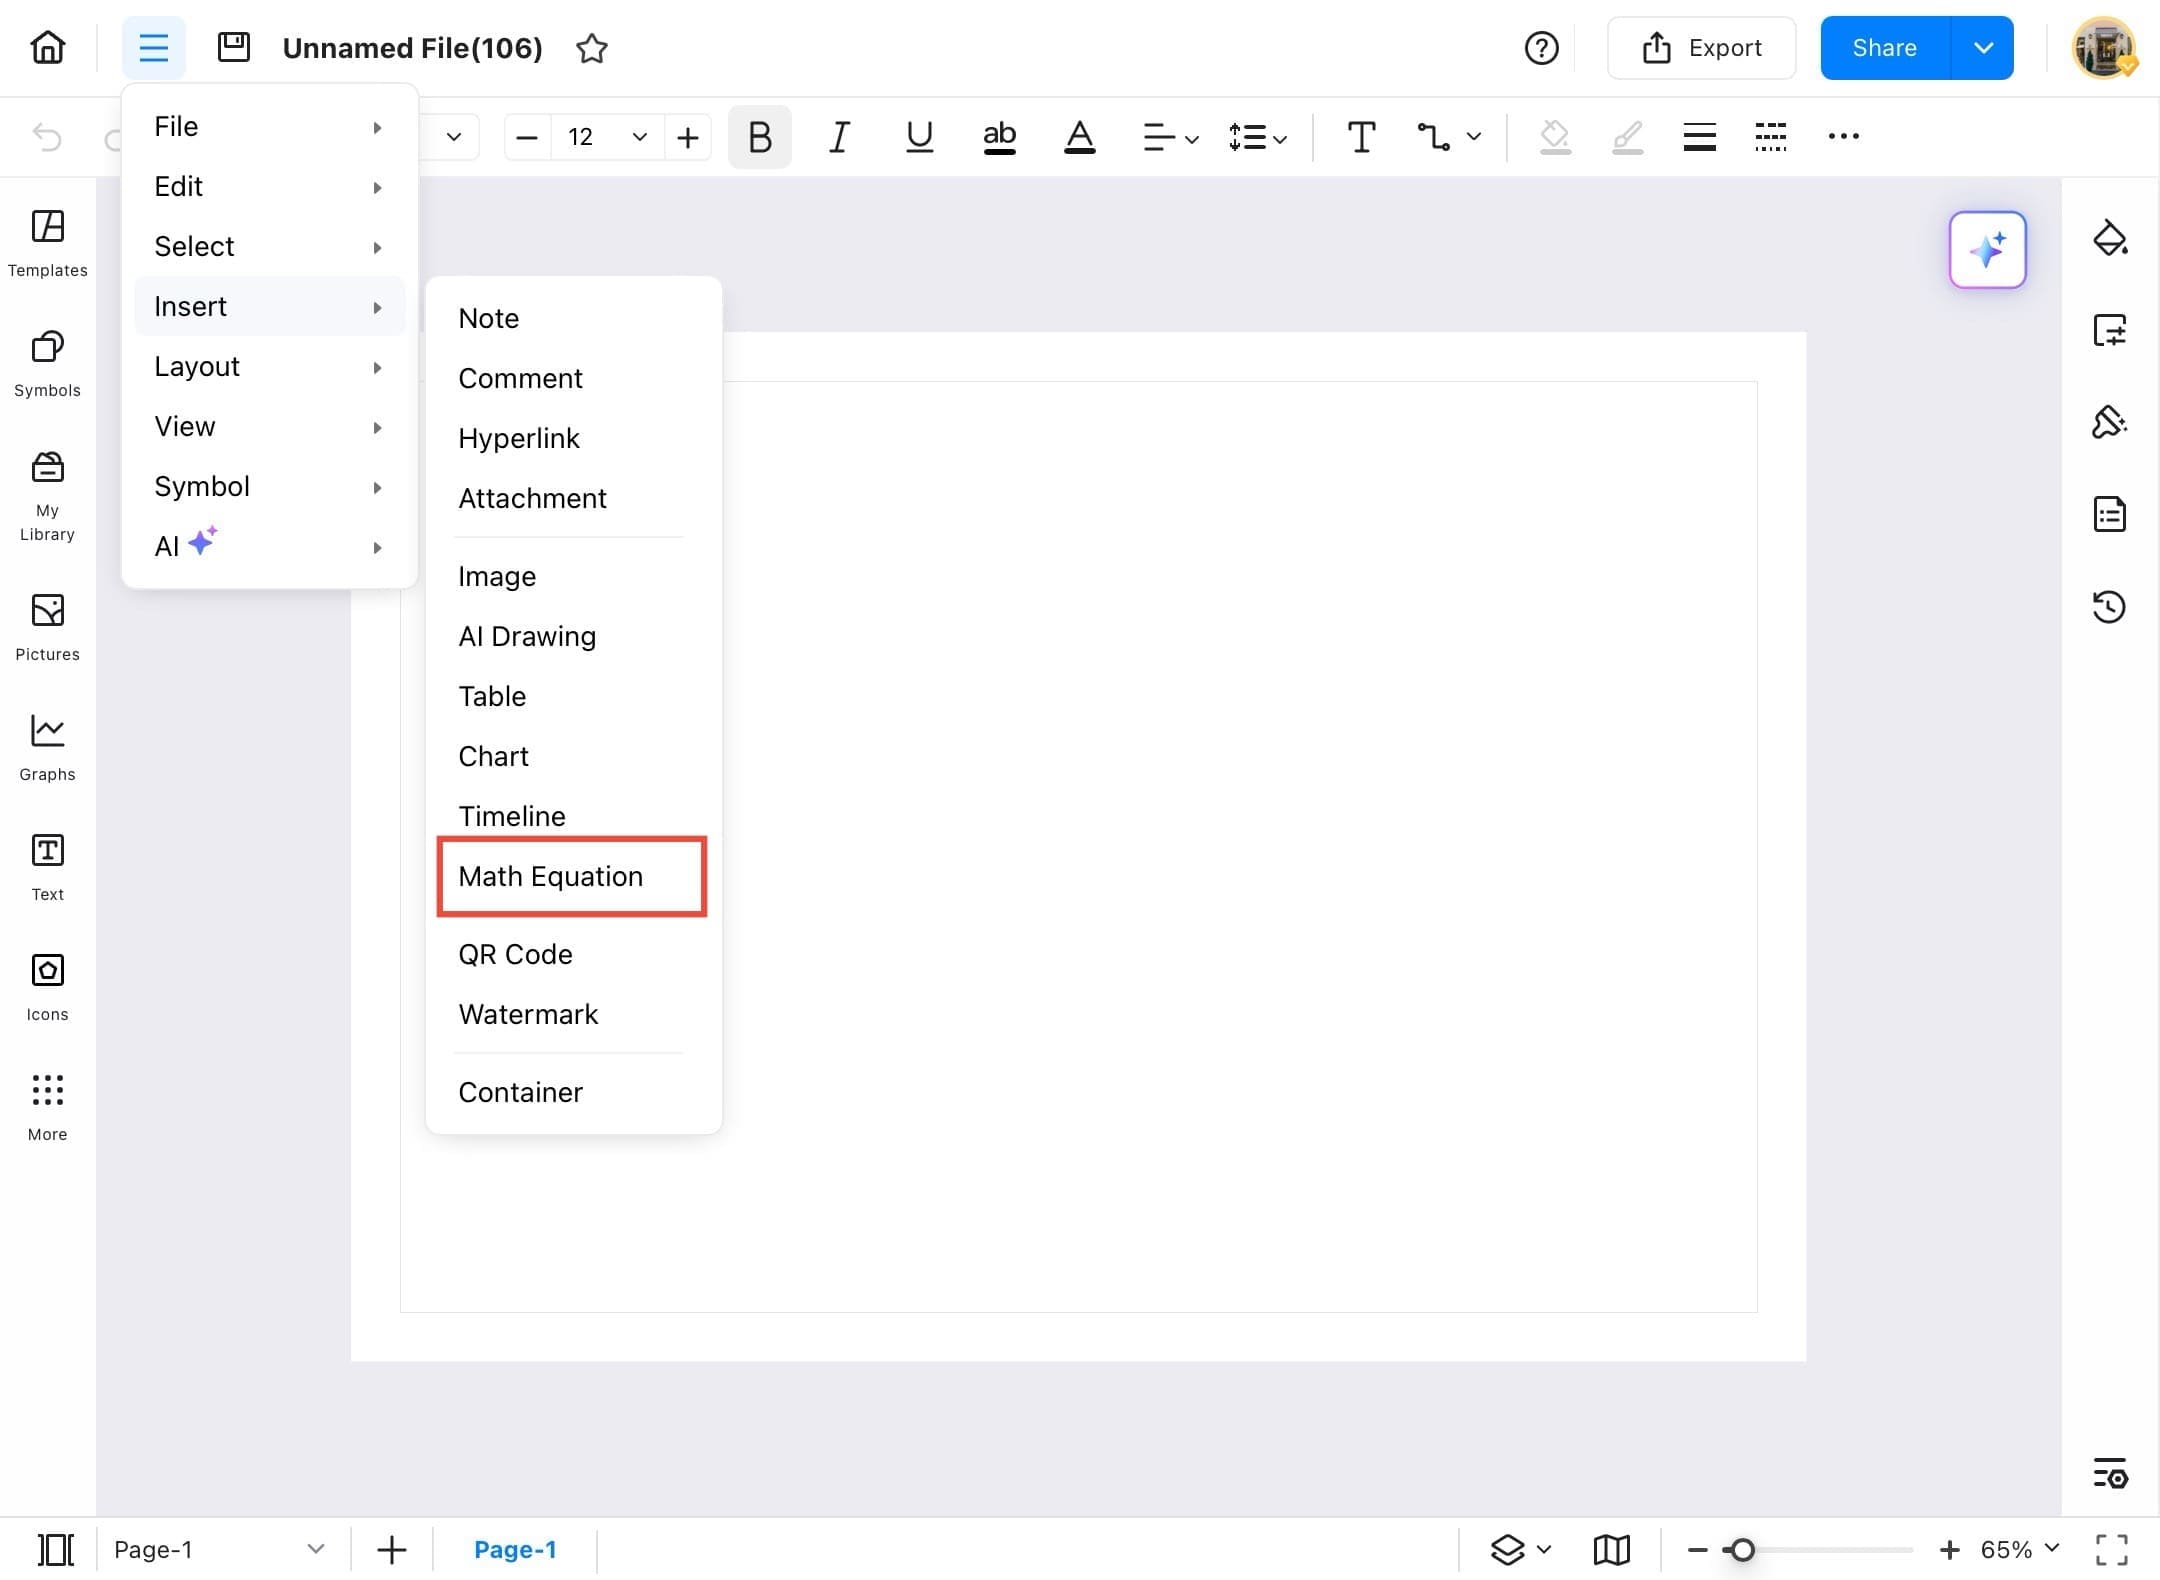
Step ❹ Tap Math Equation
- From the Insert dropdown menu, tap Math Equation to open the math editor.
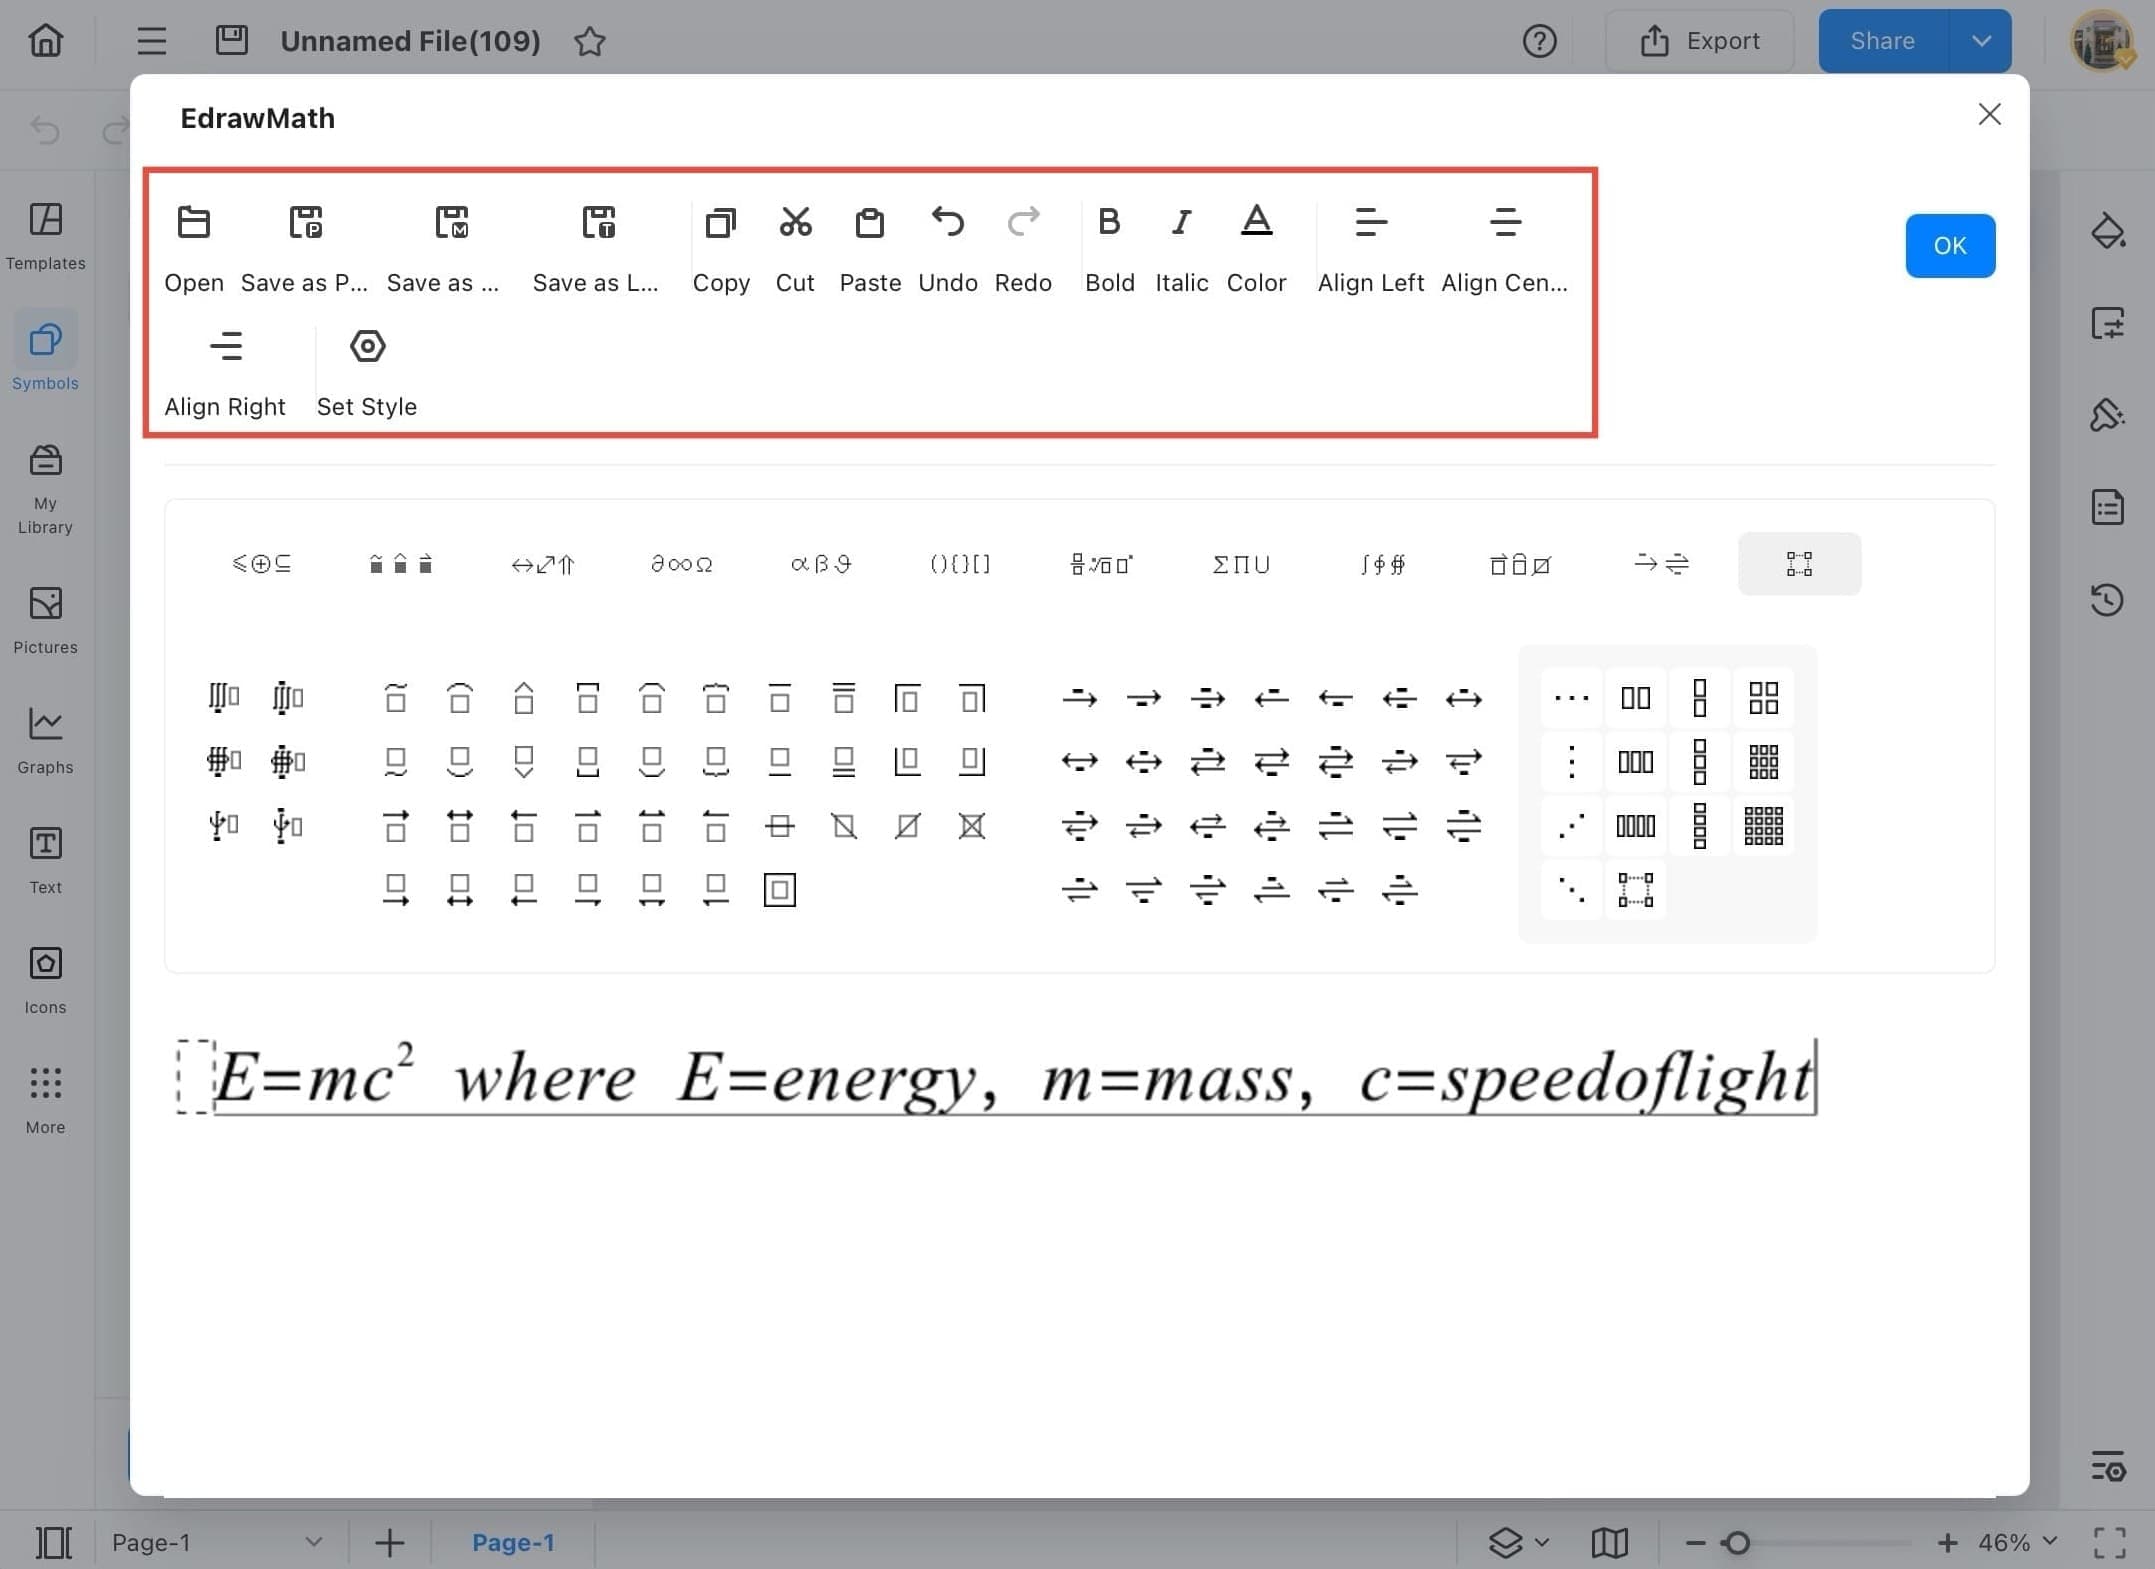
Step ❻ Customize Equation
- Use the formatting options at the top (bold, italic, alignment, etc.) to customize your equation. Example shown: $E = mc^2$ where E = energy, m = mass, c = speed of light.
Step ❽ Equation Inserted
- The formatted equation is now inserted onto your drawing canvas. You can move or resize it like any other object.

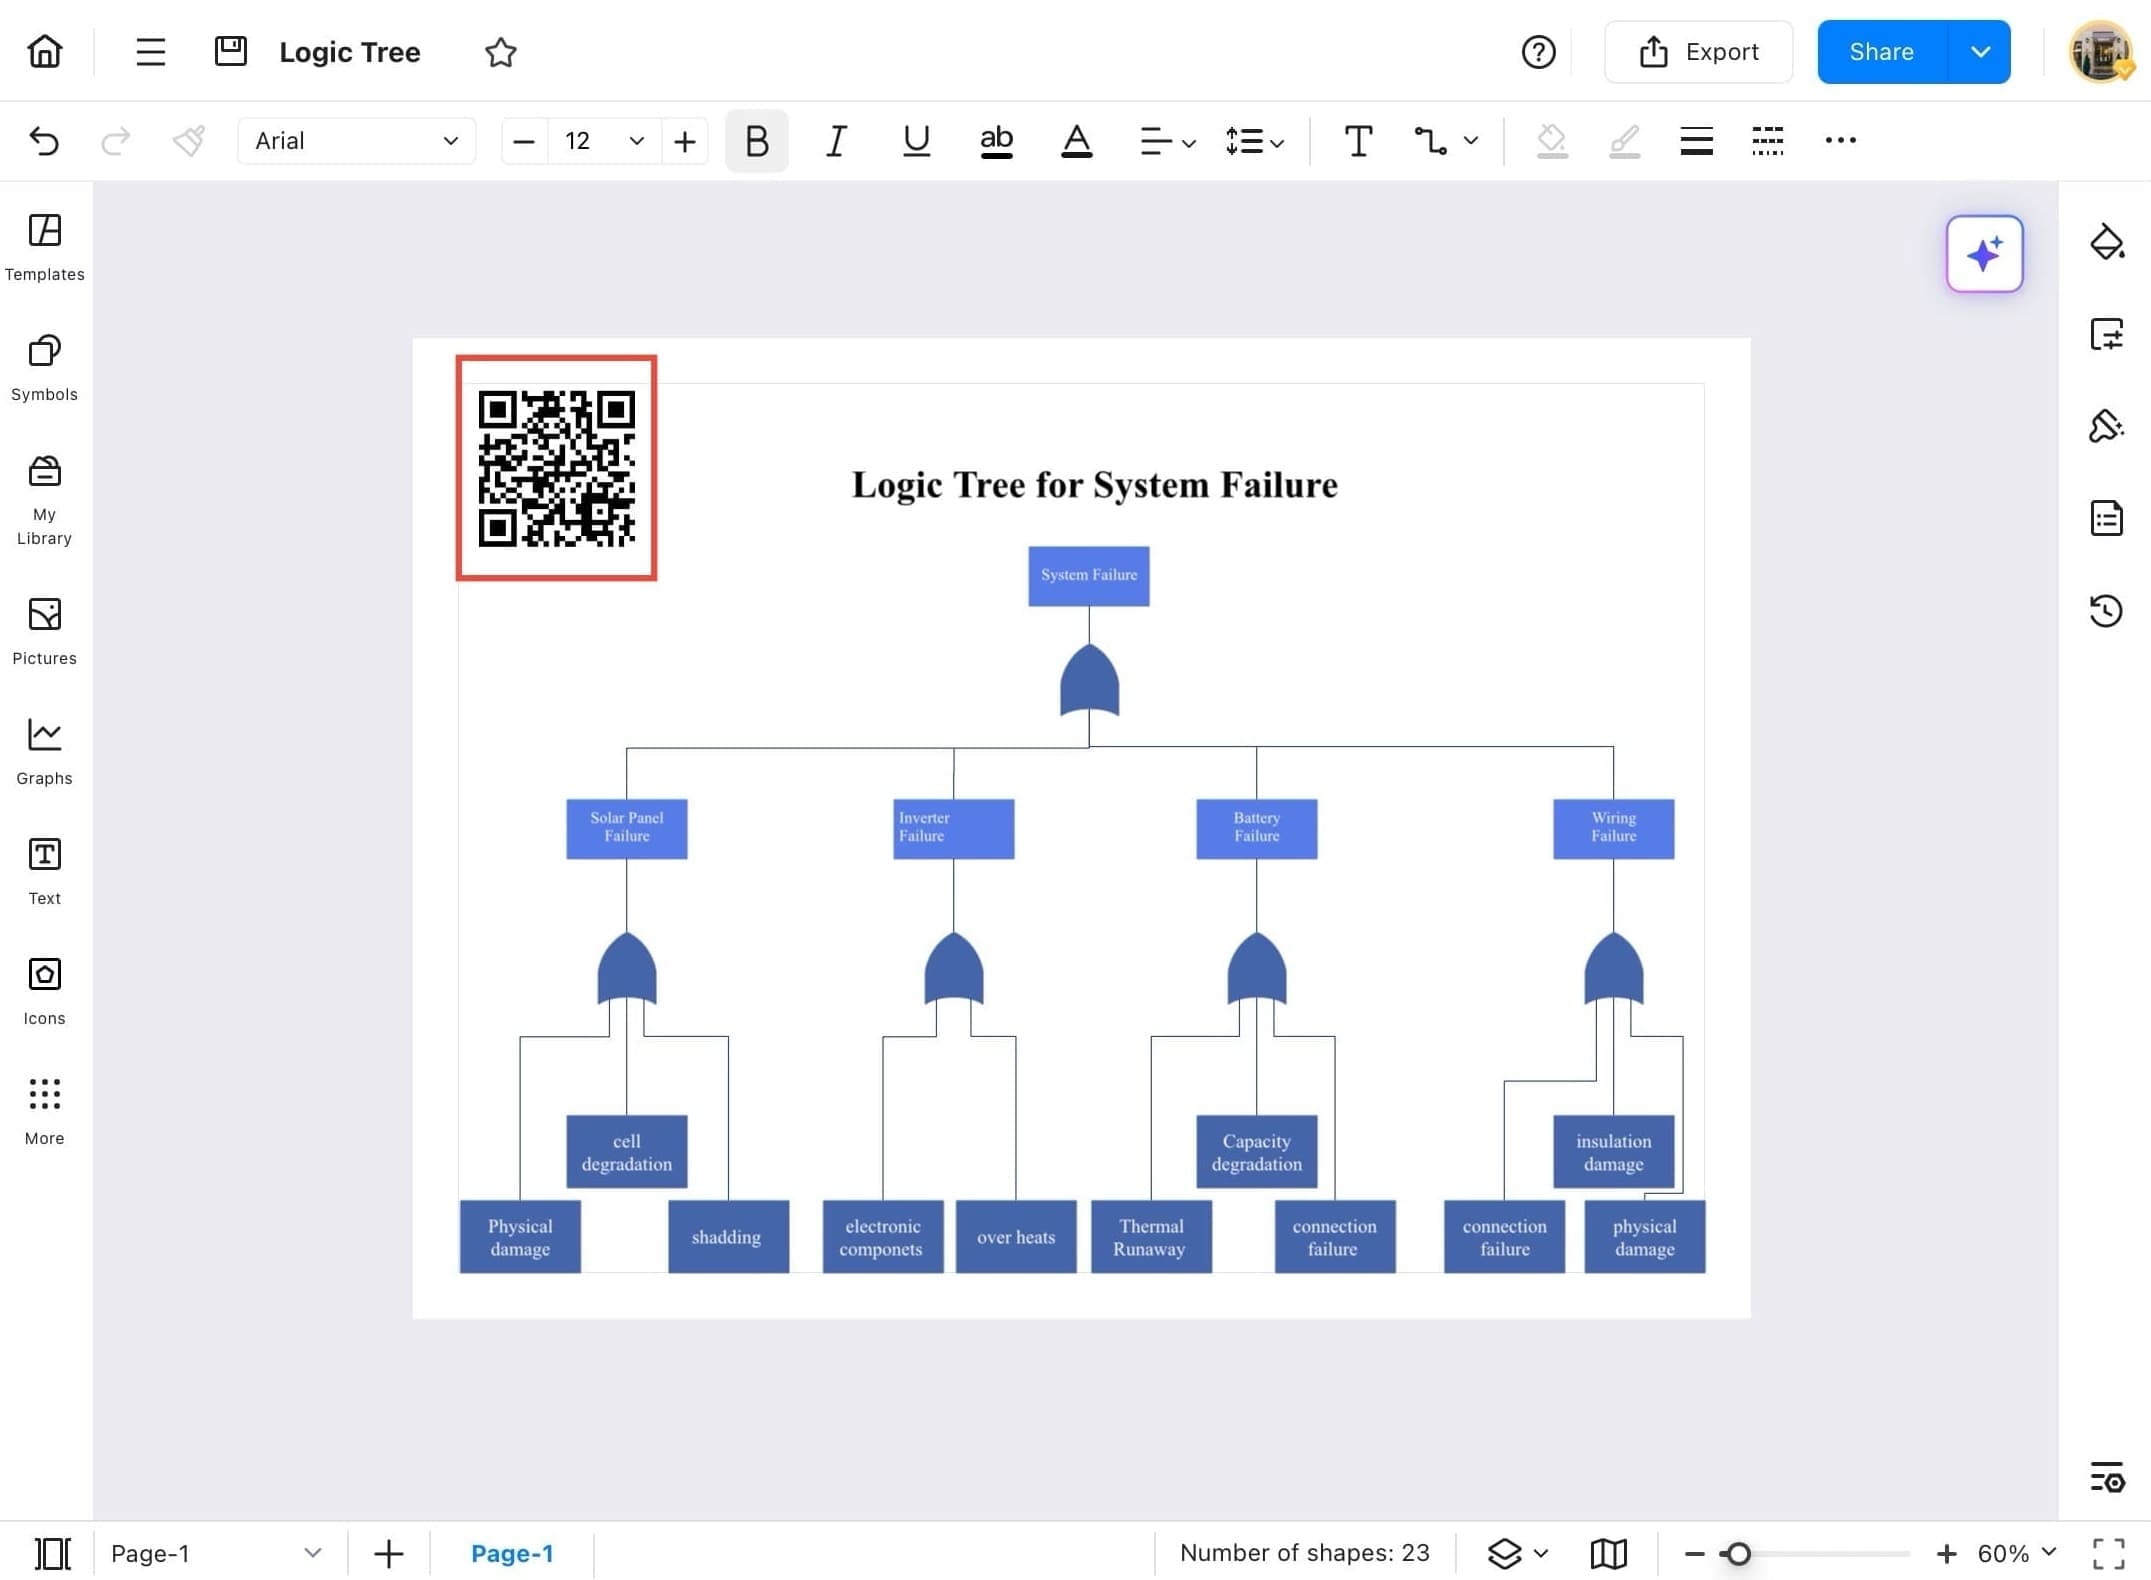
QR Code
QR codes offer a modern way to connect your diagram to online learning materials or references. EdrawMax allows you to insert fully customizable QR codes with just a few taps. Follow these simple steps to embed a QR code into your project for easy access to additional resources.
Step ❶ Launch EdrawMax and Open File
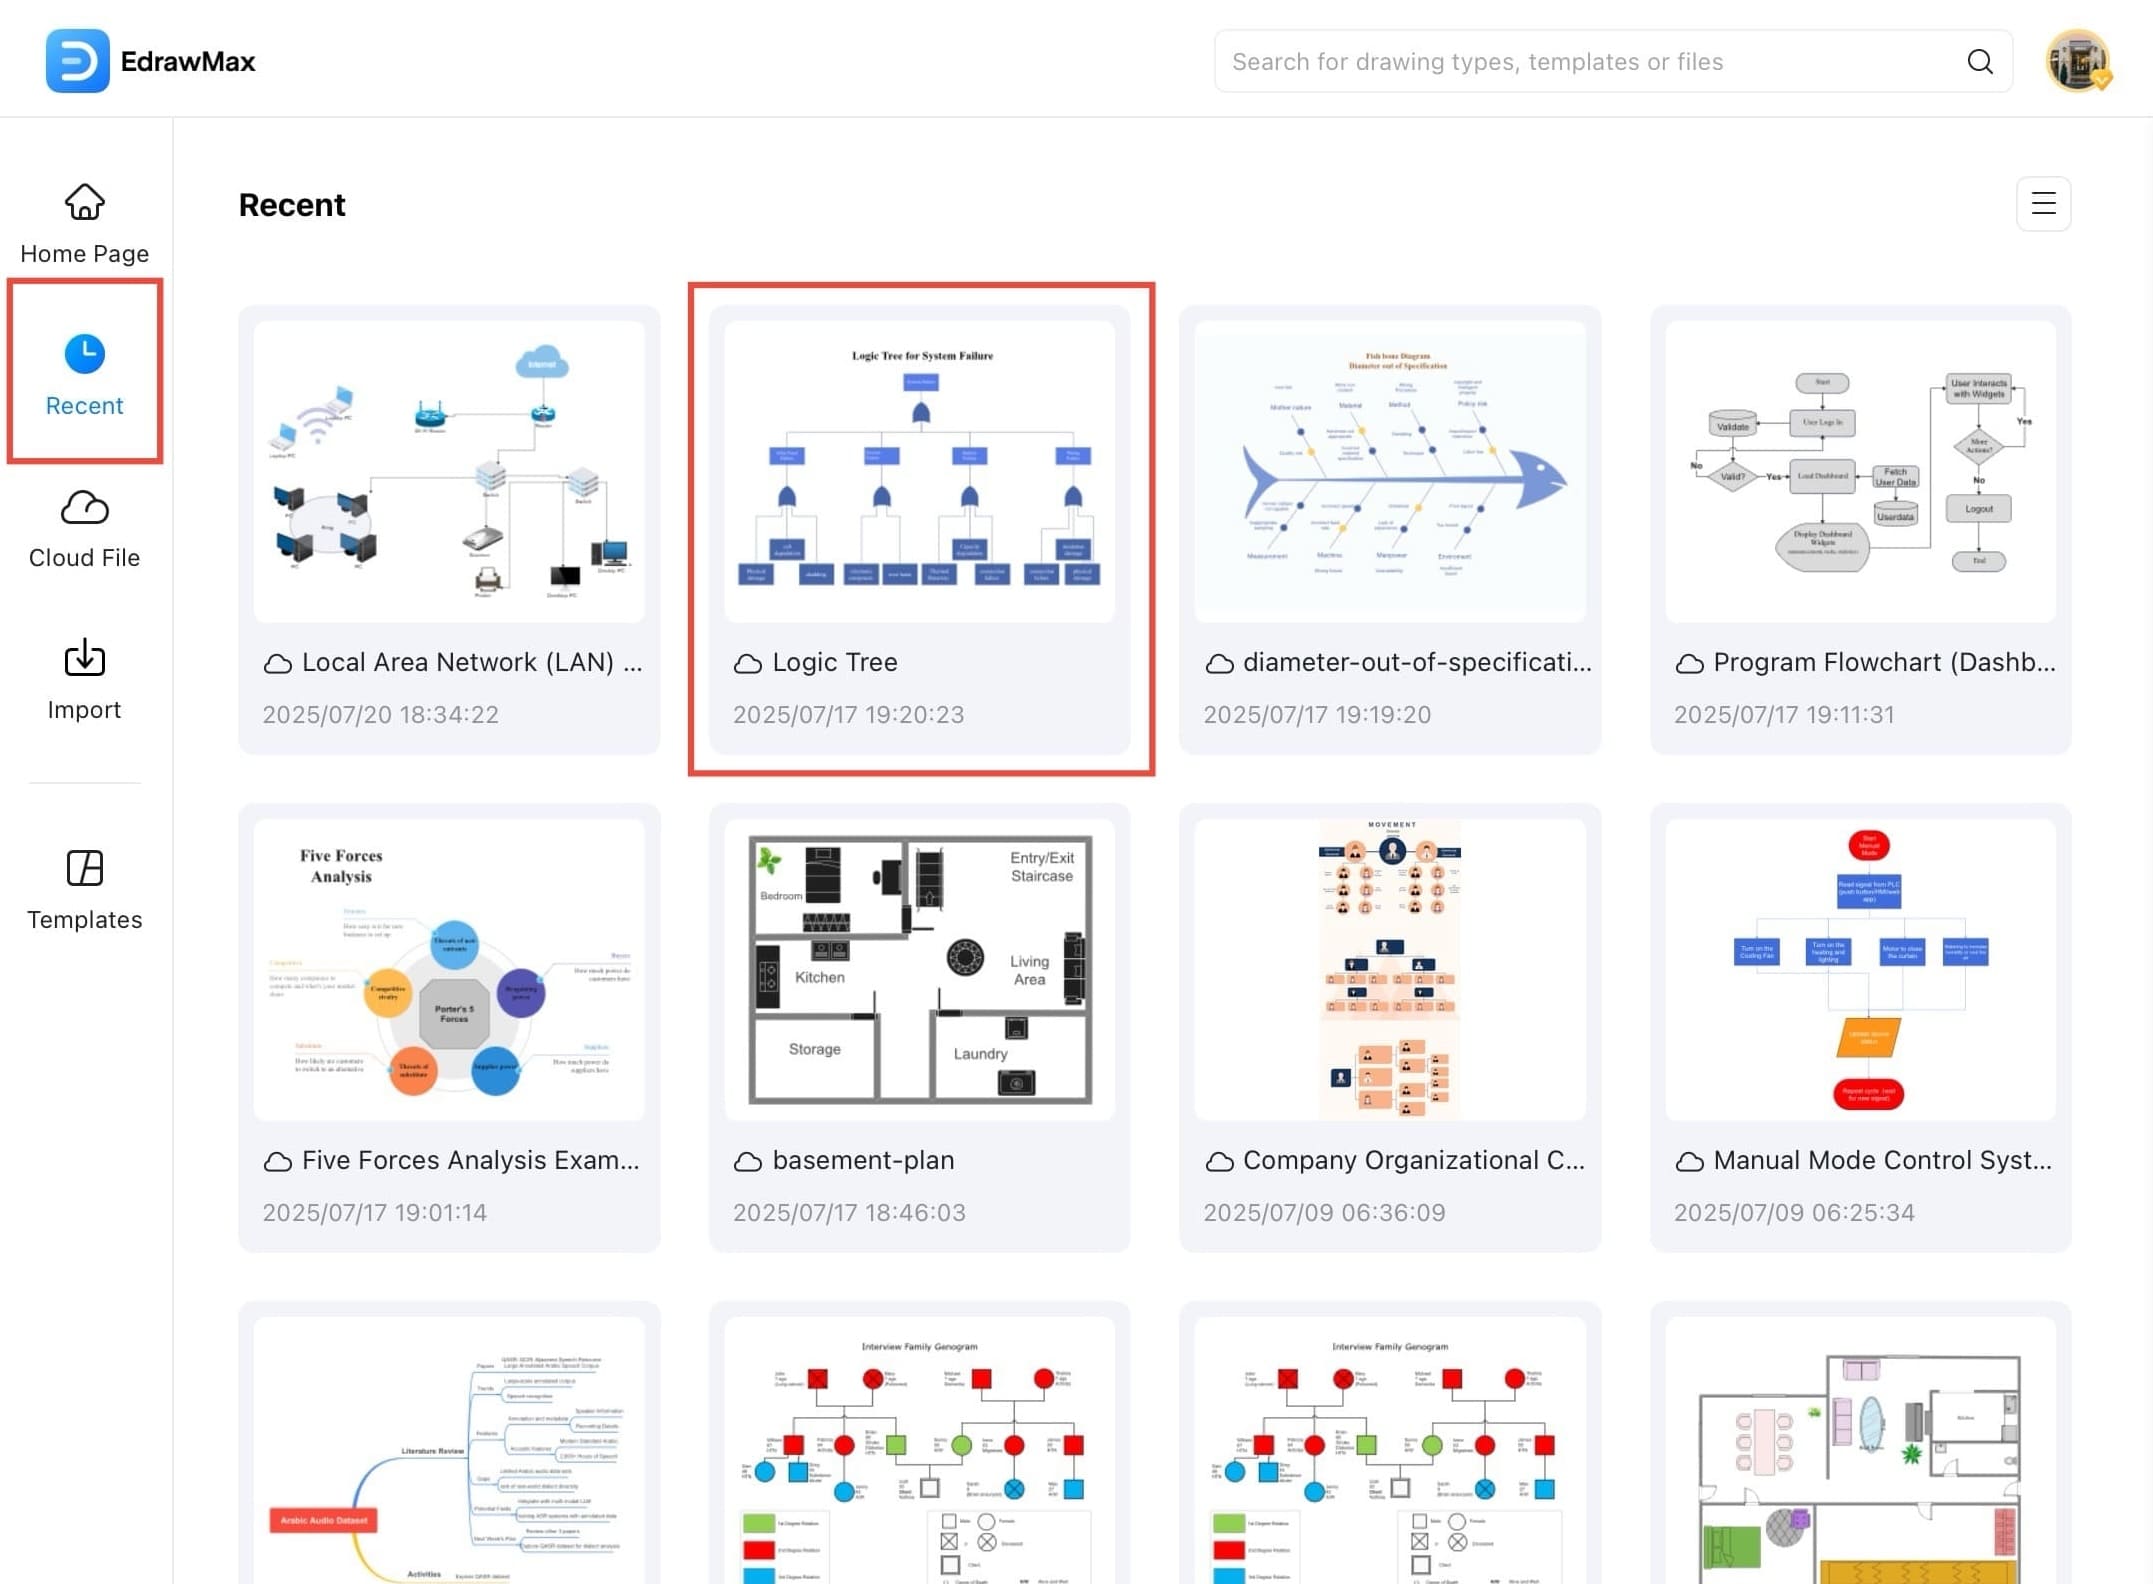
- Launch the EdrawMax app on your tablet.
- On the Home Page, tap Recent and choose a template or open an existing file where you want to insert the QR code.
Step ❷ Access Menu Icon
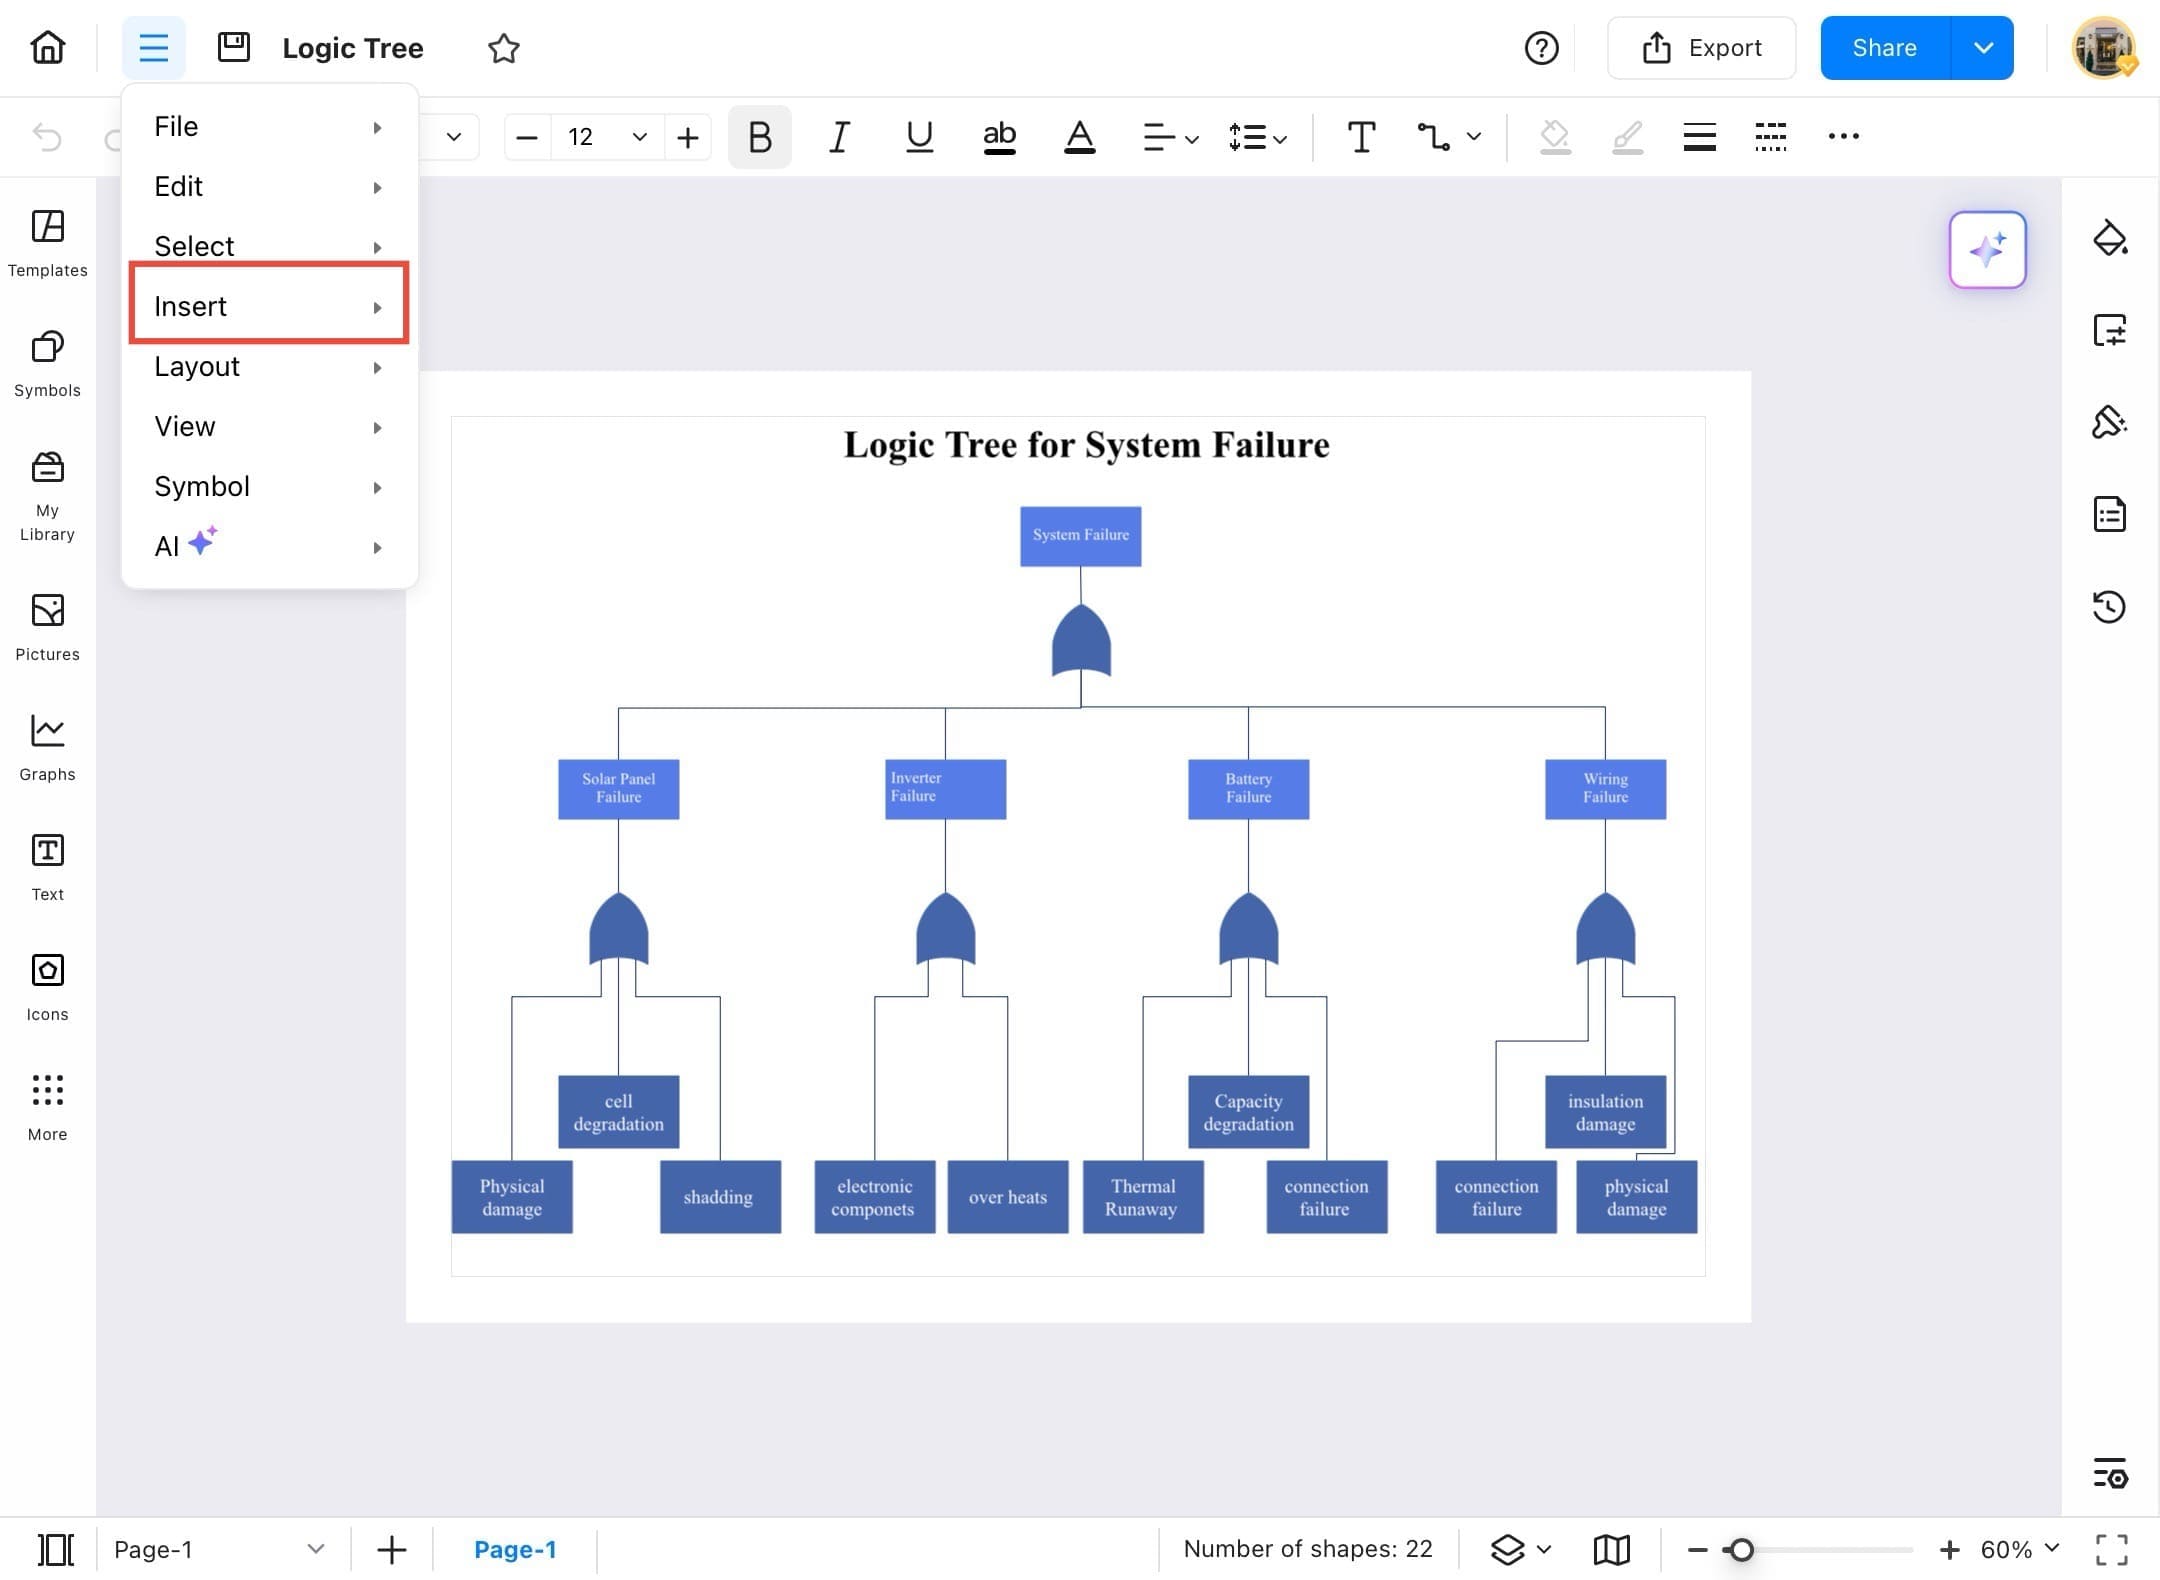
- Open your selected diagram where you want to insert the QR code. Then tap the hamburger icon on the top-left.
Step ❸ Tap Insert Option
- Tap the Insert option in the top-left menu bar to access various insertable elements.
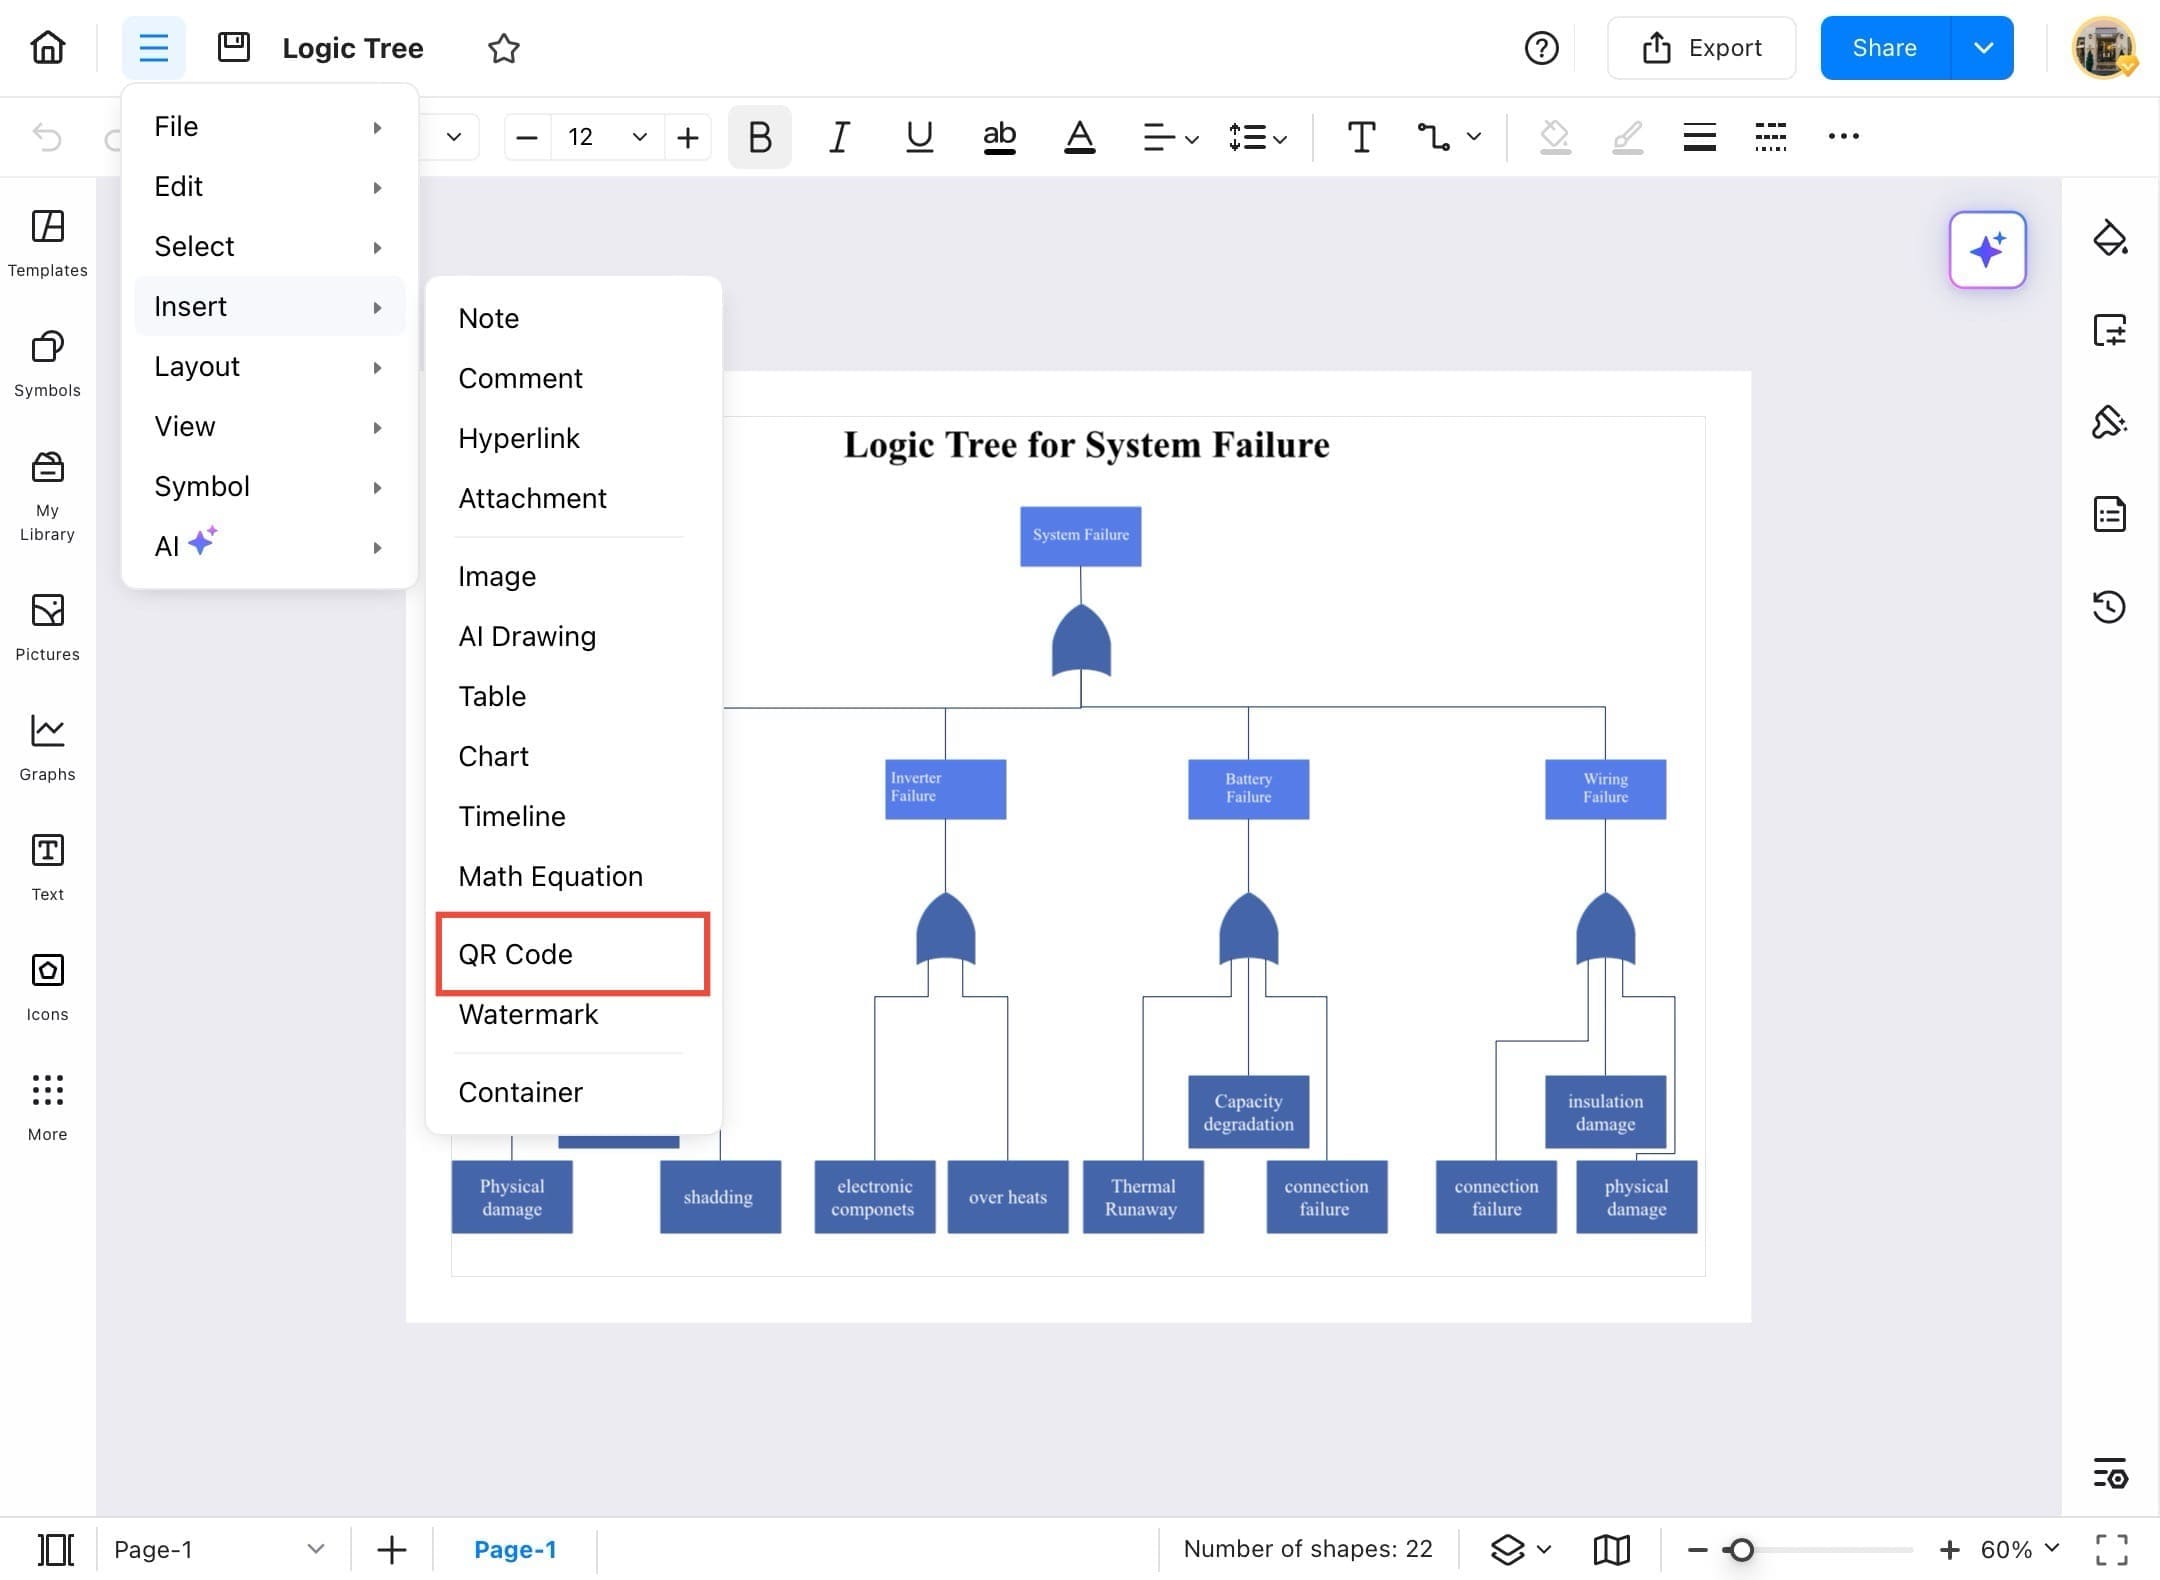
Step ❹ Select QR Code
- From the dropdown menu, select QR Code to begin inserting a scannable QR code into your project.
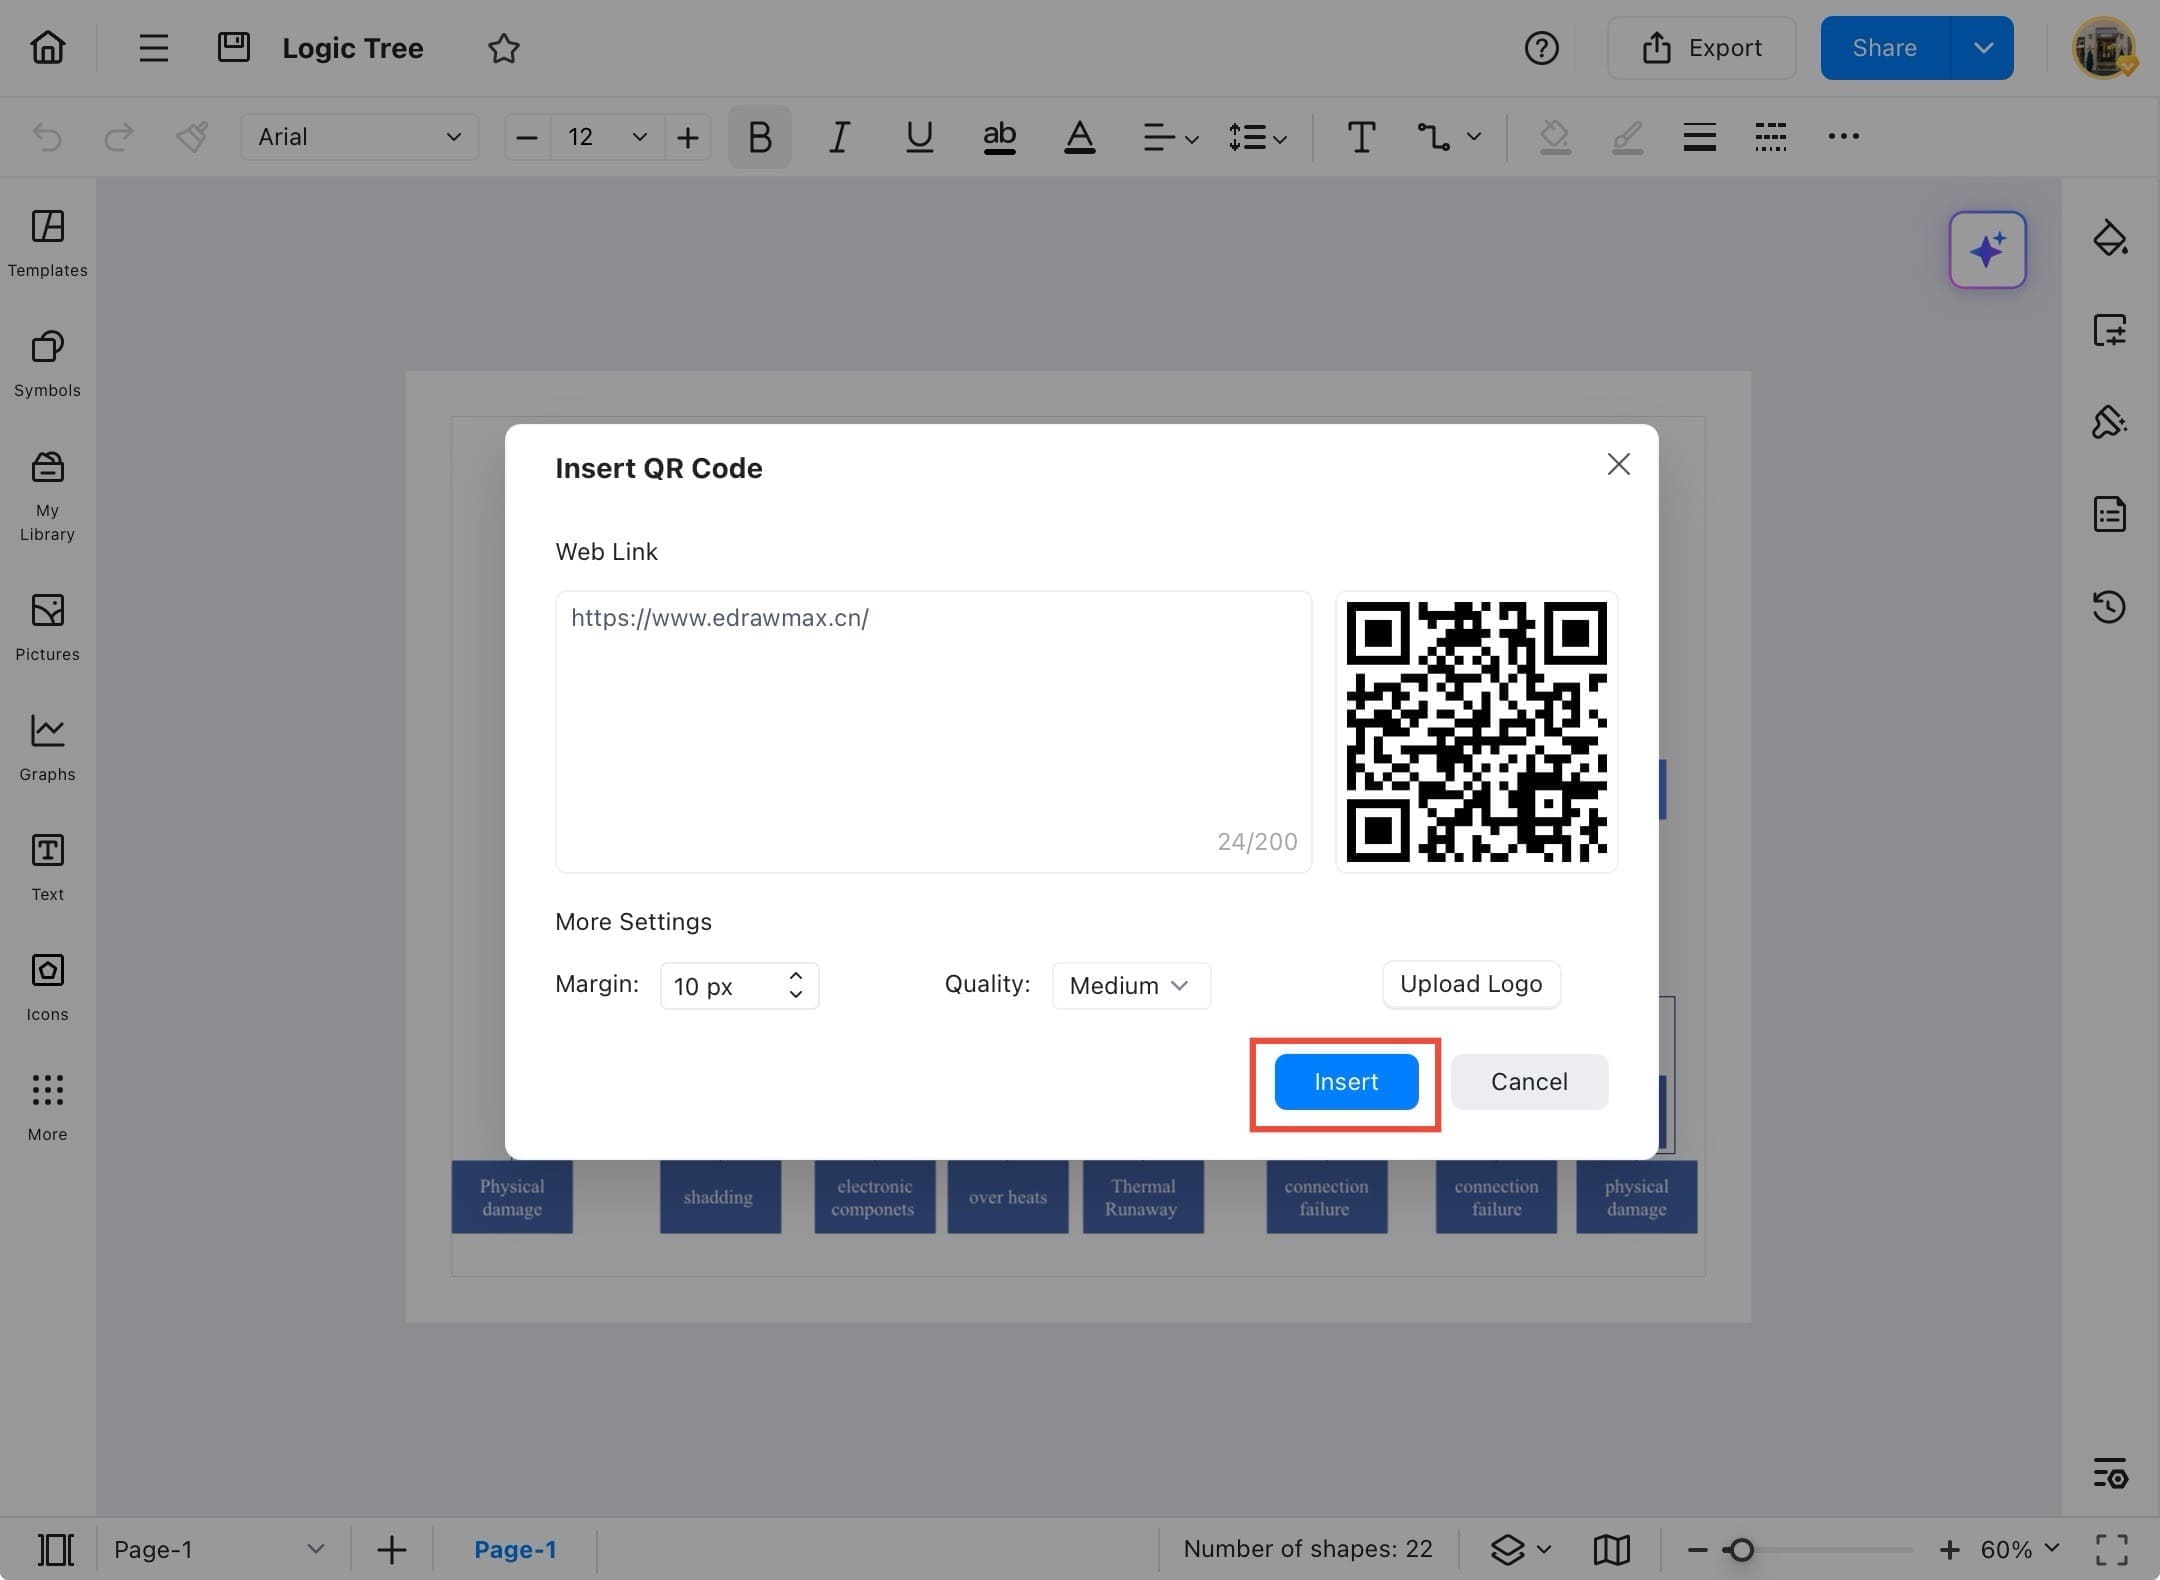
Step ❺ Customize Settings
- A dialog box will appear. Customize your QR code settings including margin, quality, and optionally upload a logo.

Step ❻ Tap Insert Button
- Tap the Insert button to add the QR code to your diagram.
Step ❼ QR Code Inserted
- Your QR code will now appear on the canvas. You can move and resize it as needed.
Watermark
Want to prevent unauthorized use of your diagrams? EdrawMax allows you to add watermarks to mark your content as confidential, copyrighted, or branded. Here's how to insert a watermark and customize its appearance for optimal visibility and security.
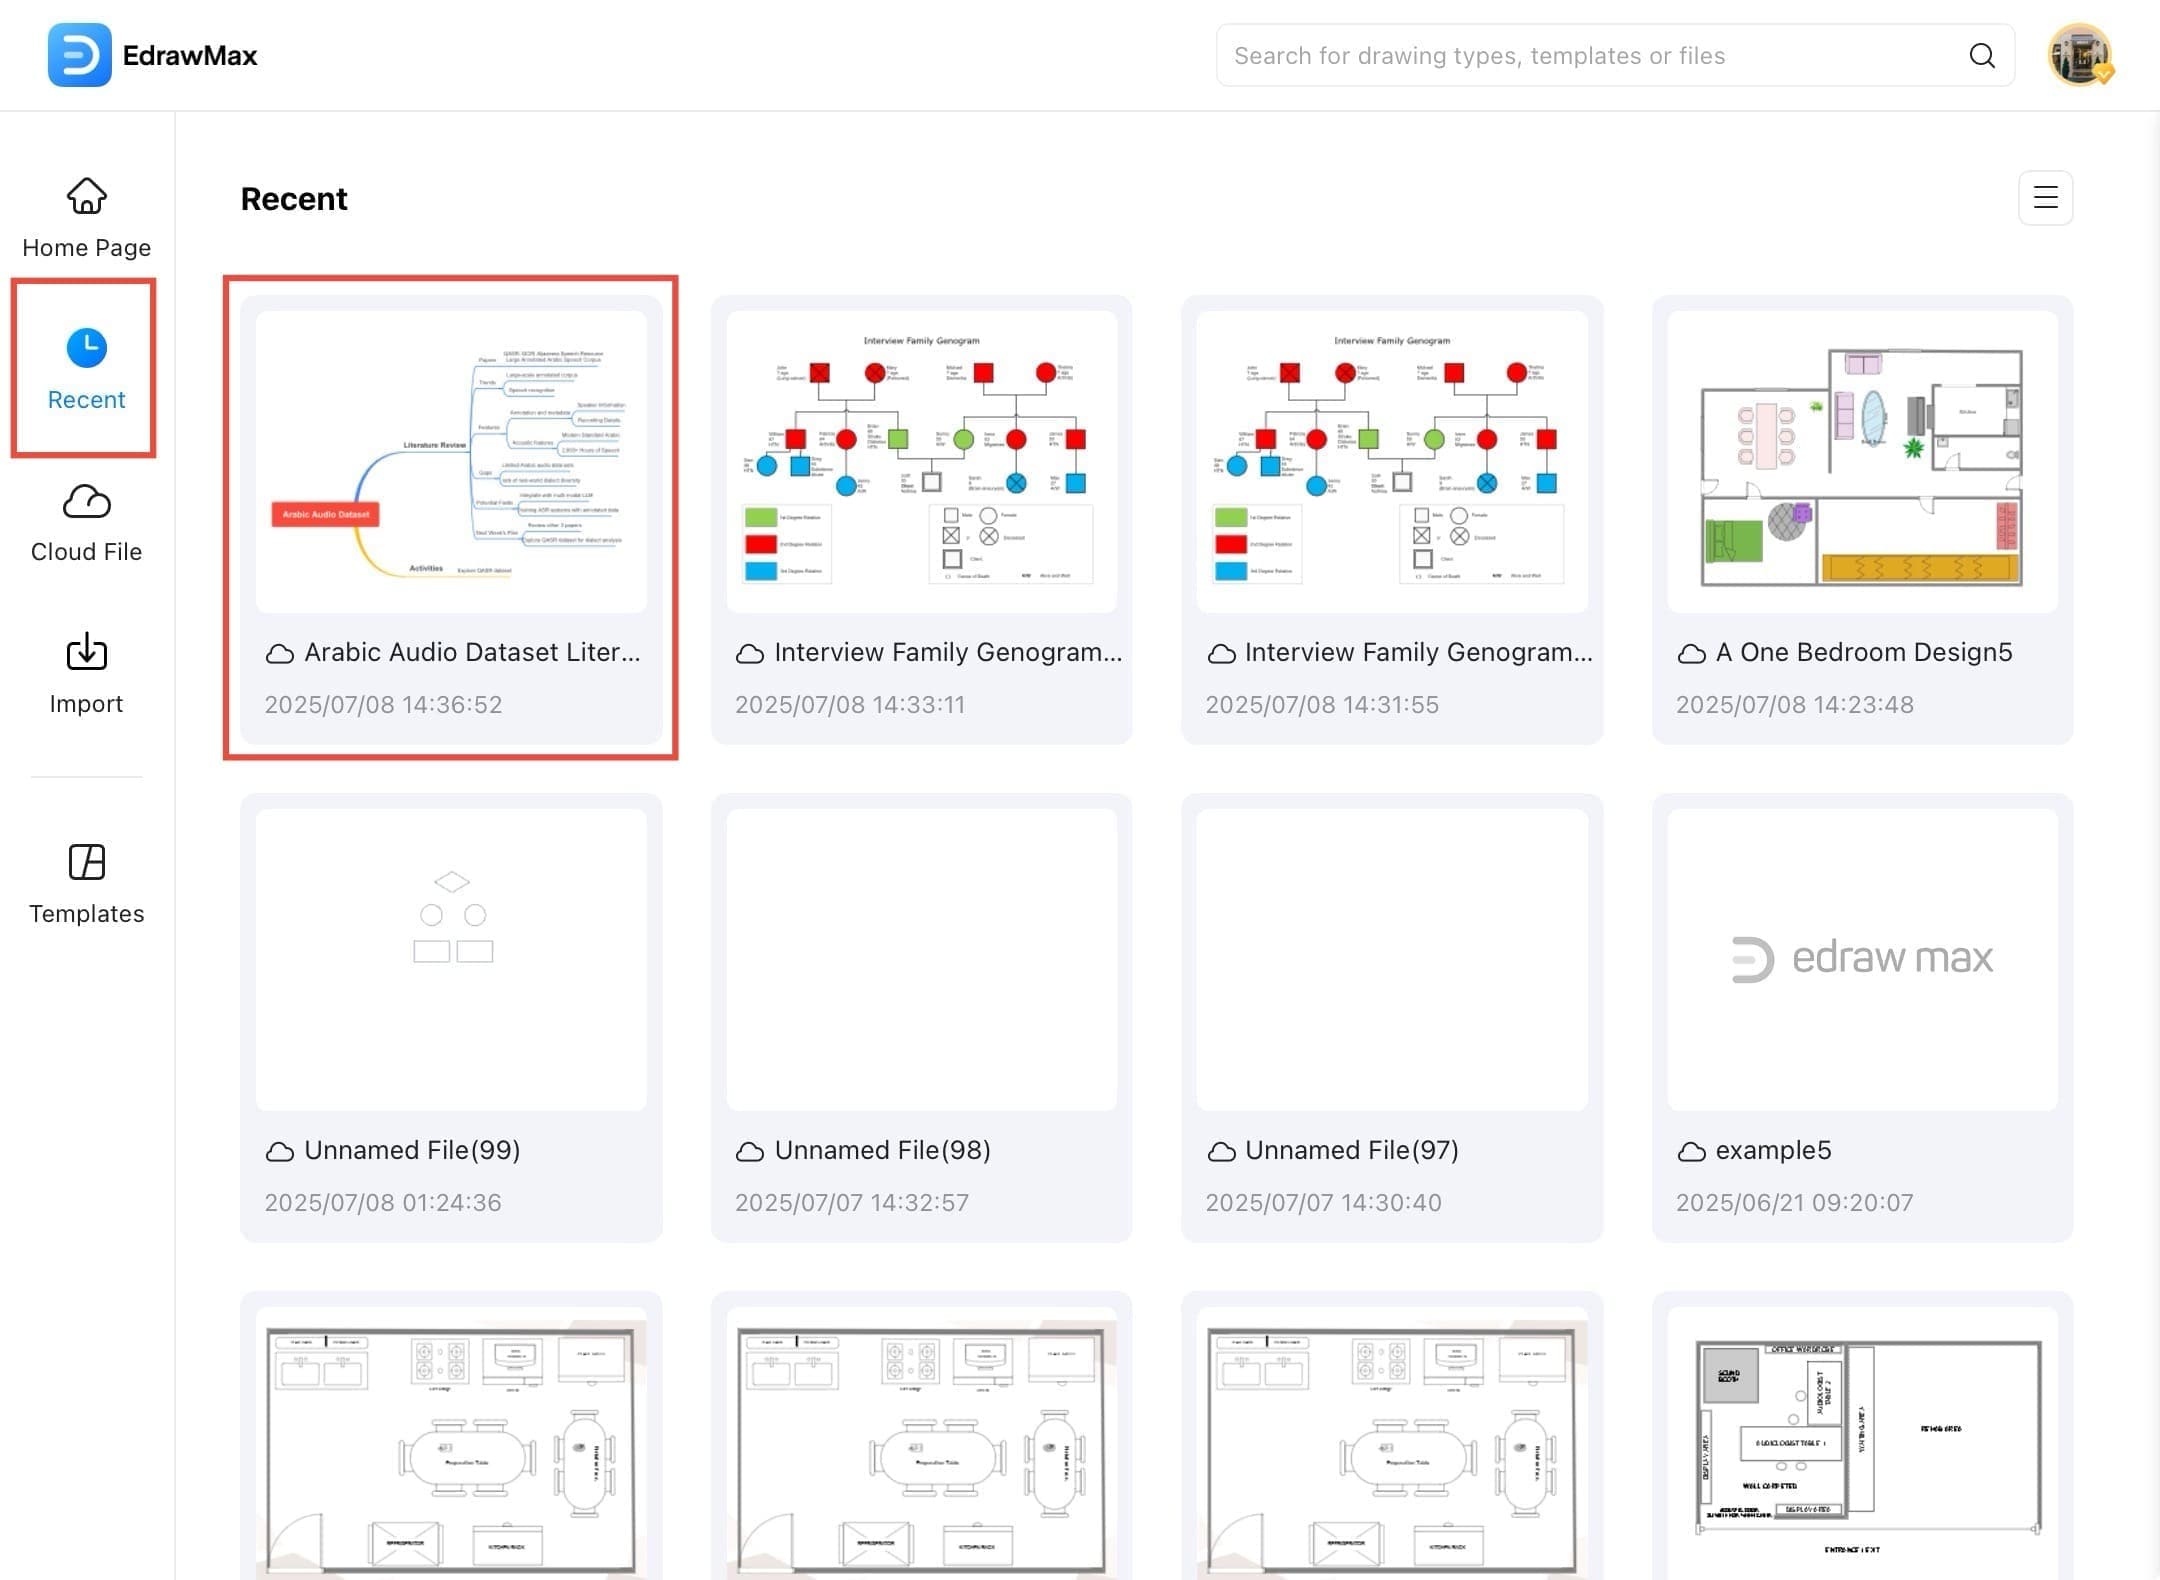
Step ❶ Open EdrawMax and Select File
- Open EdrawMax on your tablet and go to the Home page.
- Tap Recent on the left menu and select your file.
Step ❷ Access Menu Icon
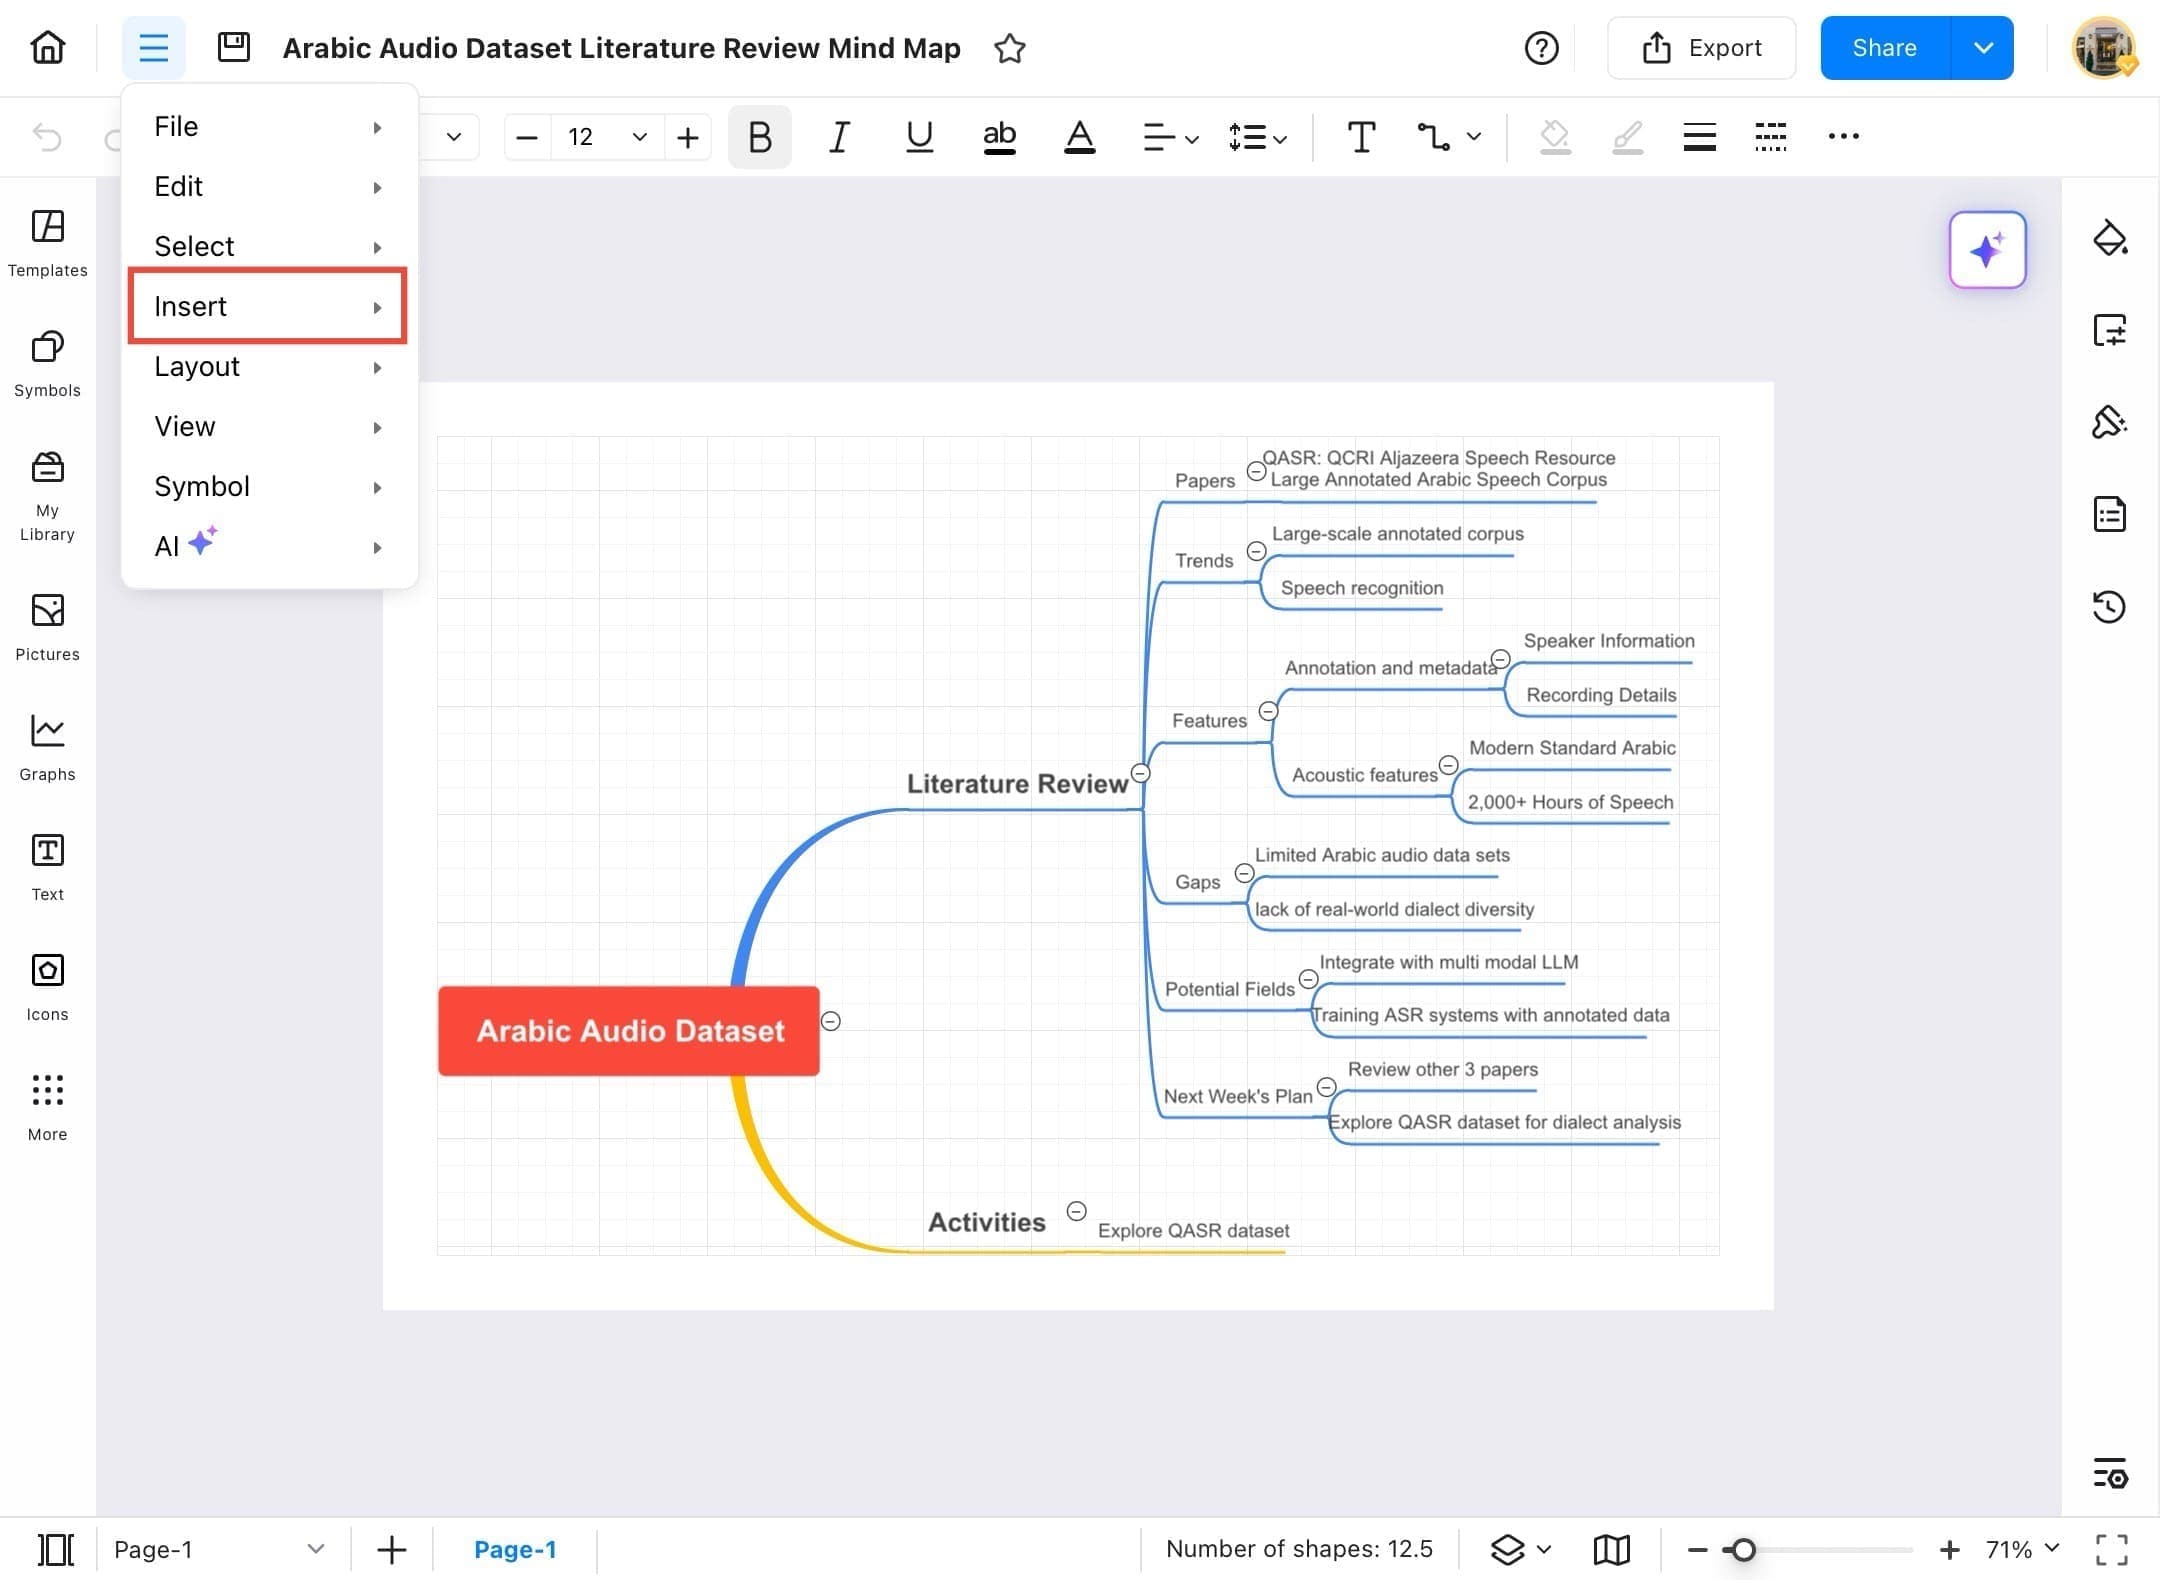
- Your selected diagram will open on the canvas. Tap on the hamburger icon for more options.
Step ❸ Tap Insert Option
- Tap Insert from the top menu bar.
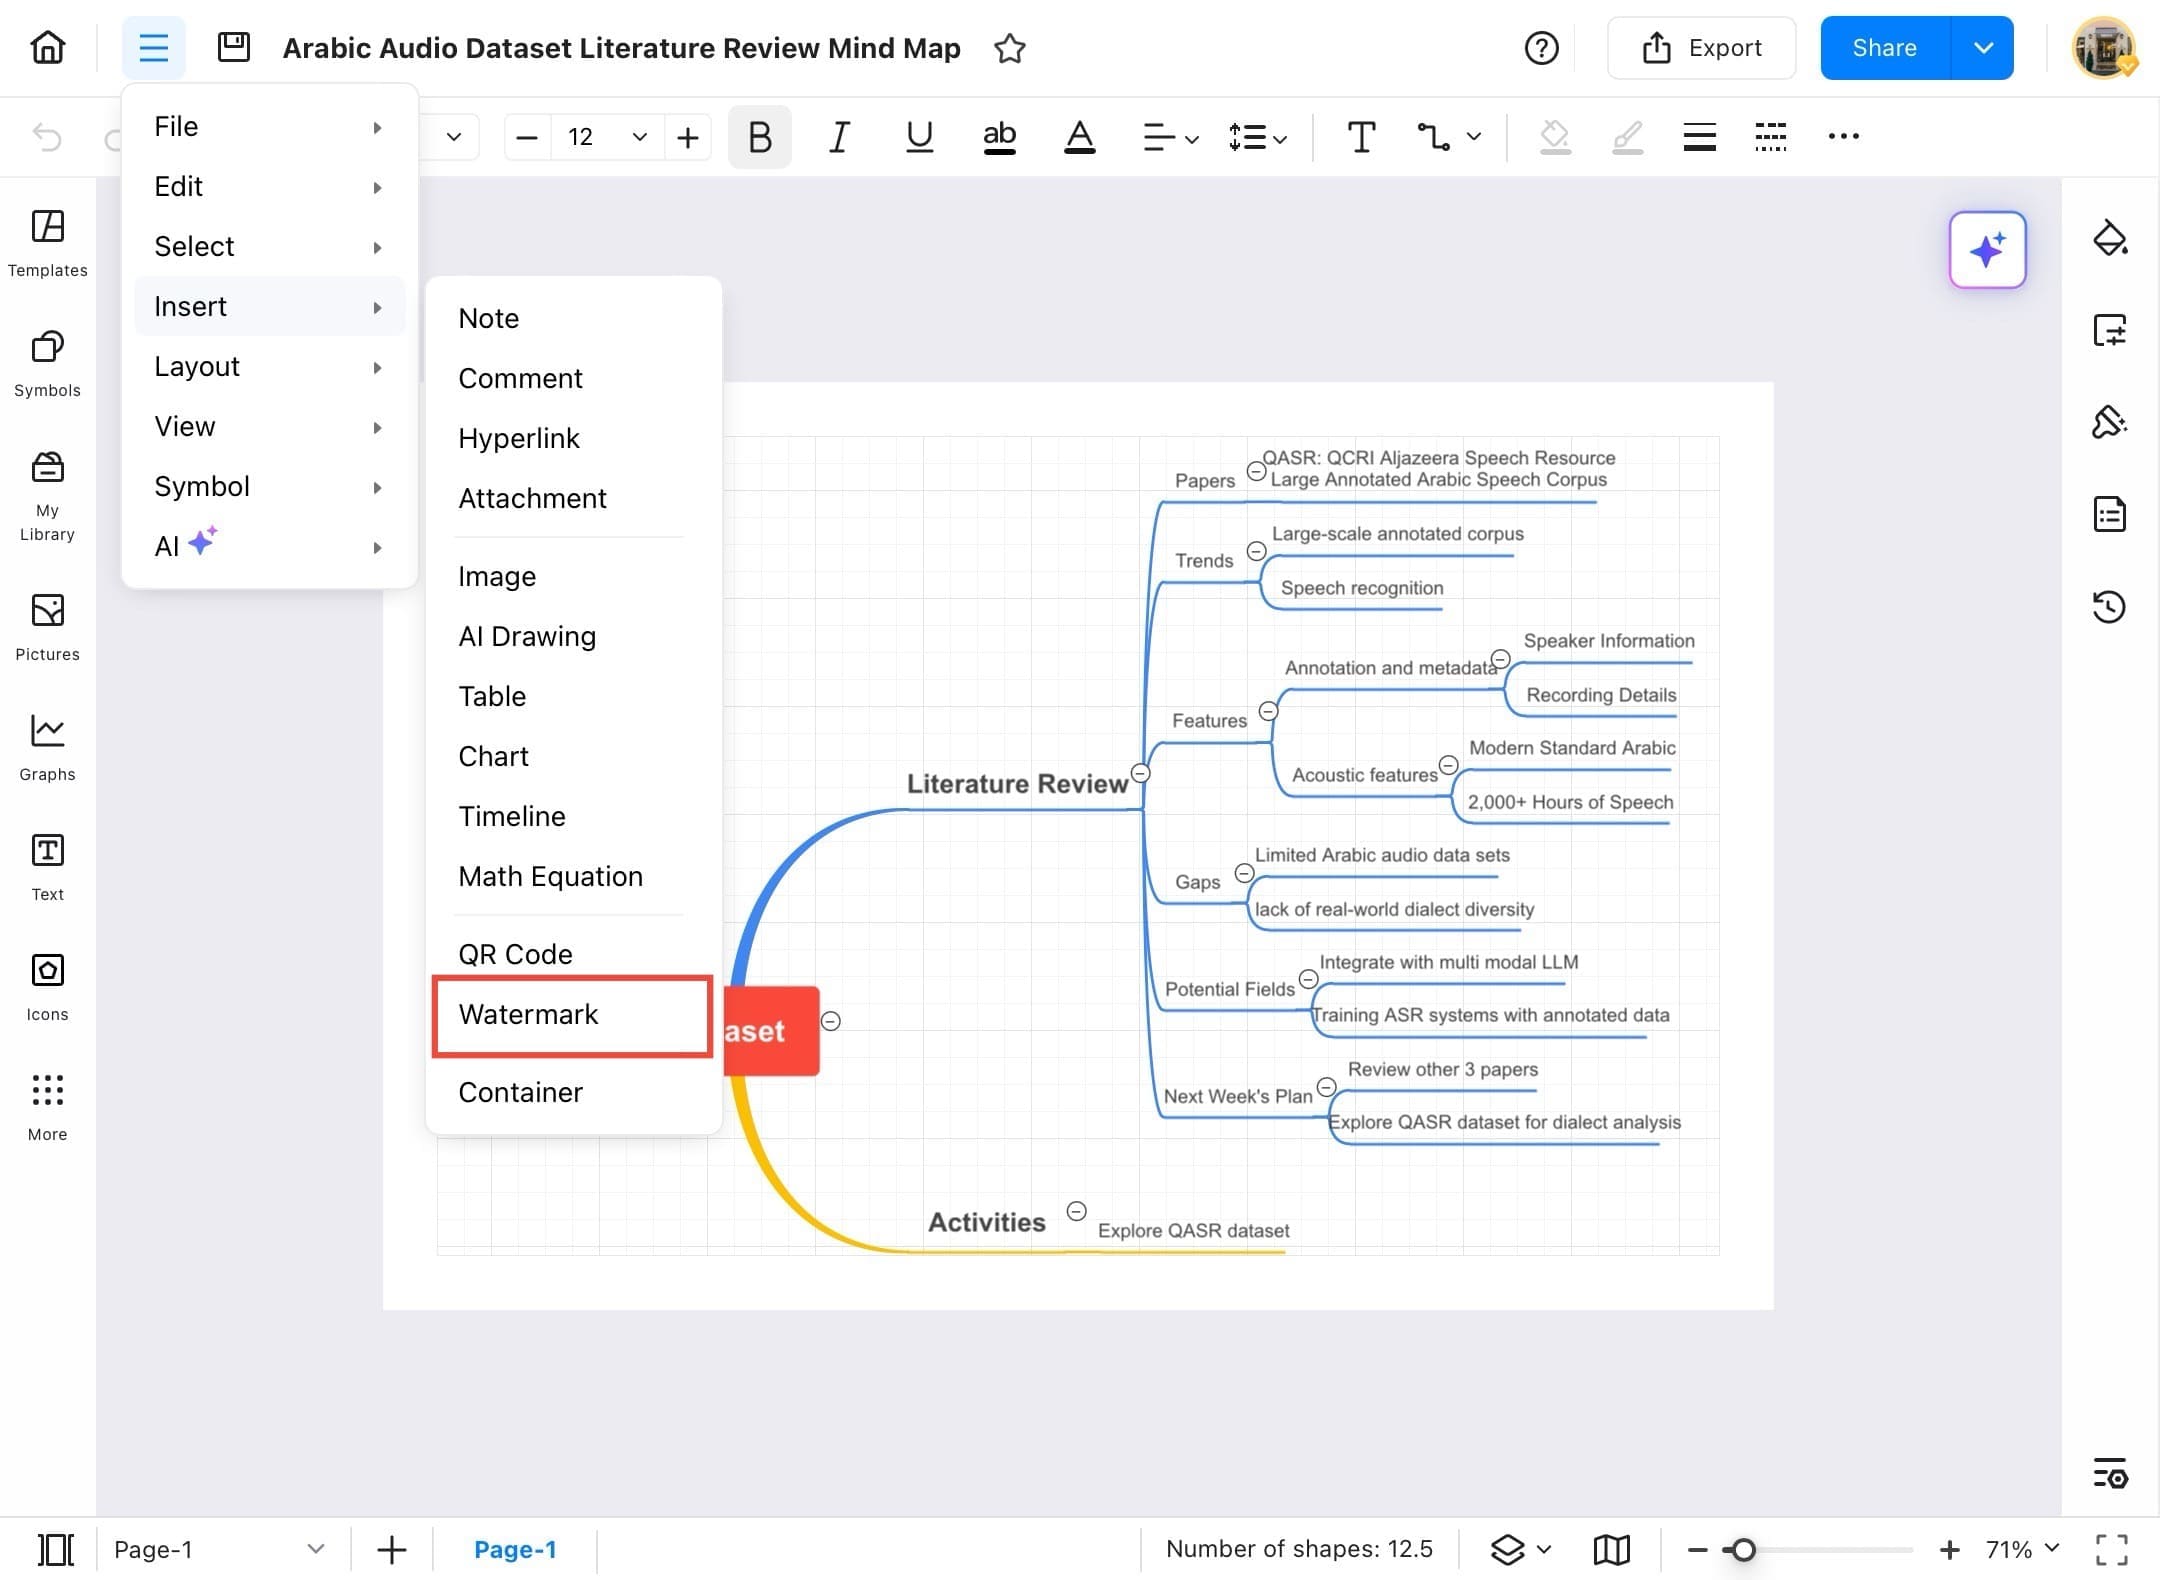
Step ❹ Select Watermark
- Tap Insert > Watermark from the dropdown menu.
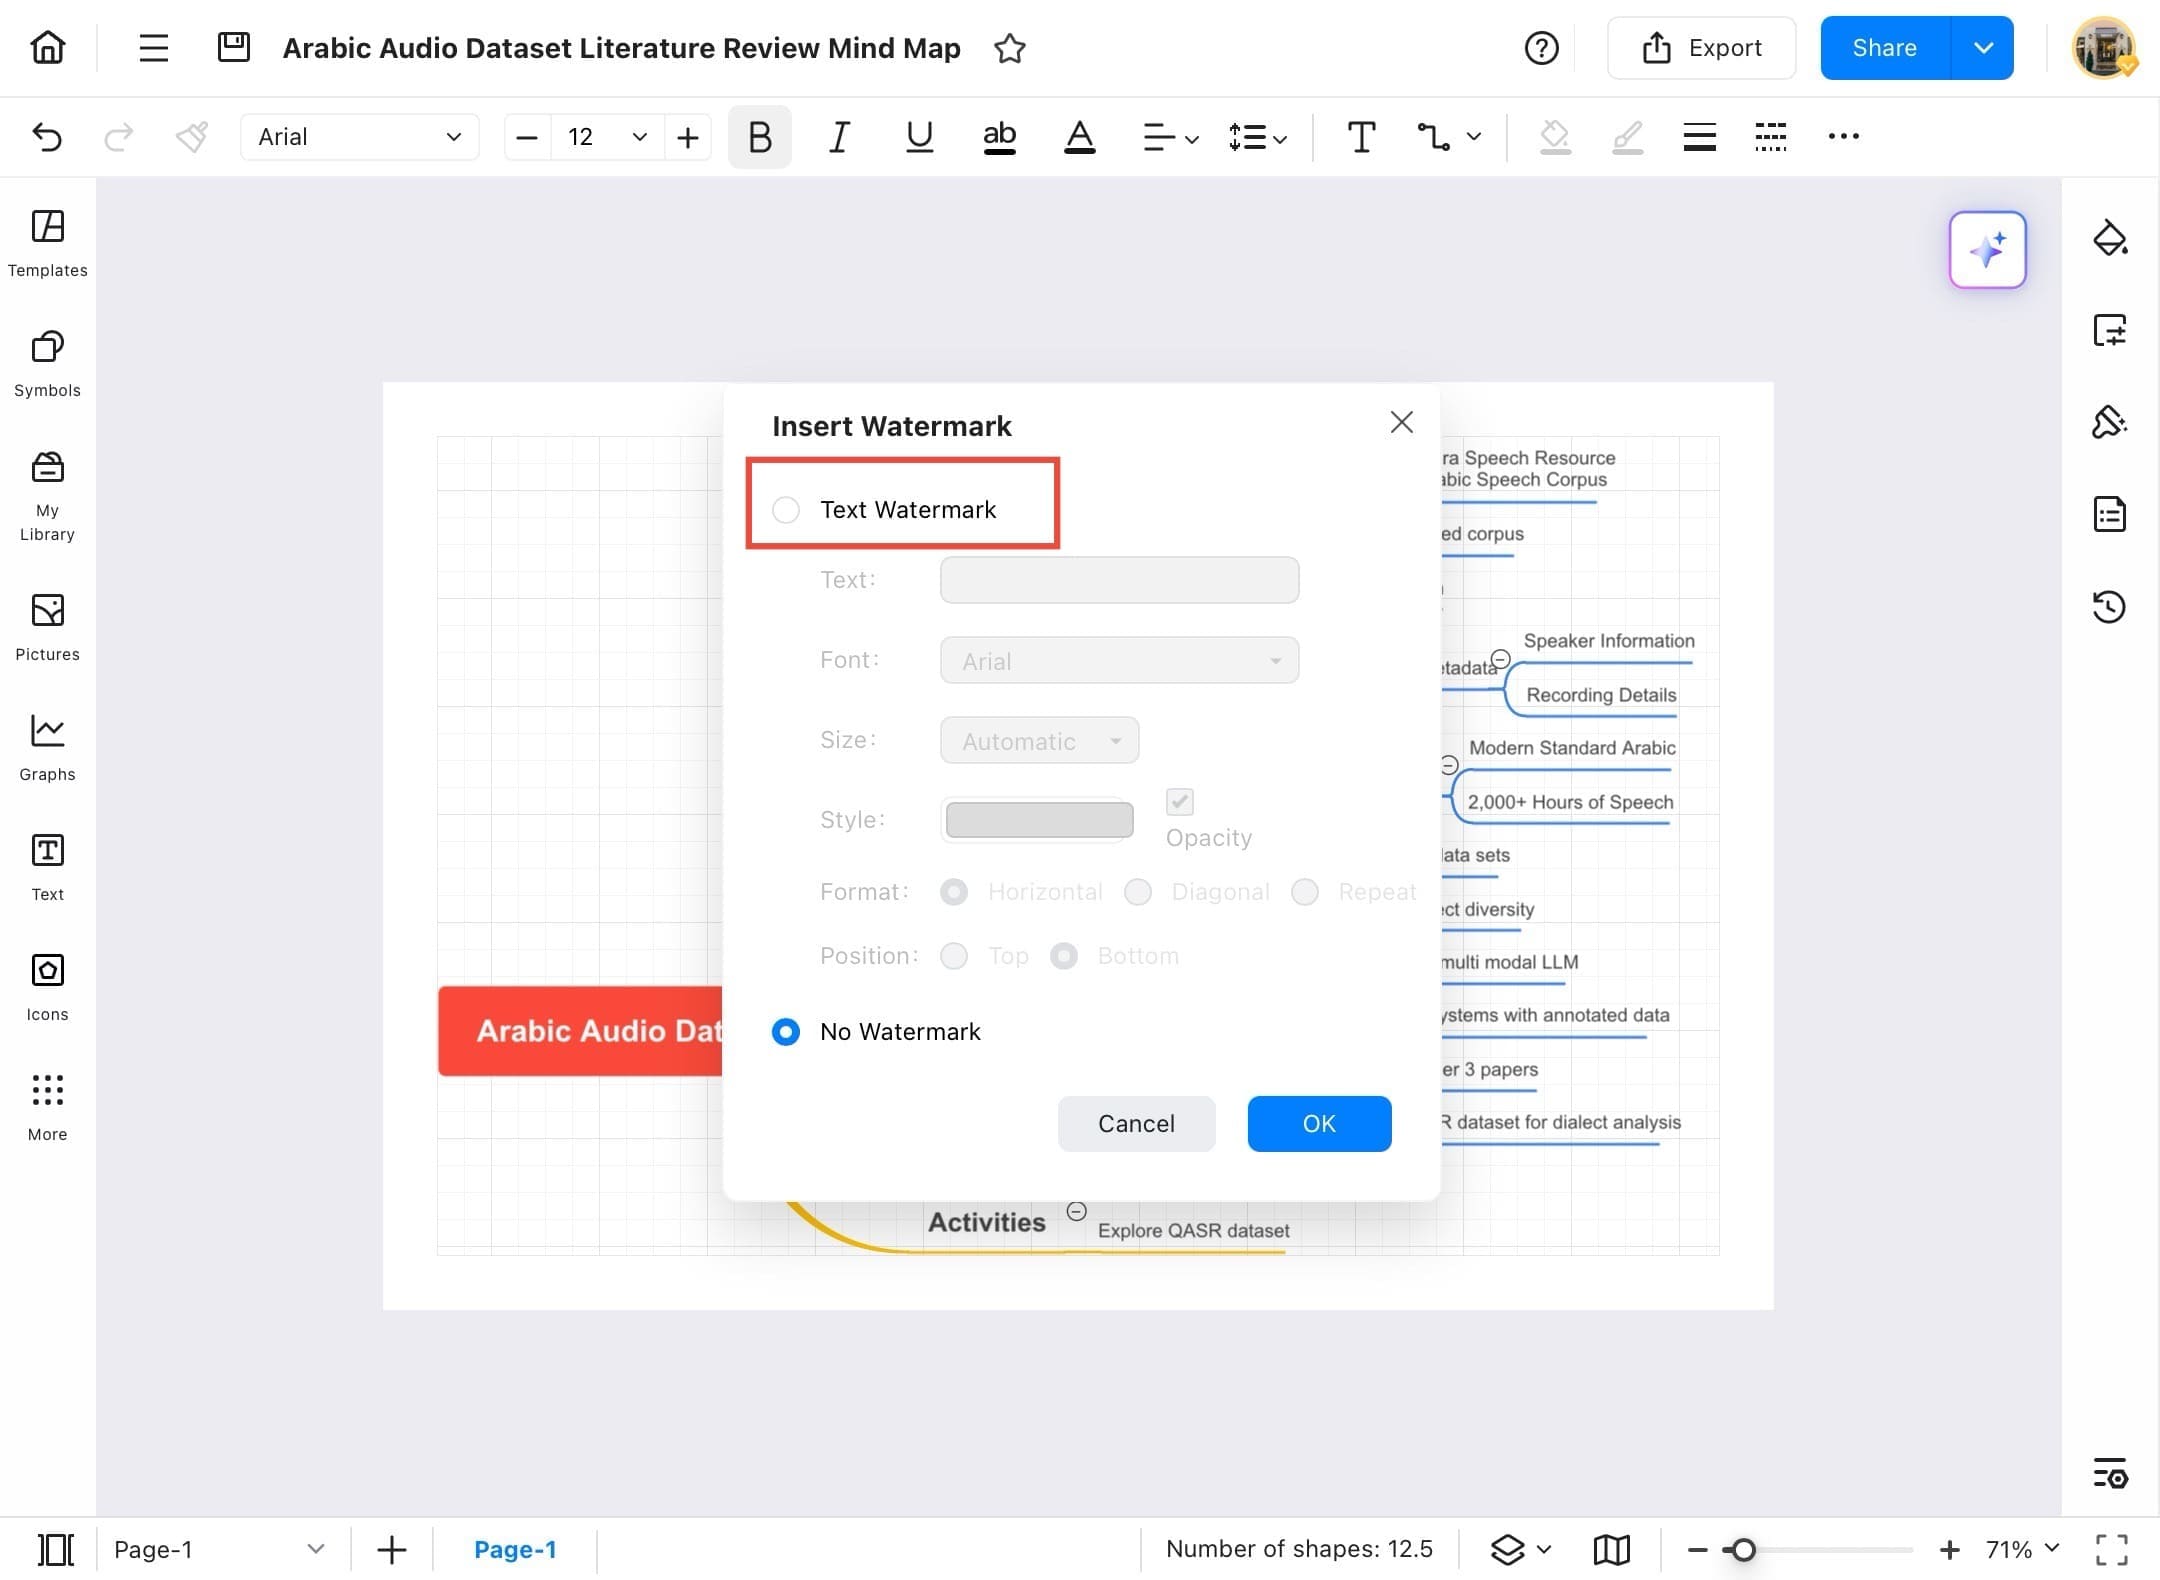
Step ❺ Choose Text Watermark
- In the dialog box, choose Text Watermark.
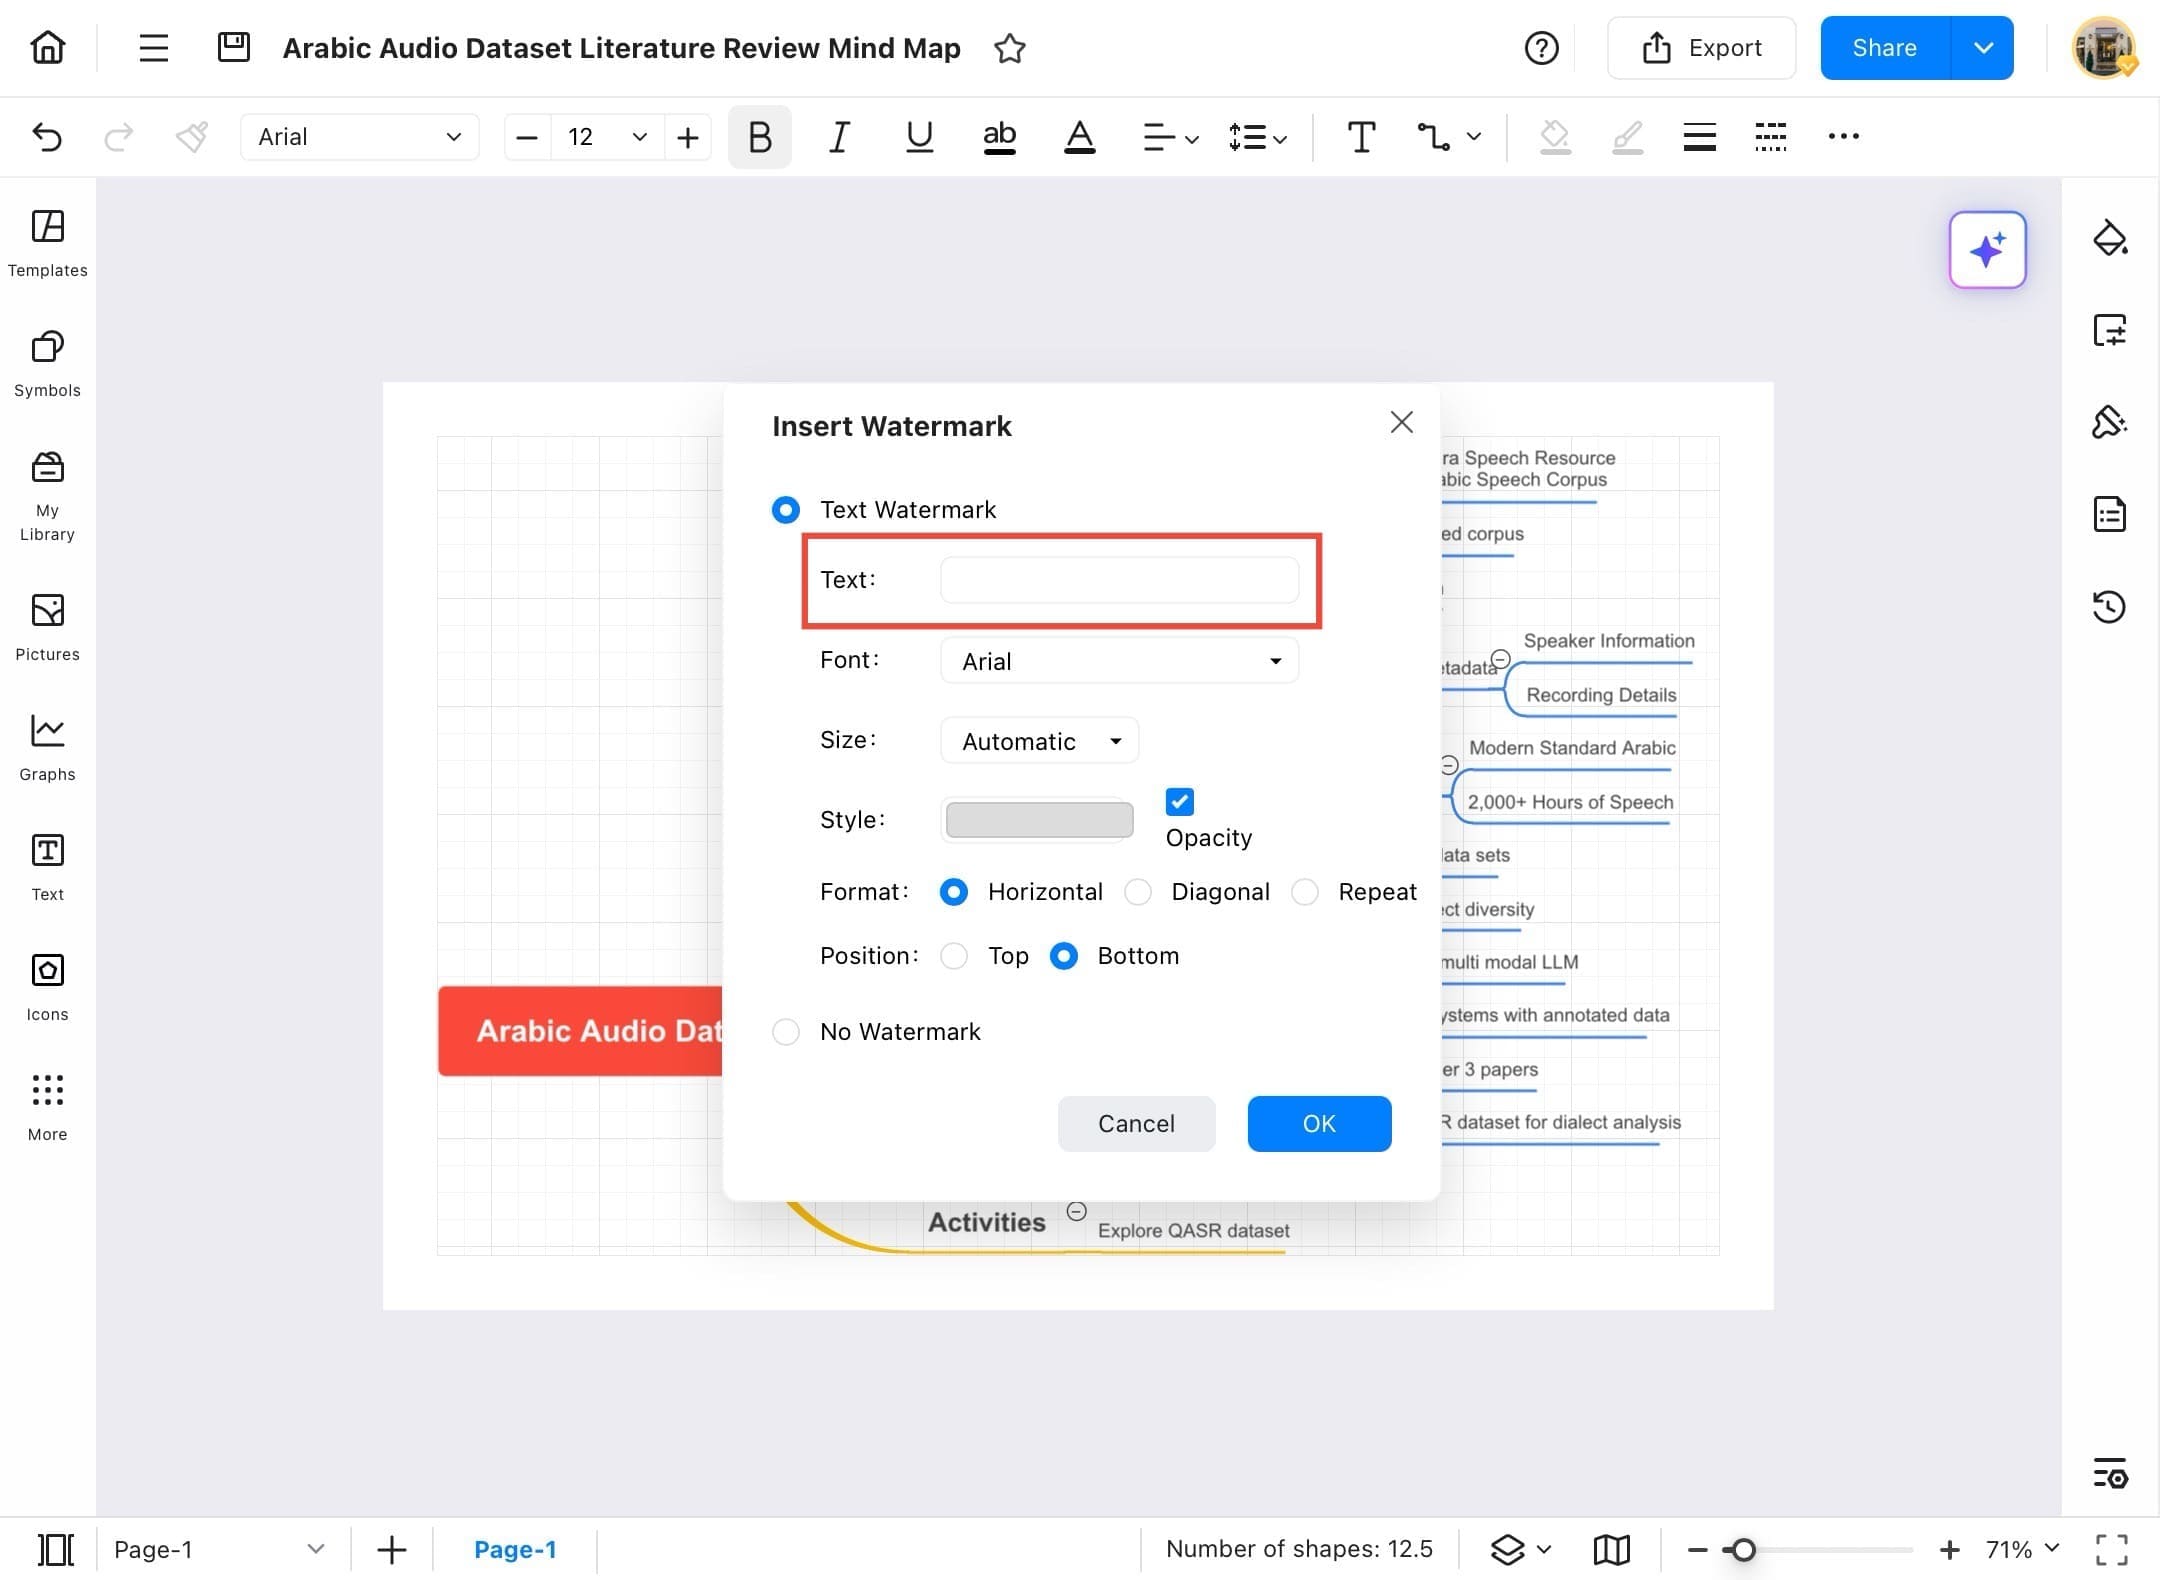
Step ❻ Enter Text and Customize
- Enter your watermark text and adjust font, style, opacity, and position.
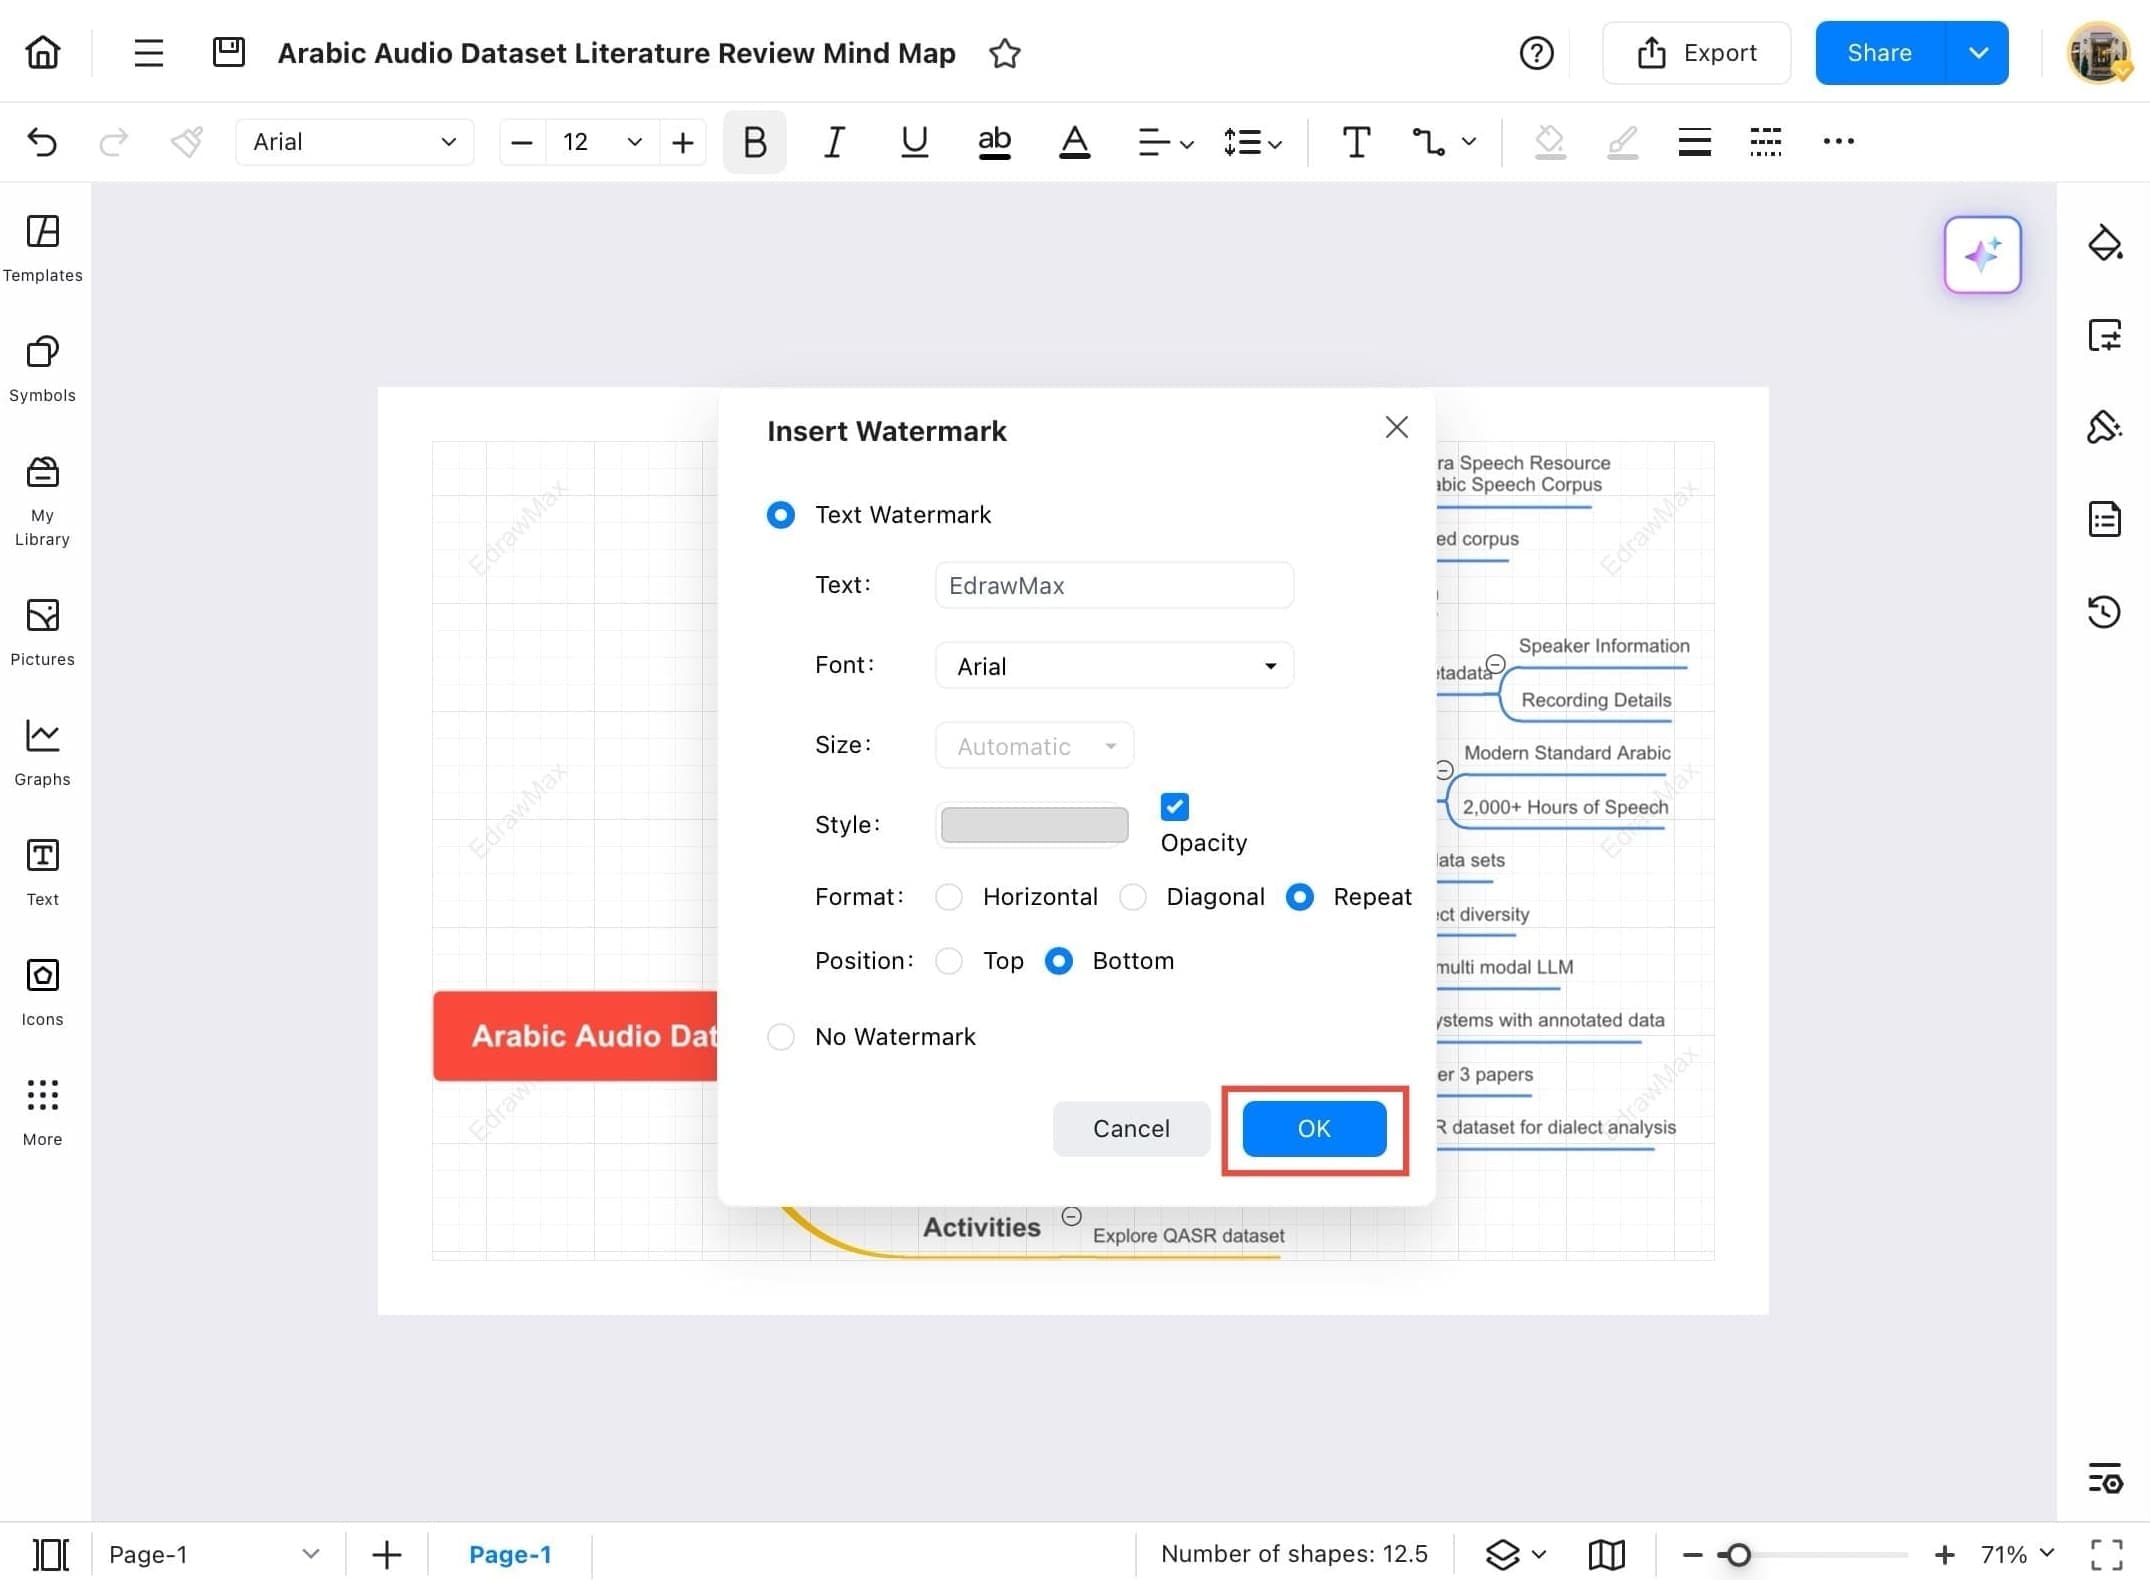
Step ❼ Tap OK to Insert Watermark
- Tap the OK button to insert the watermark into the document.
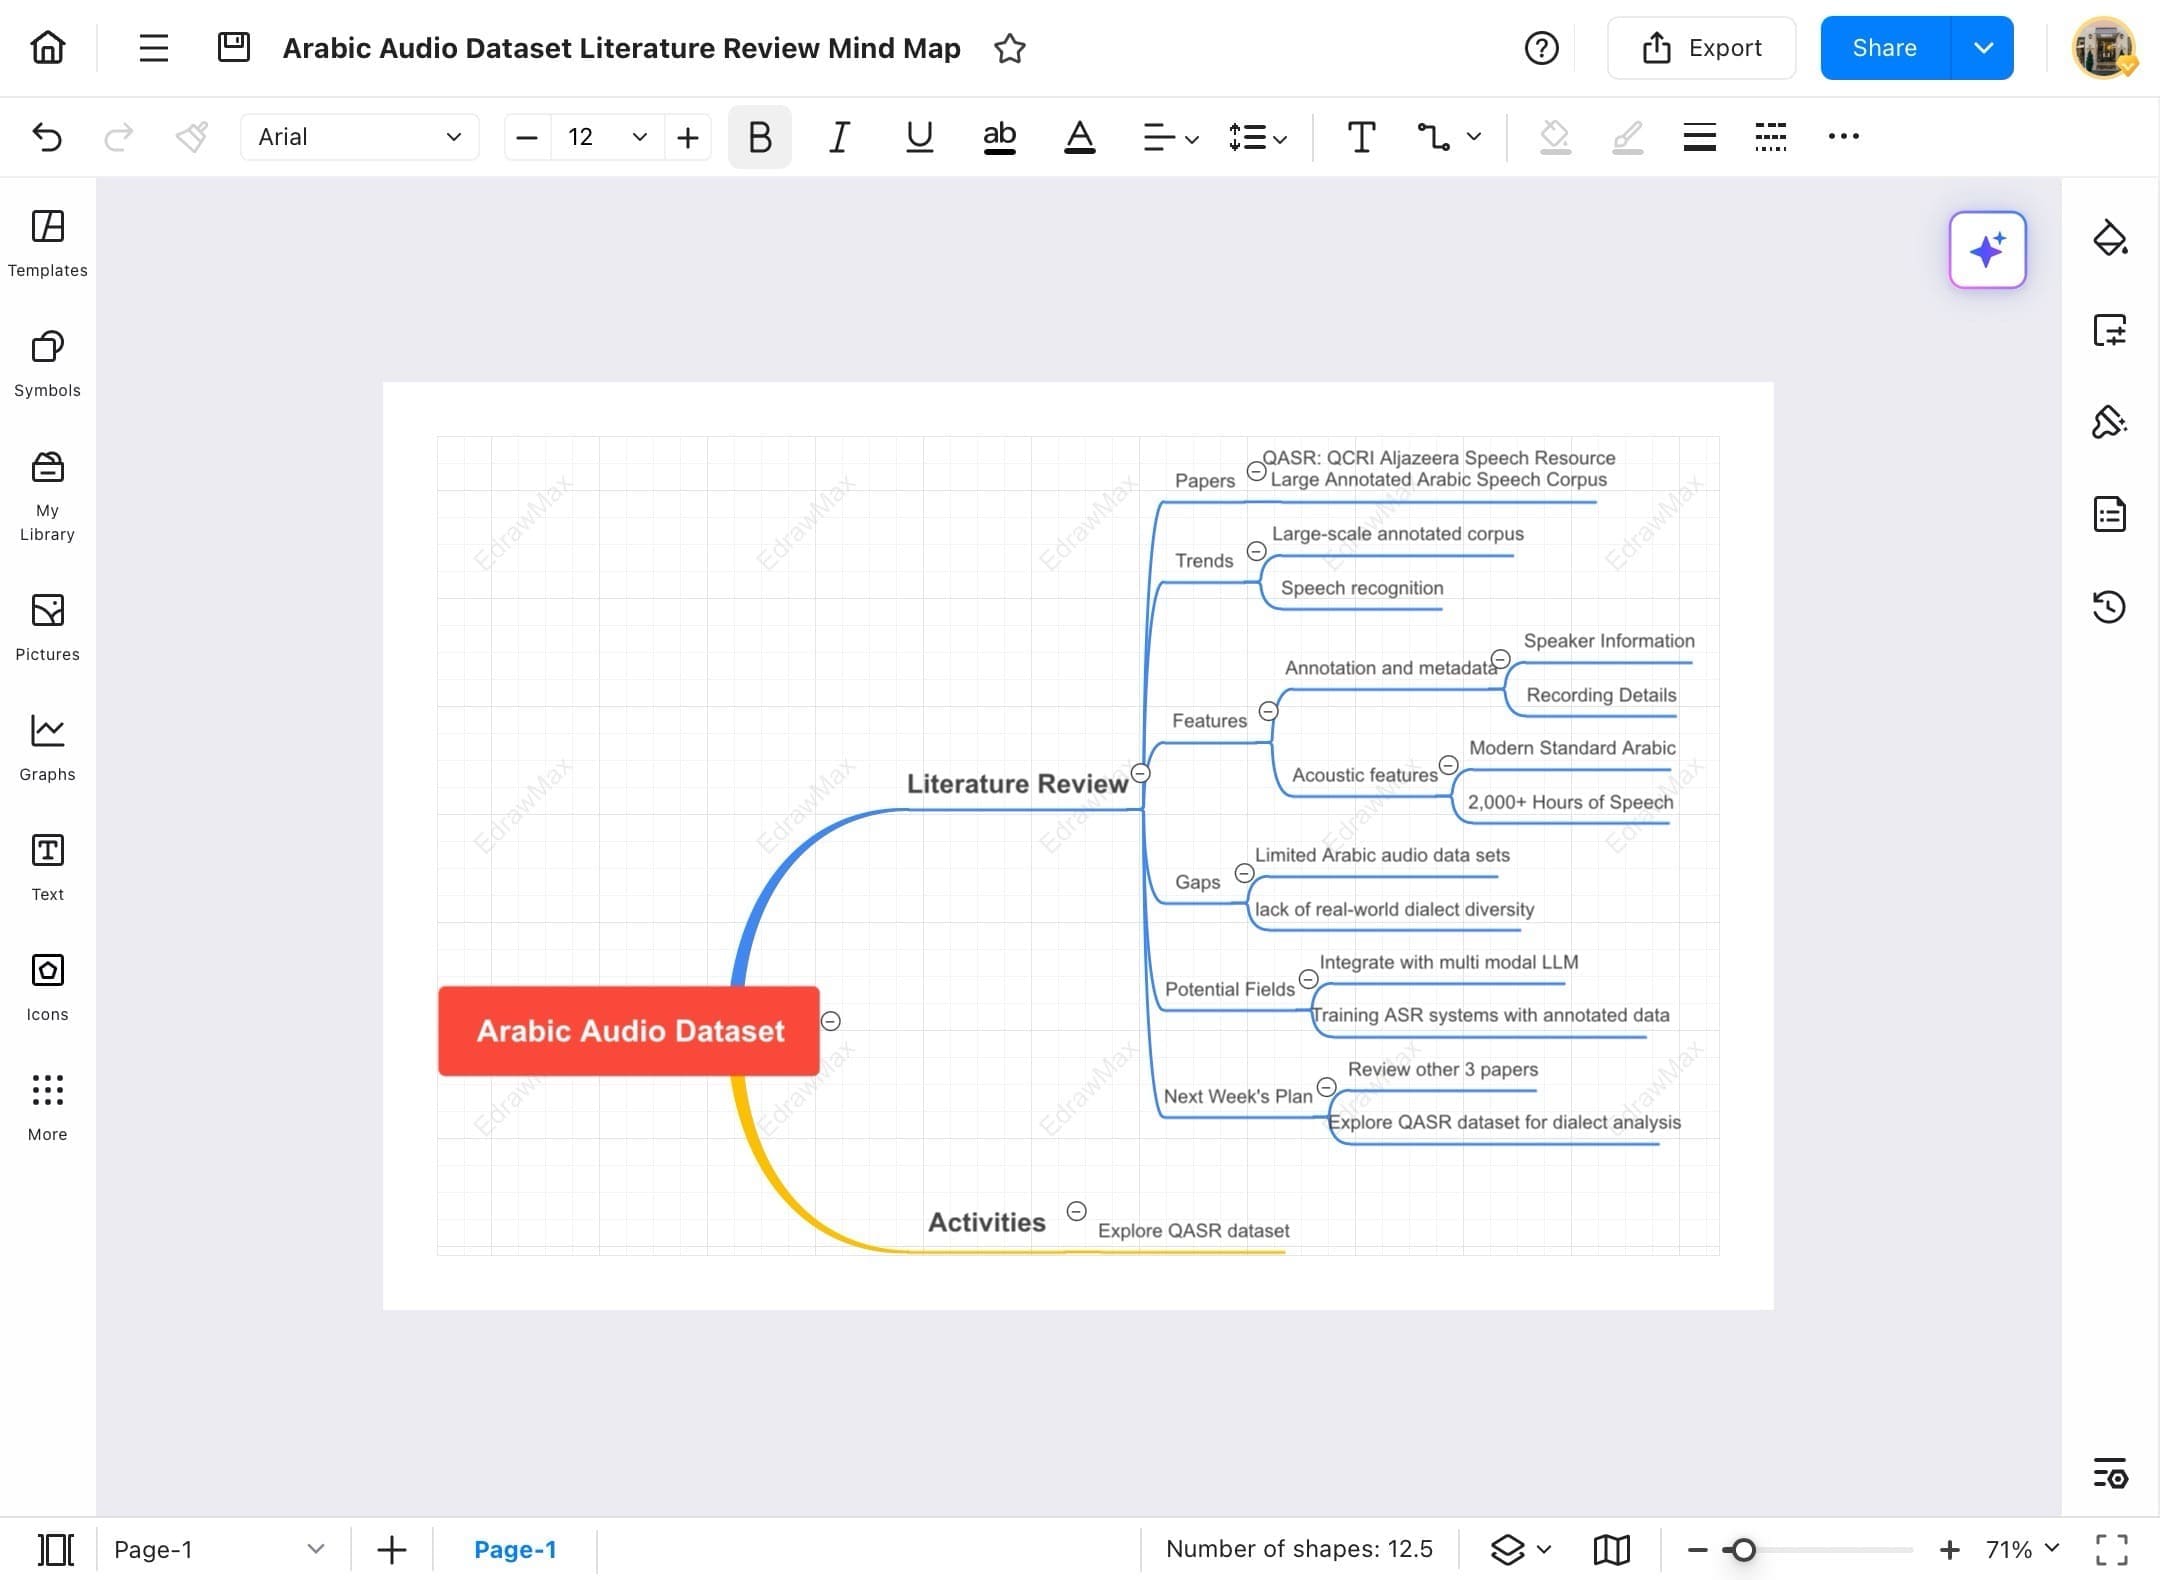
Step ❽ Watermark Visible
- The watermark is now visible across the background of the document.
Container
Containers in EdrawMax help group and organize related shapes or elements within your diagram. They make it easy to manage content, maintain layout consistency, and improve visual clarity. Follow the steps below to insert and customize containers to structure your diagram more effectively.
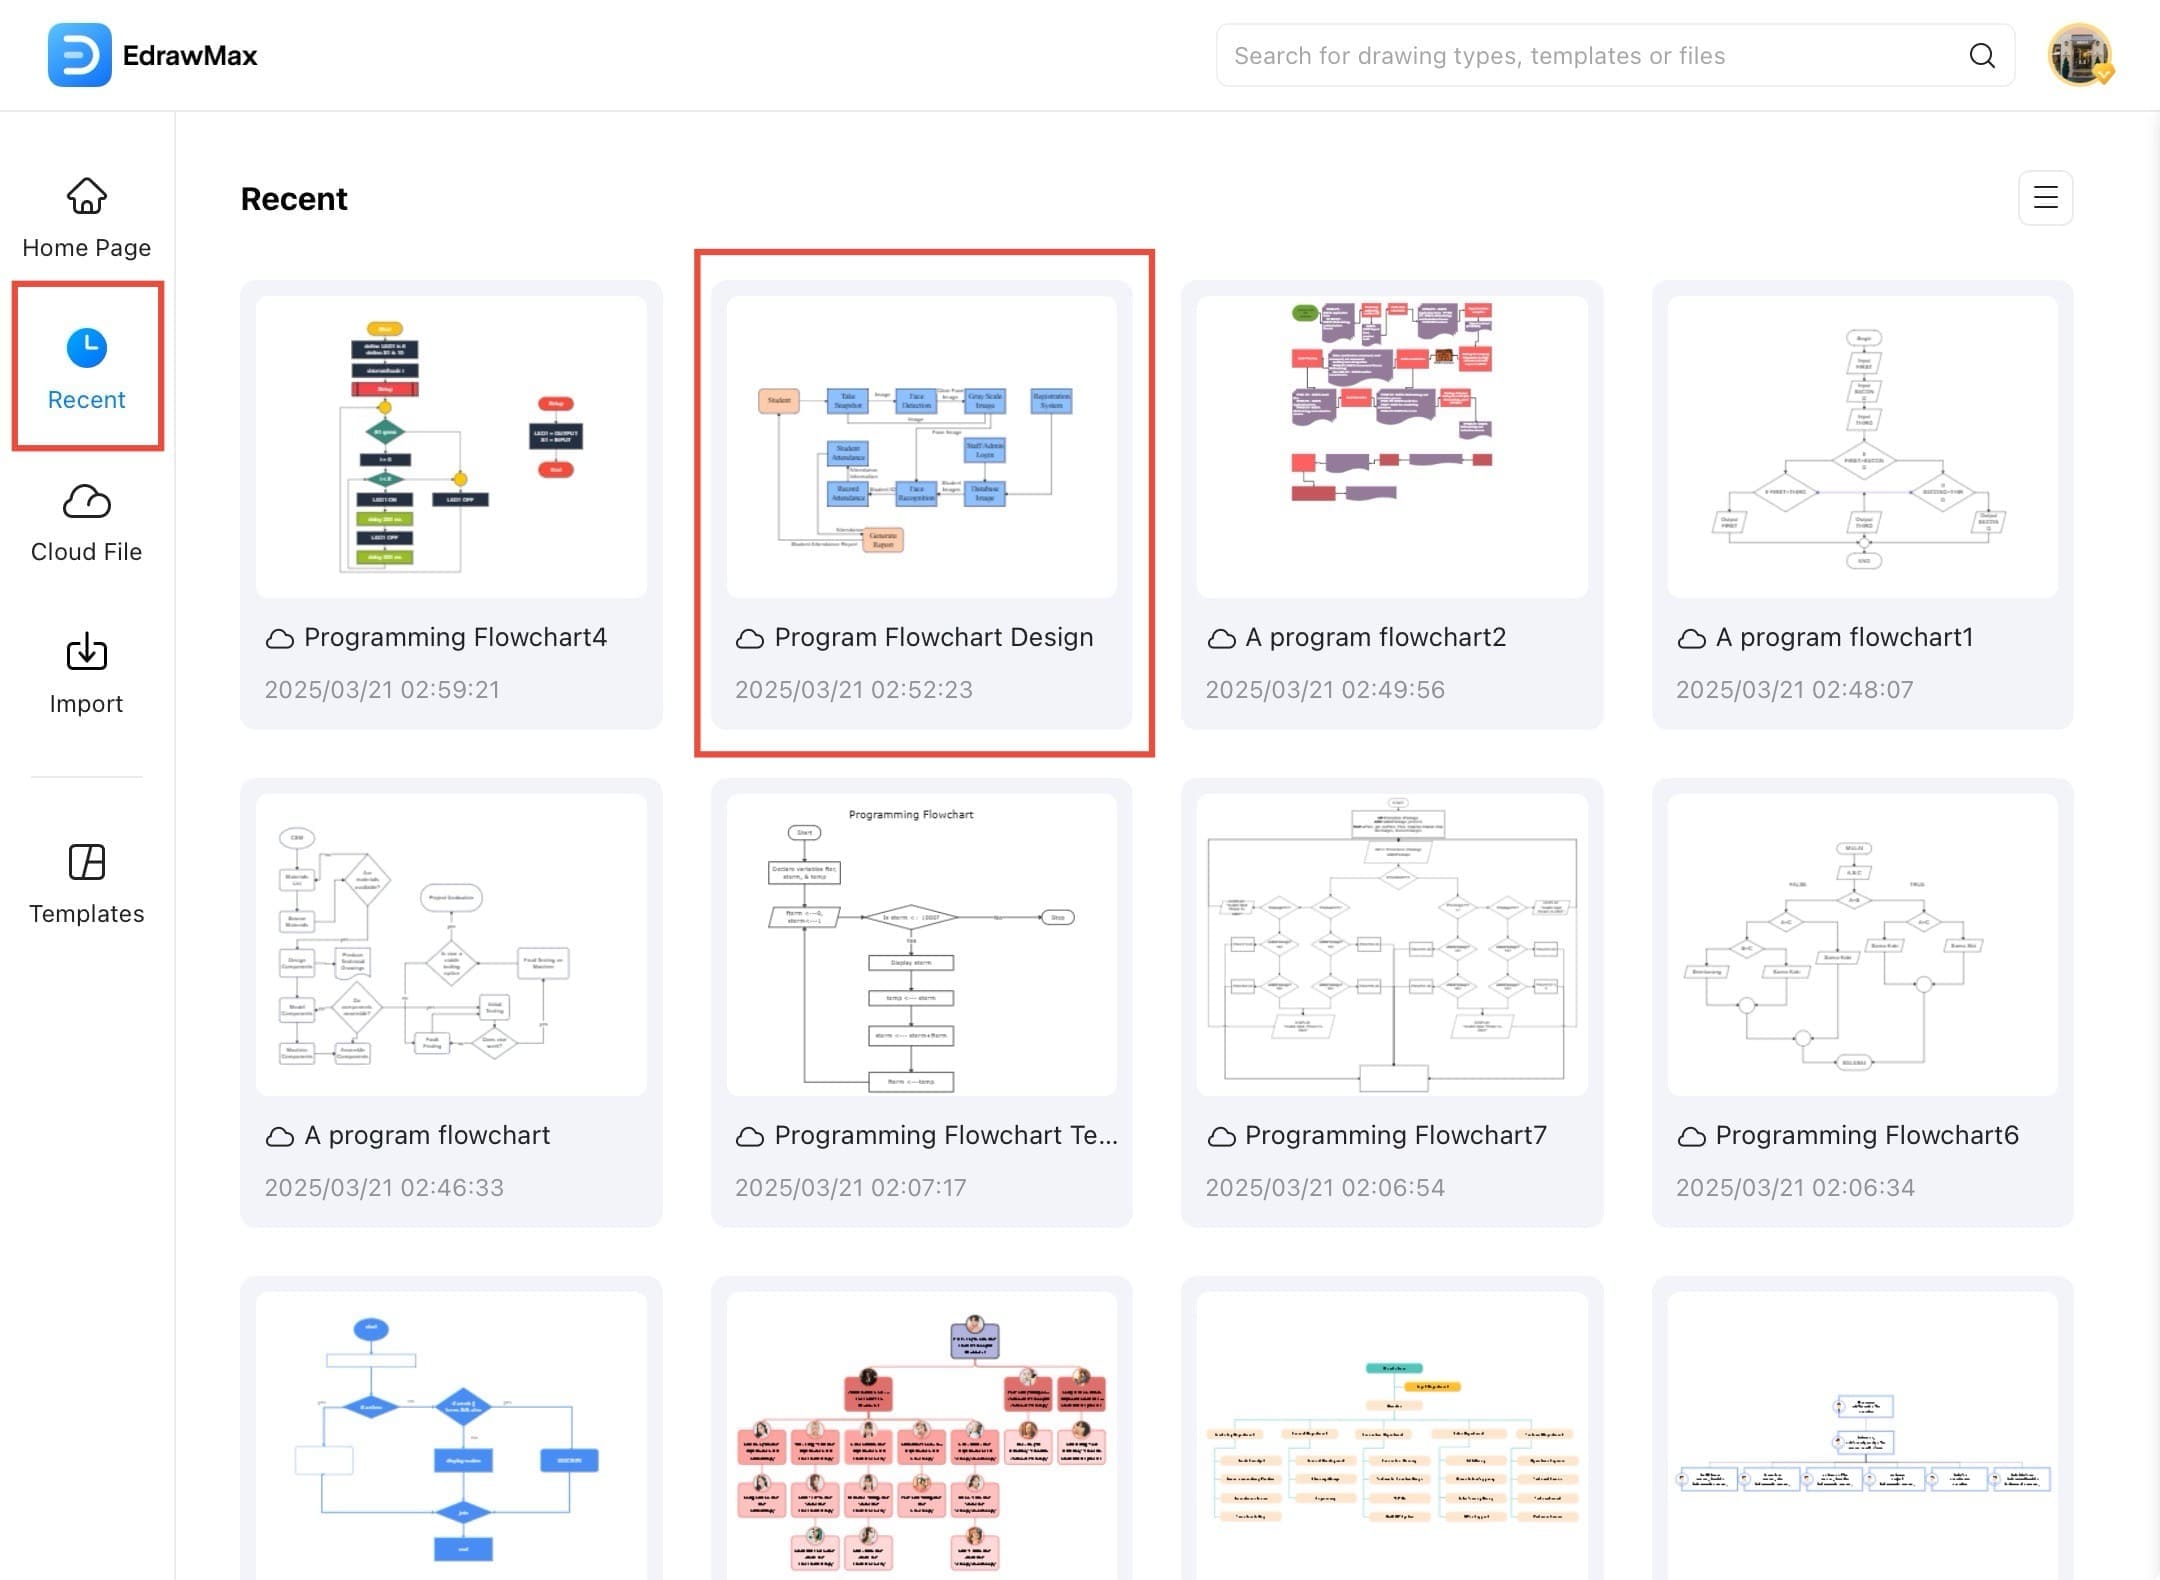
Step ❶ Launch EdrawMax and Select Project
- Launch EdrawMax on your tablet.
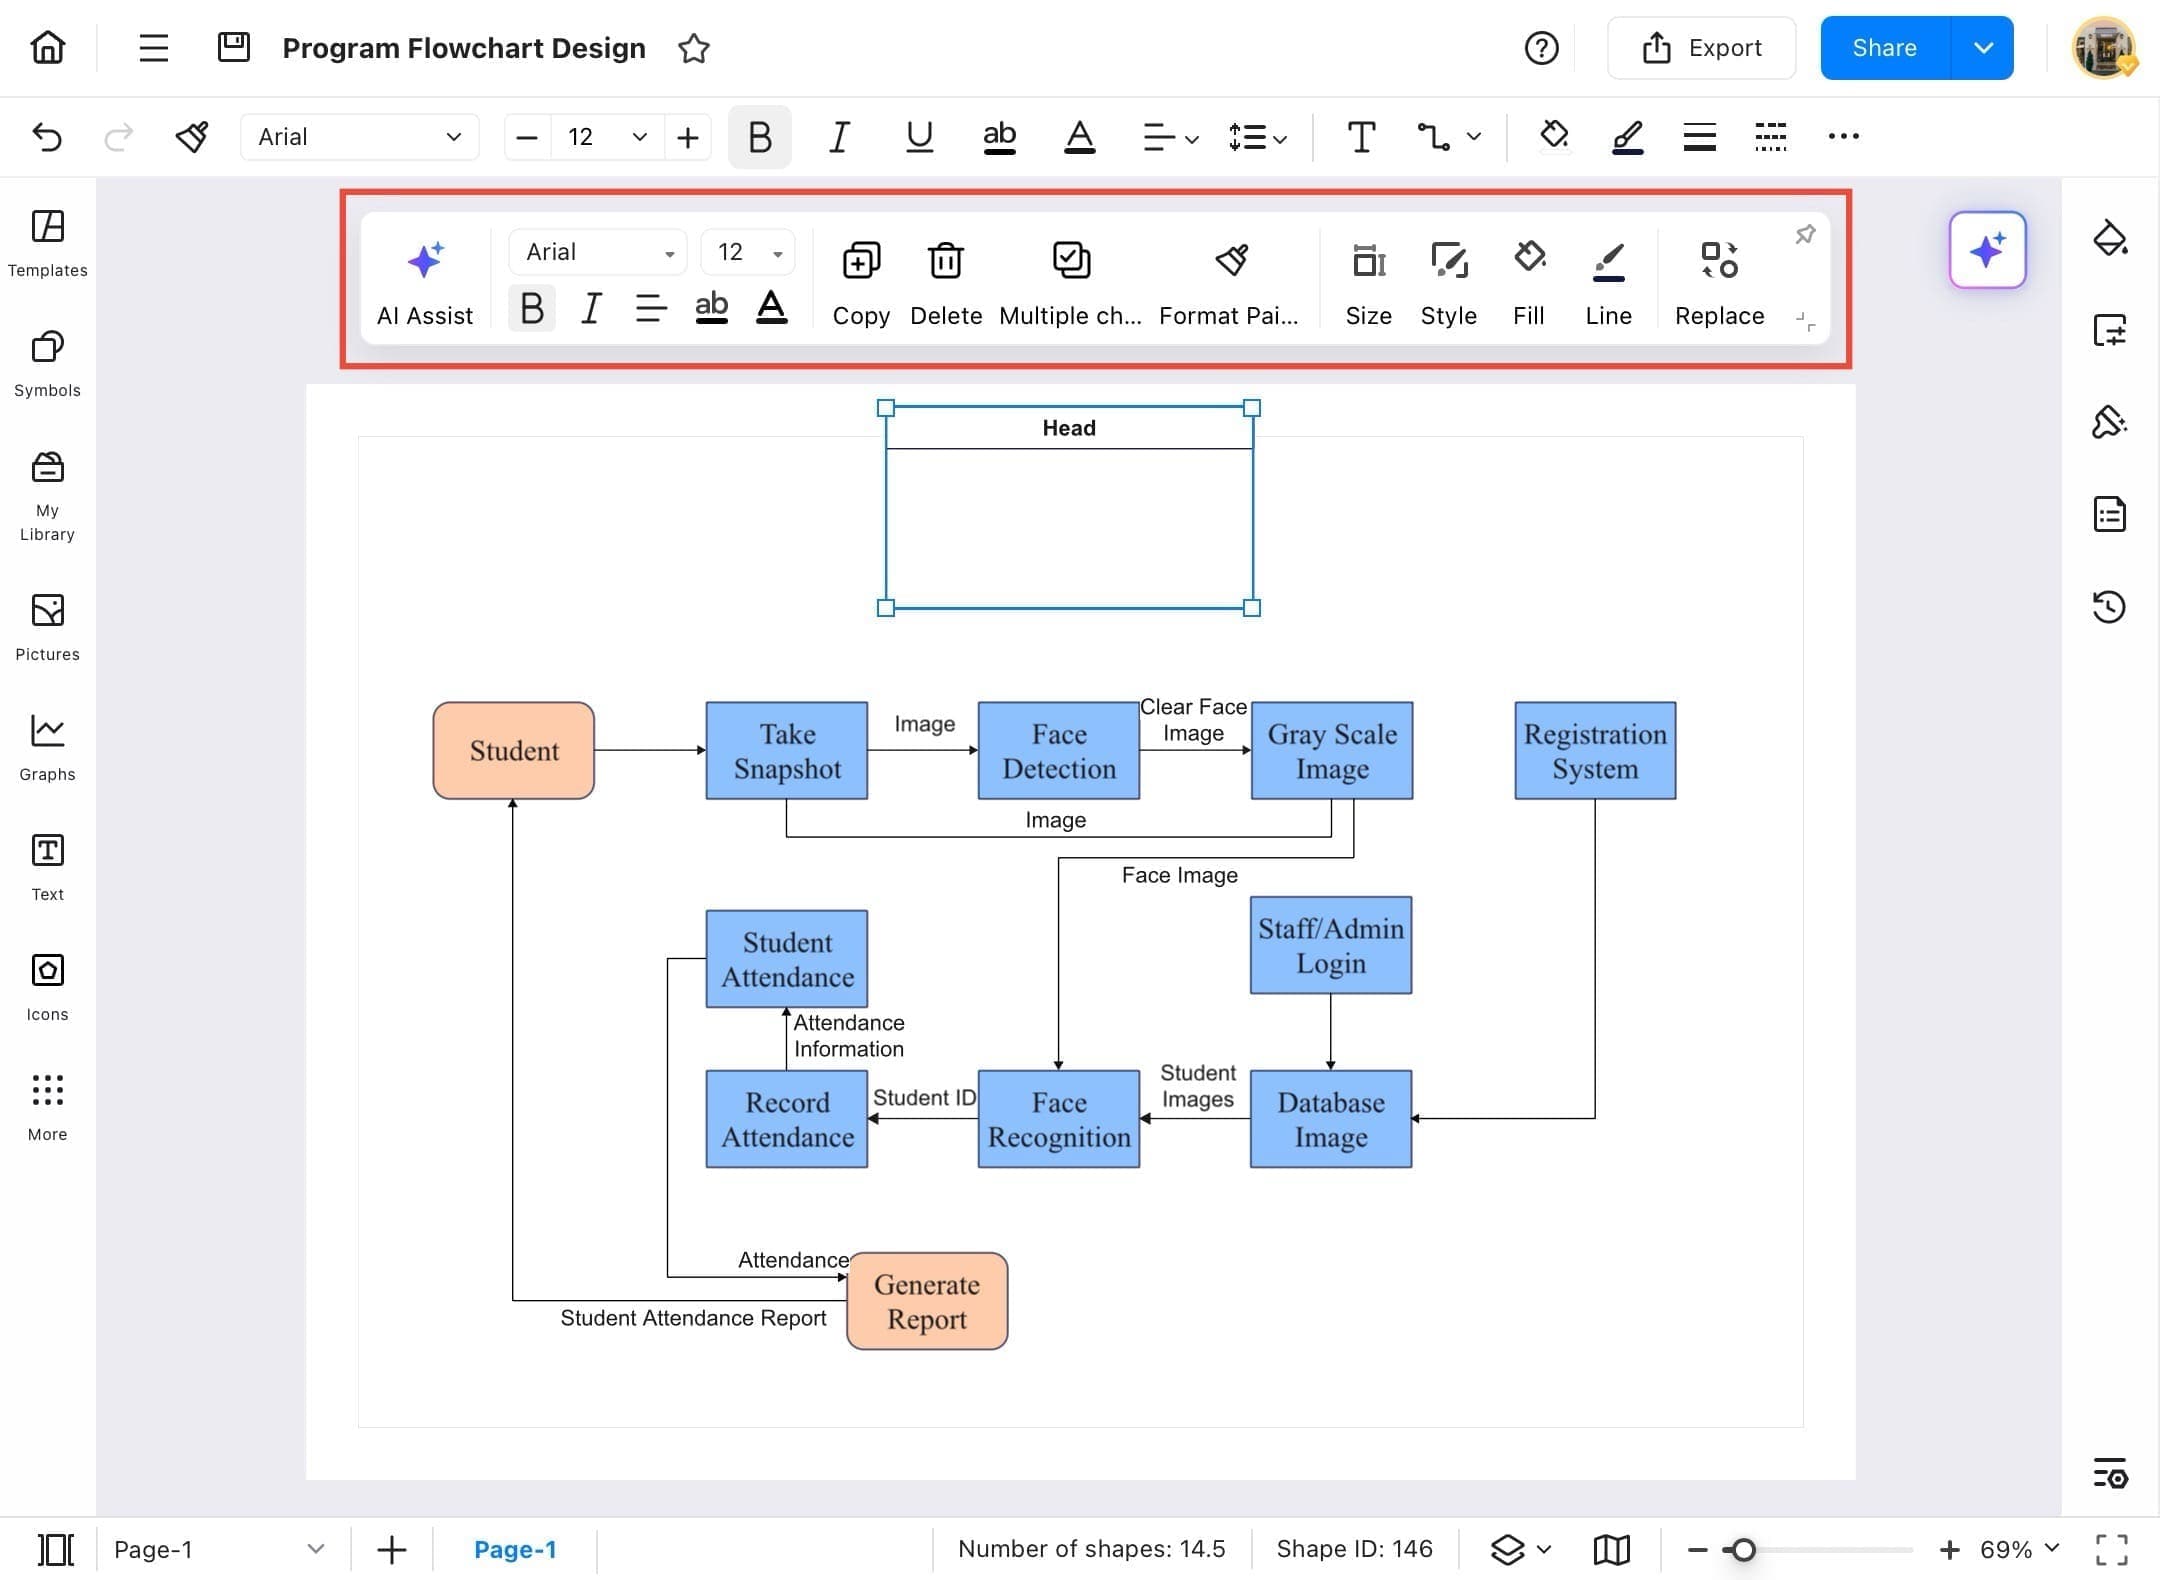
- Tap Recent and then select your desired project, such as Program Flowchart Design, to begin editing.
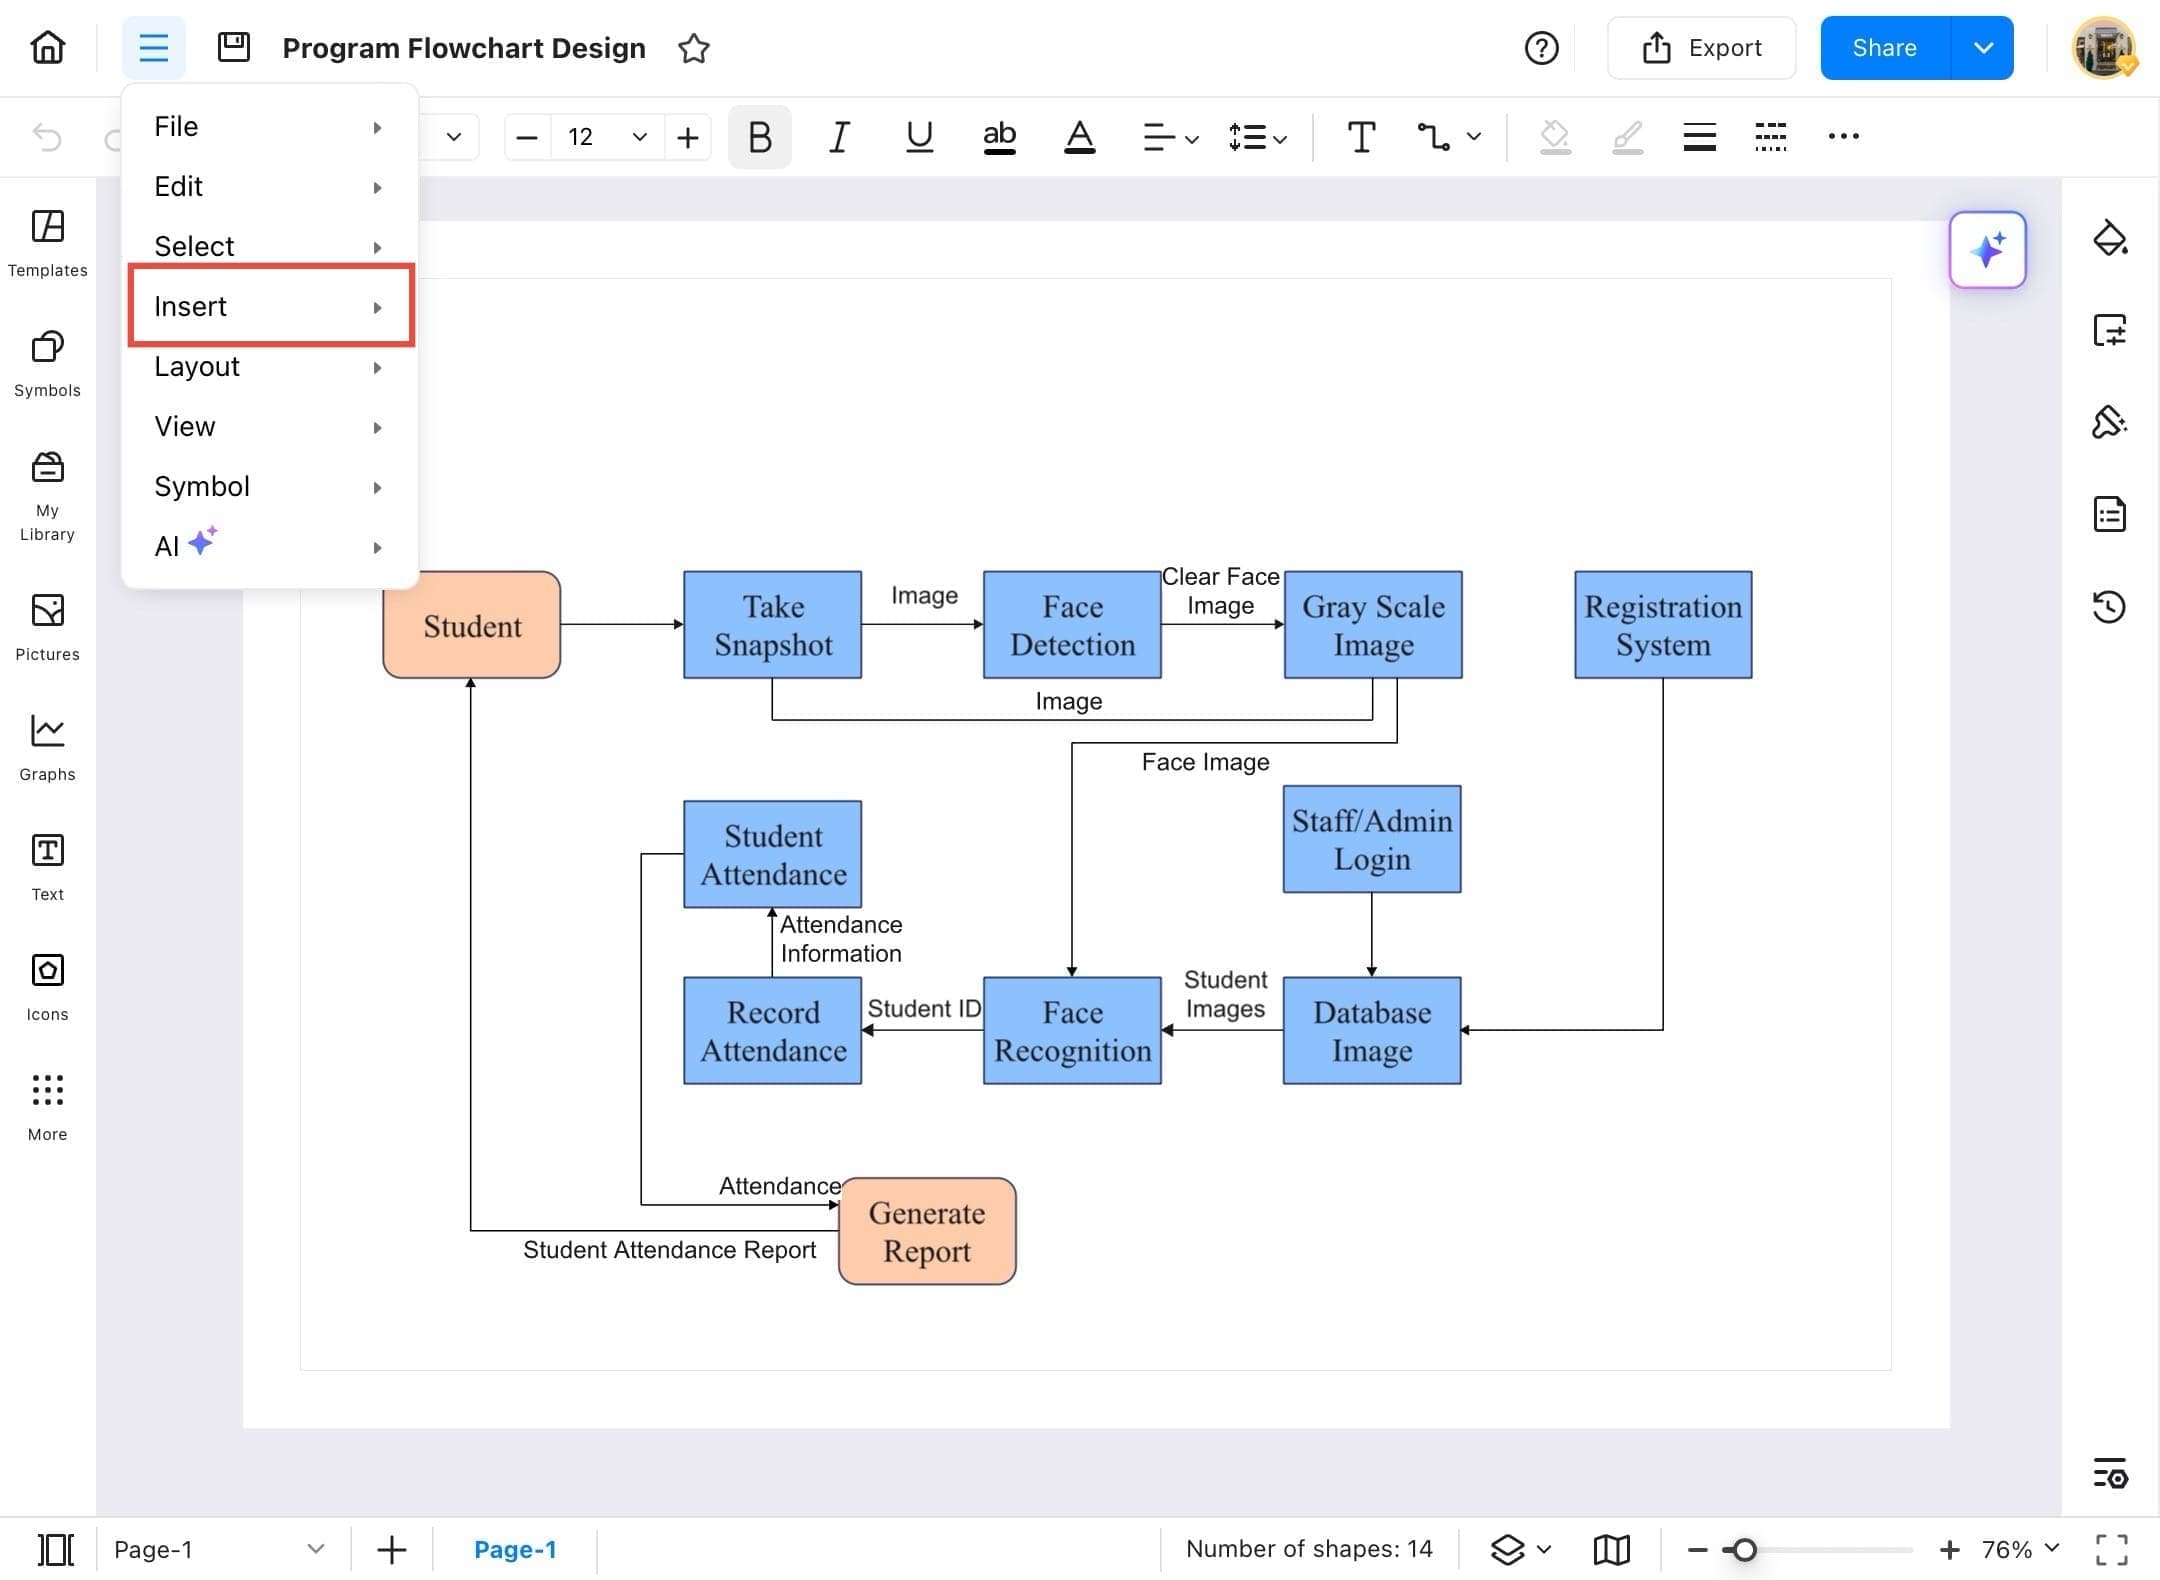
Step ❷ Access Menu Icon
- Your flowchart will open. This is where you’ll insert the container. Then tap on the hamburger icon.
Step ❸ Tap Insert Option
- Tap Insert from the top menu bar to access insertable elements.
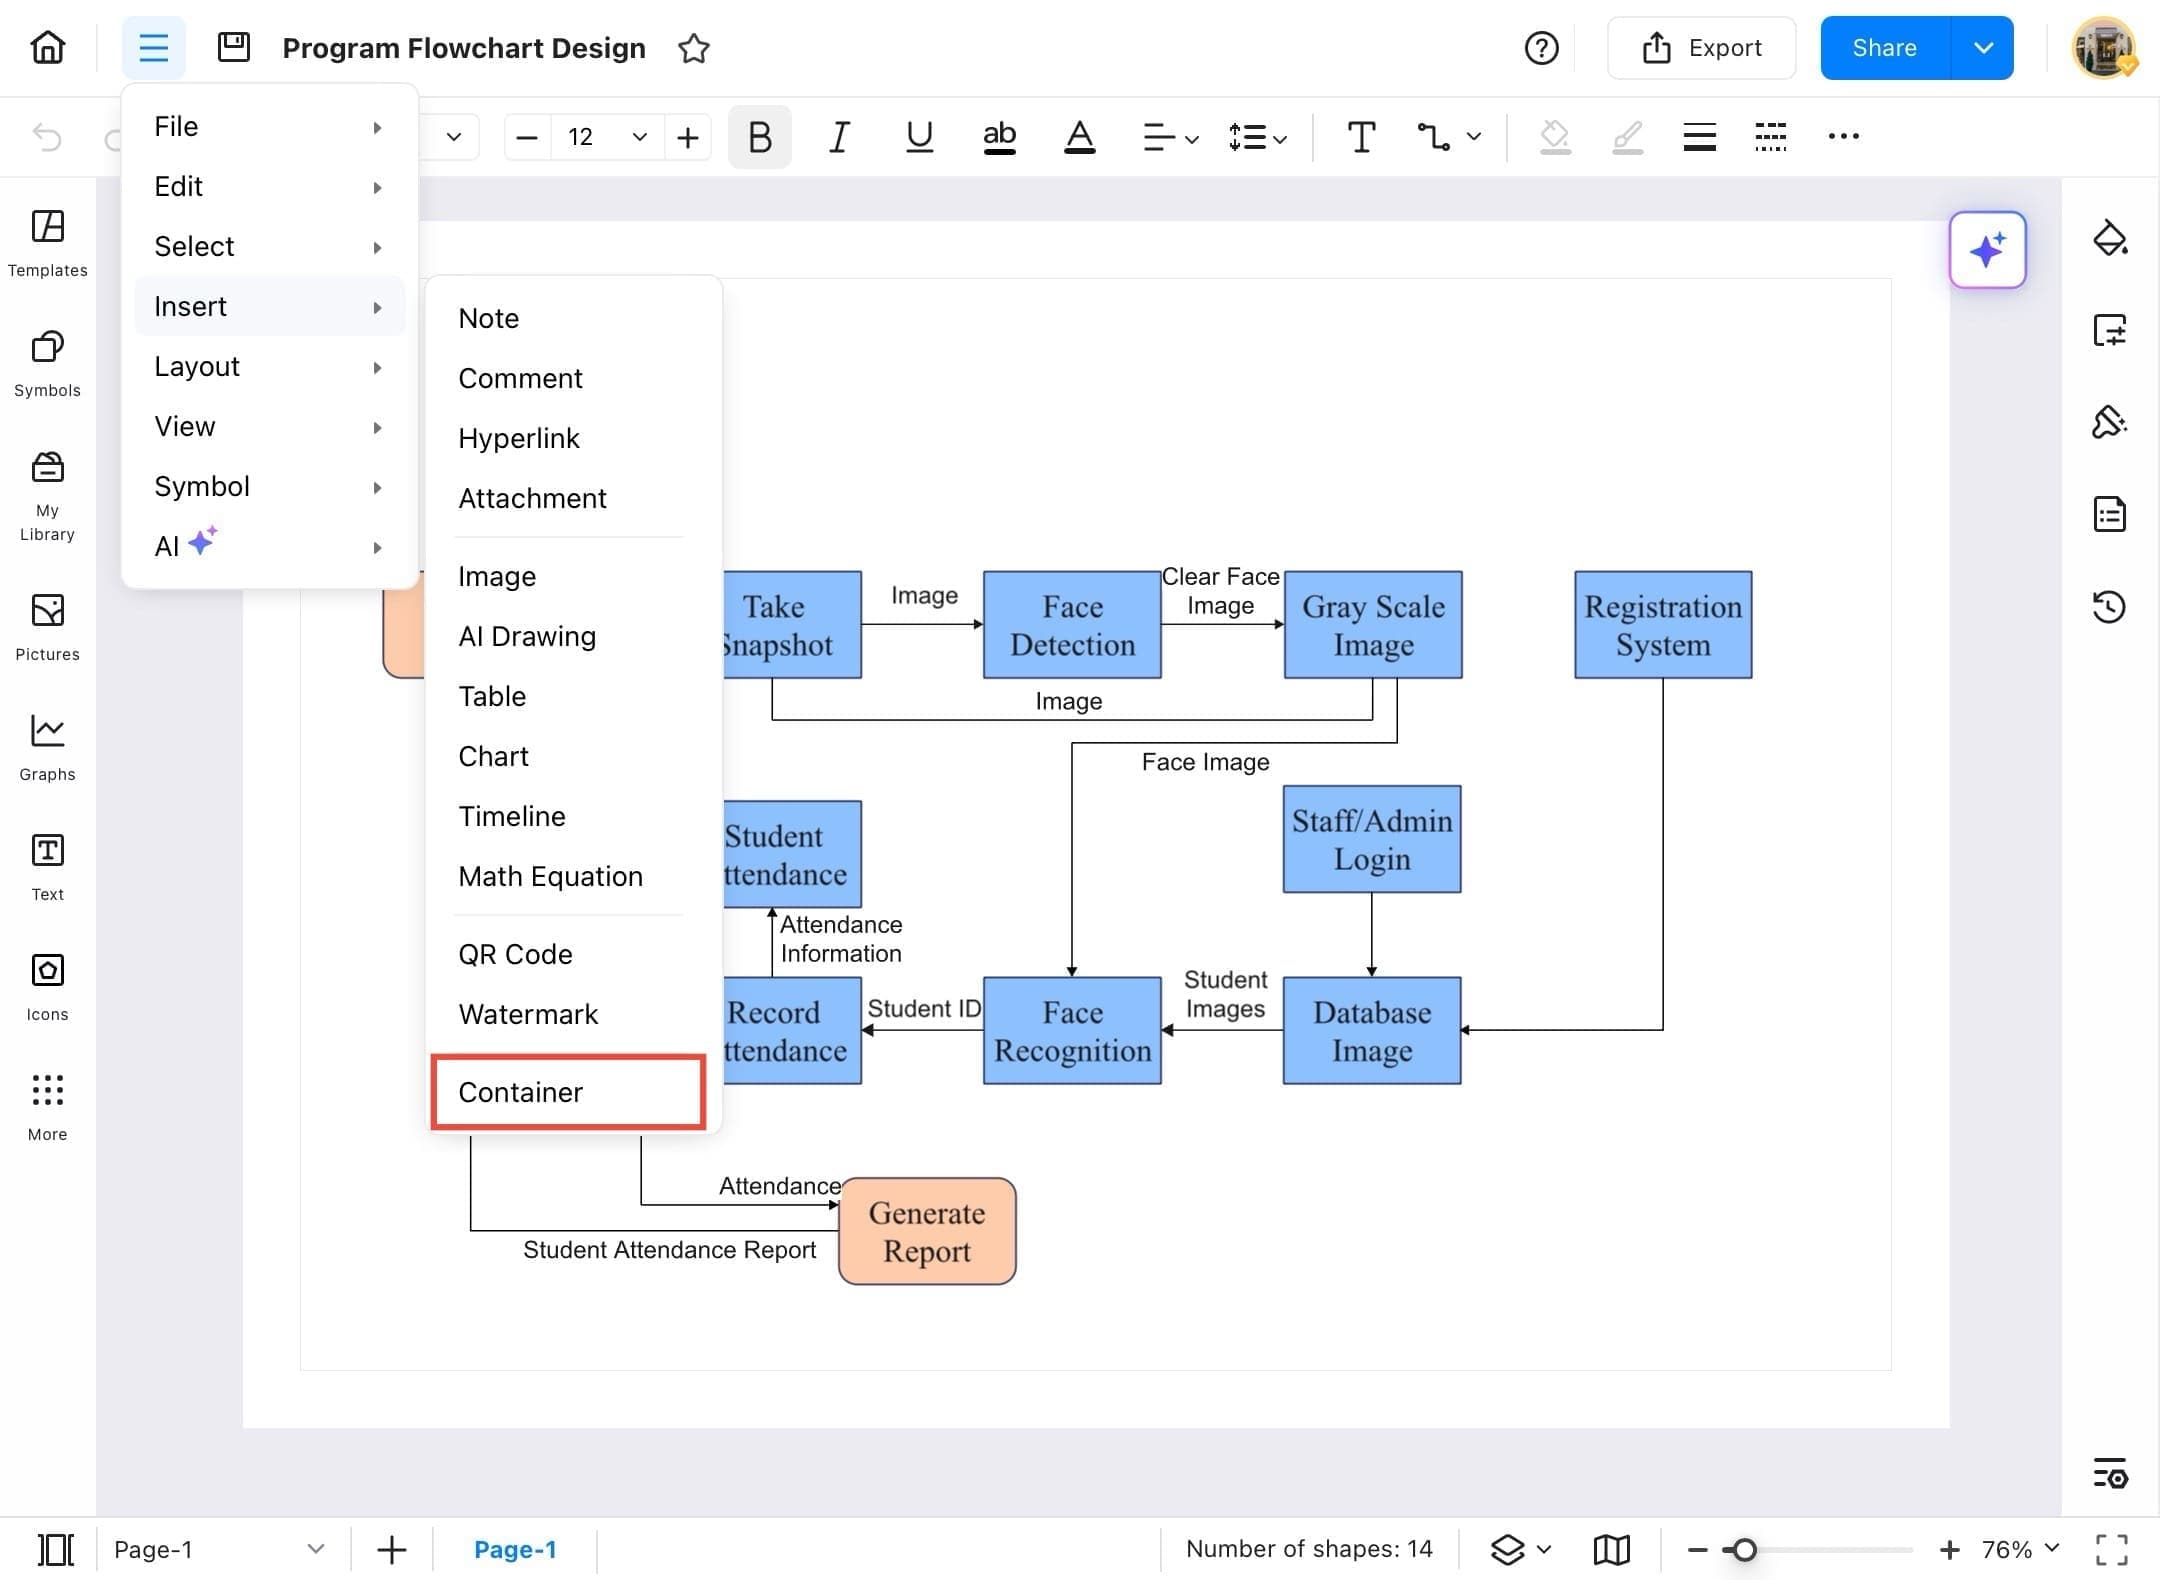
Step ❹ Select Container
- In the dropdown list, select Container to open the container options window.
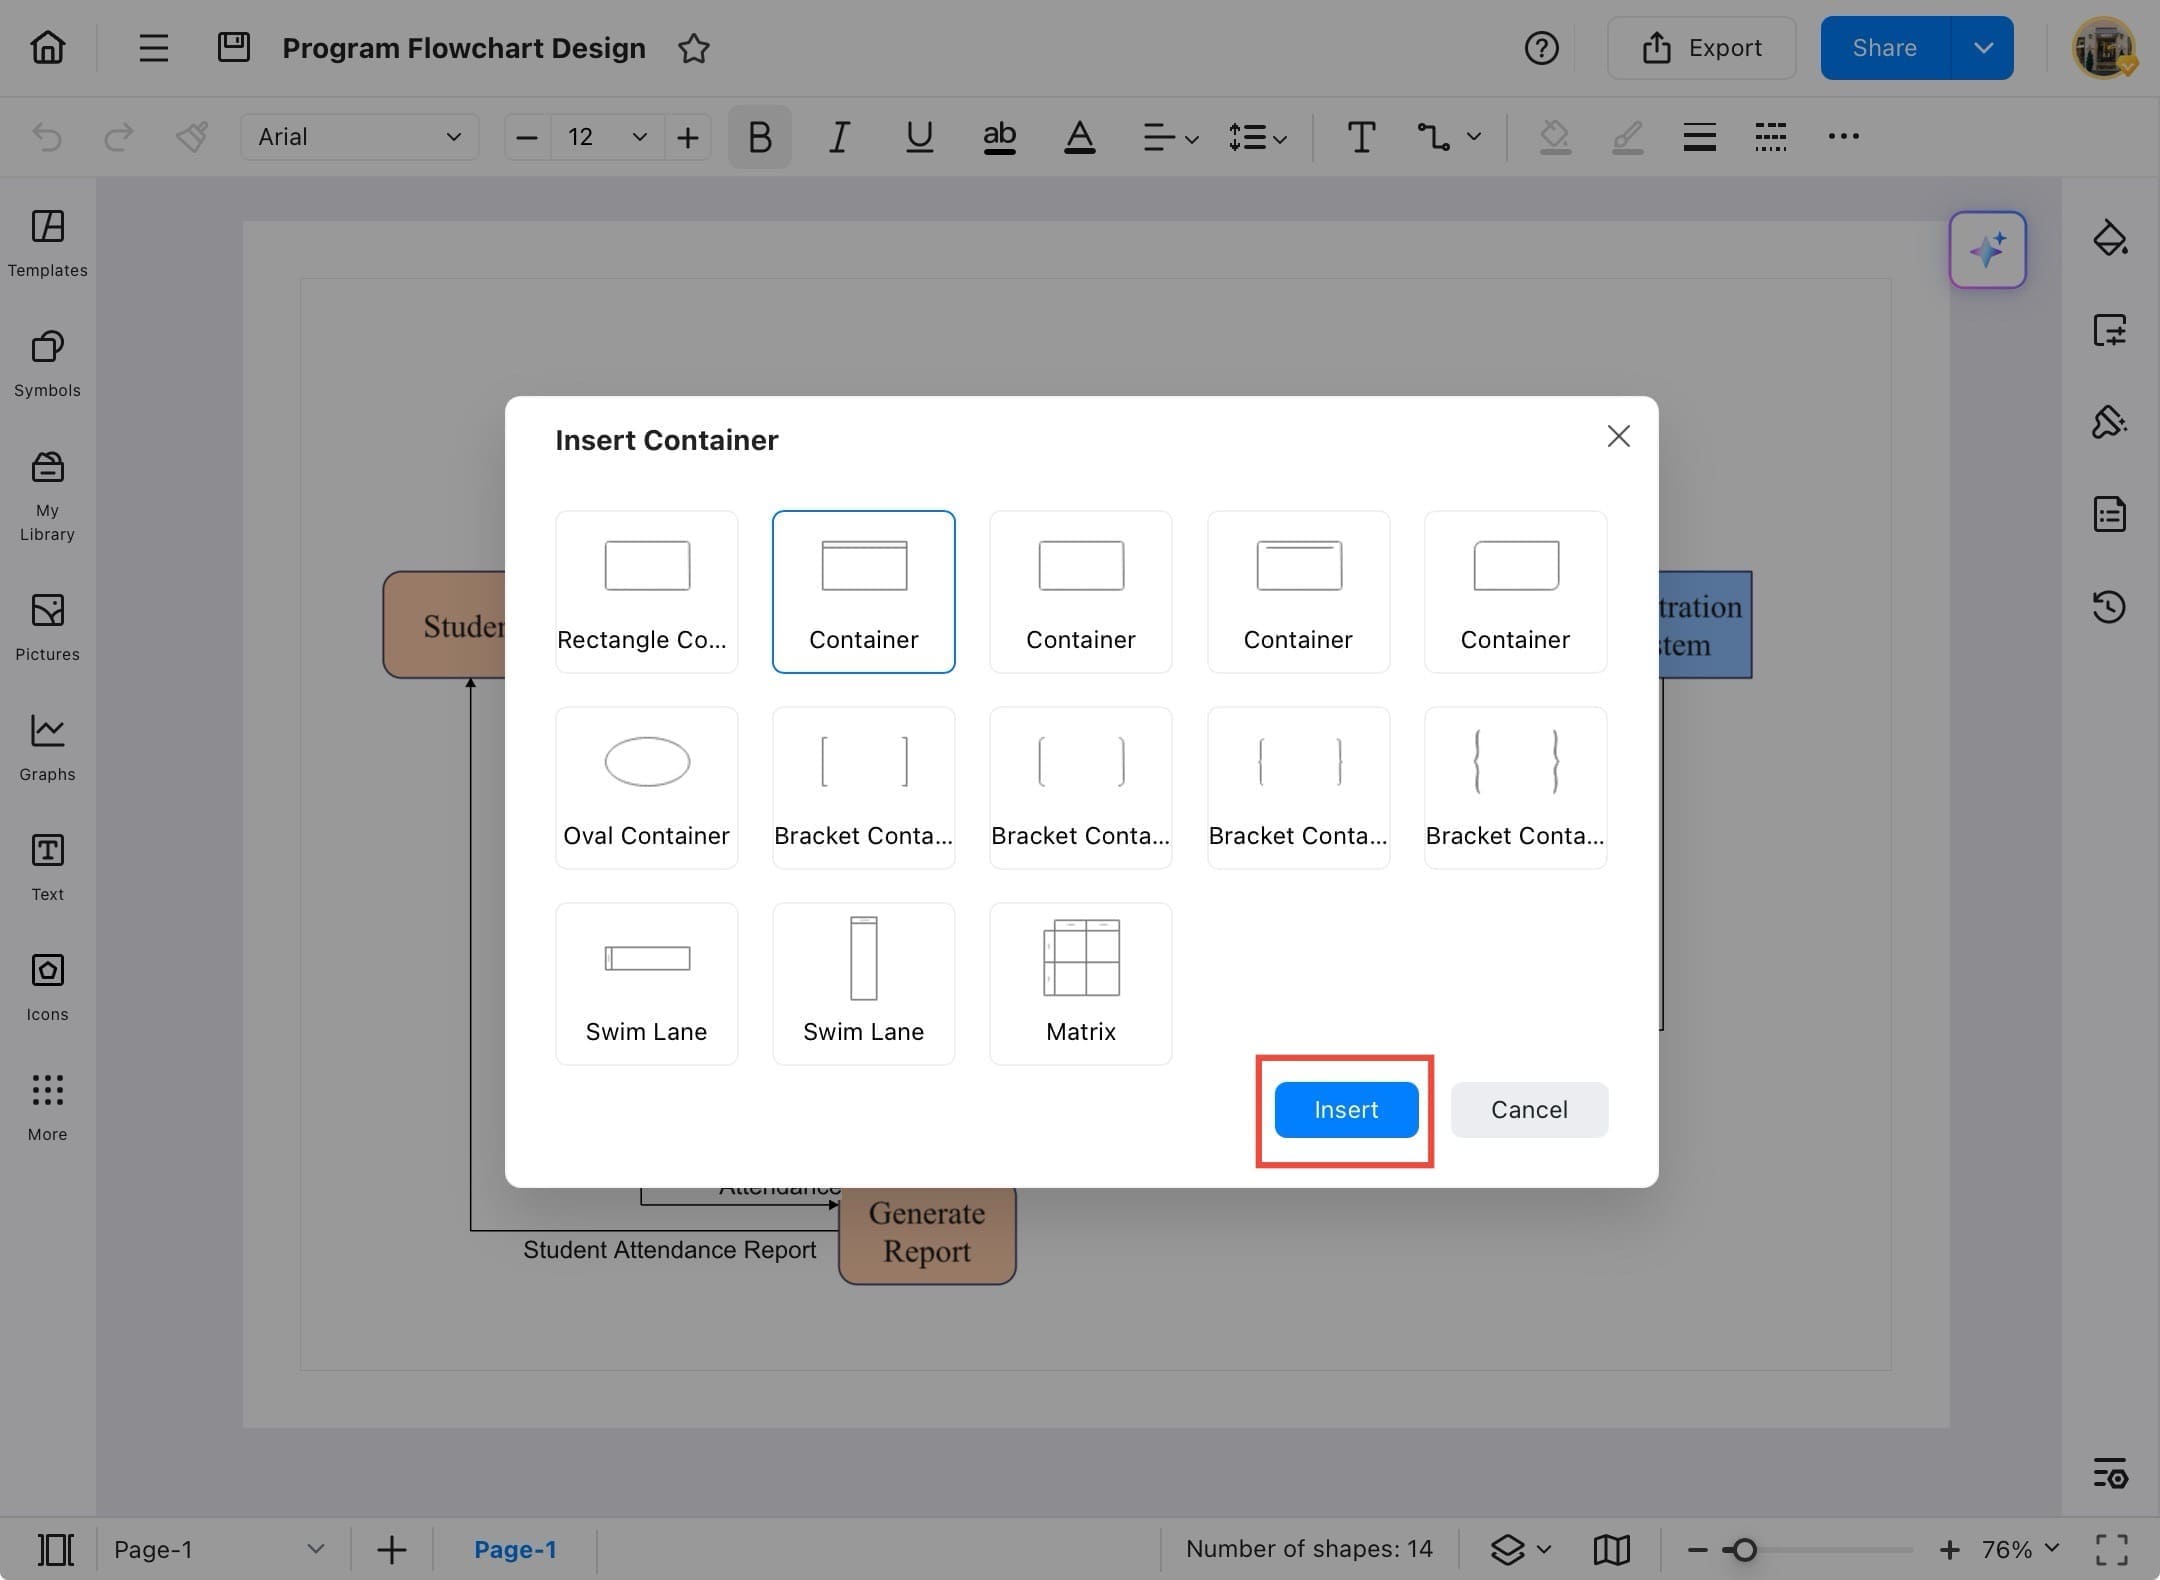
Step ❺ Choose Container Type
- A new dialog opens, displaying different container types. Browse and find the one that fits your layout.
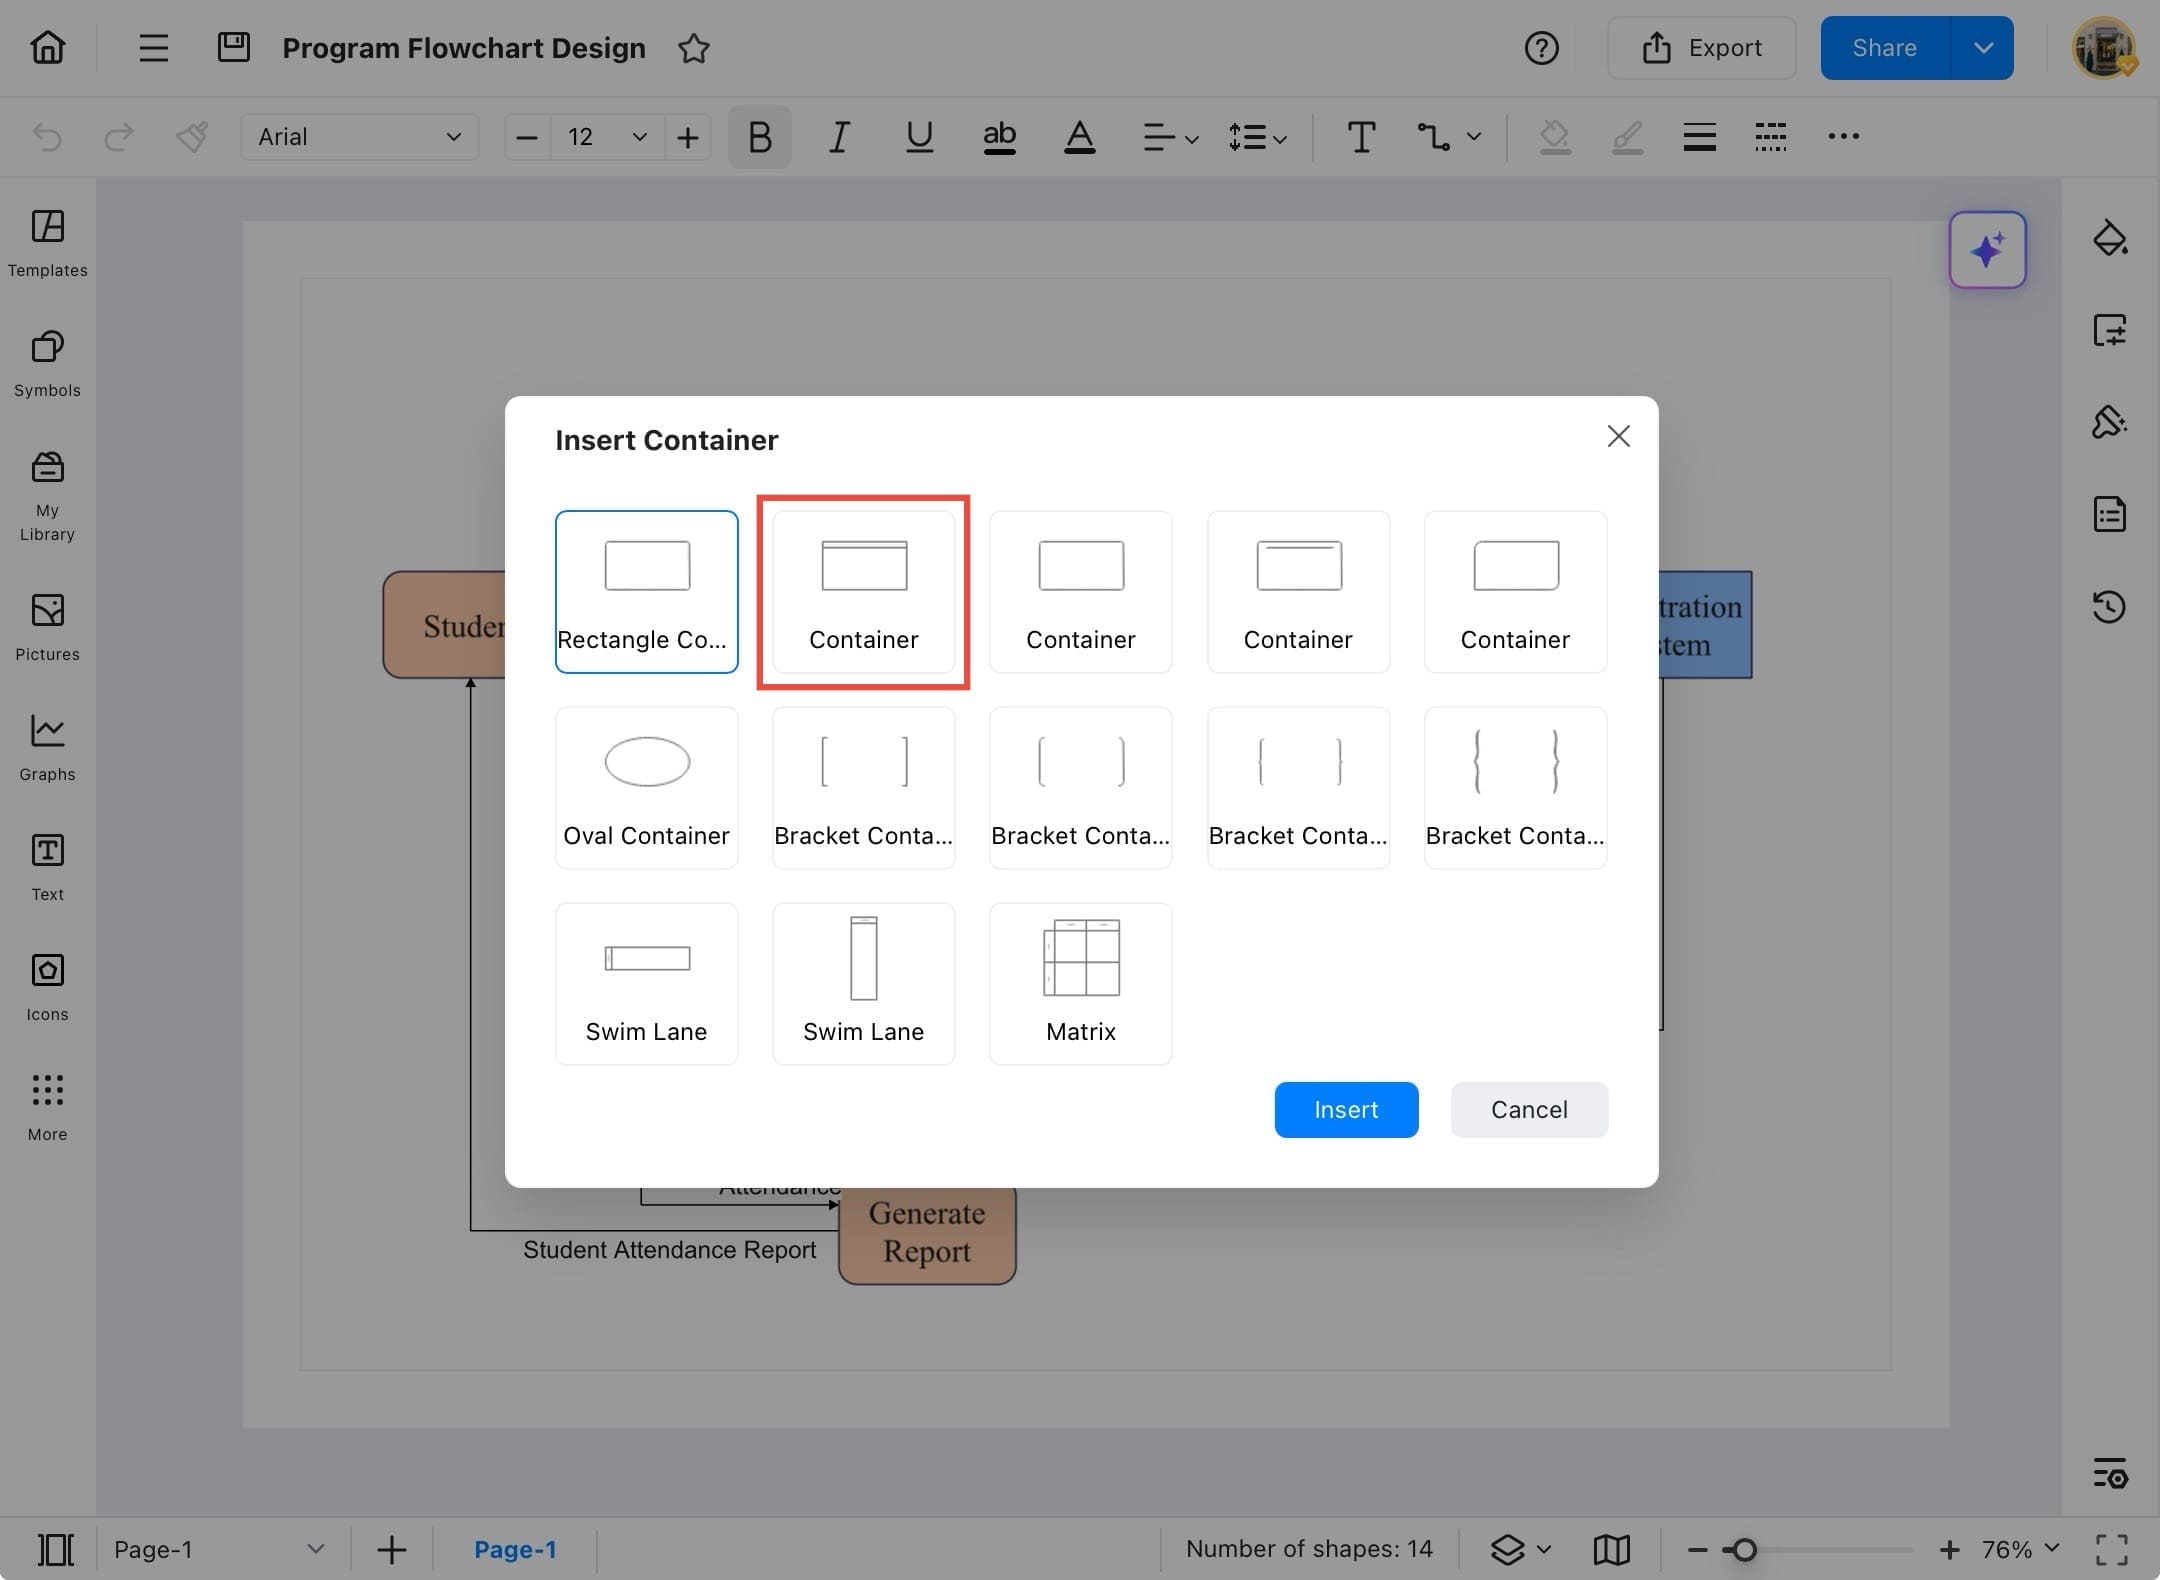
Step ❻ Tap Insert Button
- Tap on the container you want (e.g., rectangular), then tap the Insert button.
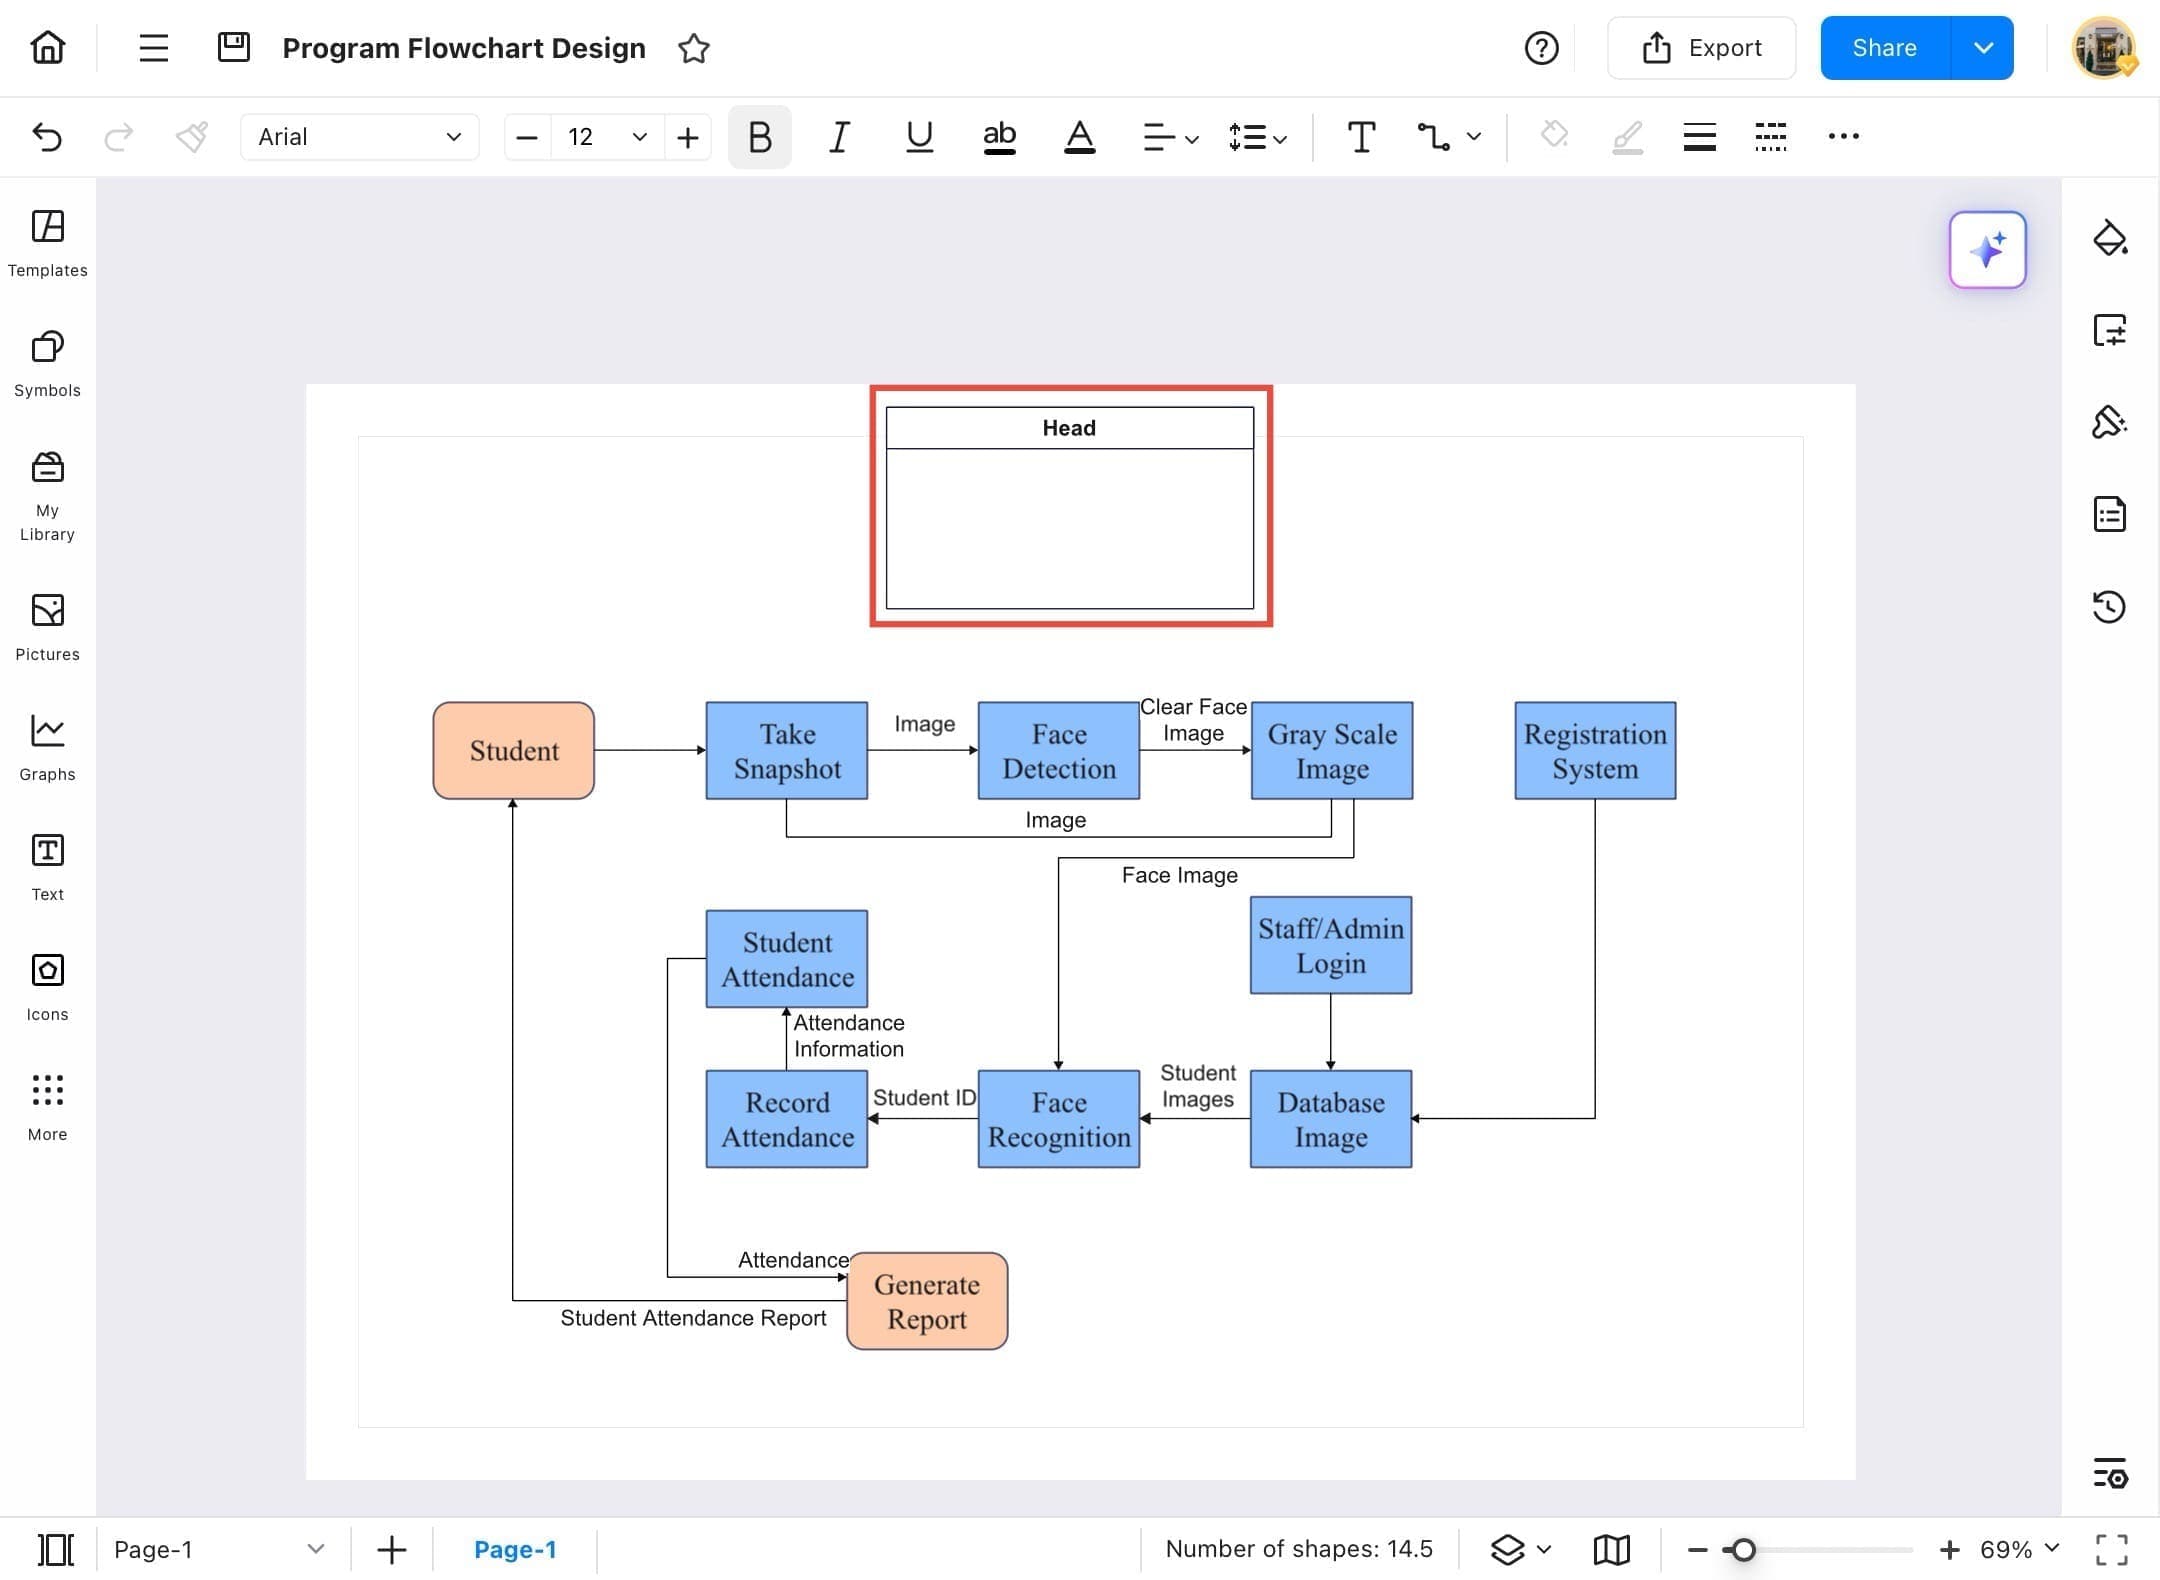
Step ❼ Container Inserted
- The selected container is now added to your diagram. It will appear with a default name like Head. You can move, resize, or rename it as needed.
Step ❽ Format Container
- Use the formatting toolbar at the top to change the container’s font, color, border, alignment, and more. This allows you to match the container to the rest of your design.