Think Bigger From EdrawMax User Guide
Shape Operation: Create a Shape
Creating shapes manually can be time-consuming. EdrawMax offers a vast number of shapes for different types of diagrams such as flowcharts, mind maps, Organizational charts, and many more. Follow the steps below to insert shapes into the canvas.
Step ❶
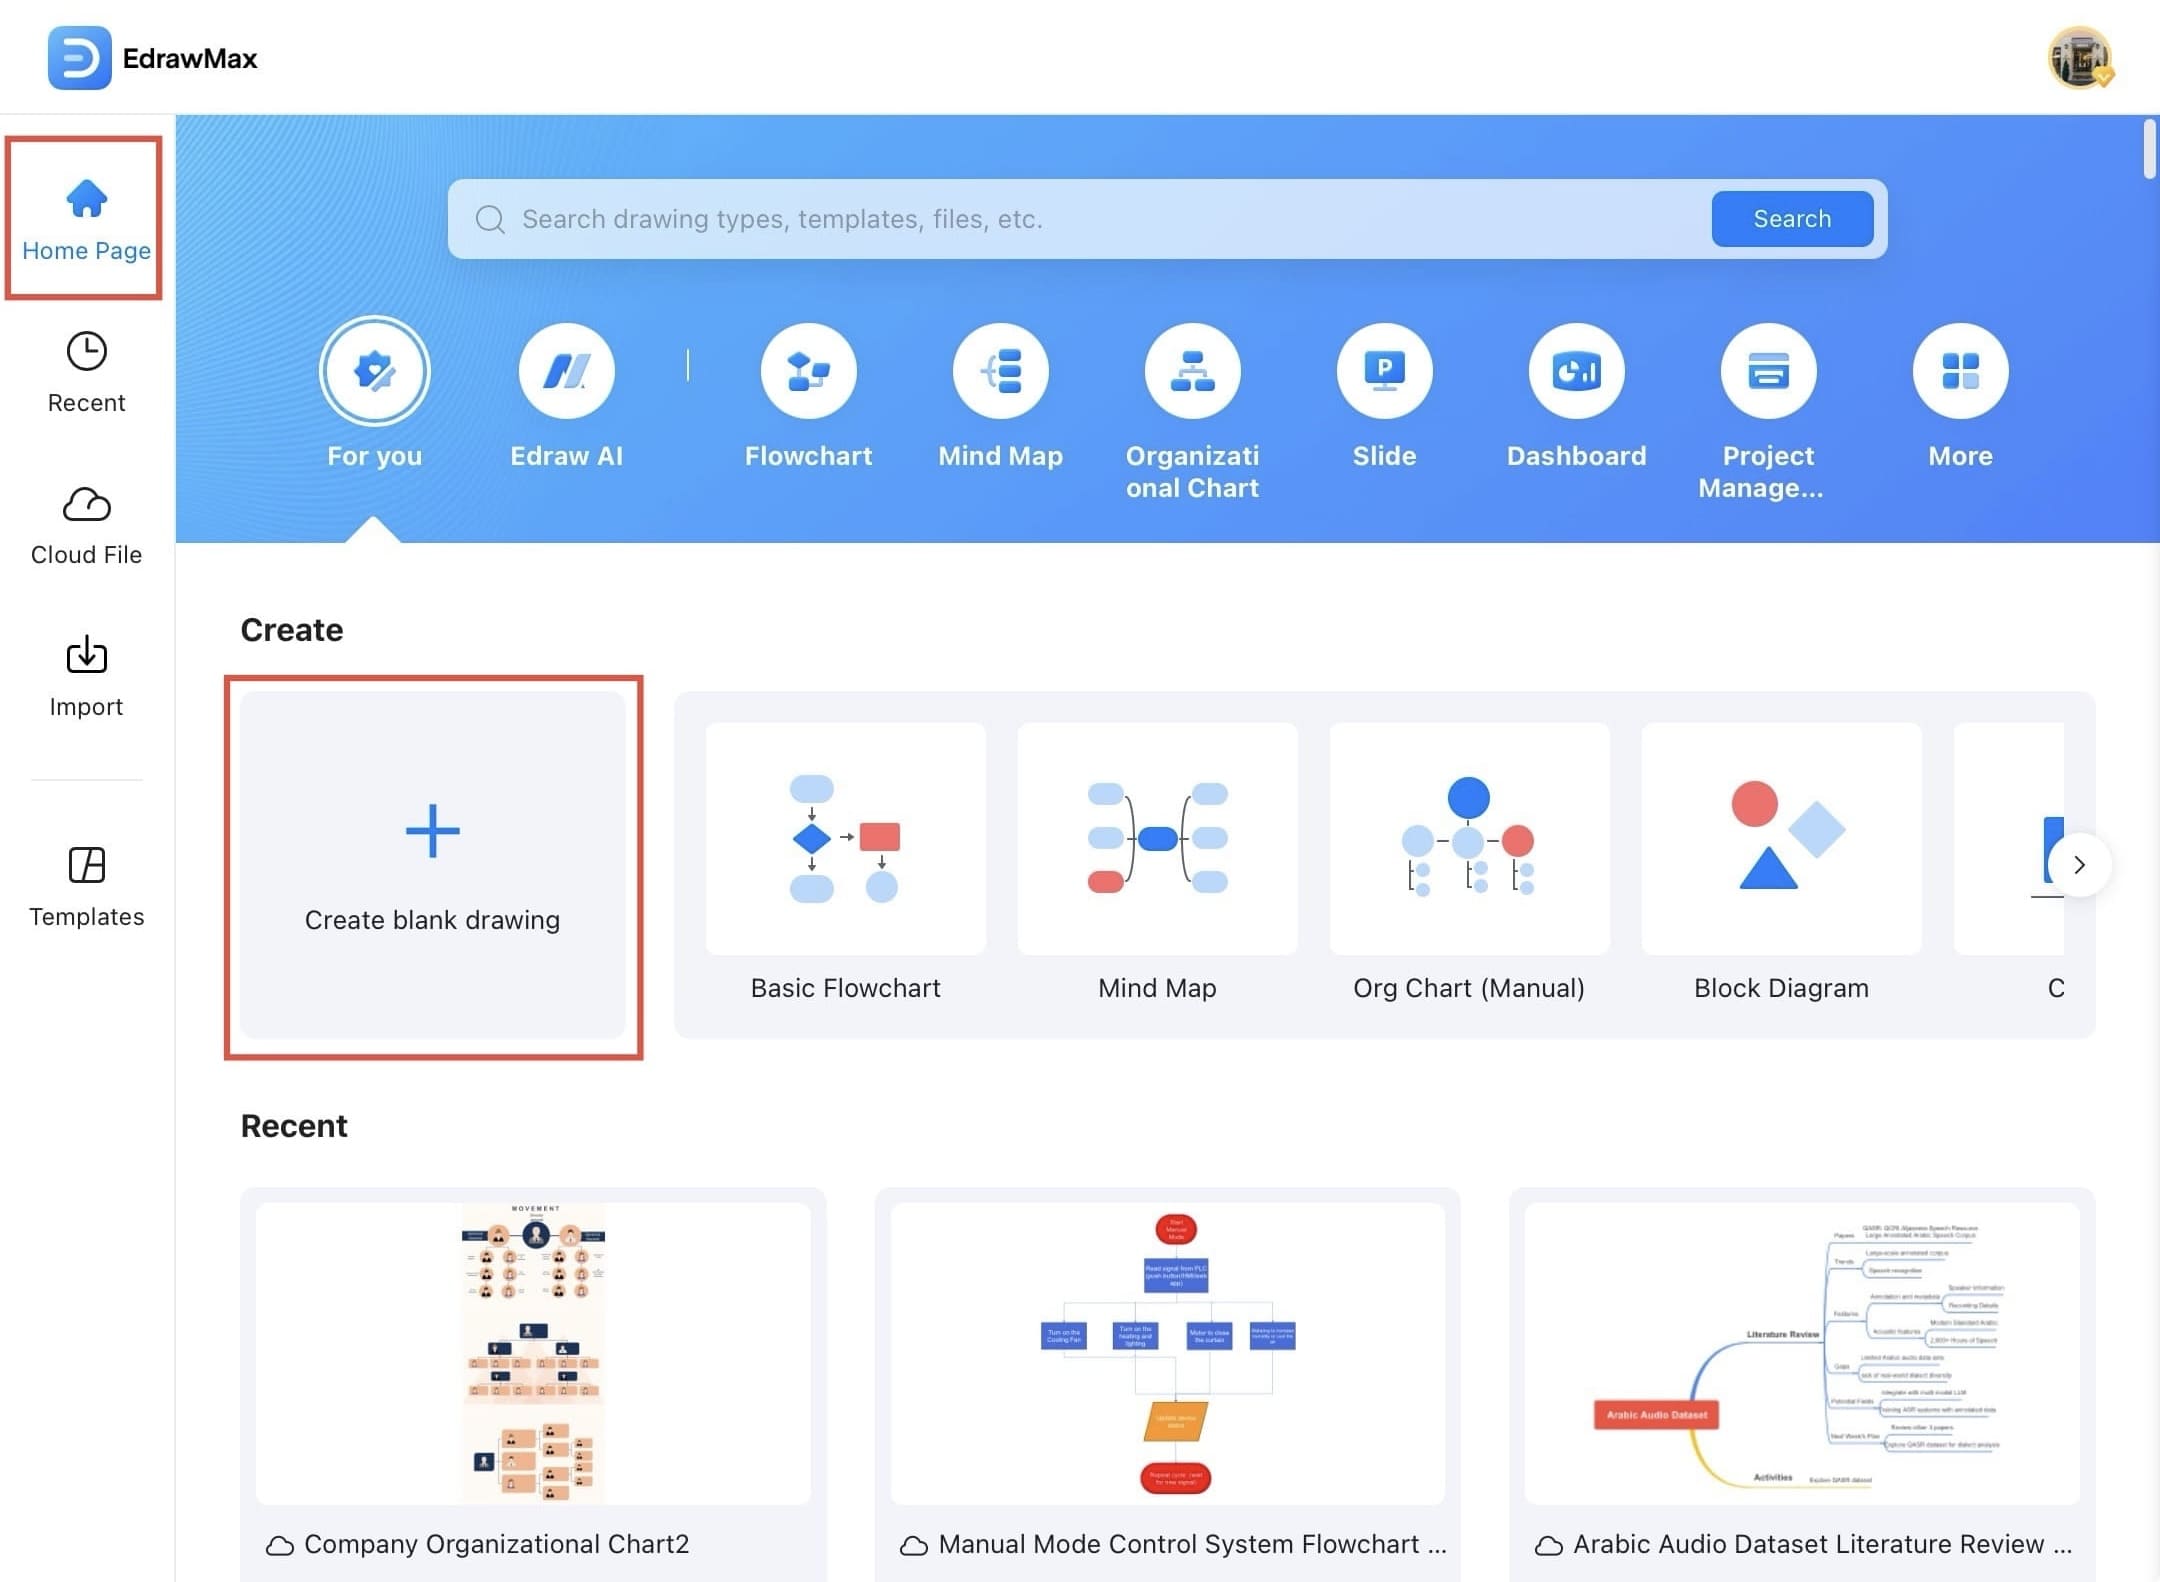
- Open EdrawMax on your tablet
Step ❷
- From the Home Page, choose a diagram layout or start with a blank drawing.
Step ❸
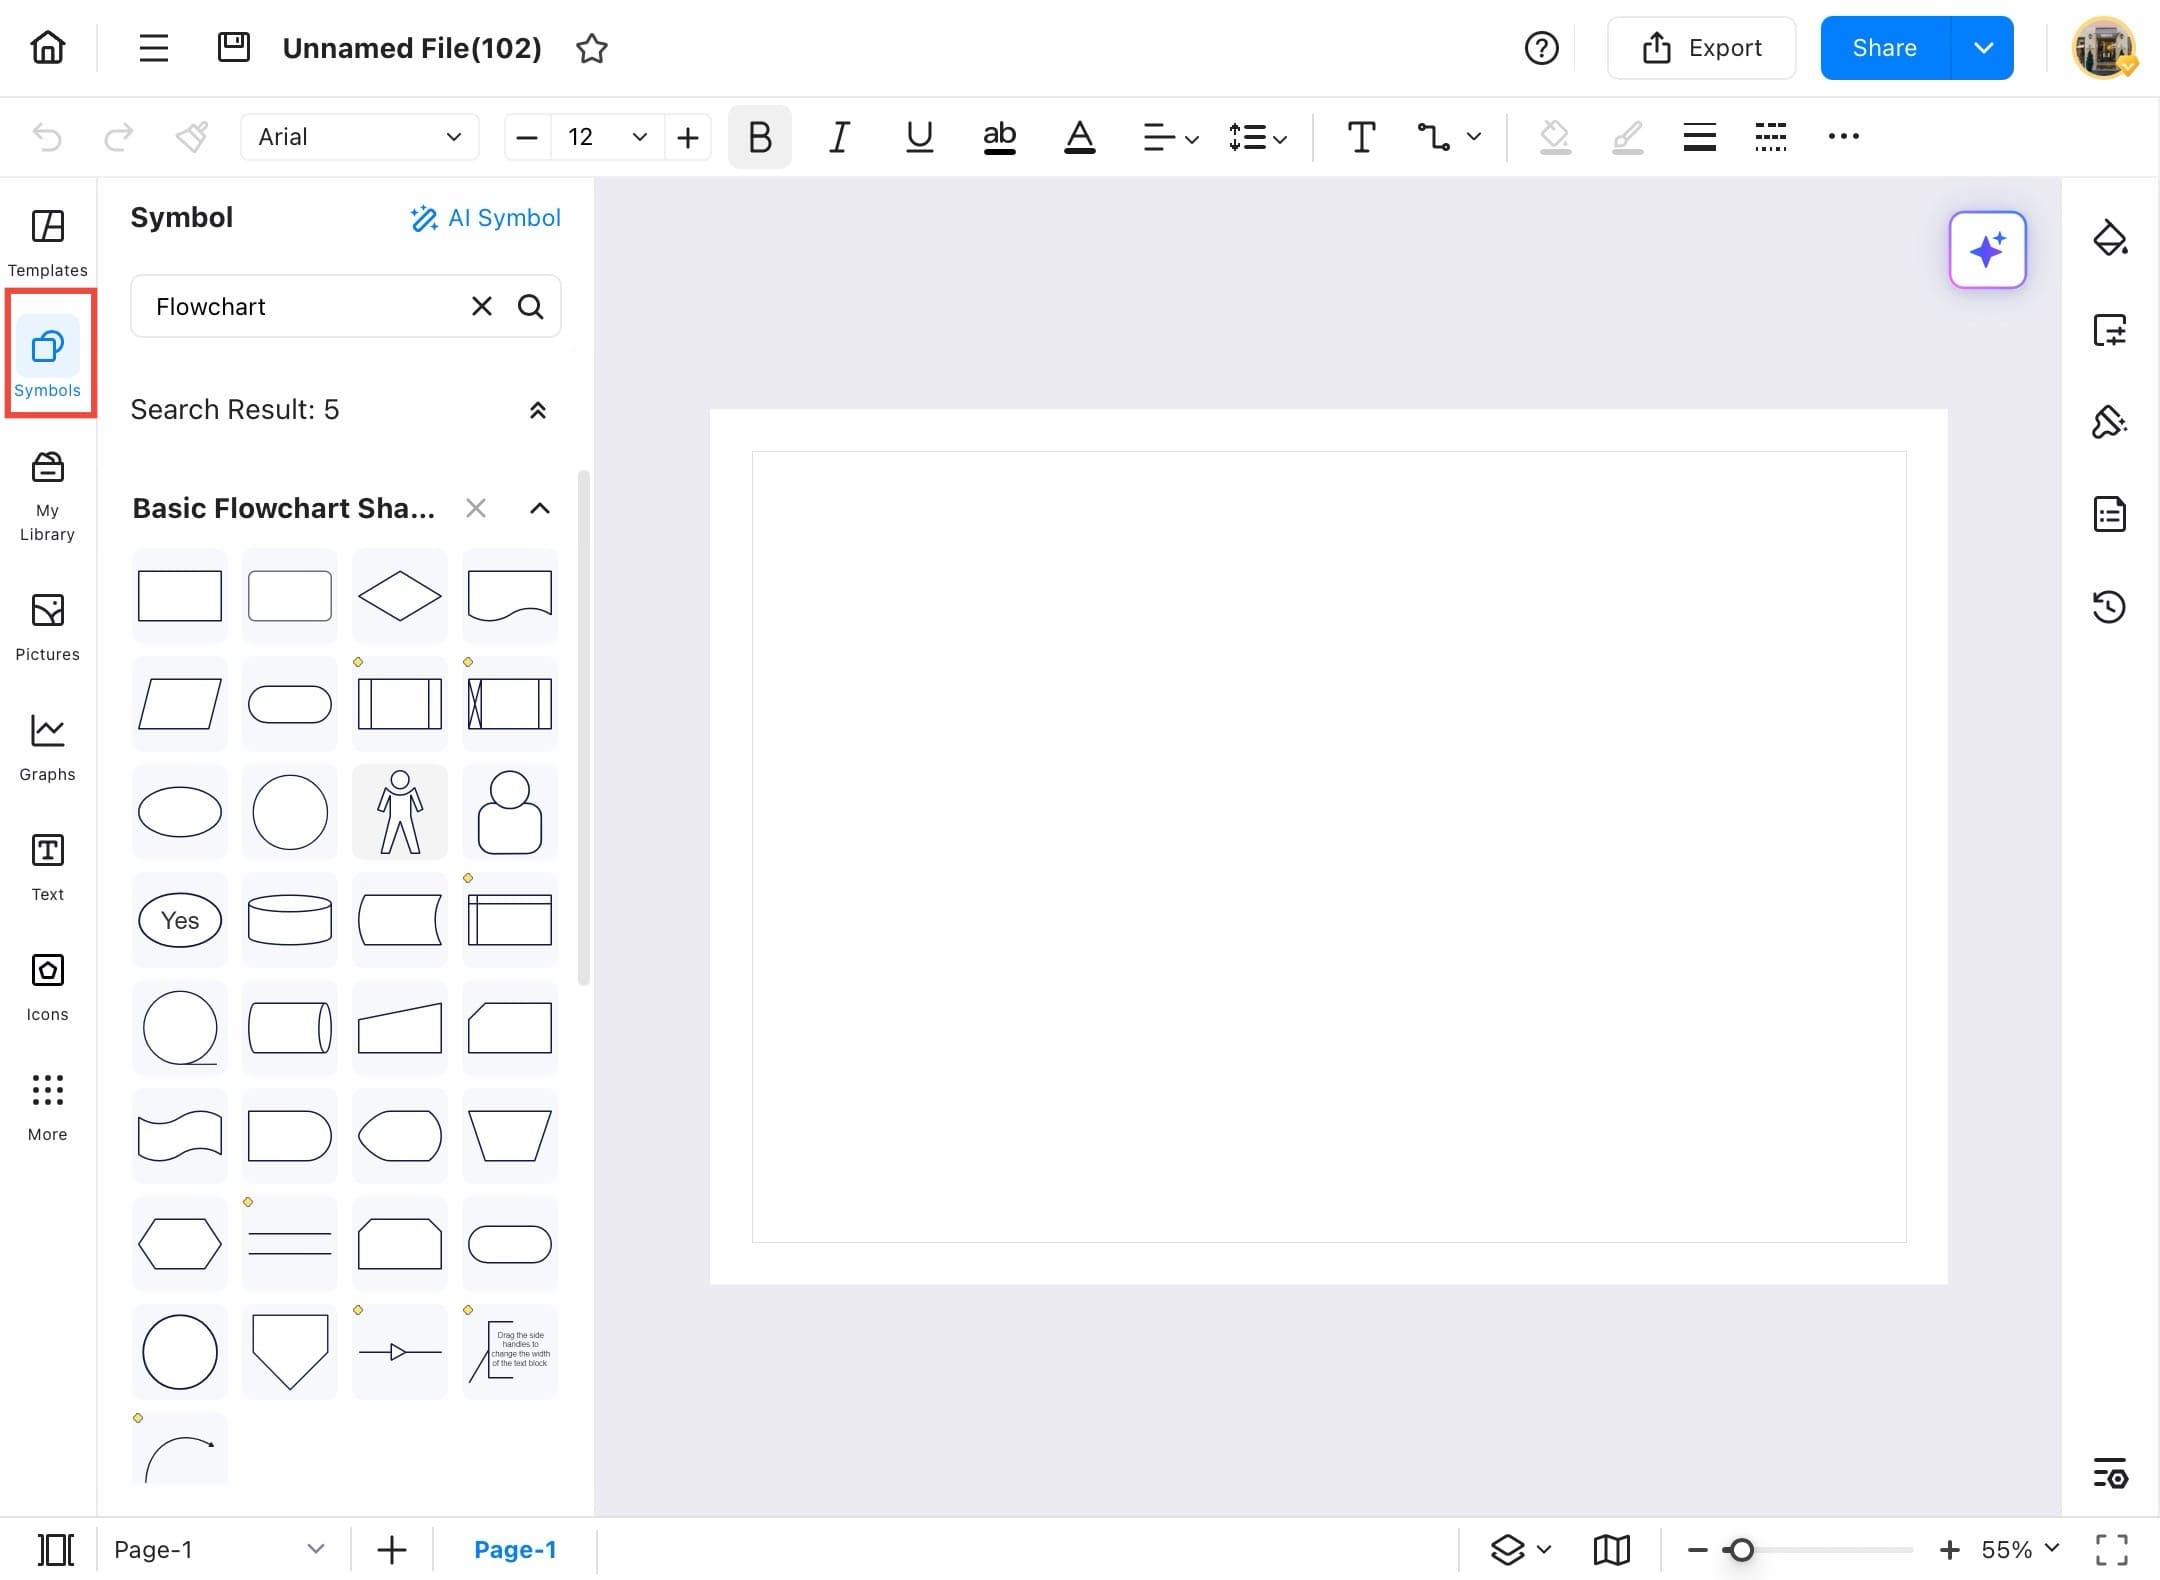
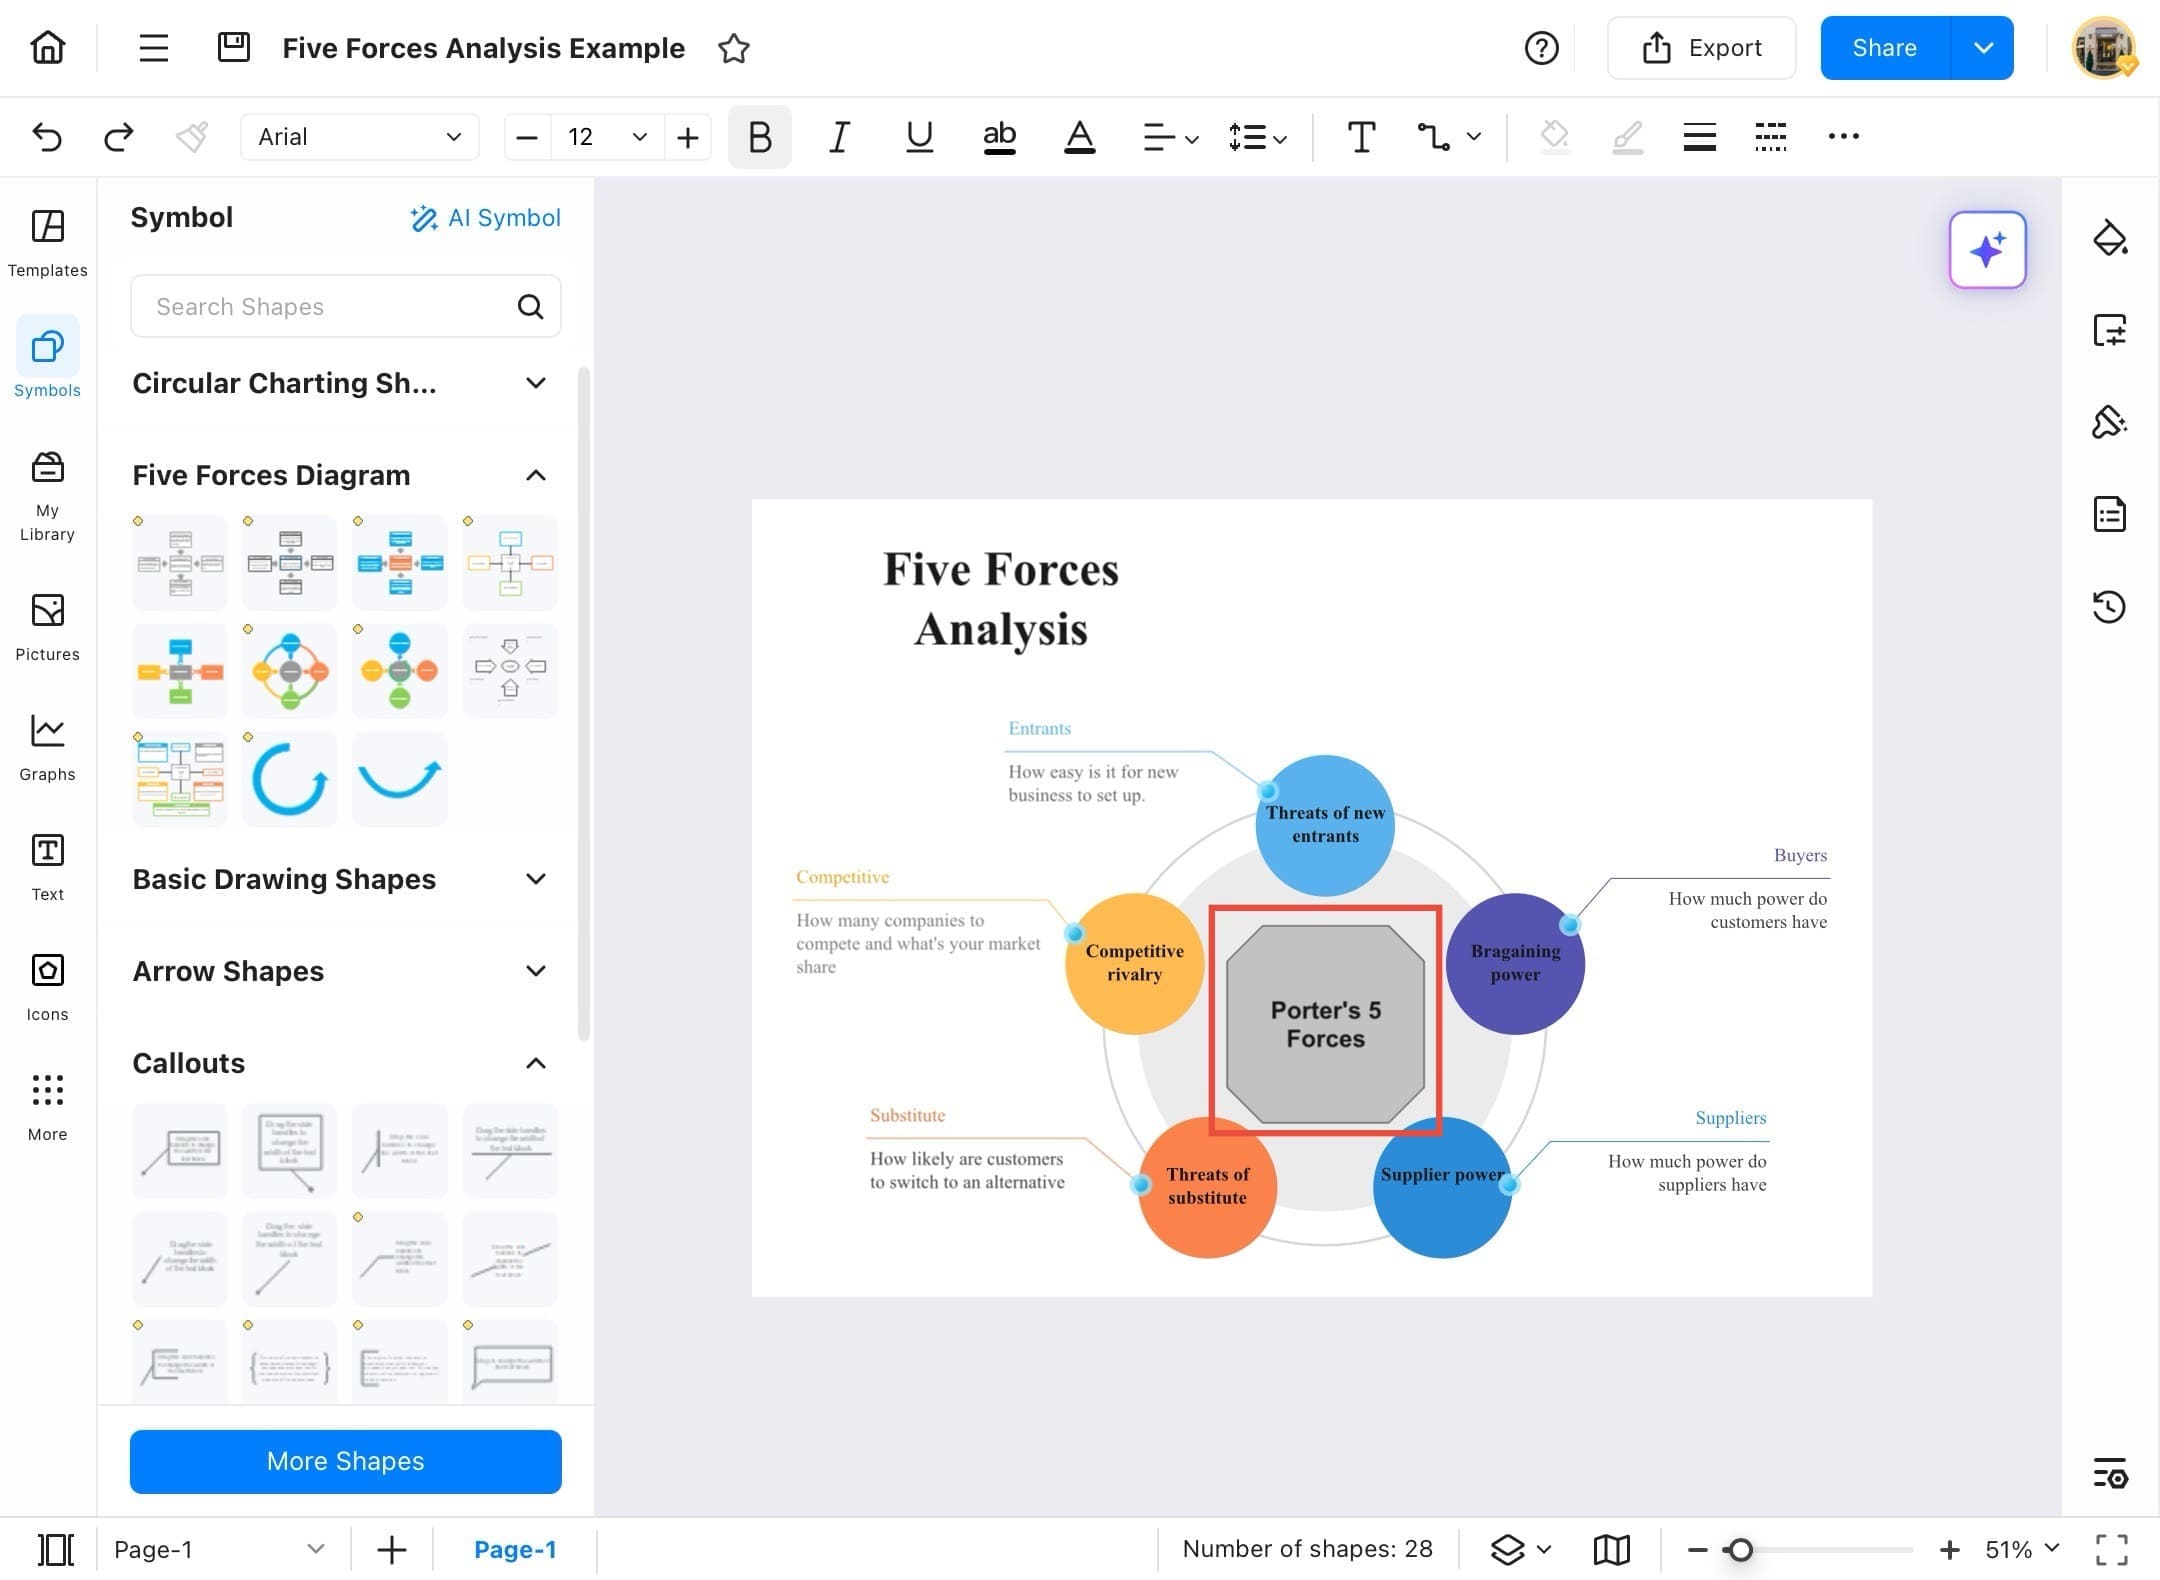
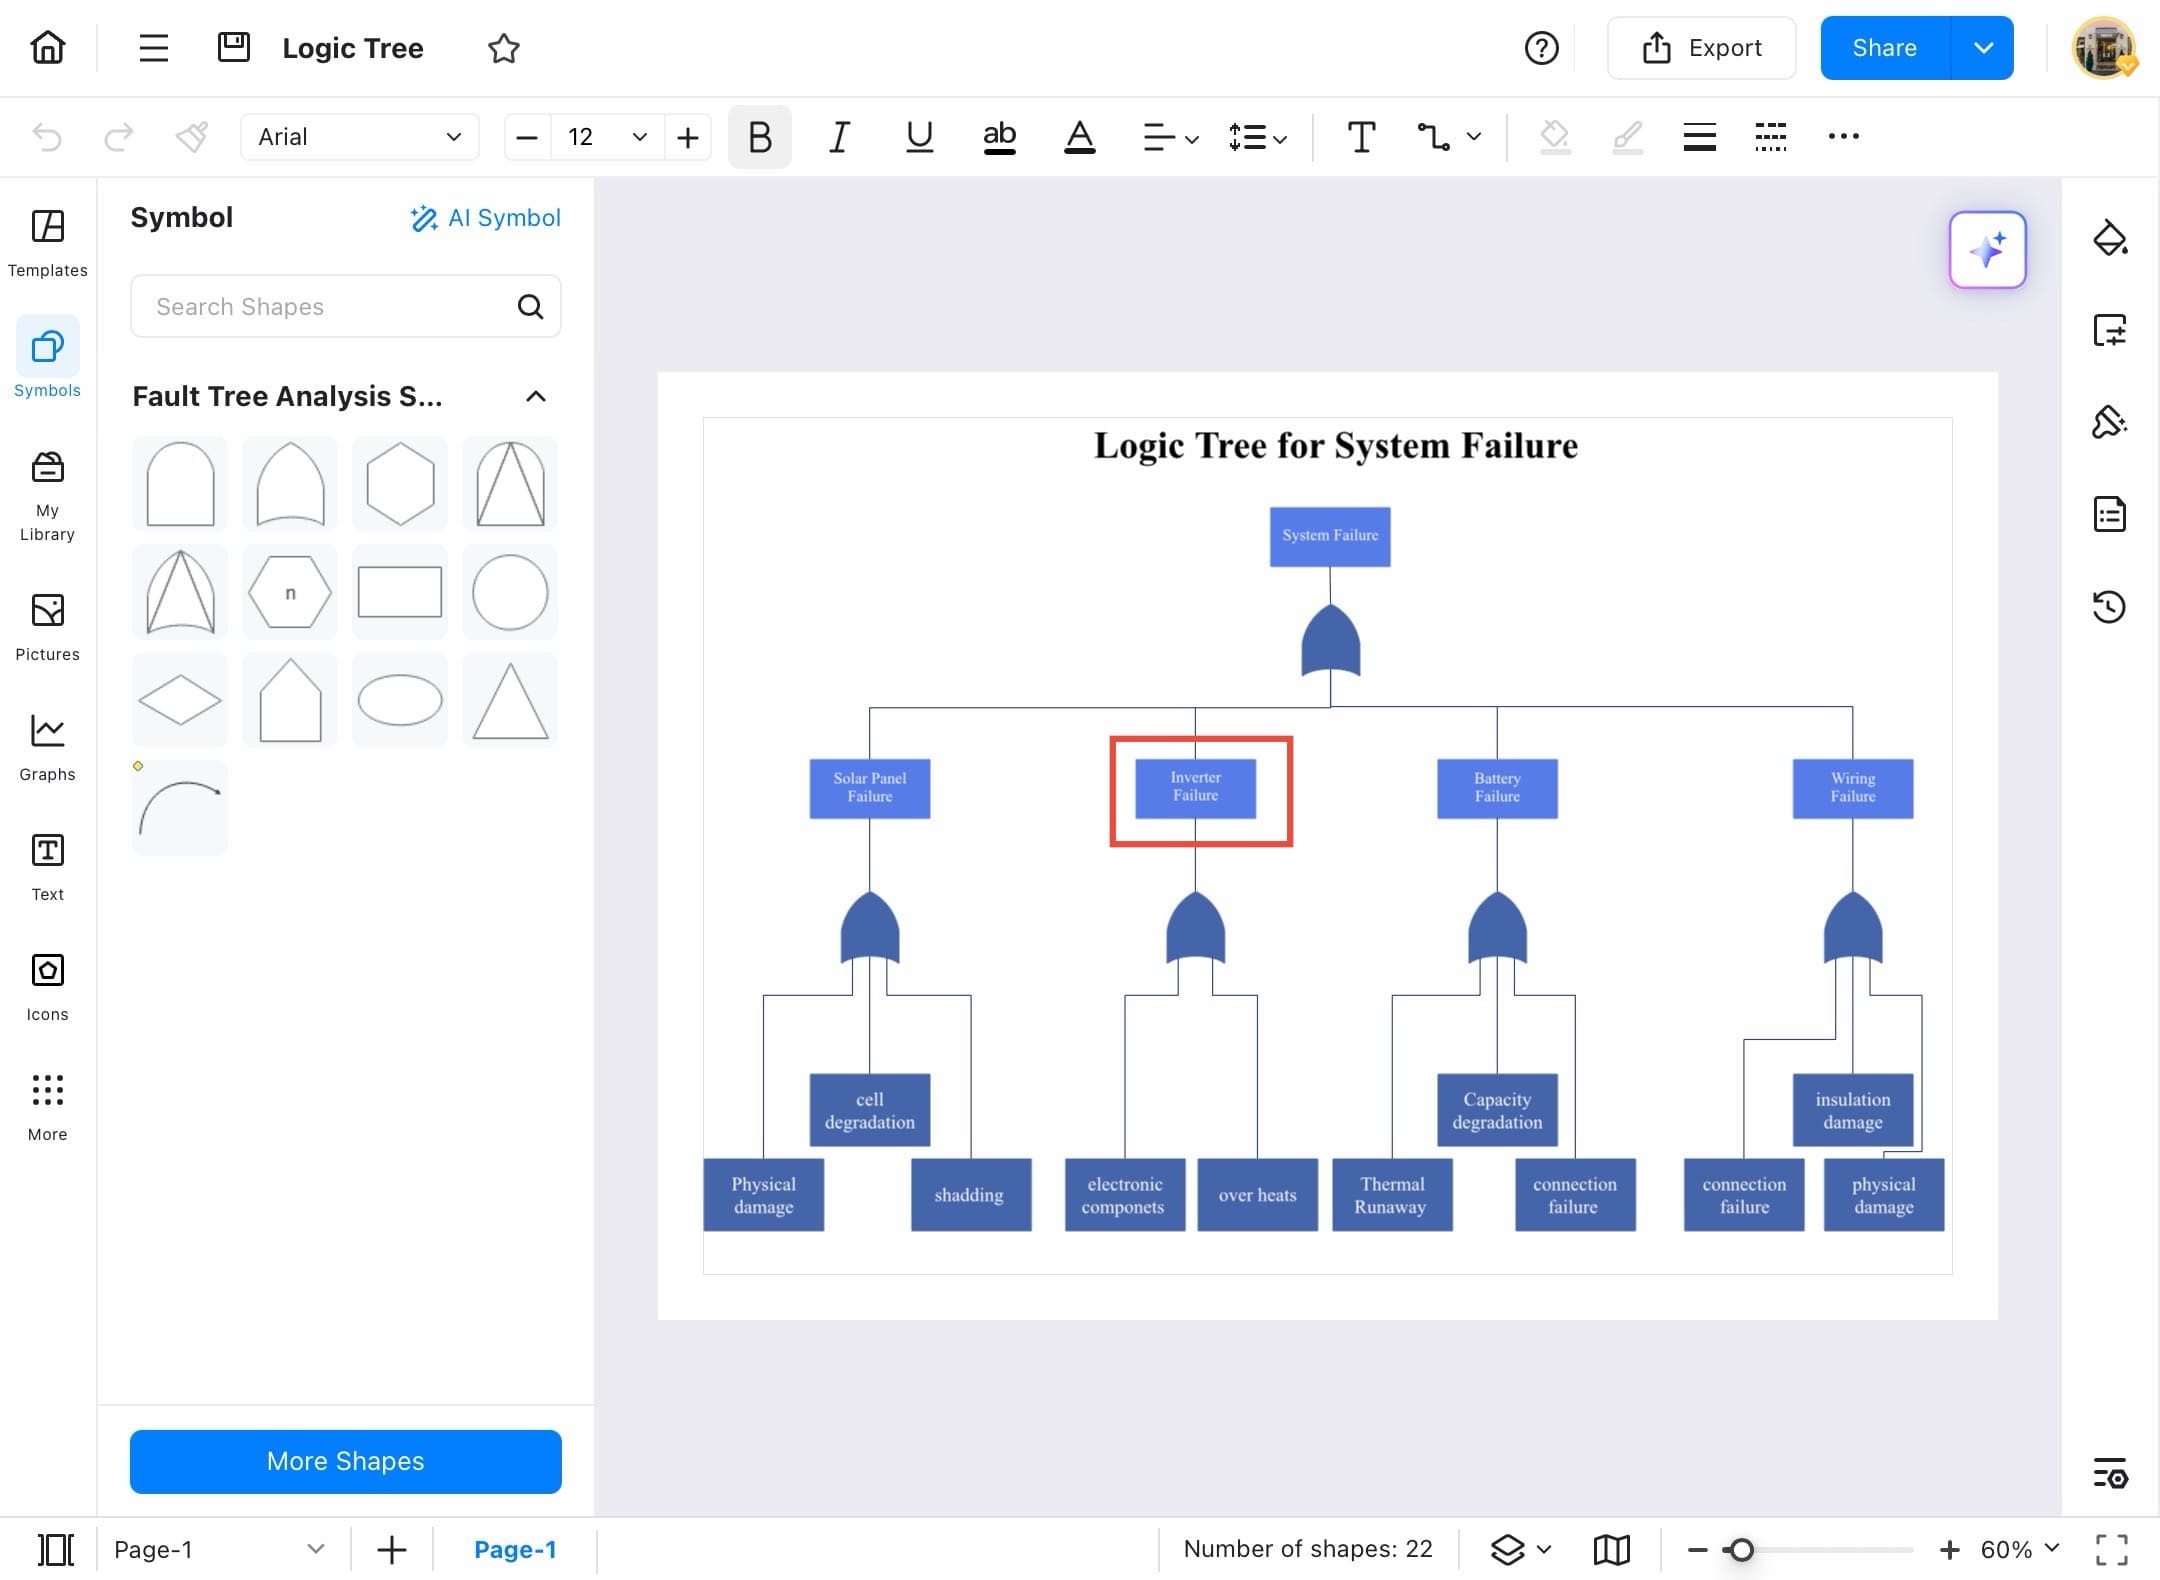
- When you open a blank drawing, the Symbols panel appears on the left.
- If it's not visible, tap Symbols from the left menu.
- To find a specific shape, use the search bar and type the symbol name.
Step ❹
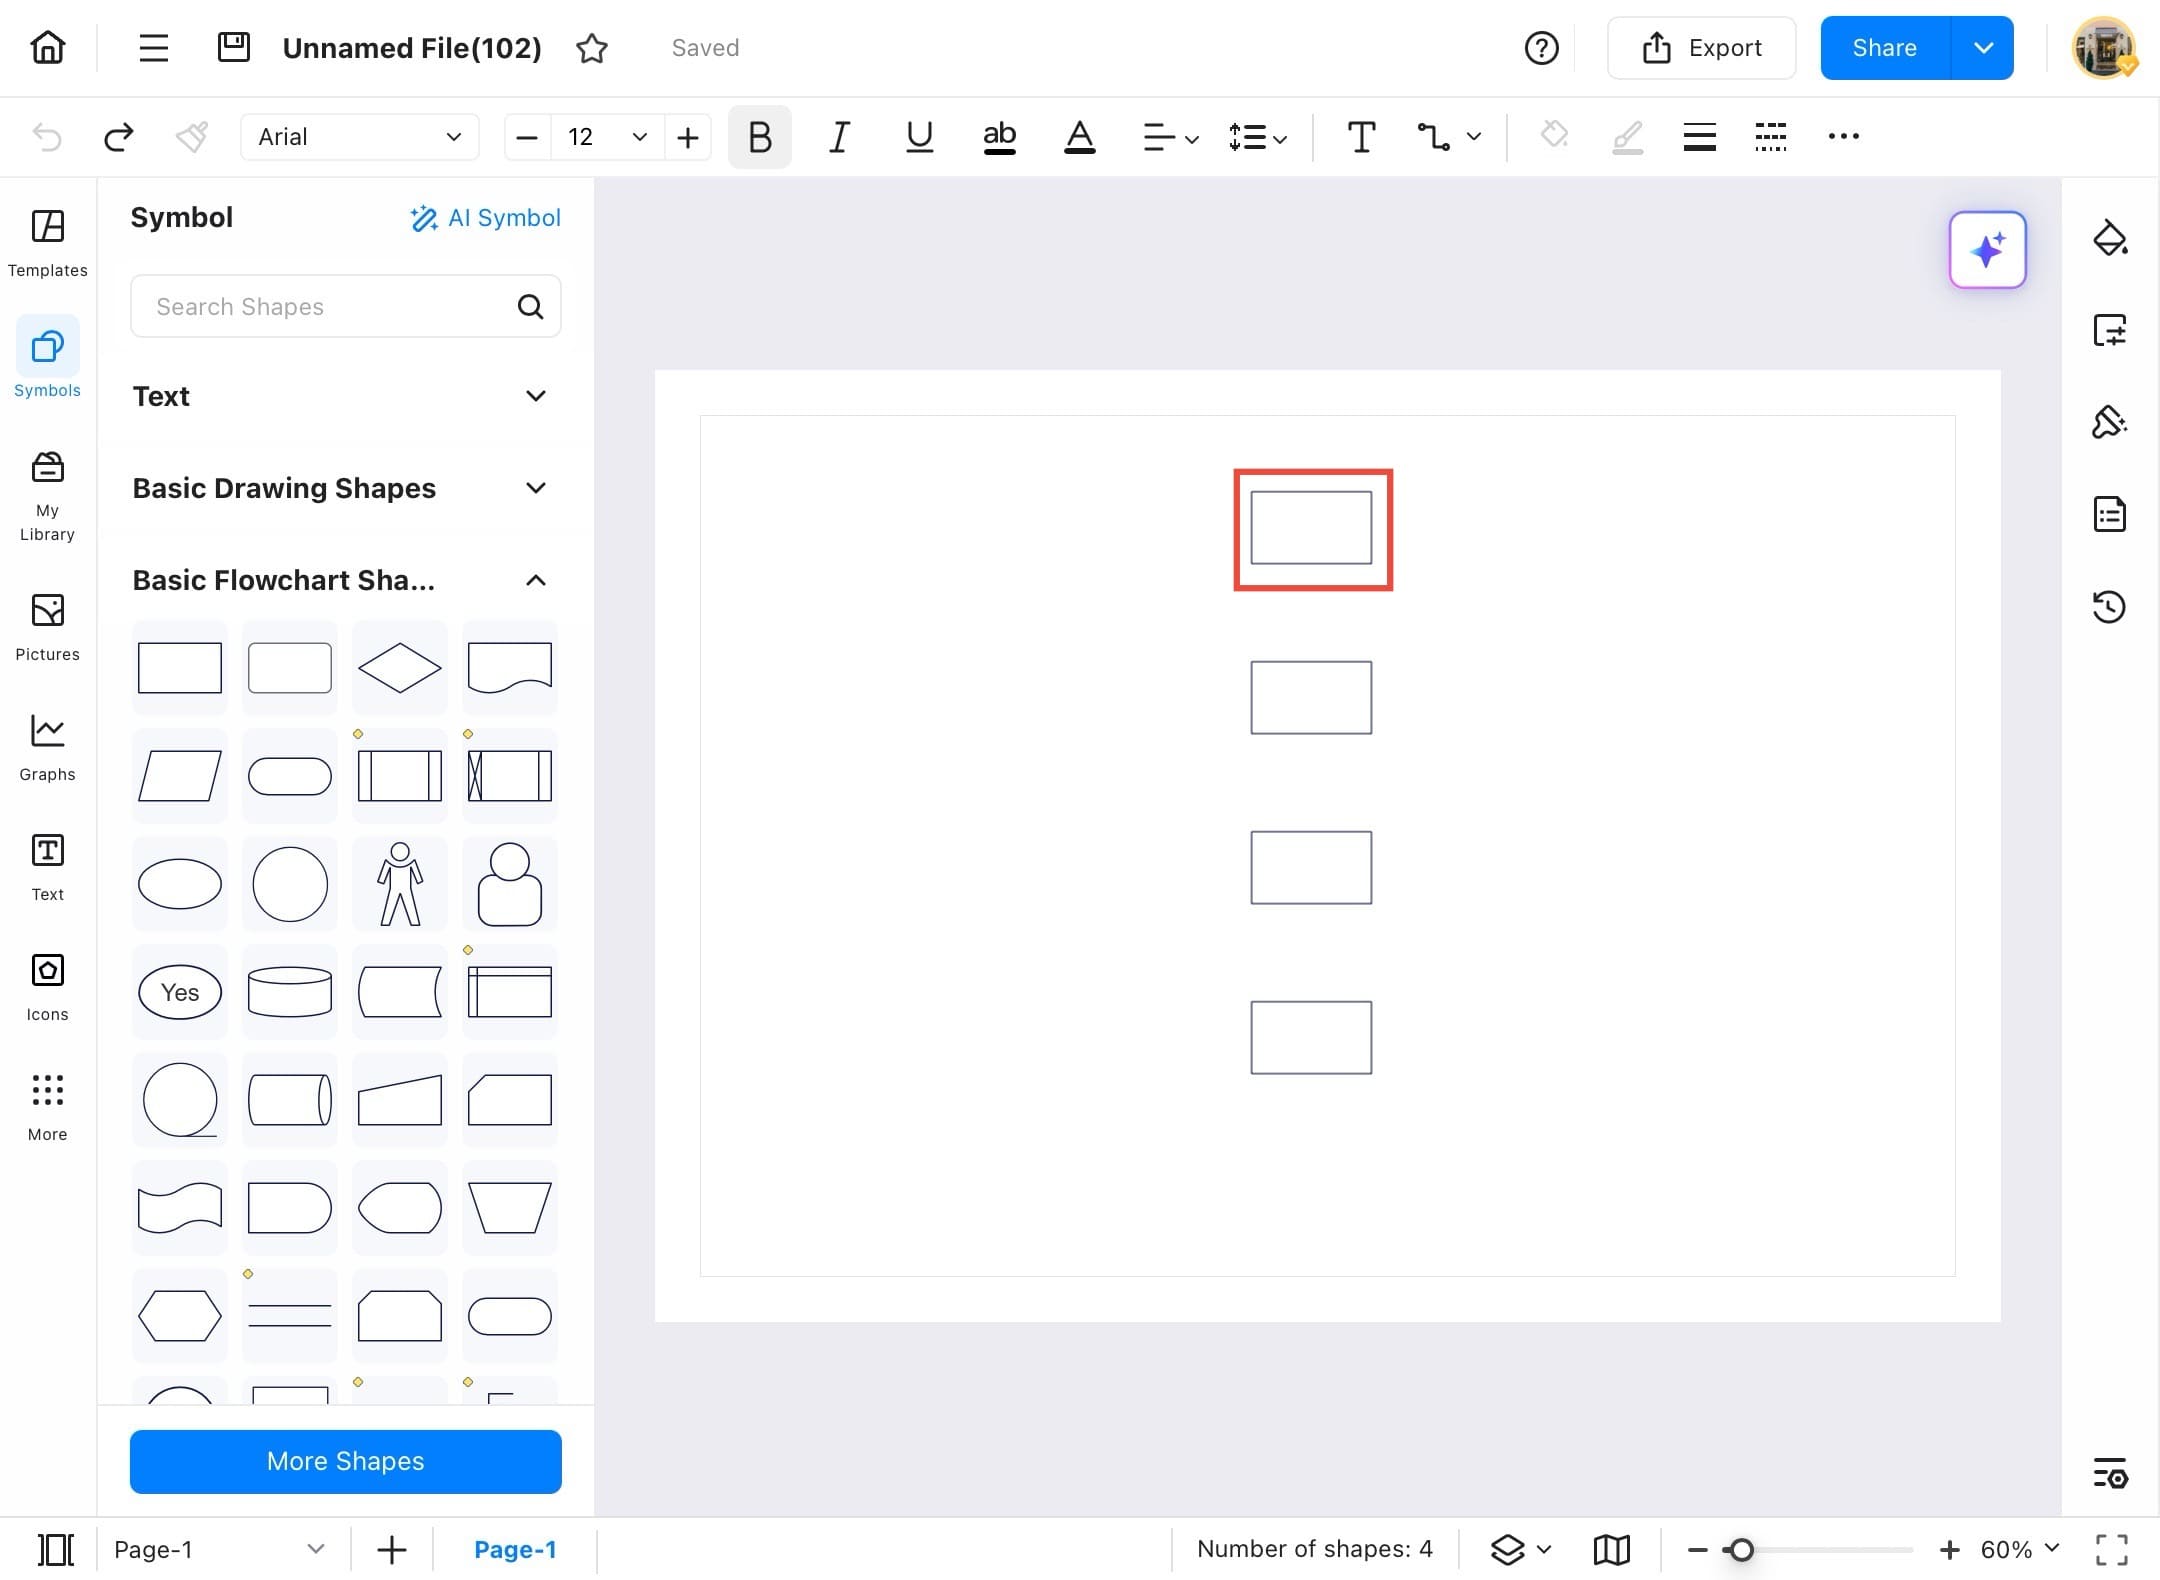
- Once you find the symbol you need, drag it from the Symbols panel to the canvas to add it to your diagram.

Step ❺
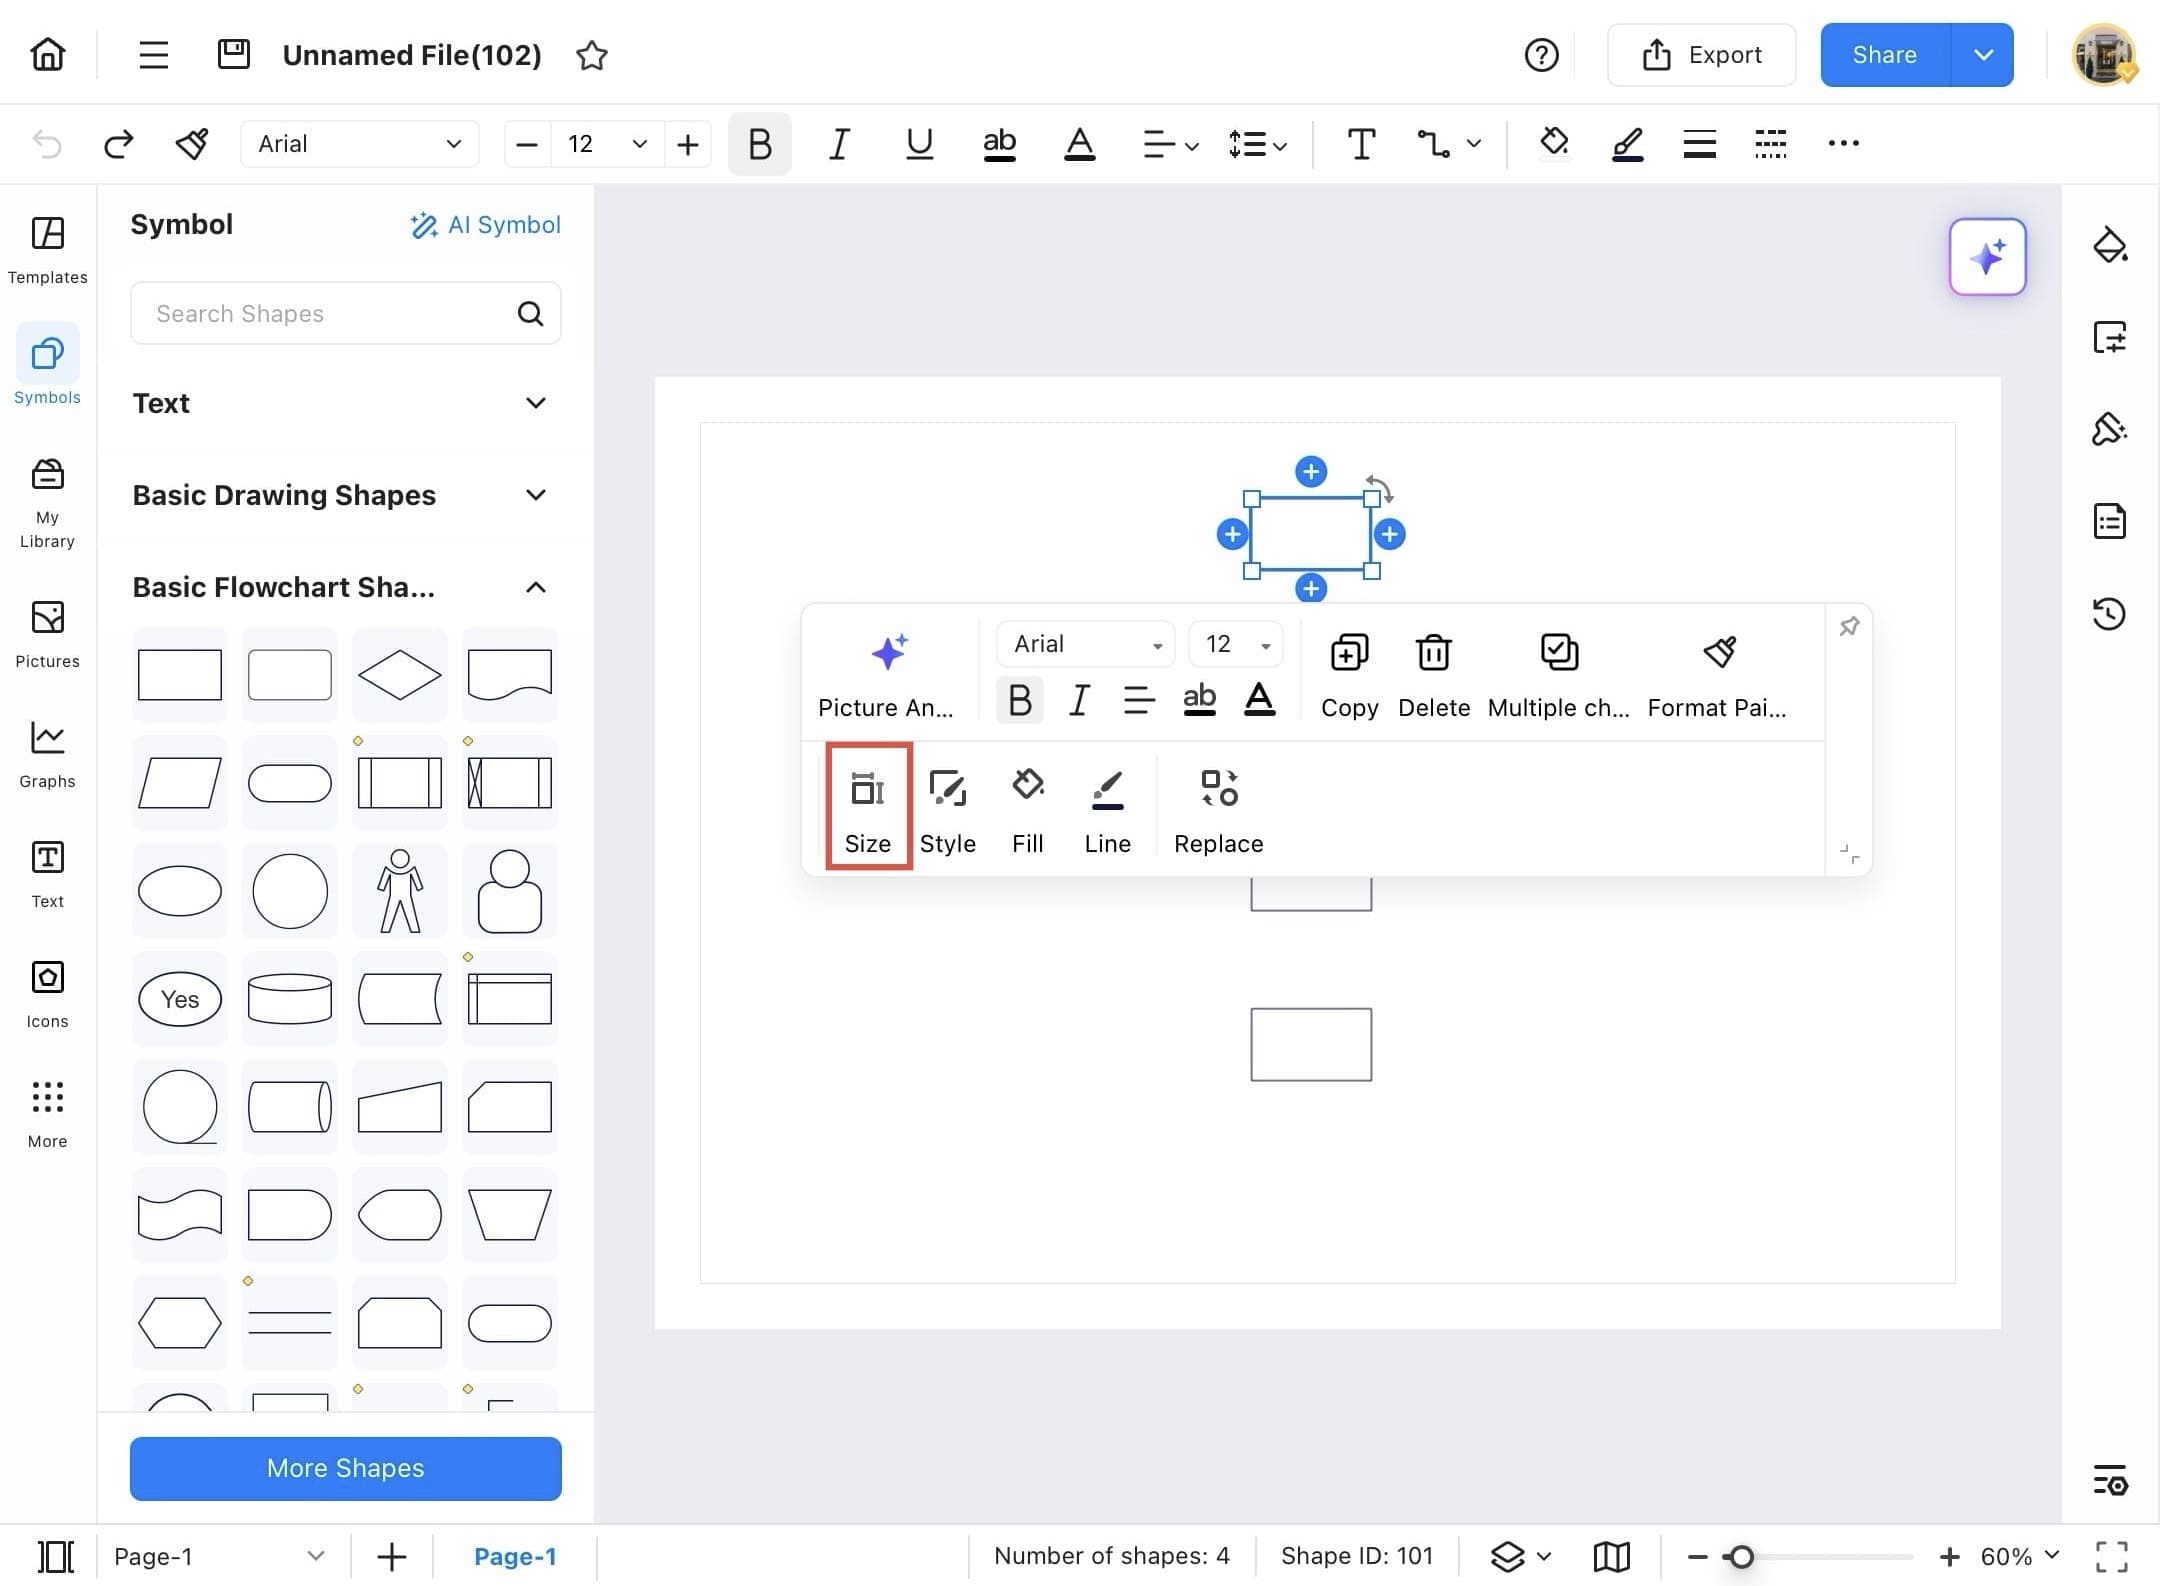
- You can manually resize any shape. Just tap the shape you want to resize and adjust the size.
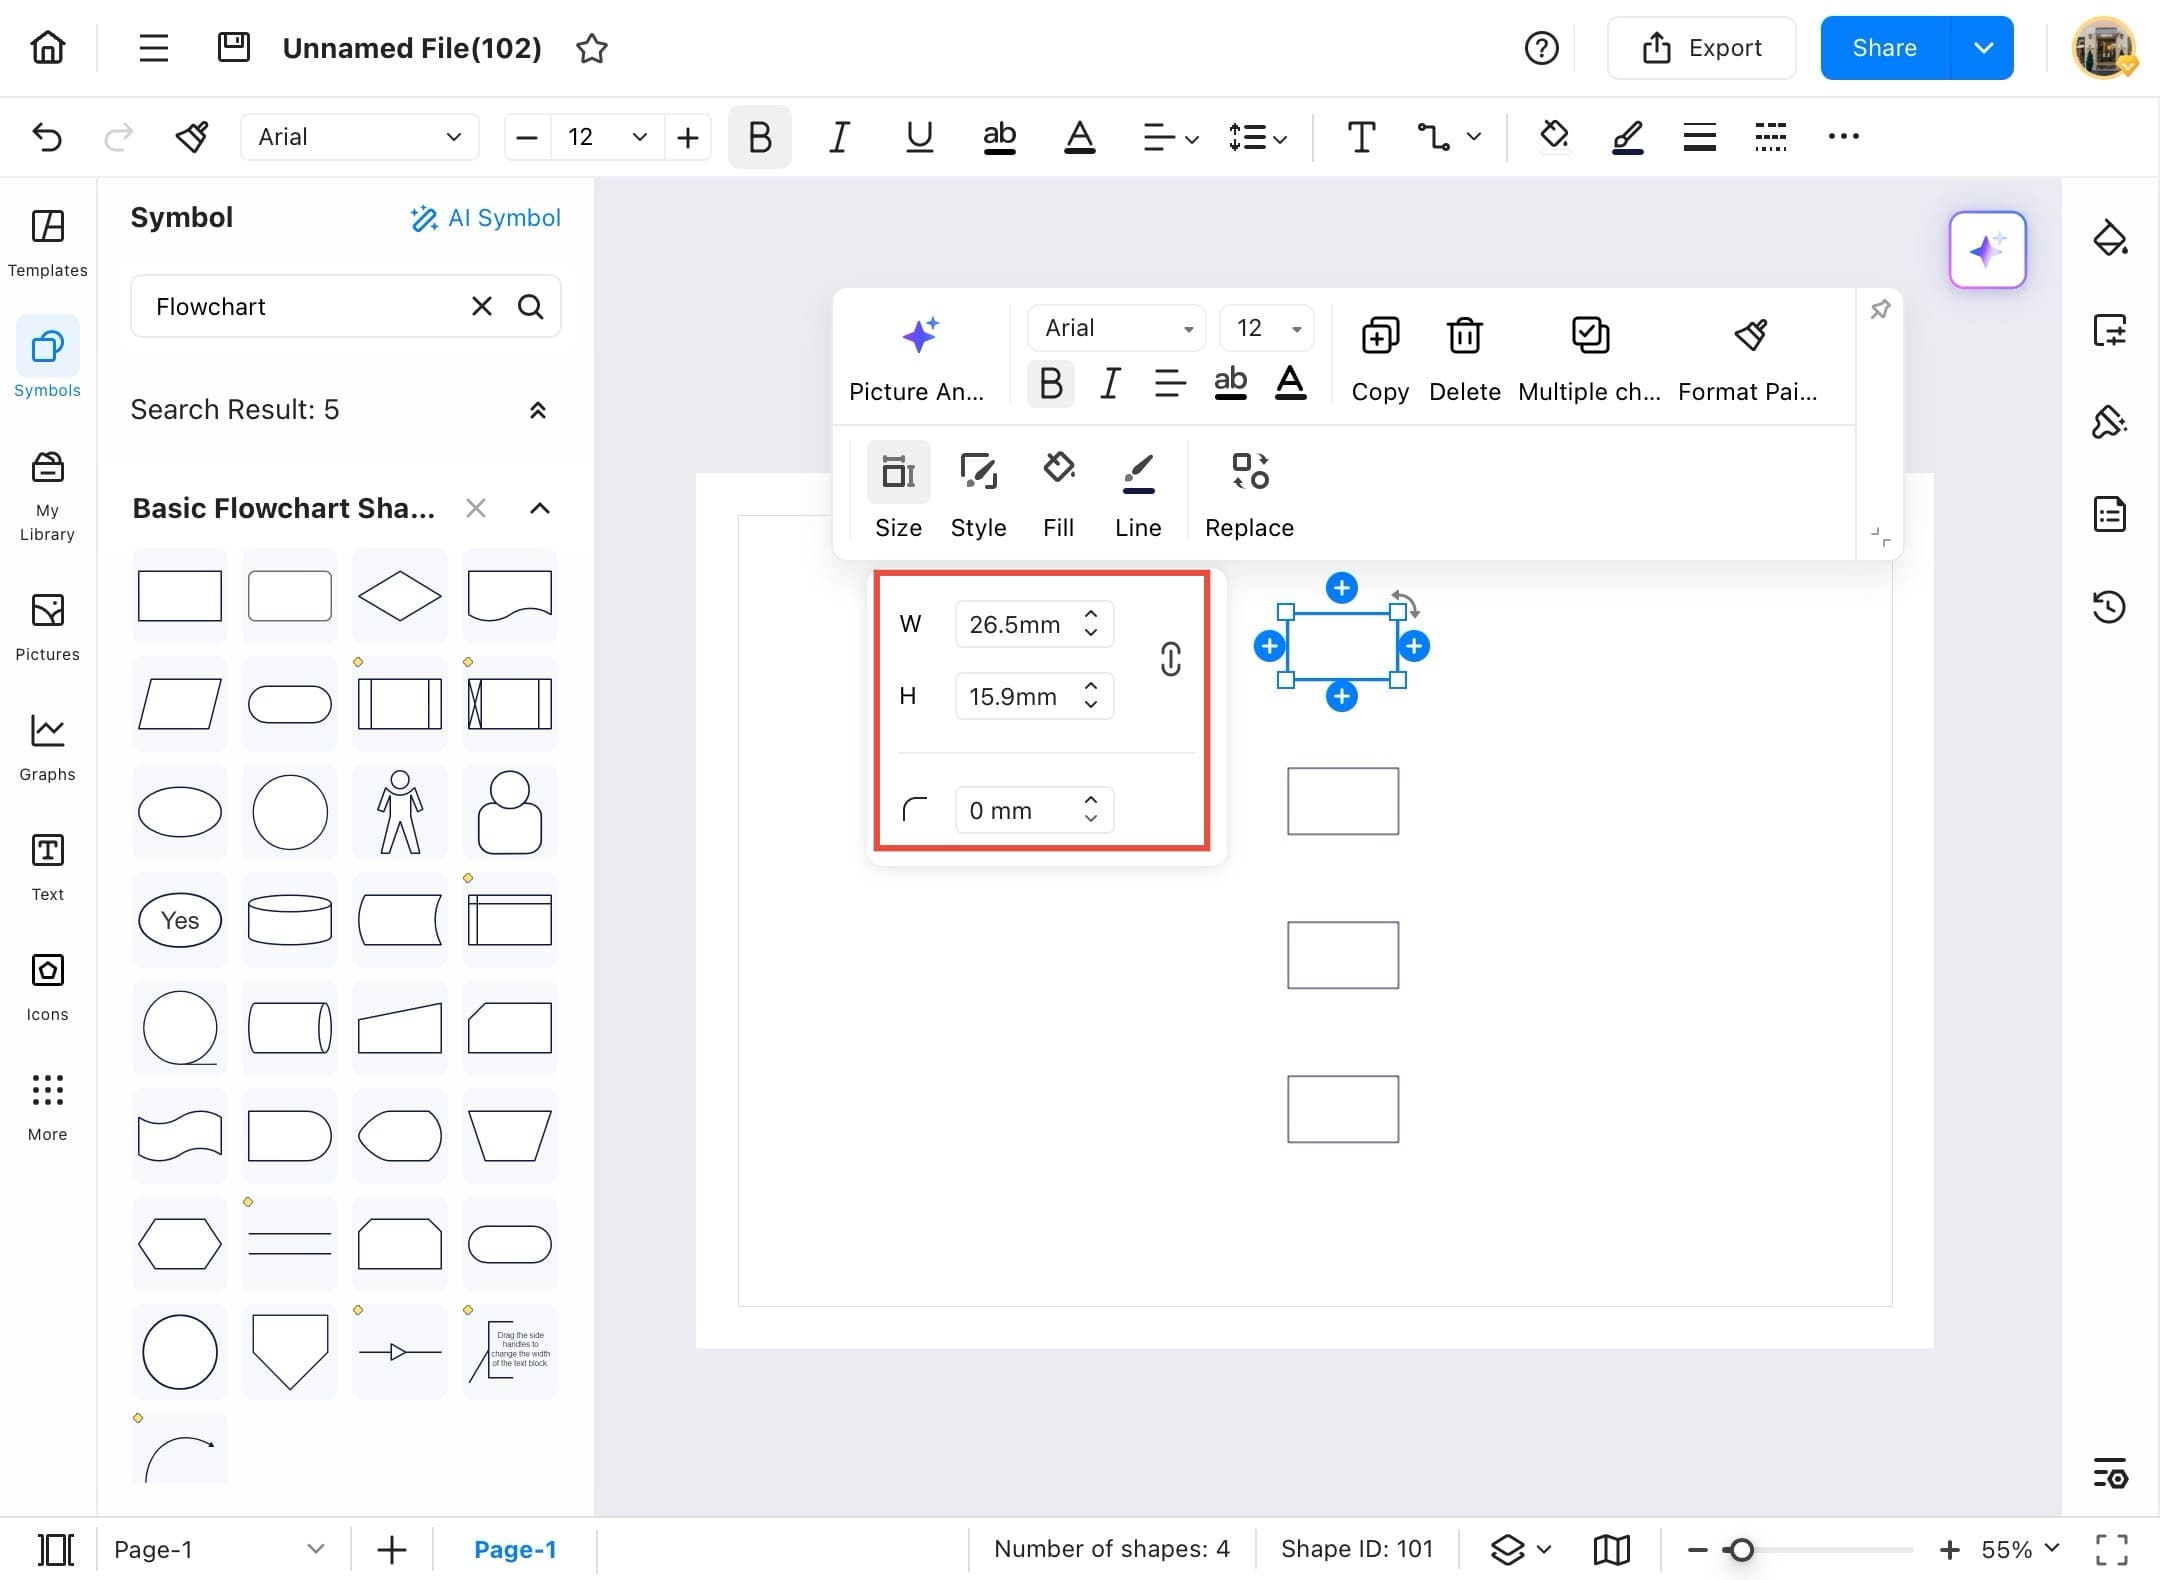
Step ❻
- Select Size from the precision tool.
Step ❼
- Now, enter the shape width and height according to your needs.
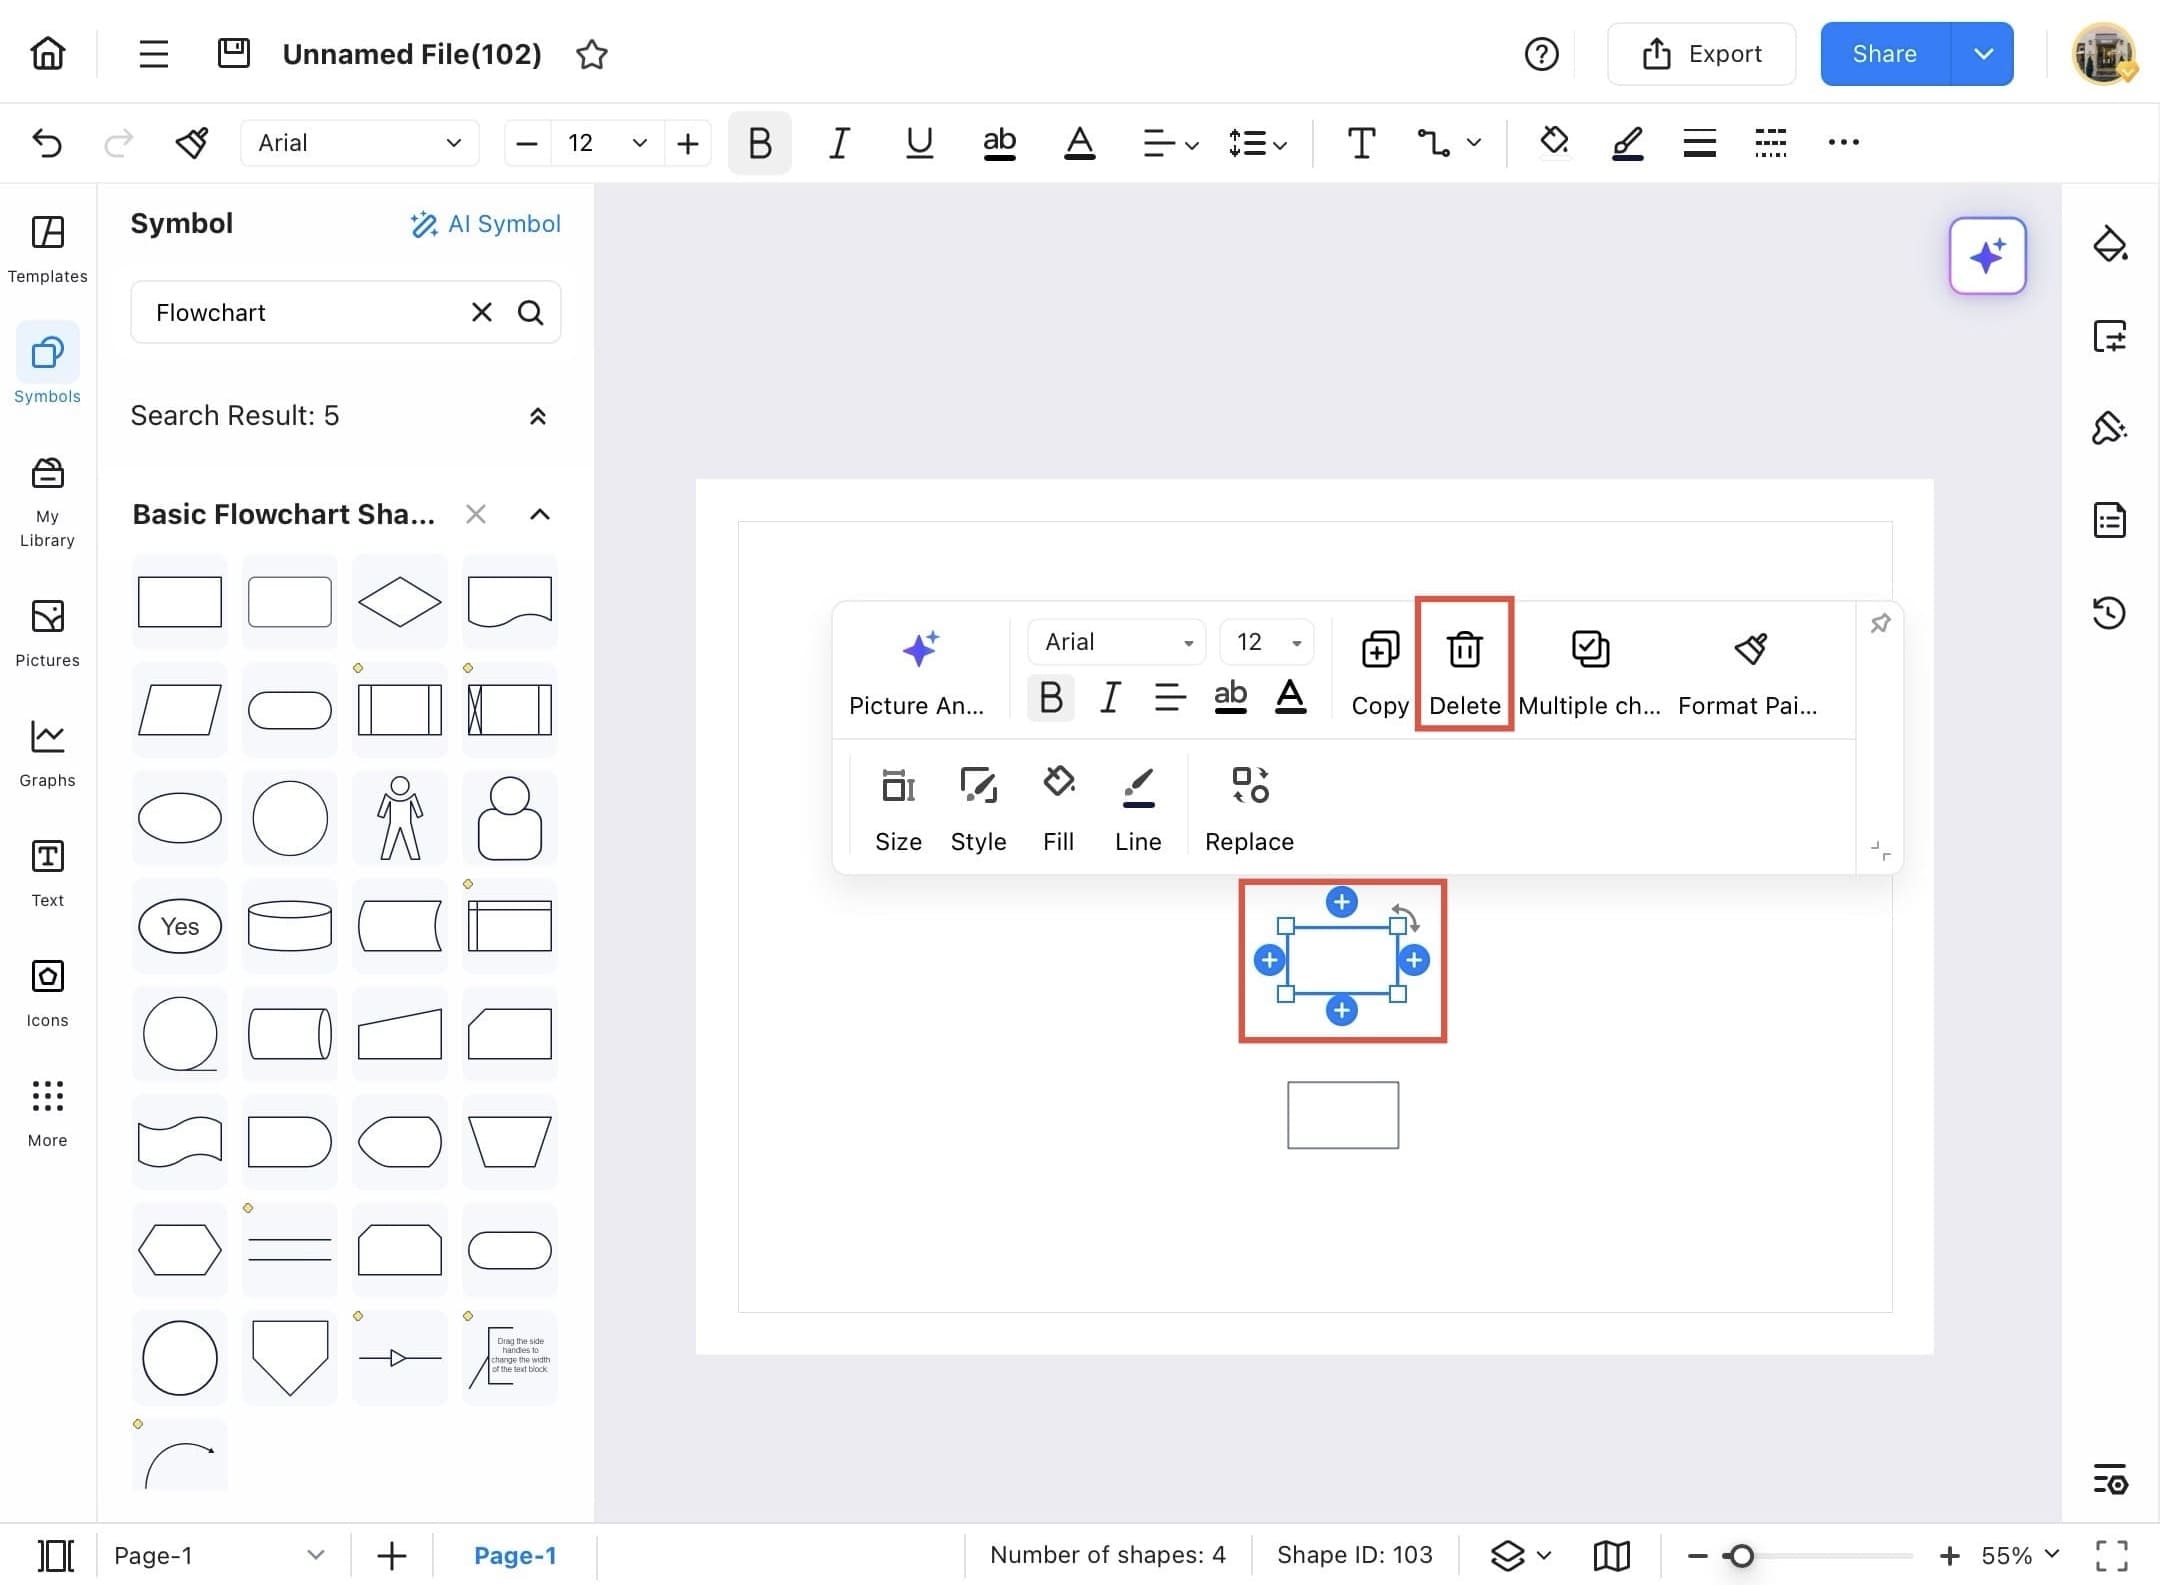
Step ❽
- To remove a shape, tap the shape you want to delete.
- Then, choose Delete from the precision tool to remove it from the canvas.
Shape Operation: Move a Shape
Change the position of the shapes to put them in the right place on the canvas. You can move multiple shapes into different positions at once so that you can arrange them quickly and save time. To change the position of the shape, follow the instructions below.
Step ❶
- Start EdrawMax on your device.
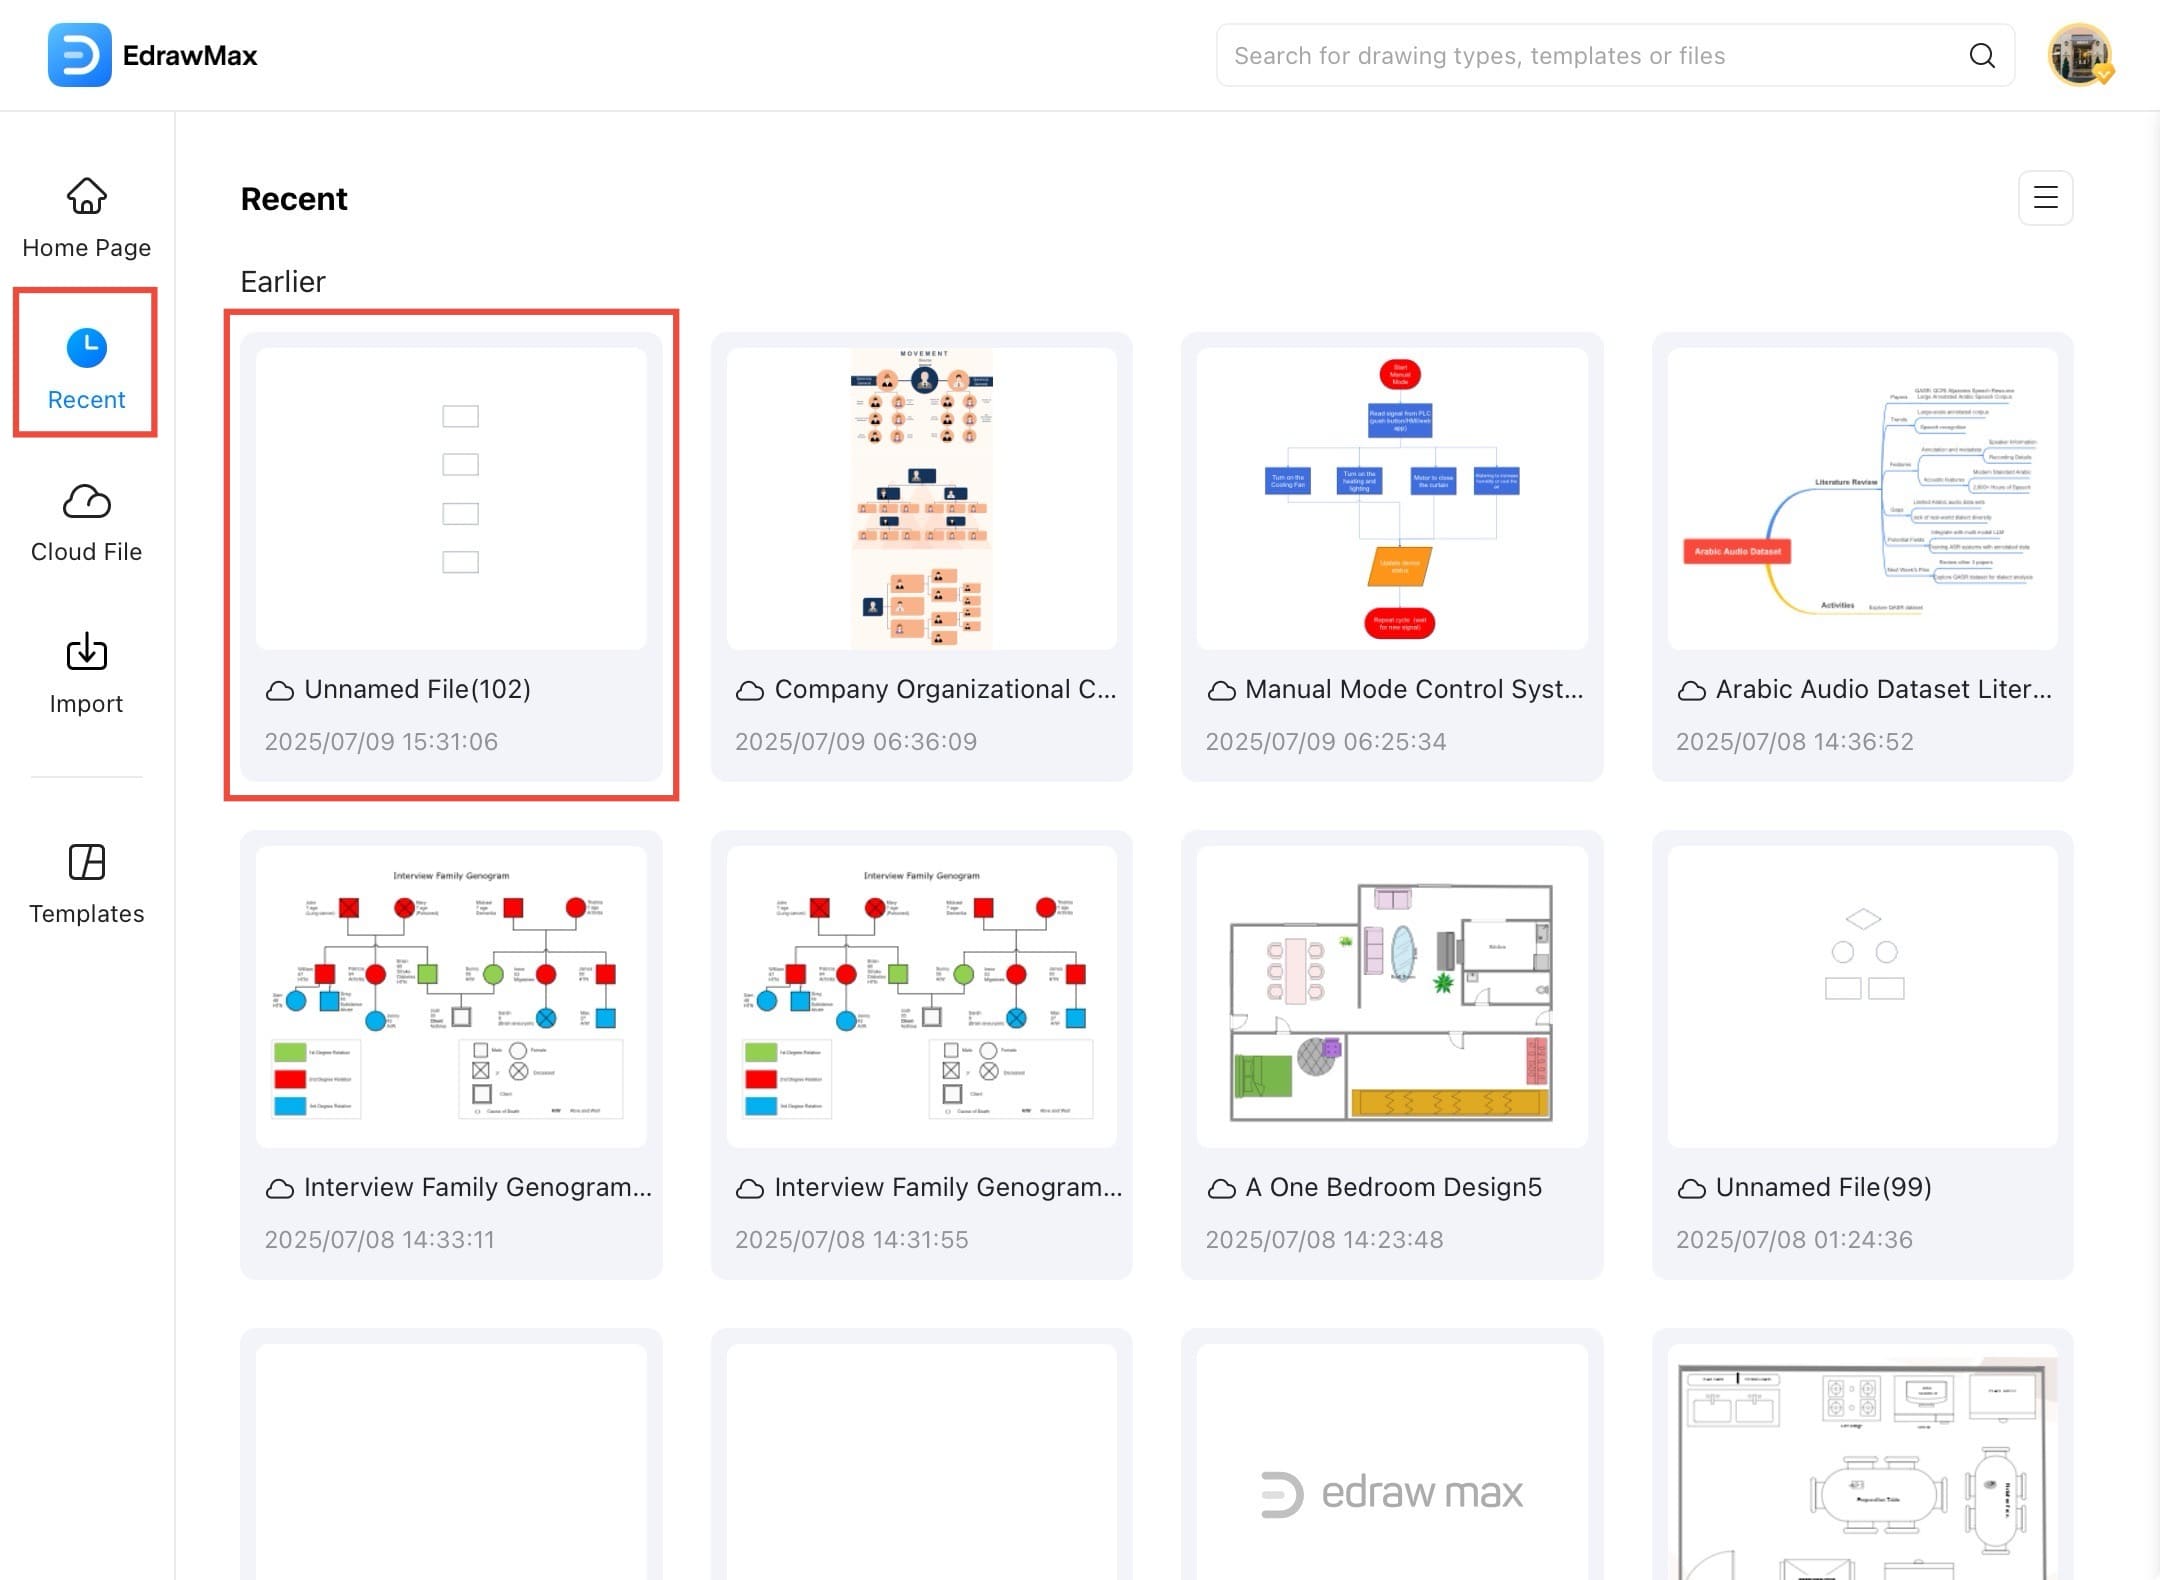
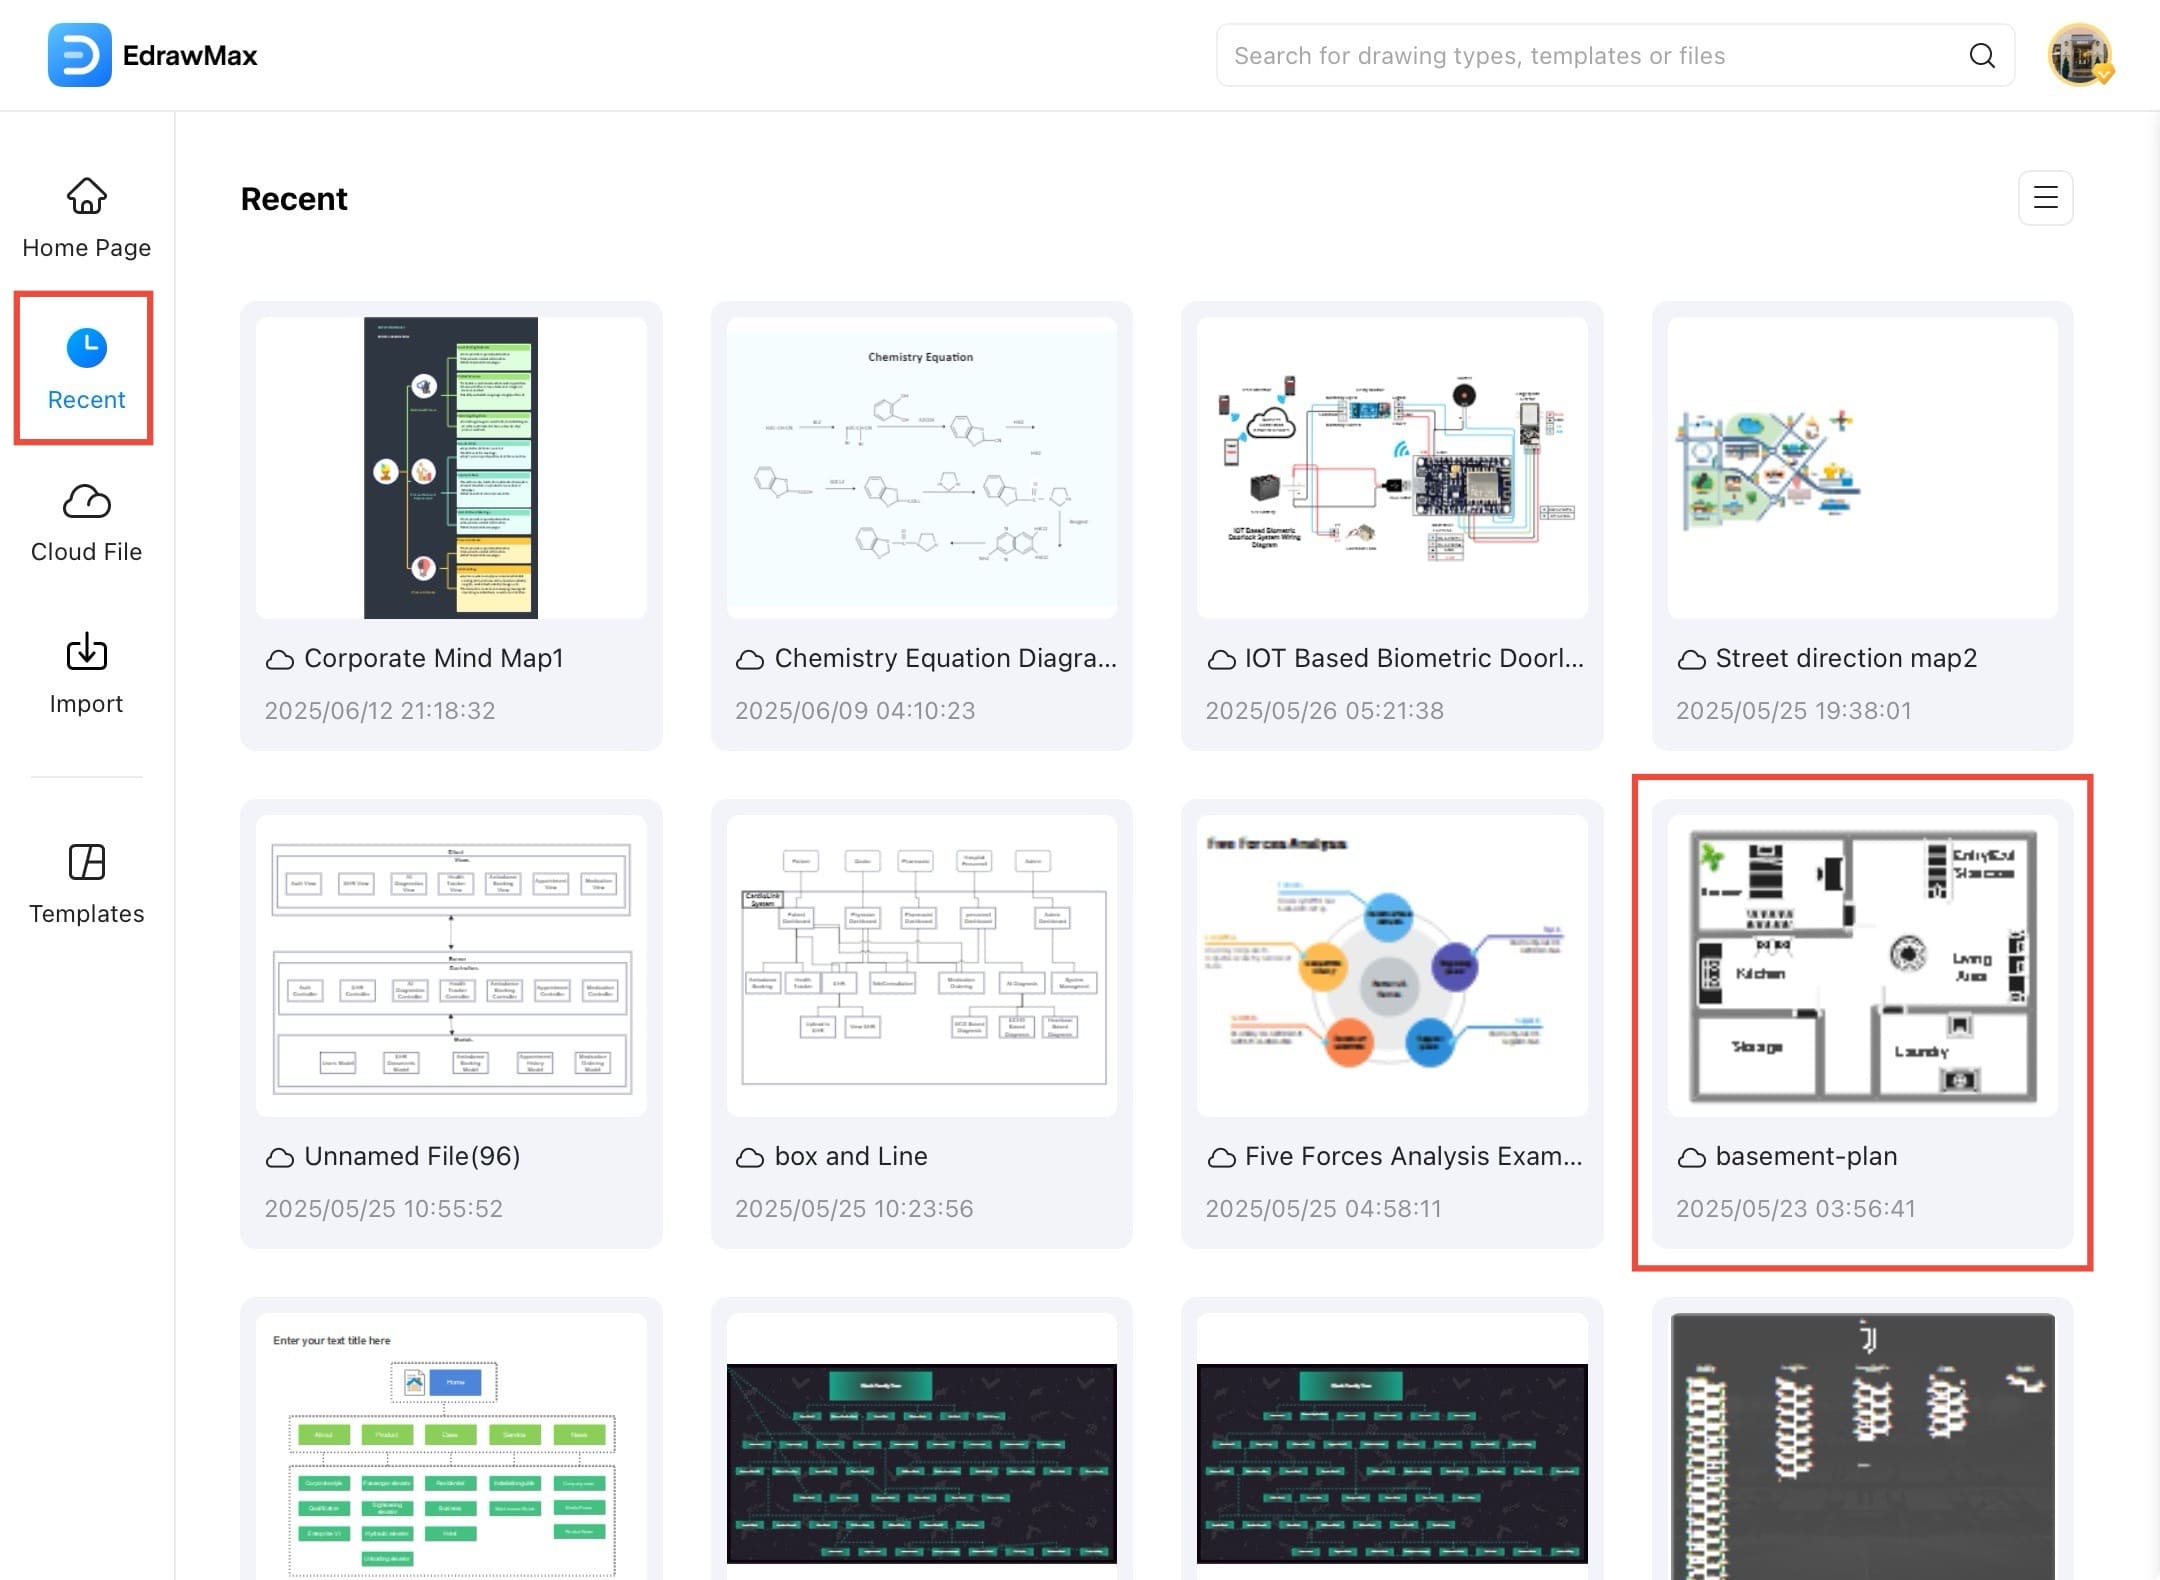
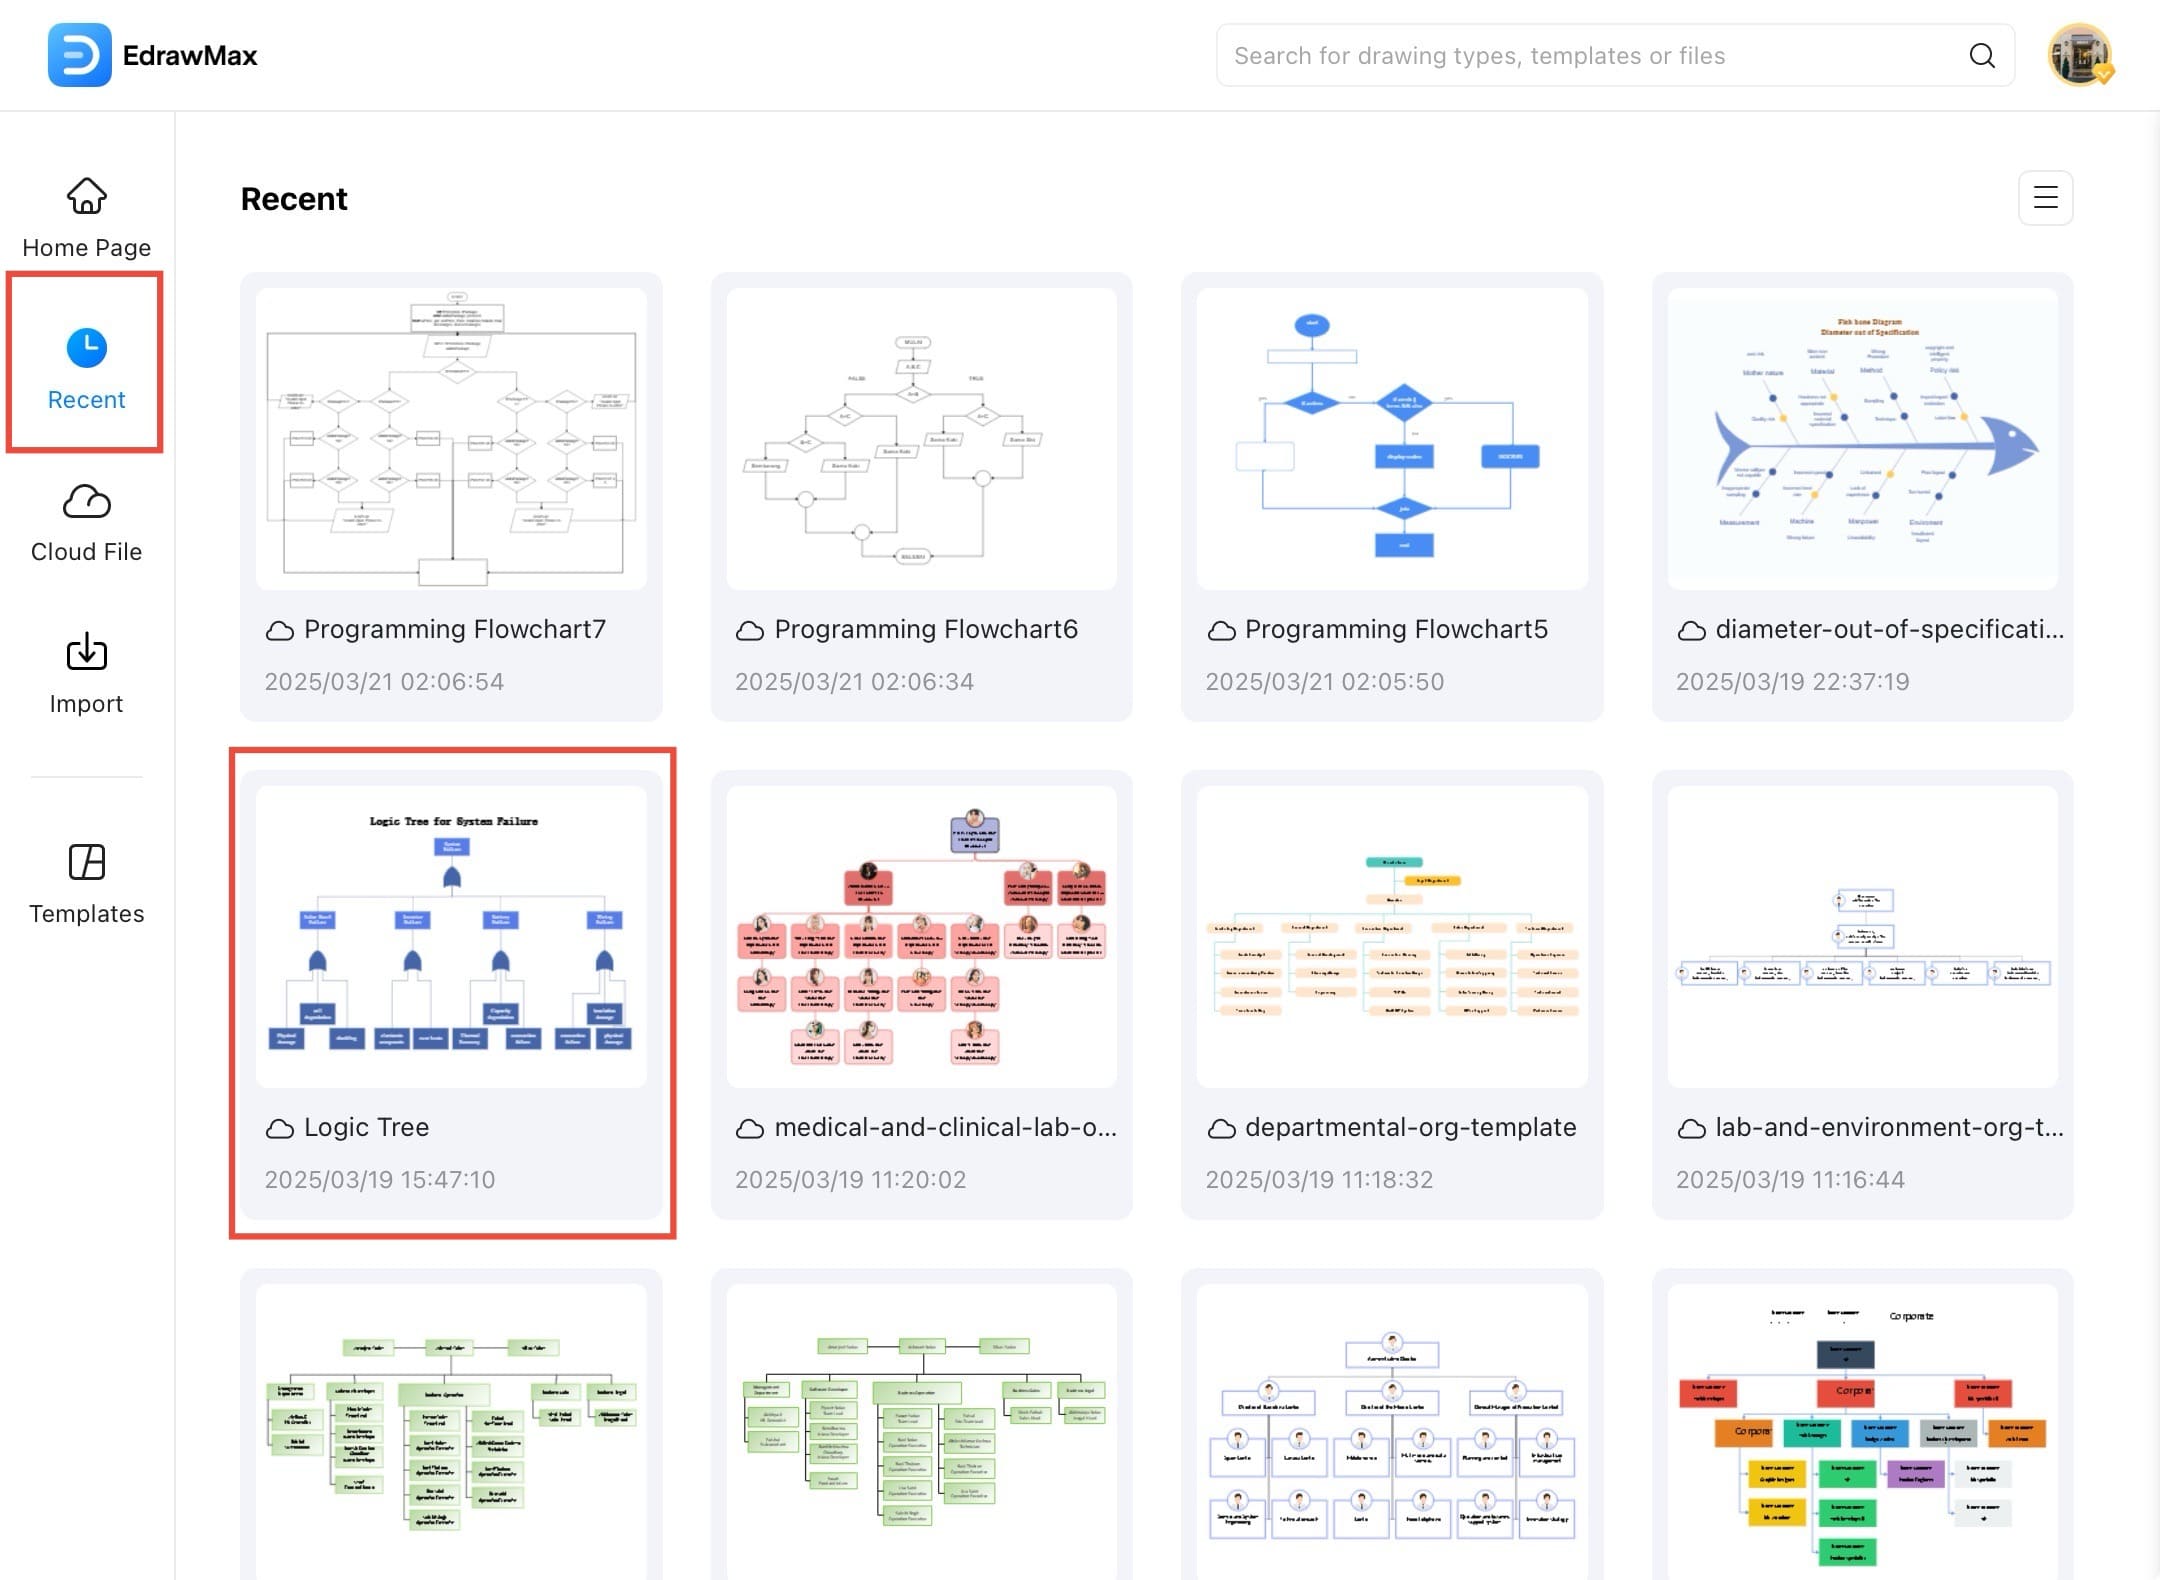
Step ❷
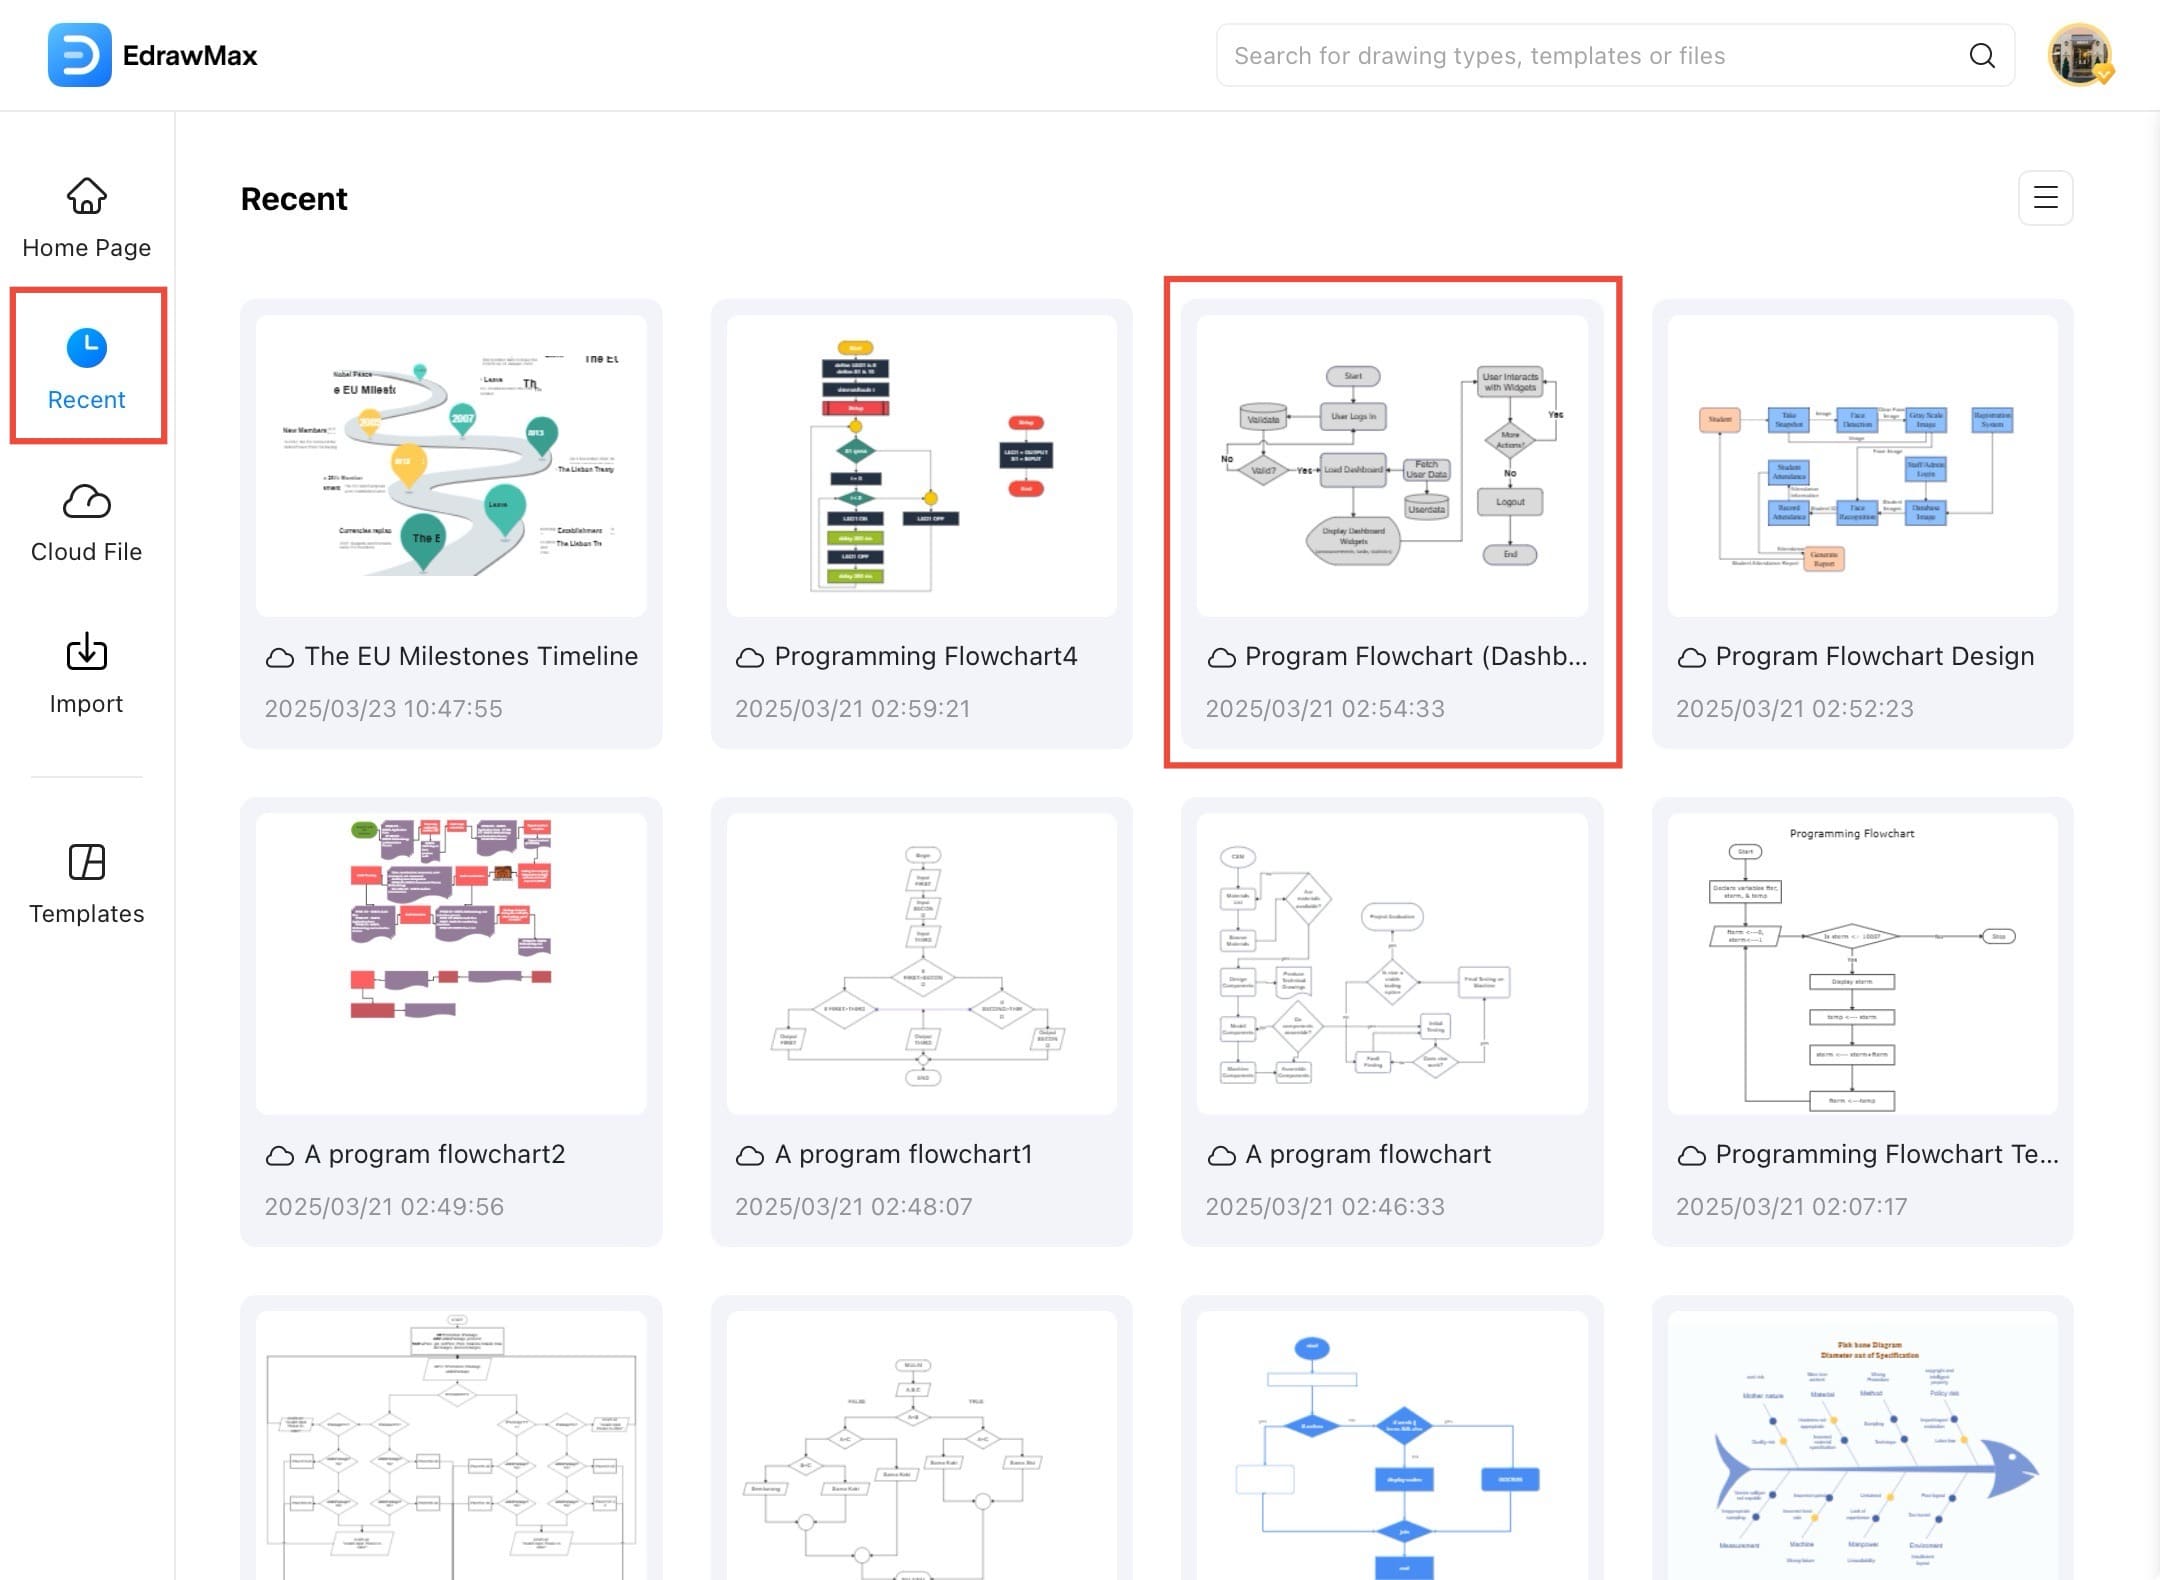
- Go to the Recent tab and open the file where you want to move shapes and organize your diagram.
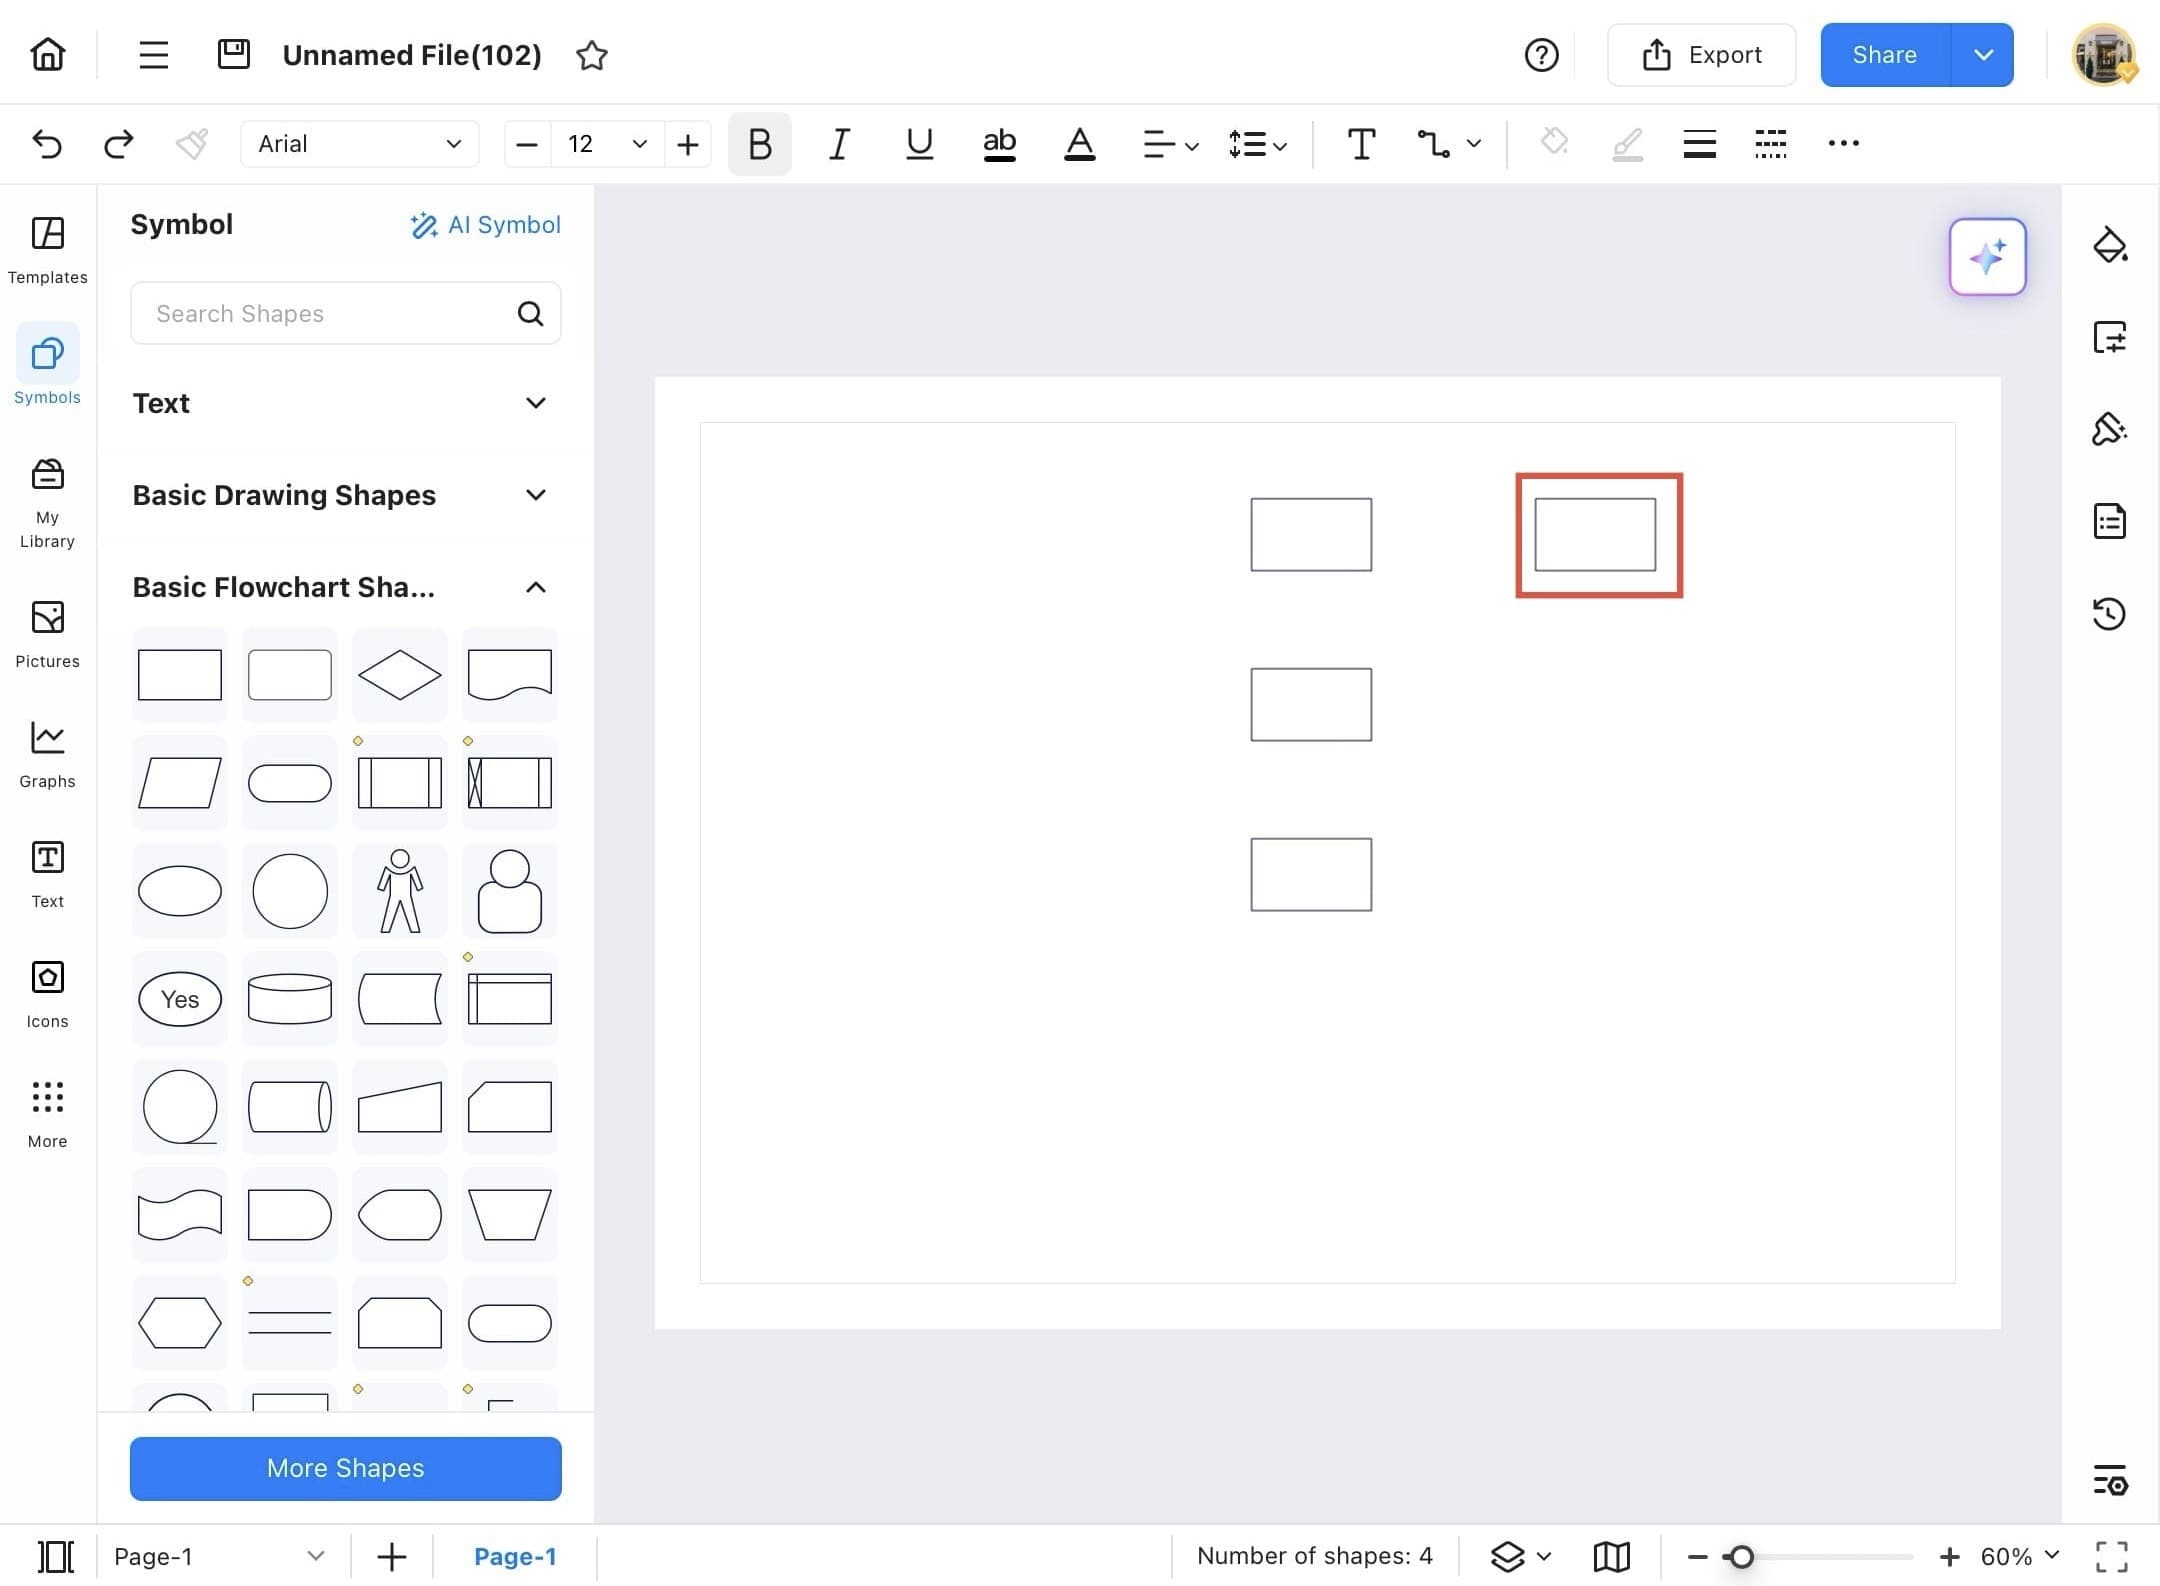
Step ❸
- Once the file is opened, tap the shape and drag it wherever you want to put it on the canvas.
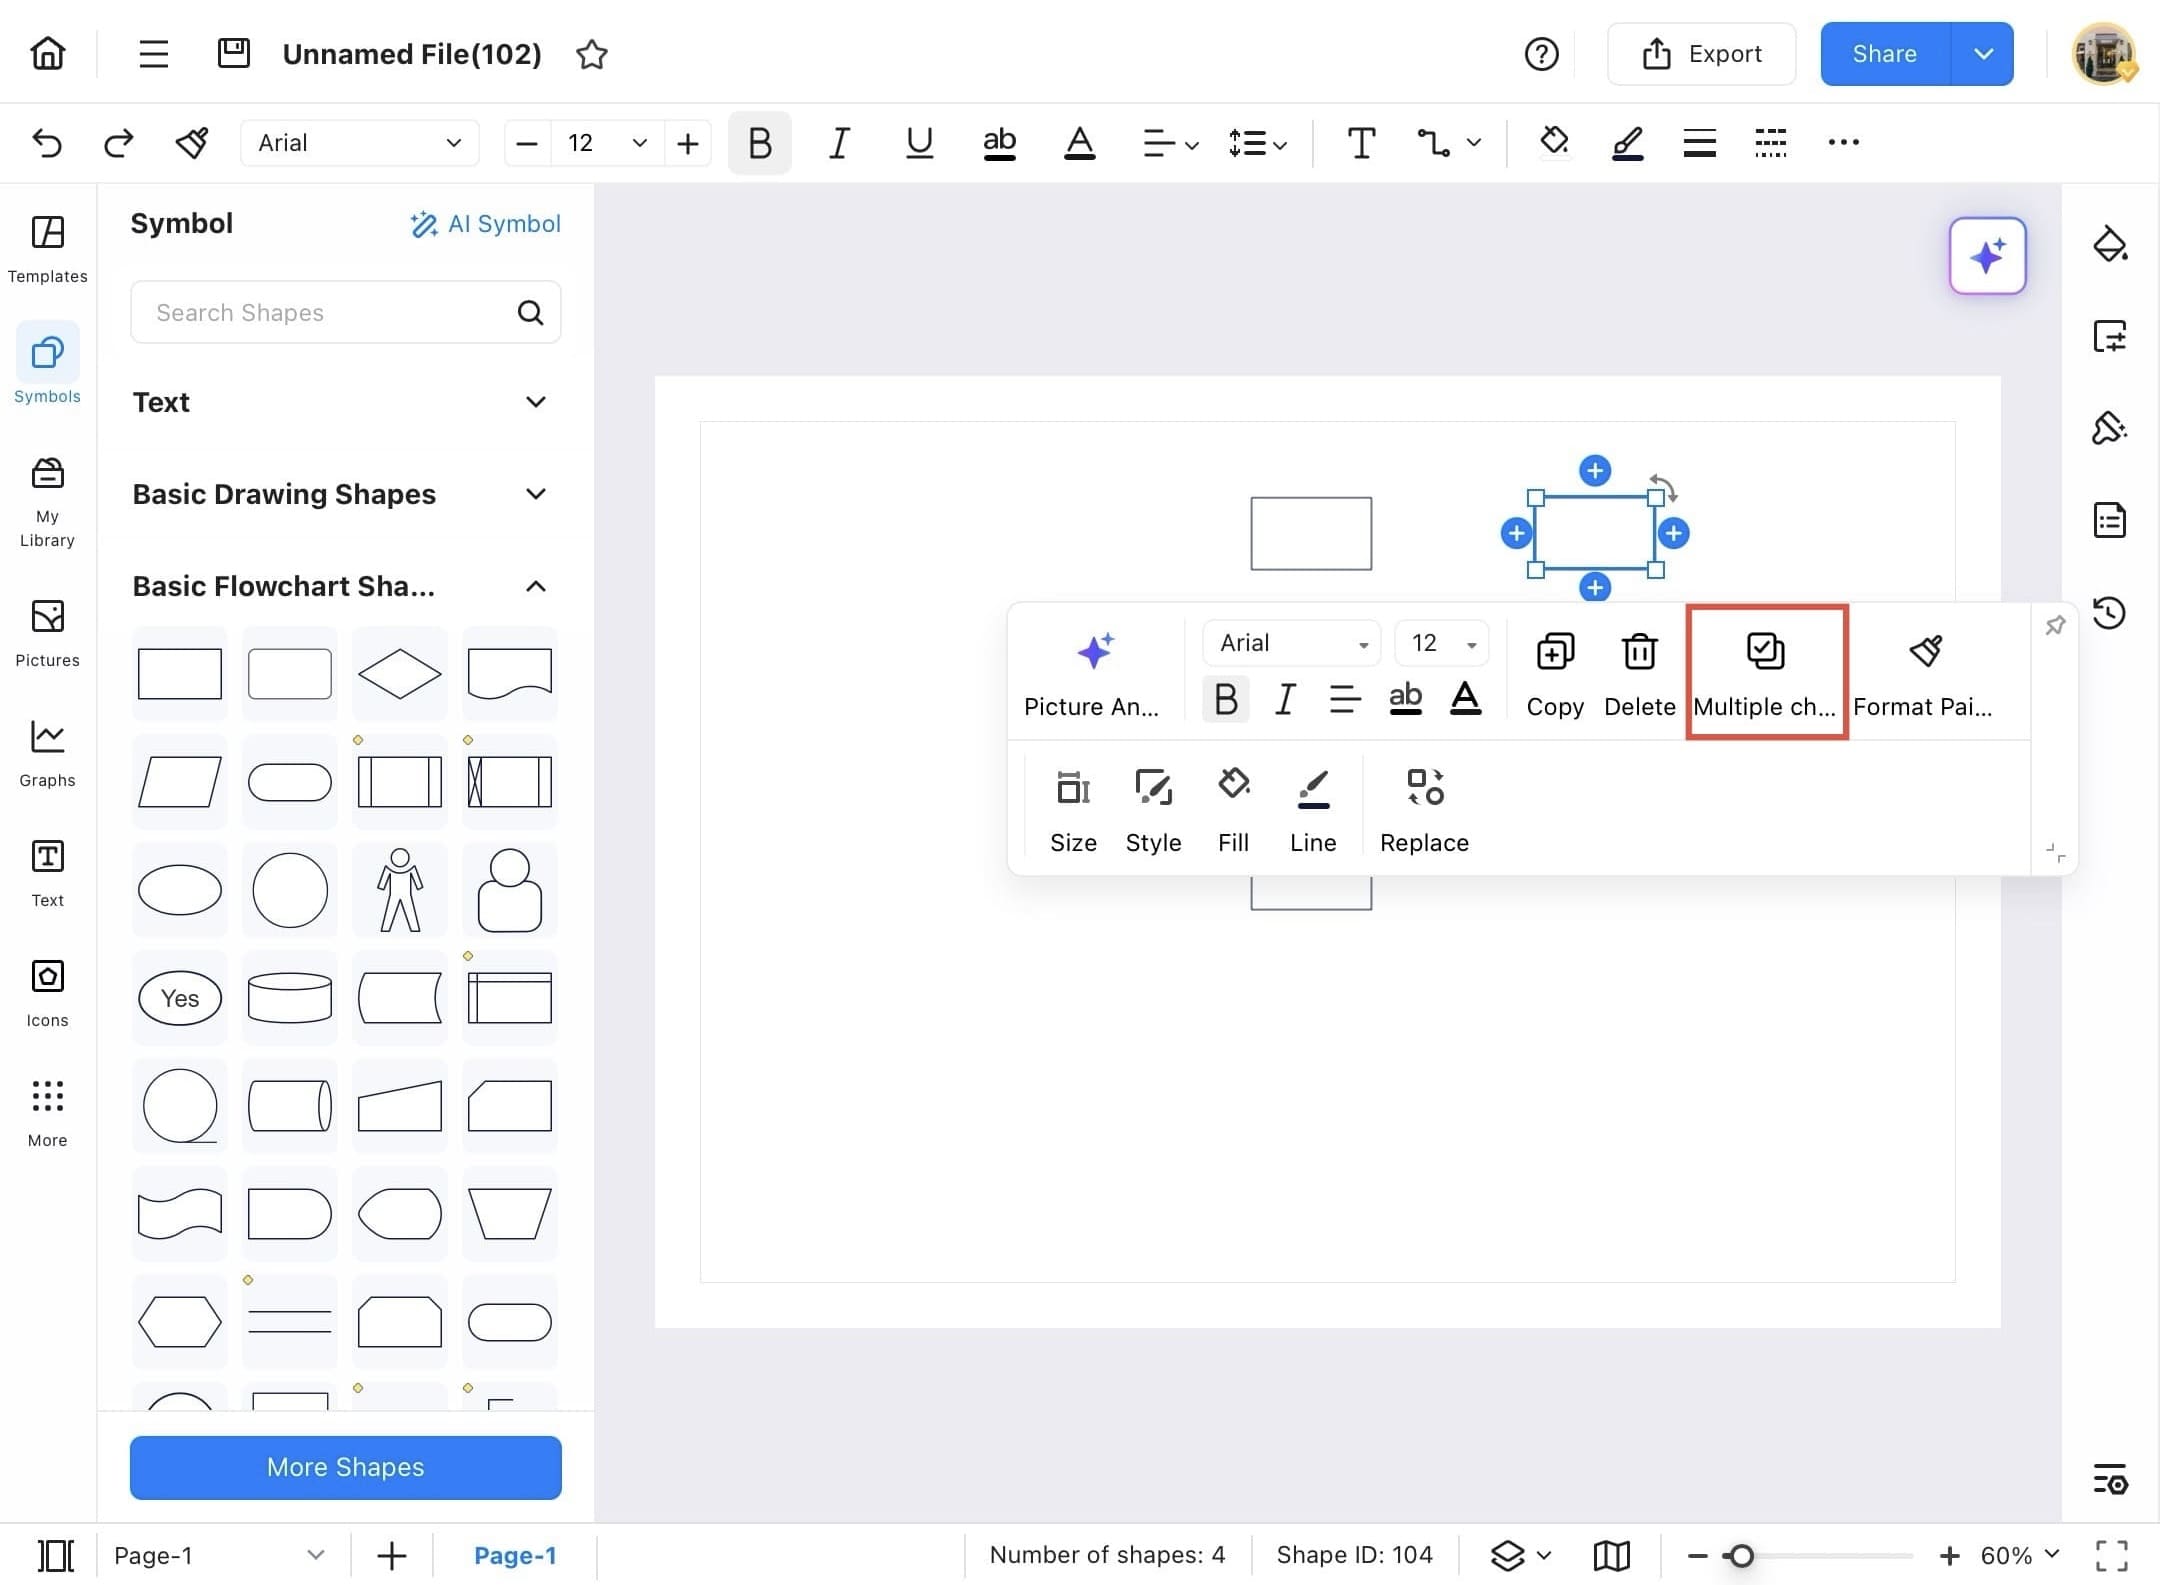
Step ❹
- To move multiple shapes at once, just tap on a shape.
Step ❺
- Select Multiple choice option to move more than one topic at once.
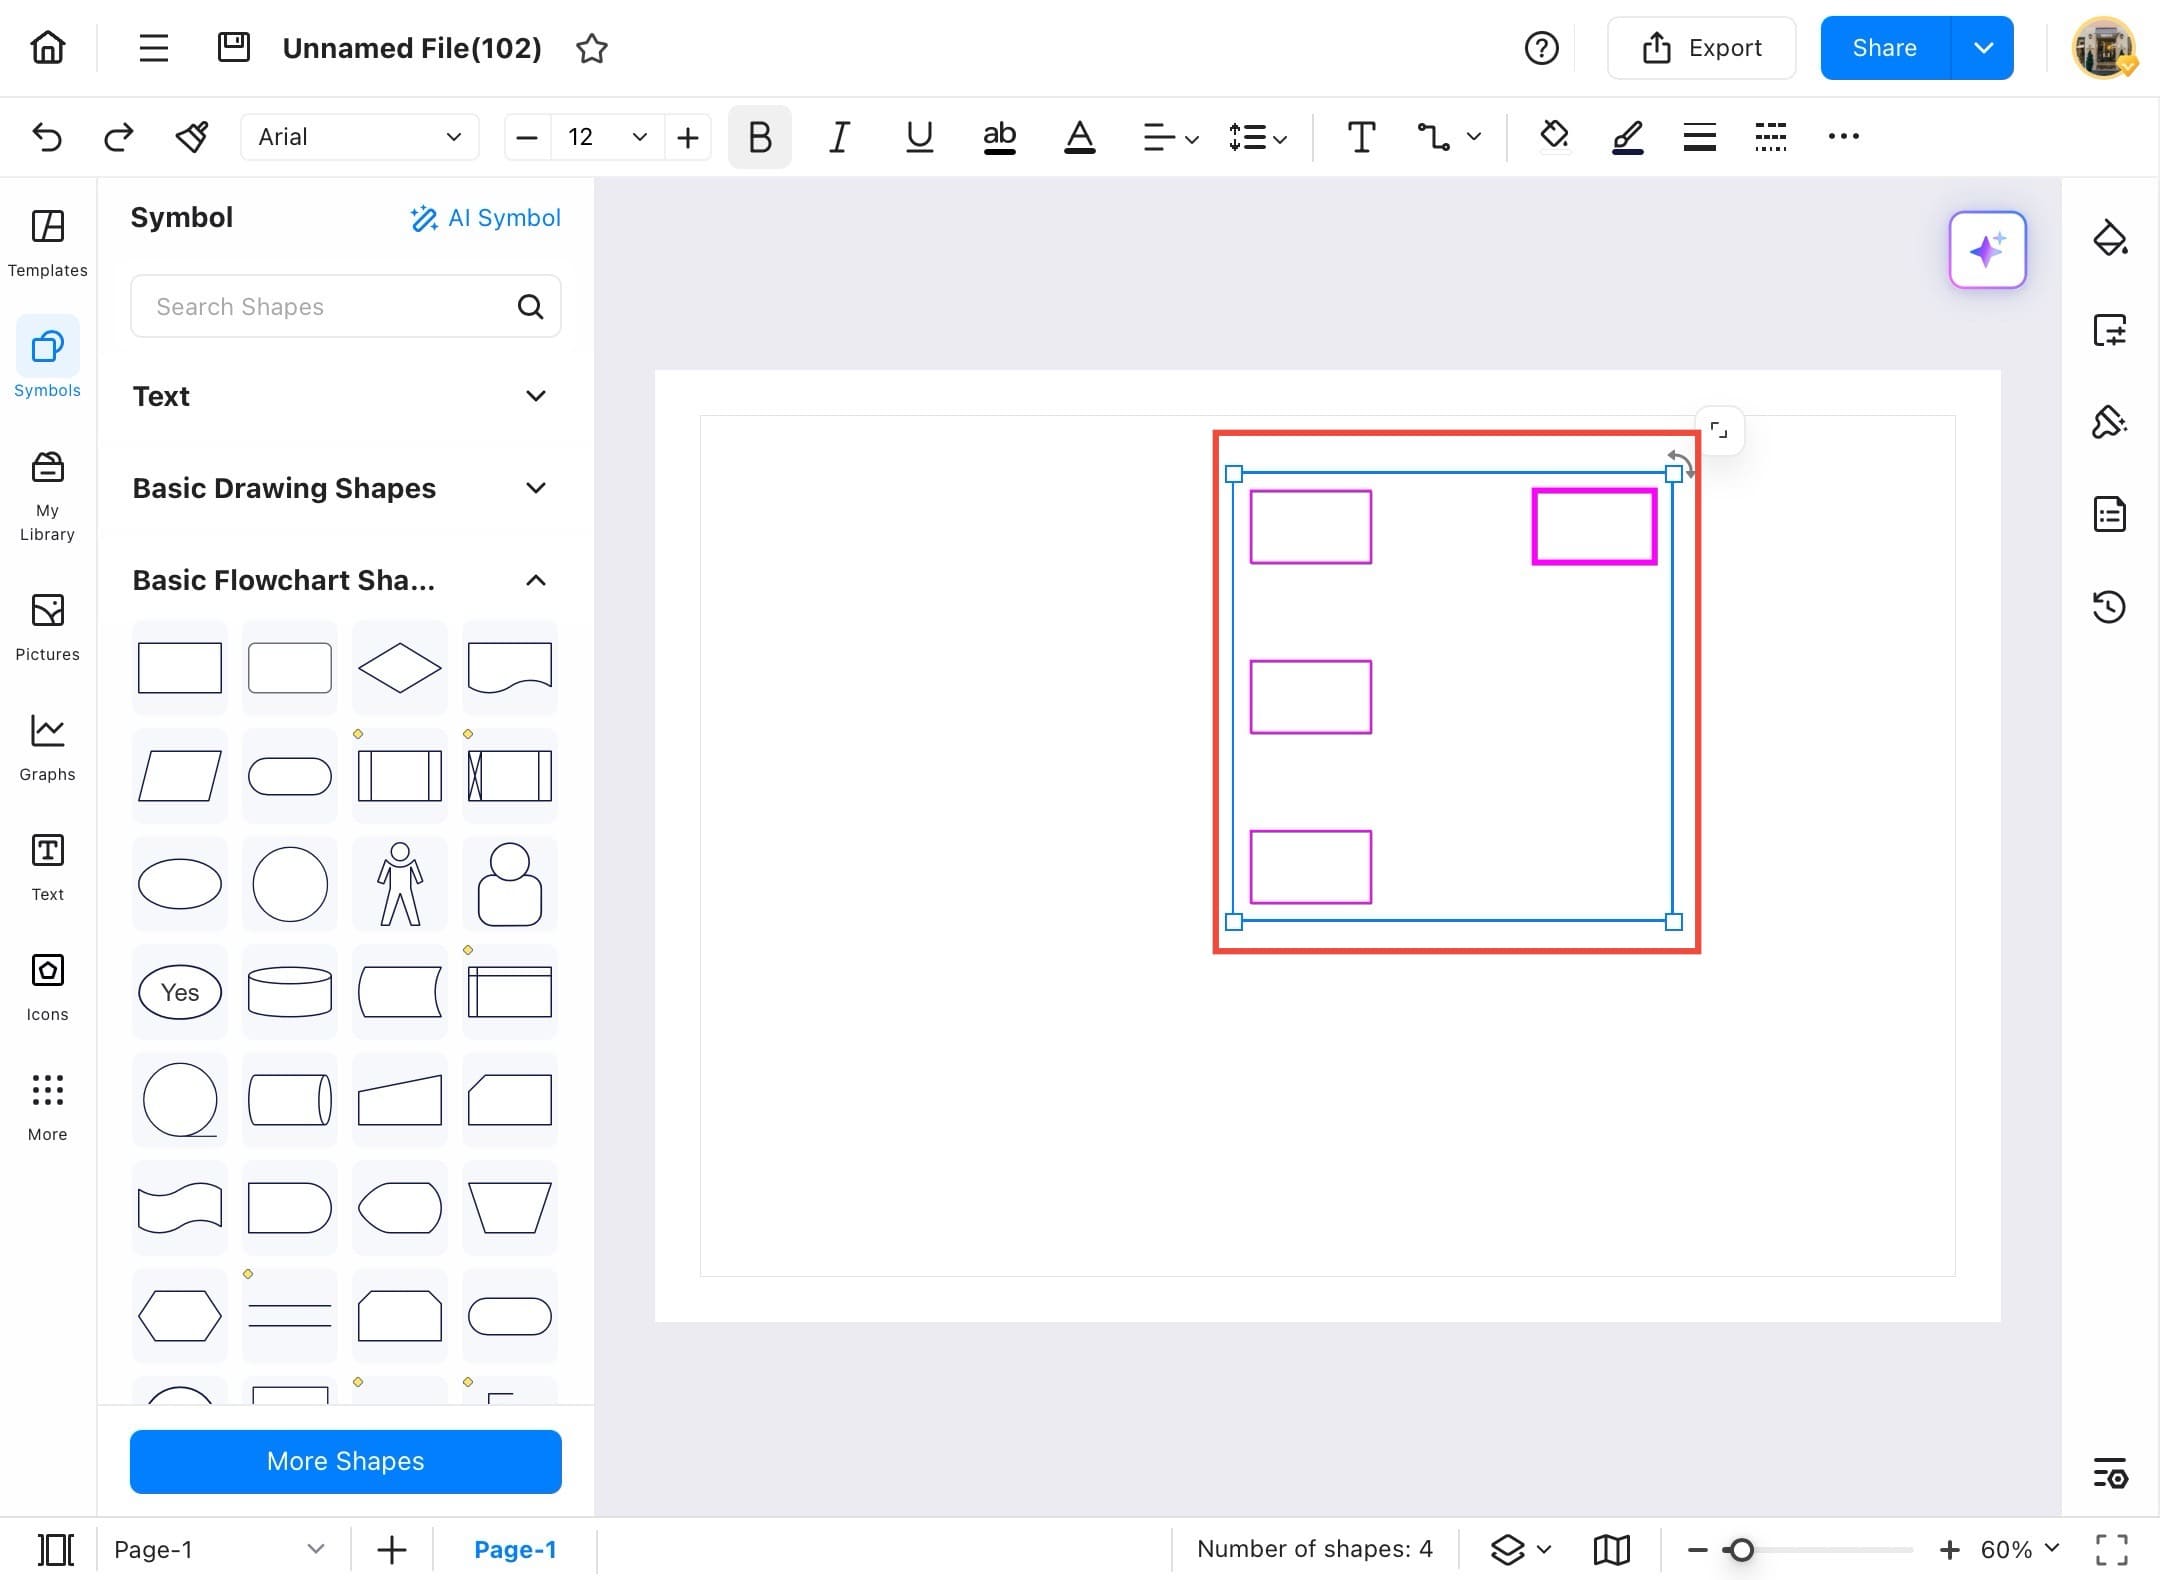
Step ❻
- Now, to select other shapes, just tap them and they will be selected automatically.
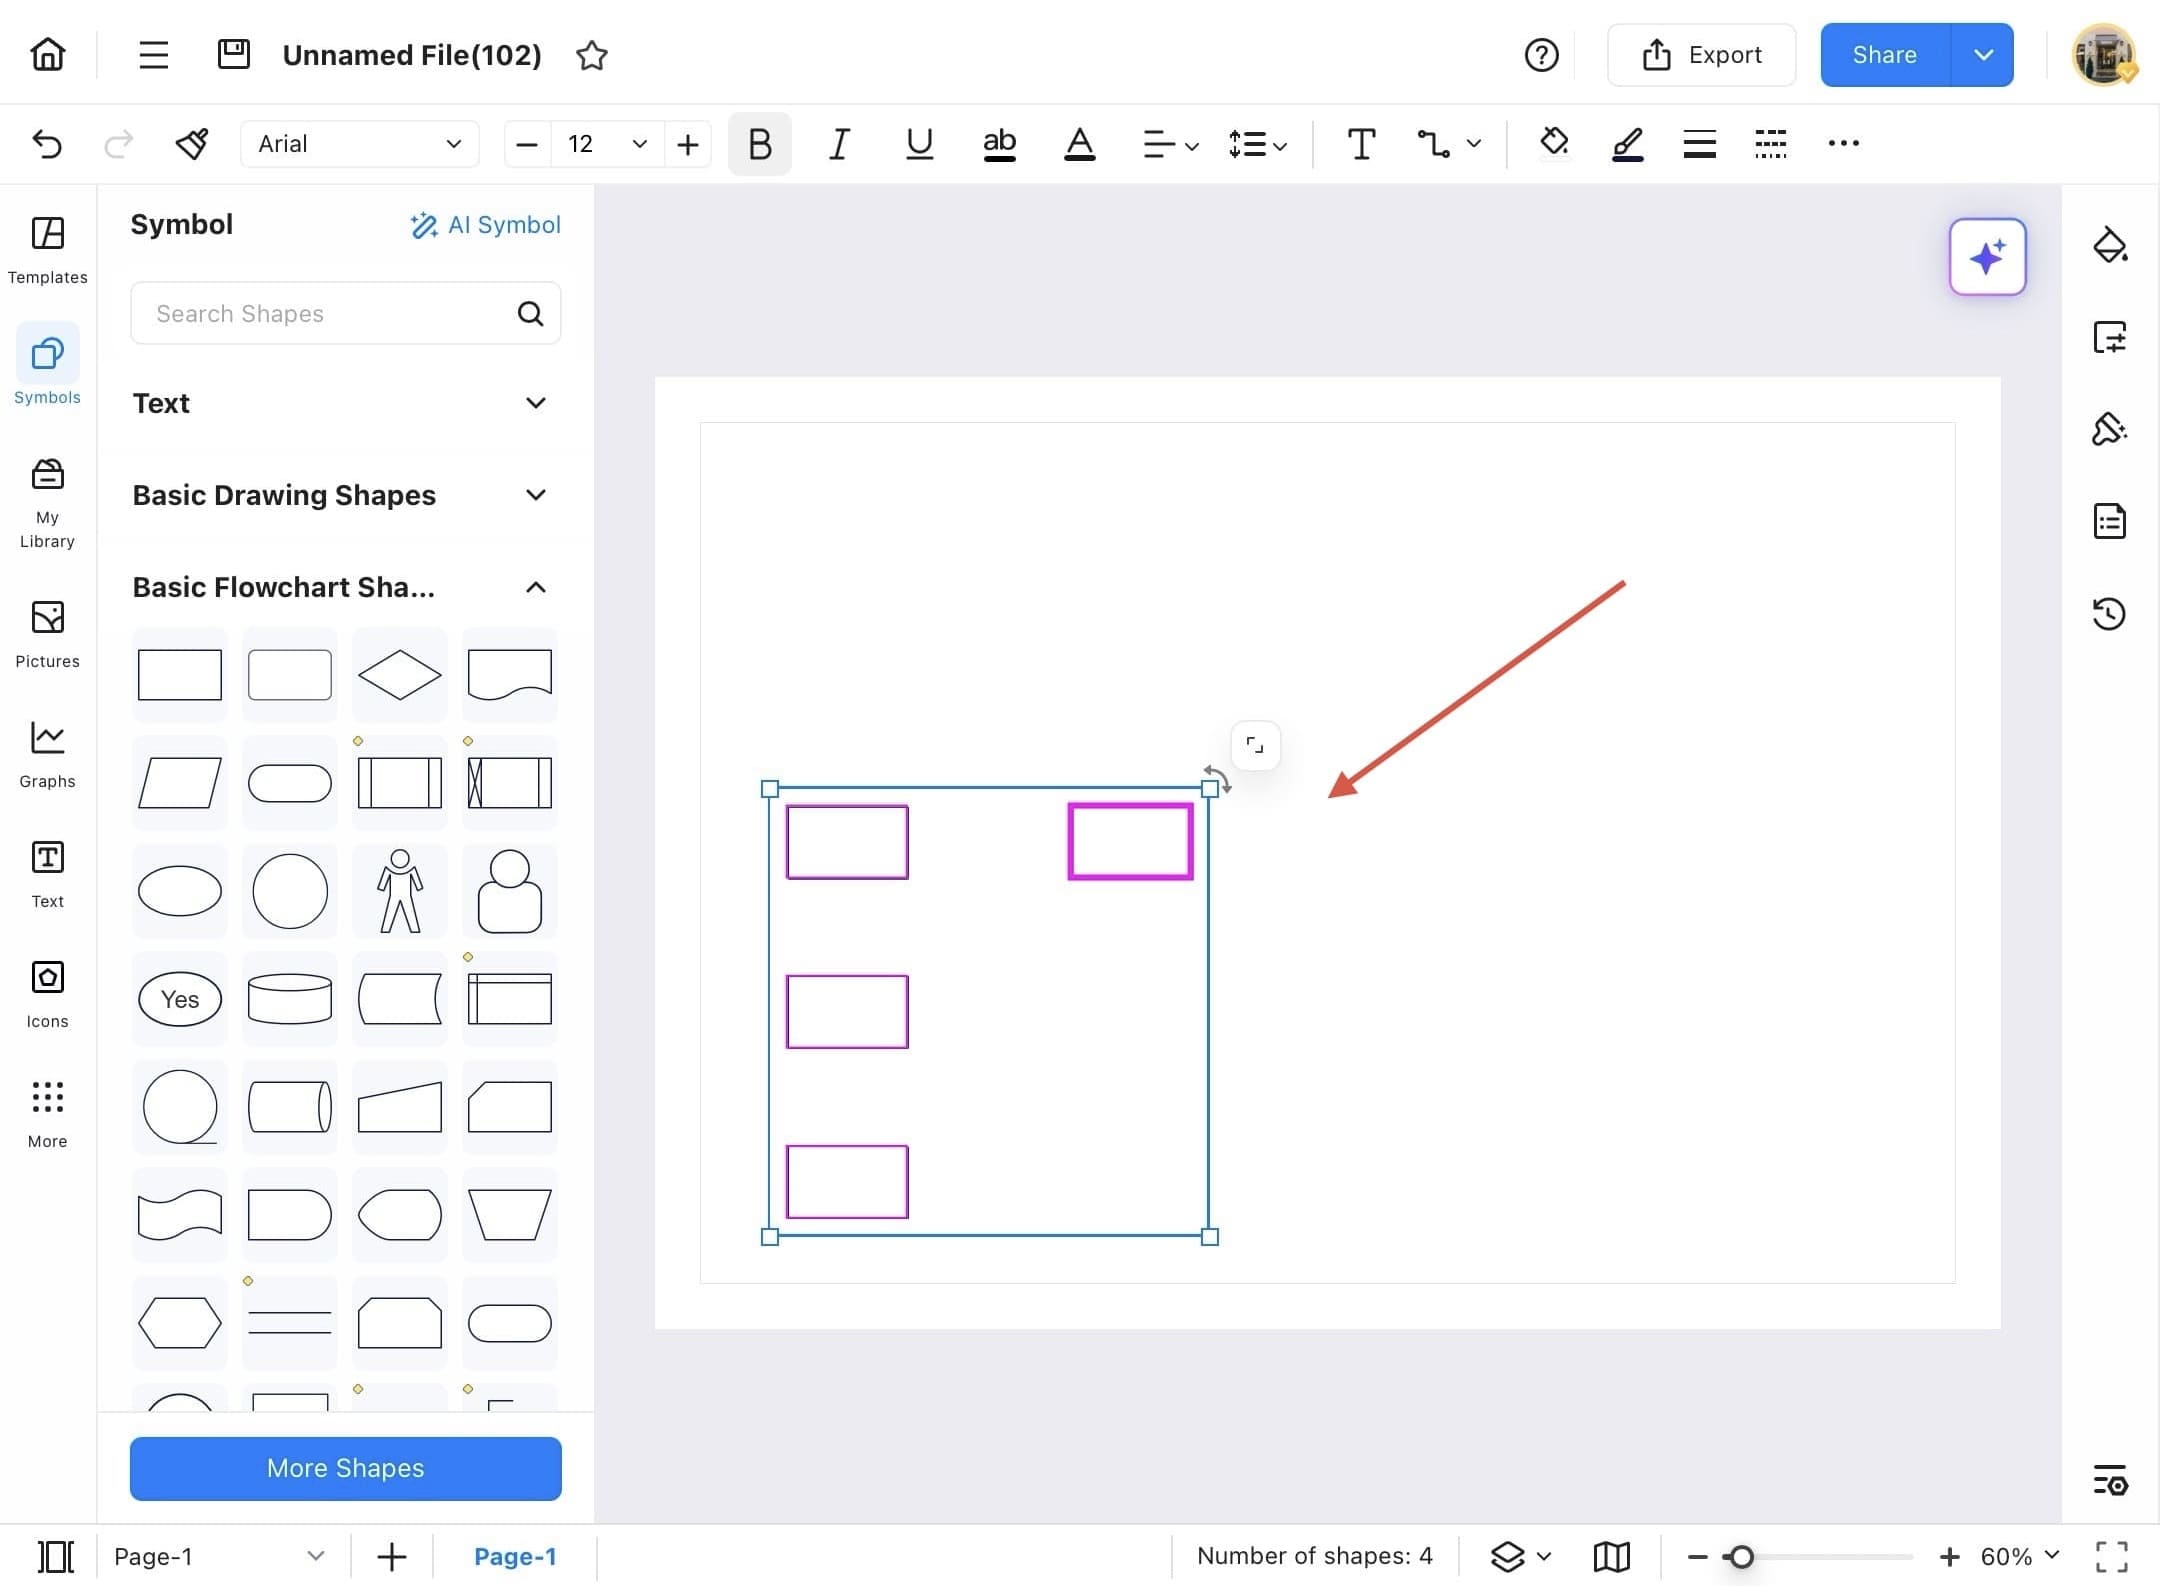
Step ❼
- When you are done selecting multiple shapes, drag them all at once where you want them to be on the canvas.
Shape Operation: Group & Ungroup Shapes
Grouping shapes is especially useful when you are working on a diagram that contains many small connected parts. Instead of moving all one by one small parts, group them all and move them at once to keep your diagram neat and organized.
Step ❶
- Launch EdrawMax on your tablet.
Step ❷
- Open your file from Local Storage or Cloud Storage in EdrawMax, depending on where it’s saved.
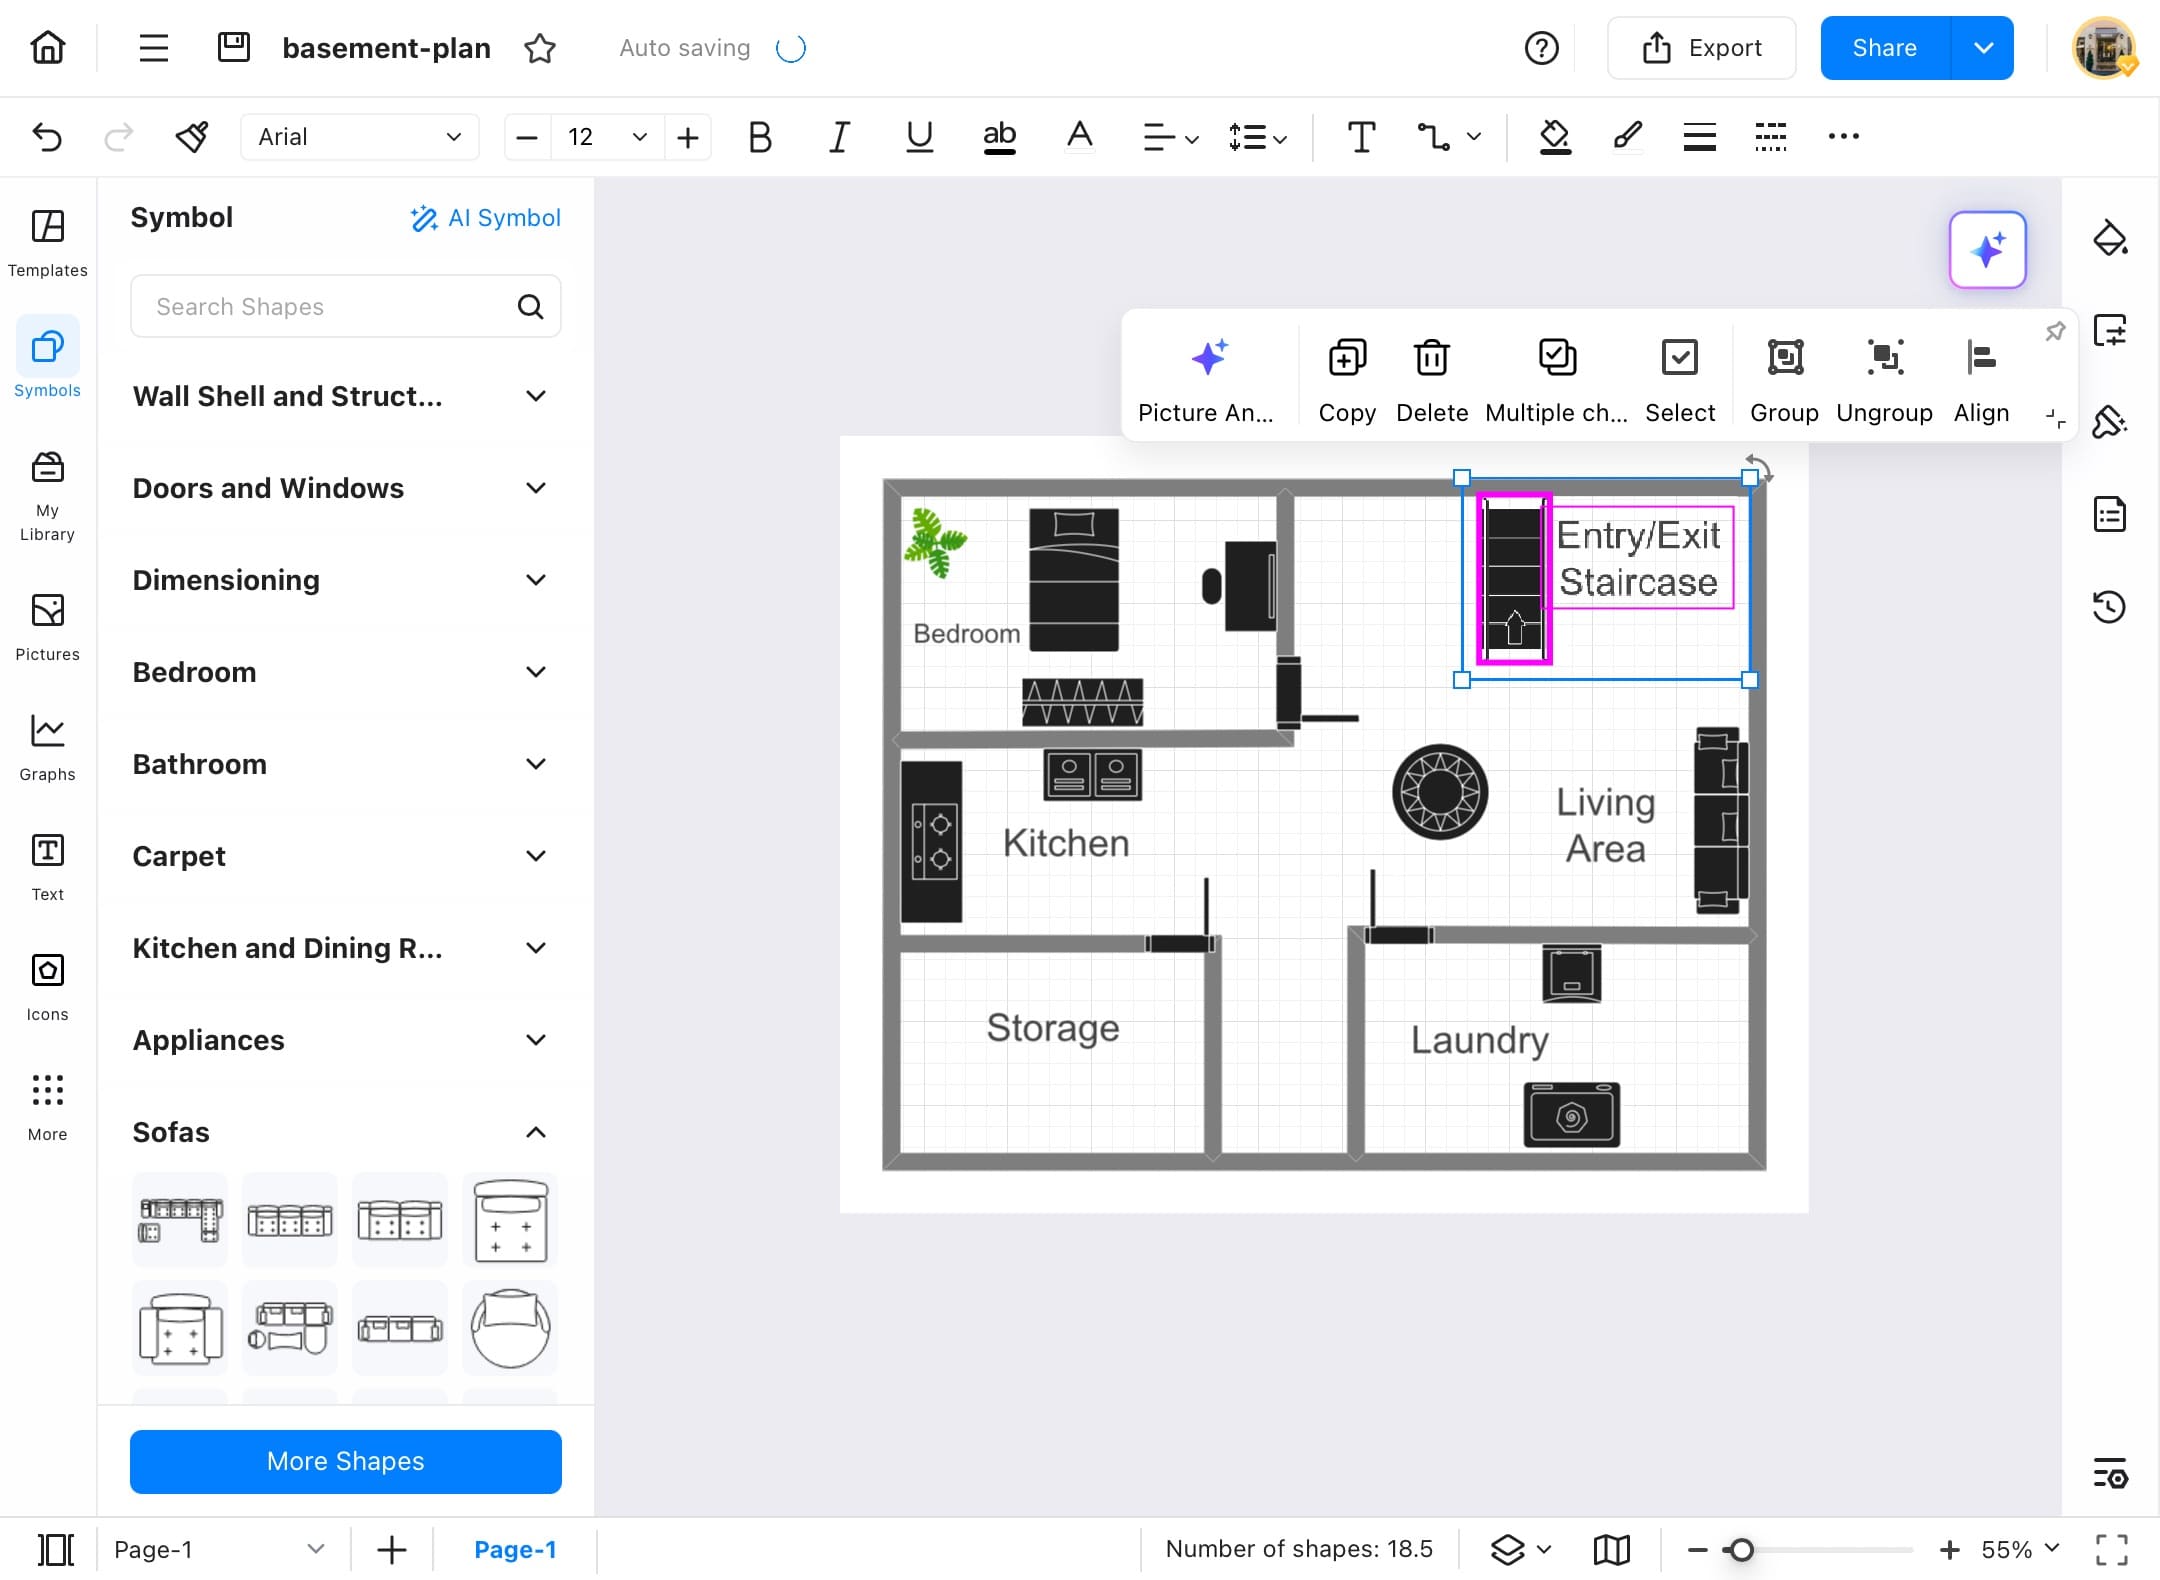
Step ❸
- Once you have opened the file, drag your finger across the empty area of the canvas to select all the small parts you want to group.
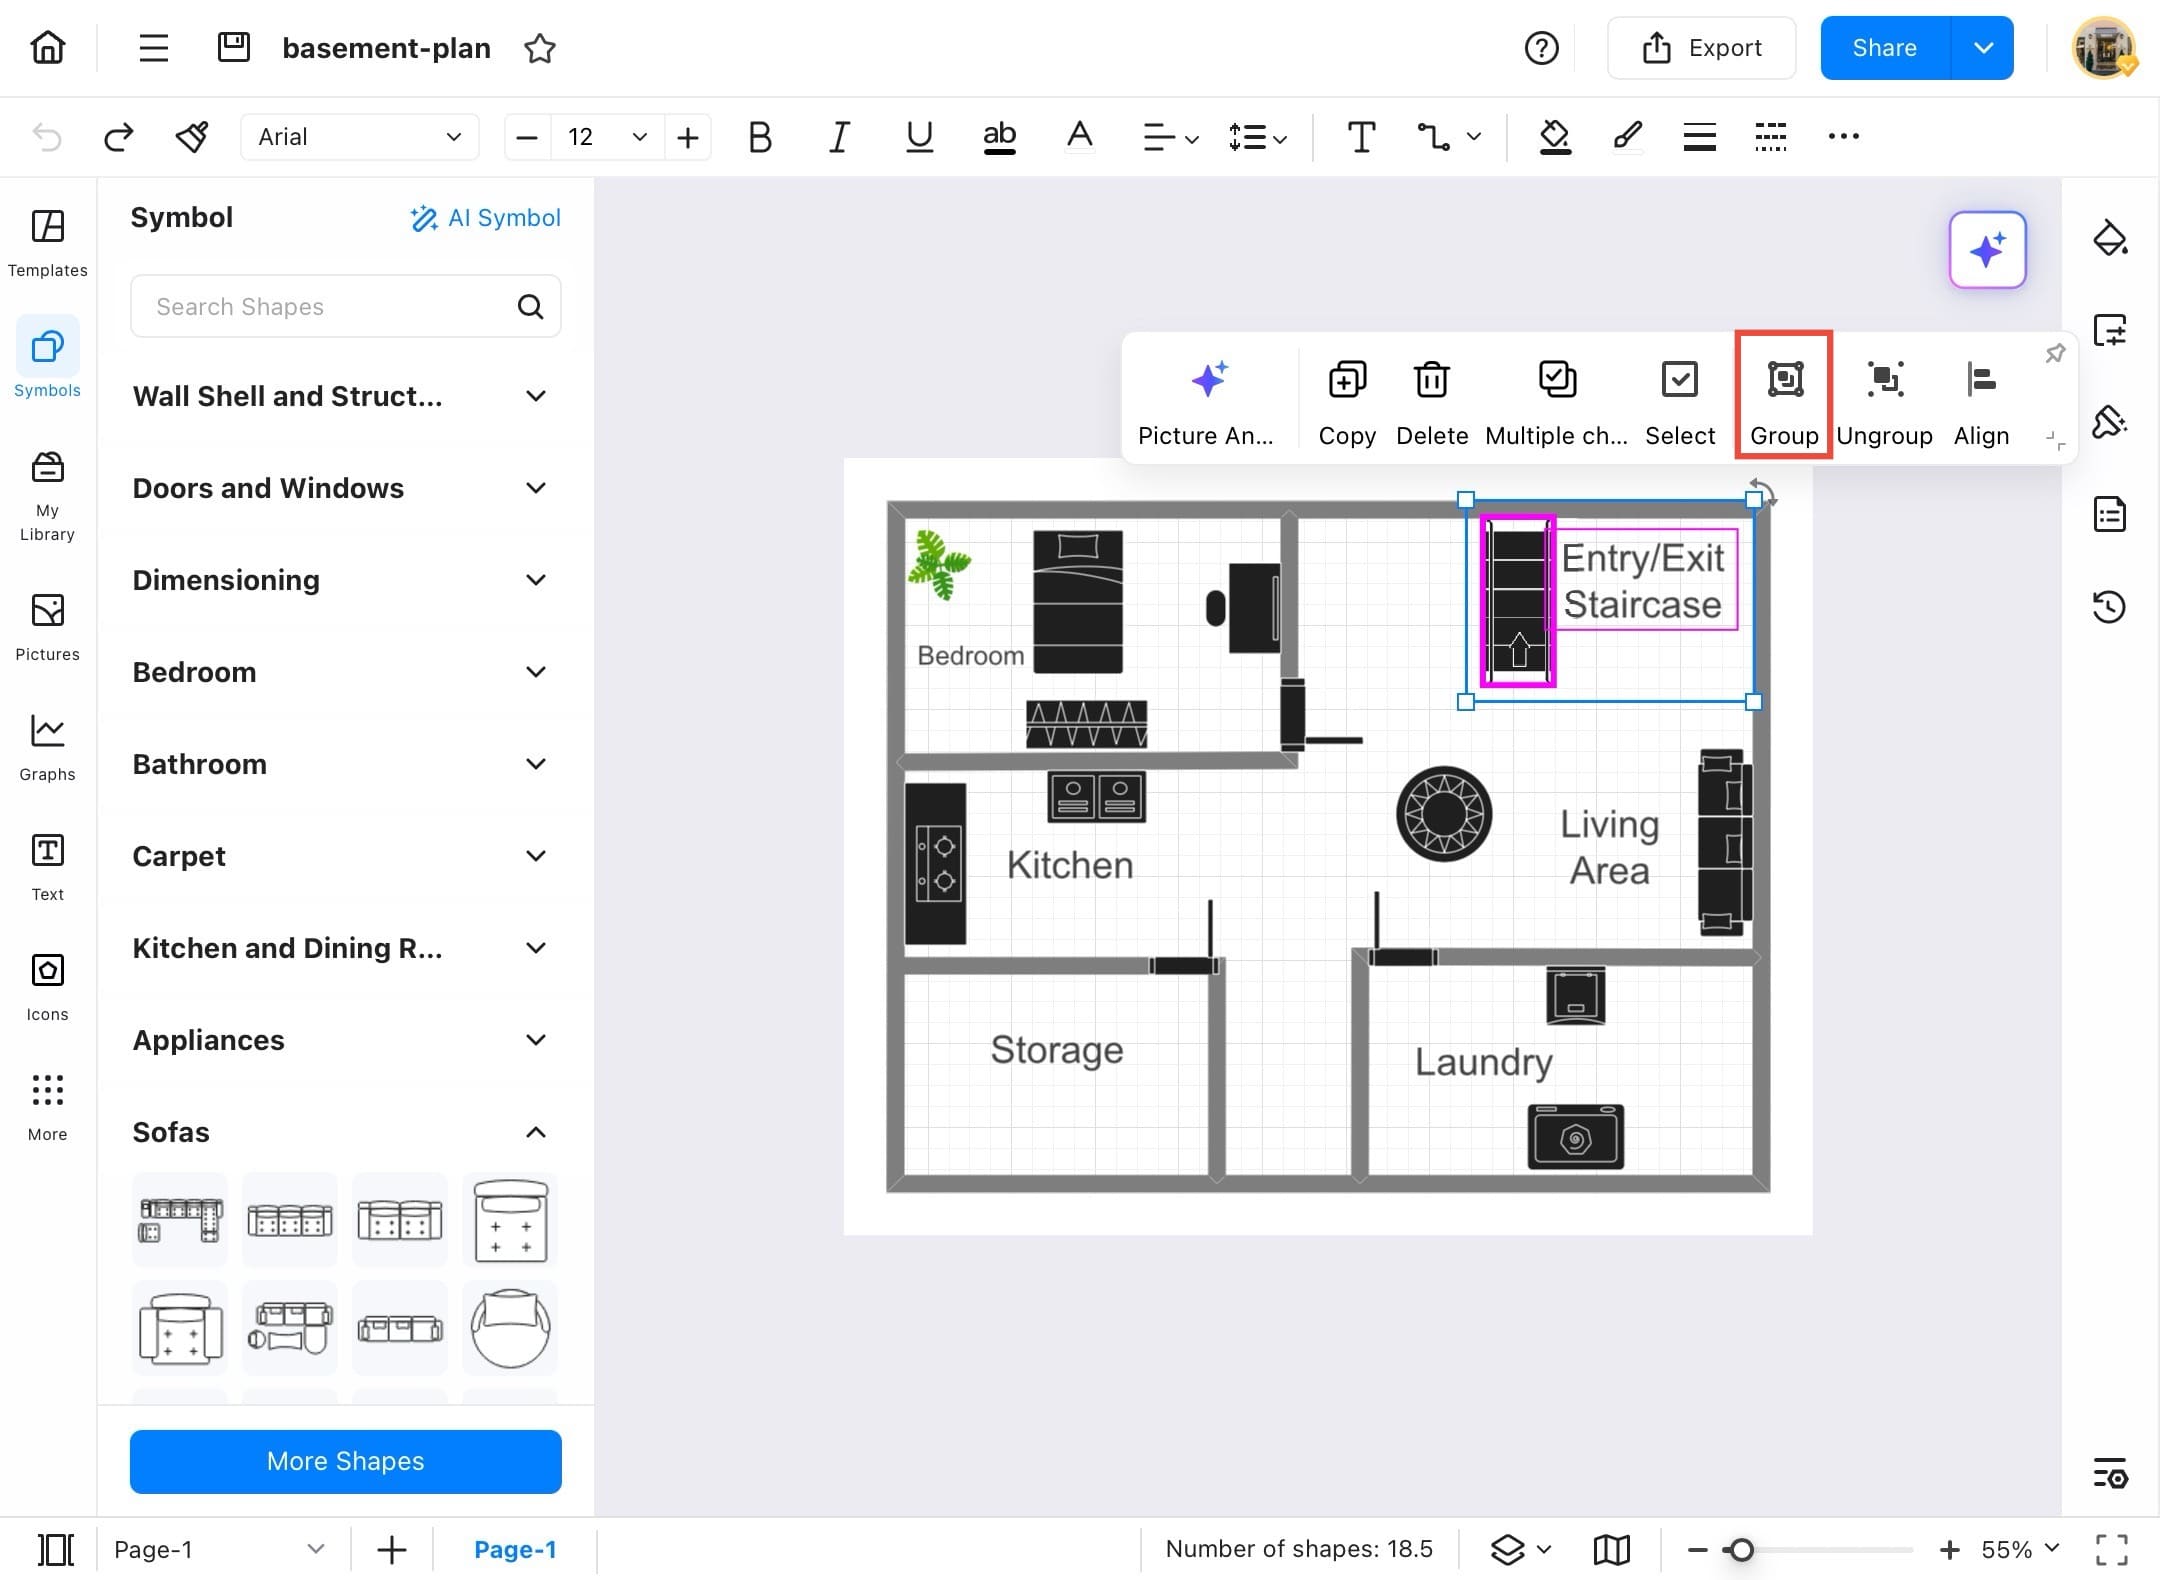
Step ❹
- After selecting the parts you want to group, tap Group from the opened precision tool.
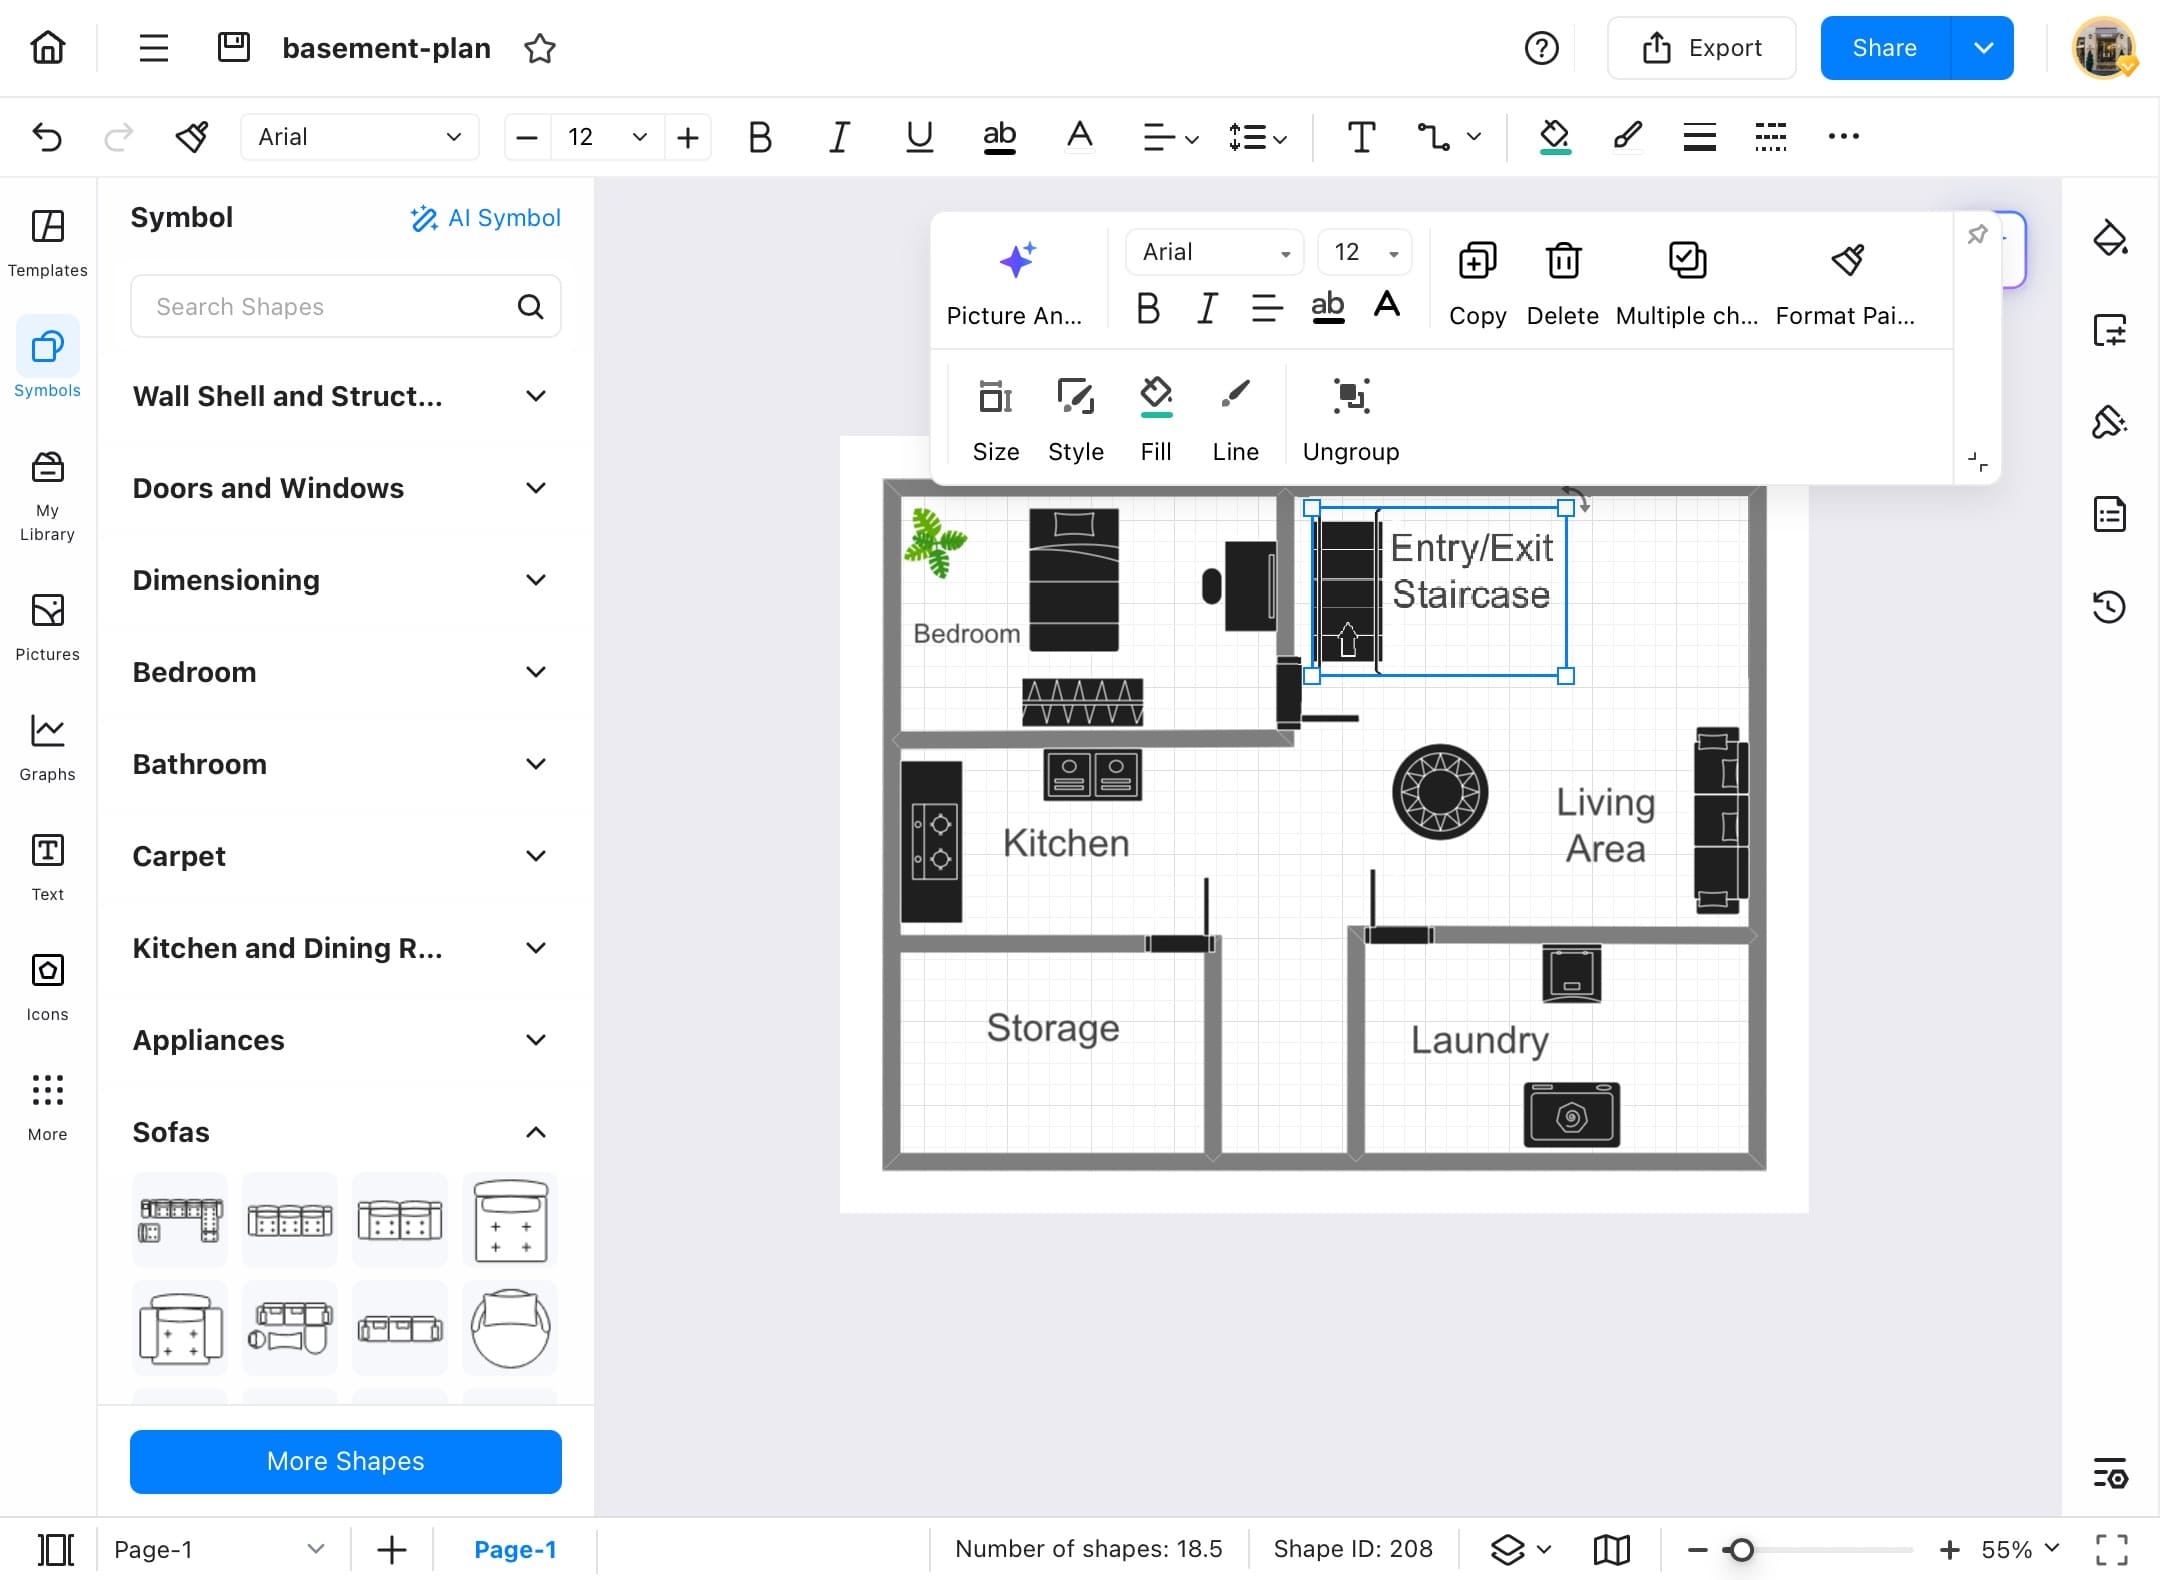
Step ❺
- When you have grouped it, you can move it anywhere on the canvas without disturbing its spacing.
Step ❻
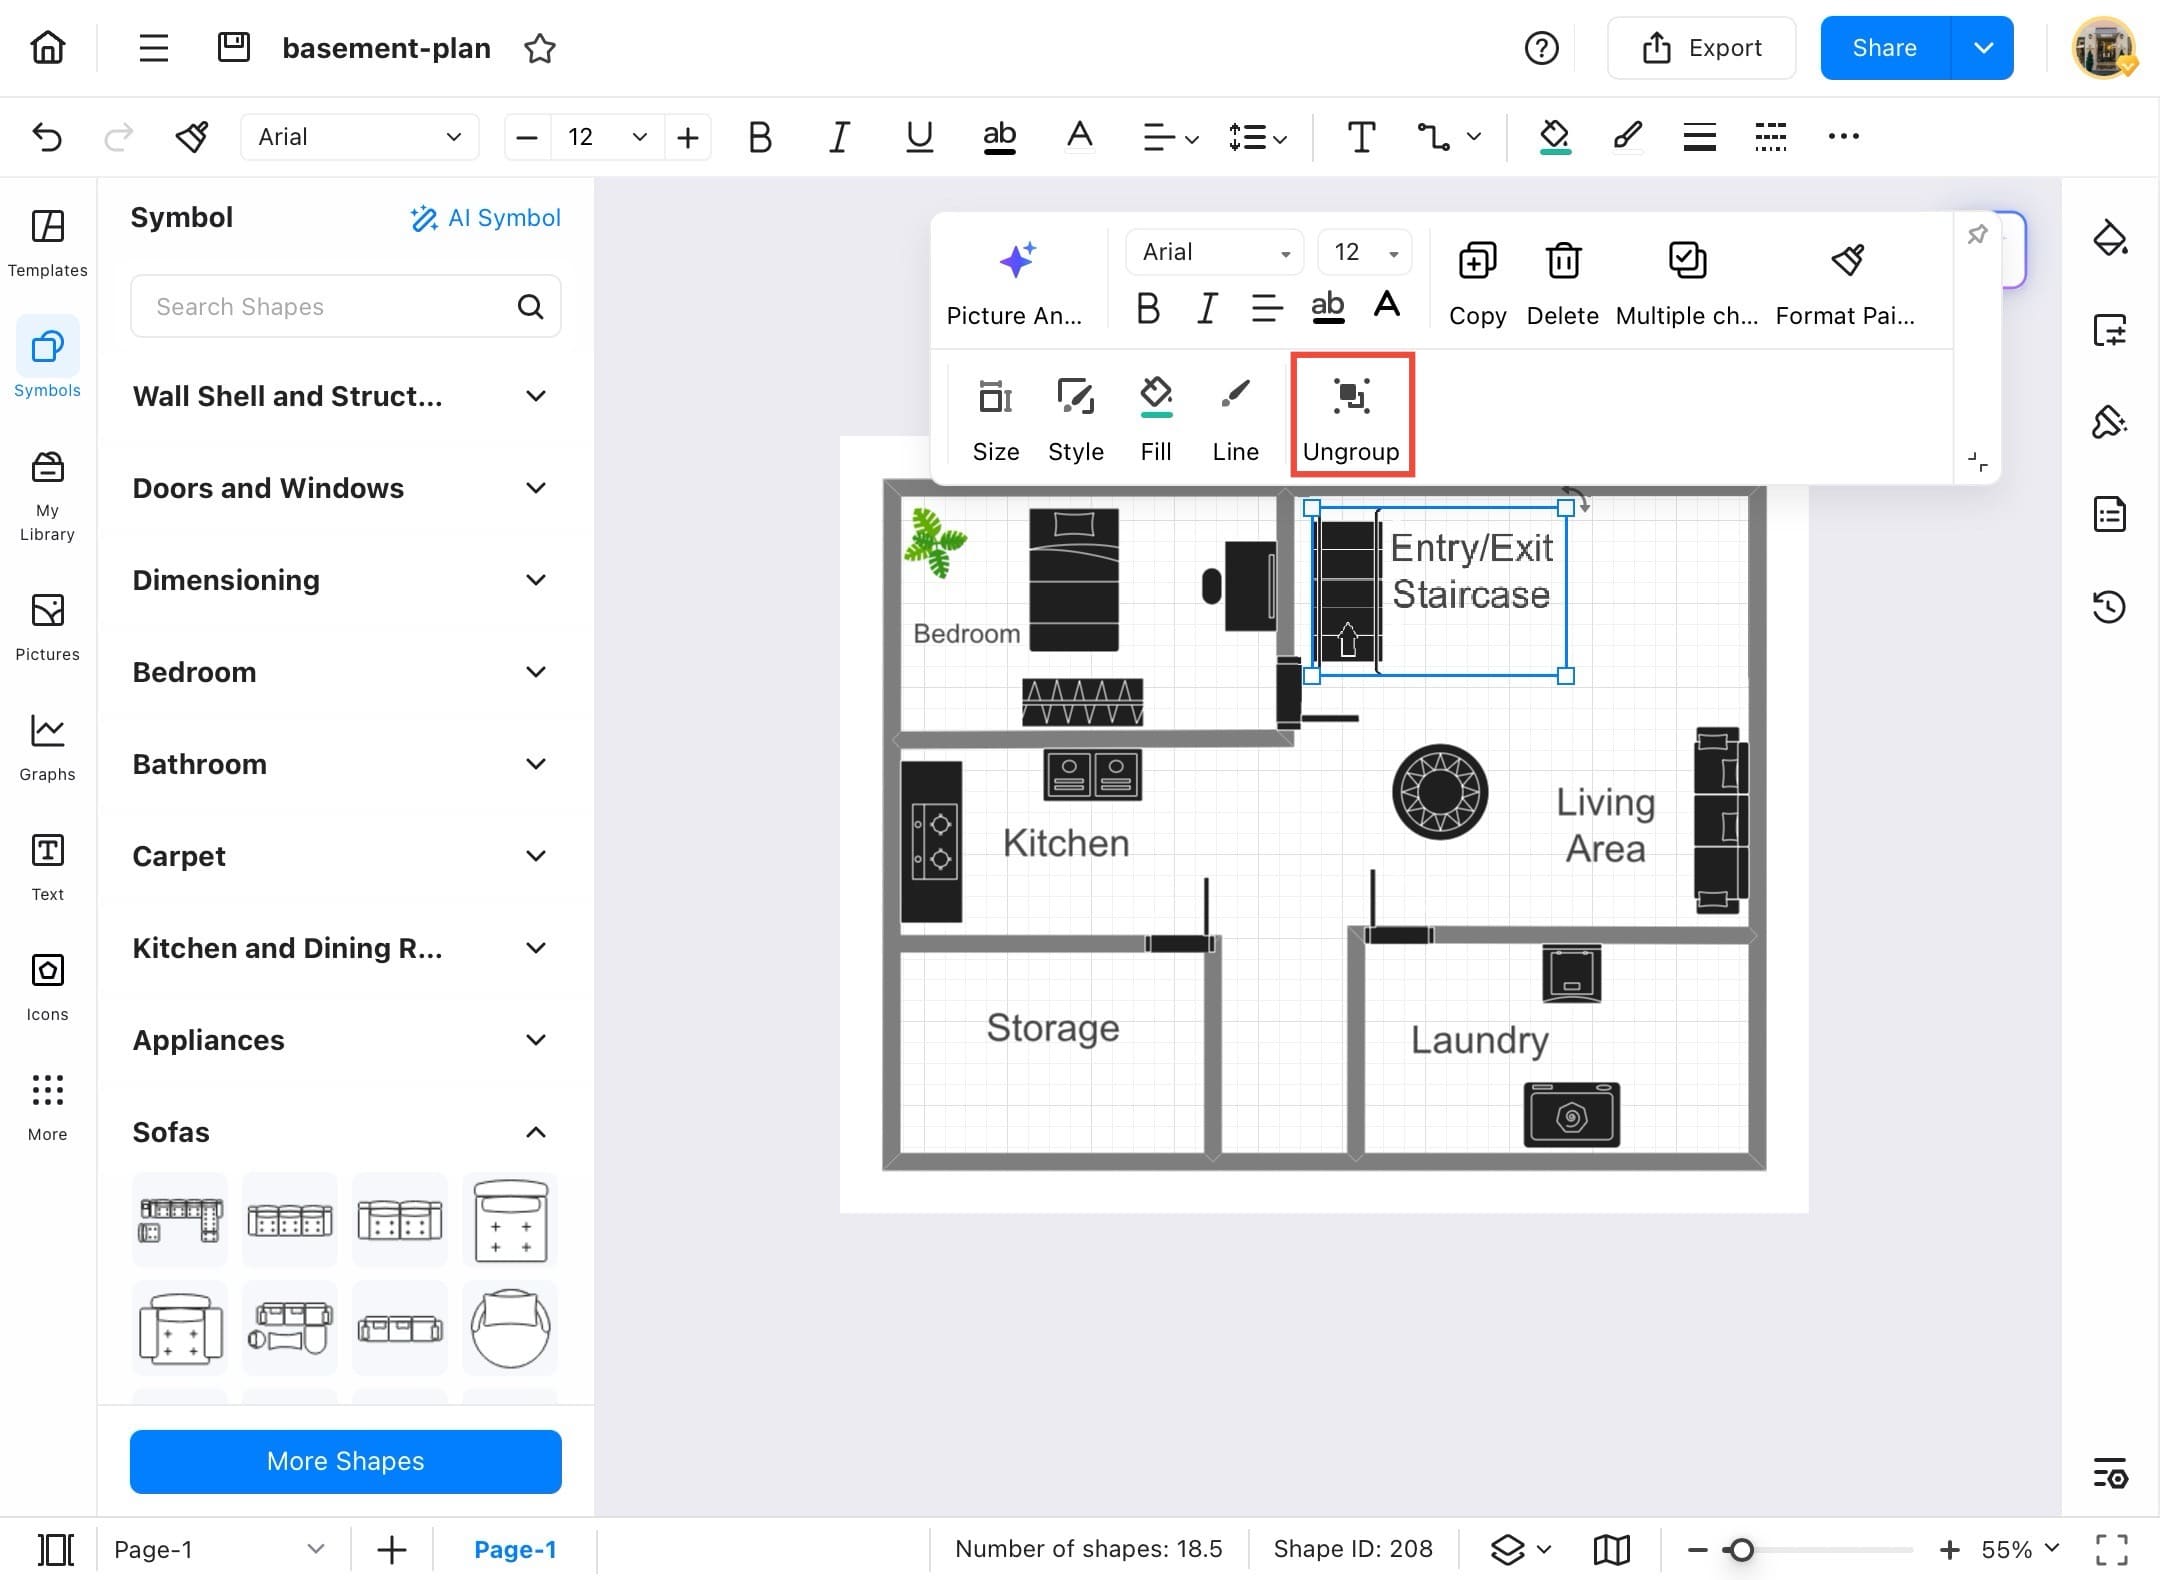
- After finishing your diagram, you can ungroup shapes that were grouped earlier. Just tap the grouped shape to select it.
Step ❼
- Now, tap Ungroup from the precision tool to ungroup the shapes.
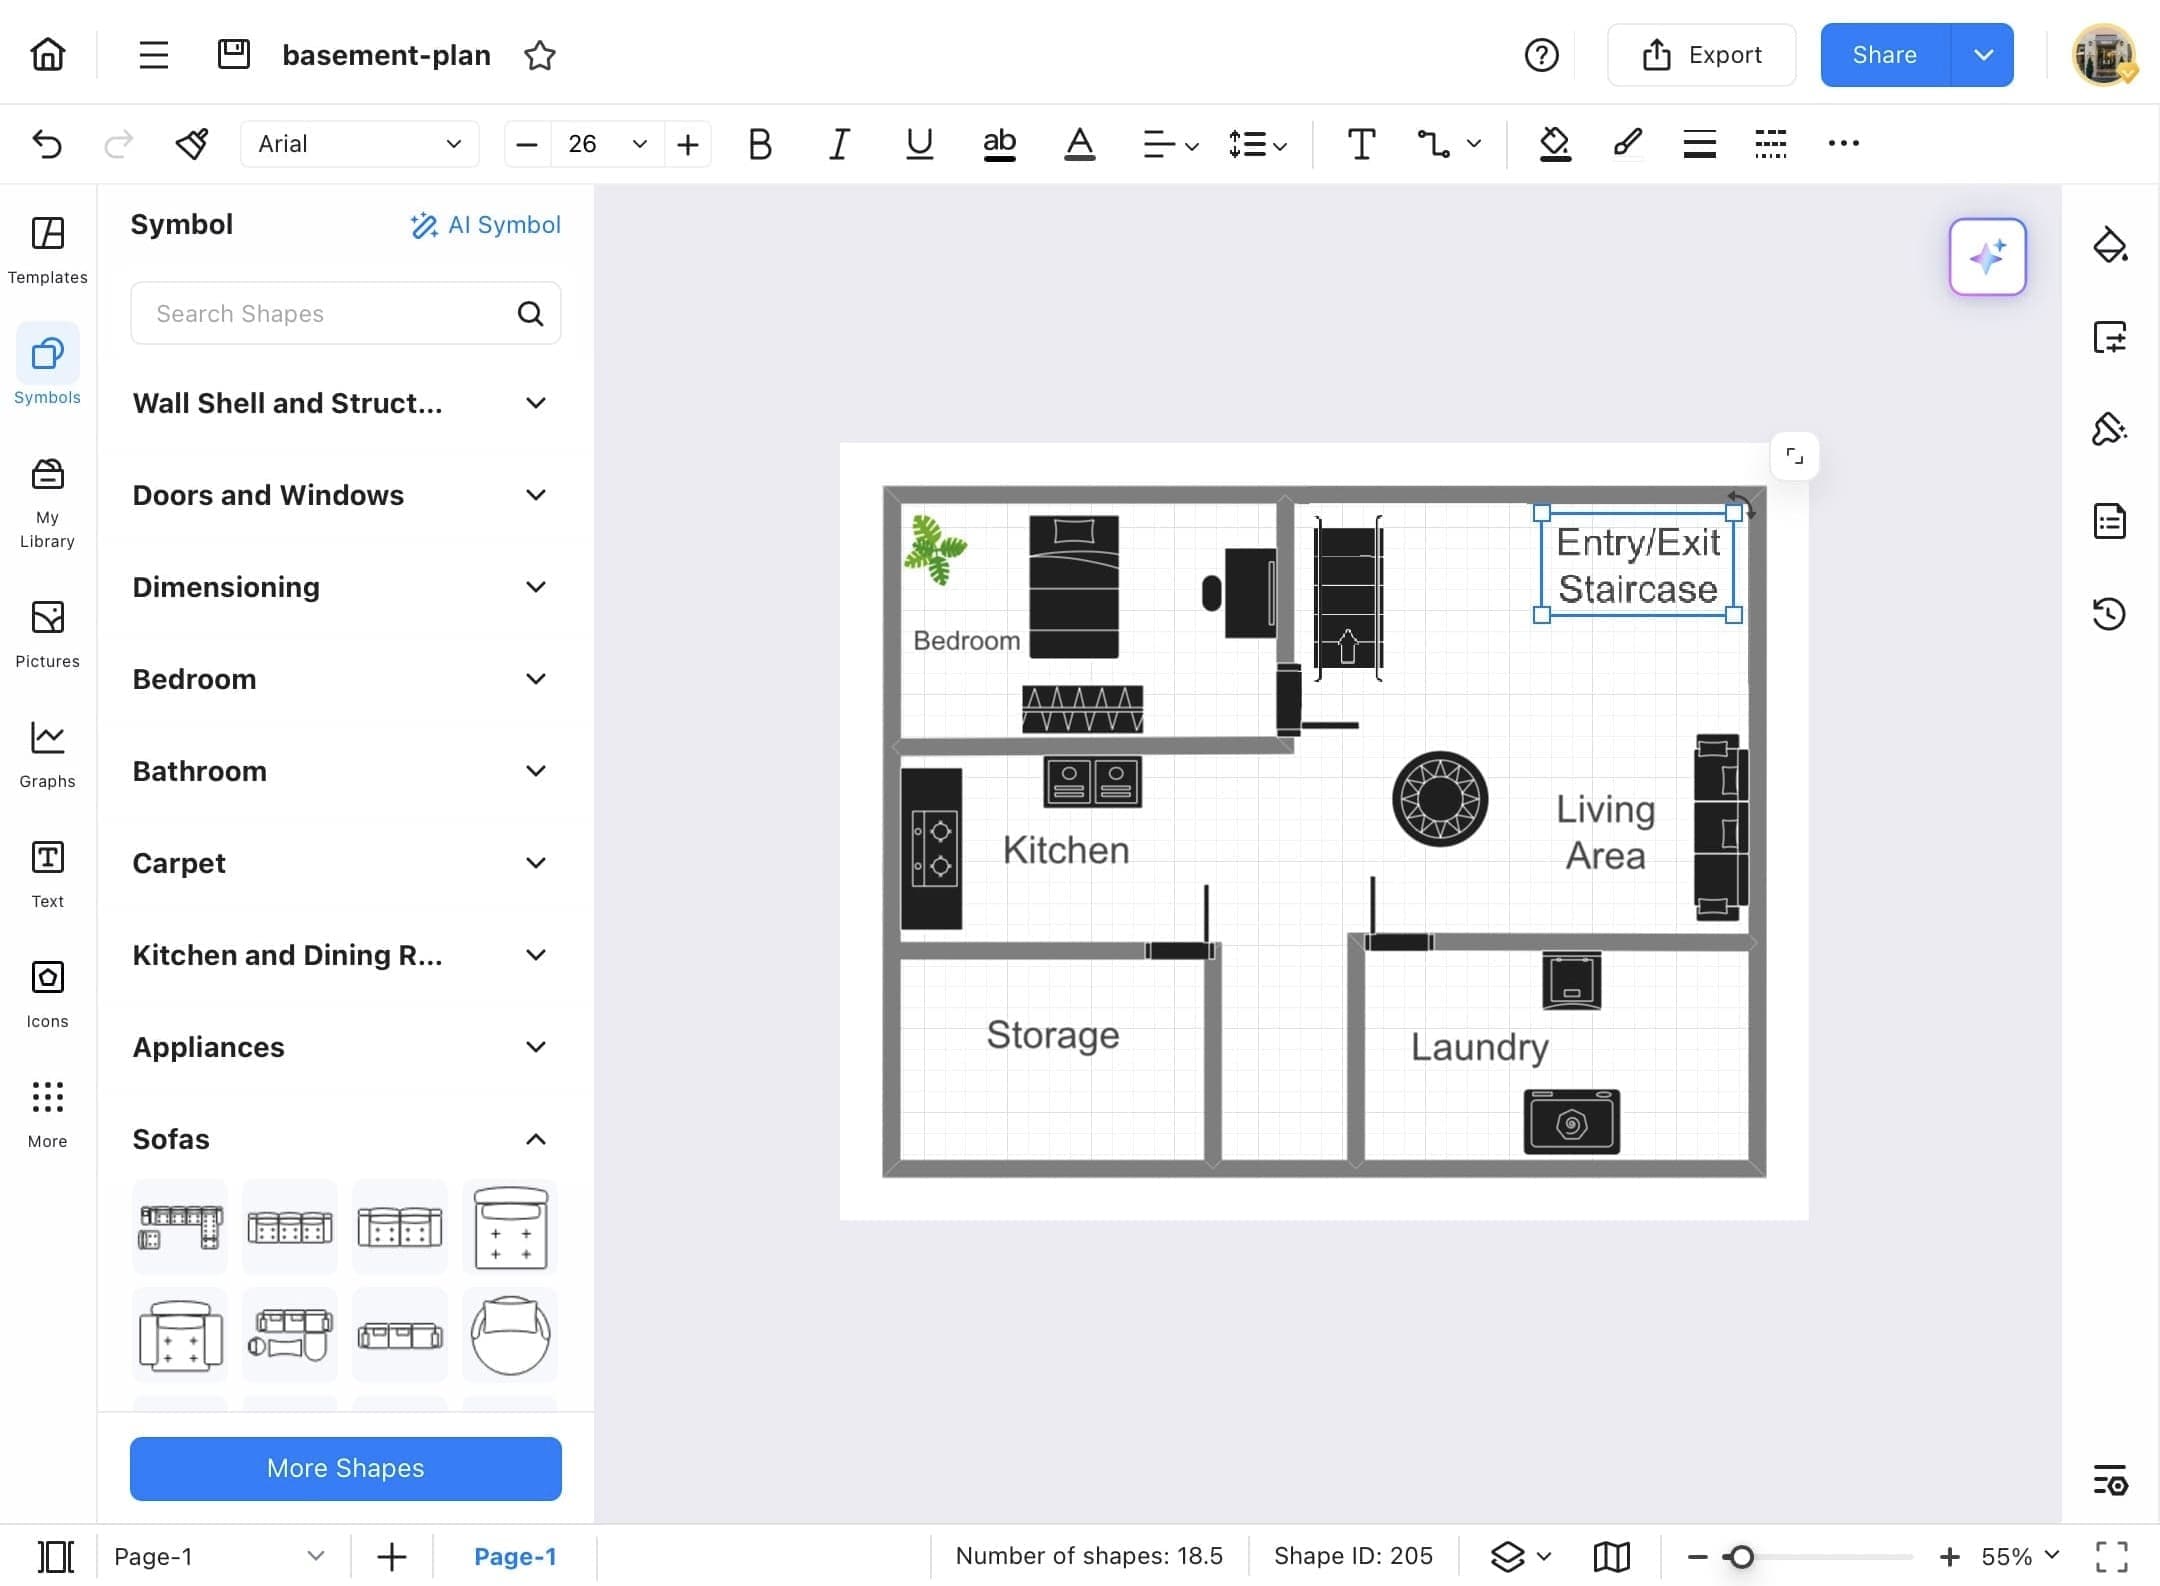
Step ❽
- The shapes are now ungrouped, now you can move each at a time.
Replace Shapes
Instead of removing the shape from the diagram, adding another shape and doing all adjustments and spacing again. Just replace the shape and add another so that you do not have to make all adjustments and spacing again. Here are the steps to replace the shape.
Step ❶
- Open EdrawMax on your device
Step ❷
- Access the file from the local storage or the cloud storage of EdrawMax.

Step ❸
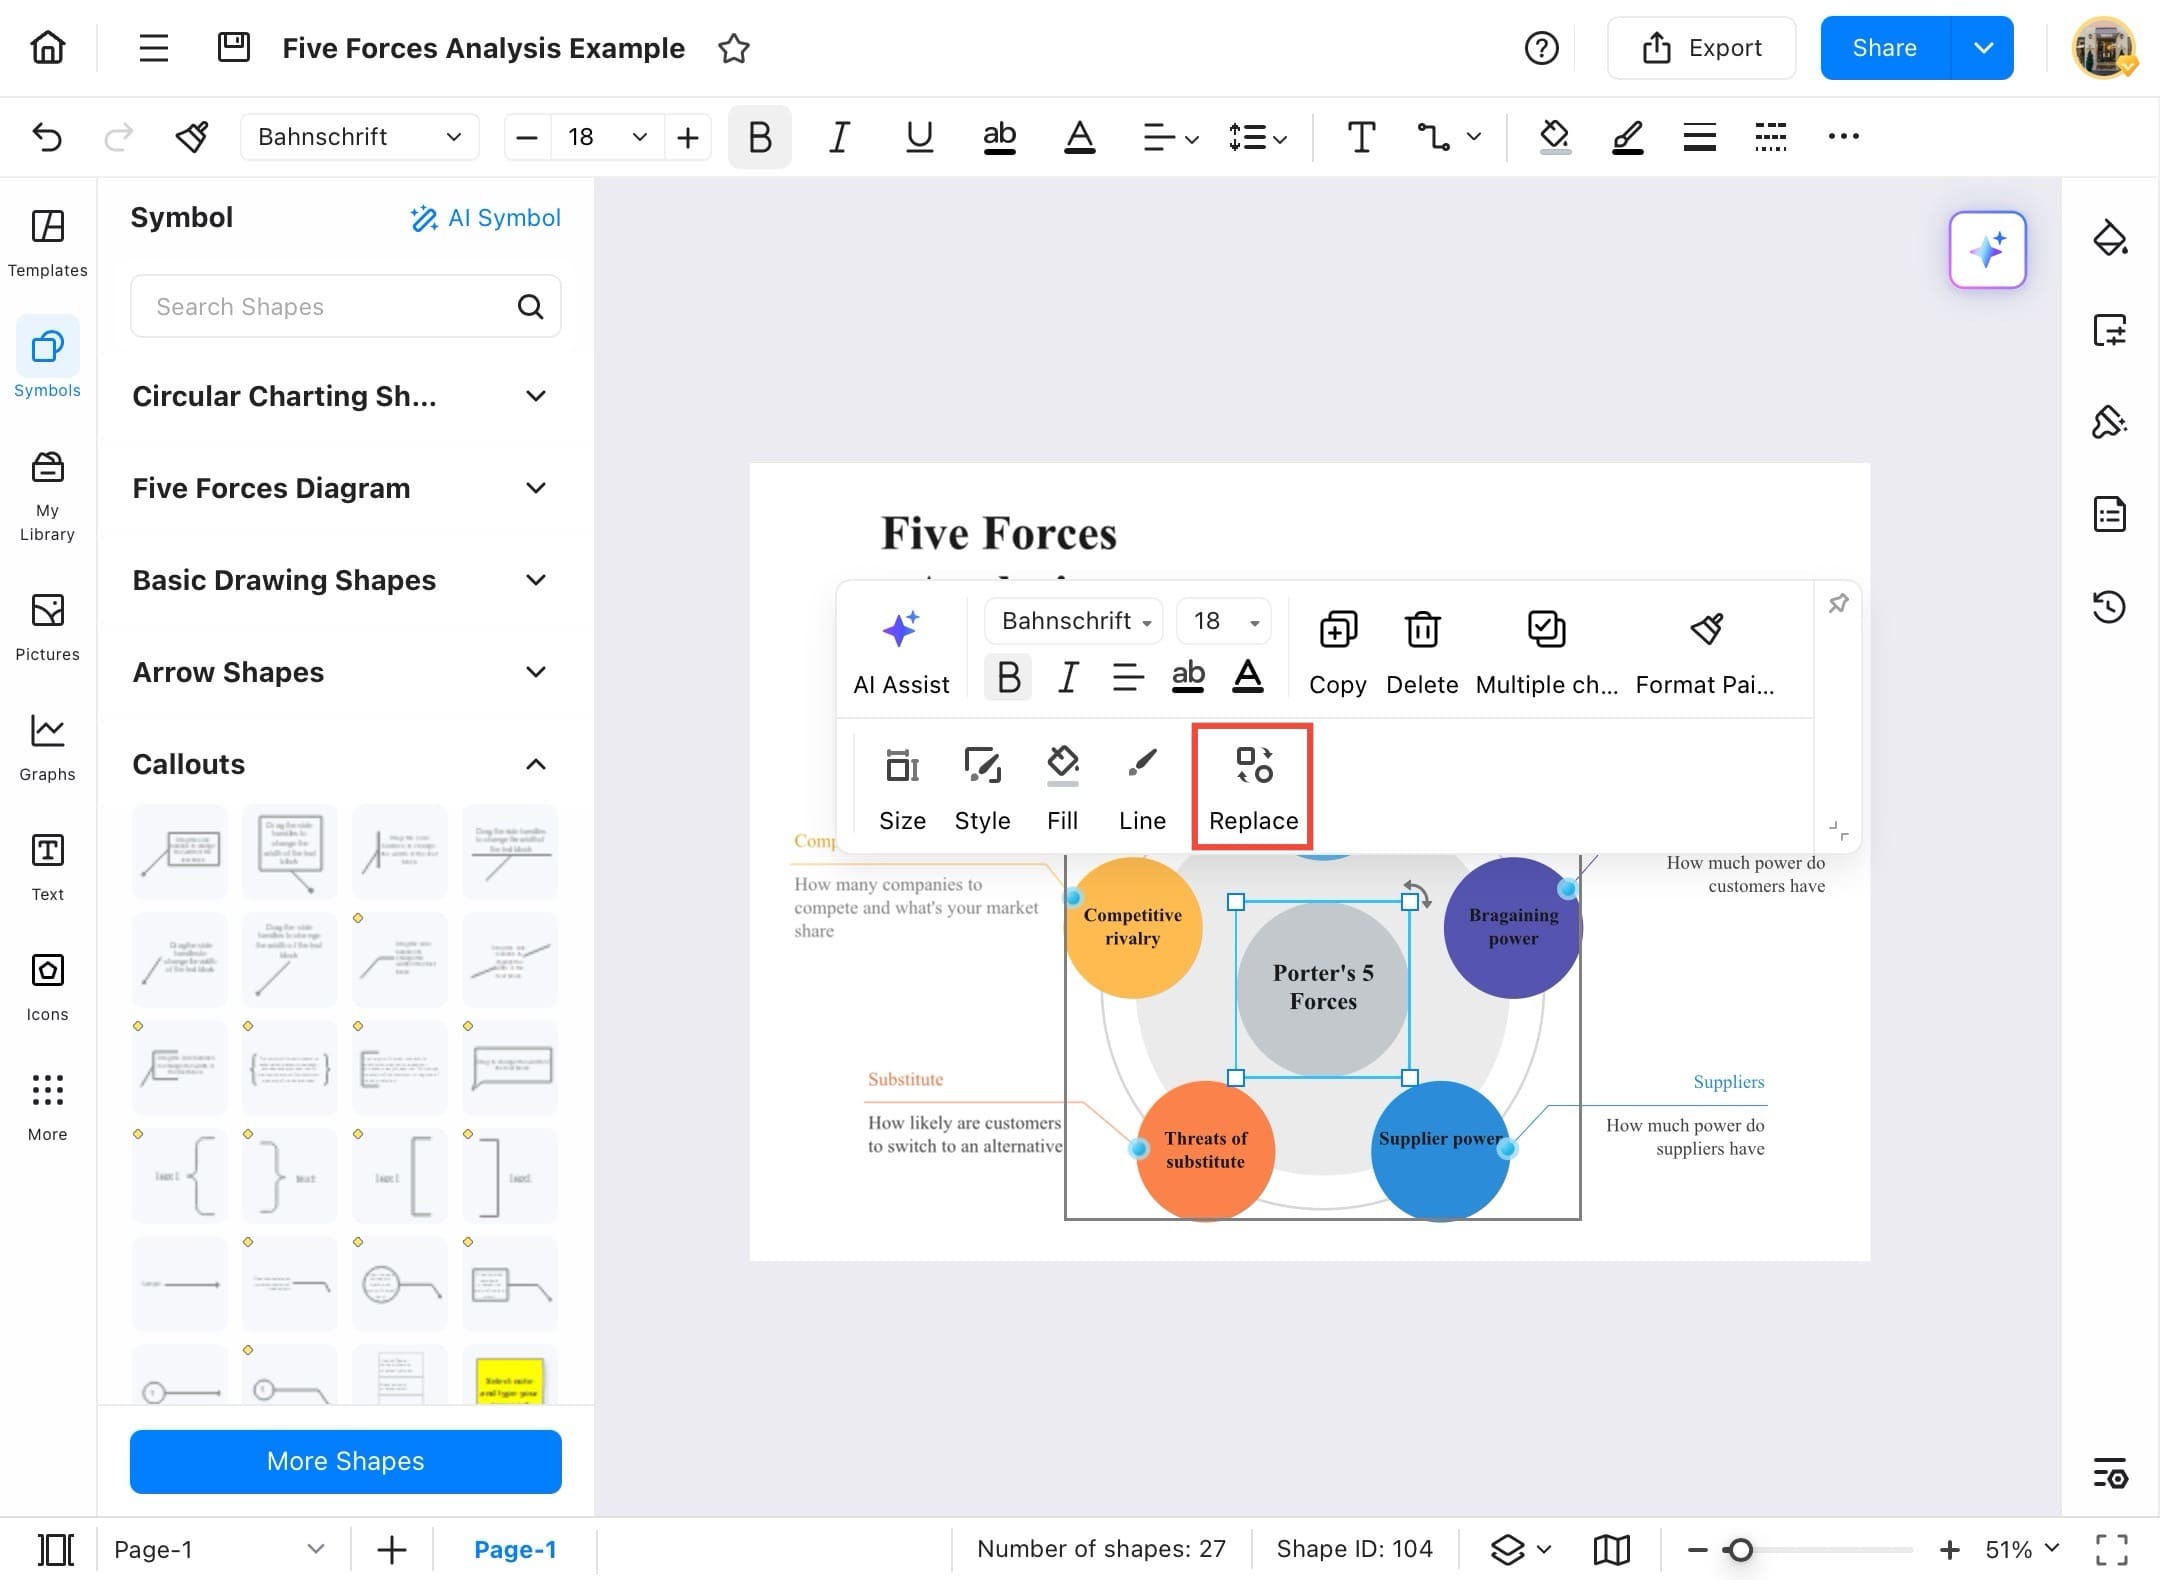
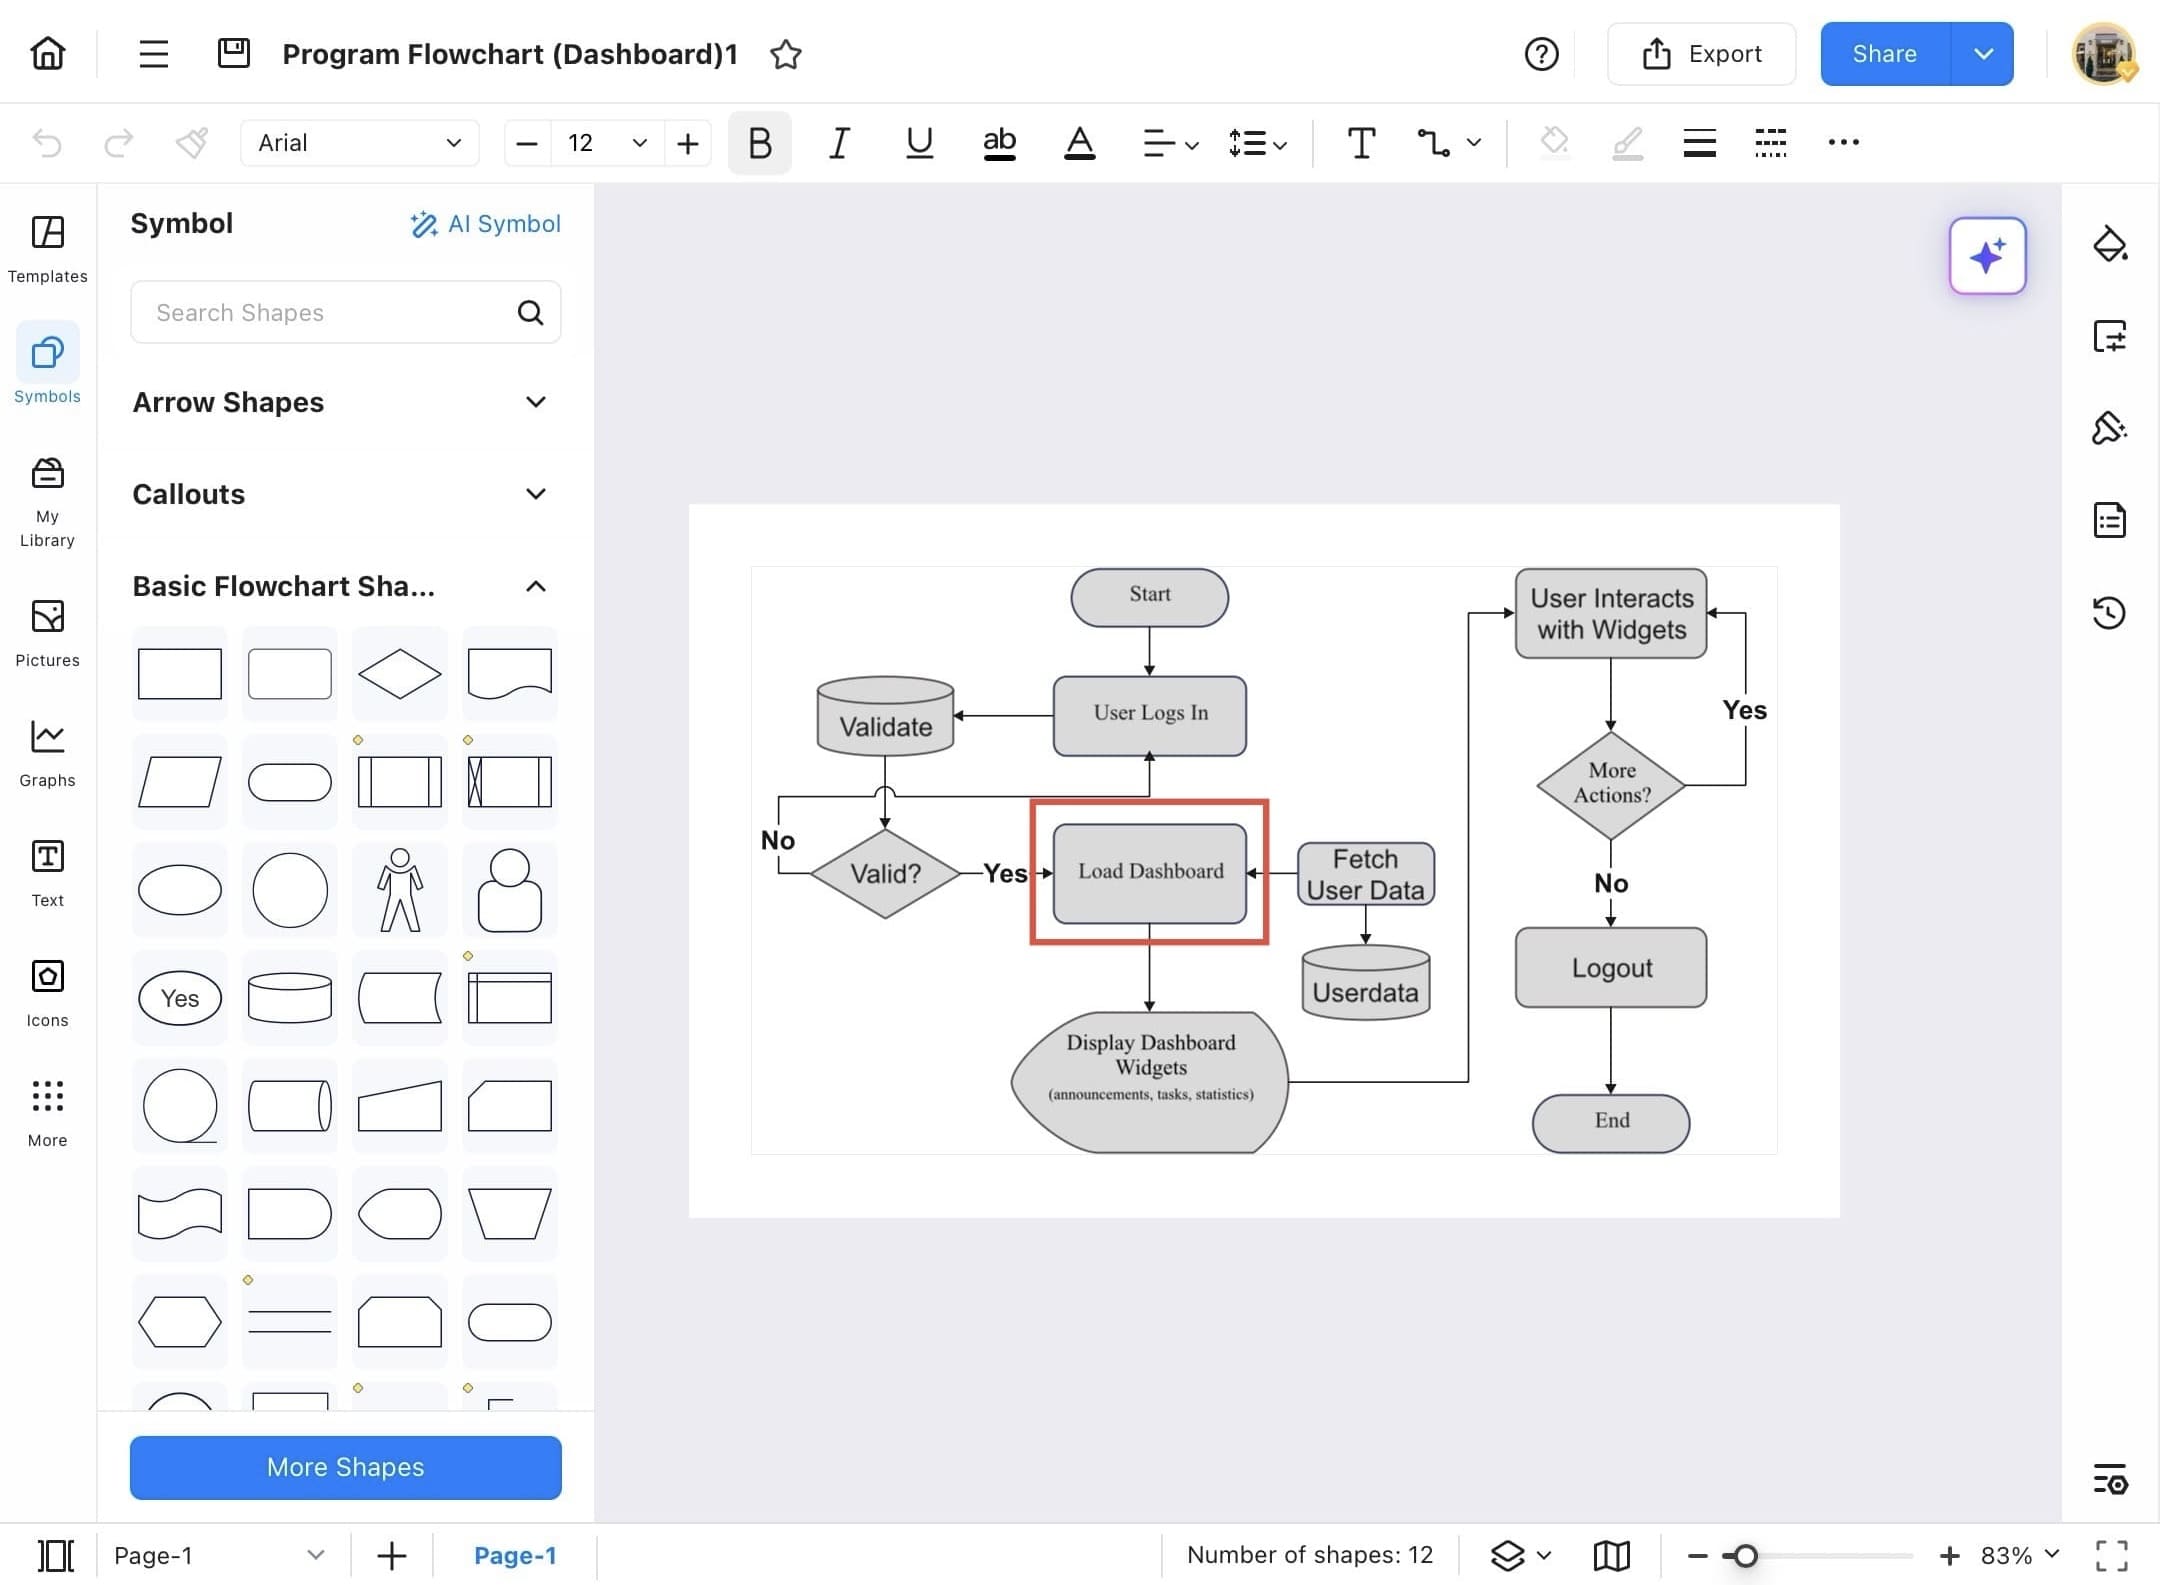
- When the file opens, tap on a shape that you want to replace.

Step ❹
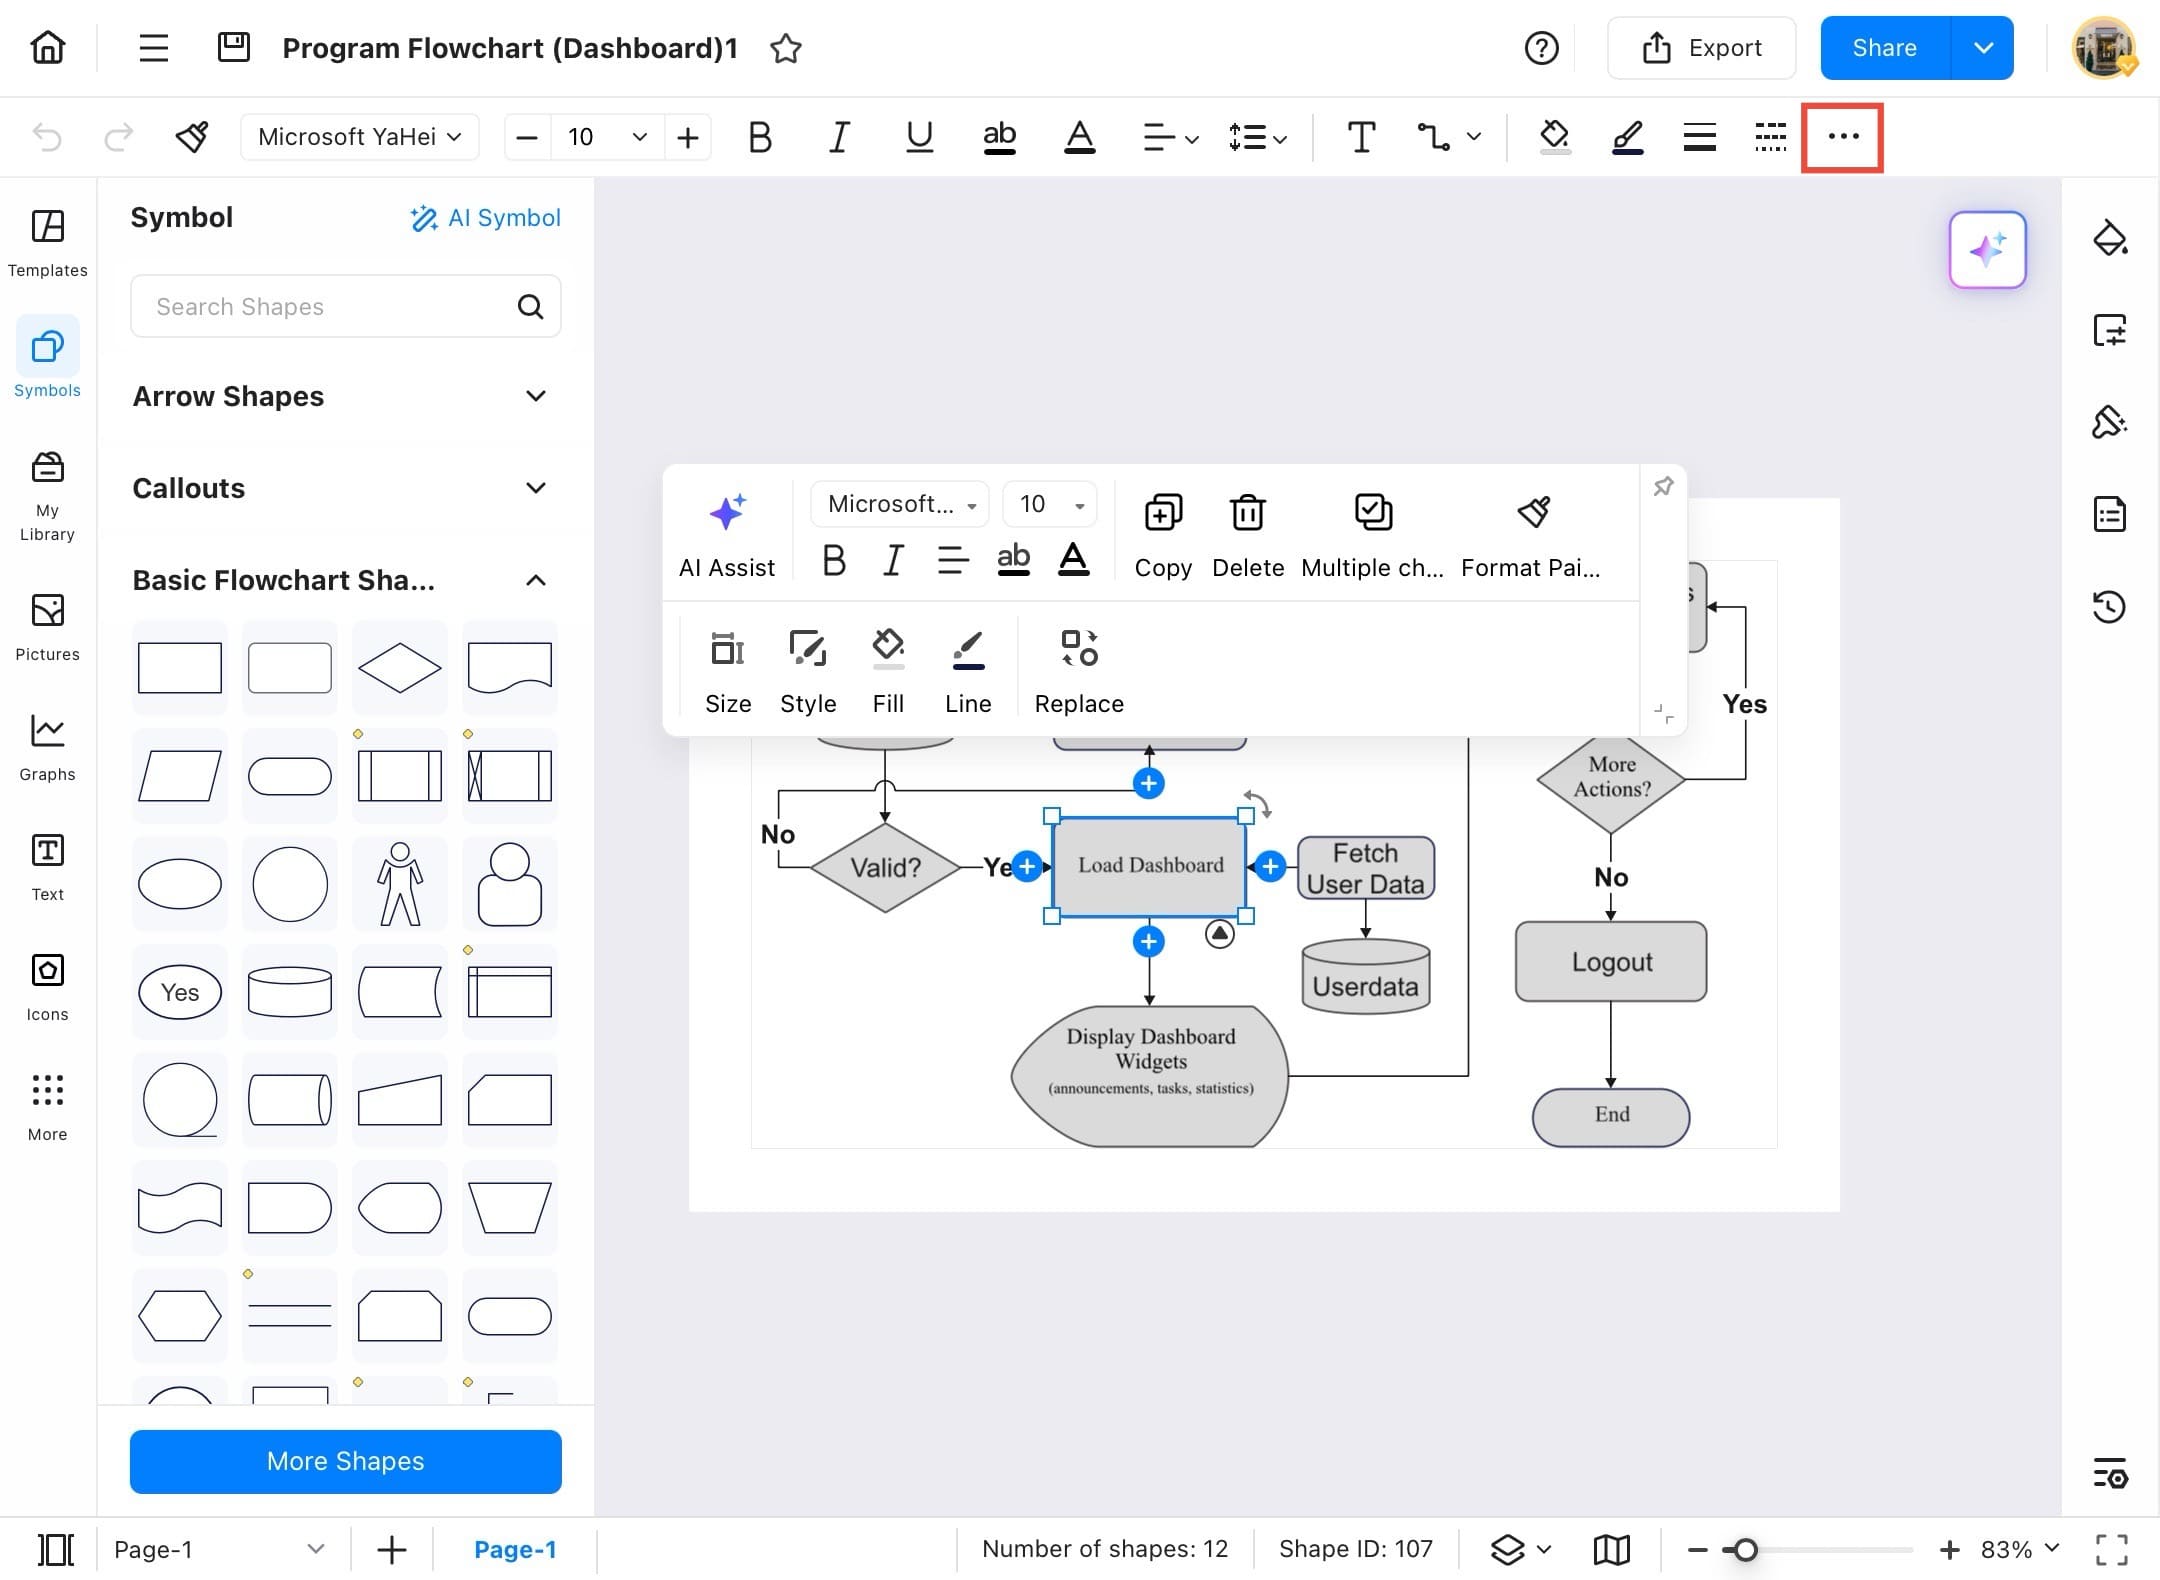
- Select Replace from the precision tool
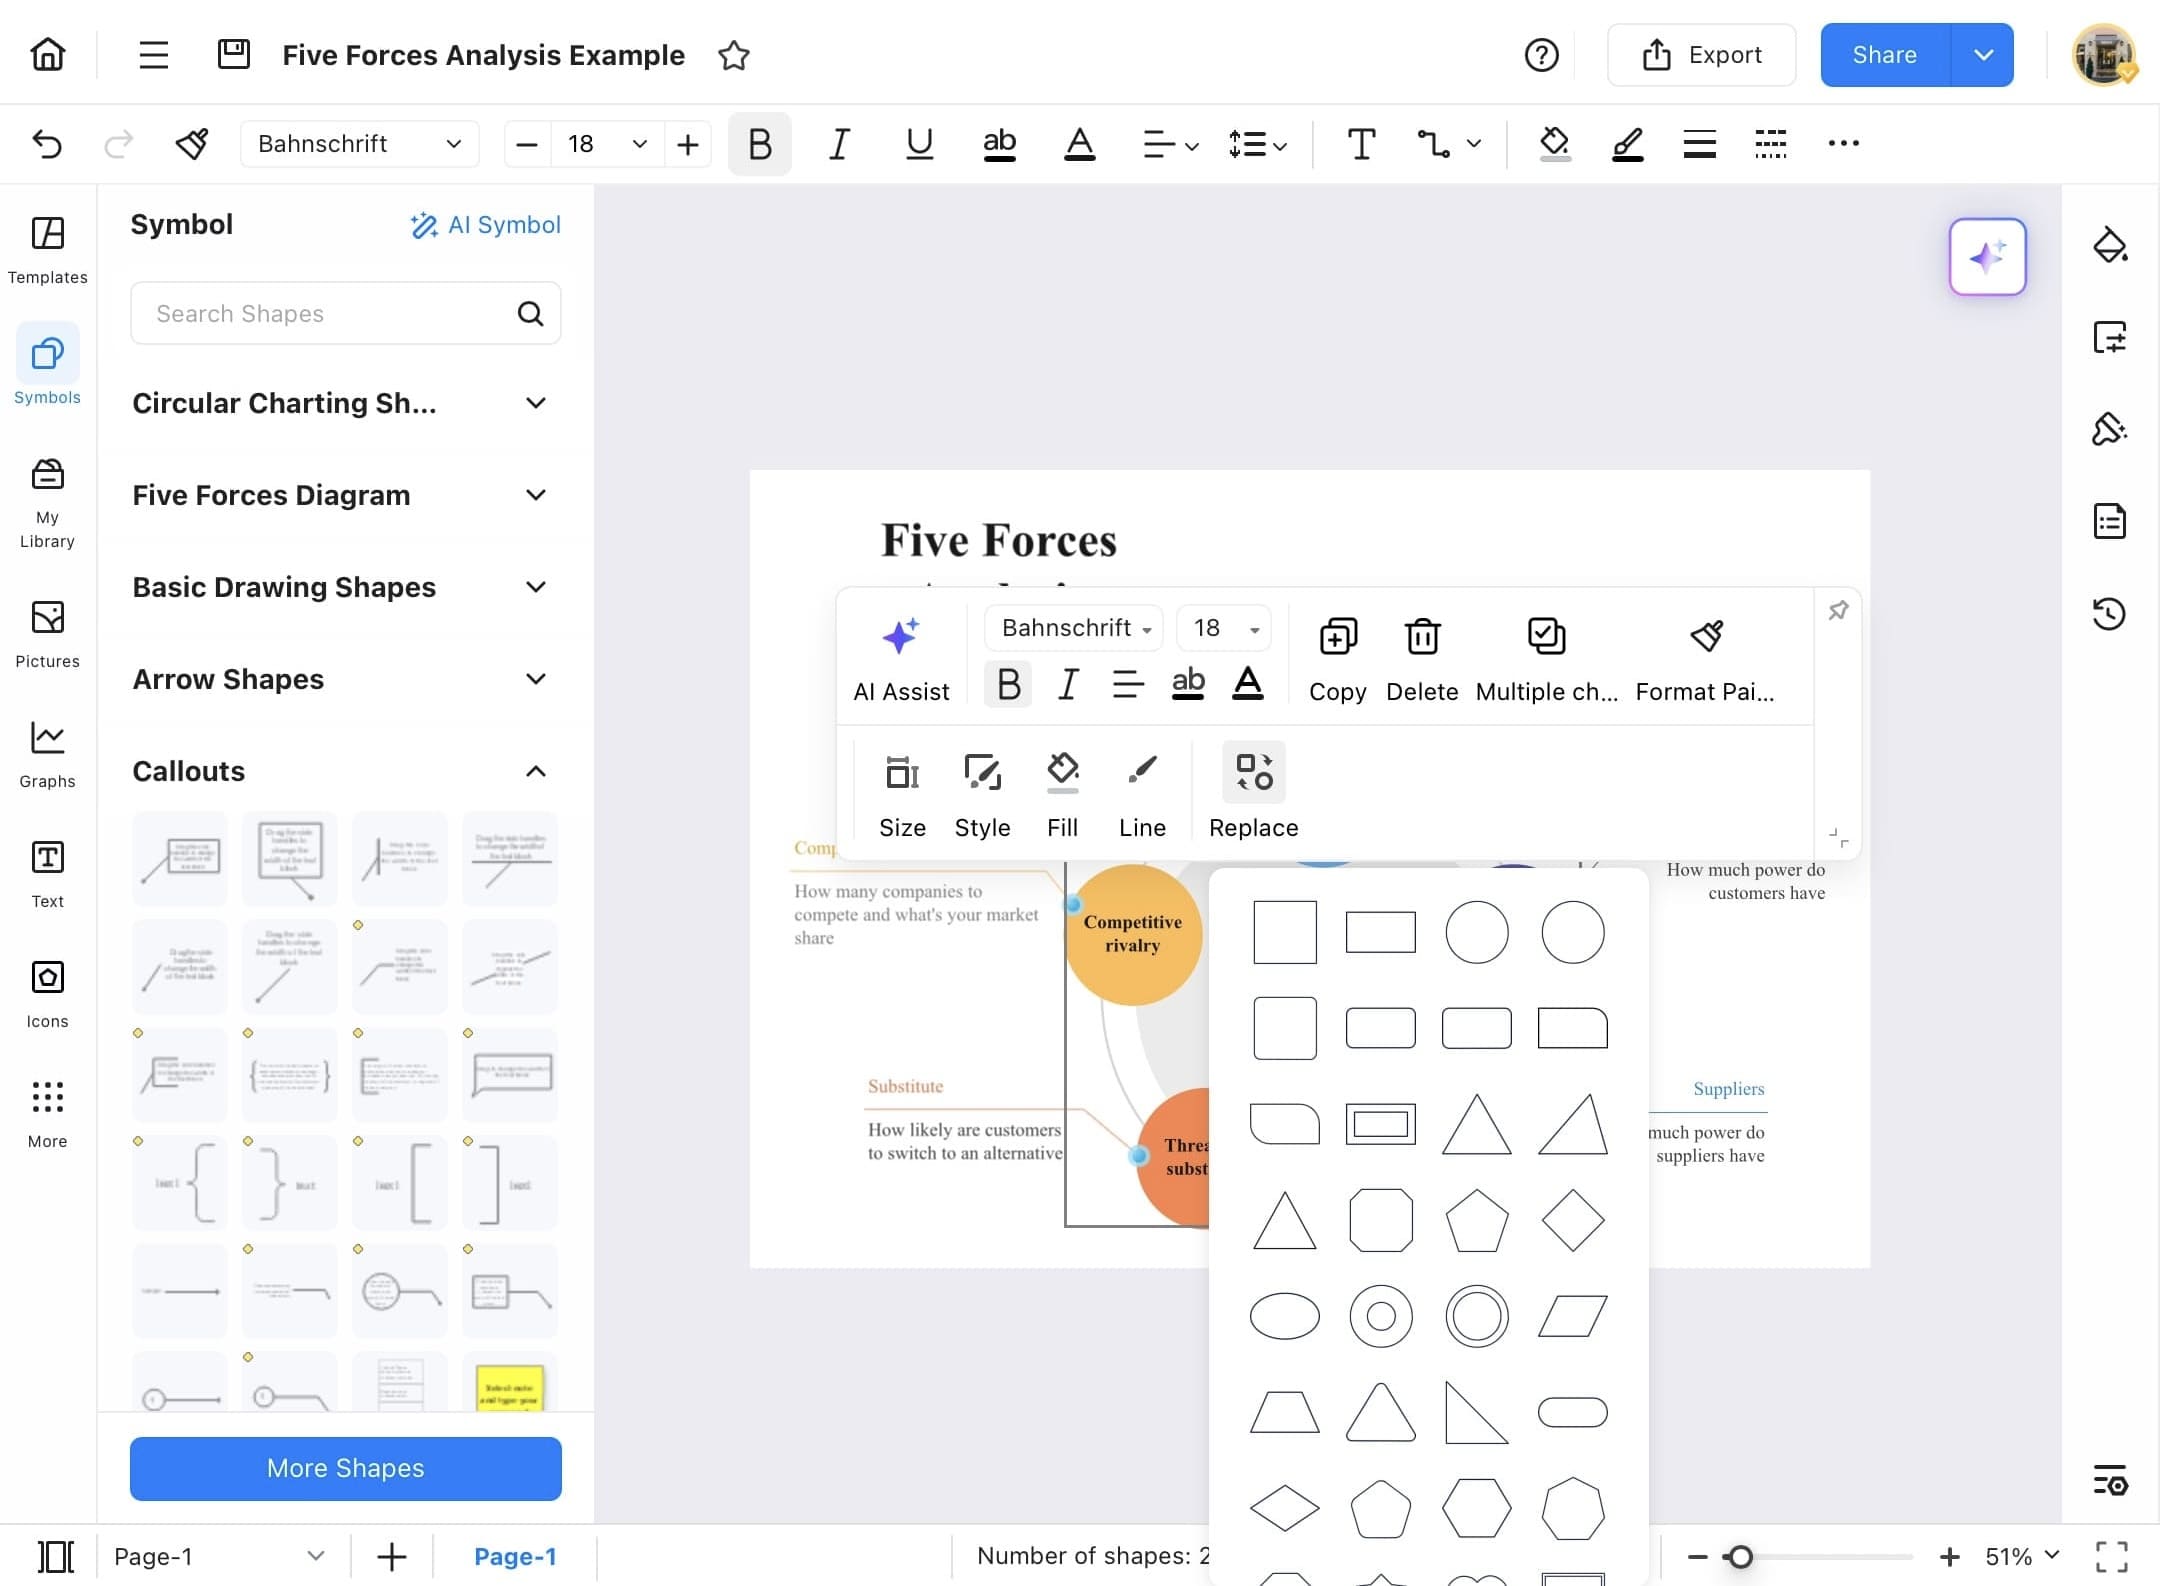
Step ❺
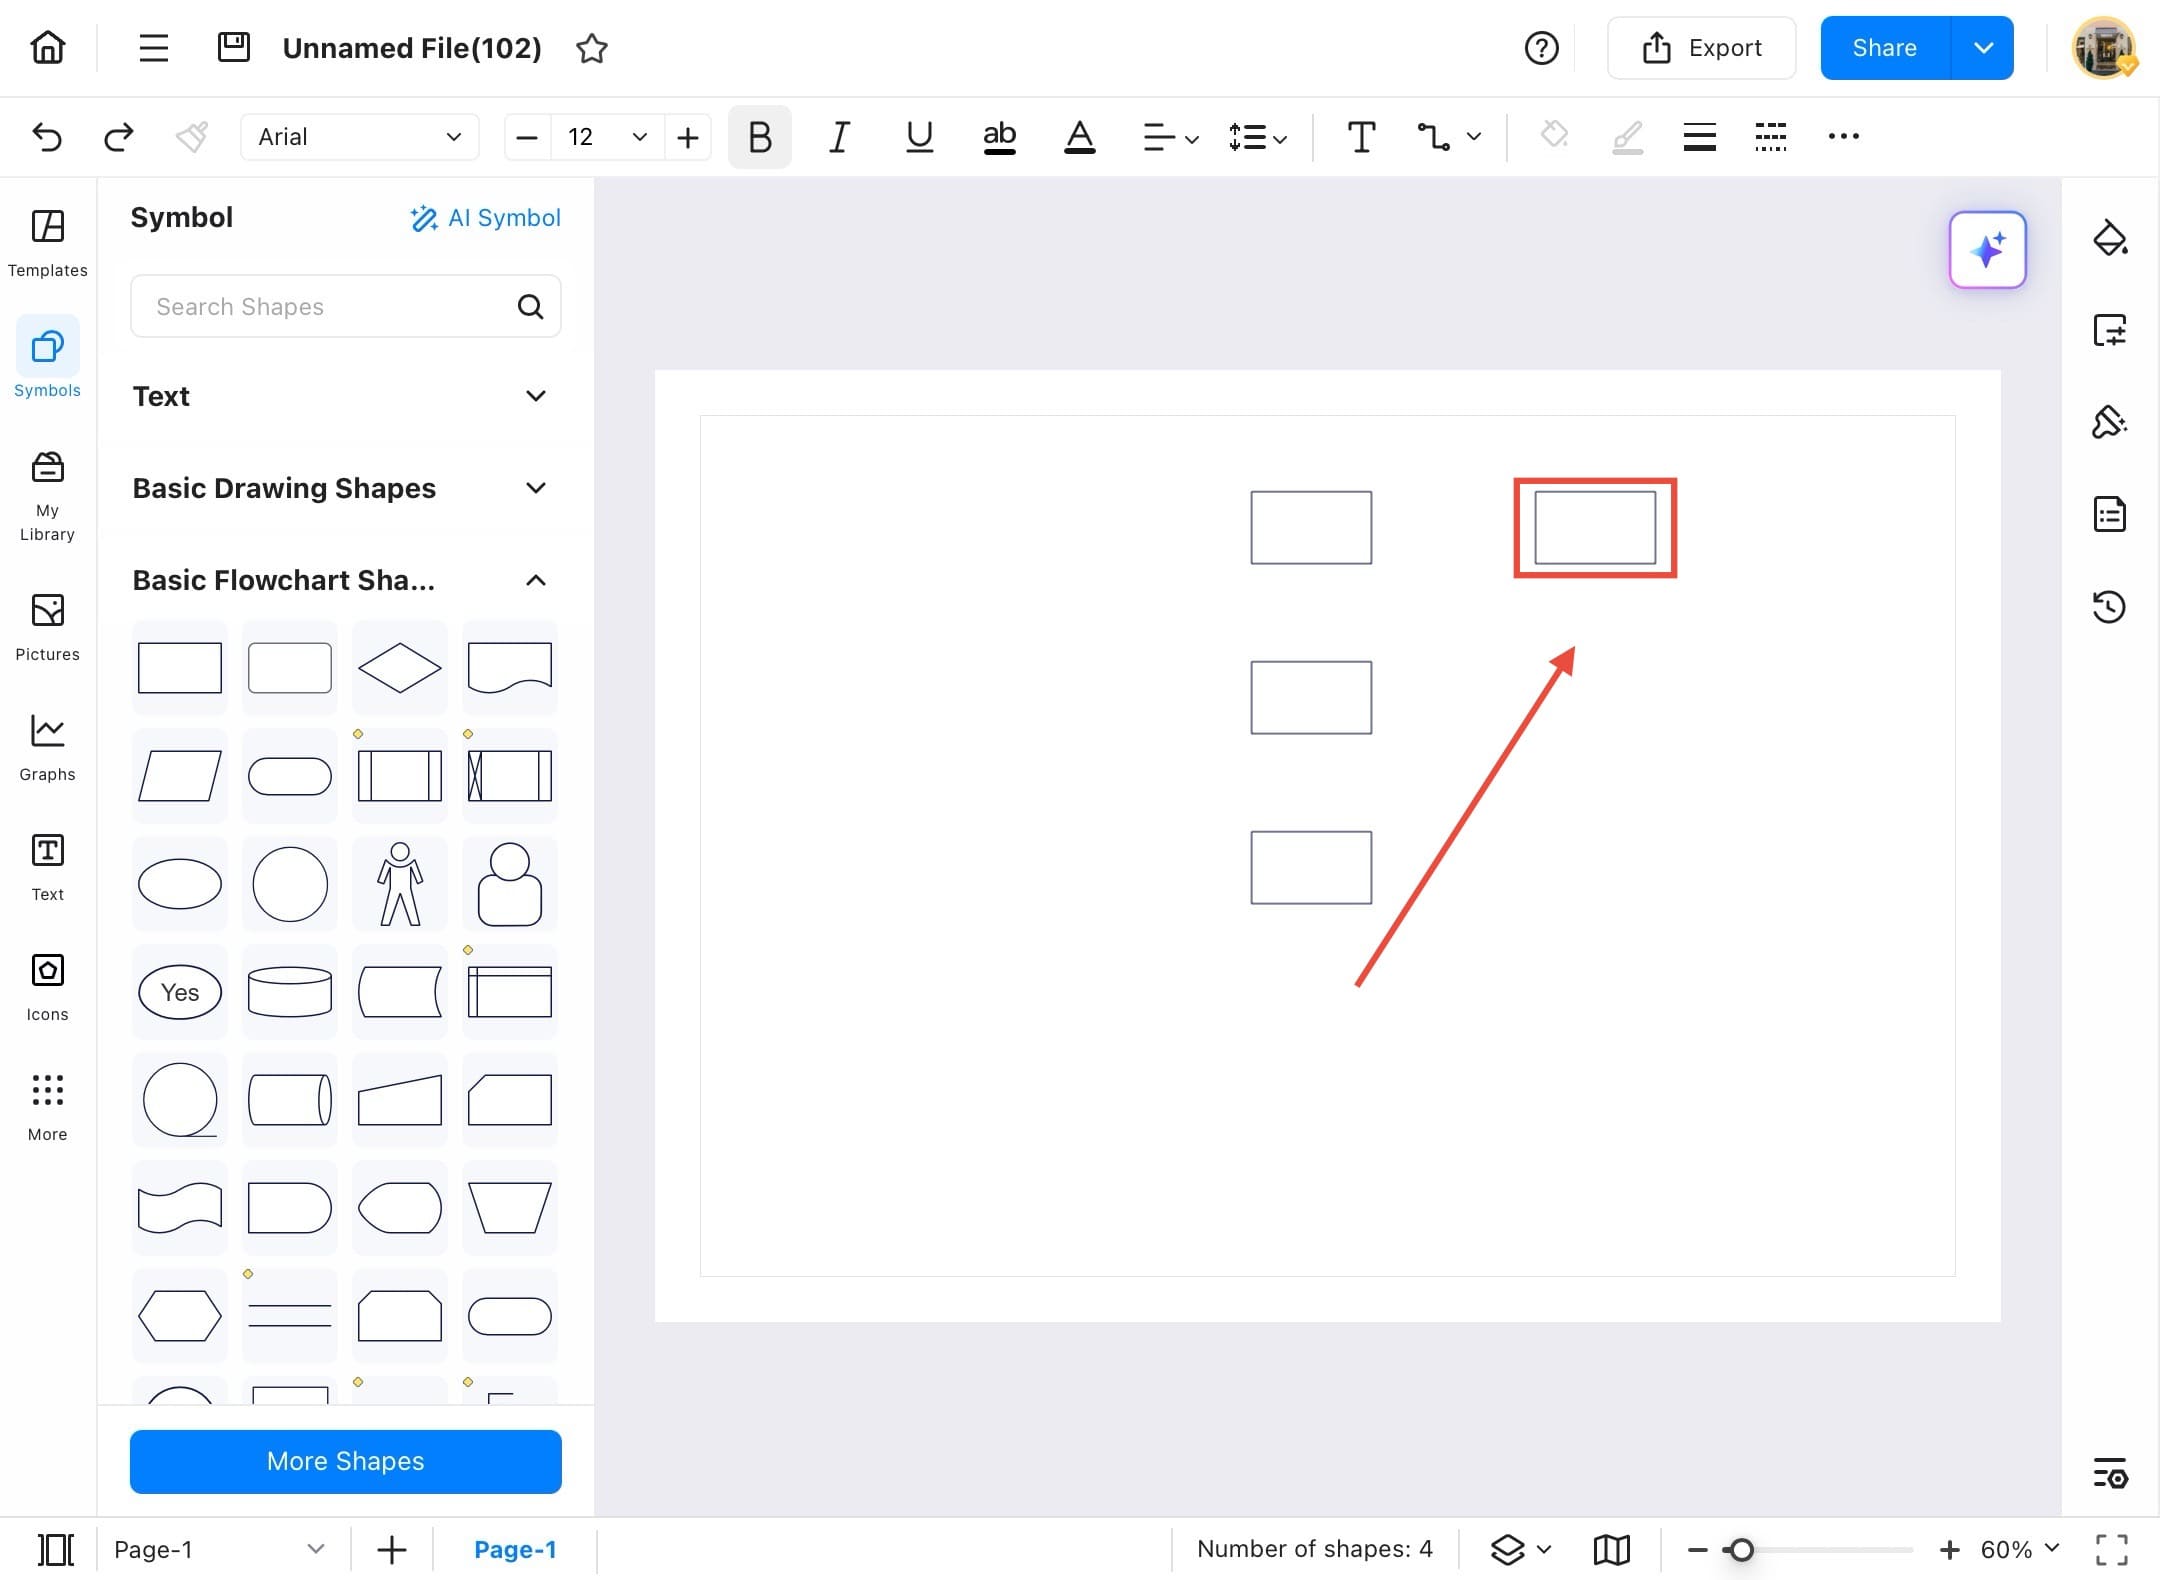
- Now, choose the shape you want from the list, and it will be automatically replaced with that.
Step ❻
- The selected shape is now replaced with the shape that you have chosen from the list.
Shape Operation: Lock and Unlock Shapes
Locking shapes is very helpful to avoid unintentional edits. When the shape is locked, it can not be moved, replaced, resized, rotated, or any kind of edit until it is unlocked. Below are the steps to lock and unlock shapes.
Step ❶
- Start EdrawMax on your tablet.
Step ❷
- Go to the Recent to open a file from the cloud space of EdrawMax.
- Or open the file from the local storage.
Step ❸
- When the file opens, tap the shape in which you do not want unintentional edits.
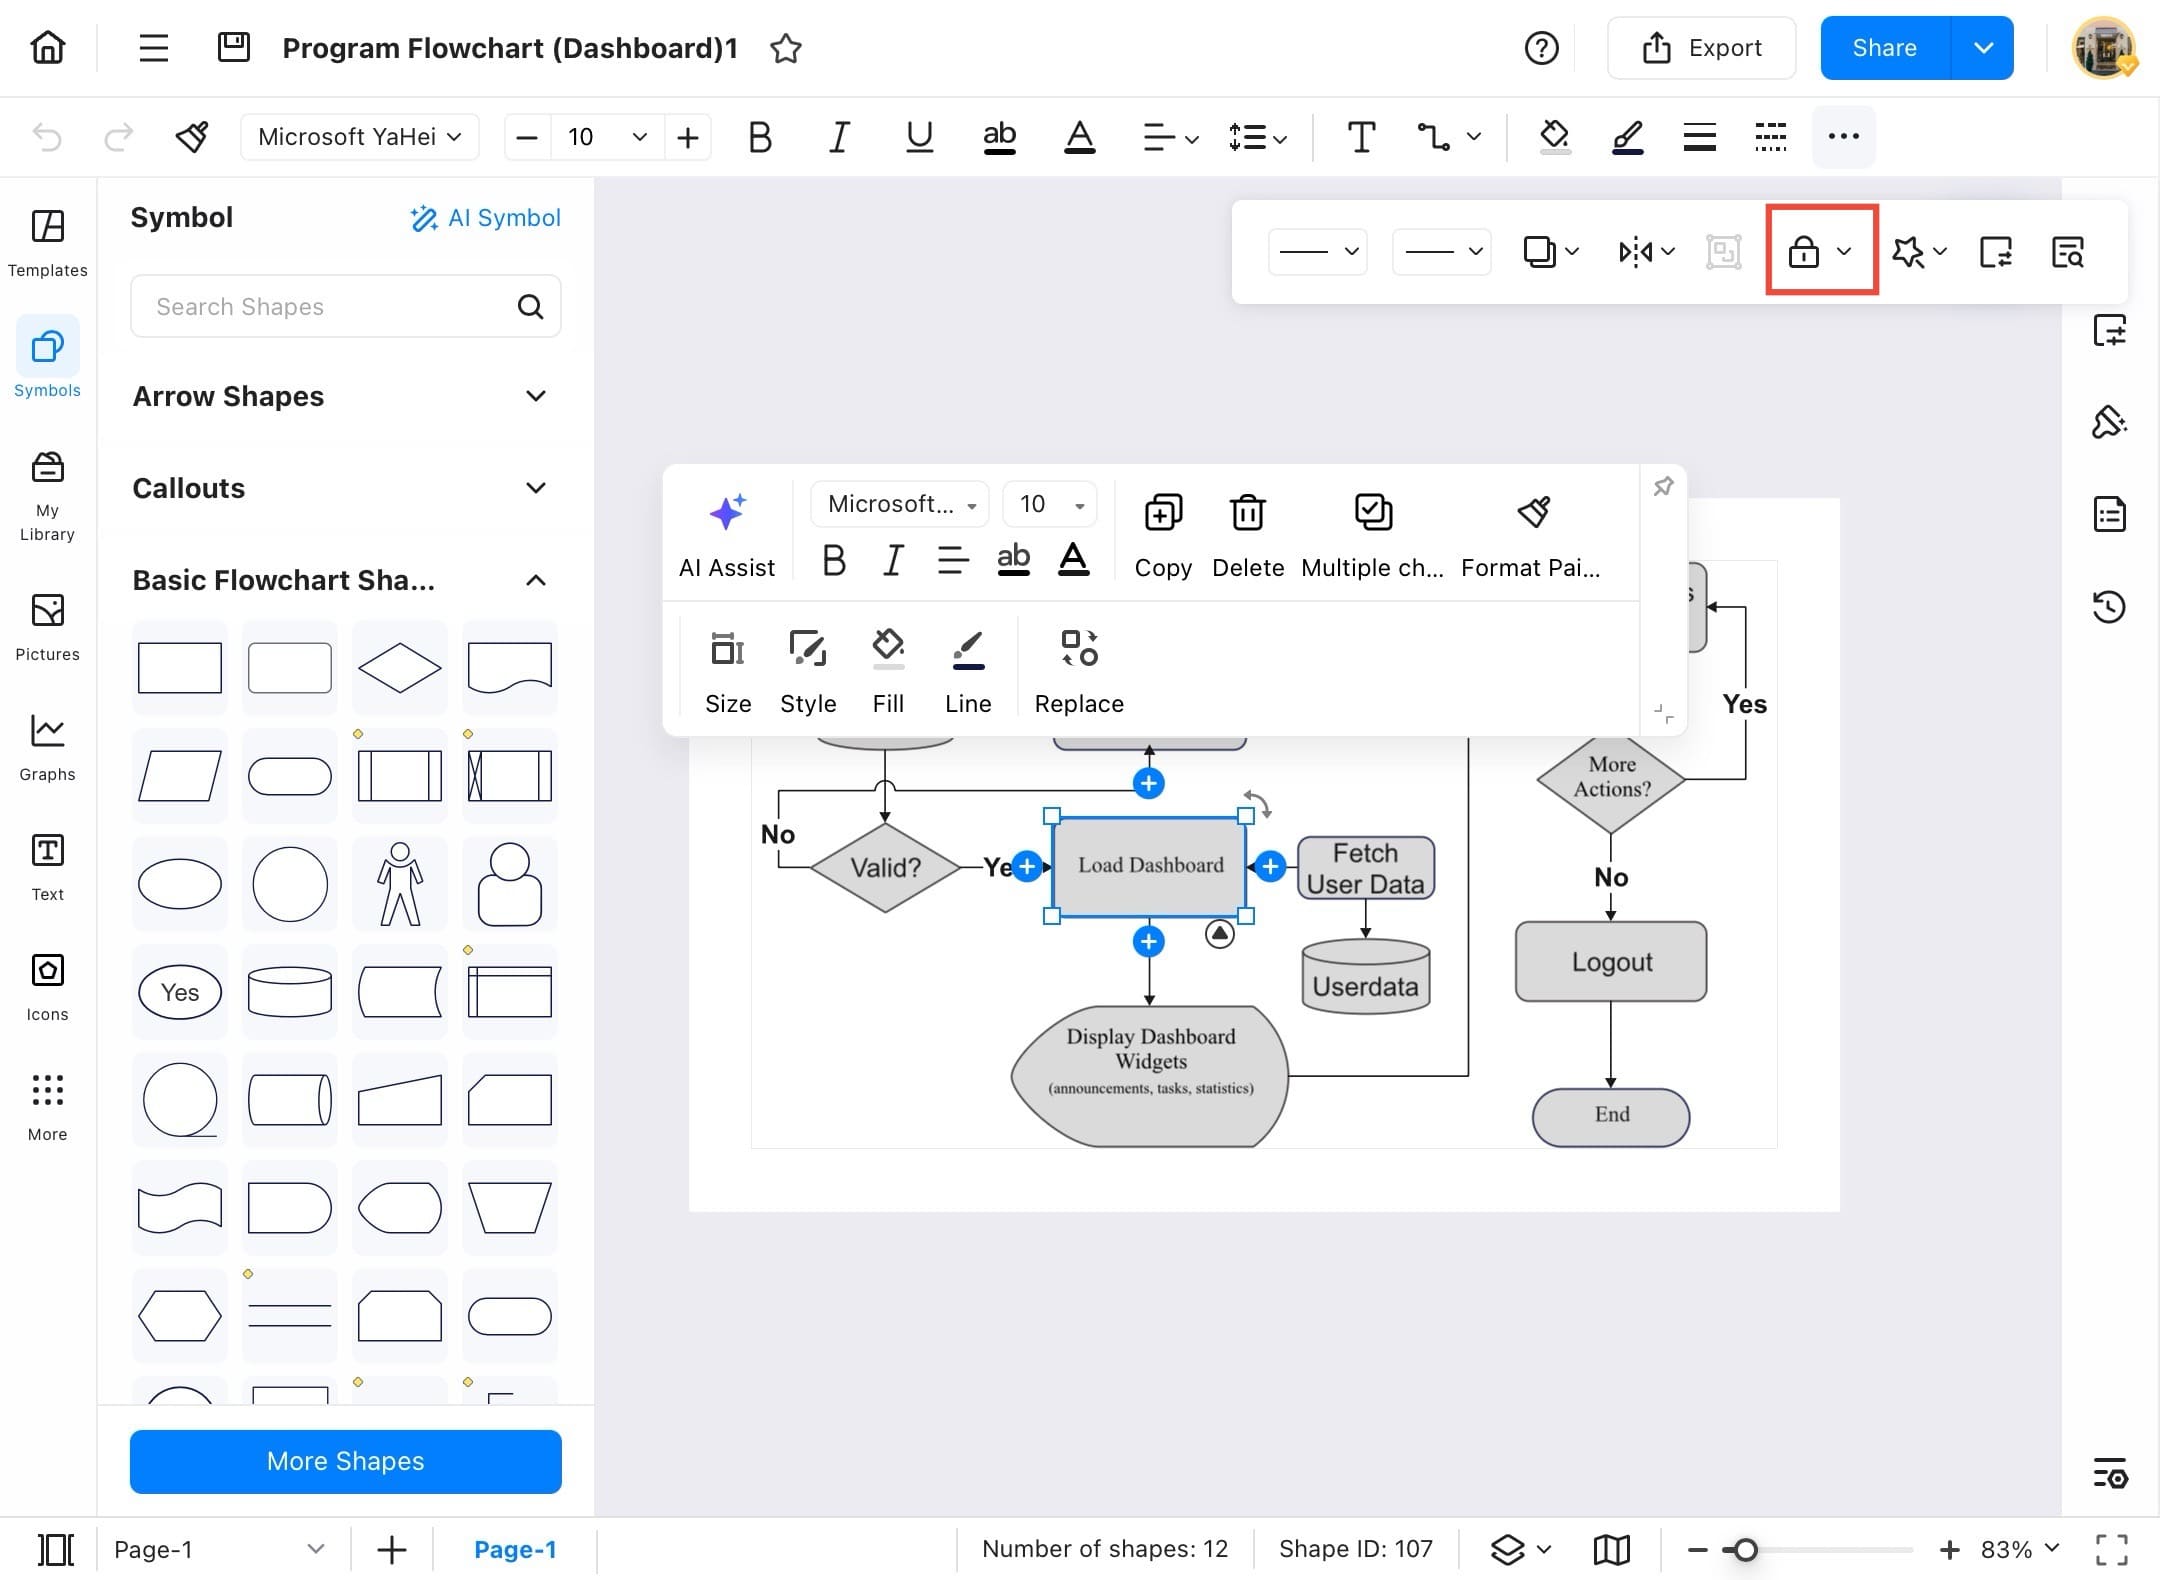
Step ❹
- Now, tap the three dots at the top of the quick access toolbar to find the lock option.
Step ❺
- Tap on the lock icon from the open menu to lock the selected shape.
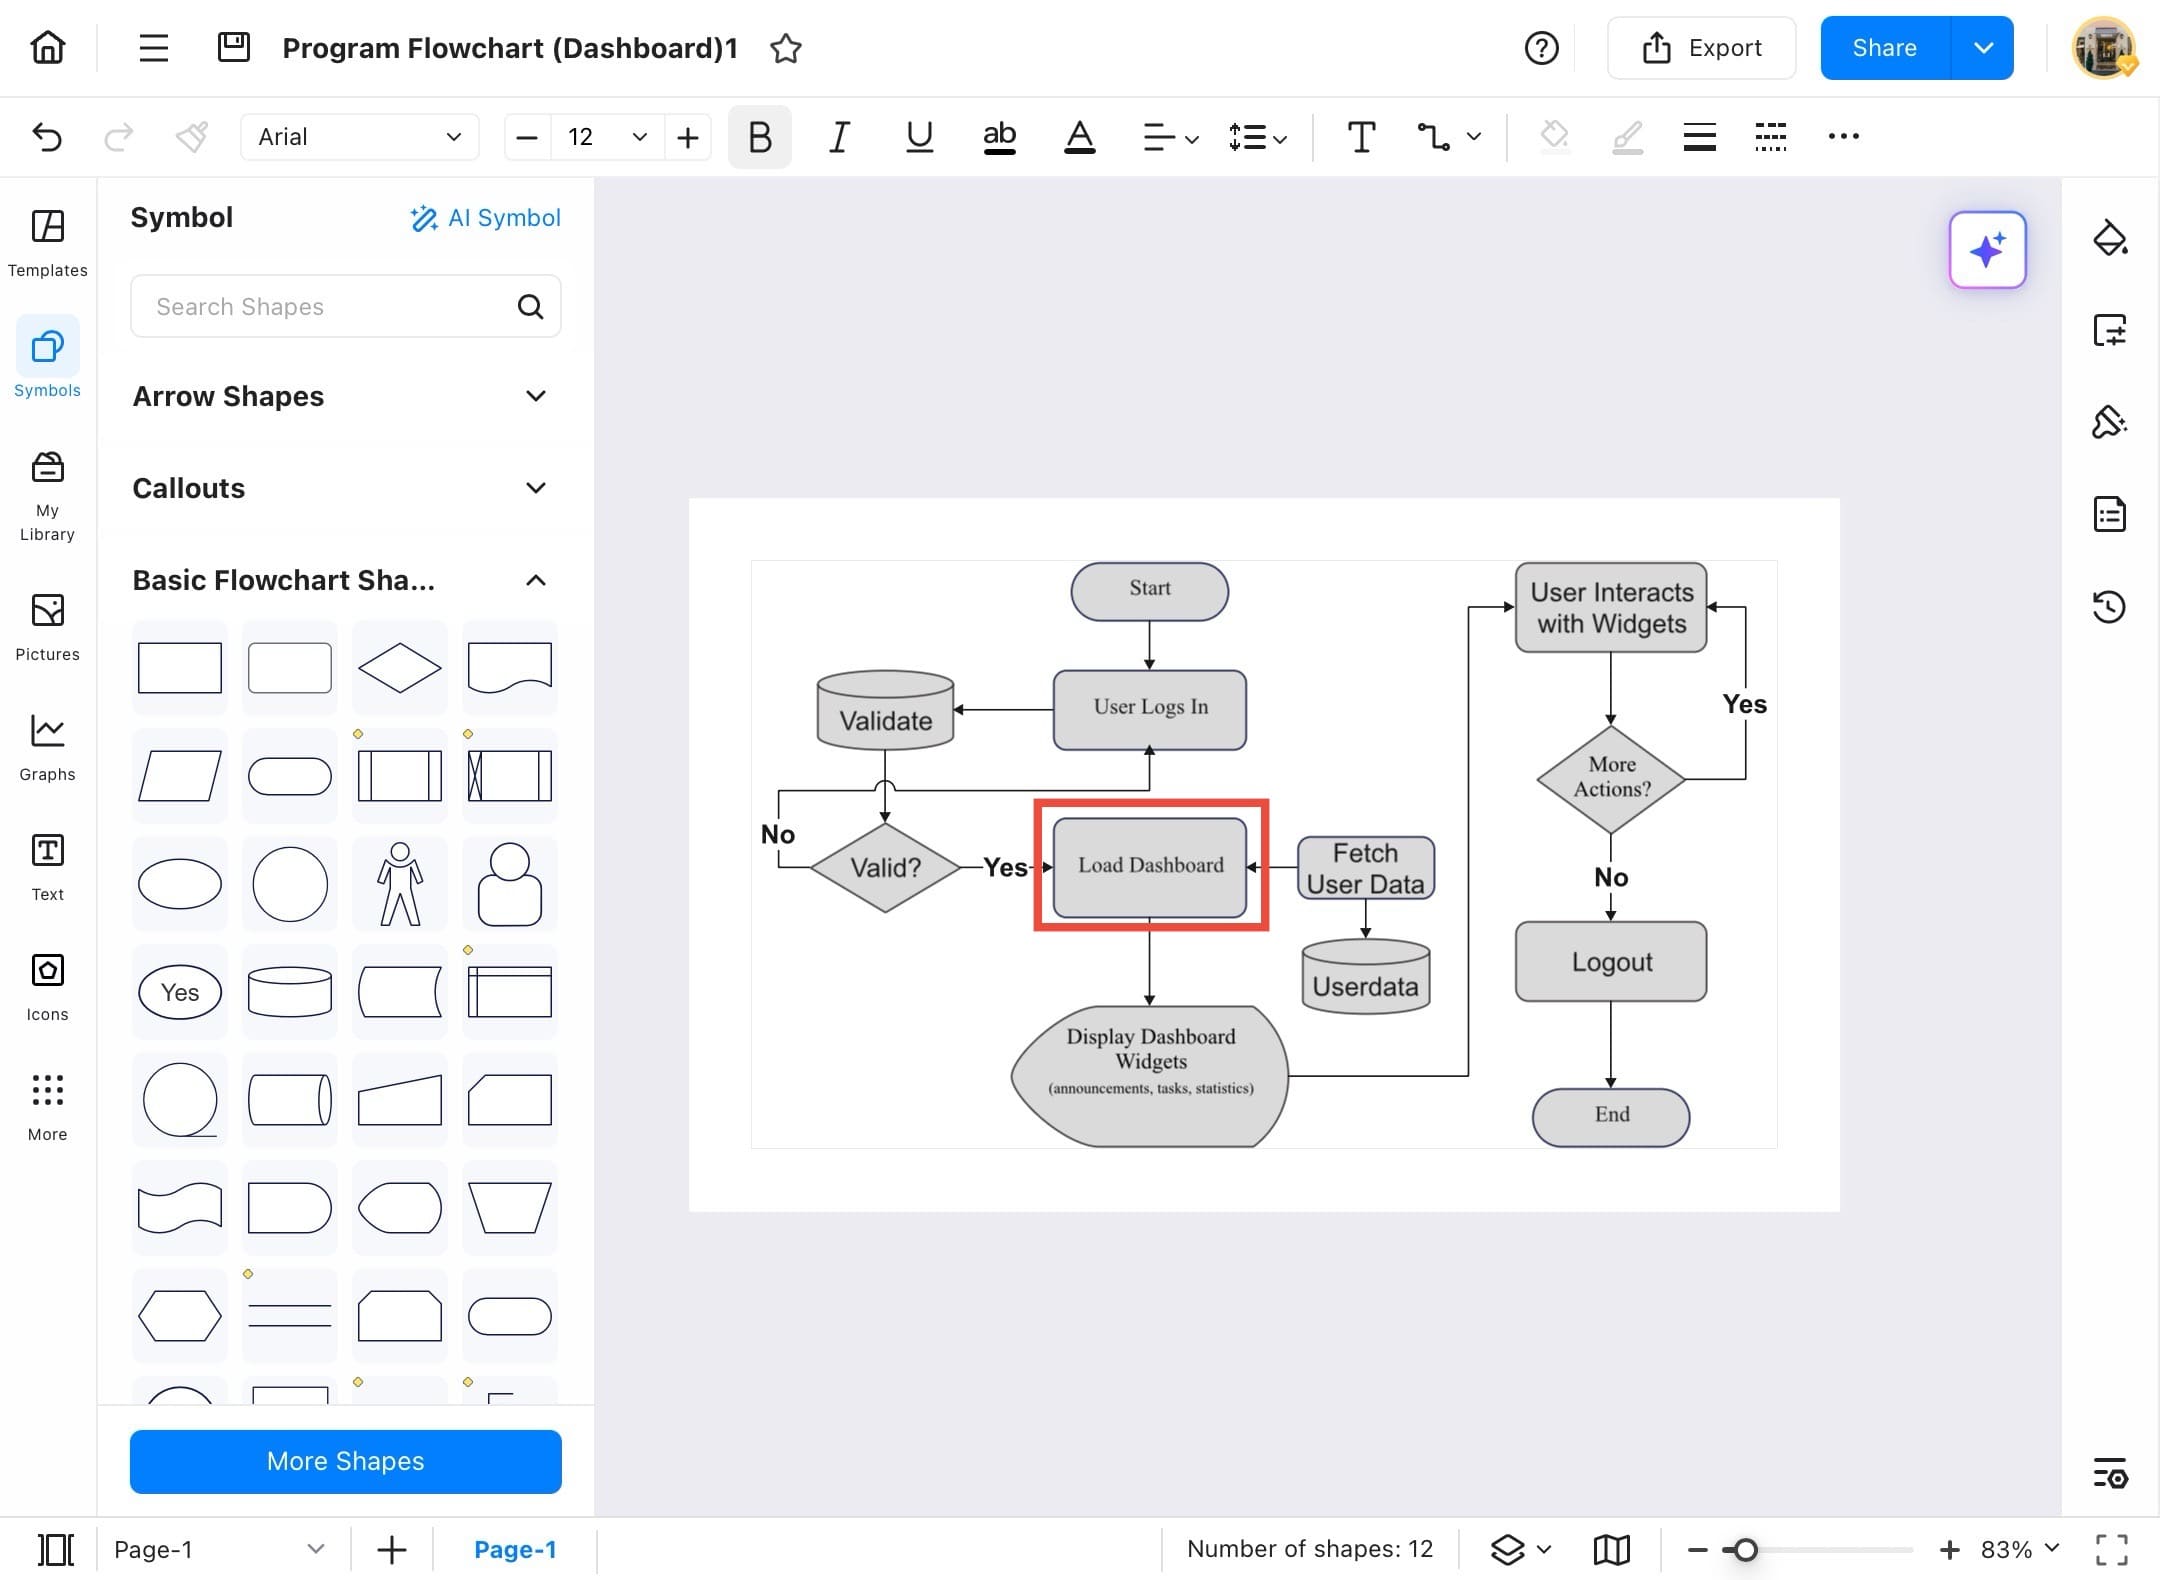
Step ❻
- The shape is now locked; it can not be moved or edited until it is unlocked

Step ❼
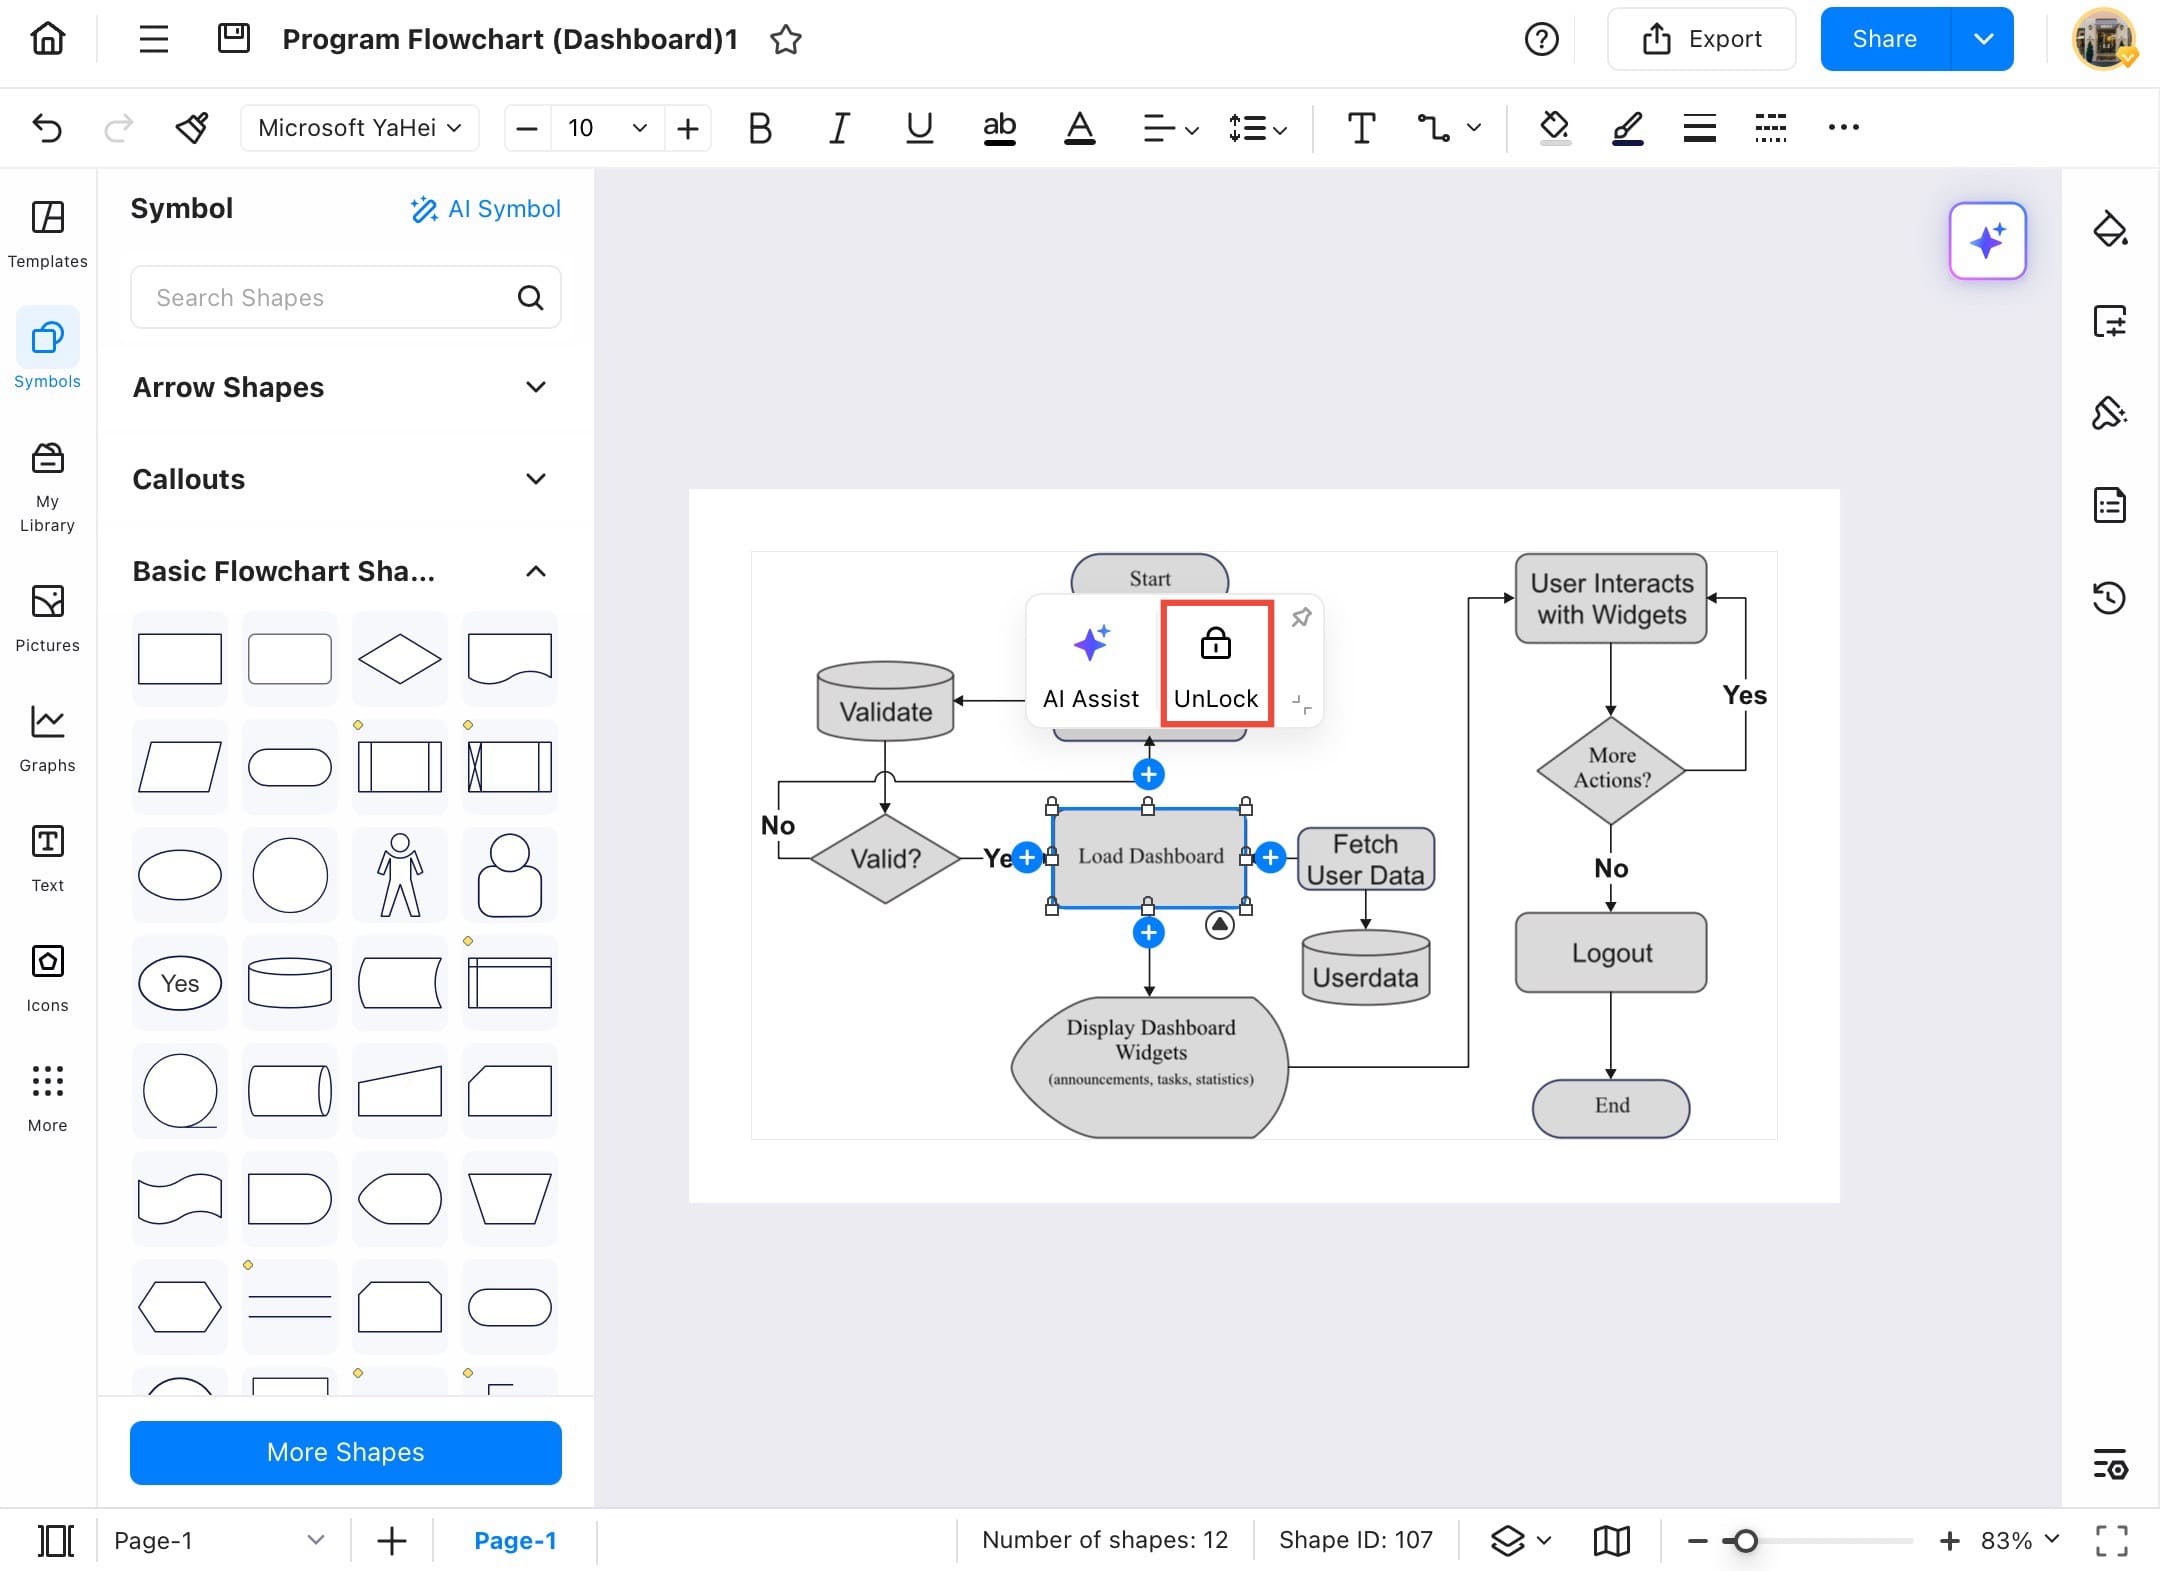
- To unlock the shape, tap the locked shape.
Step ❽
- After tapping on the lock shape, select Unlock, and the shape will be editable and can be moved anywhere on the canvas.
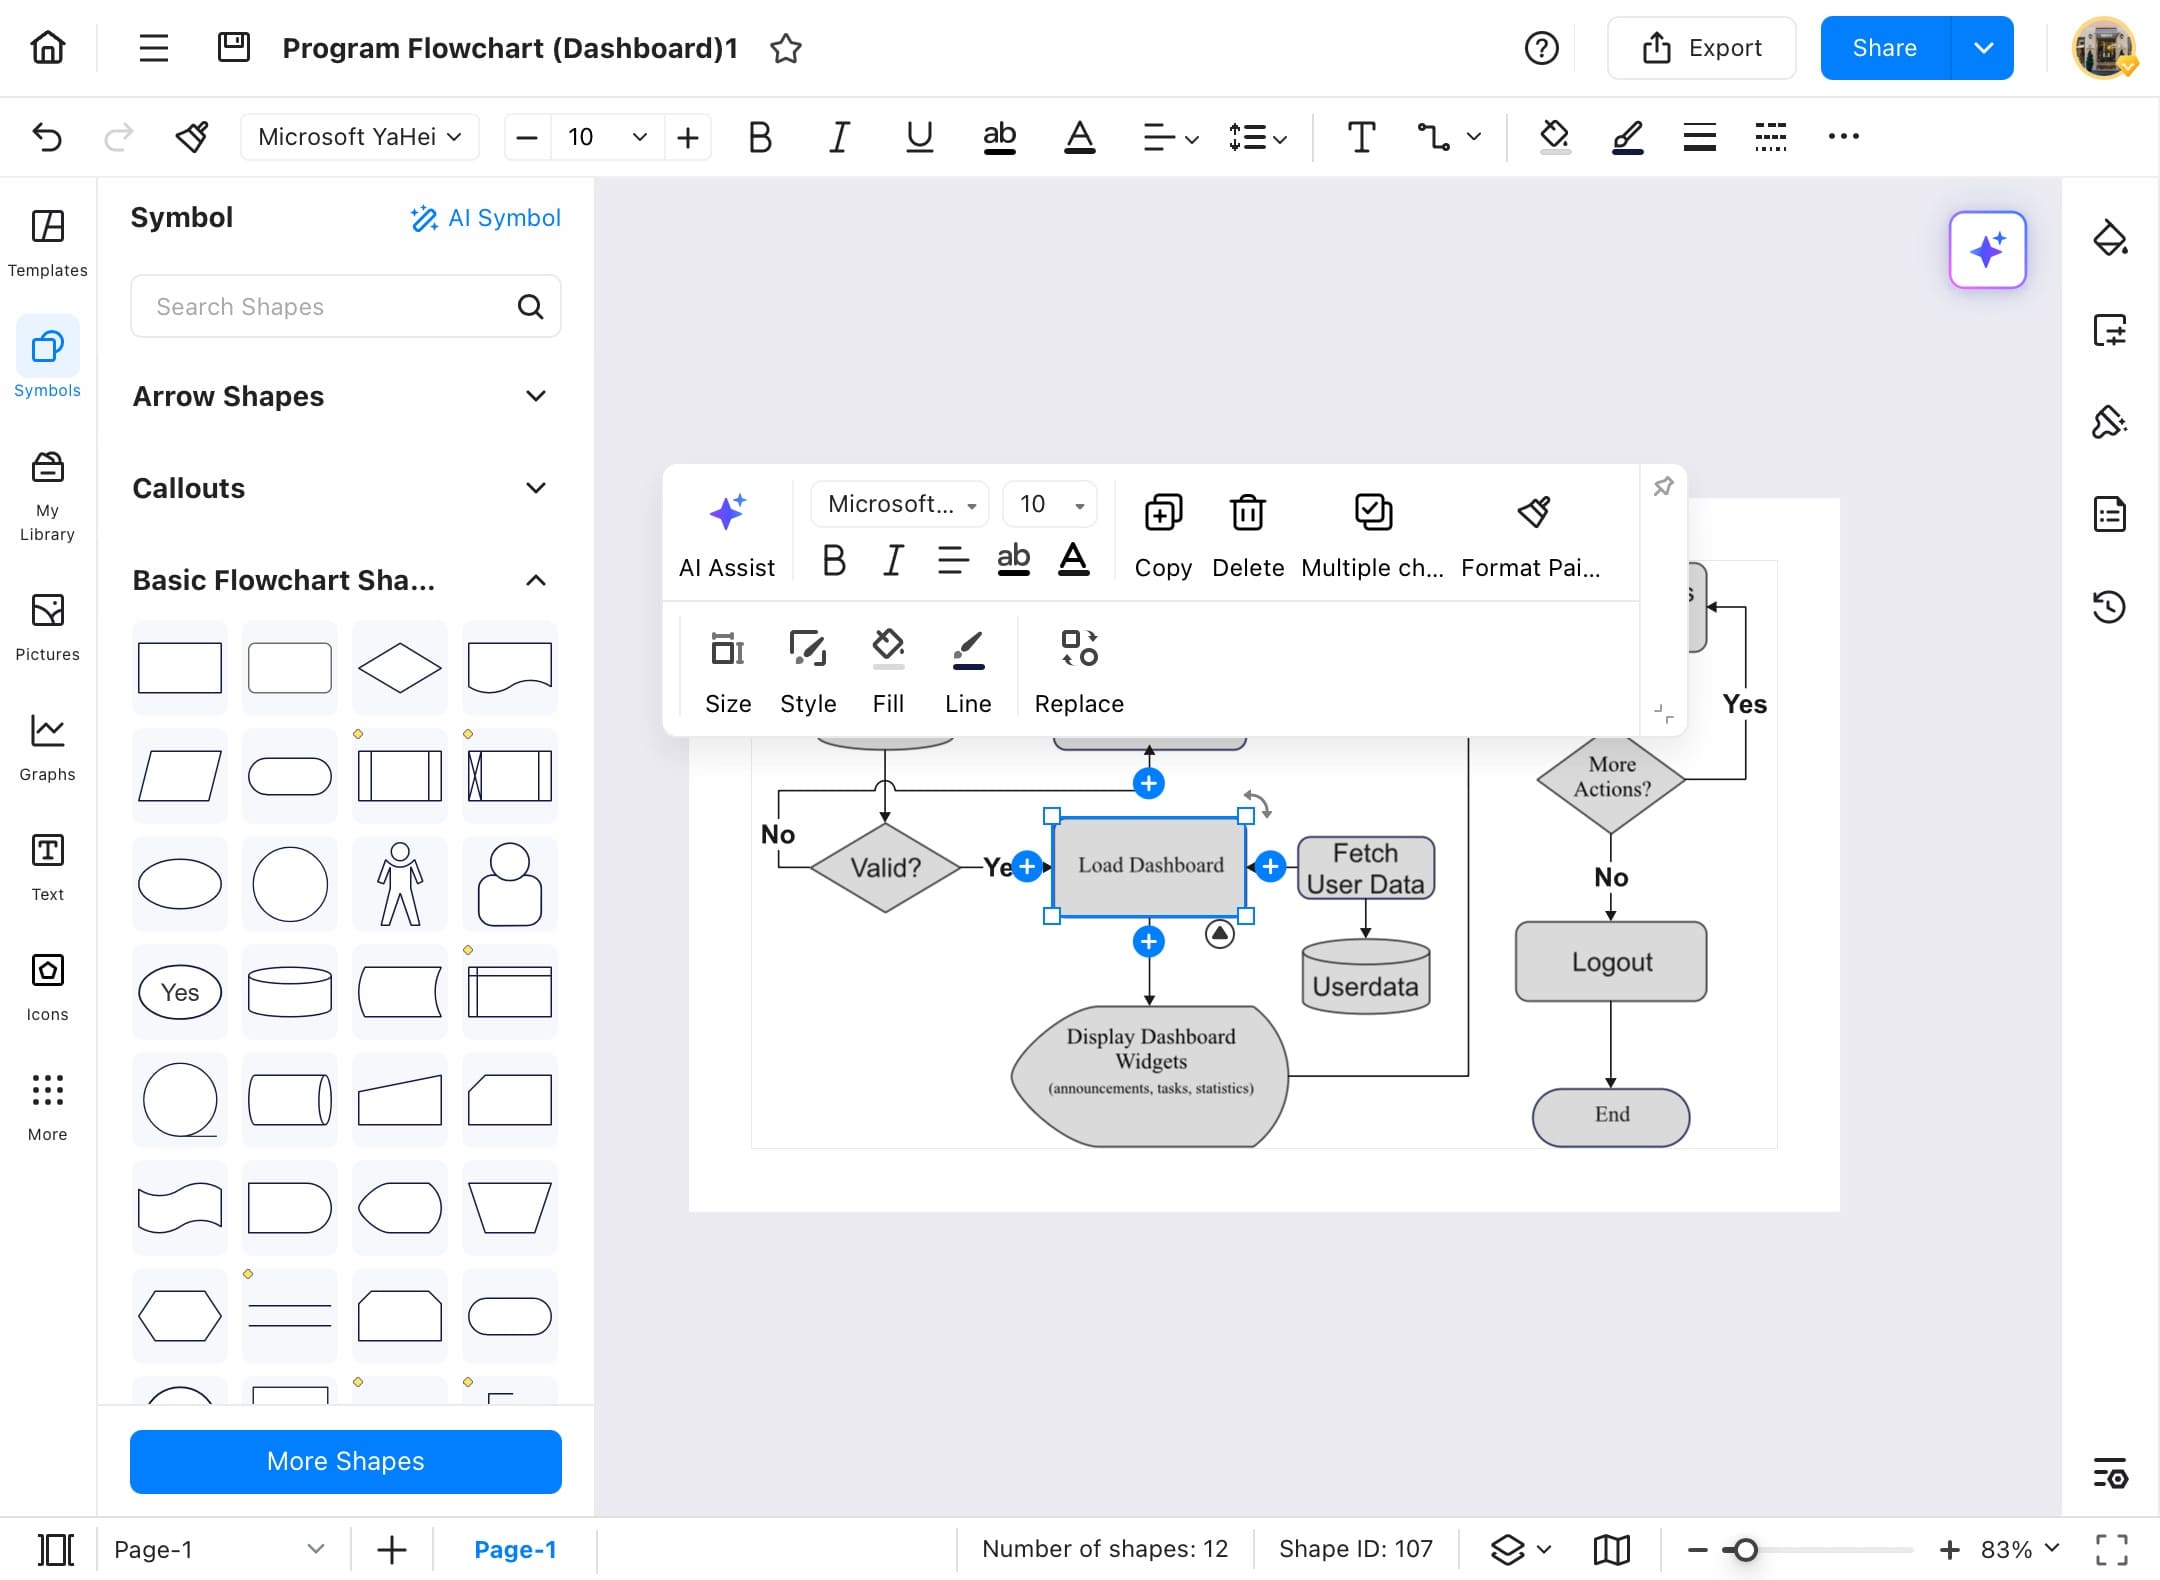
Step ❾
- As you can see from the shape lock icons are gone, which means it is unlocked and can be moved anywhere on the canvas.
Shape Operation: Align Shapes
Aligning shapes helps you make the text look neat and organized in the shape by changing its position, whether you want the text on top, bottom, left, or right of the shape. Follow the steps below to align the shapes of your diagram.
Step ❶
- Start EdrawMax on your tablet.
Step ❷
- Access your file that contains the shapes you want to align.
Step ❸
- When the file opens, tap the shape that you want to align.
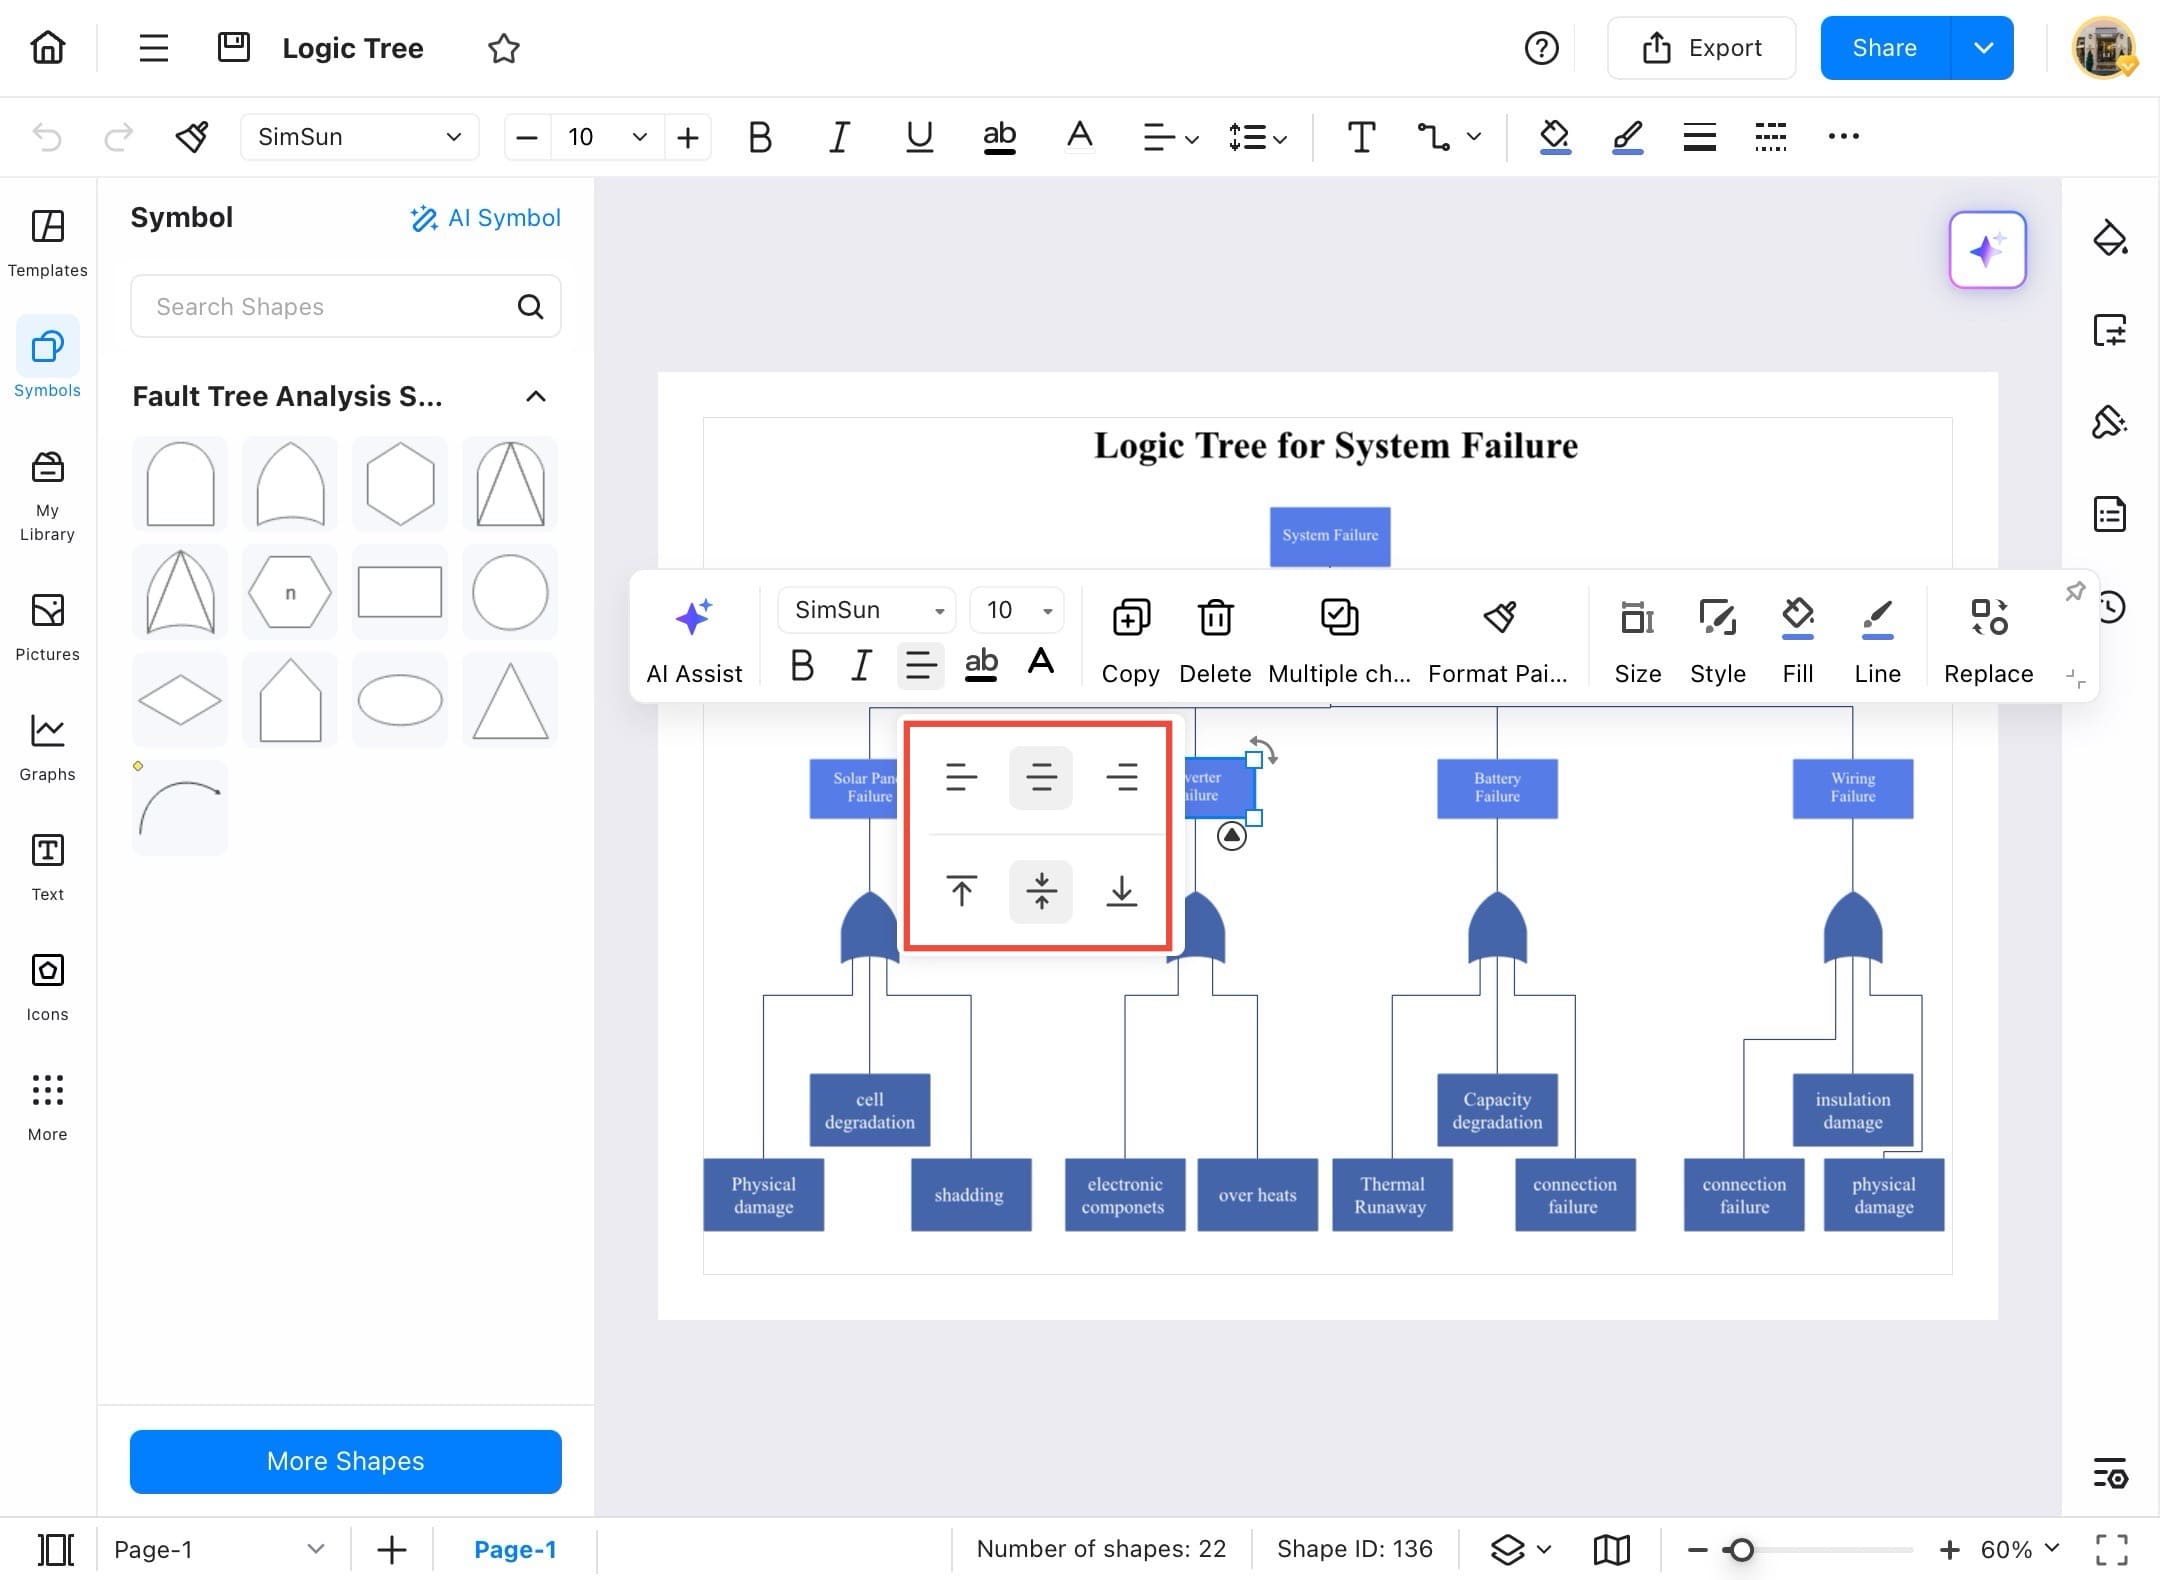
Step ❹
- Now, choose the align option from the precision tool to get the alignment options.

Step ❺
- Choose the option you prefer the most, and it will be automatically applied to the selected topic.
Step ❻
- The alignment of the shape is now changed according to the settings.
