Think Bigger From EdrawMax User Guide
View the diagram
Need a closer look or want to see everything at once? EdrawMax lets you zoom in and out easily so you can work on your diagram your way. Follow the steps below to adjust your canvas view for better editing and navigation.
Step ❶
- Open the EdrawMax application on your tablet.
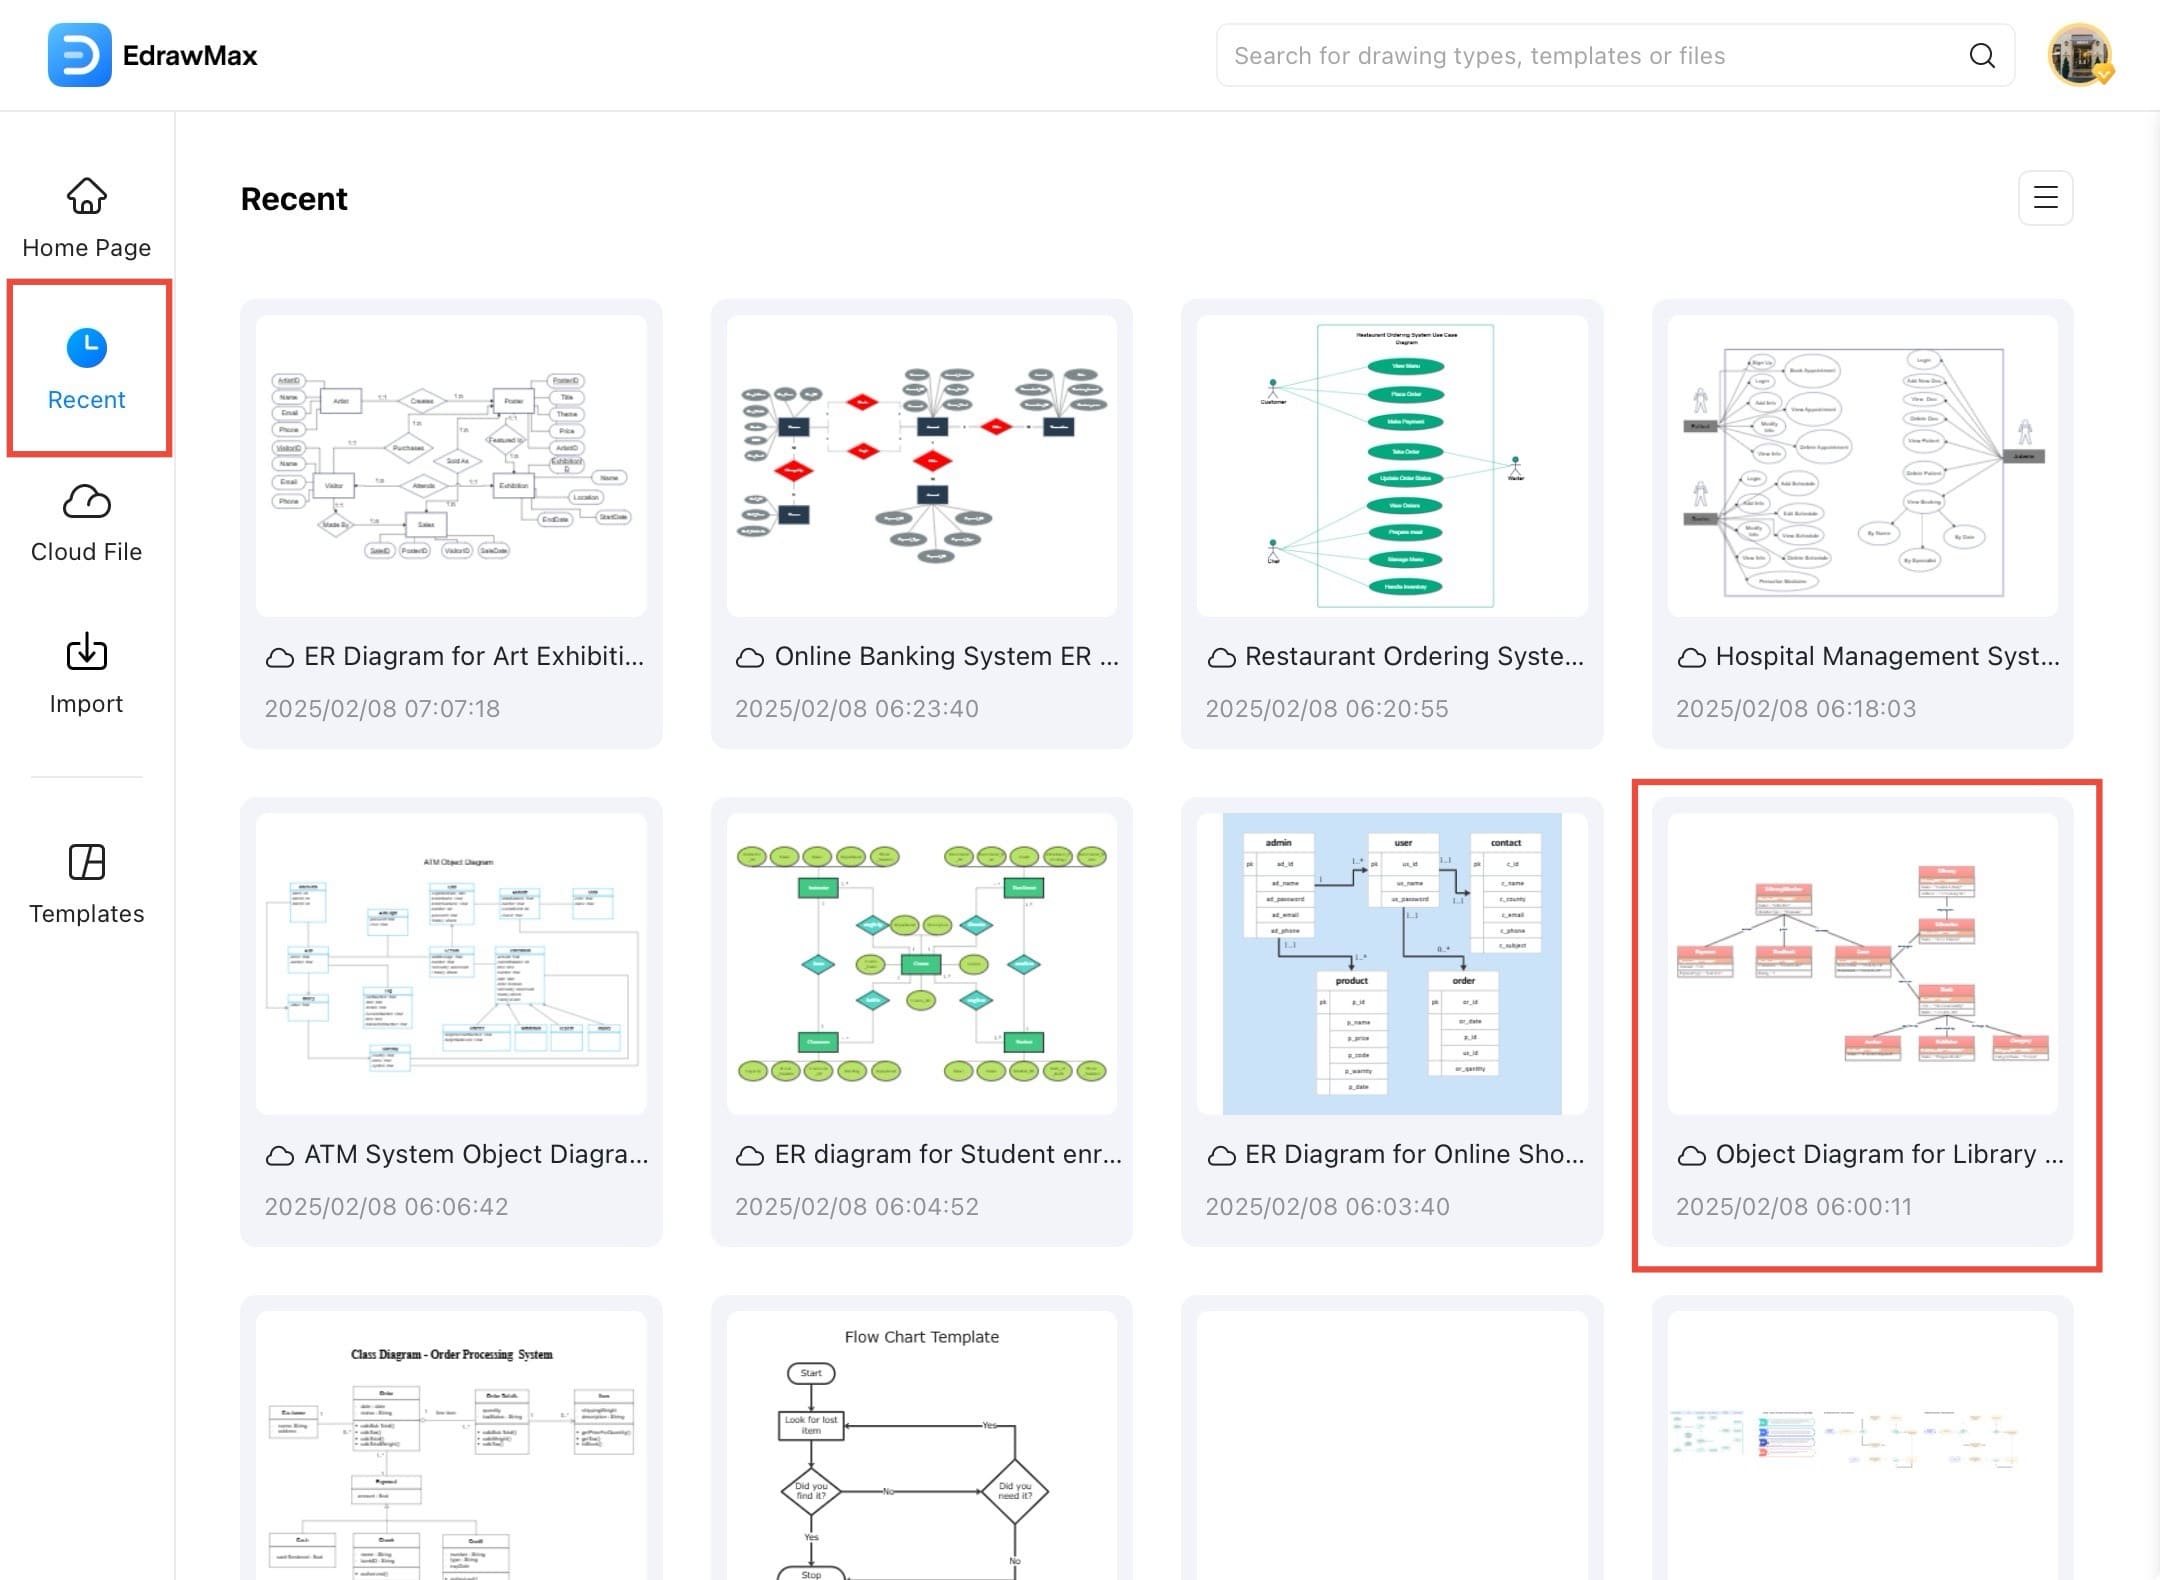
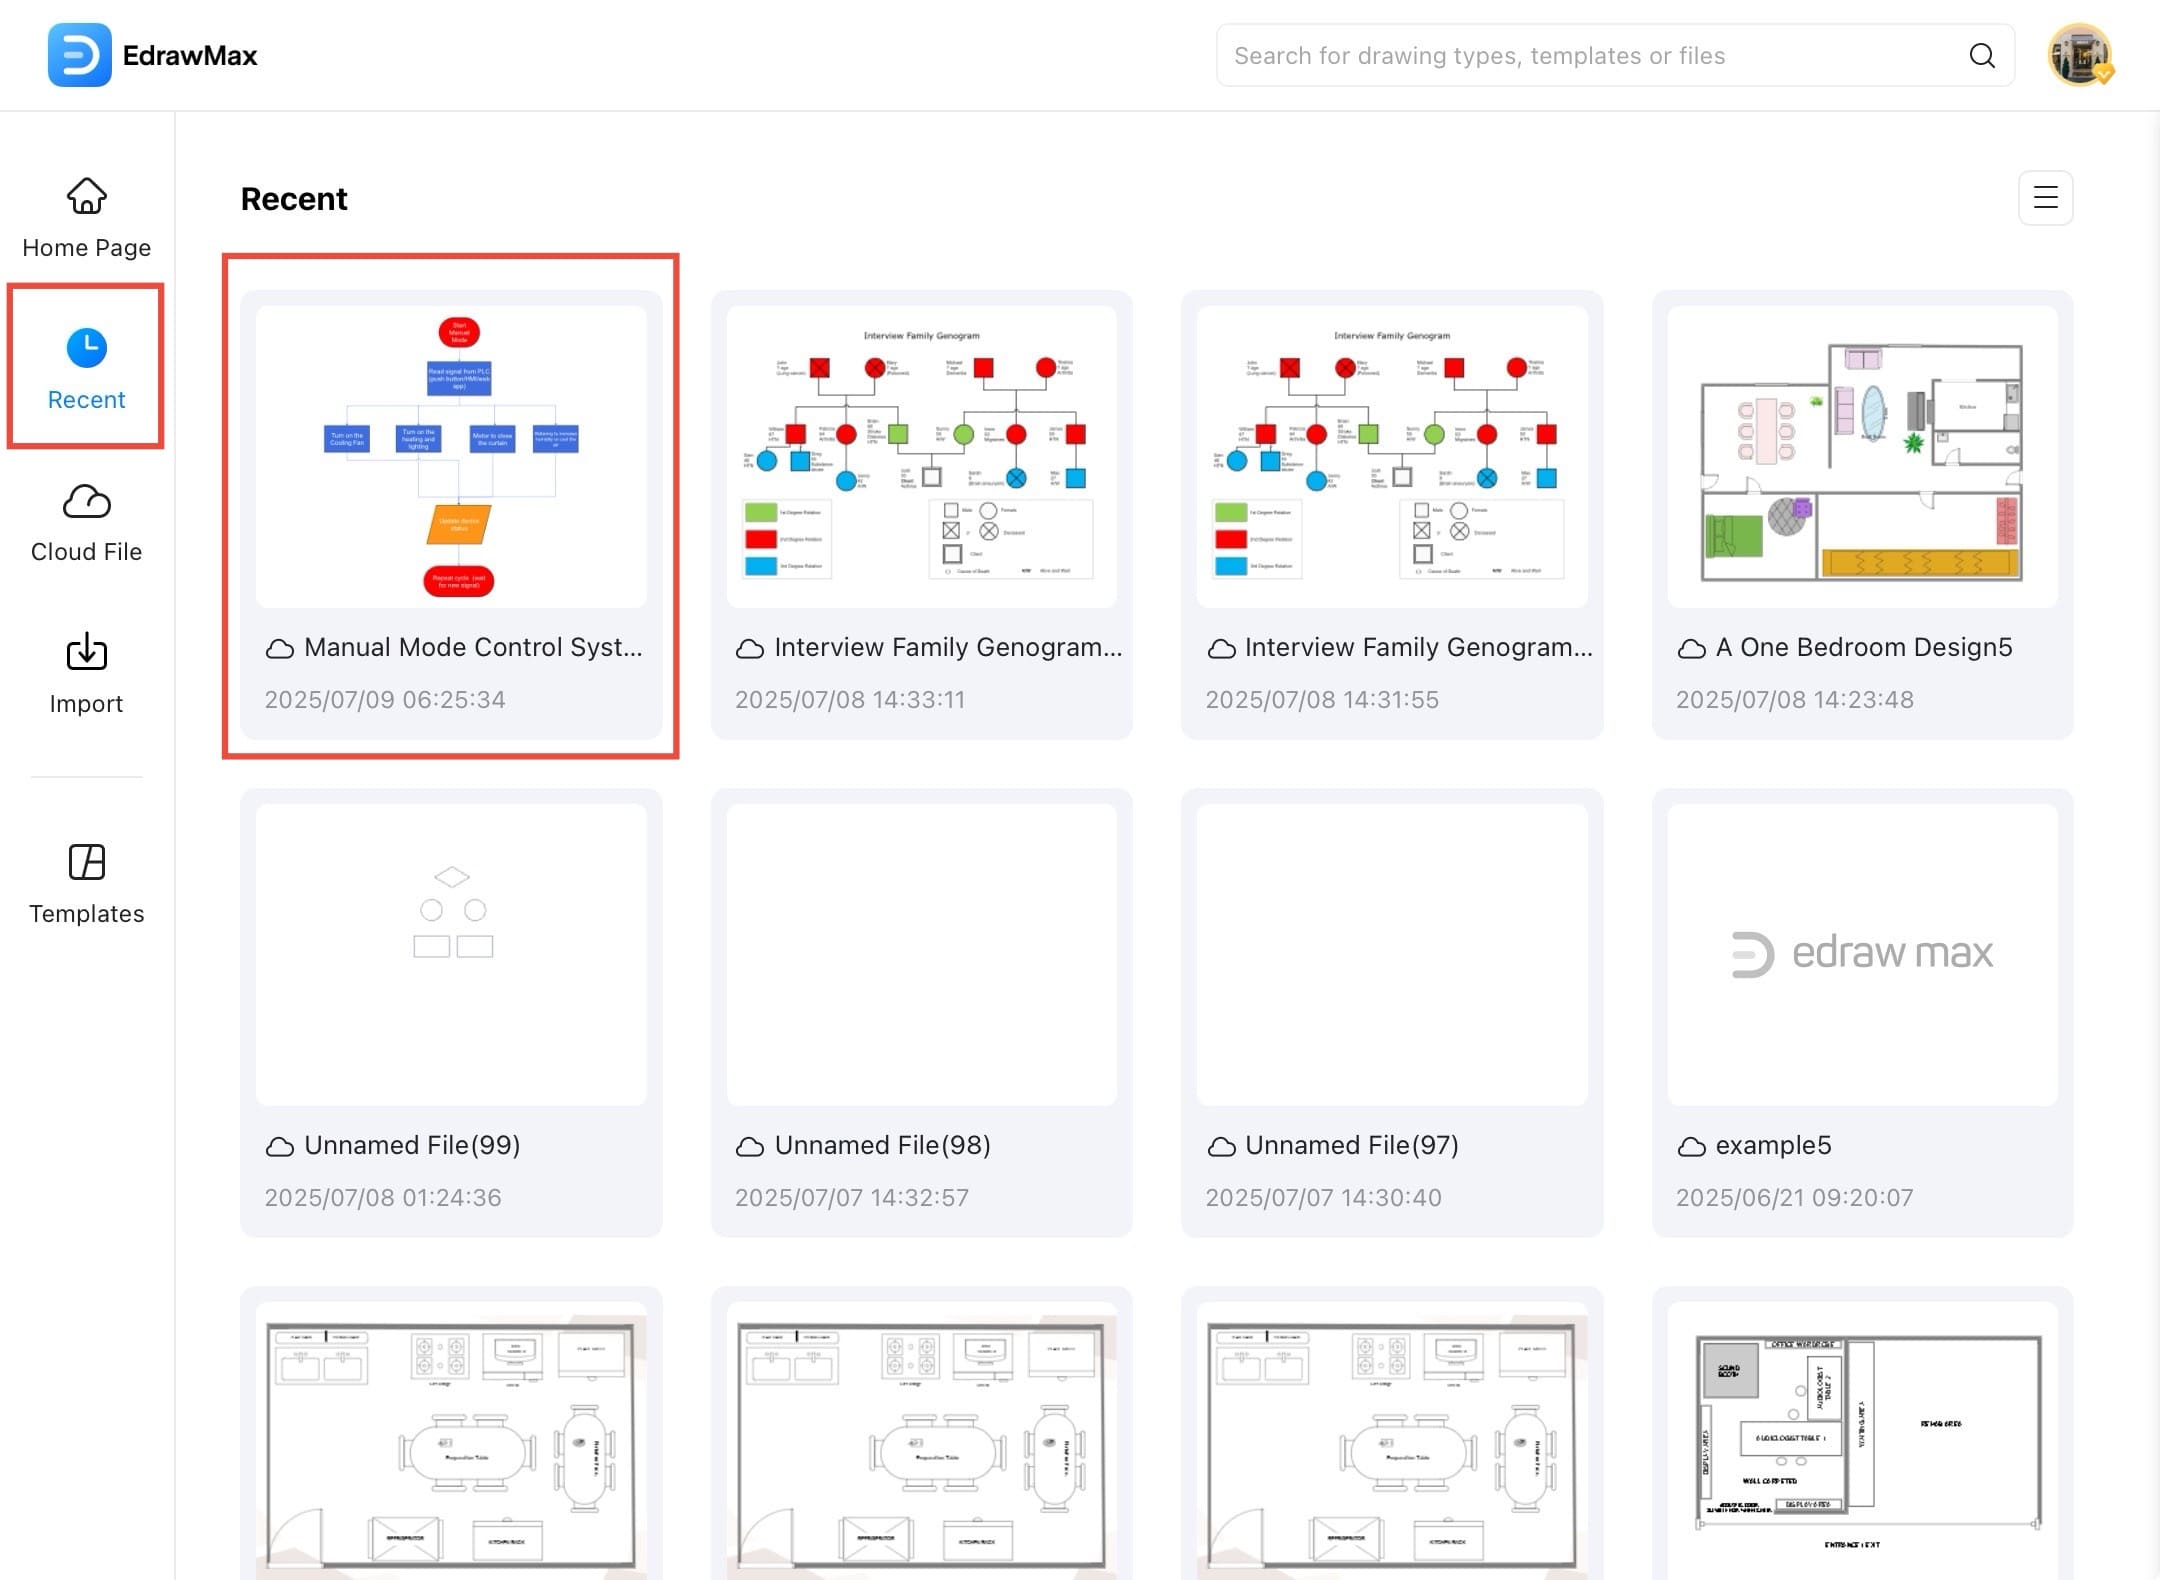
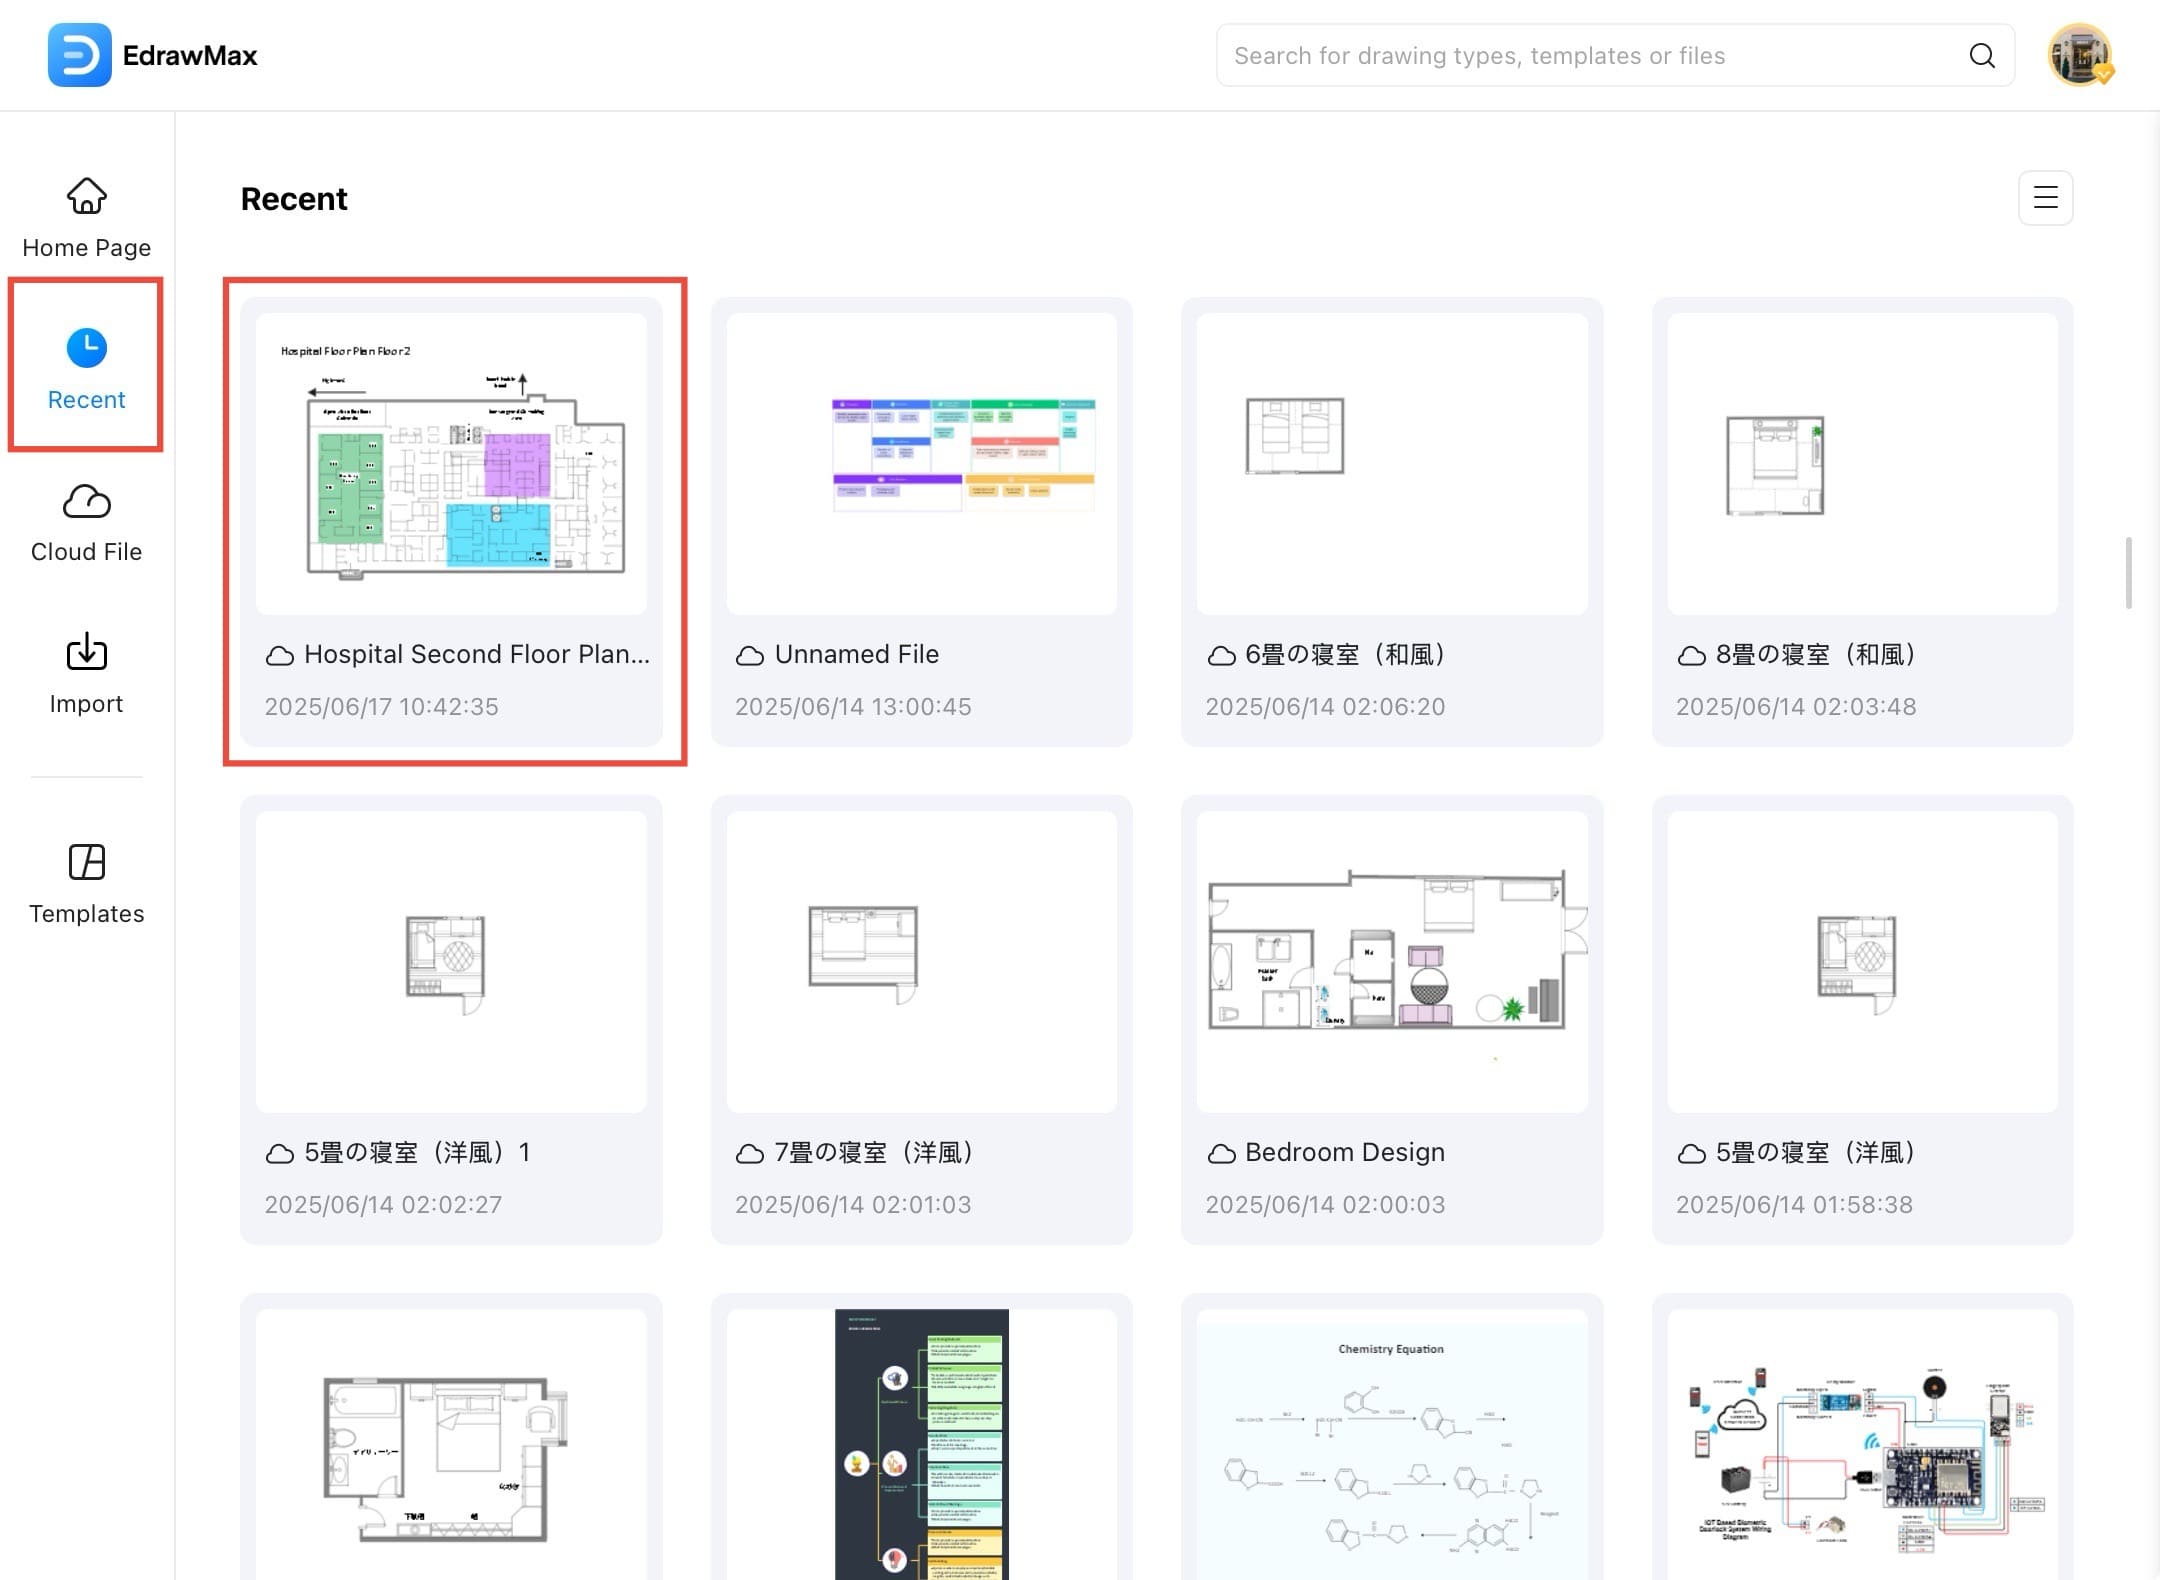
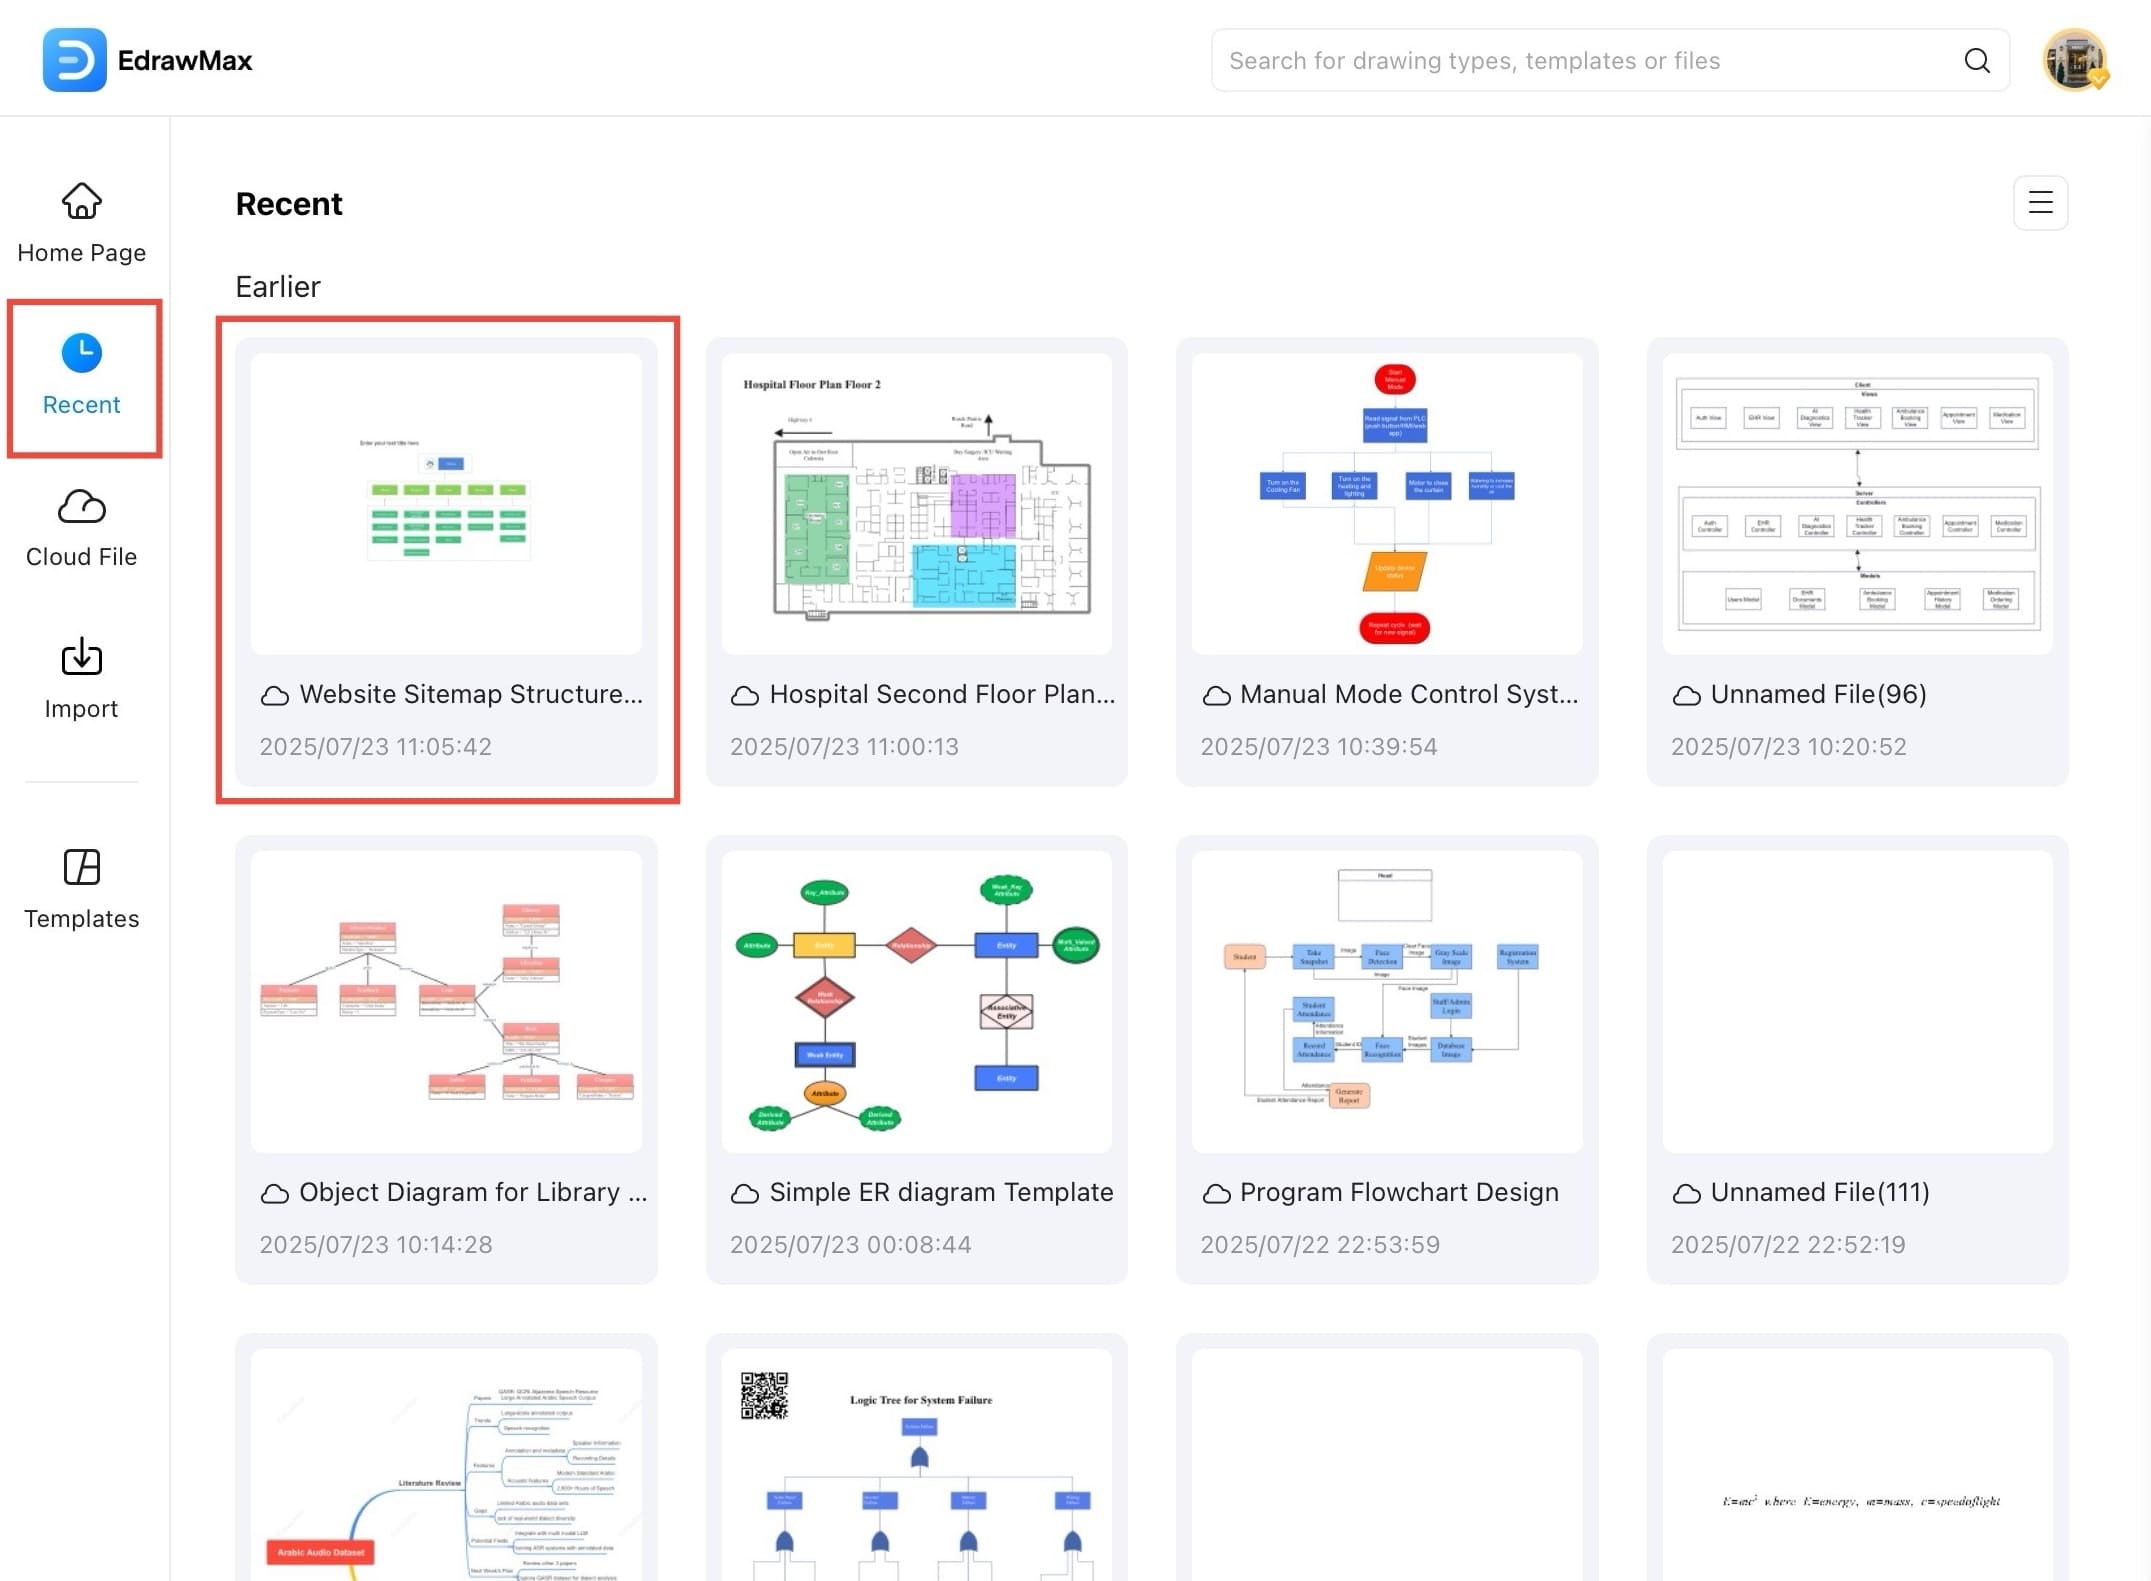
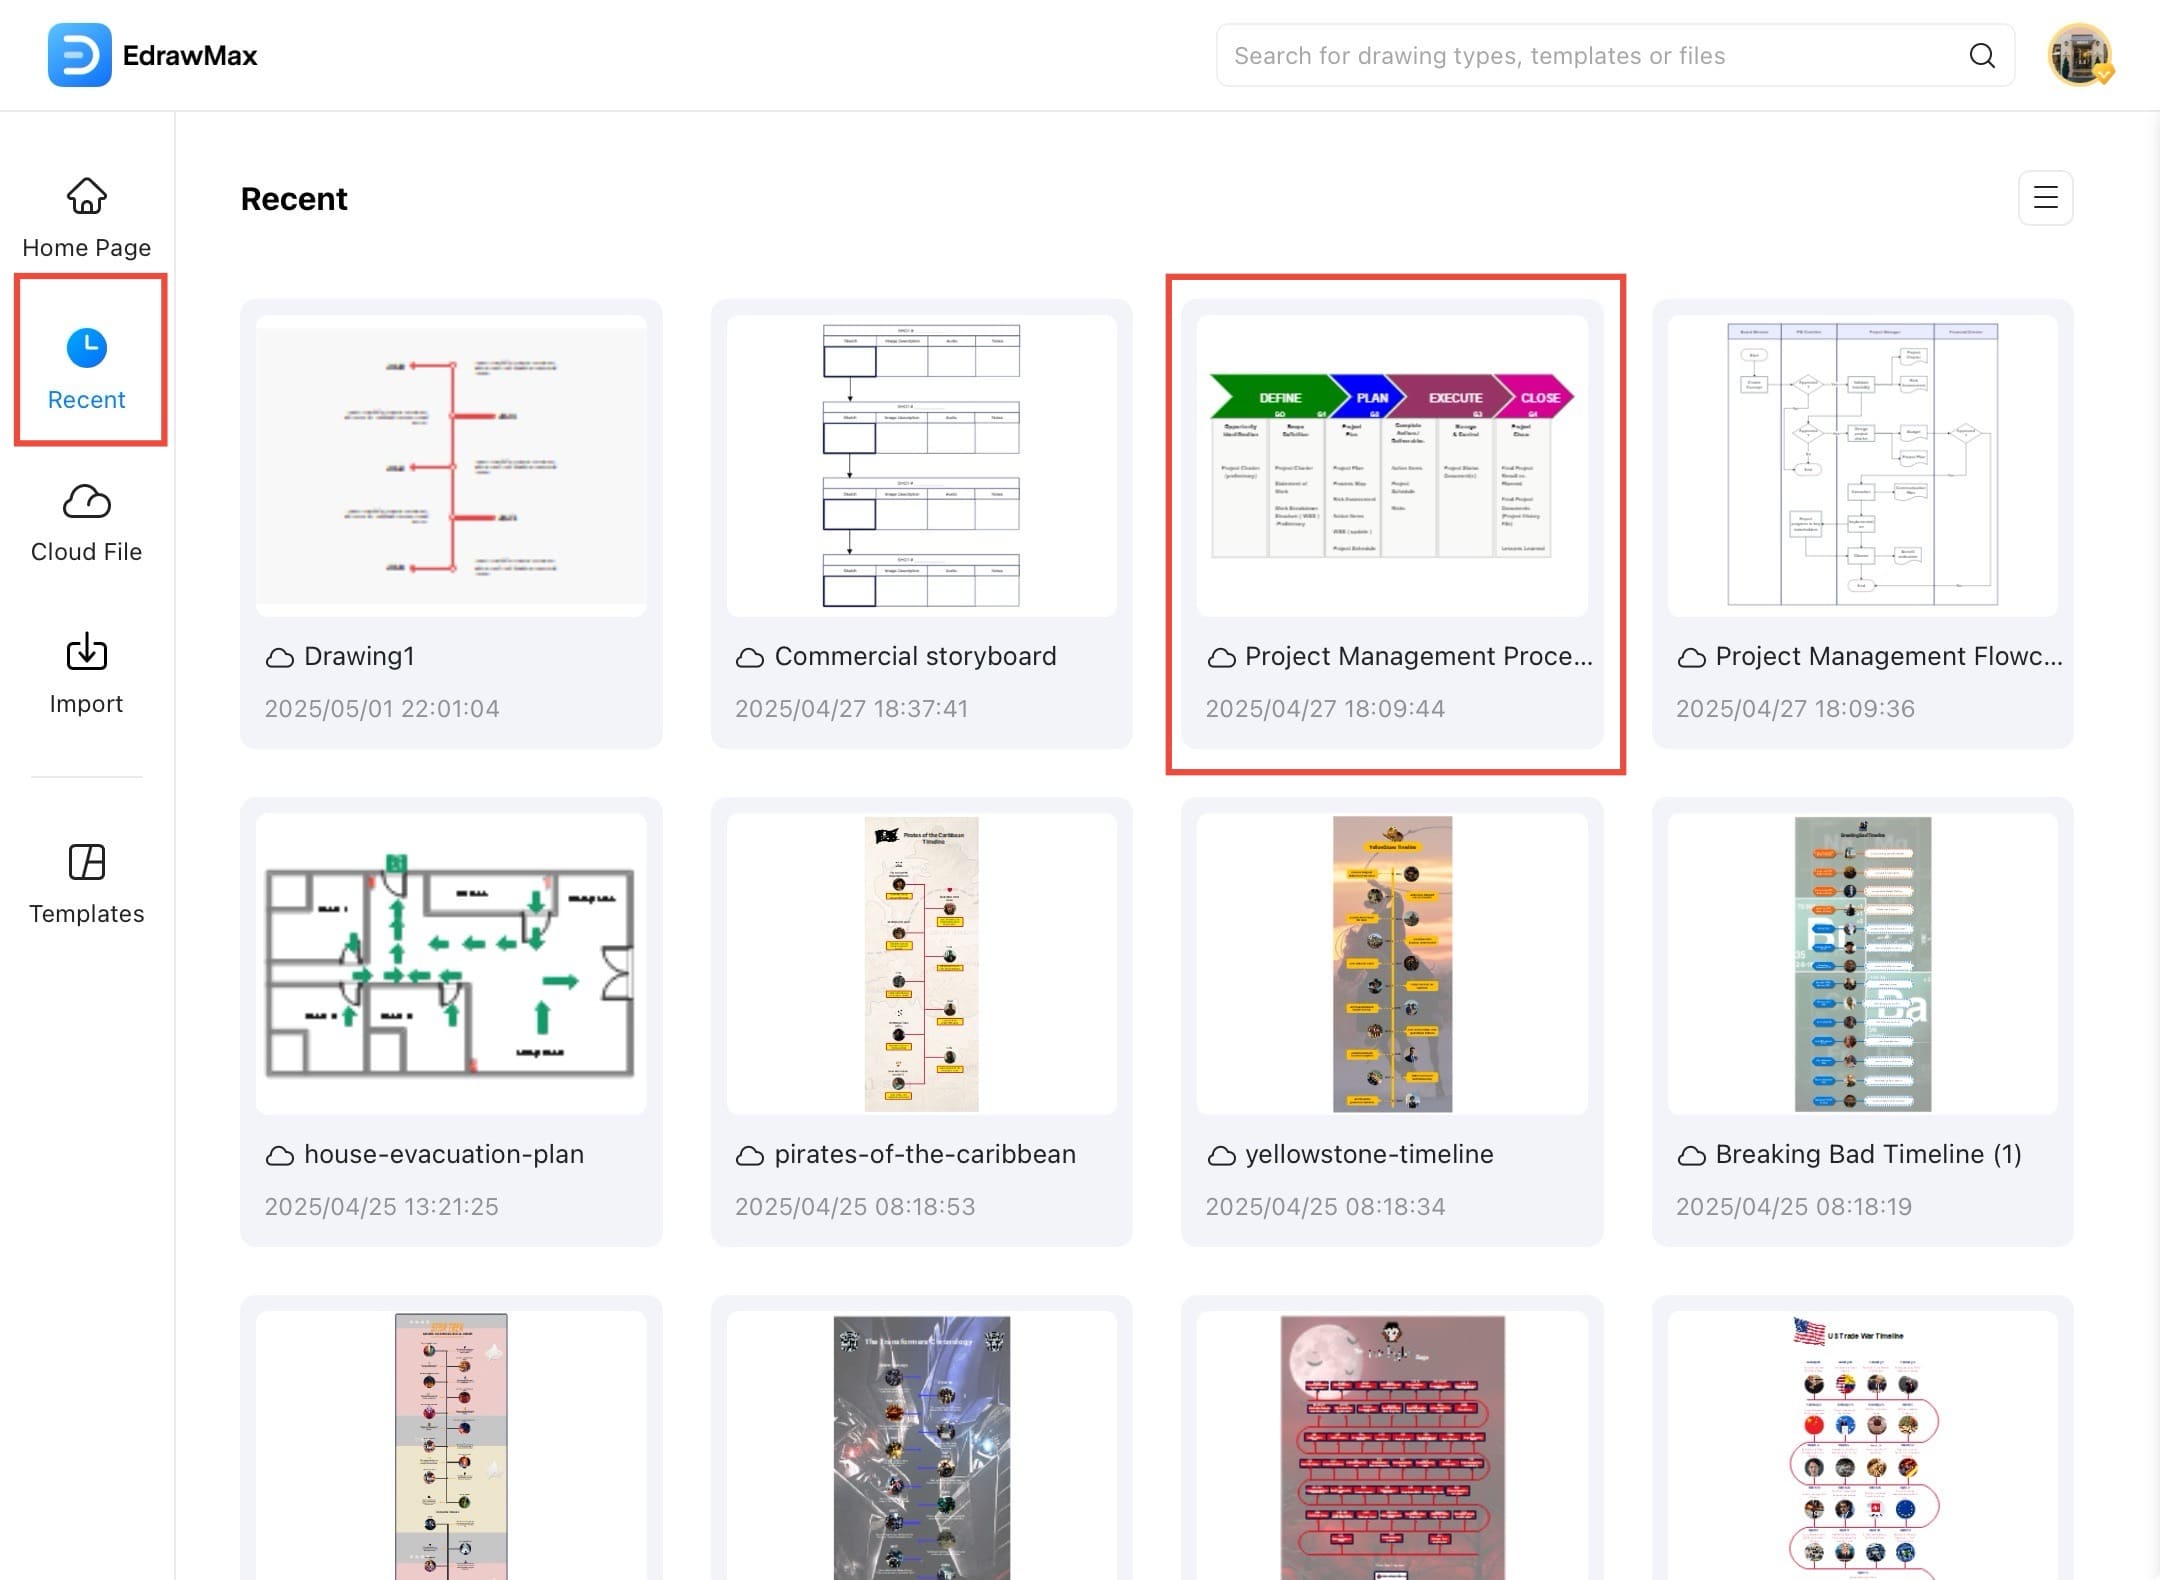
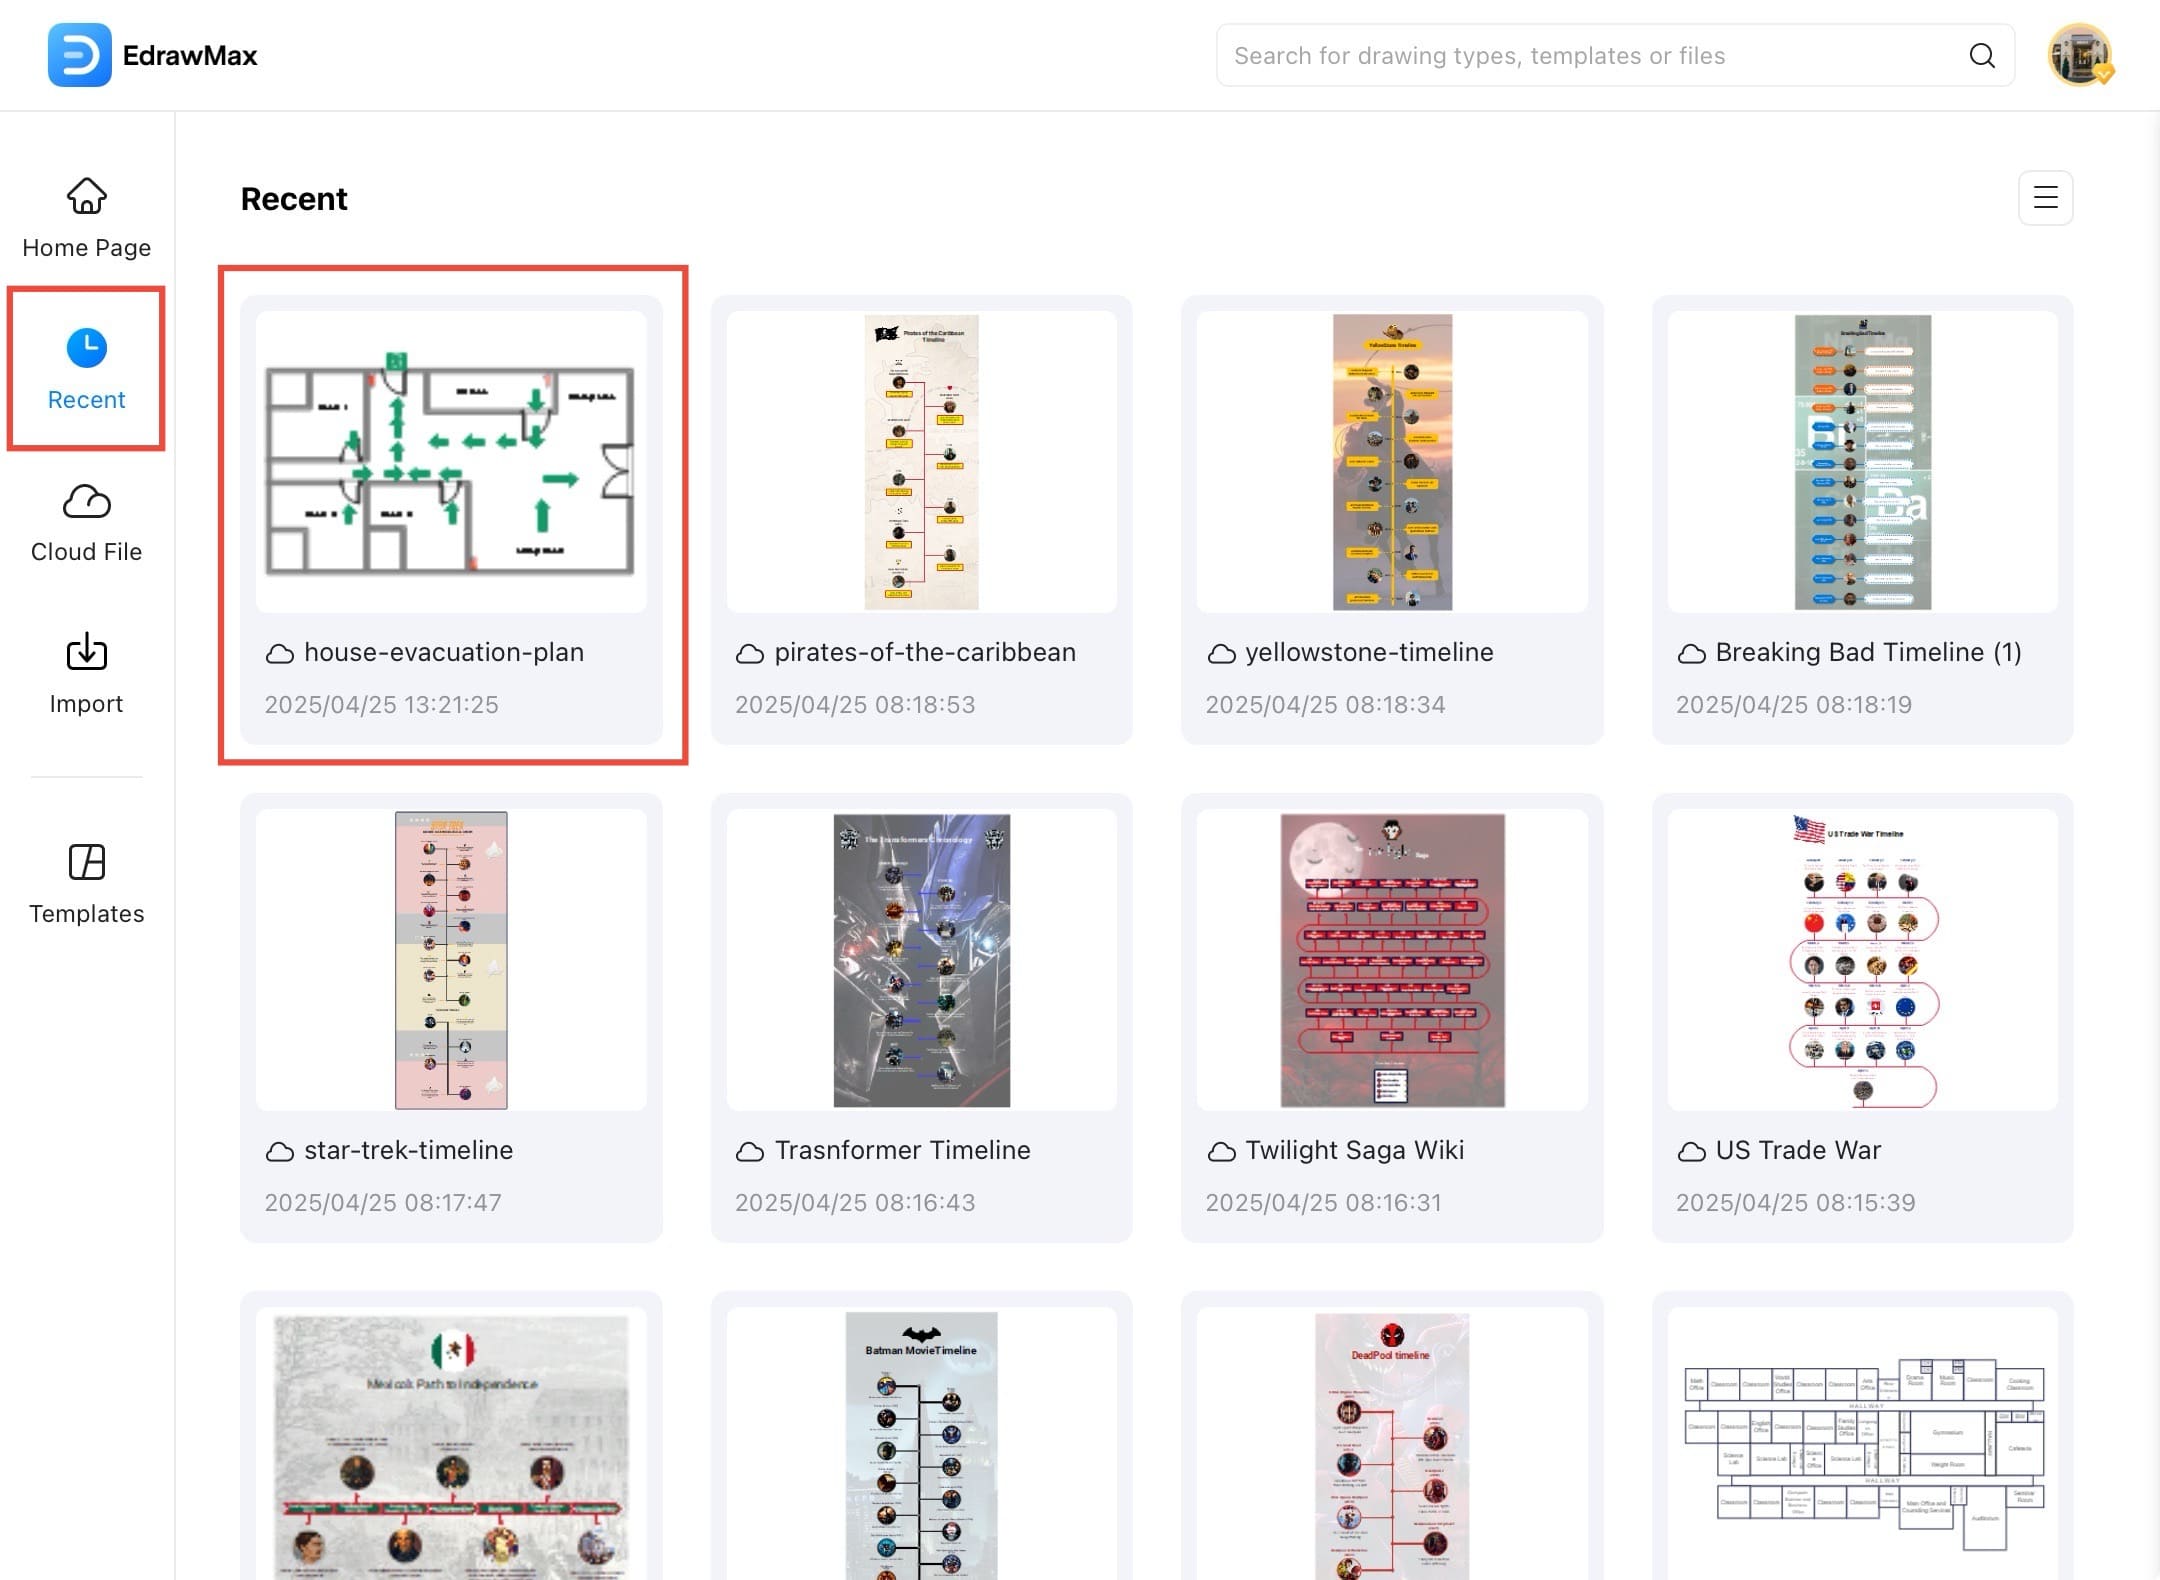
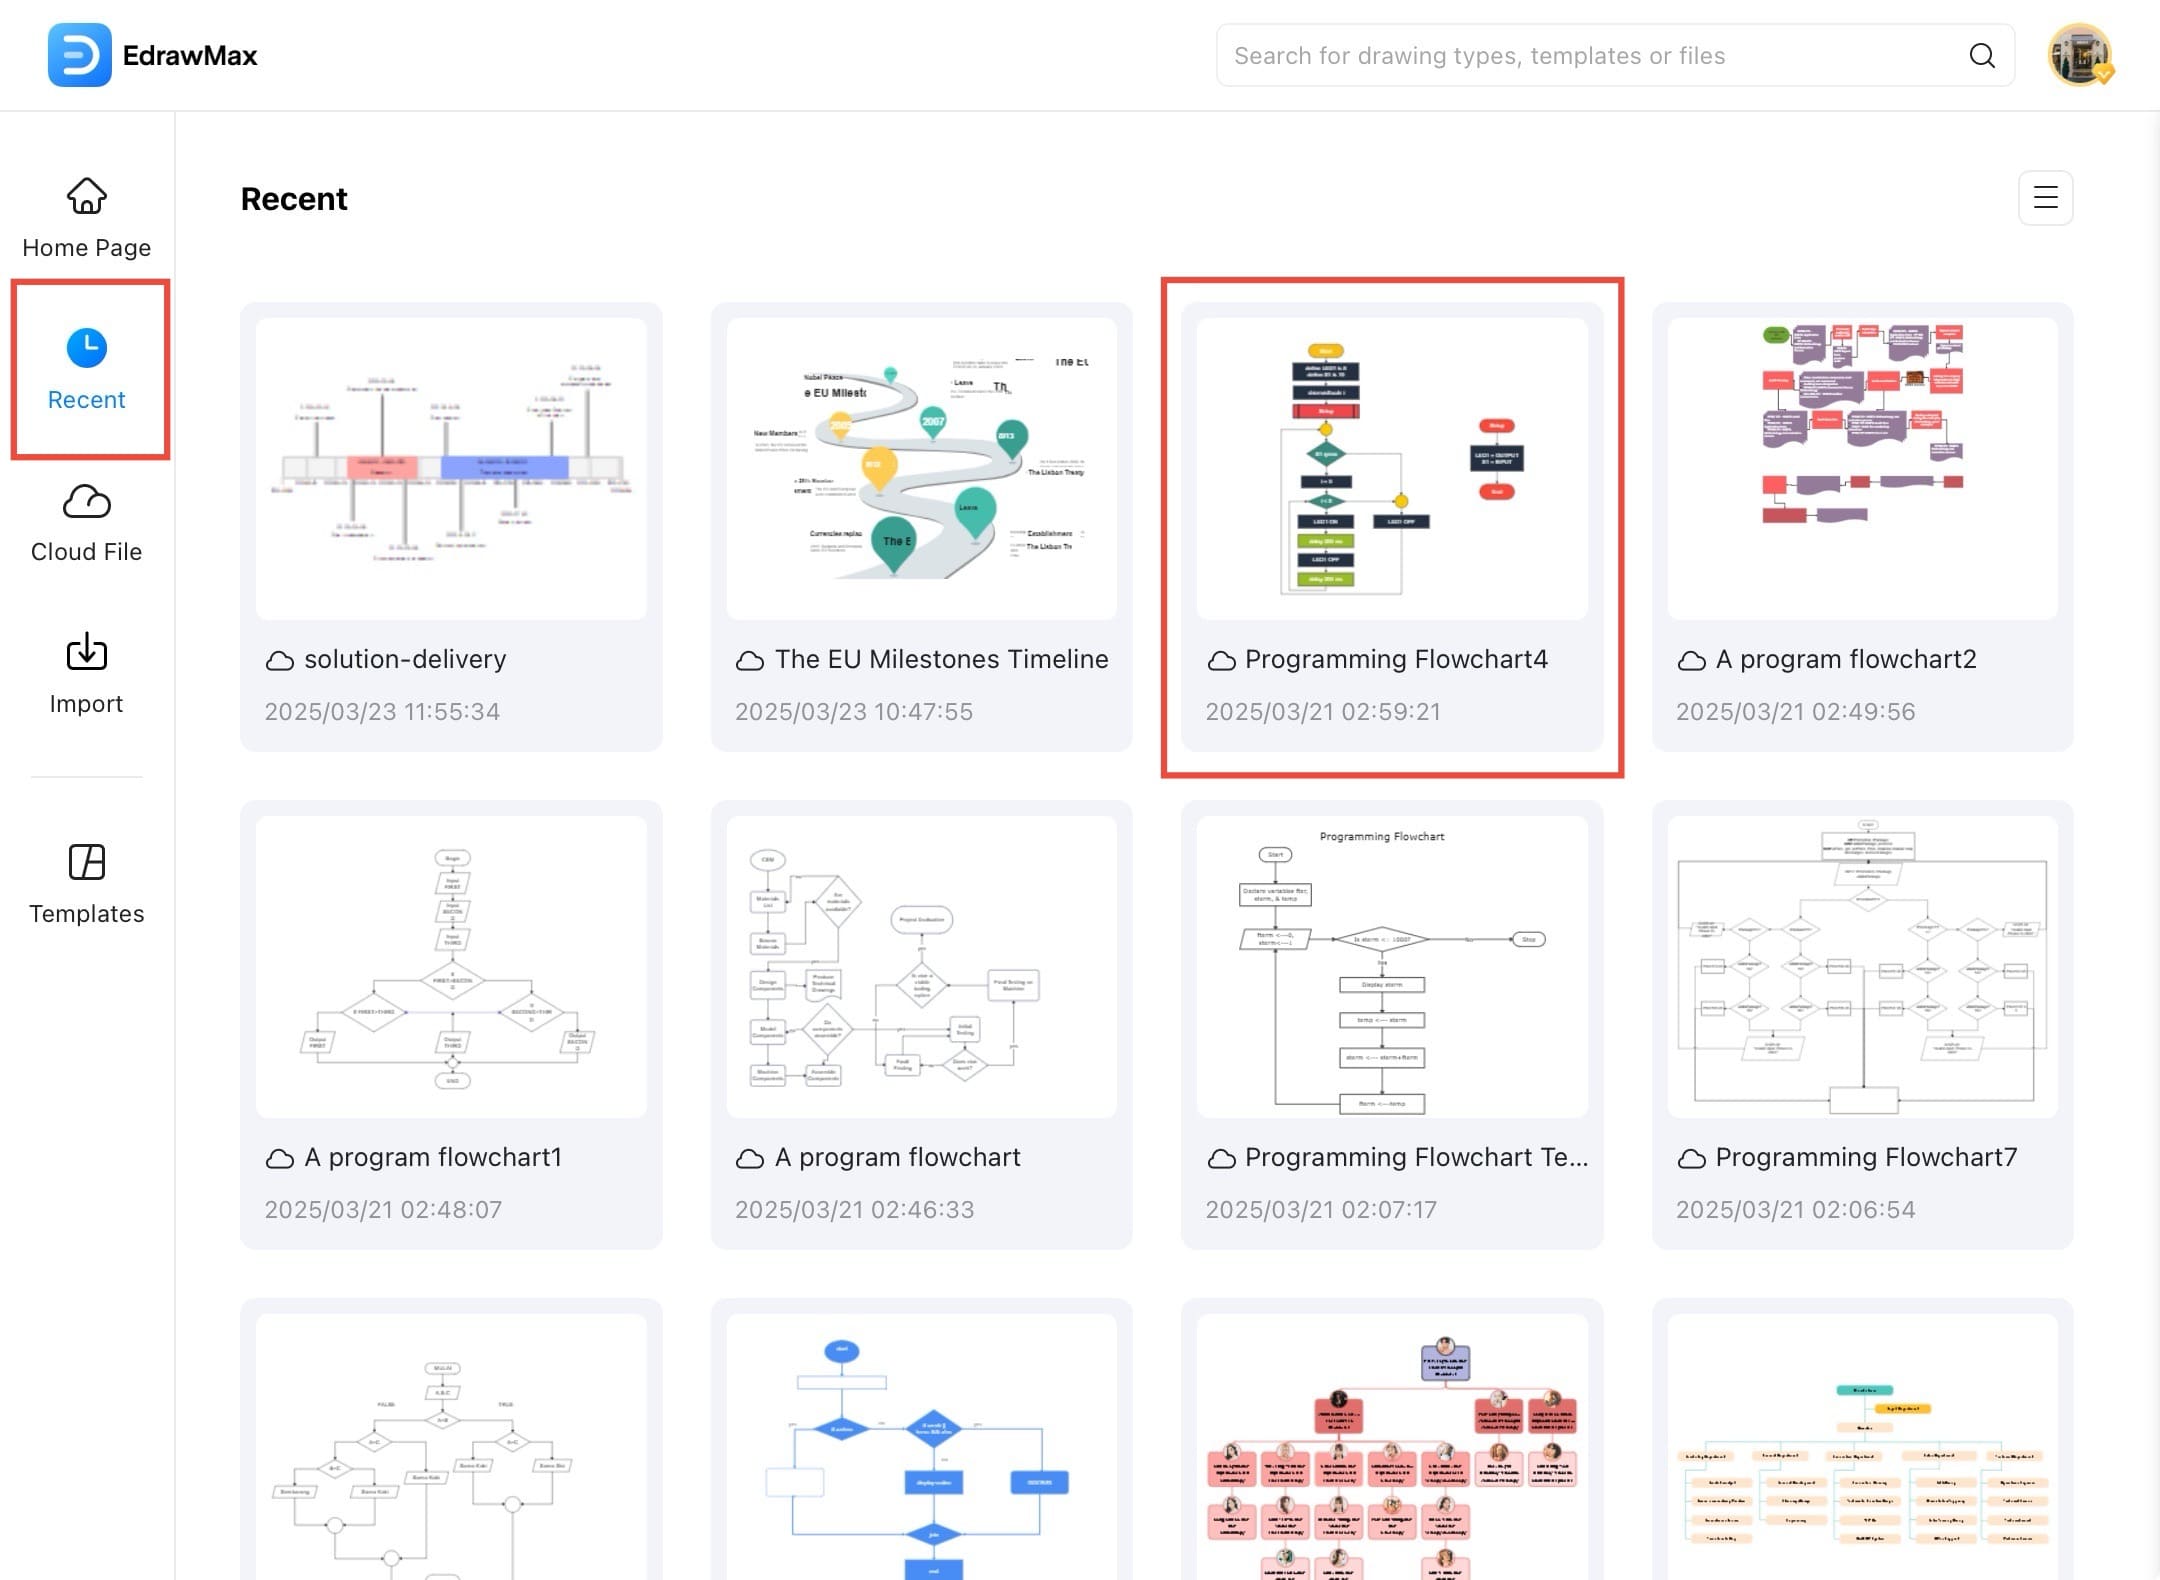
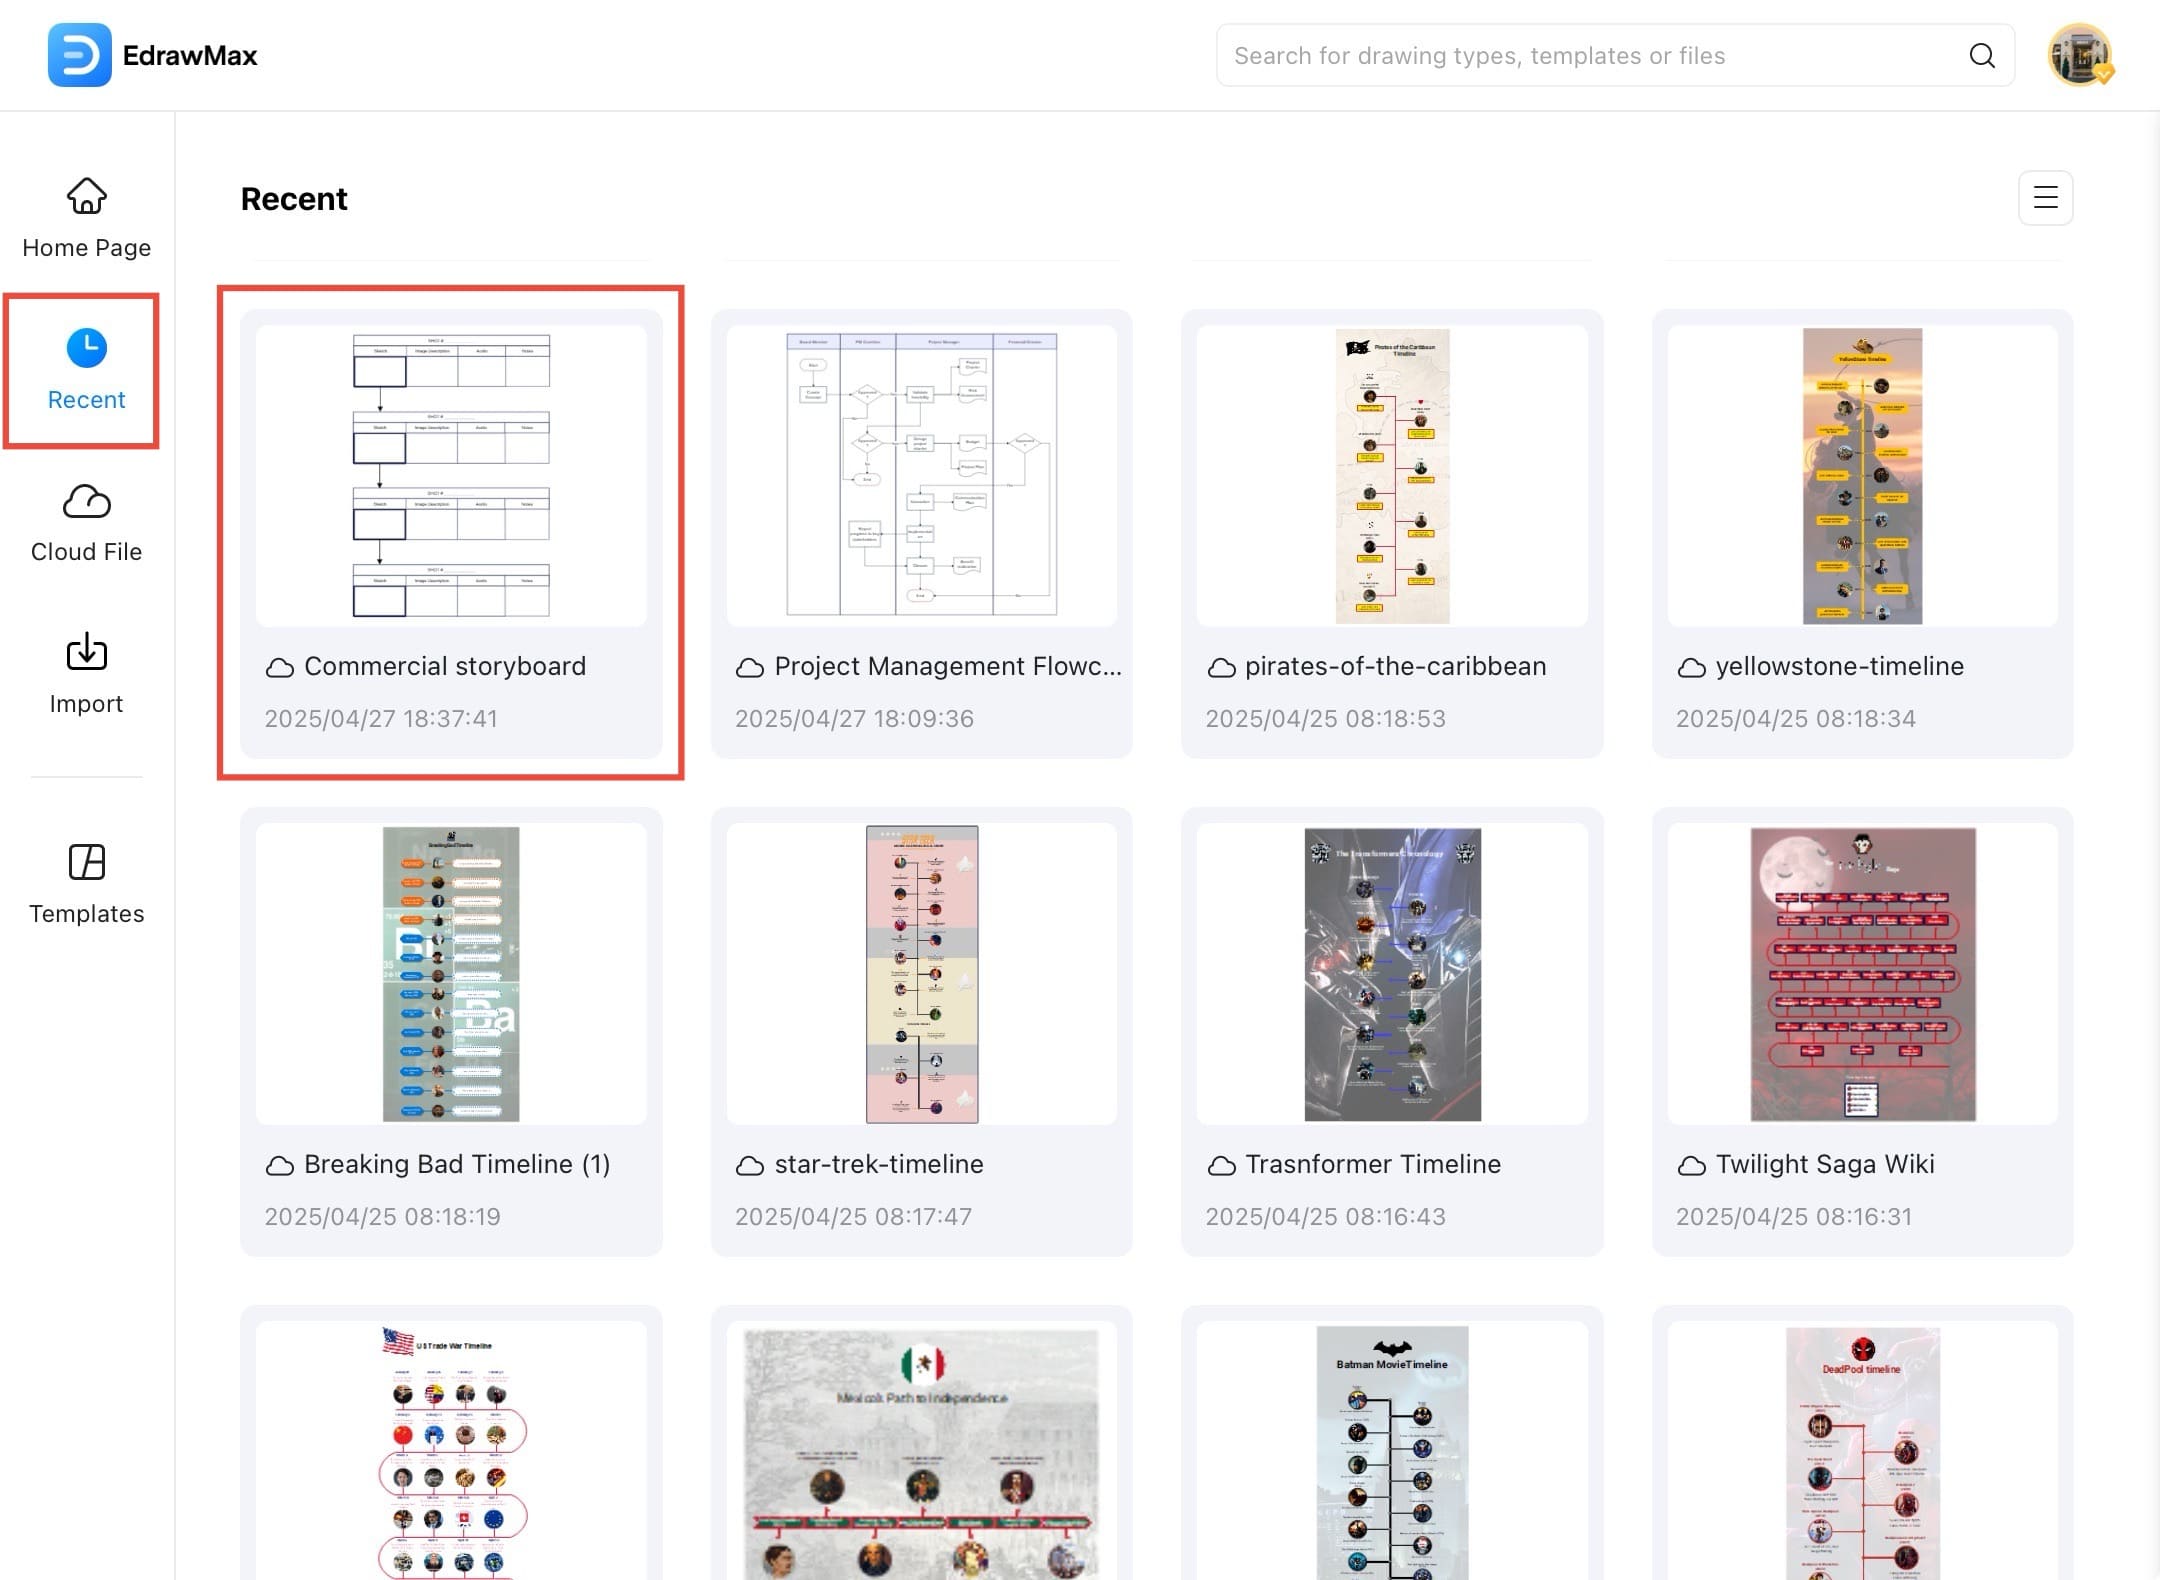
Step ❷ Select a diagram to open
- From the Home Page, tap Recent on the left sidebar and select the diagram you want to open.
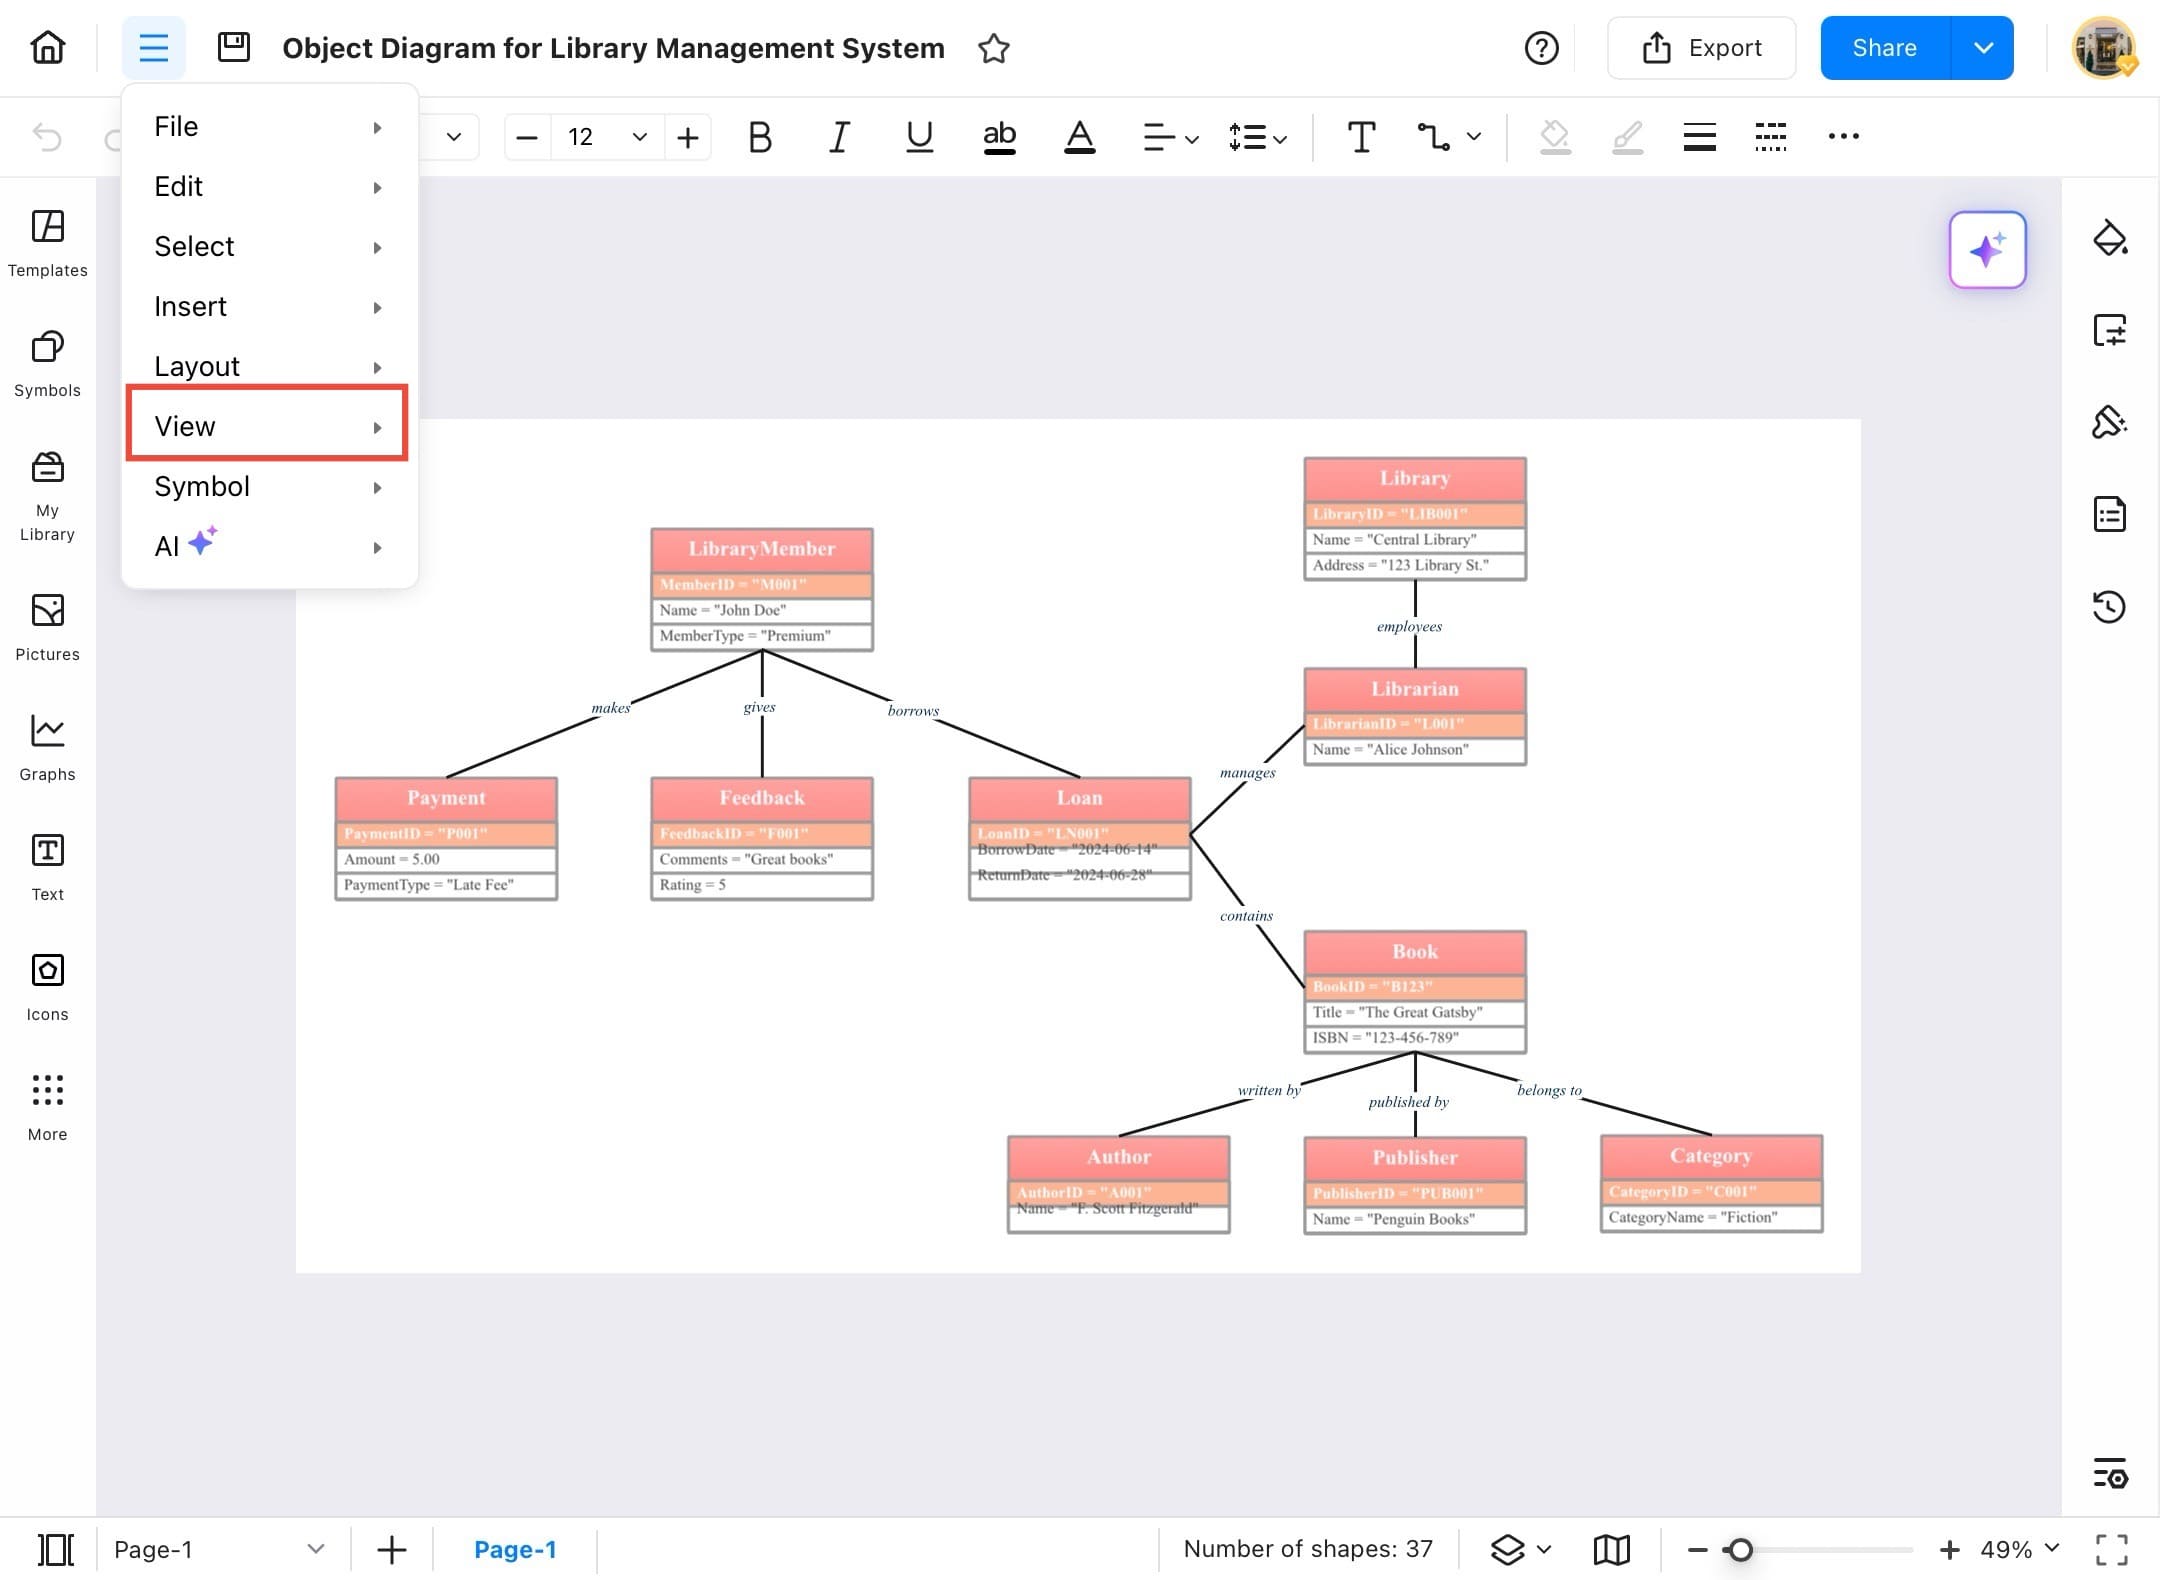
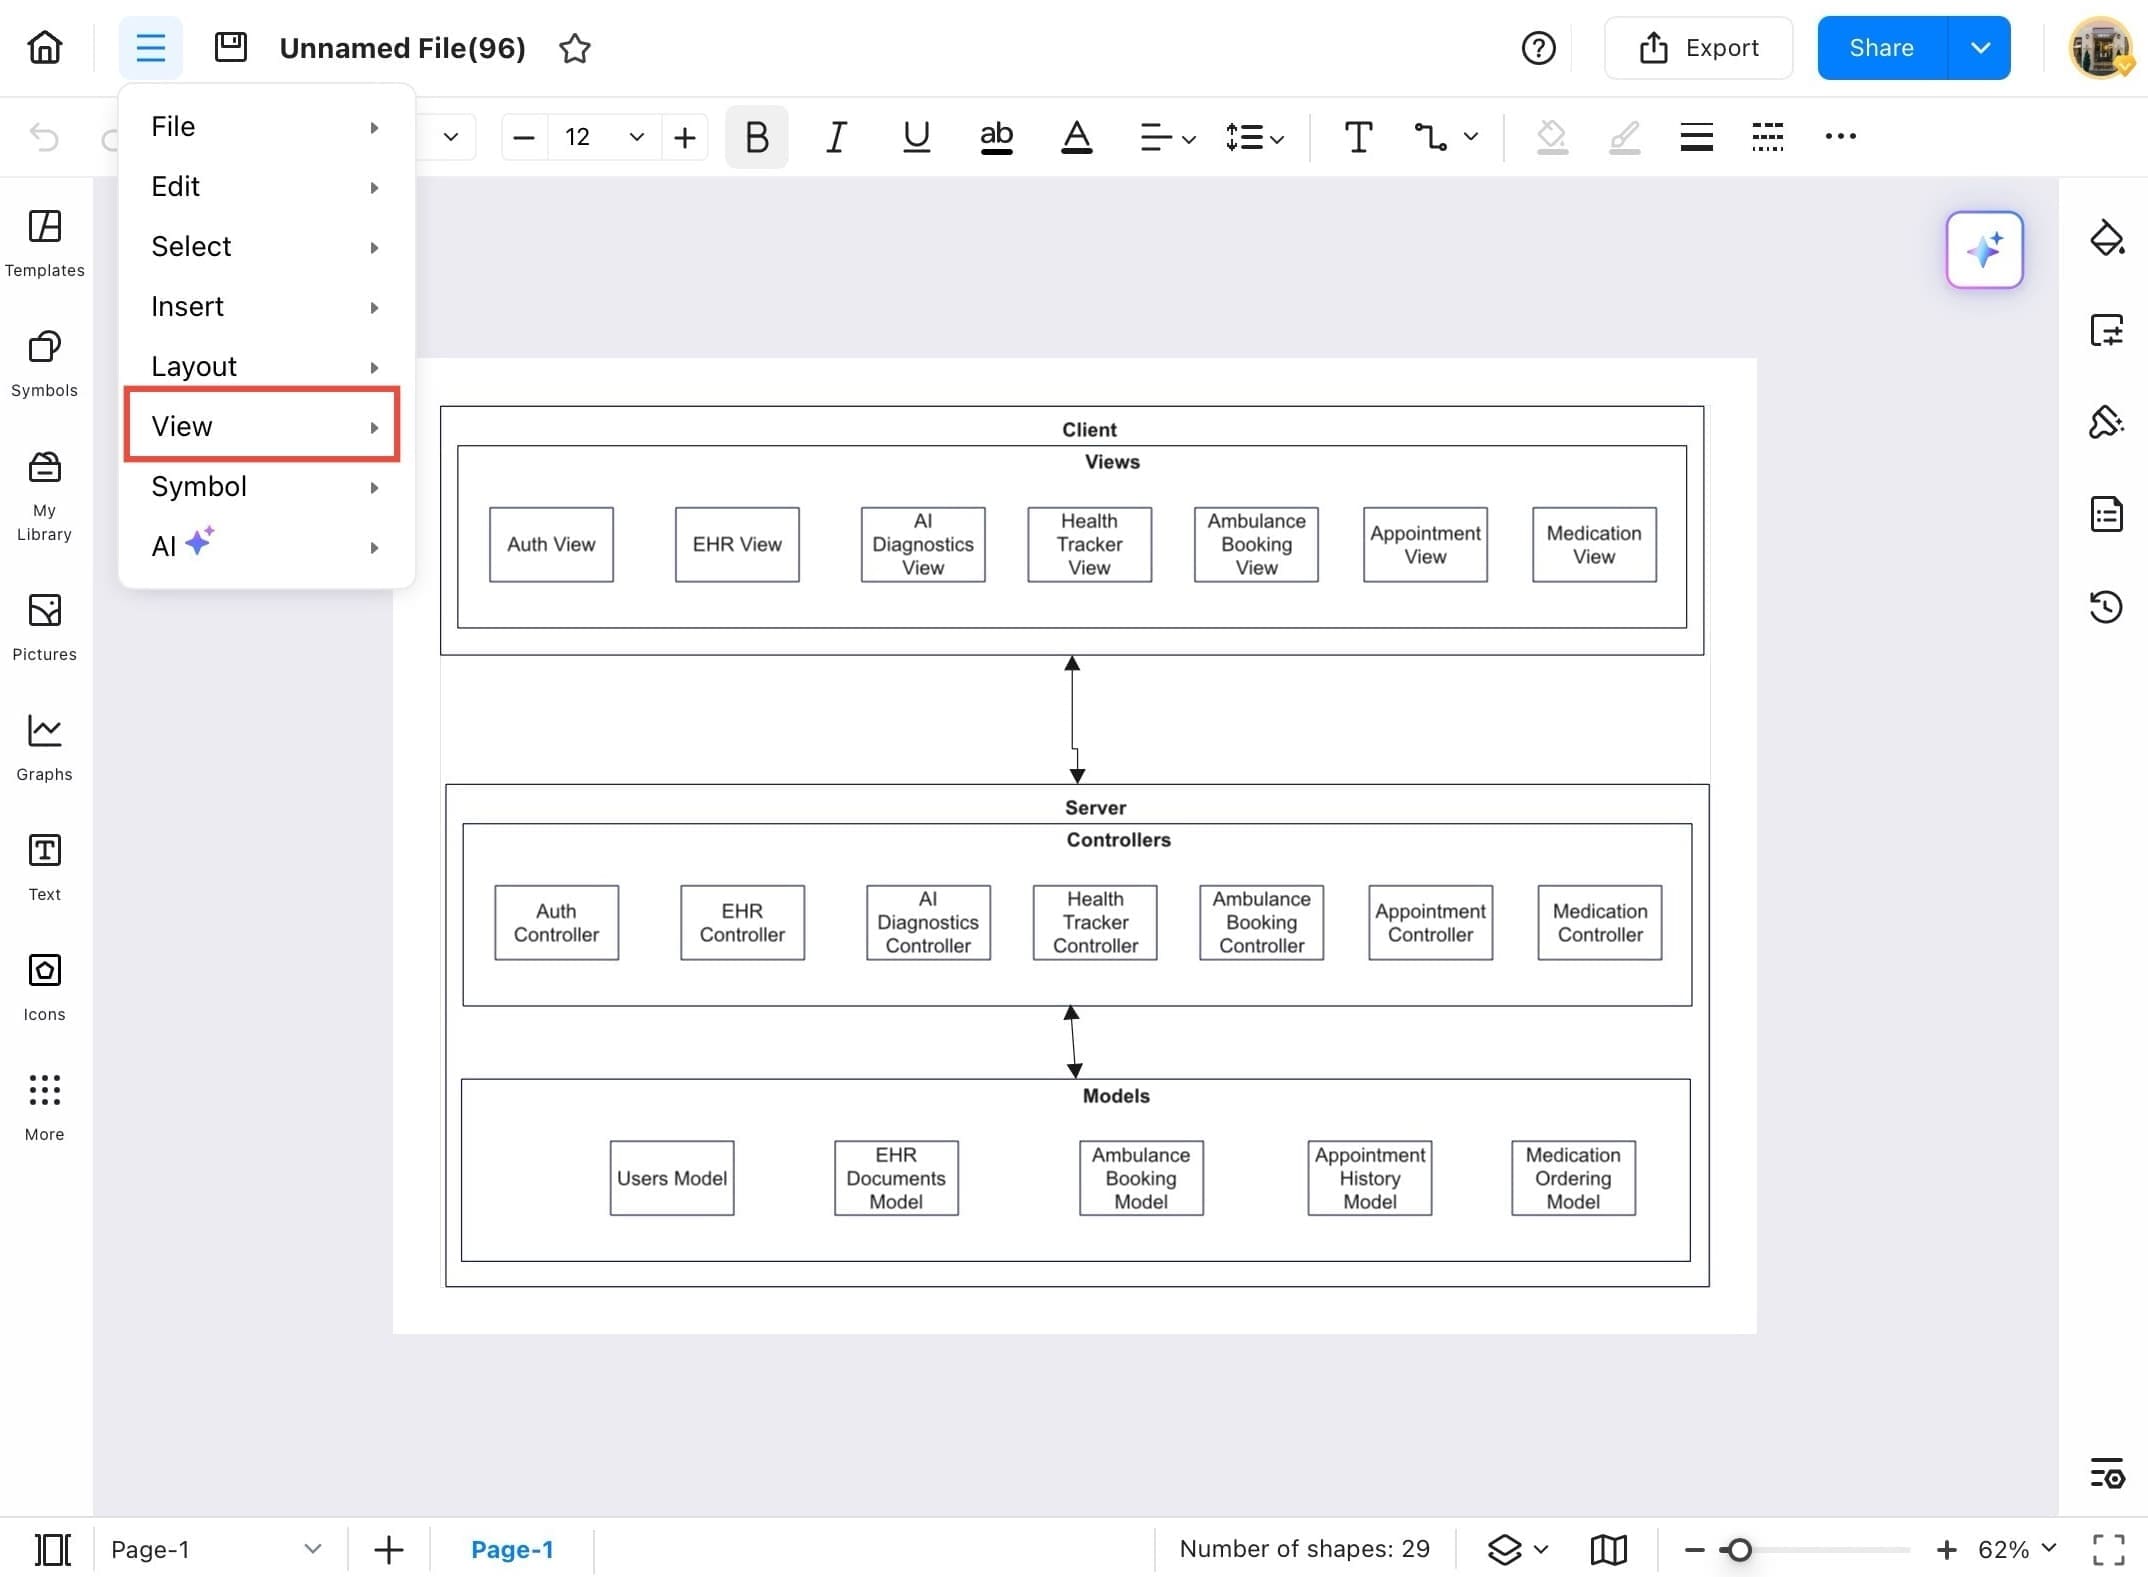
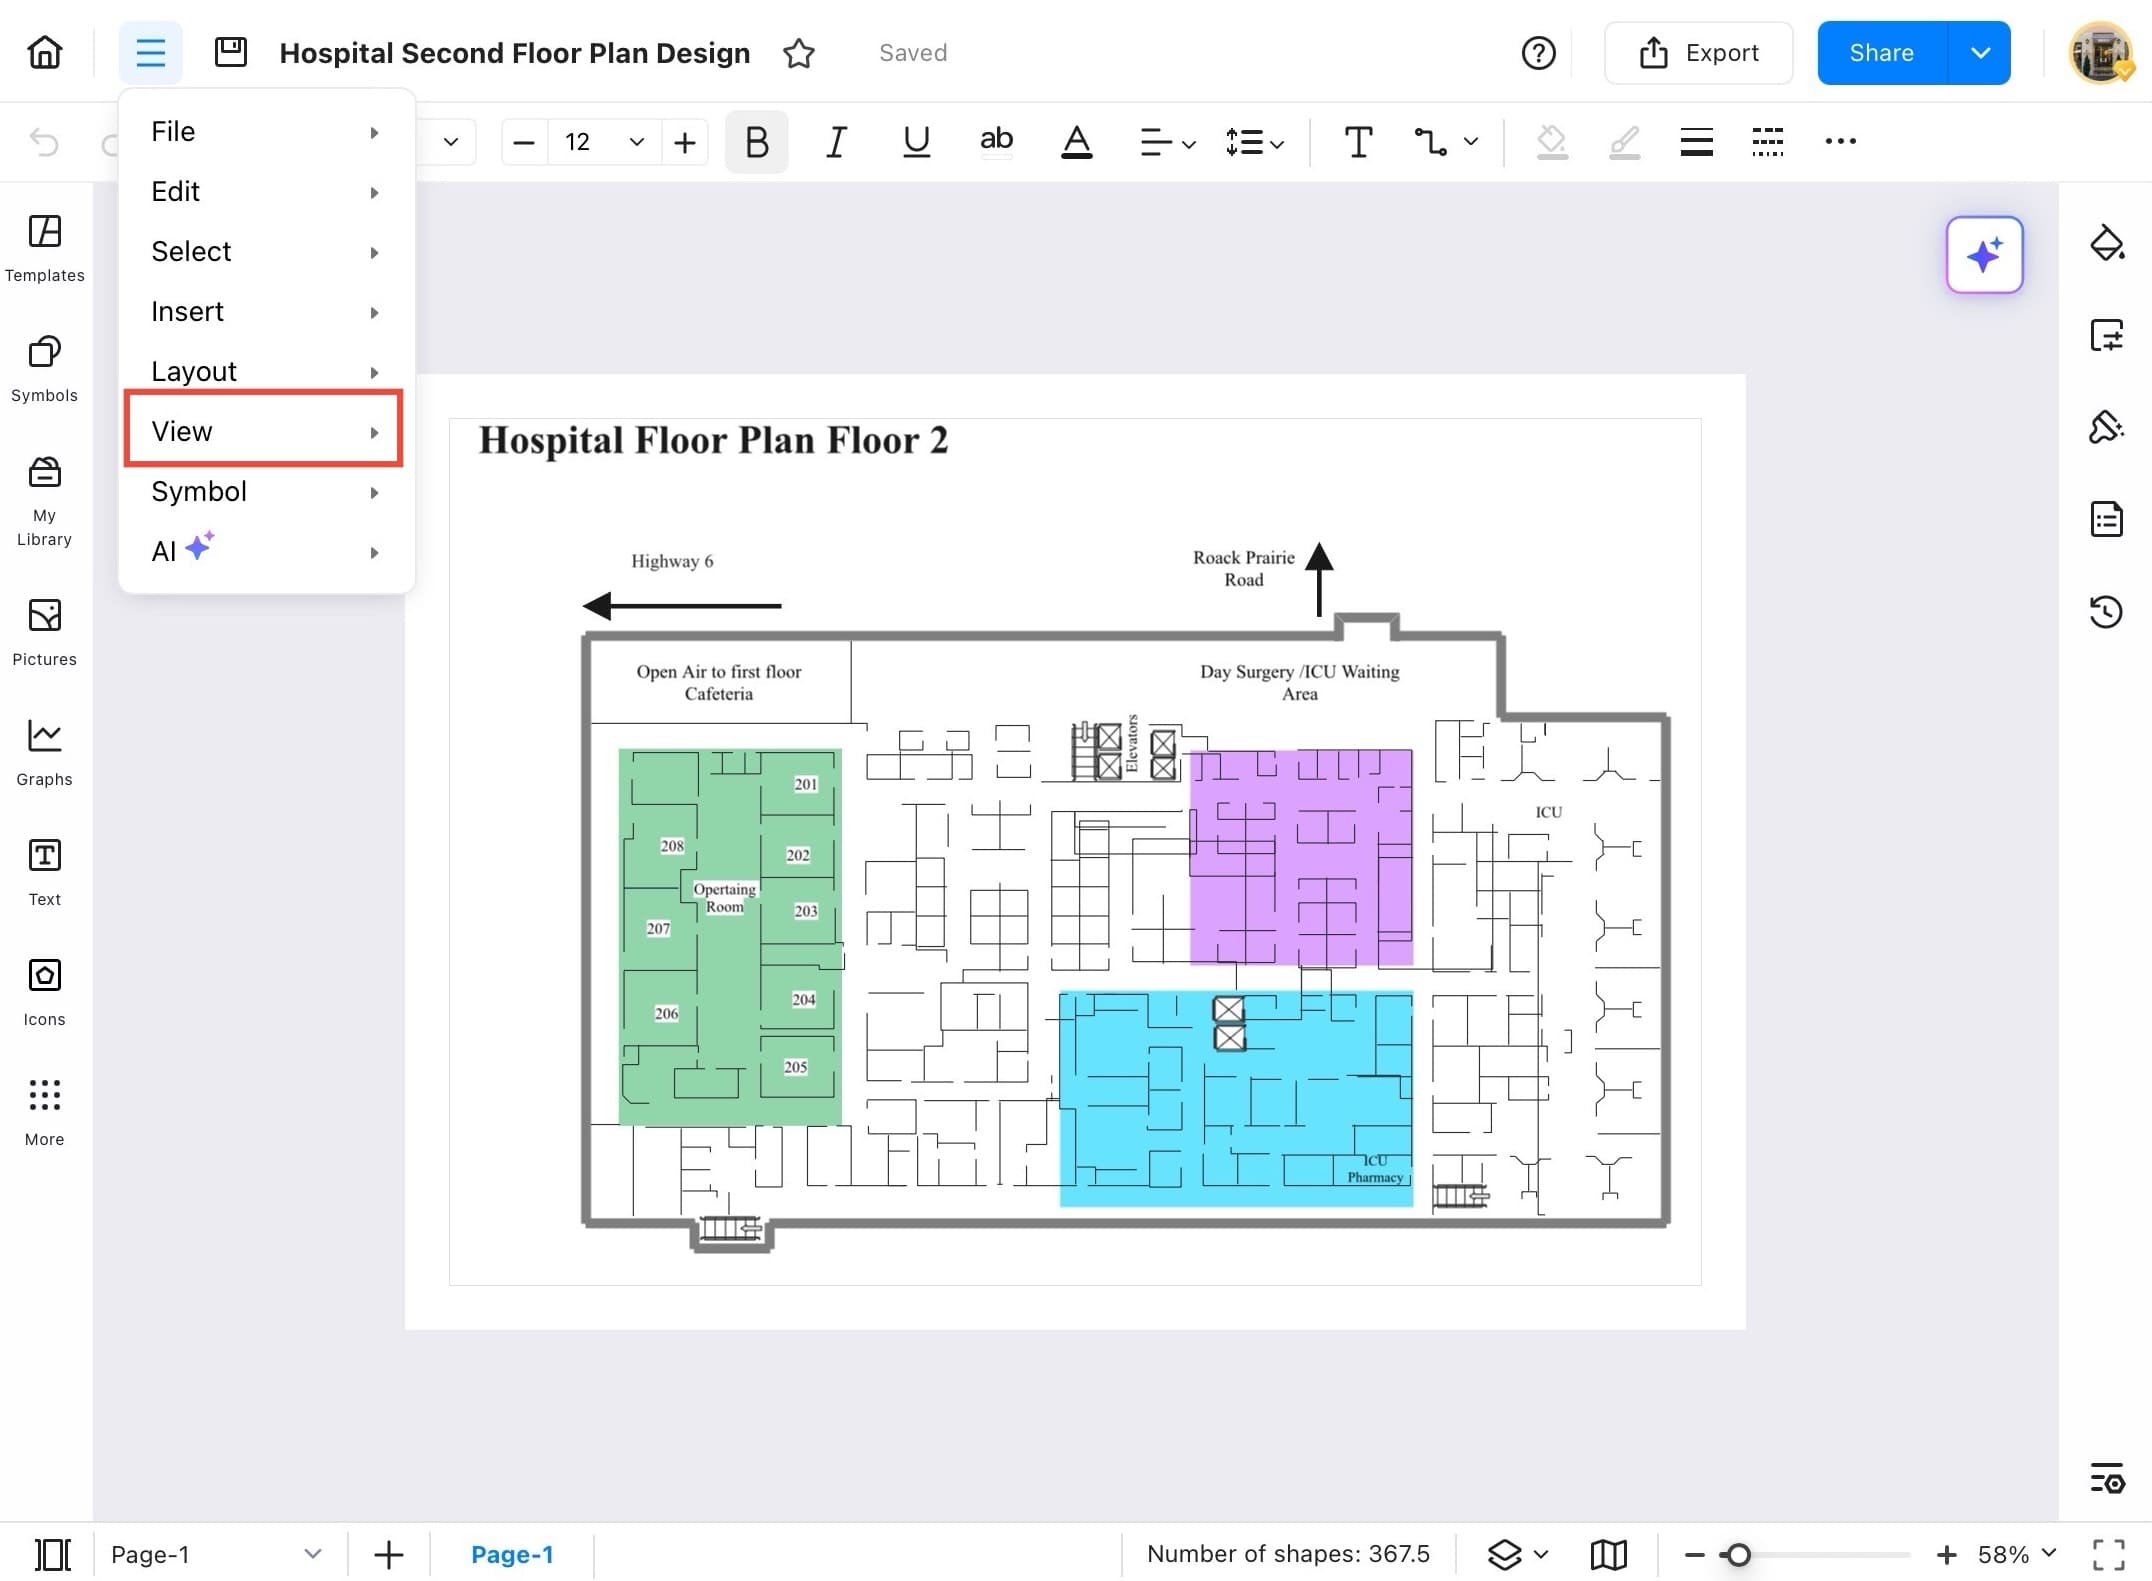
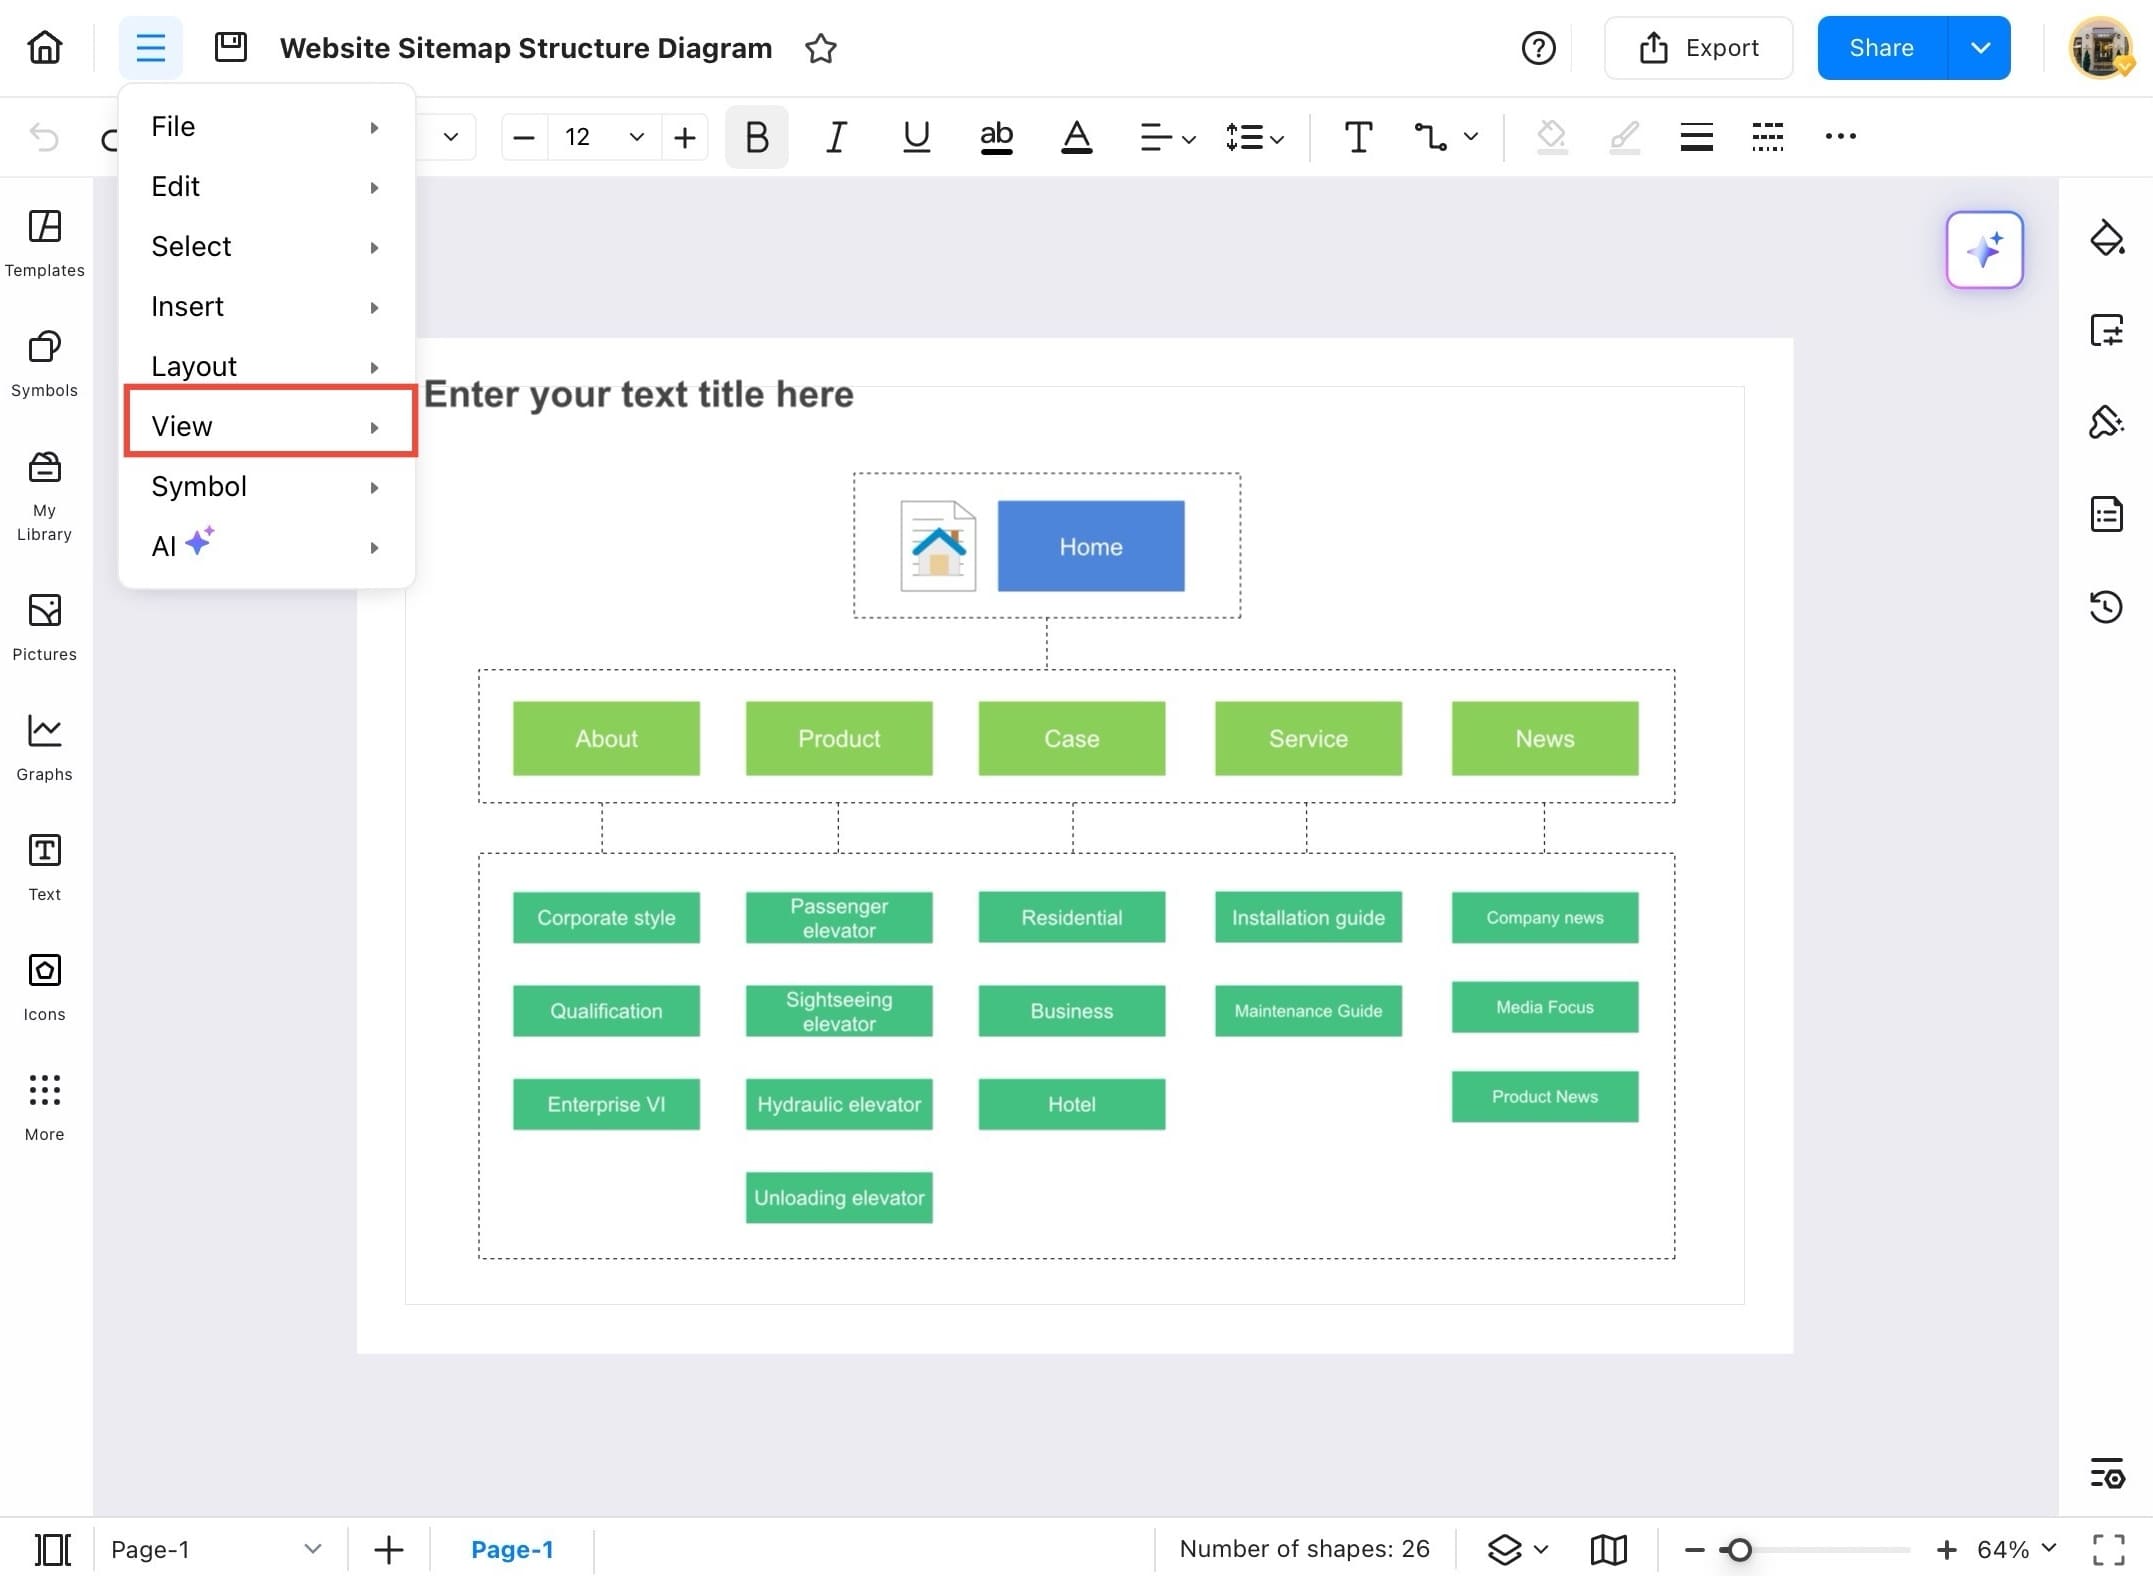
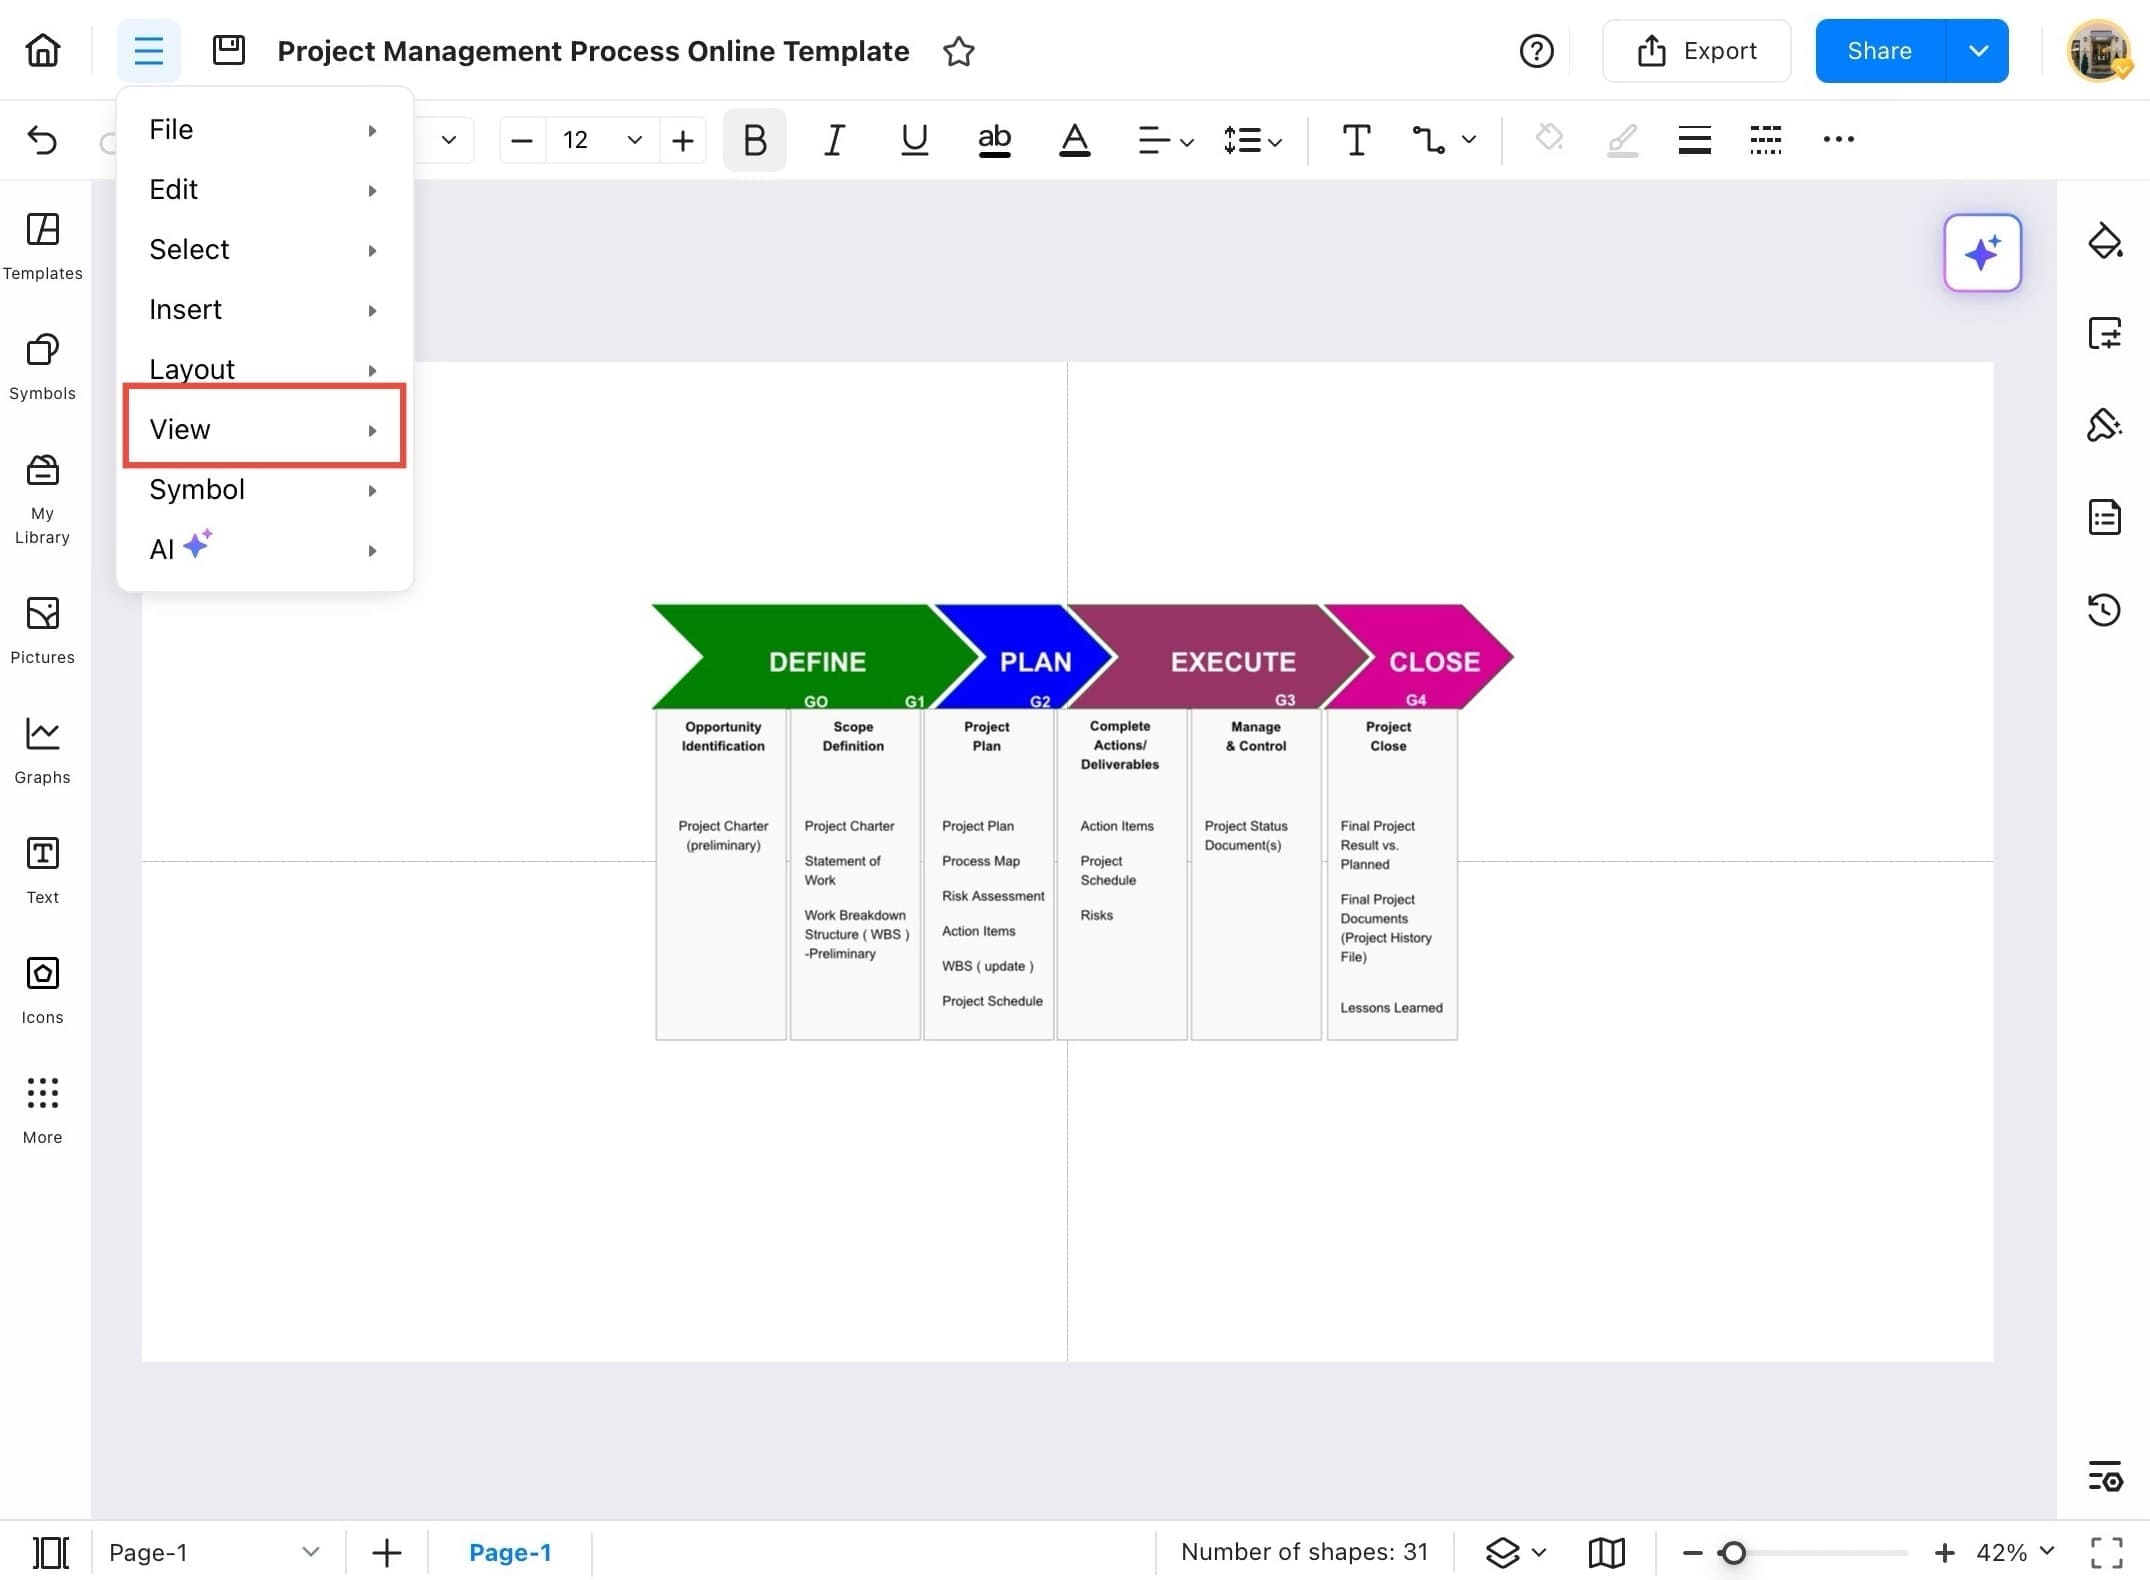
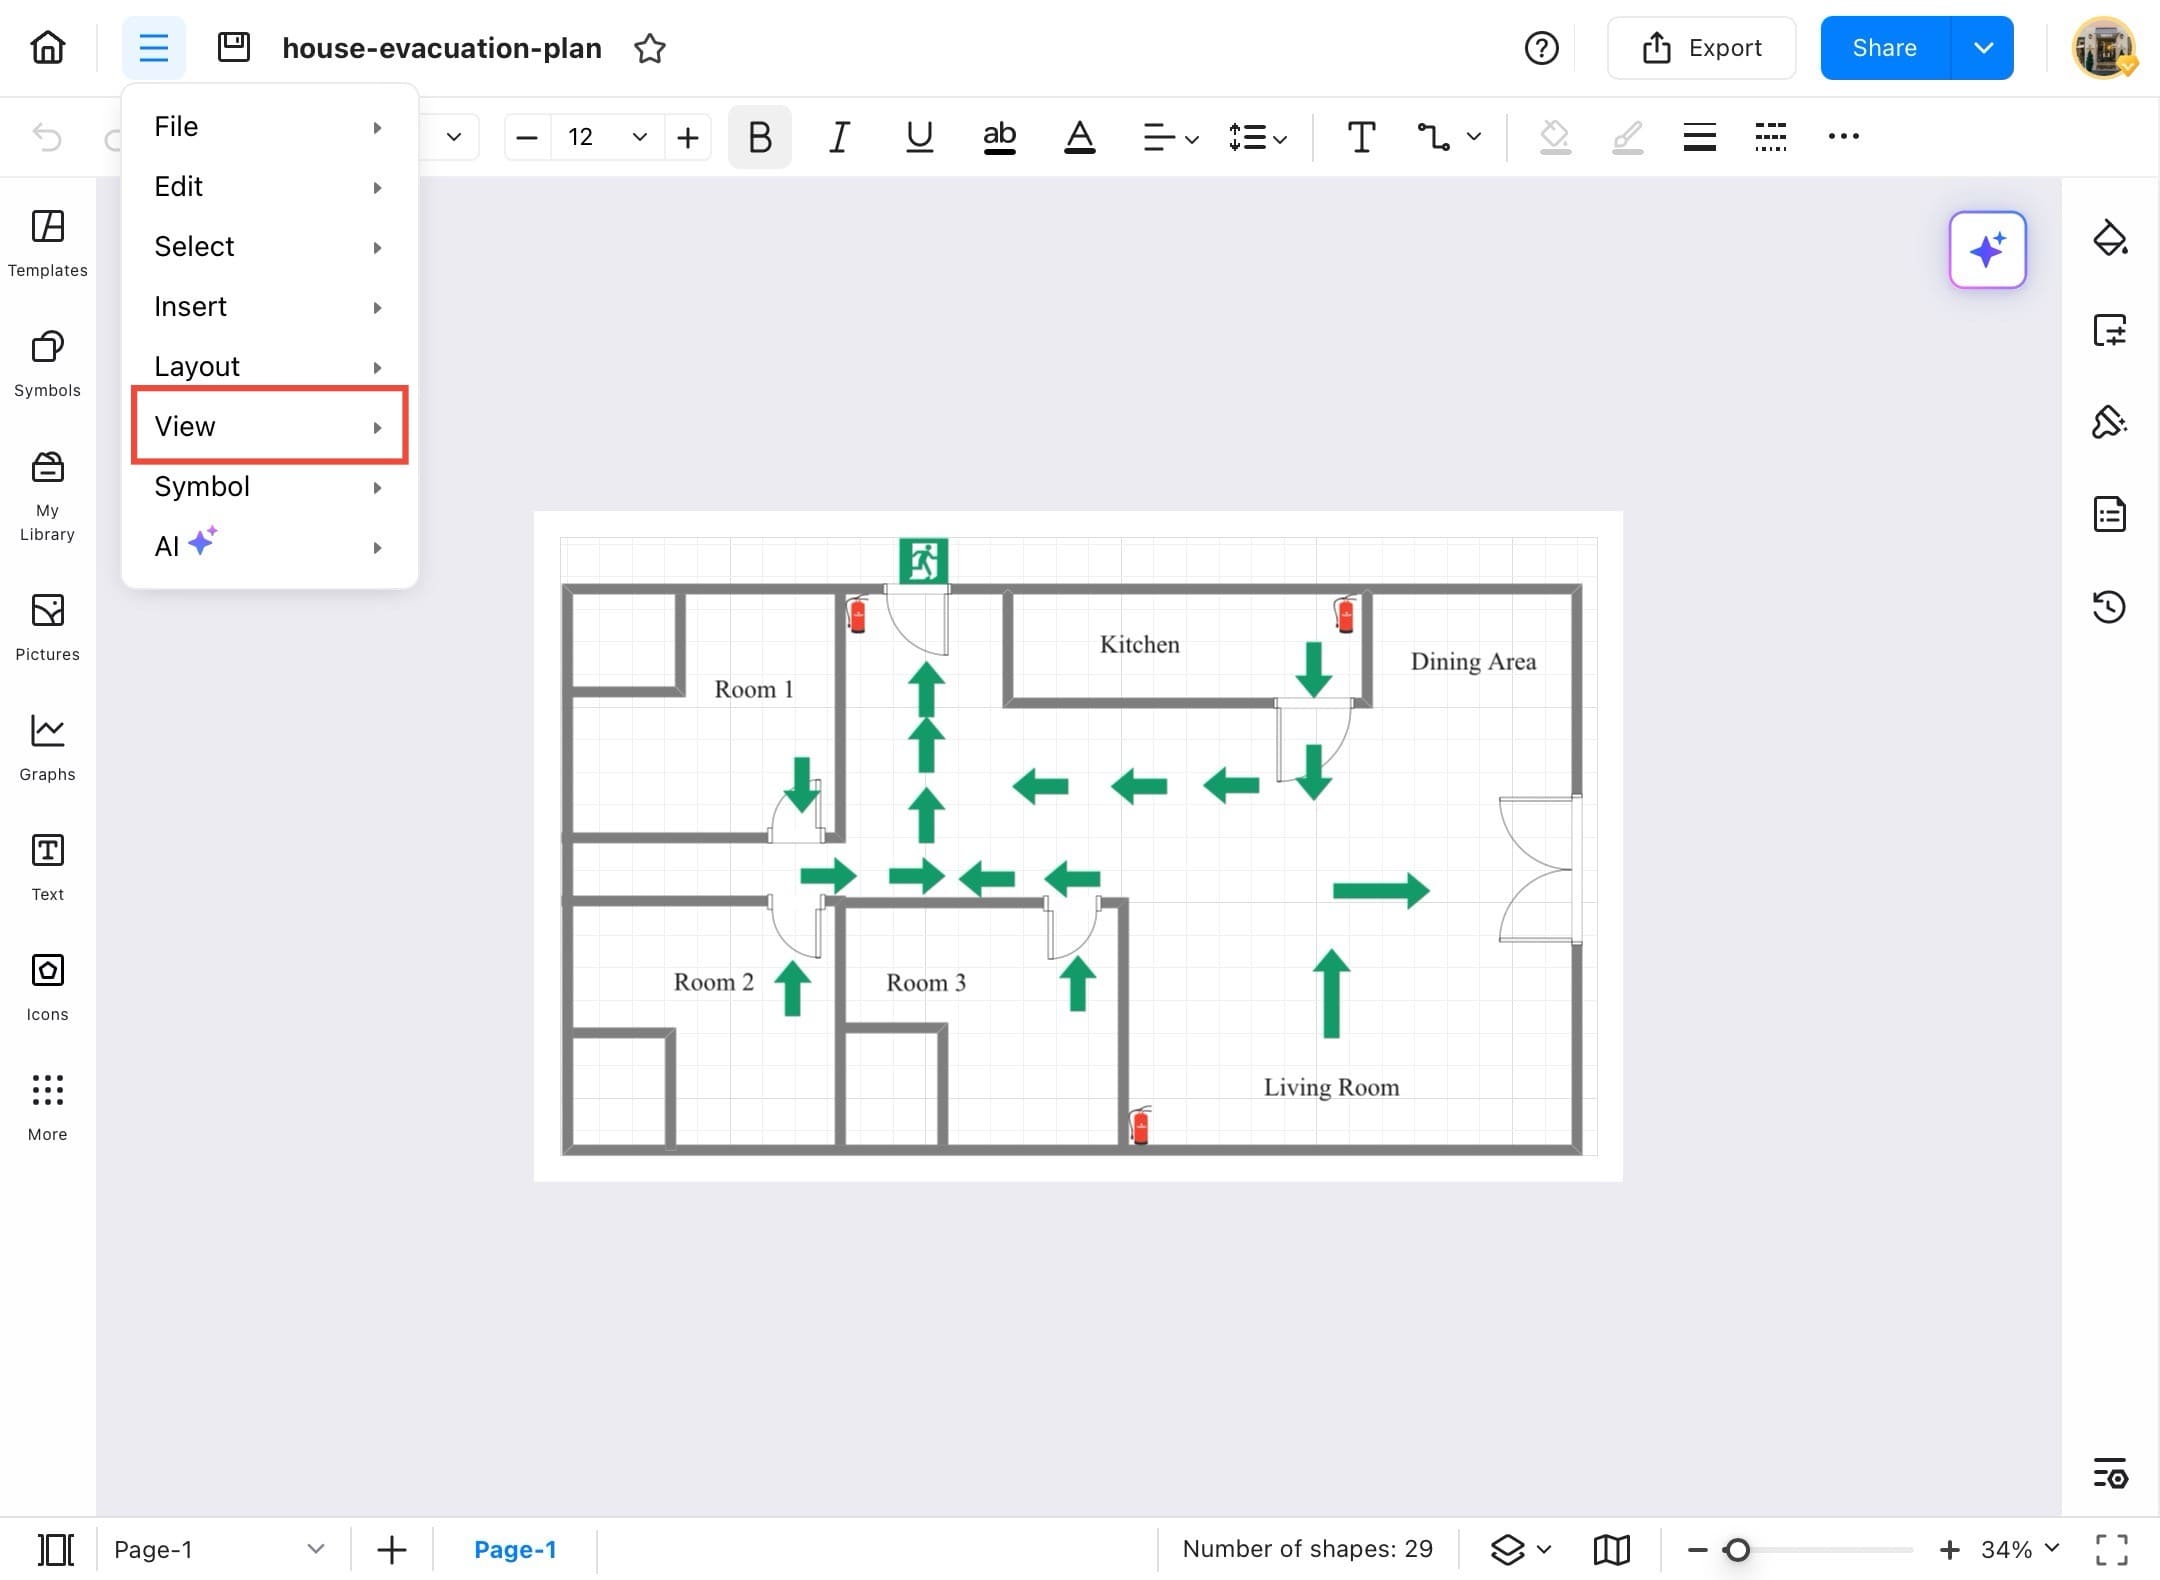
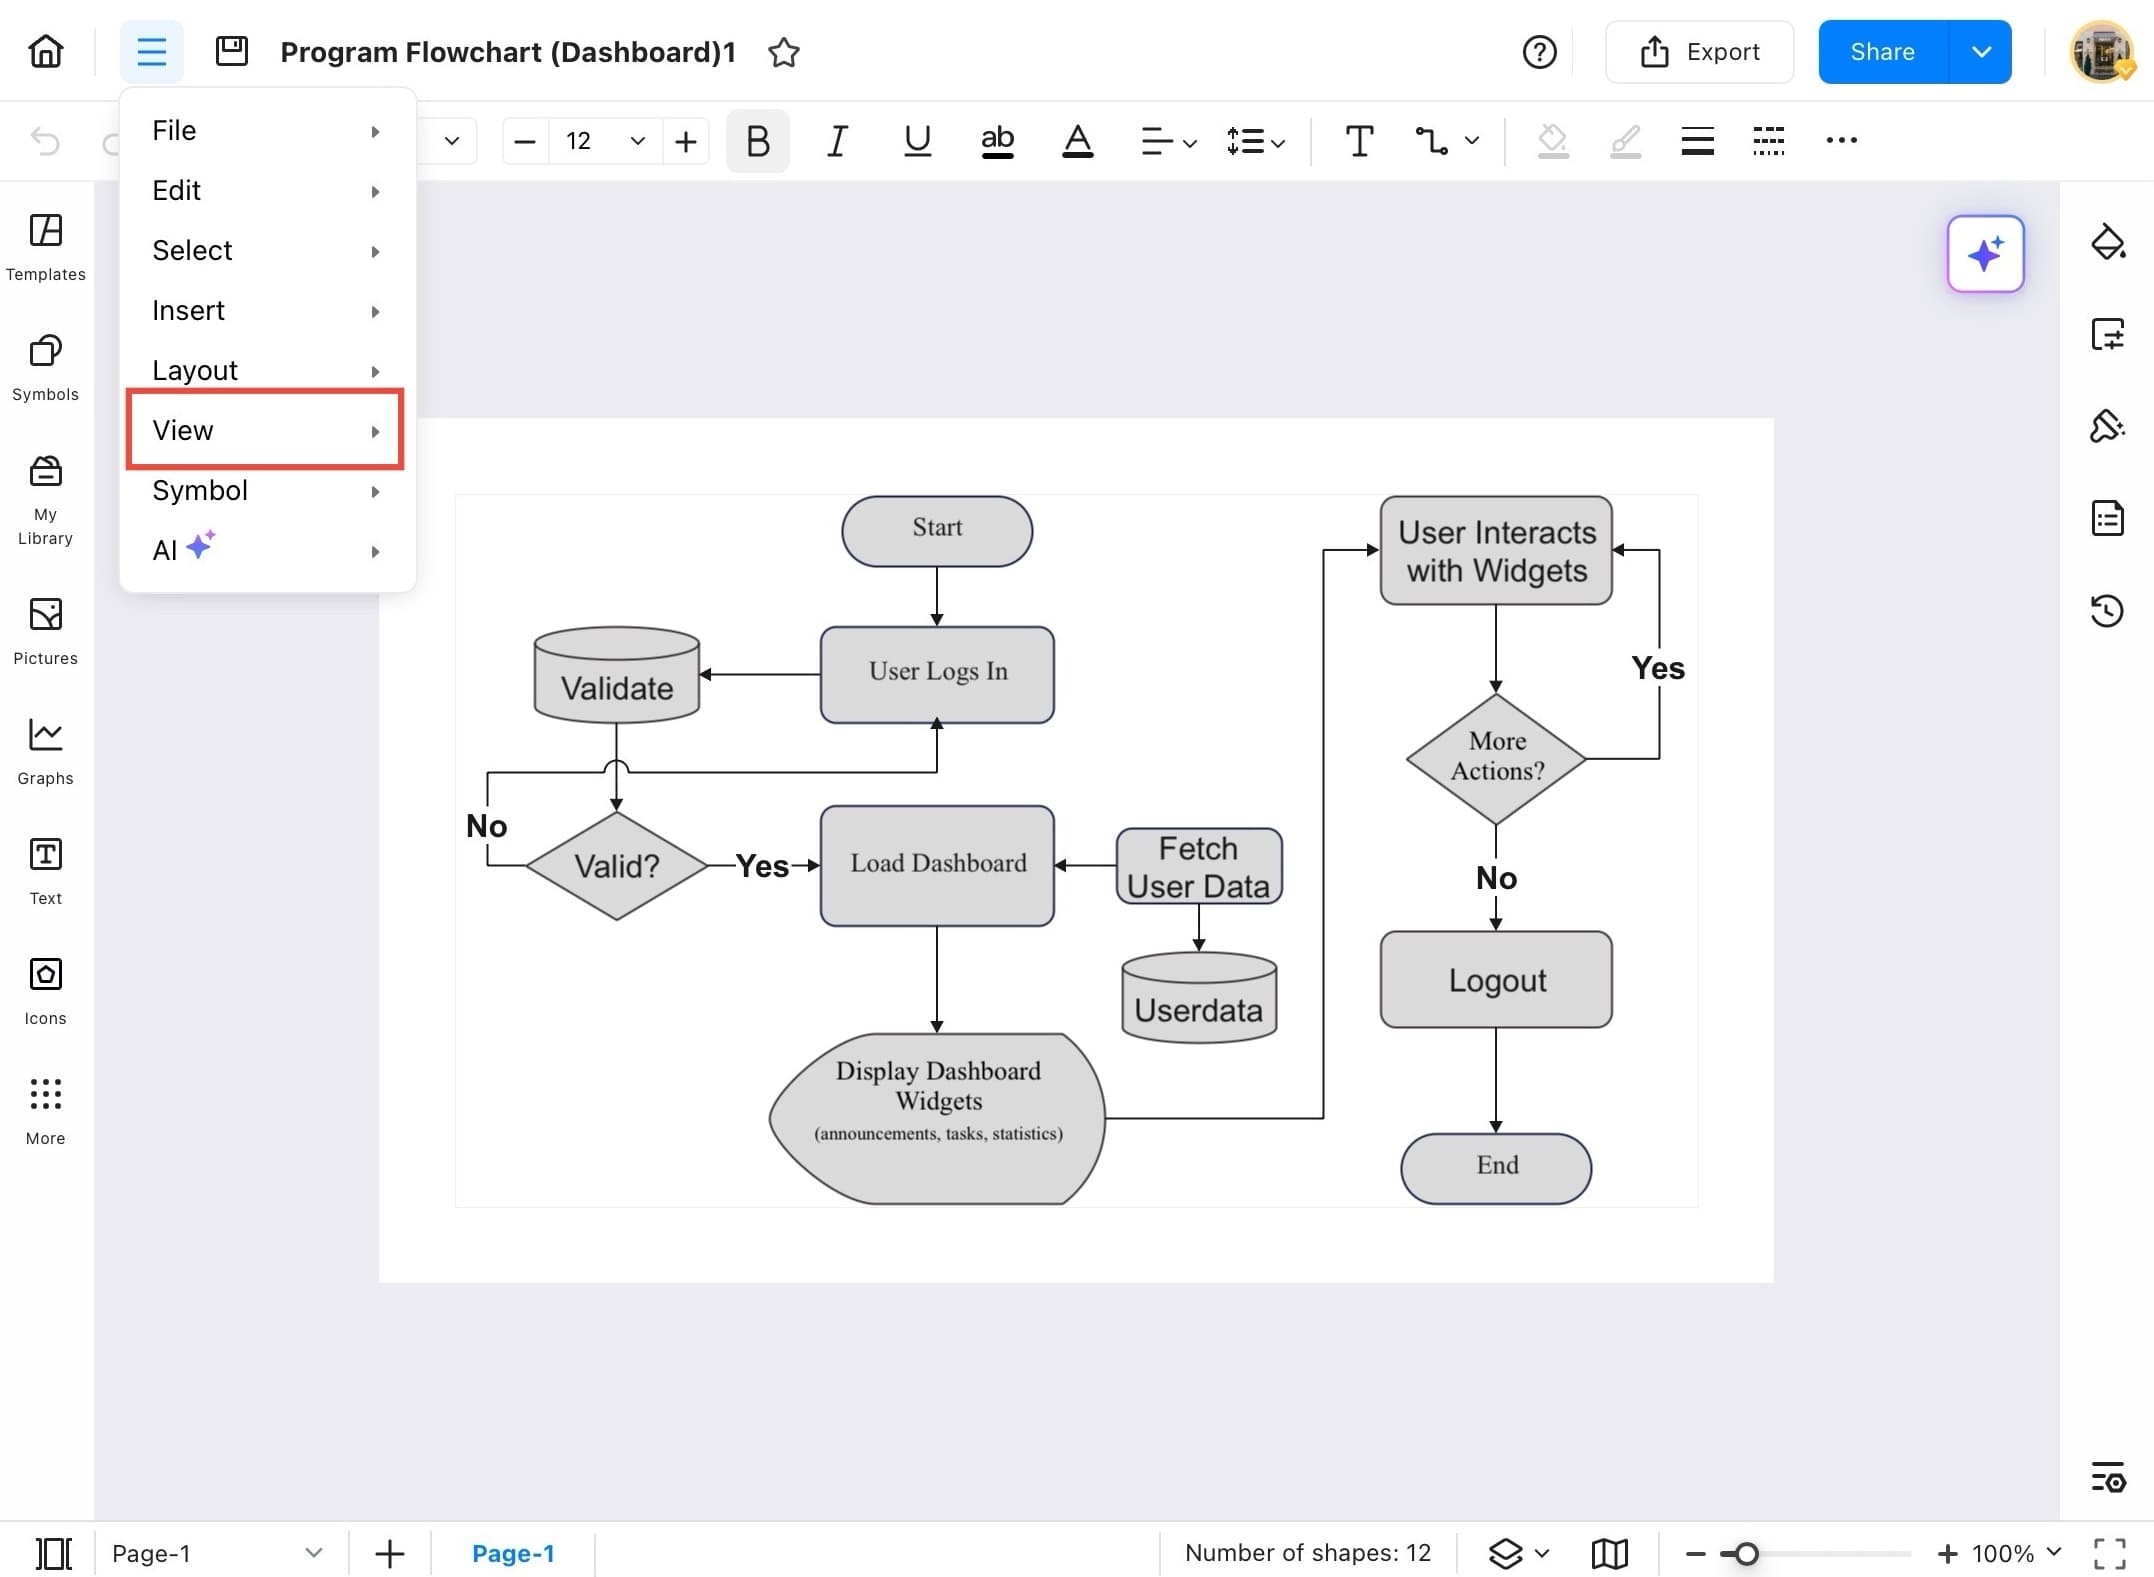
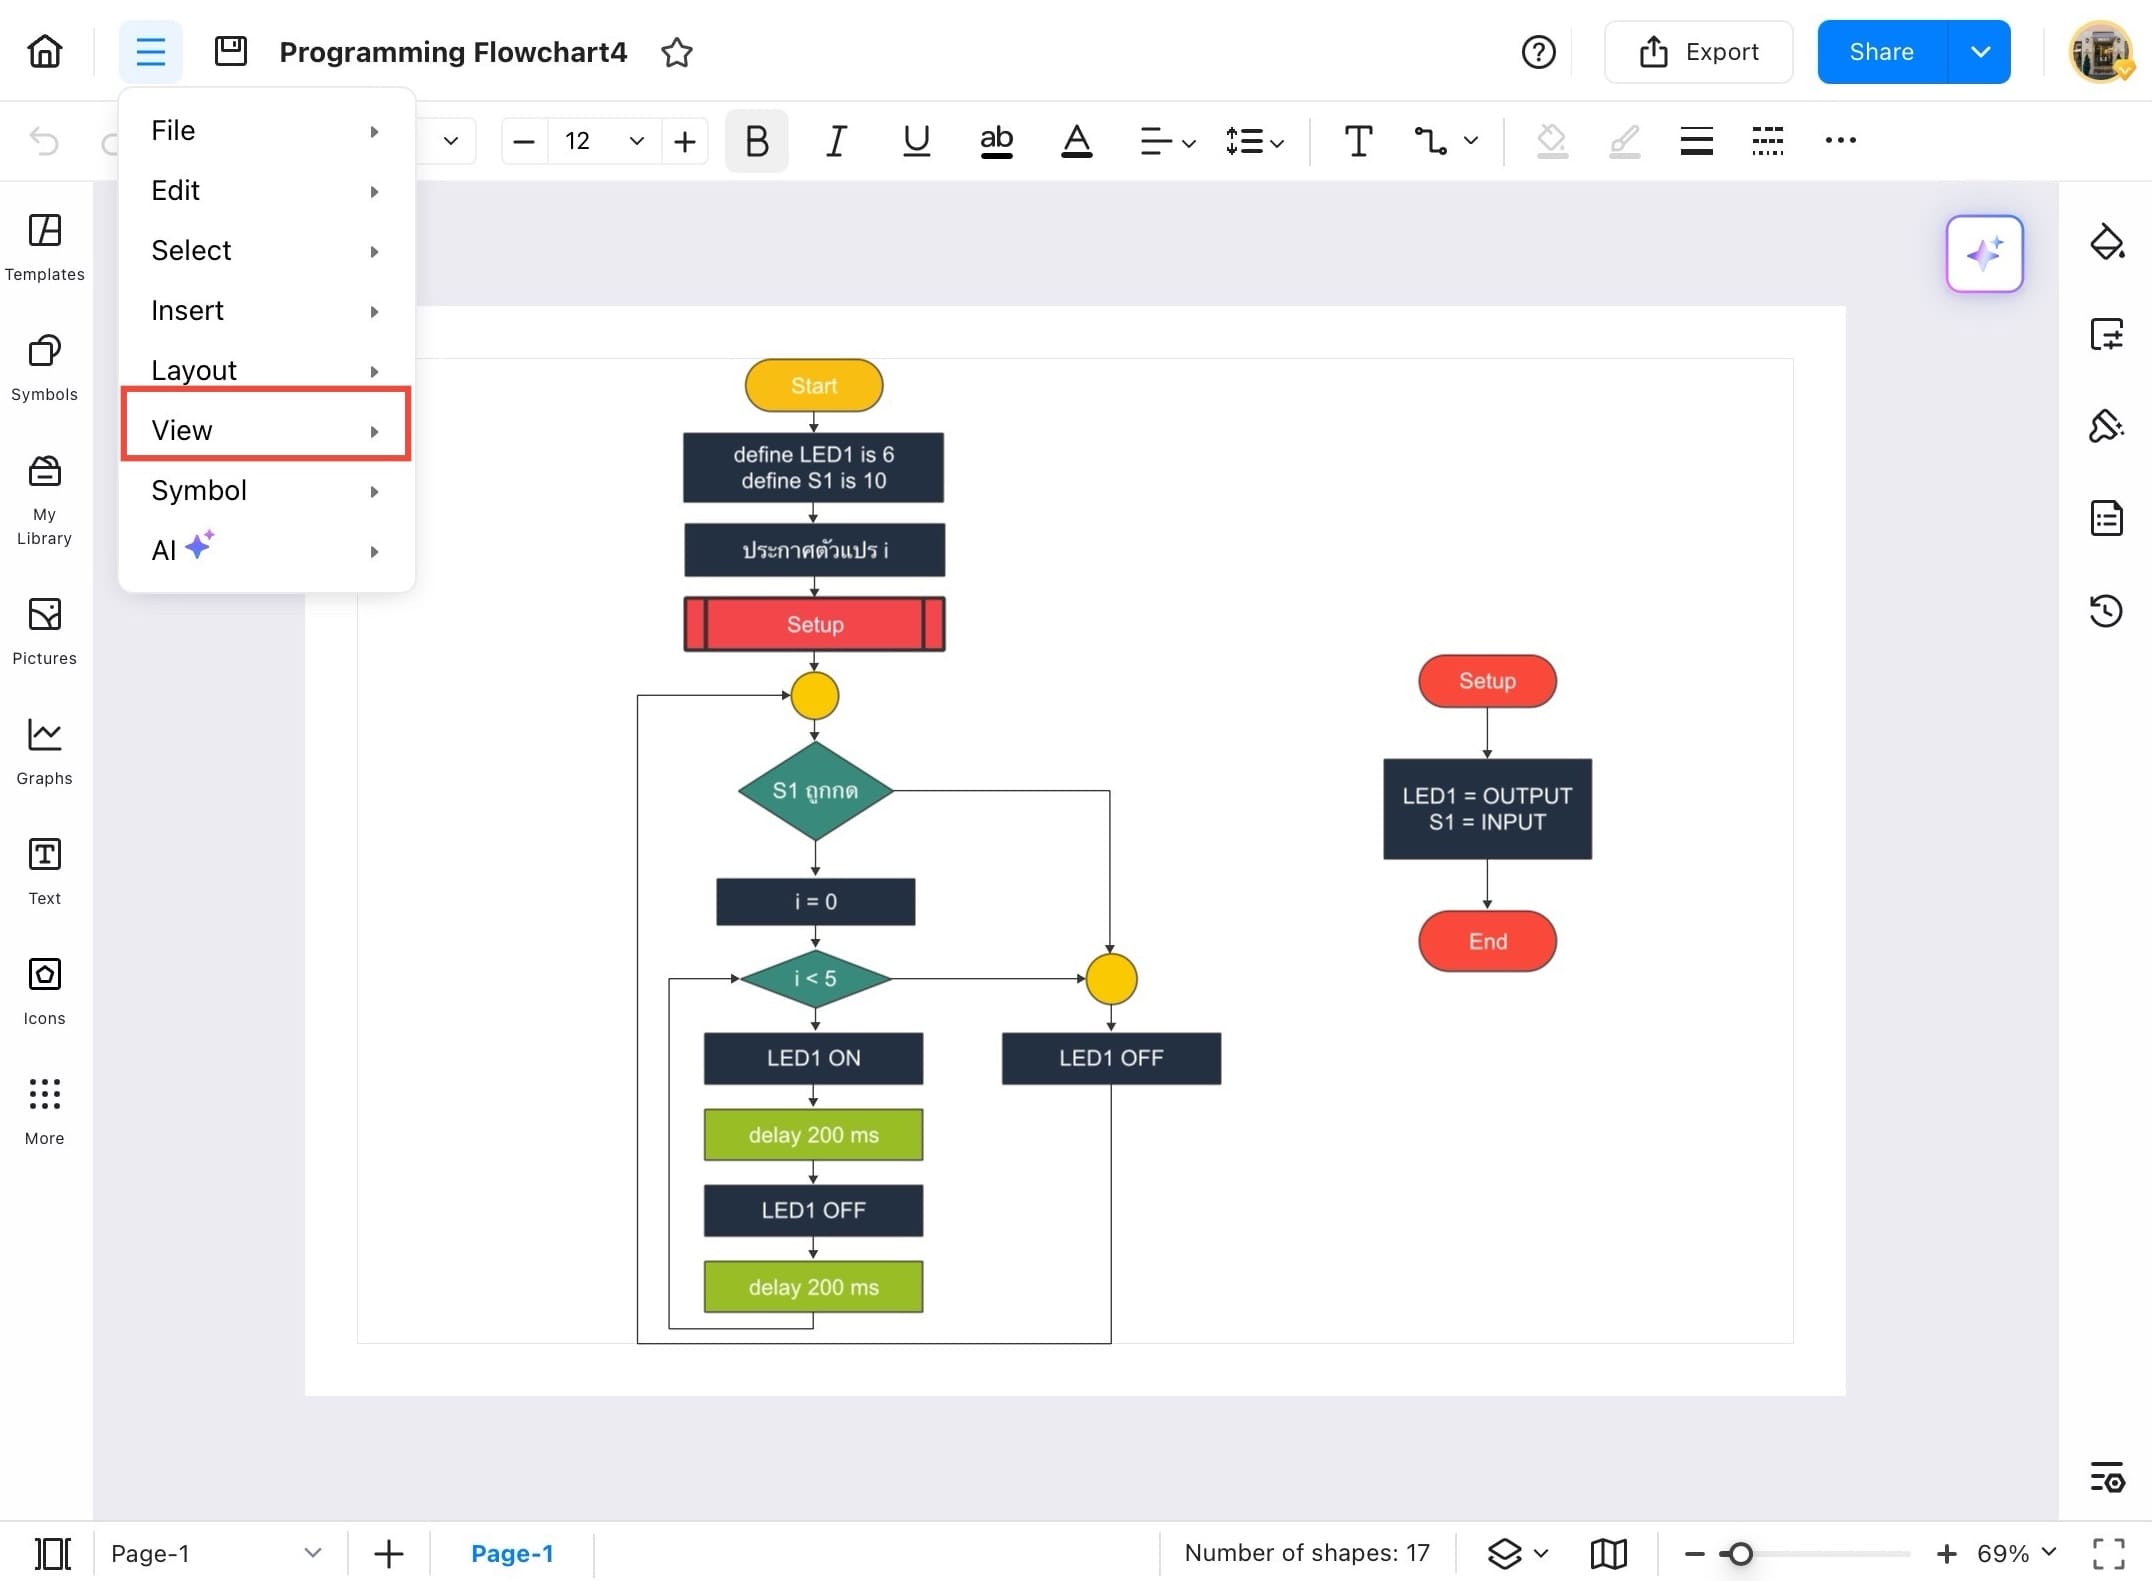
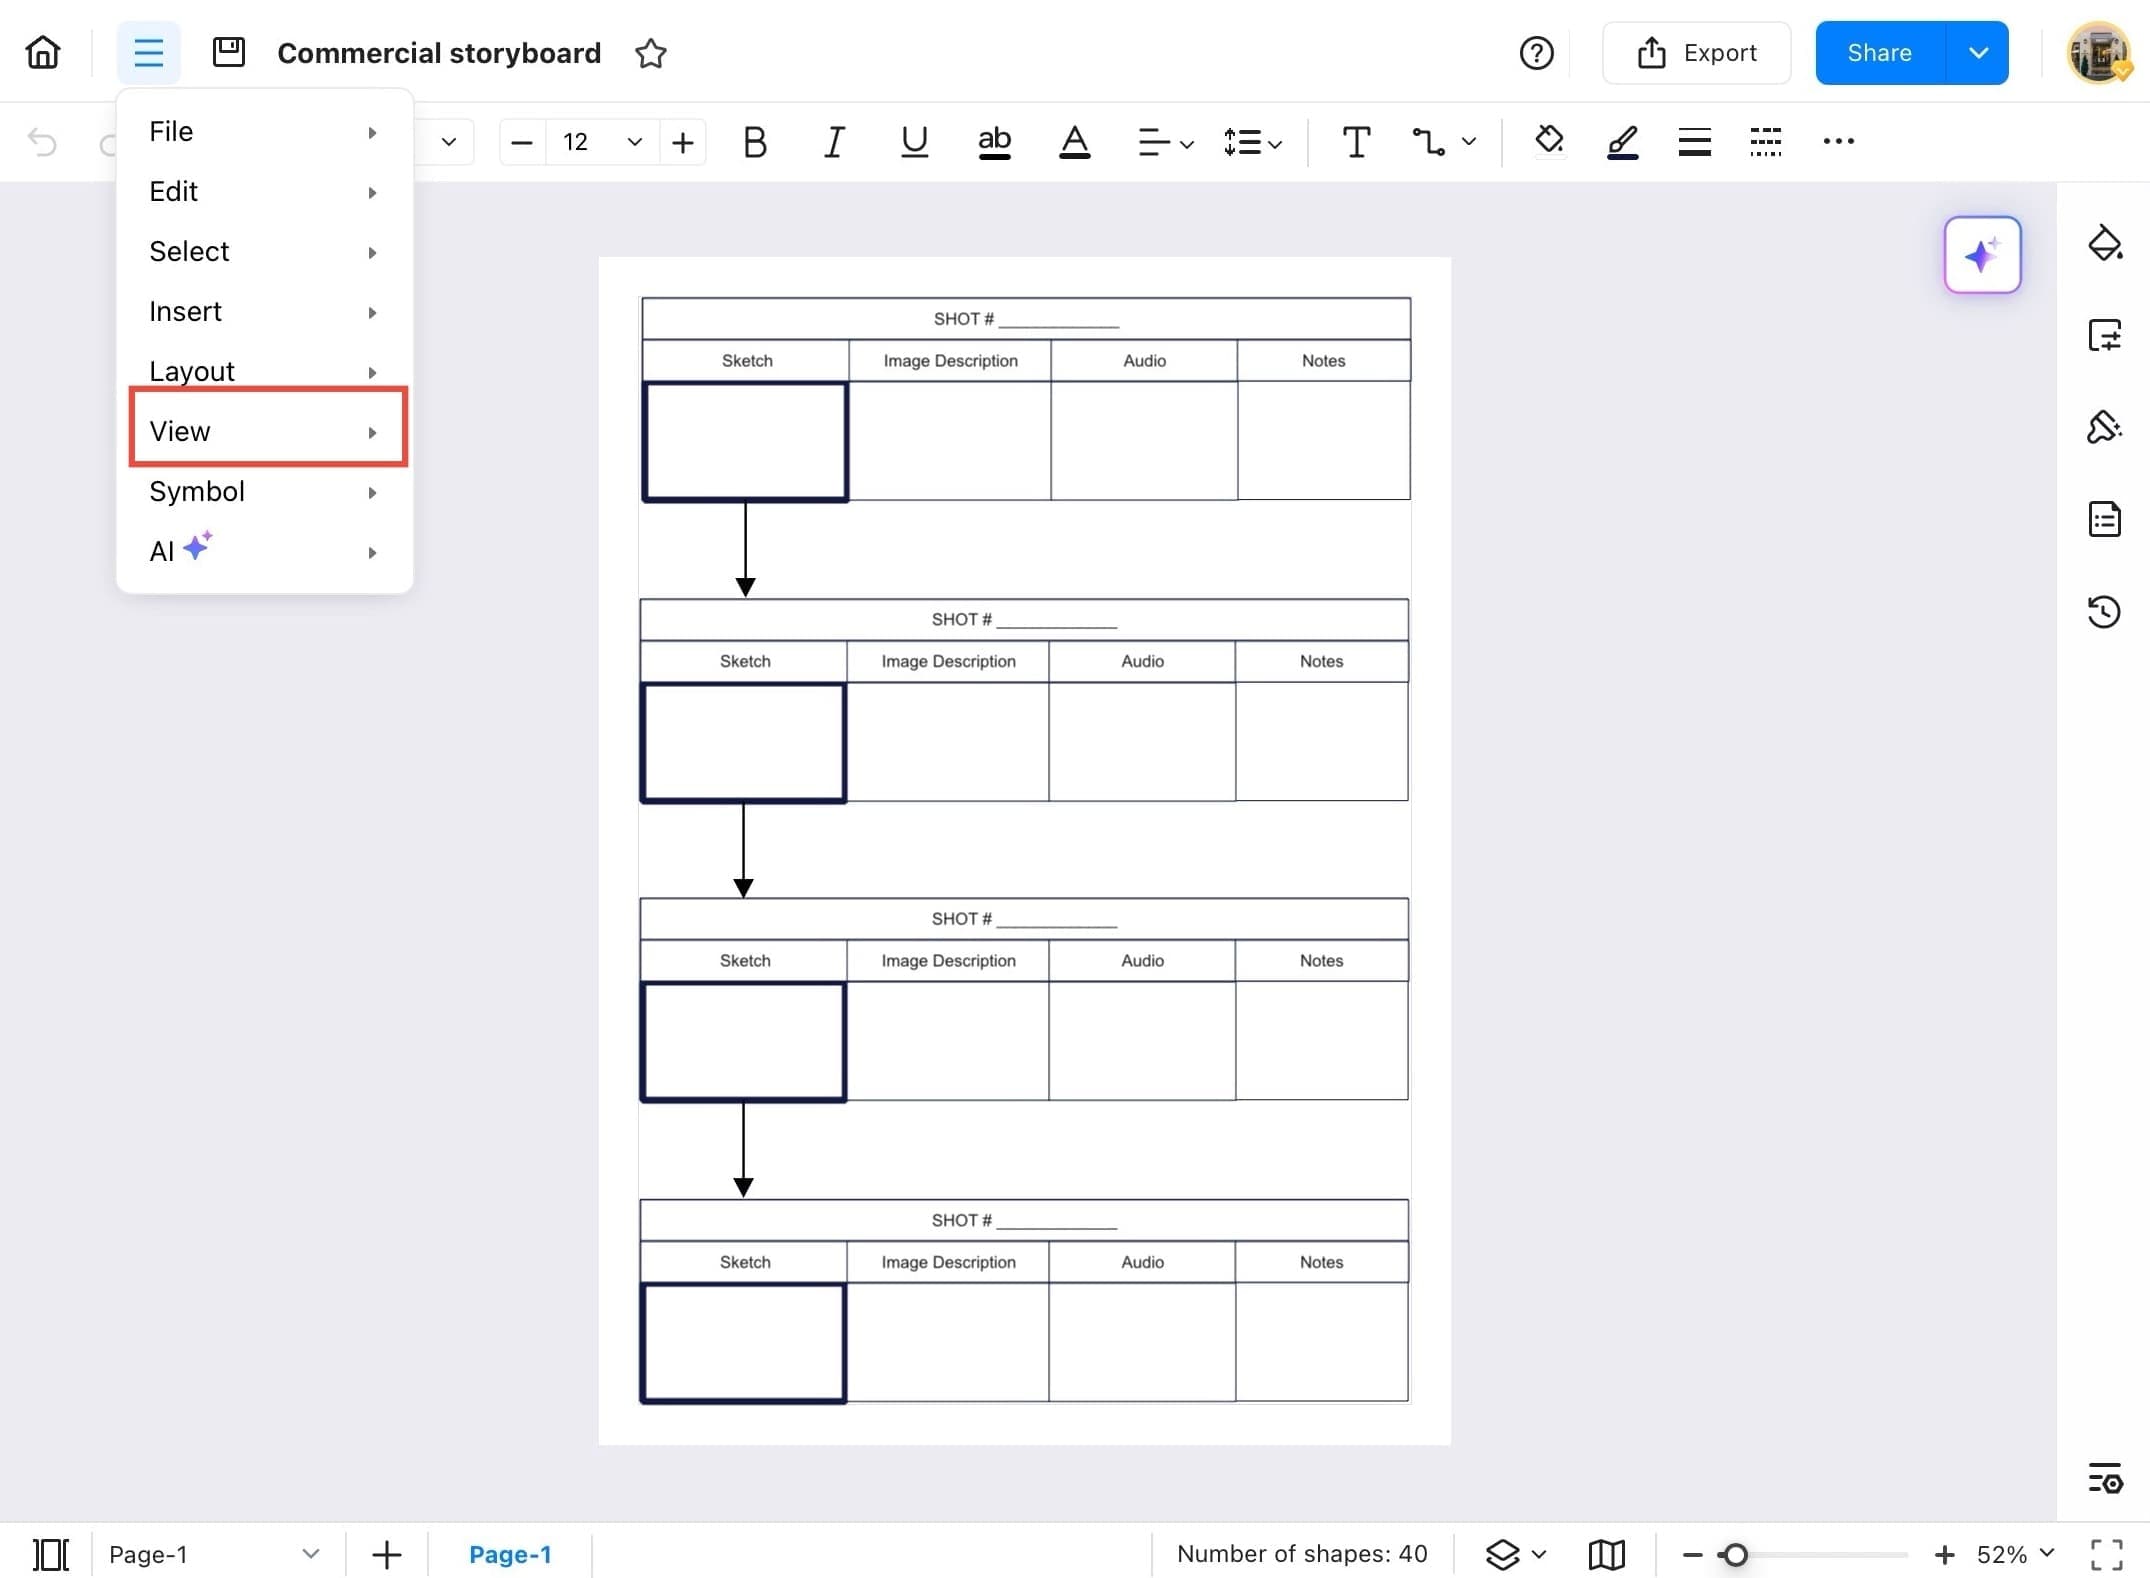
Step ❸ Tap the Menu icon
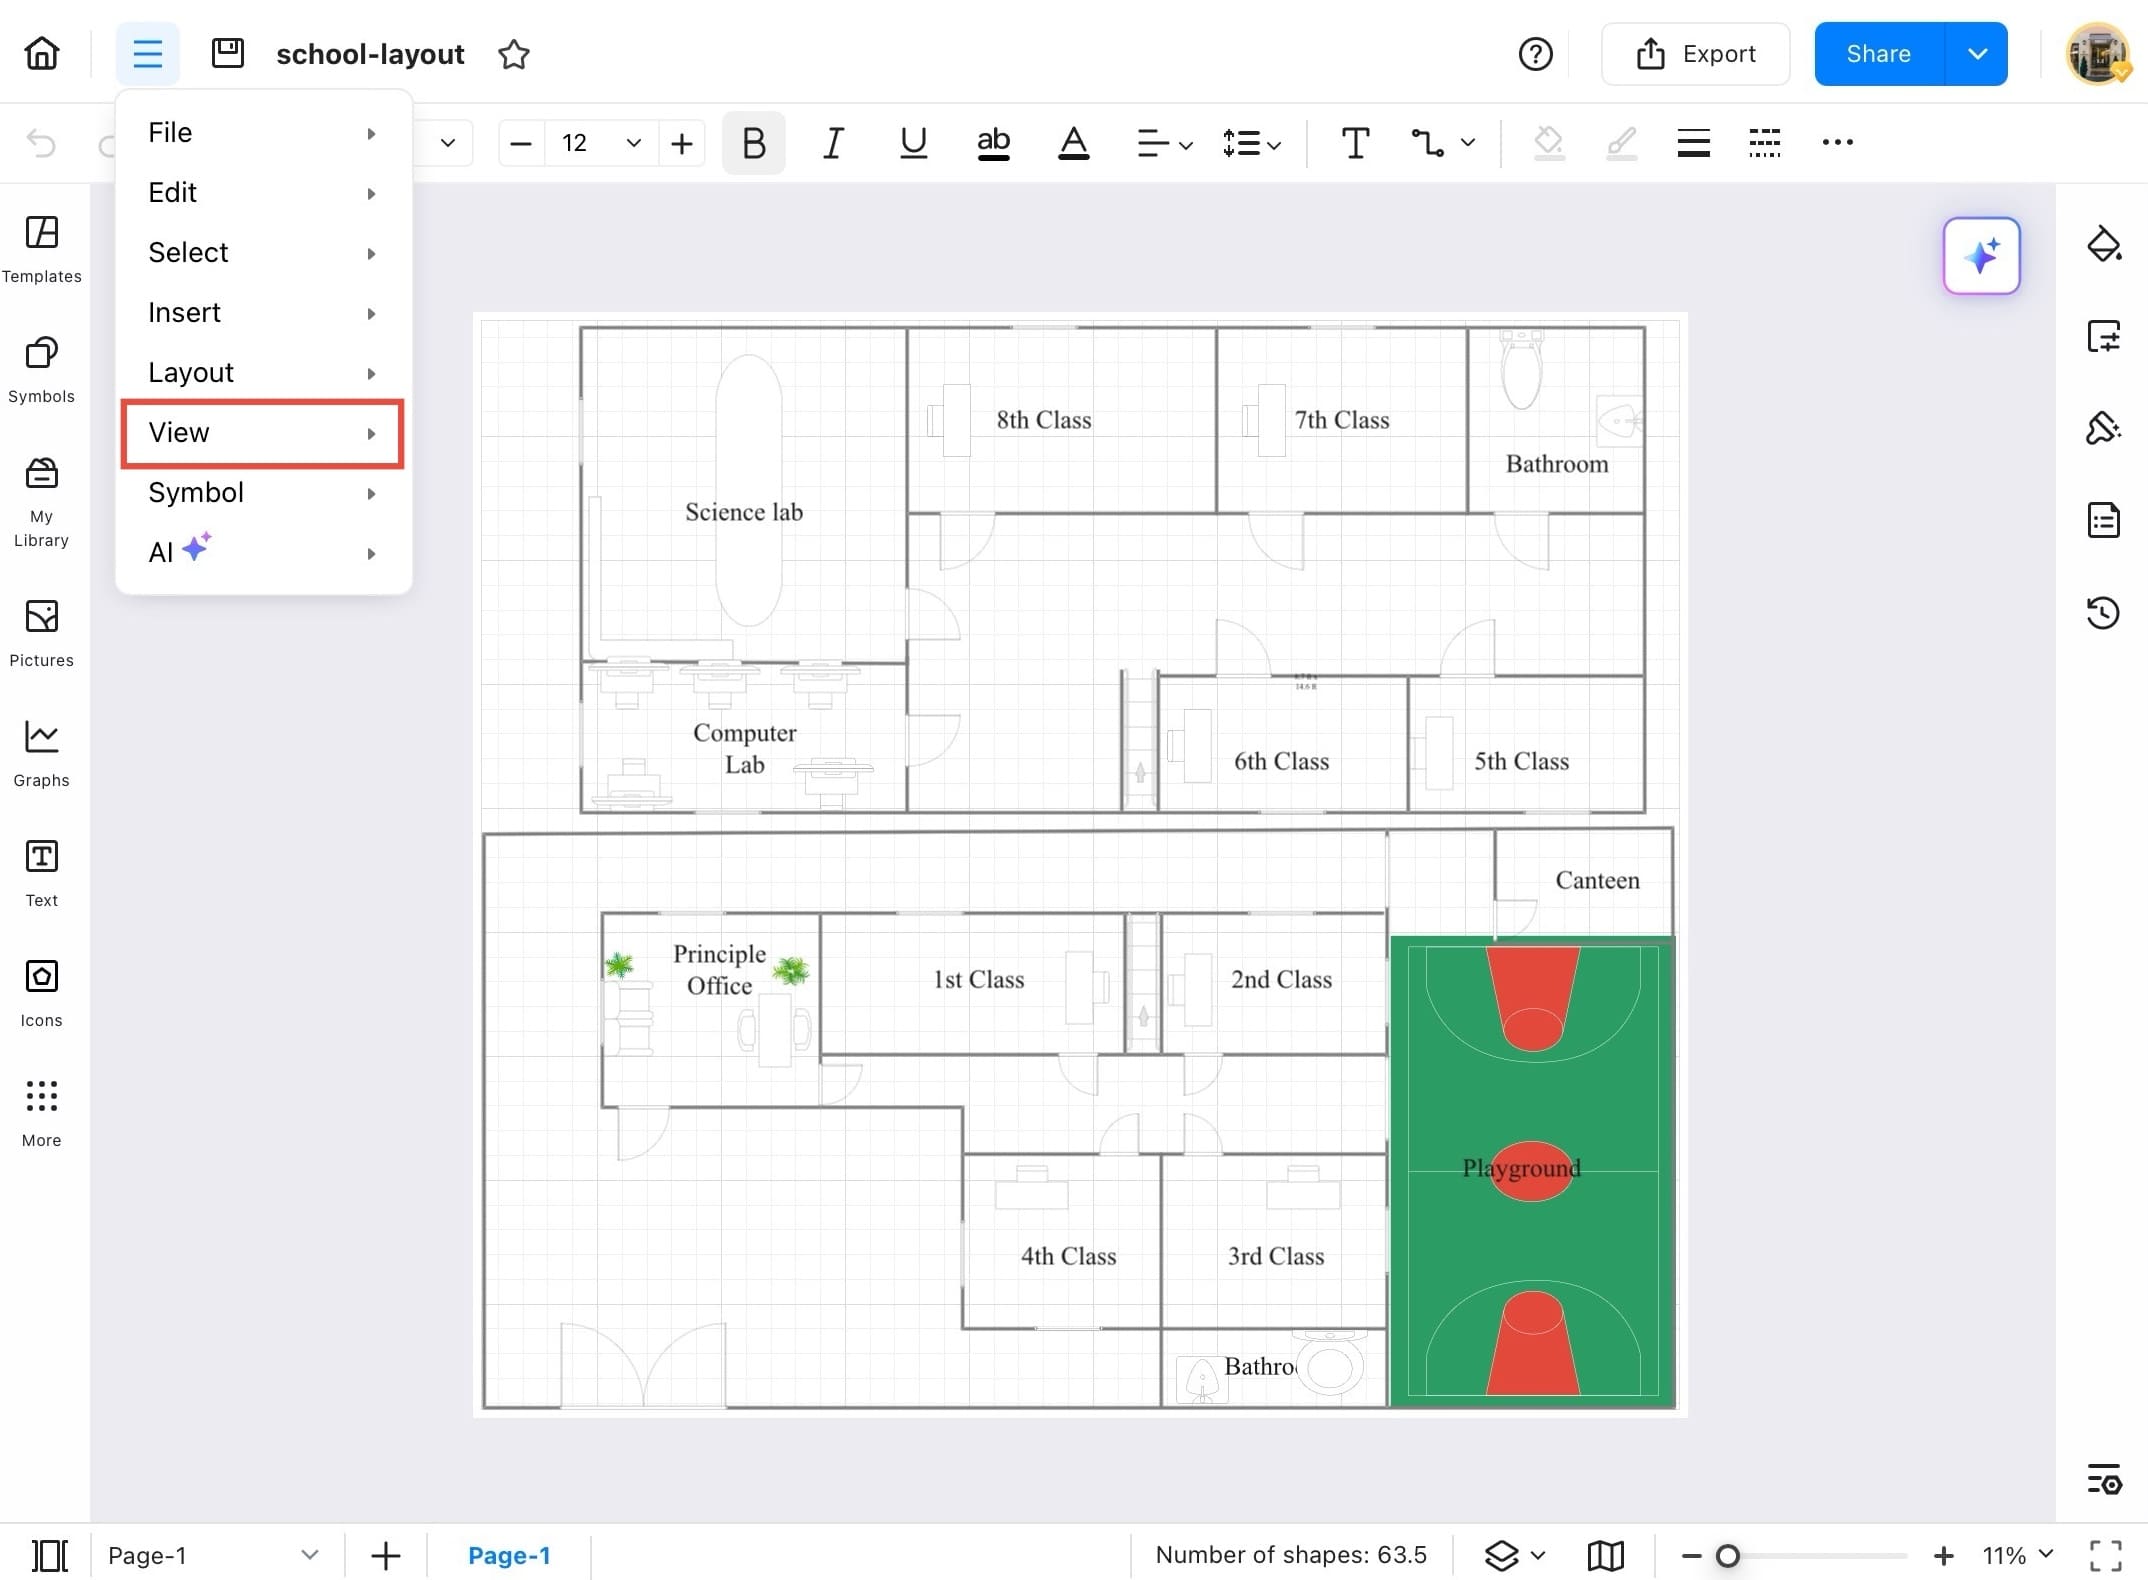
- Once the diagram opens, tap the three lines Menu icon on the top-left corner.
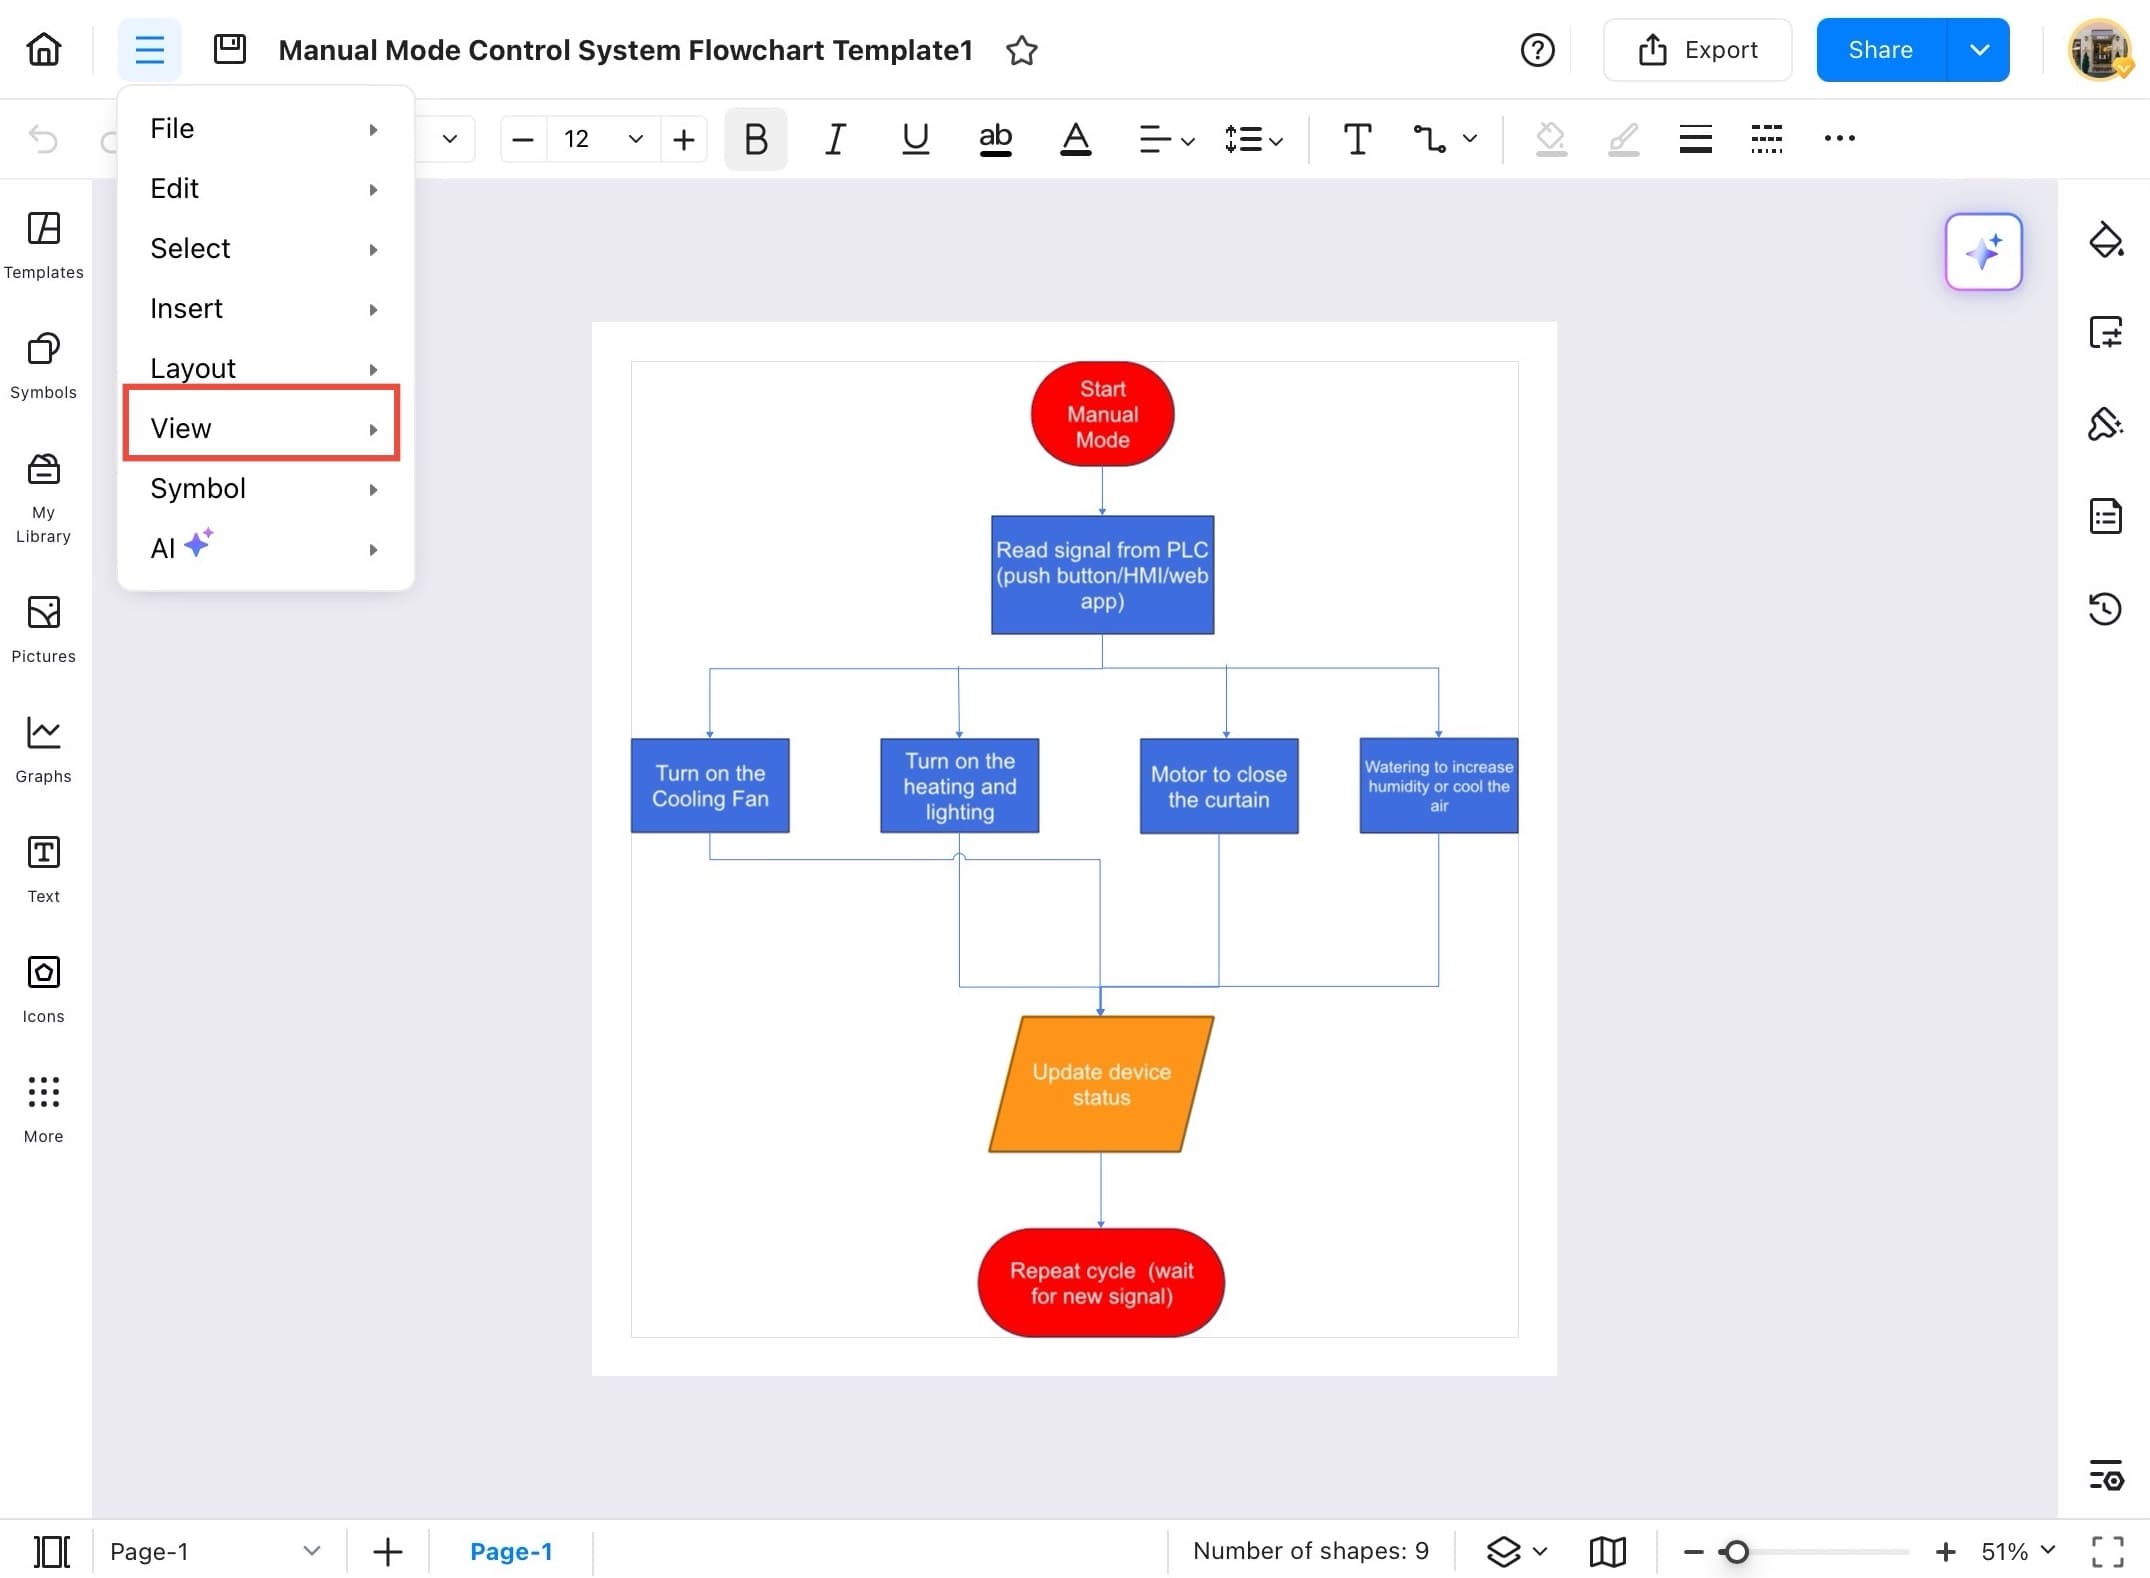
Step ❹ Go to View and select a zoom option
- Go to View, and select zoom options from the dropdown to zoom in or out precisely.
Step ❺ Alternatively, use the View option for Zoom In/Out
- You can also access zoom controls by tapping the View option from the top-left menu. Then, select Zoom In or Zoom Out from the dropdown.

Fit Width and Height
Sometimes you need the diagram to fit perfectly within your screen, either by width, height, or full page. EdrawMax provides flexible zoom options to help with that. Follow these steps to use Fit to Width, Fit to Height, or Fit to Content features.
Step ❶ Launch EdrawMax
- Launch the EdrawMax app on your tablet.
Step ❷ Open a diagram from Recent
- From the left sidebar, tap Recent and select the diagram you want to work on.
Step ❸ Tap the menu icon
- After the diagram opens, tap the menu icon (three bars) at the top left of the screen.
Step ❹ Tap on View
- Tap on View in the dropdown list.
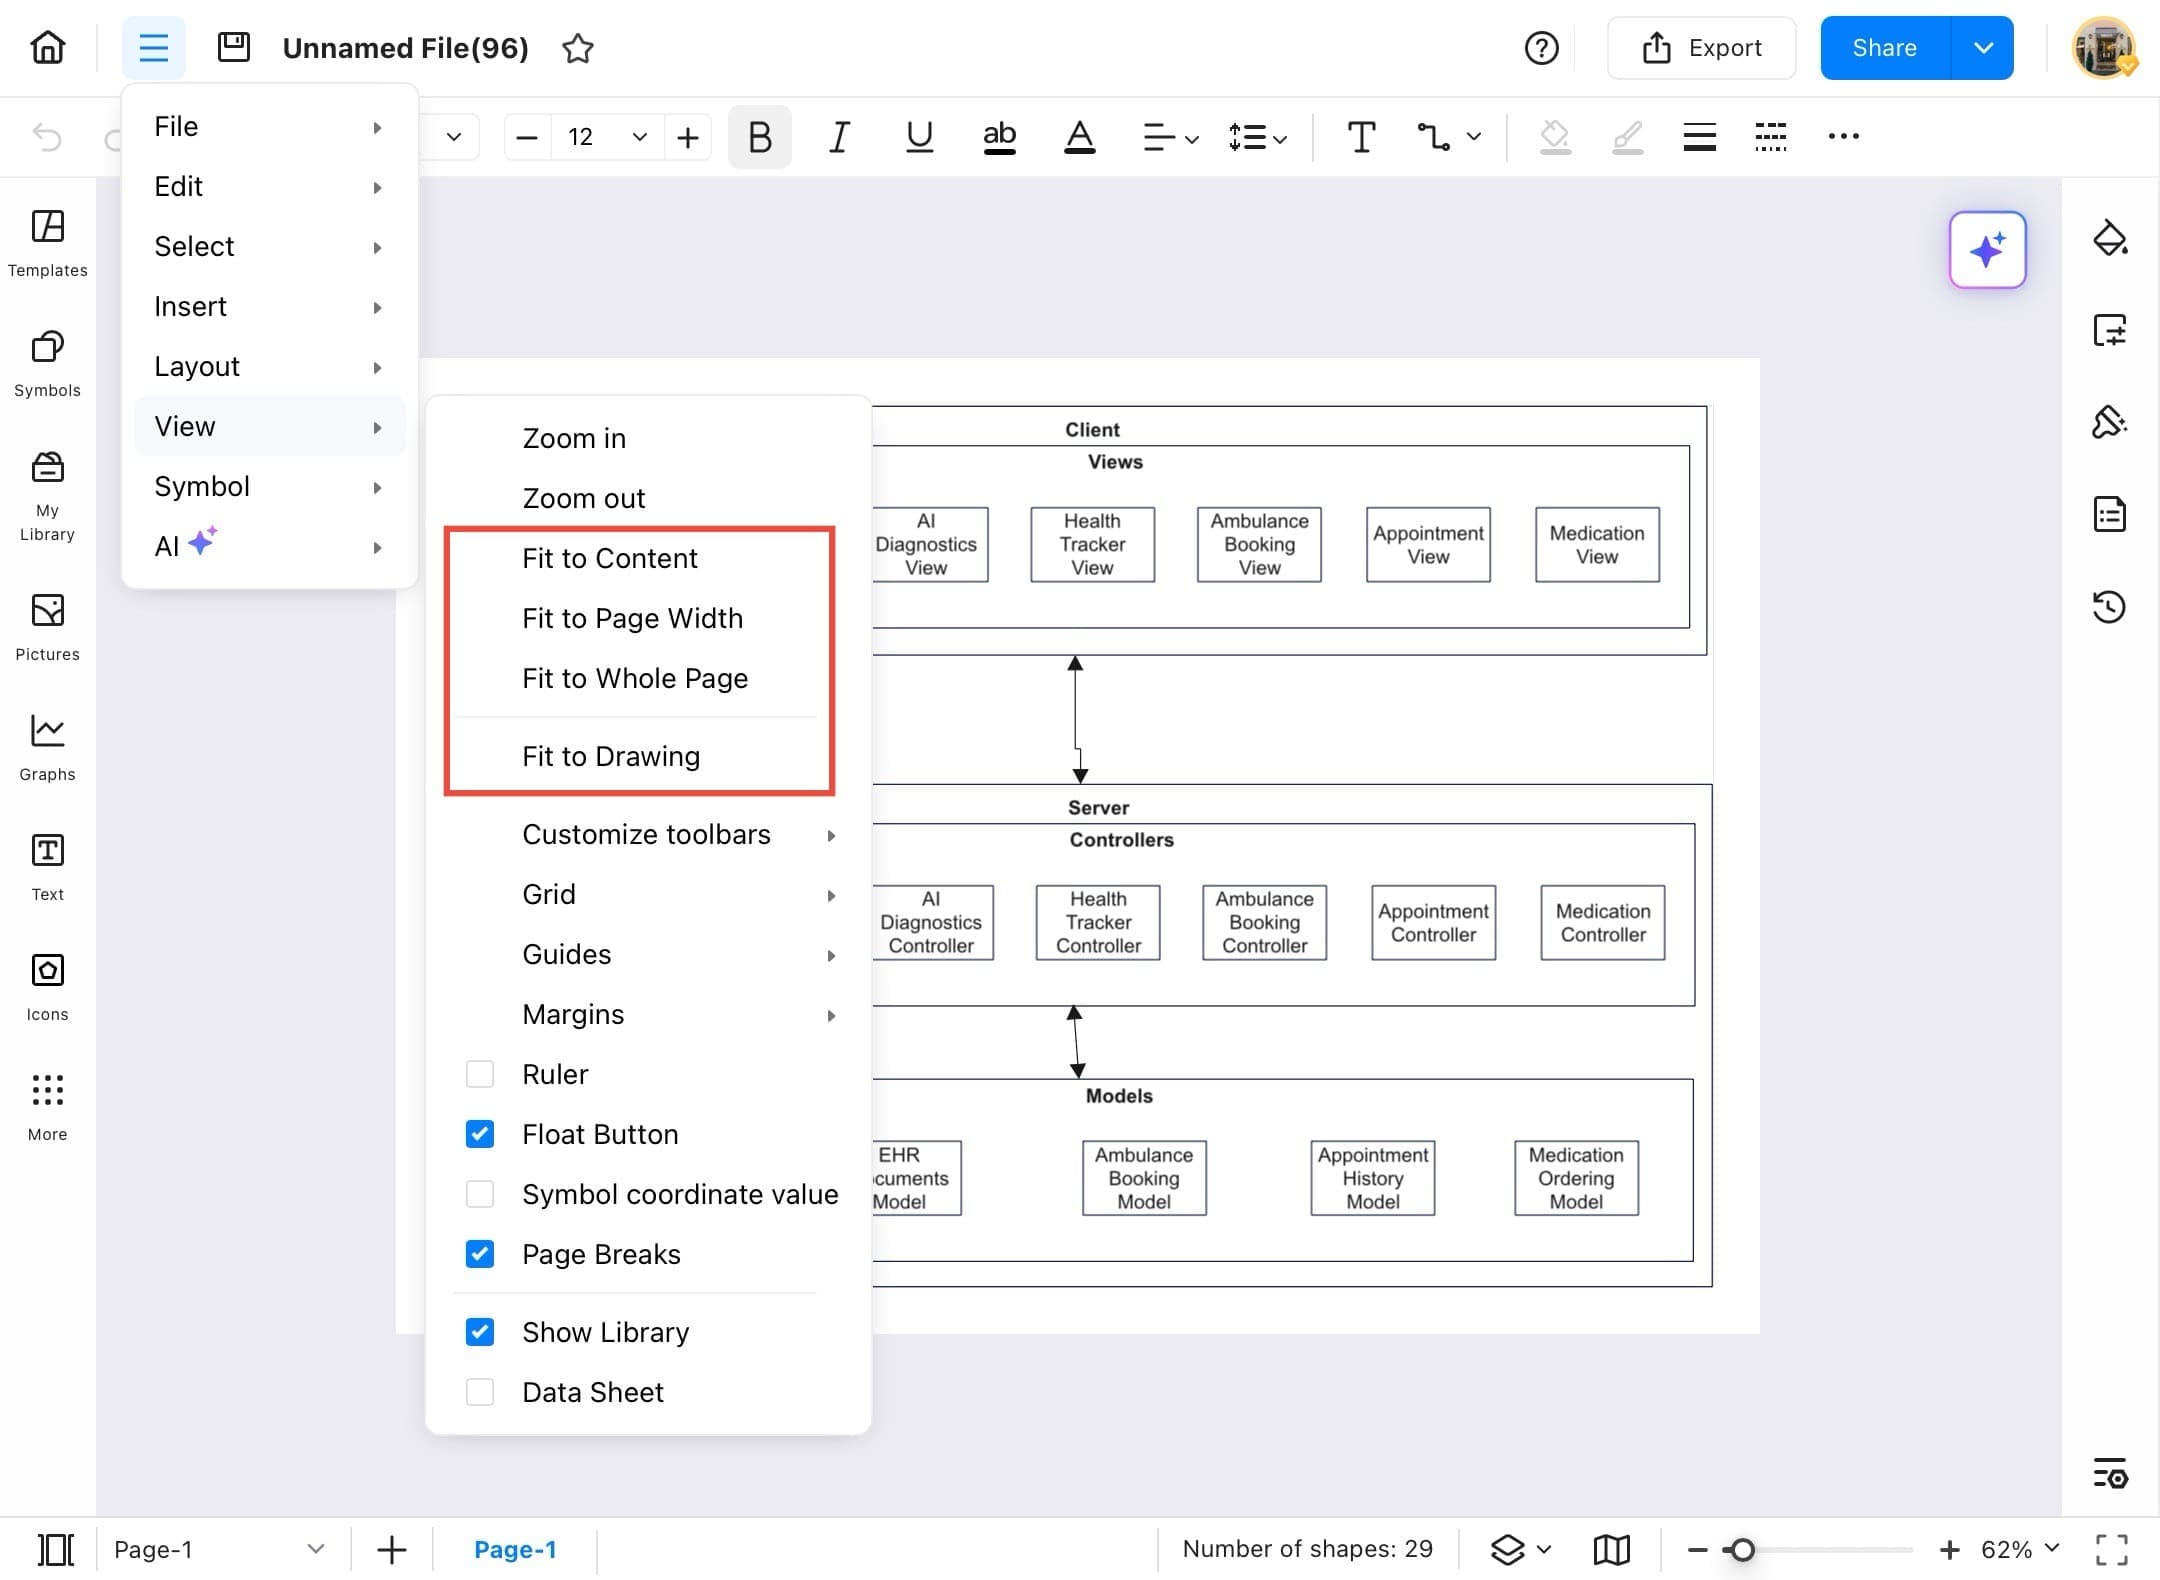
Step ❺ Choose a Fit option
- From the View menu, choose one of the following options depending on your need:
- Fit to Content: Zooms to fit the diagram’s content
- Fit to Page Width
- Fit to Whole Page
- Fit to Drawing
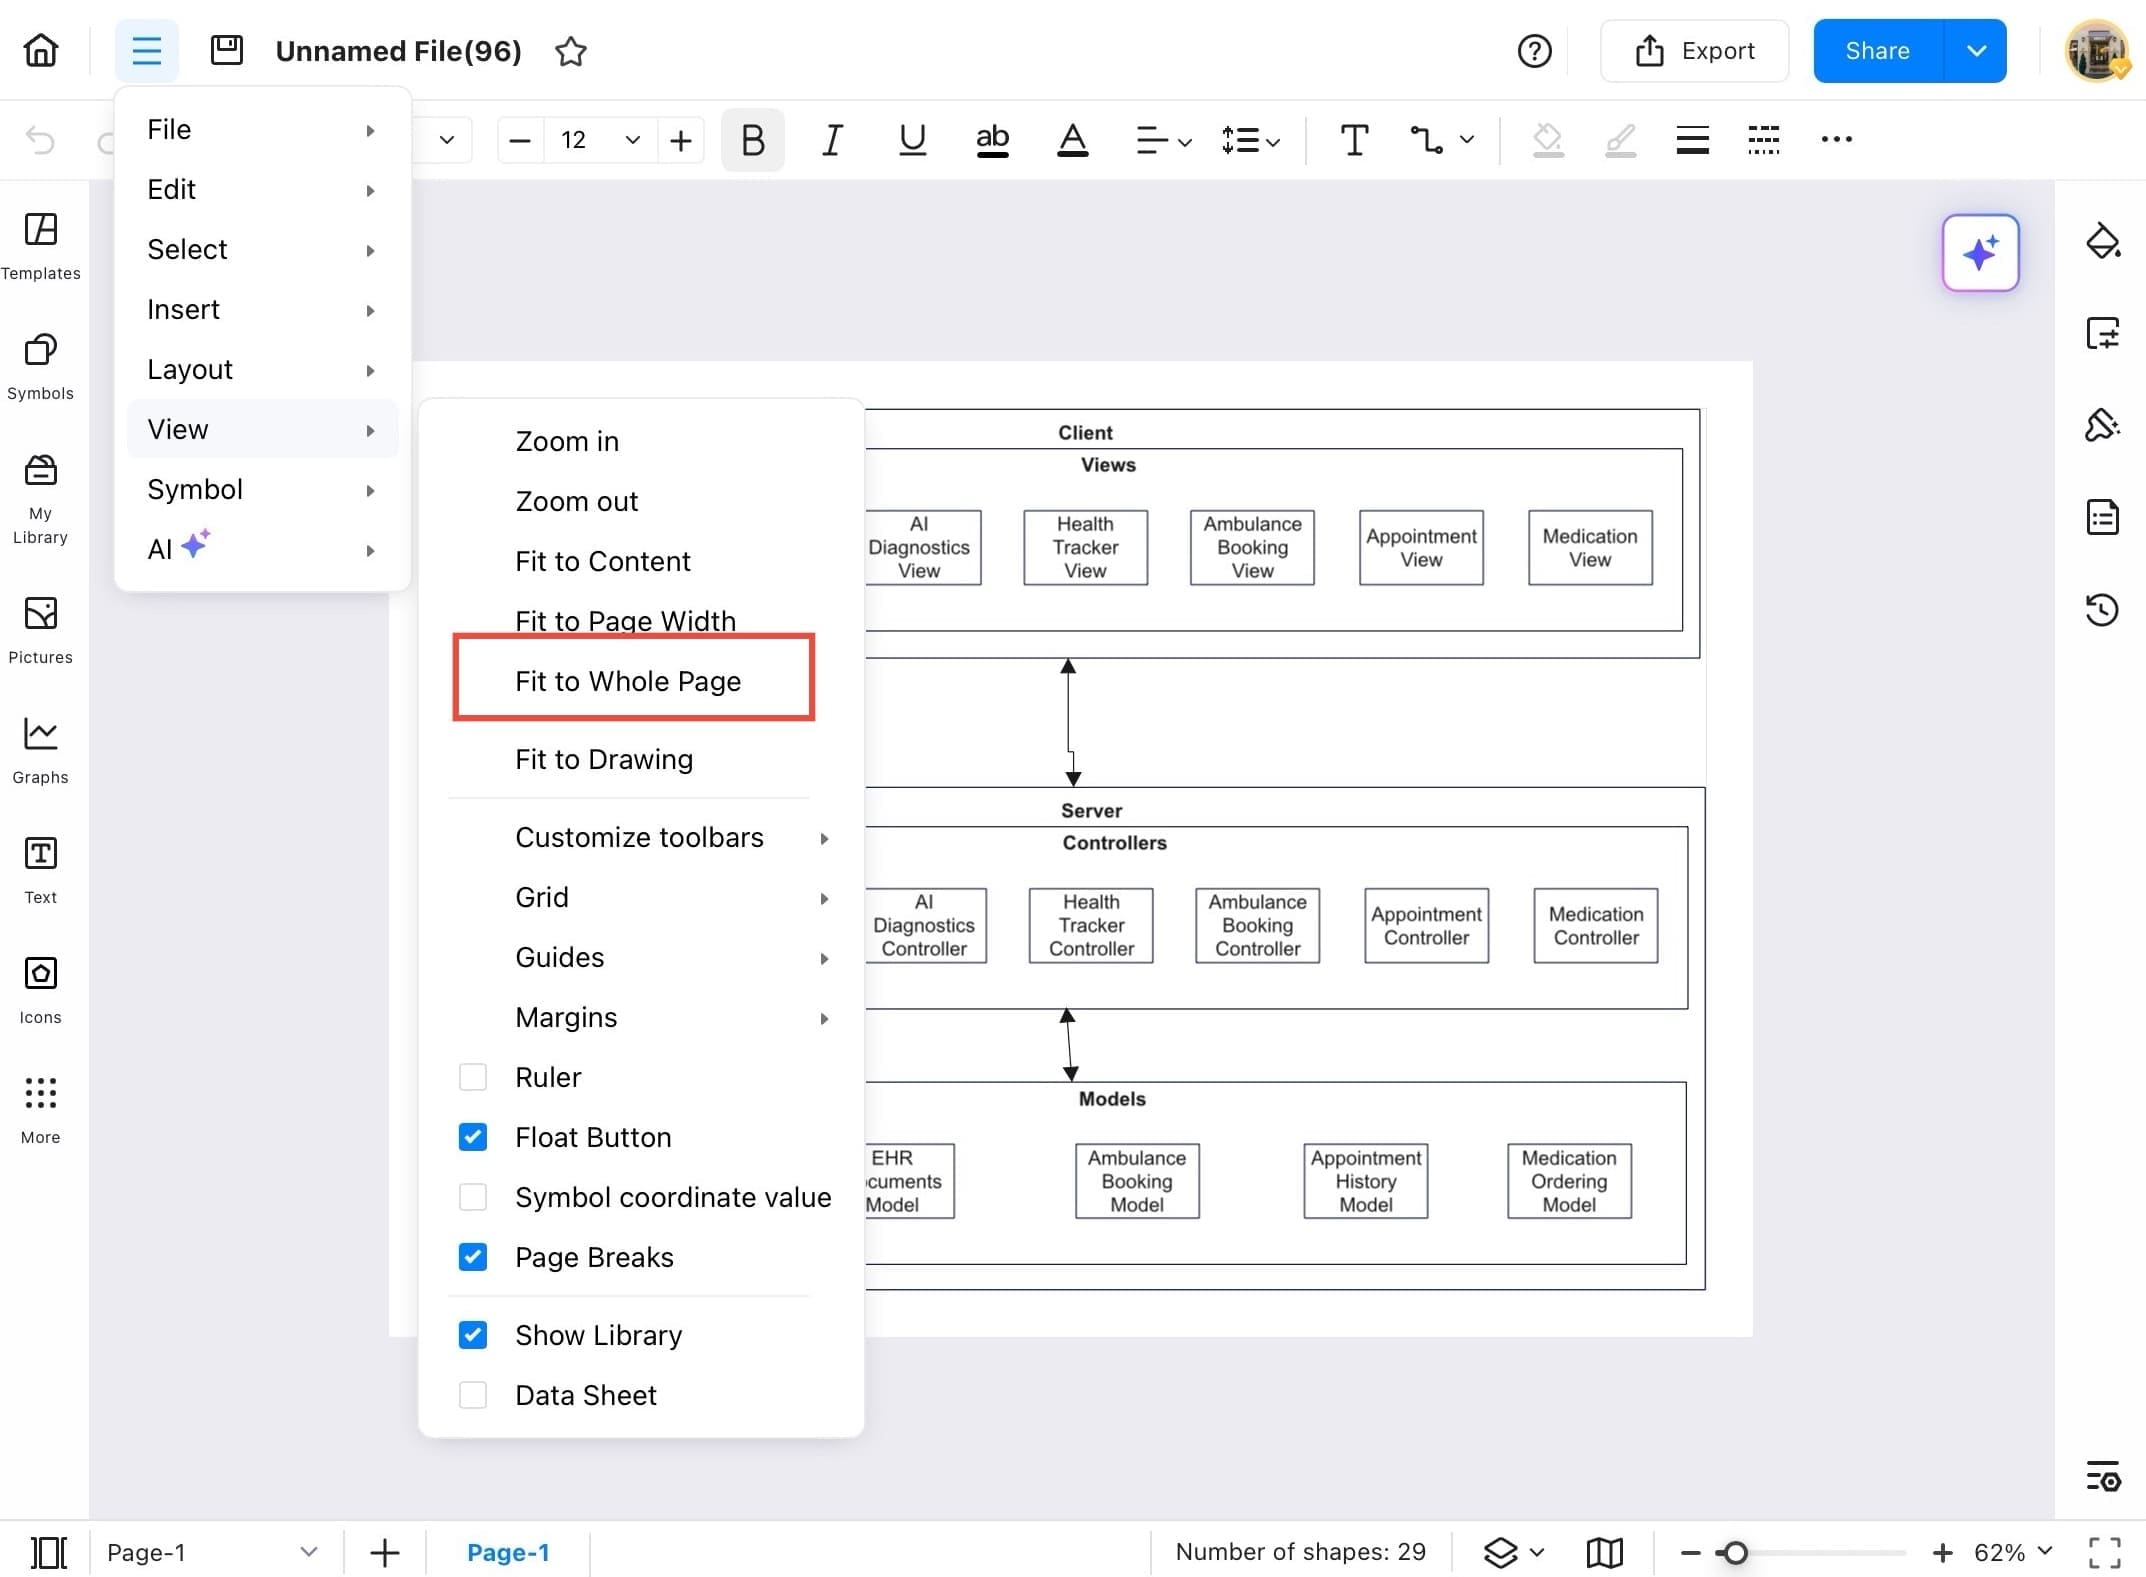
Step ❻ Tap Fit to Whole Page (Example)
- In the same View dropdown menu, you can tap Fit to Whole Page to resize the diagram so the entire content fits within the visible screen.
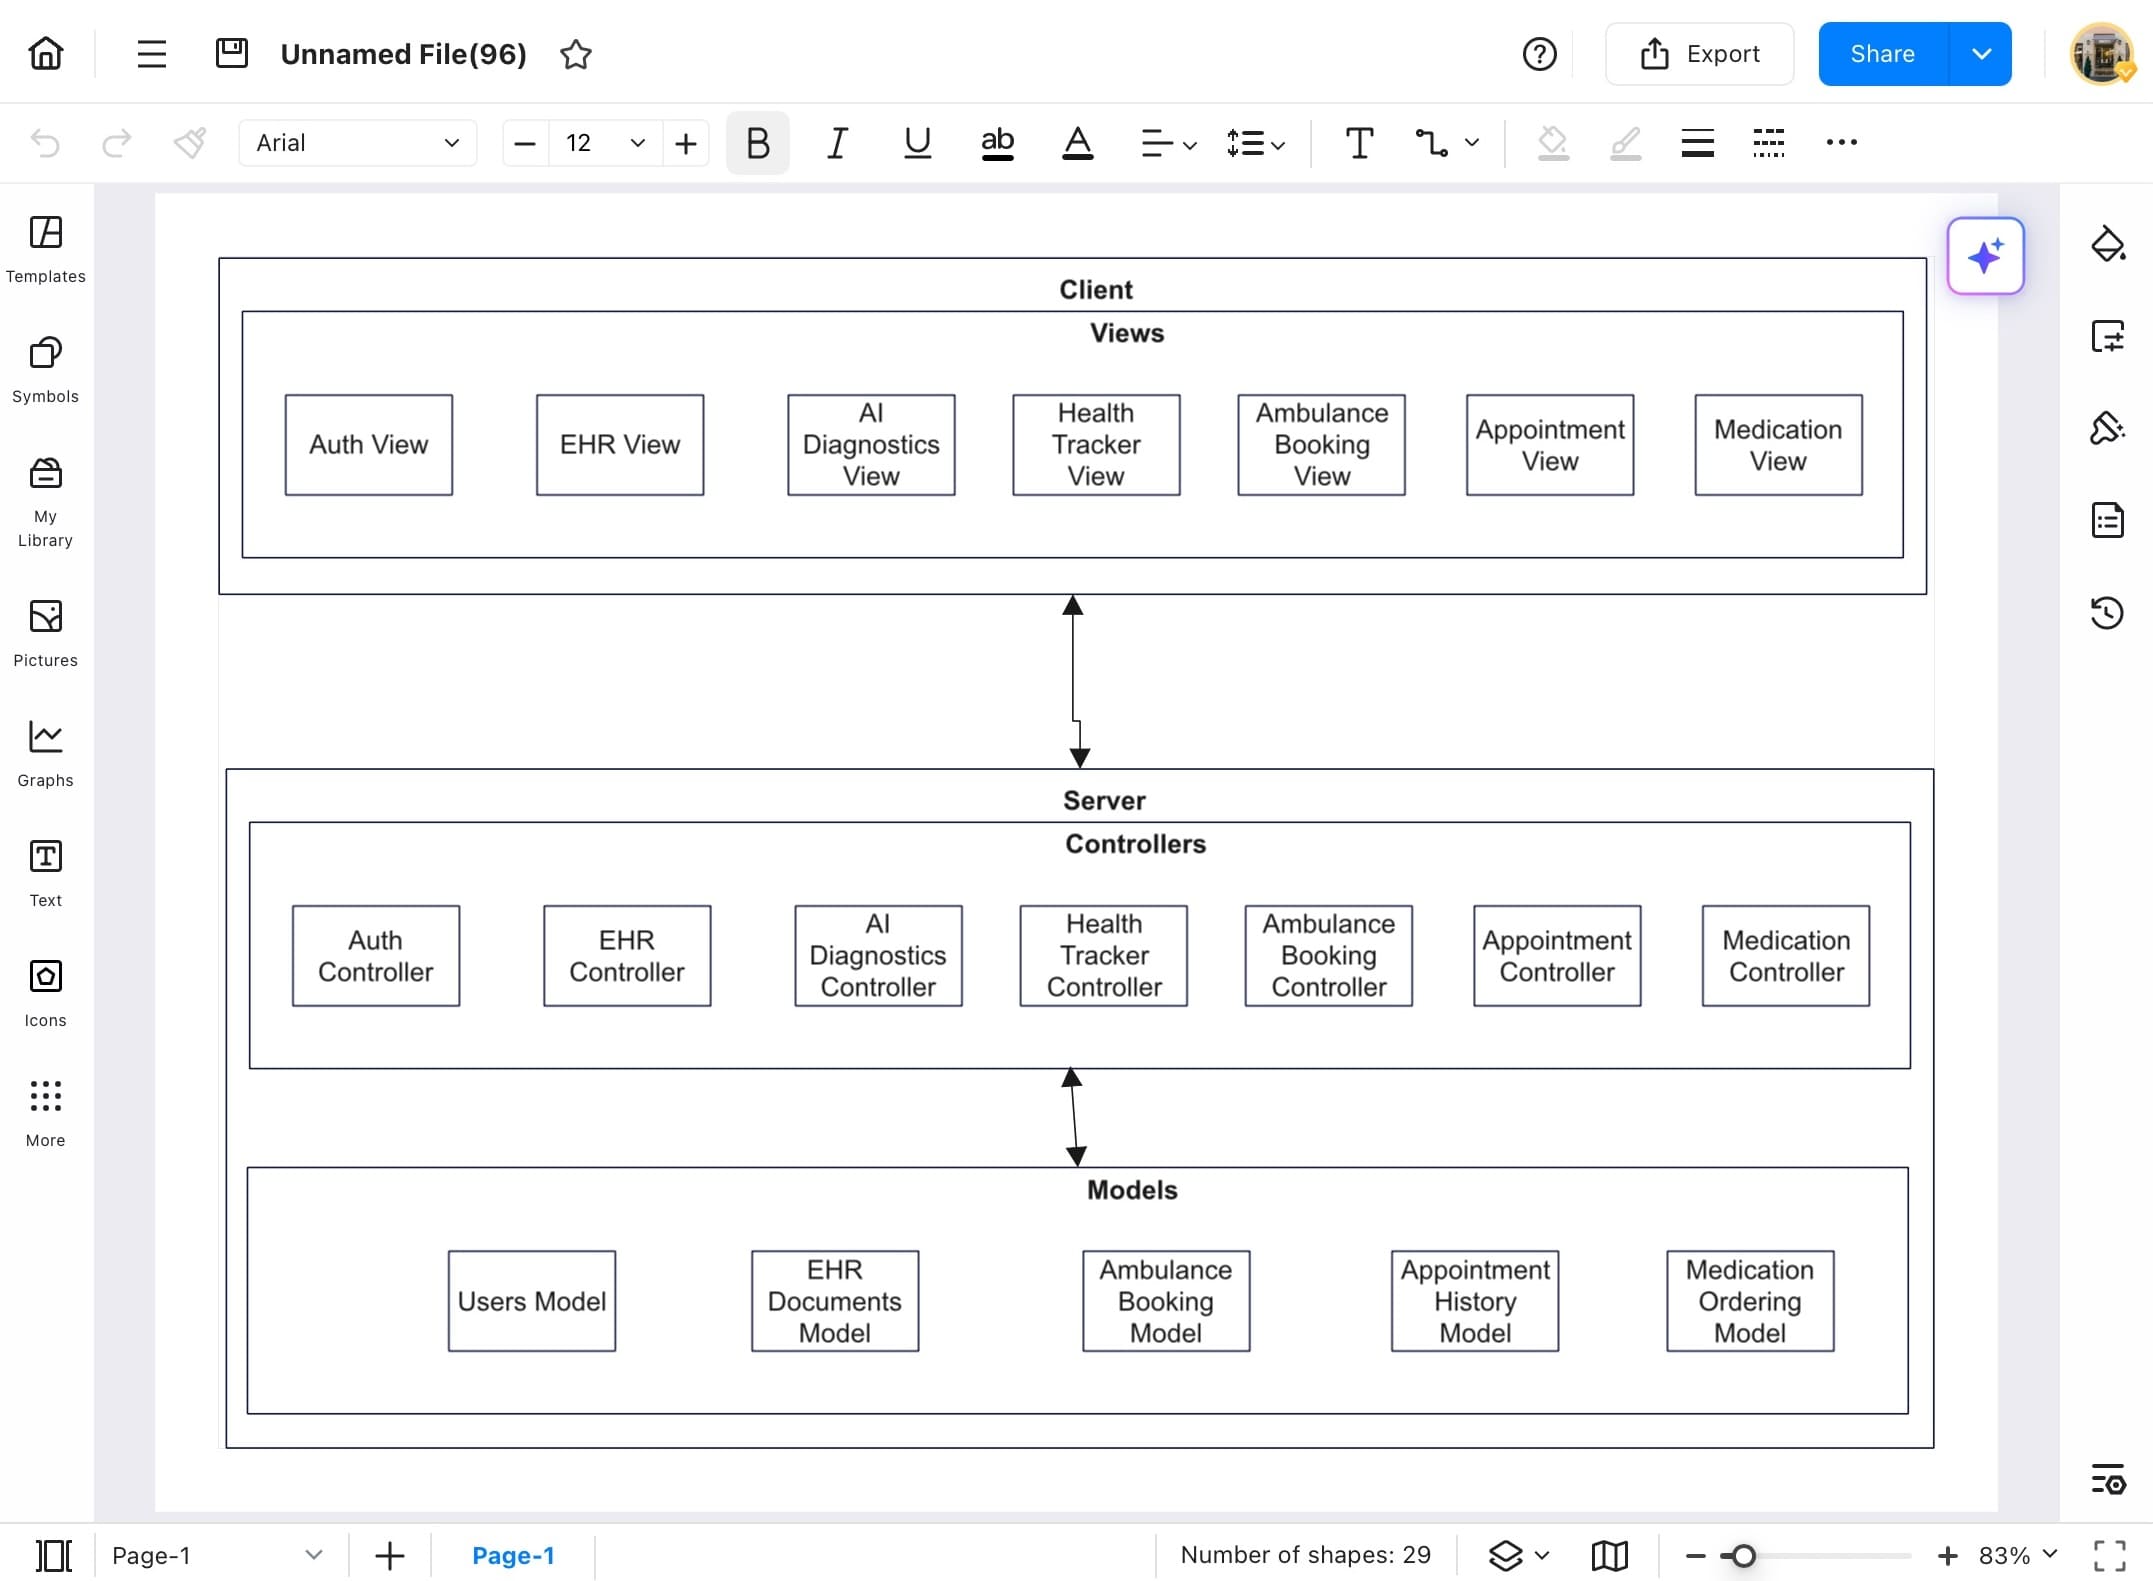
Step ❼ View the scaled diagram
- Your diagram will now scale perfectly to fit the full screen, making it easier to see the overall layout.
Customize Toolbar
Customize the toolbar in EdrawMax to show only the tools you use most often. You can enable or disable tool options to create a clean and personalized workspace. Follow these steps to manage your toolbar setup.
Step ❶ Launch EdrawMax
- Launch EdrawMax on your tablet.
Step ❷ Open your diagram
- Tap the Recent tab from the sidebar and open your diagram.
Step ❸ Tap the menu icon
- Once the file opens, tap the menu icon (three horizontal lines) at the top-left corner of the screen.
Step ❹ Tap View
- In the dropdown menu, tap View to access display and toolbar options.
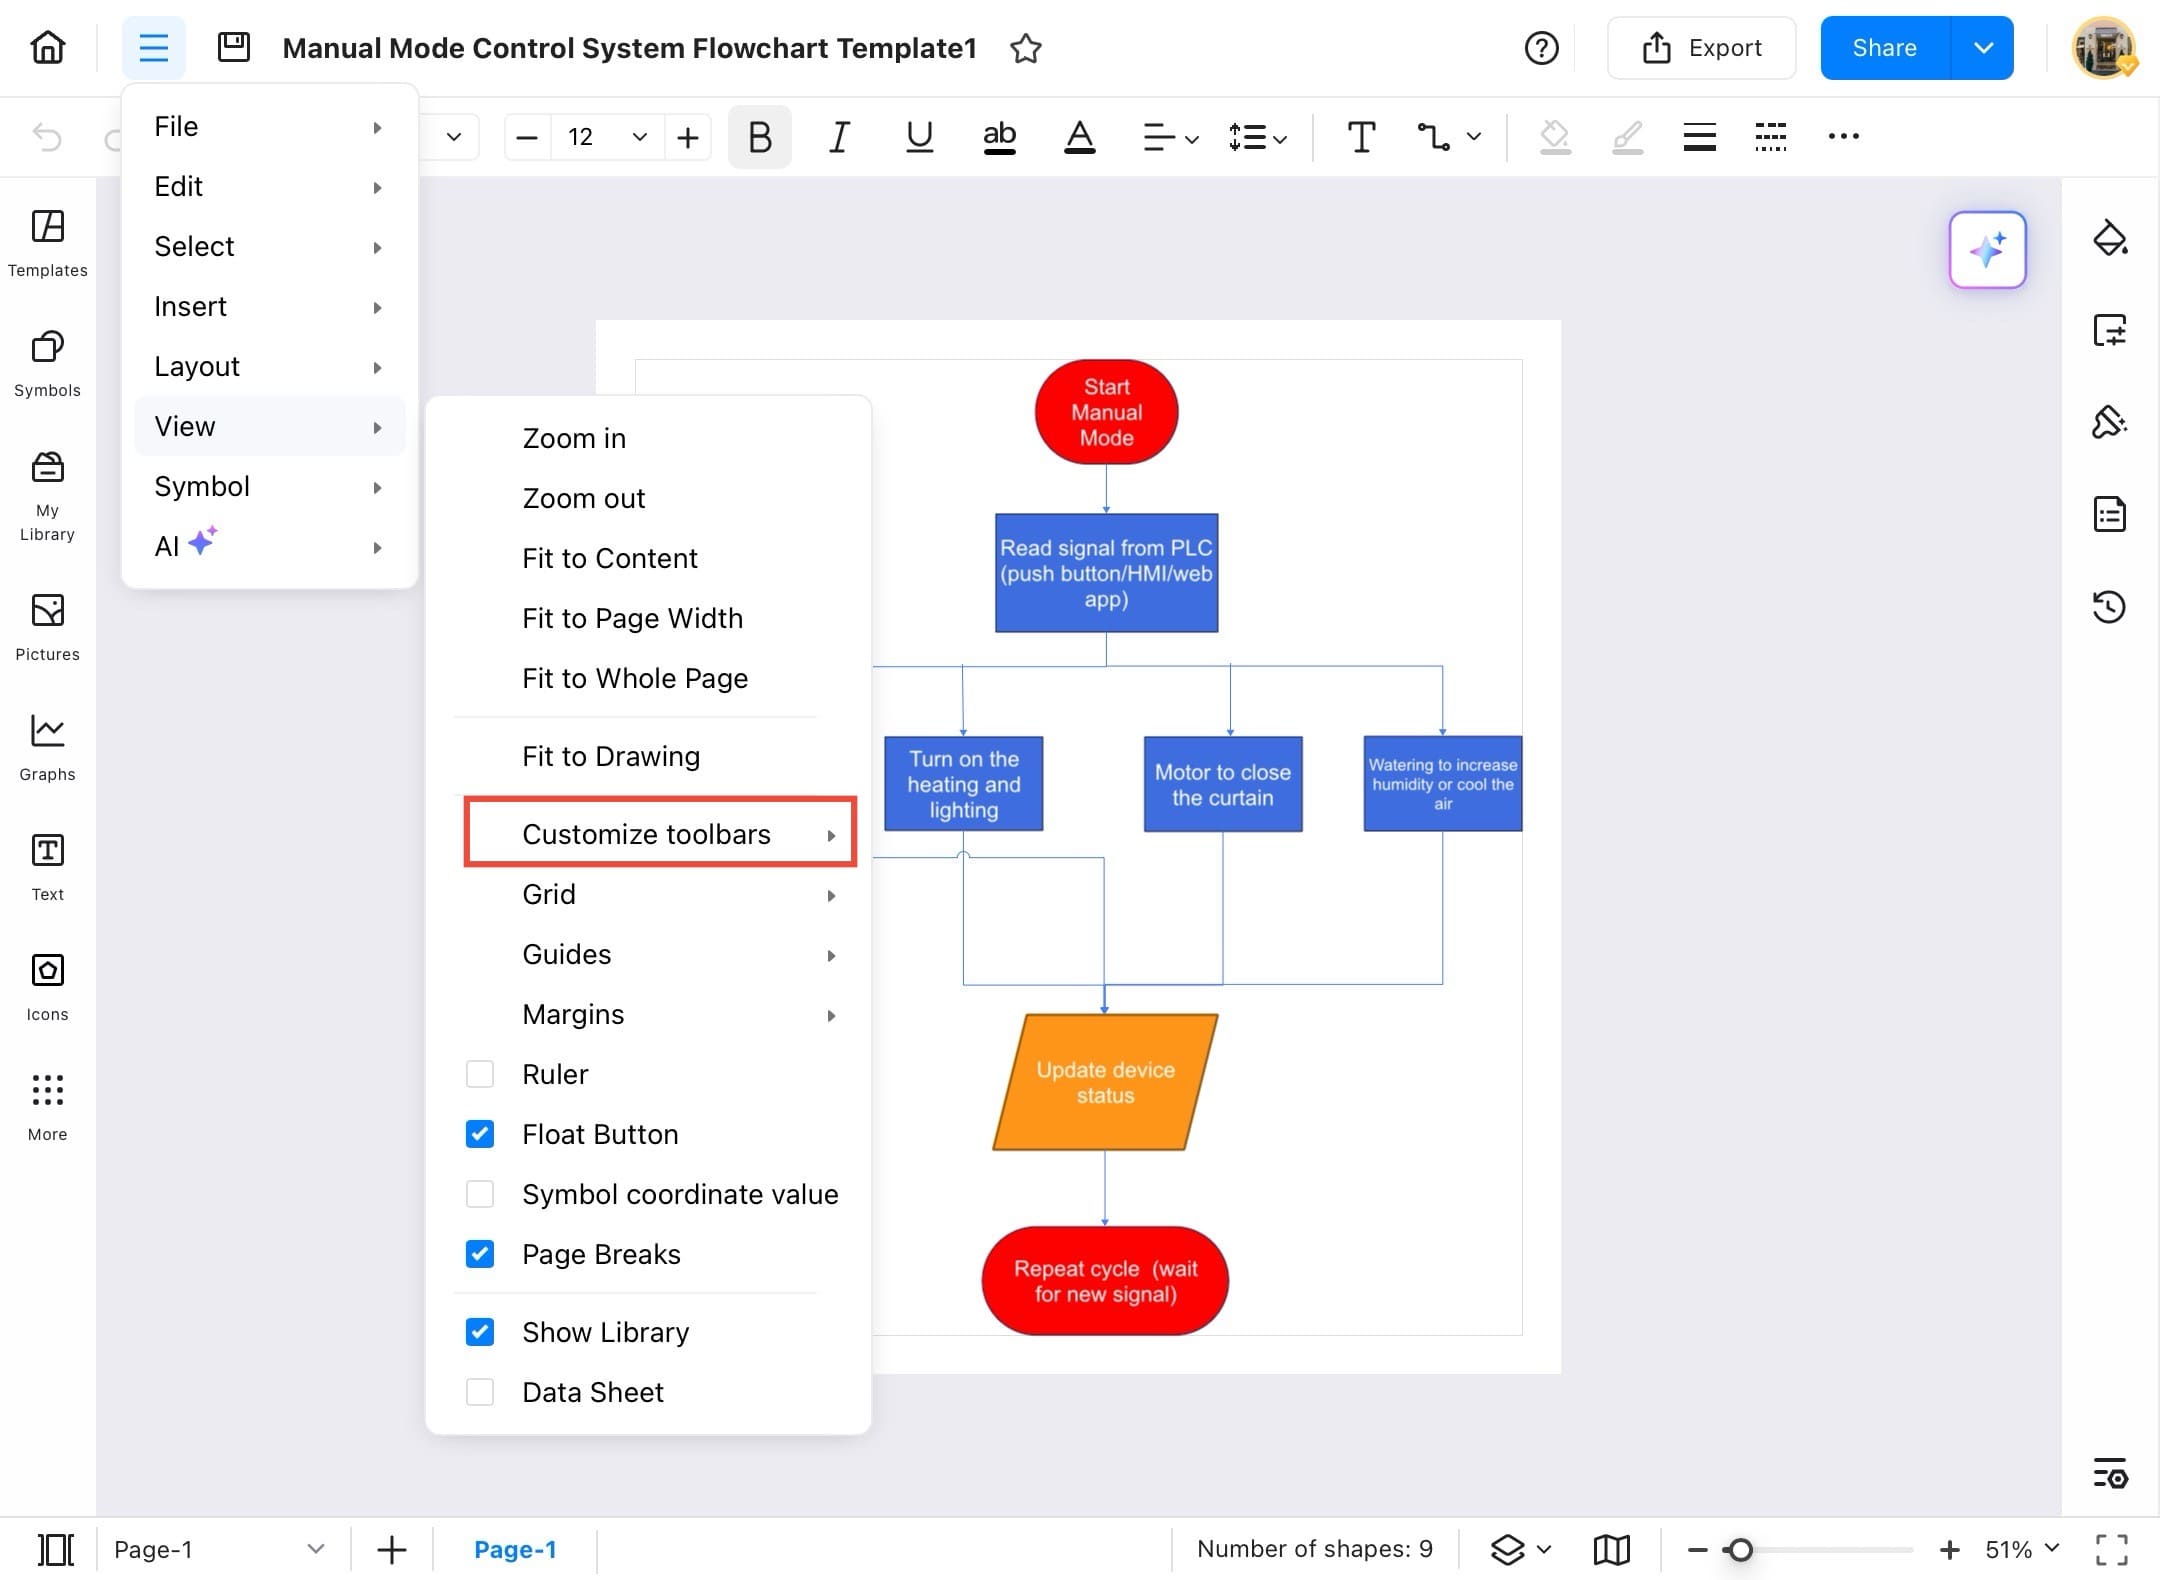
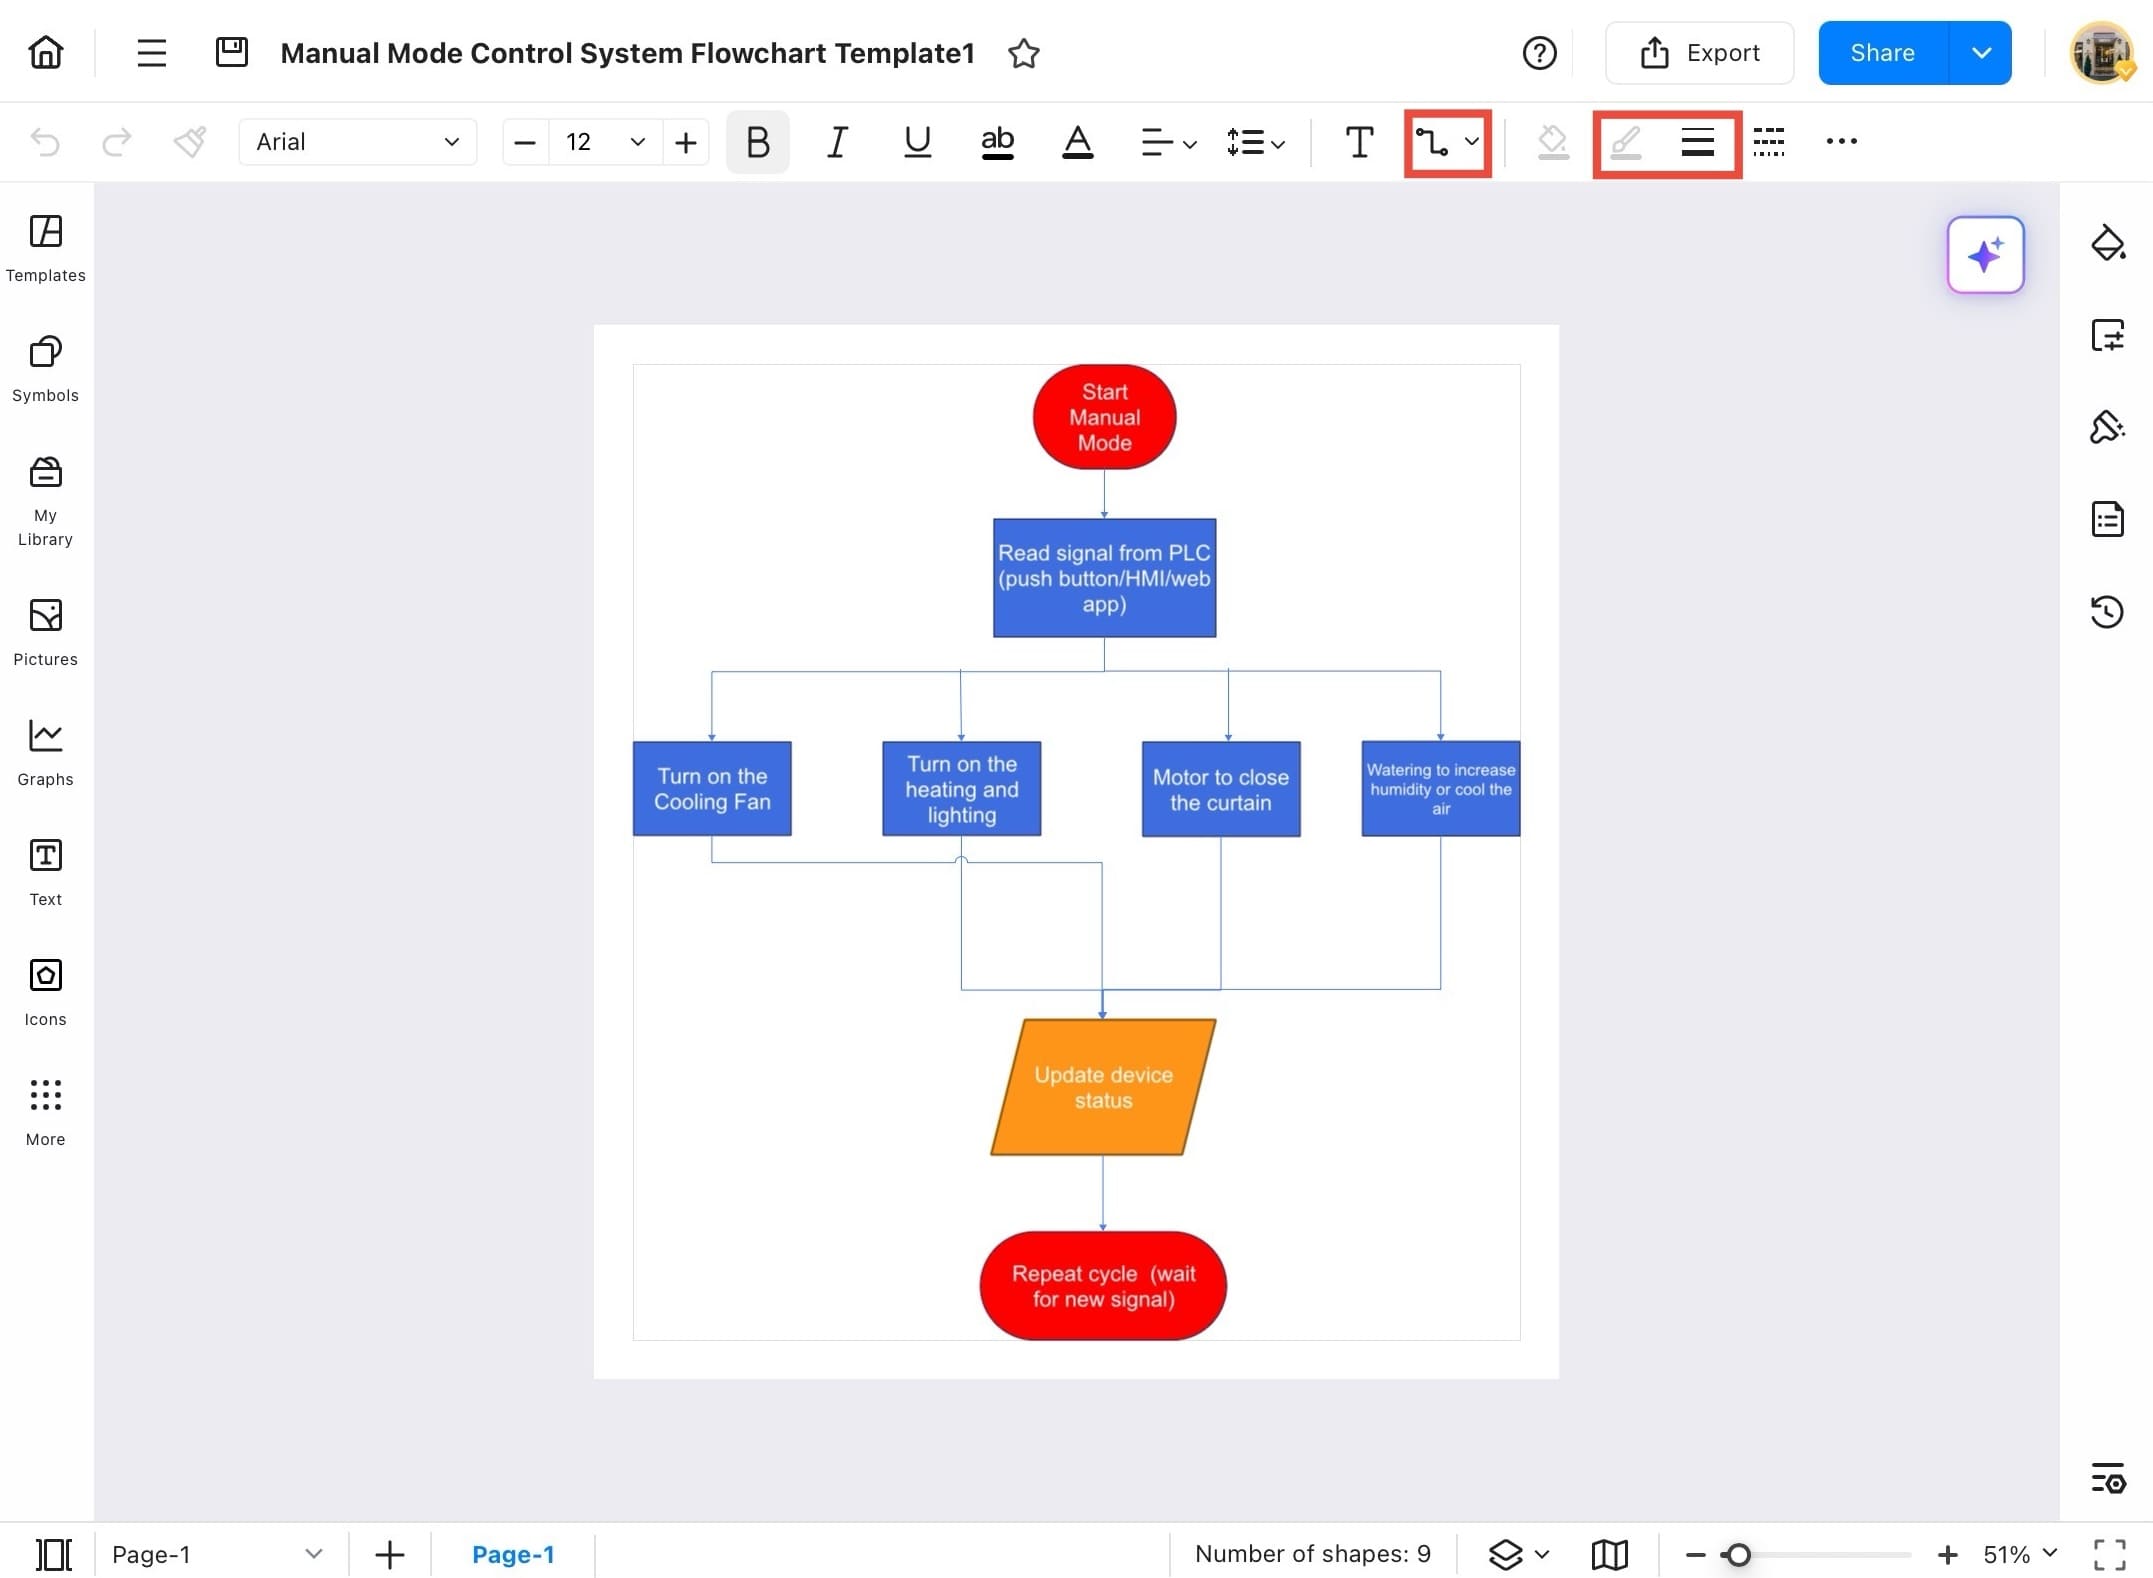
Step ❺ Tap Customize Toolbars
- From the View menu, tap Customize Toolbars to choose which toolbar elements to show or hide.
Step ❻ Select or deselect tools
- A list of toolbar options will appear. Use the checkboxes to enable or disable tools like Add Text, Connector, Fill Color, Flip, Group, Locked, and more.
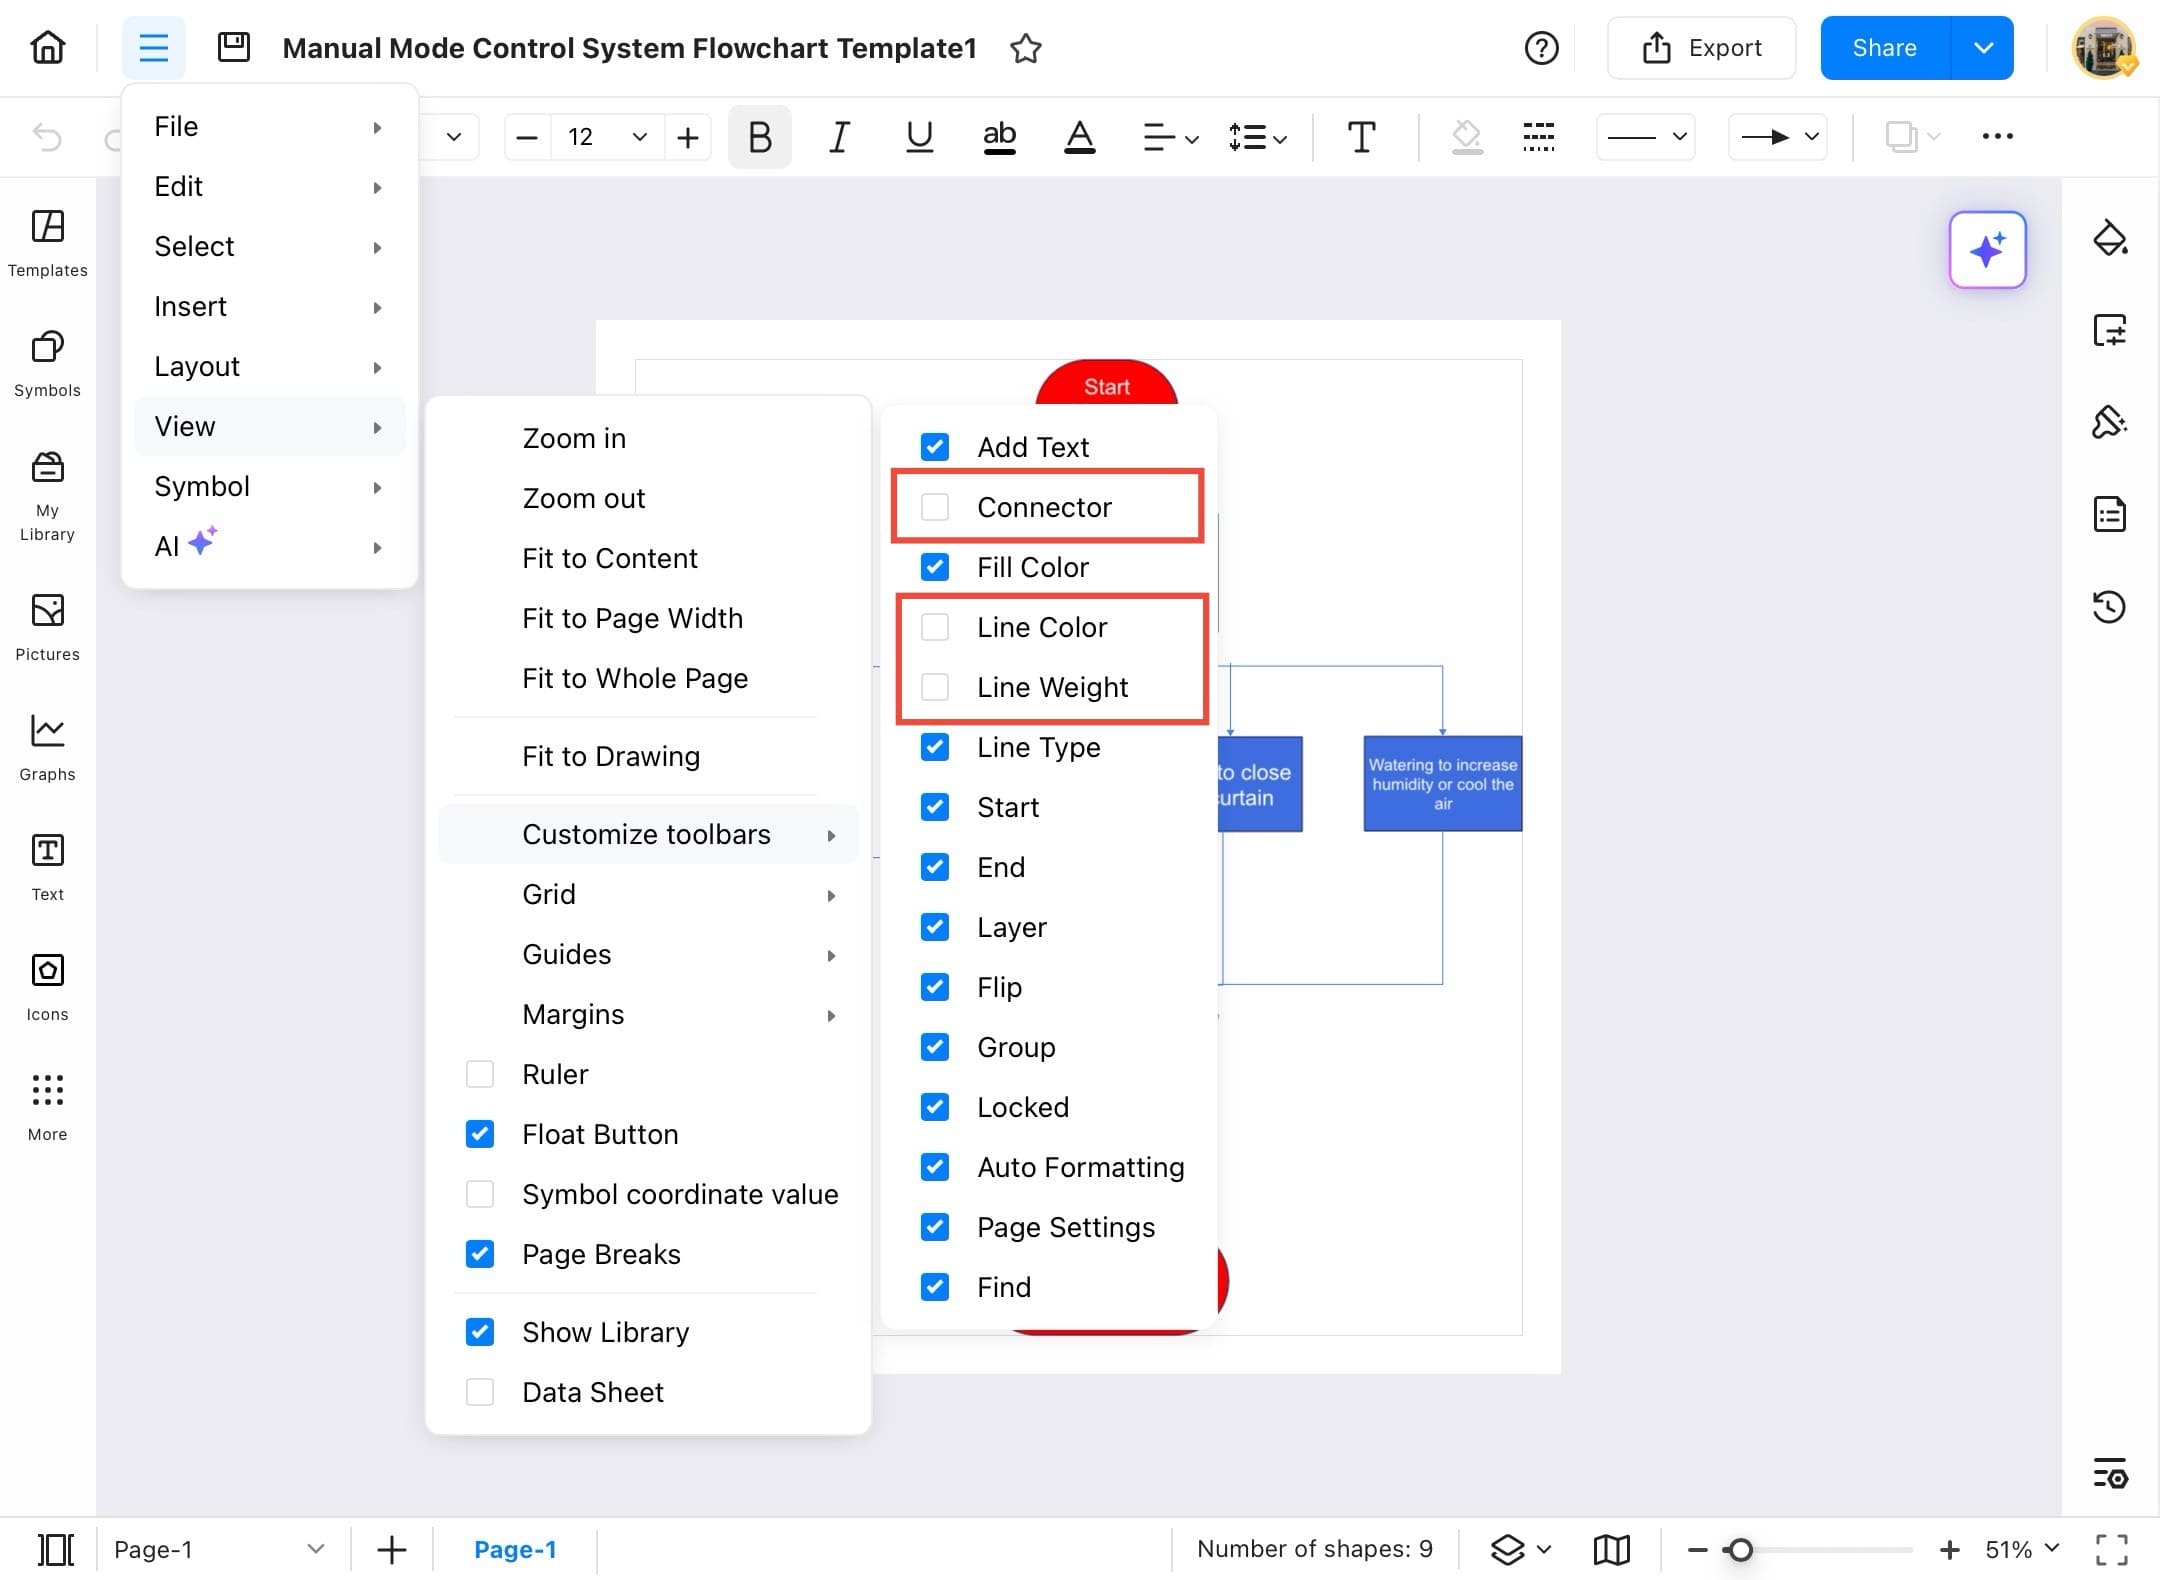
Step ❼ Scroll and finalize tool selection
- Scroll down the list to view all available toolbar items. Tick the boxes for the tools you frequently use and uncheck the ones you want to hide.

Step ❽ View the updated toolbar
- The toolbar at the top will now reflect your selected tools. You’ll see that the new buttons (like Flip, Connector, etc.) have been added or removed accordingly.
Grid
Grids help you align and position elements accurately on the canvas. You can turn the grid on or off and even use the Snap to Grid option to make shapes automatically align with the grid lines. Here is how to use it:
Step ❶ Open EdrawMax
- Open the EdrawMax app on your tablet.
Step ❷ Open the file
- Tap the Recent tab from the left panel and open the file you want to work on.
Step ❸ Tap the menu icon
- When the diagram opens, tap the menu icon (three horizontal lines) at the top-left of the screen.
Step ❹ Tap View
- Tap View to open the visual settings from the dropdown menu
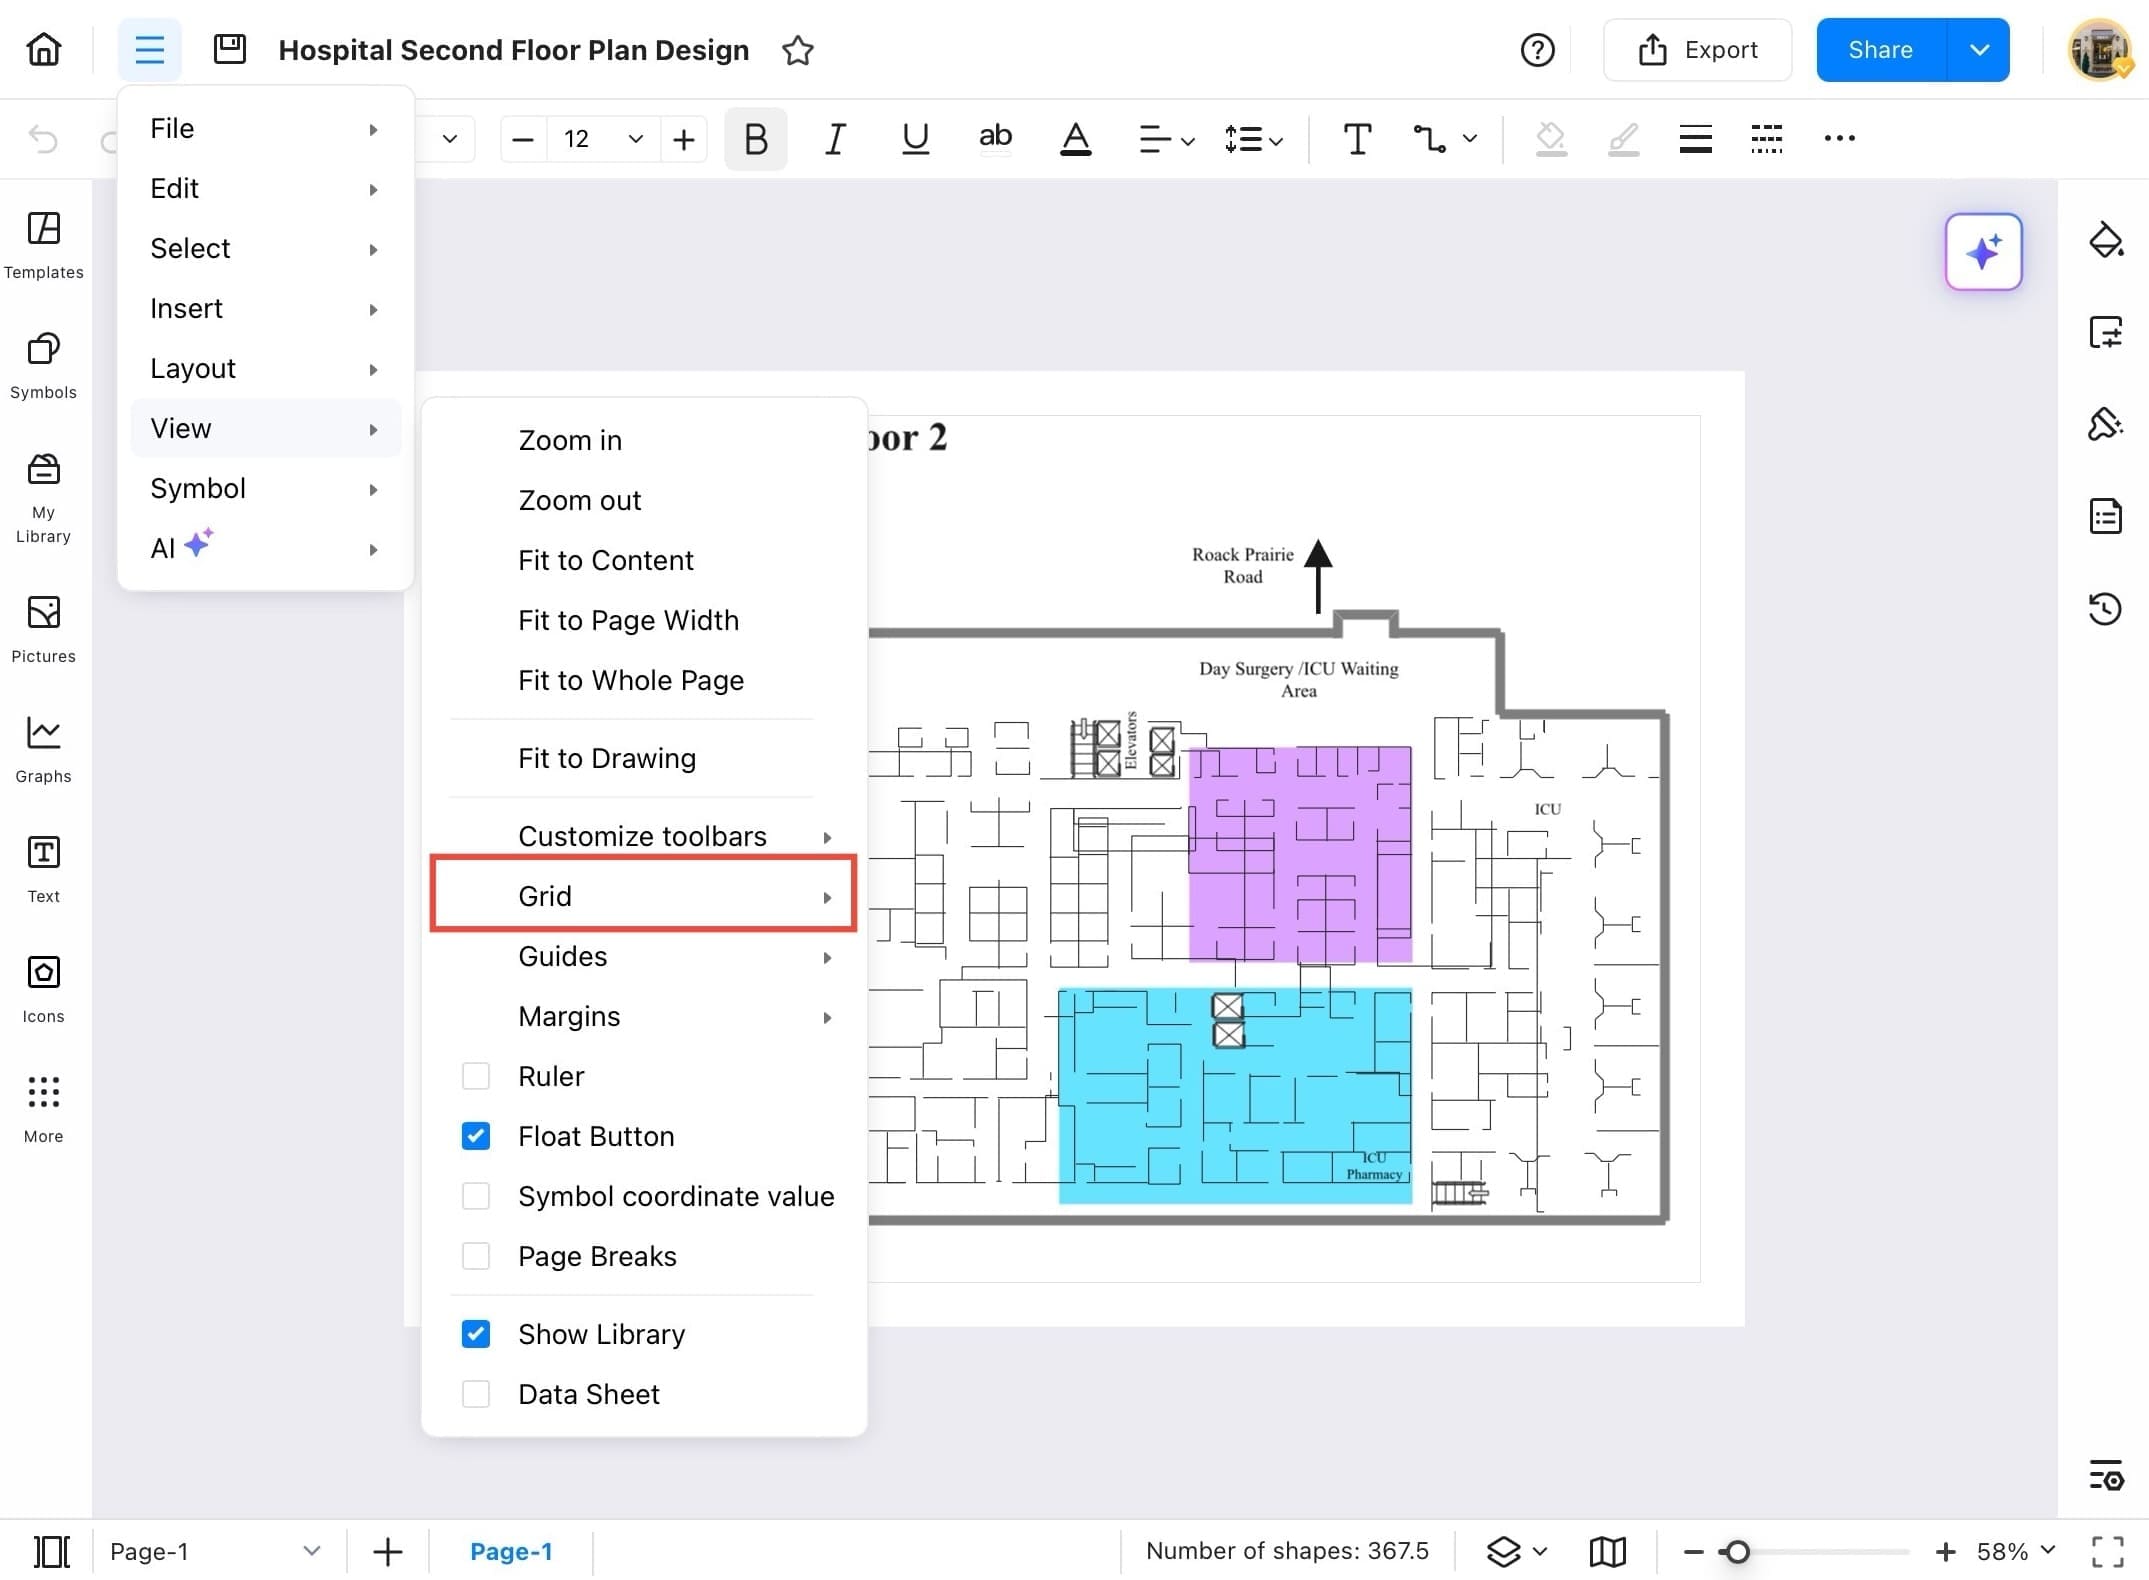
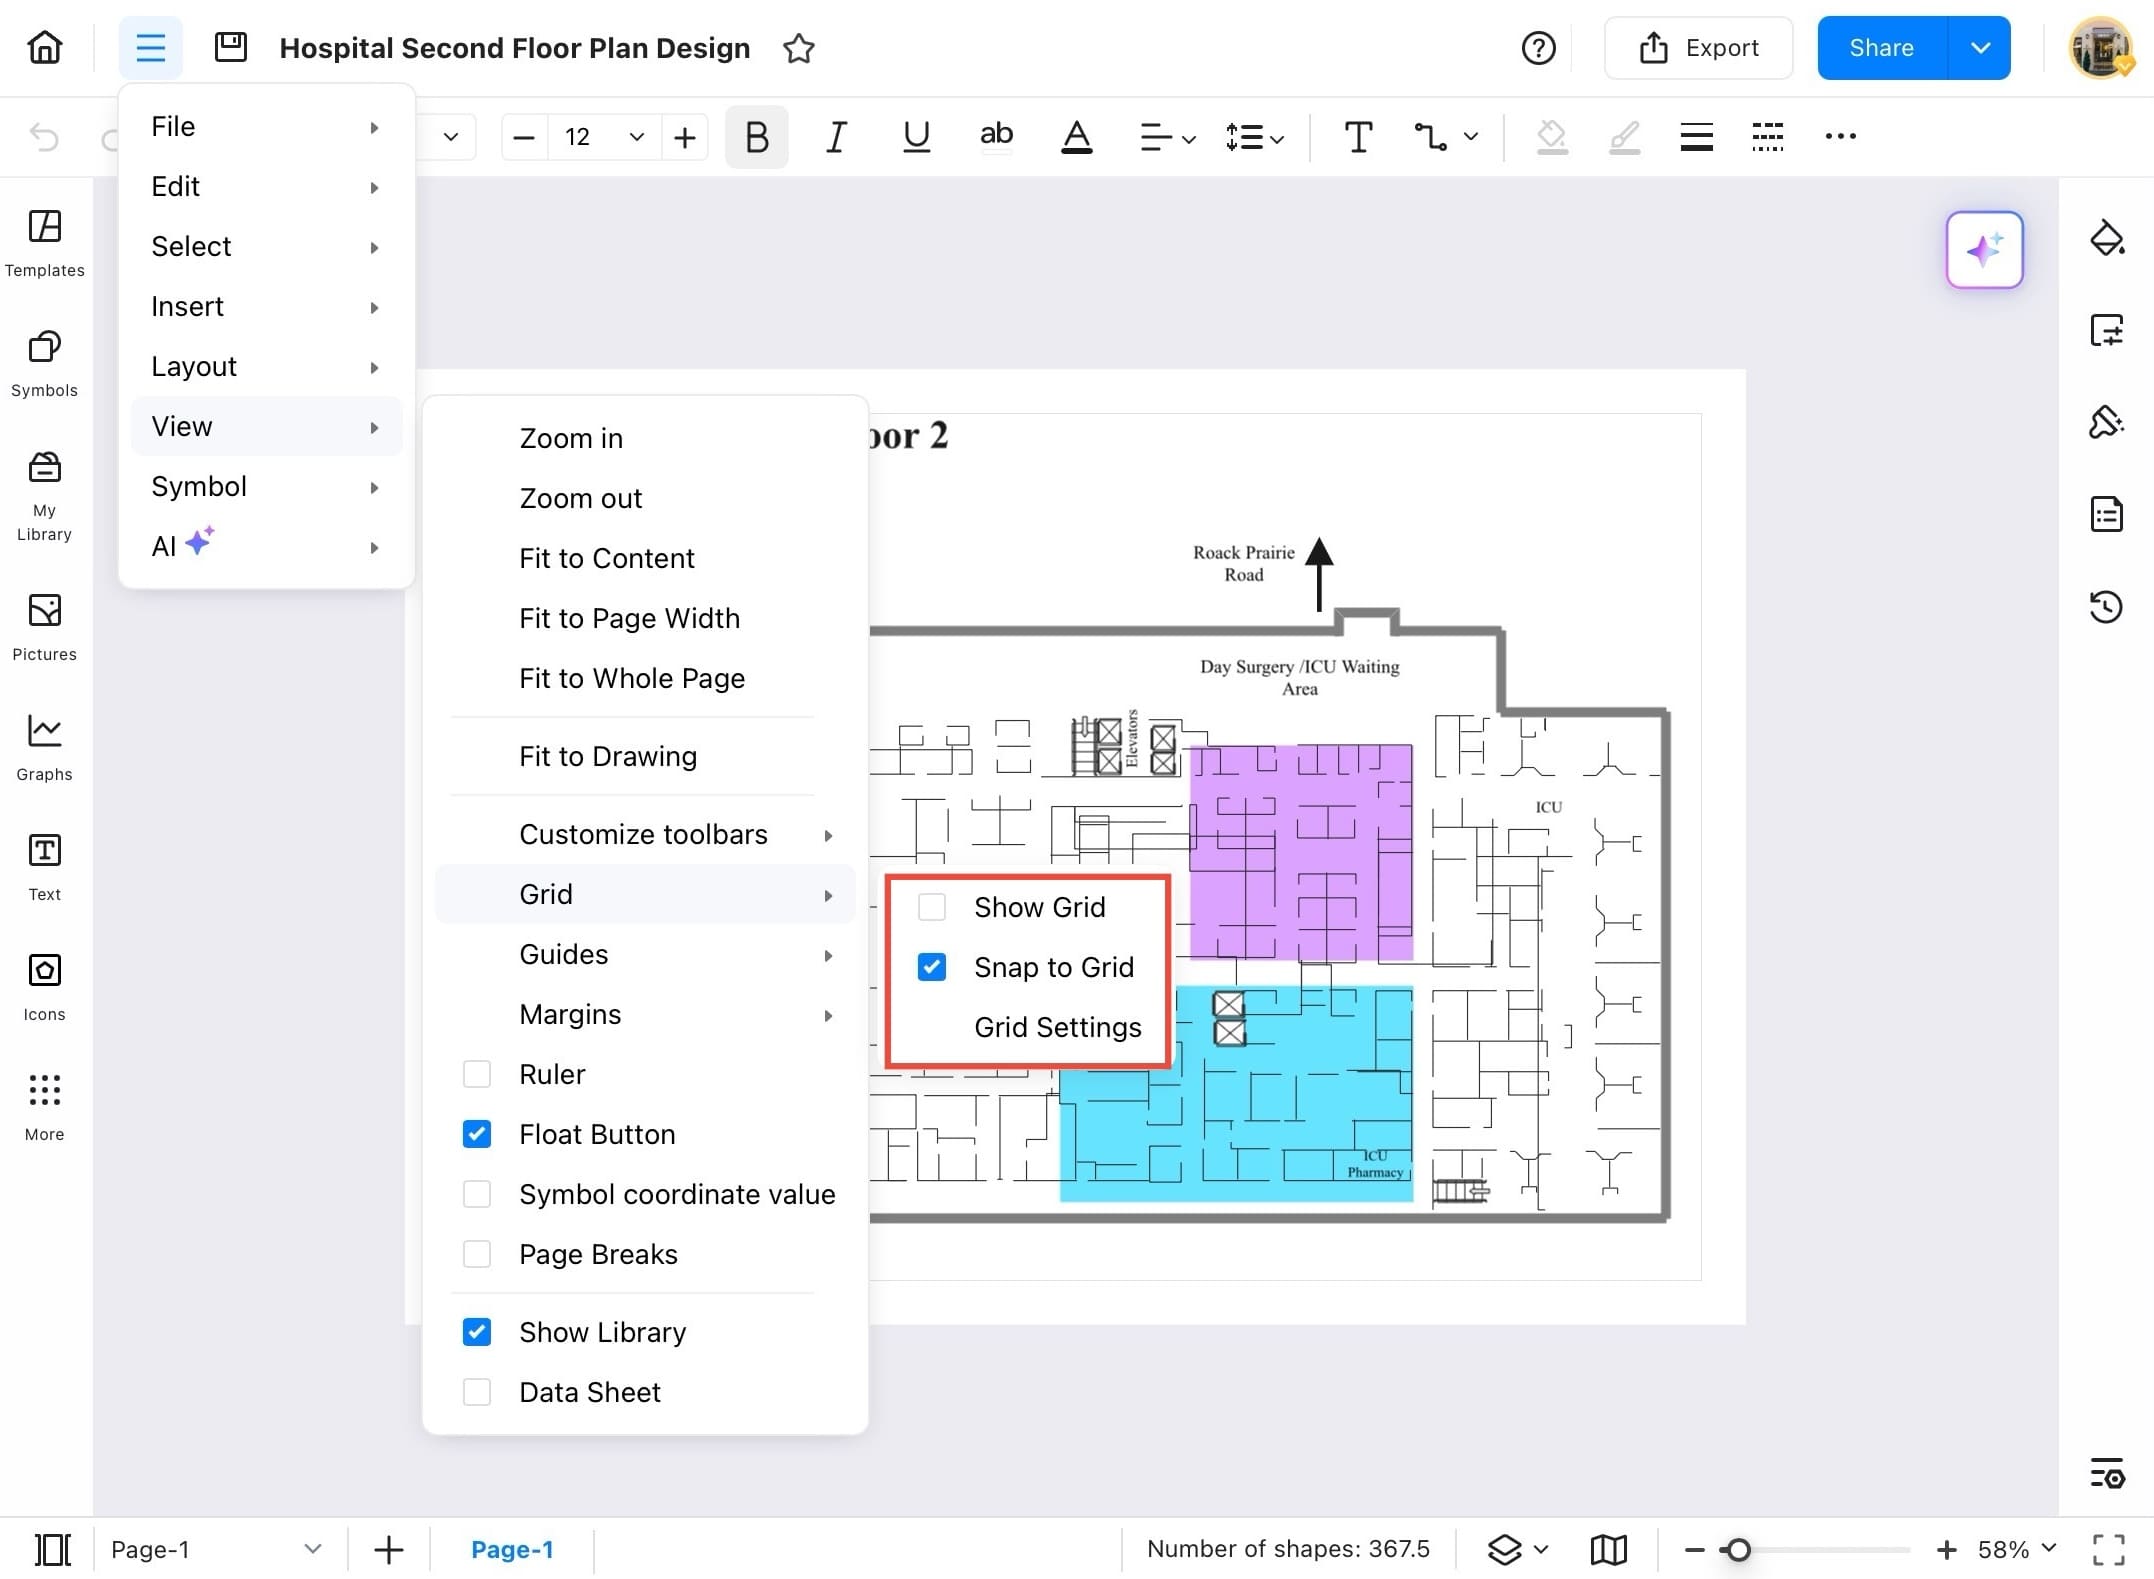
Step ❺ Tap Grid
- In the View menu, tap Grid to open grid-related options.
Step ❻ Toggle Show Grid and Snap to Grid
- Toggle Show Grid to display the grid on your canvas. You can also enable Snap to Grid if you want your objects to align automatically with the grid lines.
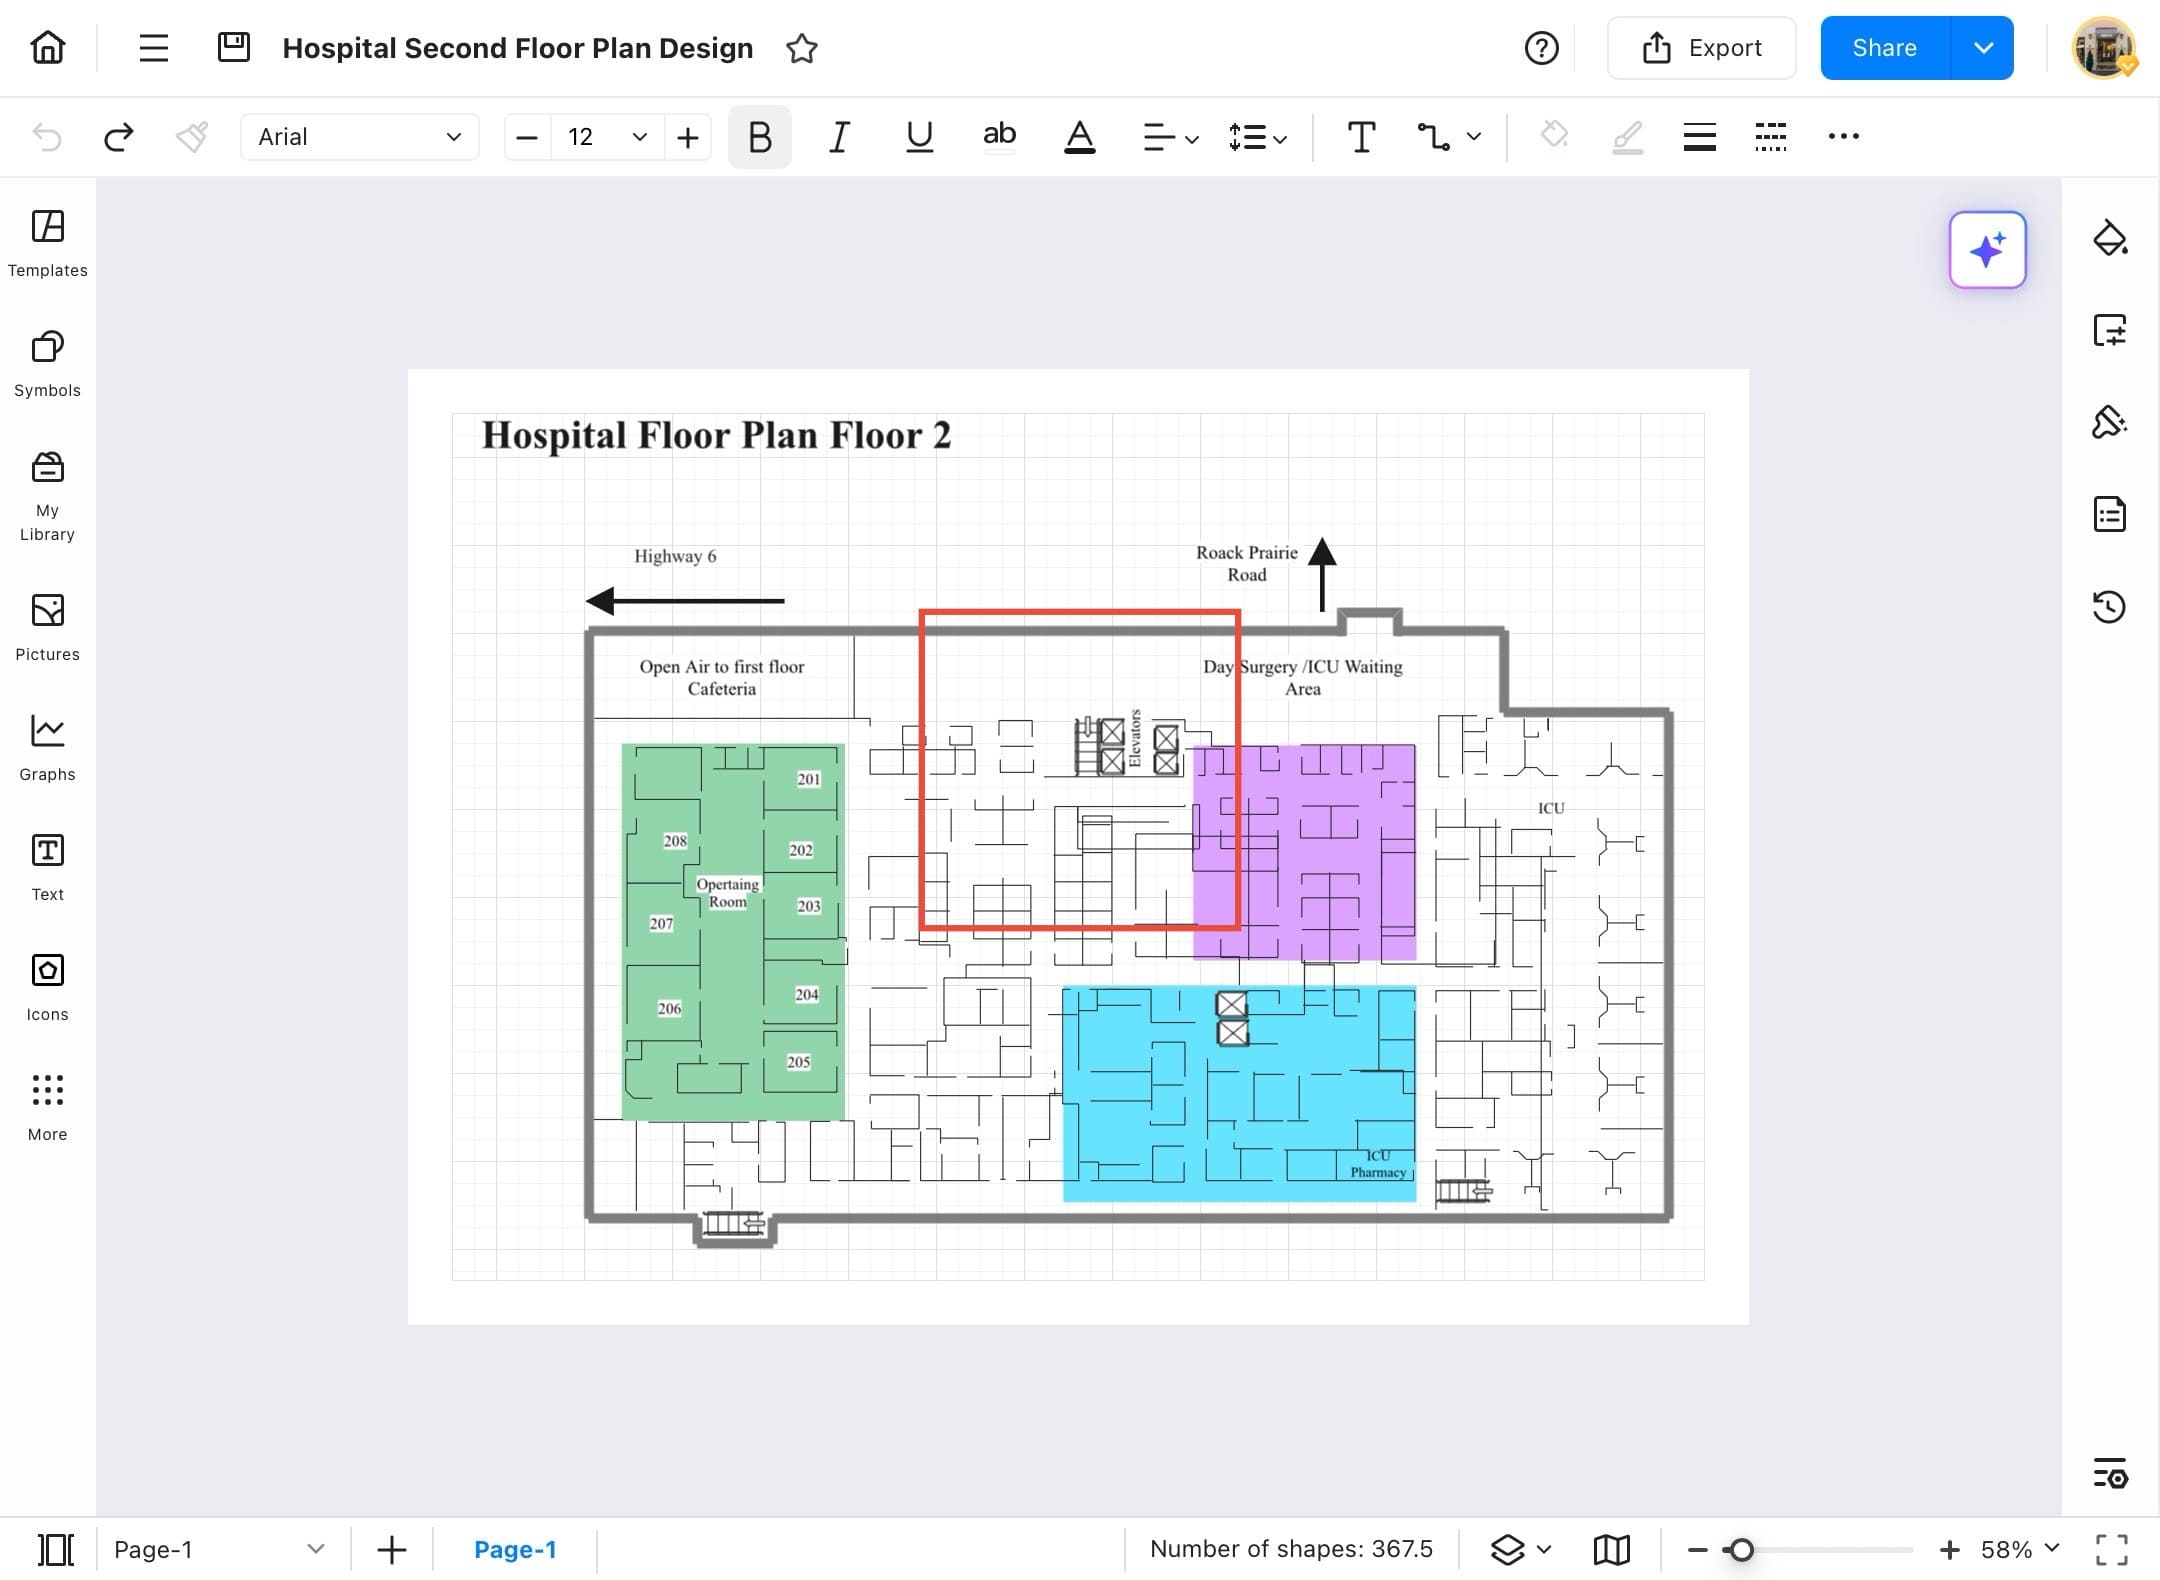
Step ❼ View the grid on the canvas
- The grid will now be visible on your canvas, helping you organize and align objects more precisely.
Step ❽ Tap Grid Settings
- To adjust how the grid appears, go to the View menu, hover over Grid, and tap Grid Settings.
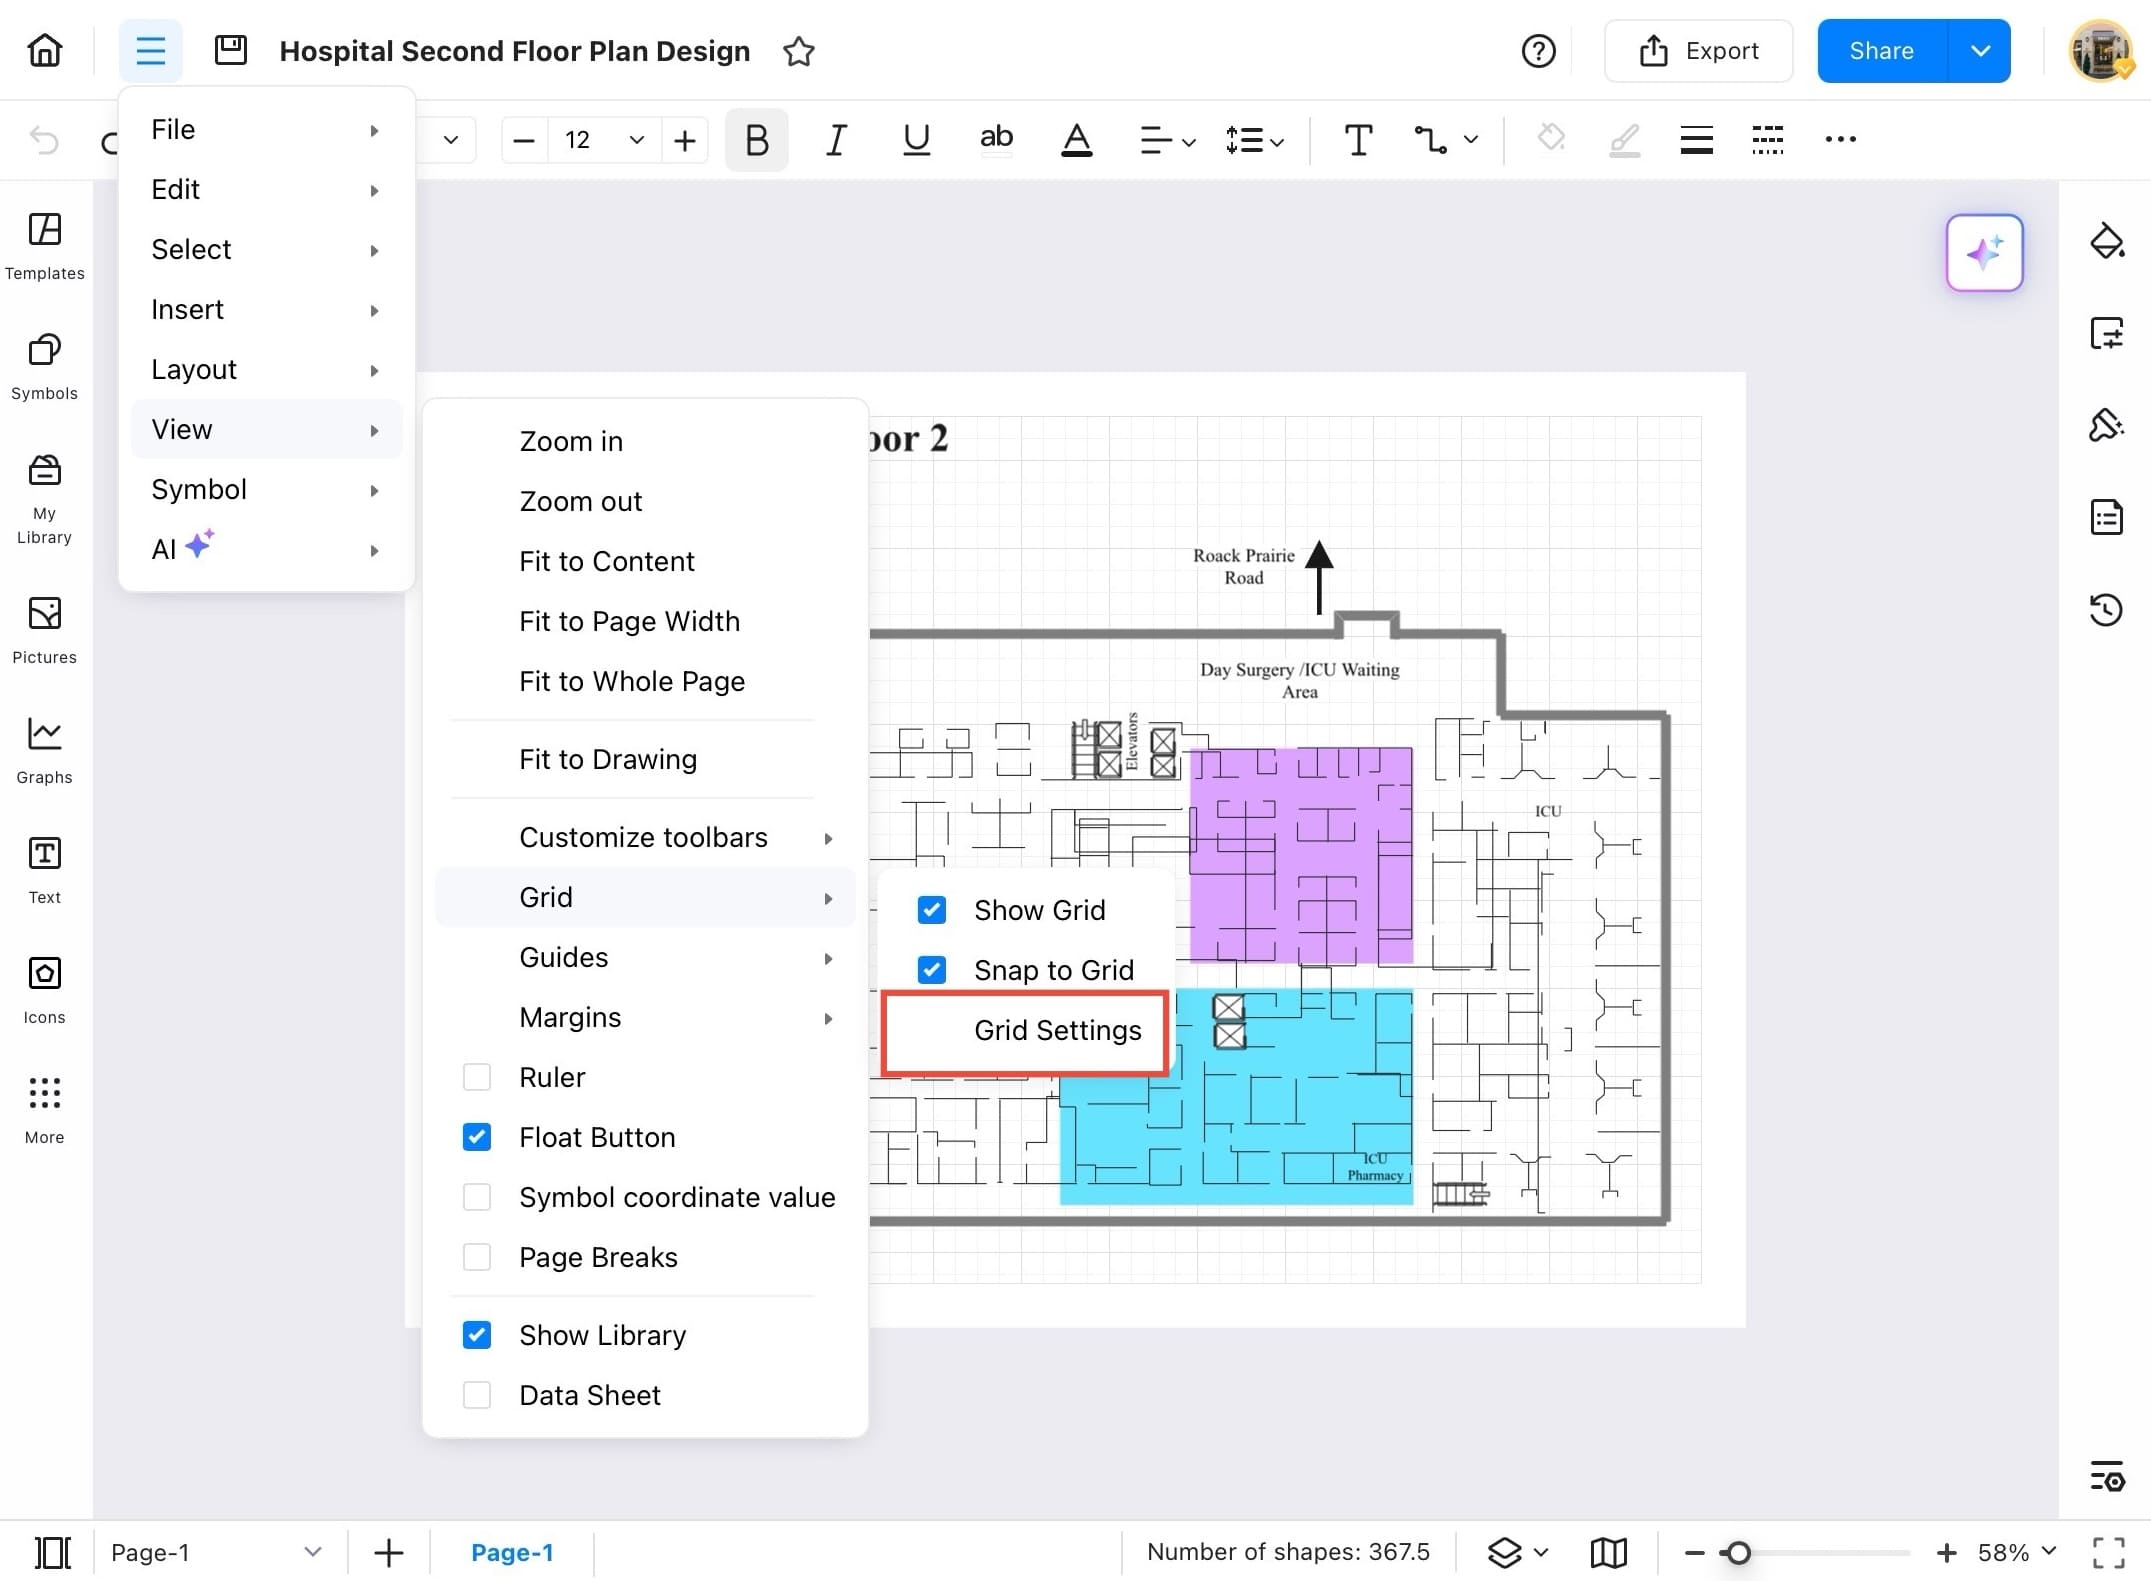
Step ❾ Adjust grid settings
- On the right panel, you can now adjust grid size, spacing, orientation, and page setup settings according to your preferences.

Guides
To keep your visuals perfectly arranged, EdrawMax provides **Guides** that you can drag into your workspace. These lines act as alignment references, making sure every element is positioned properly. Here's how you can add them:
Step ❶ Open EdrawMax
- Open EdrawMax on your device.
Step ❷ Select your file
- From the Recent tab, select the file you want to work on.
Step ❸ Tap the menu icon
- Tap on the menu icon (three horizontal lines) at the top left of the canvas.
Step ❹ Tap View
- From the dropdown menu, hover over View to open the display options.
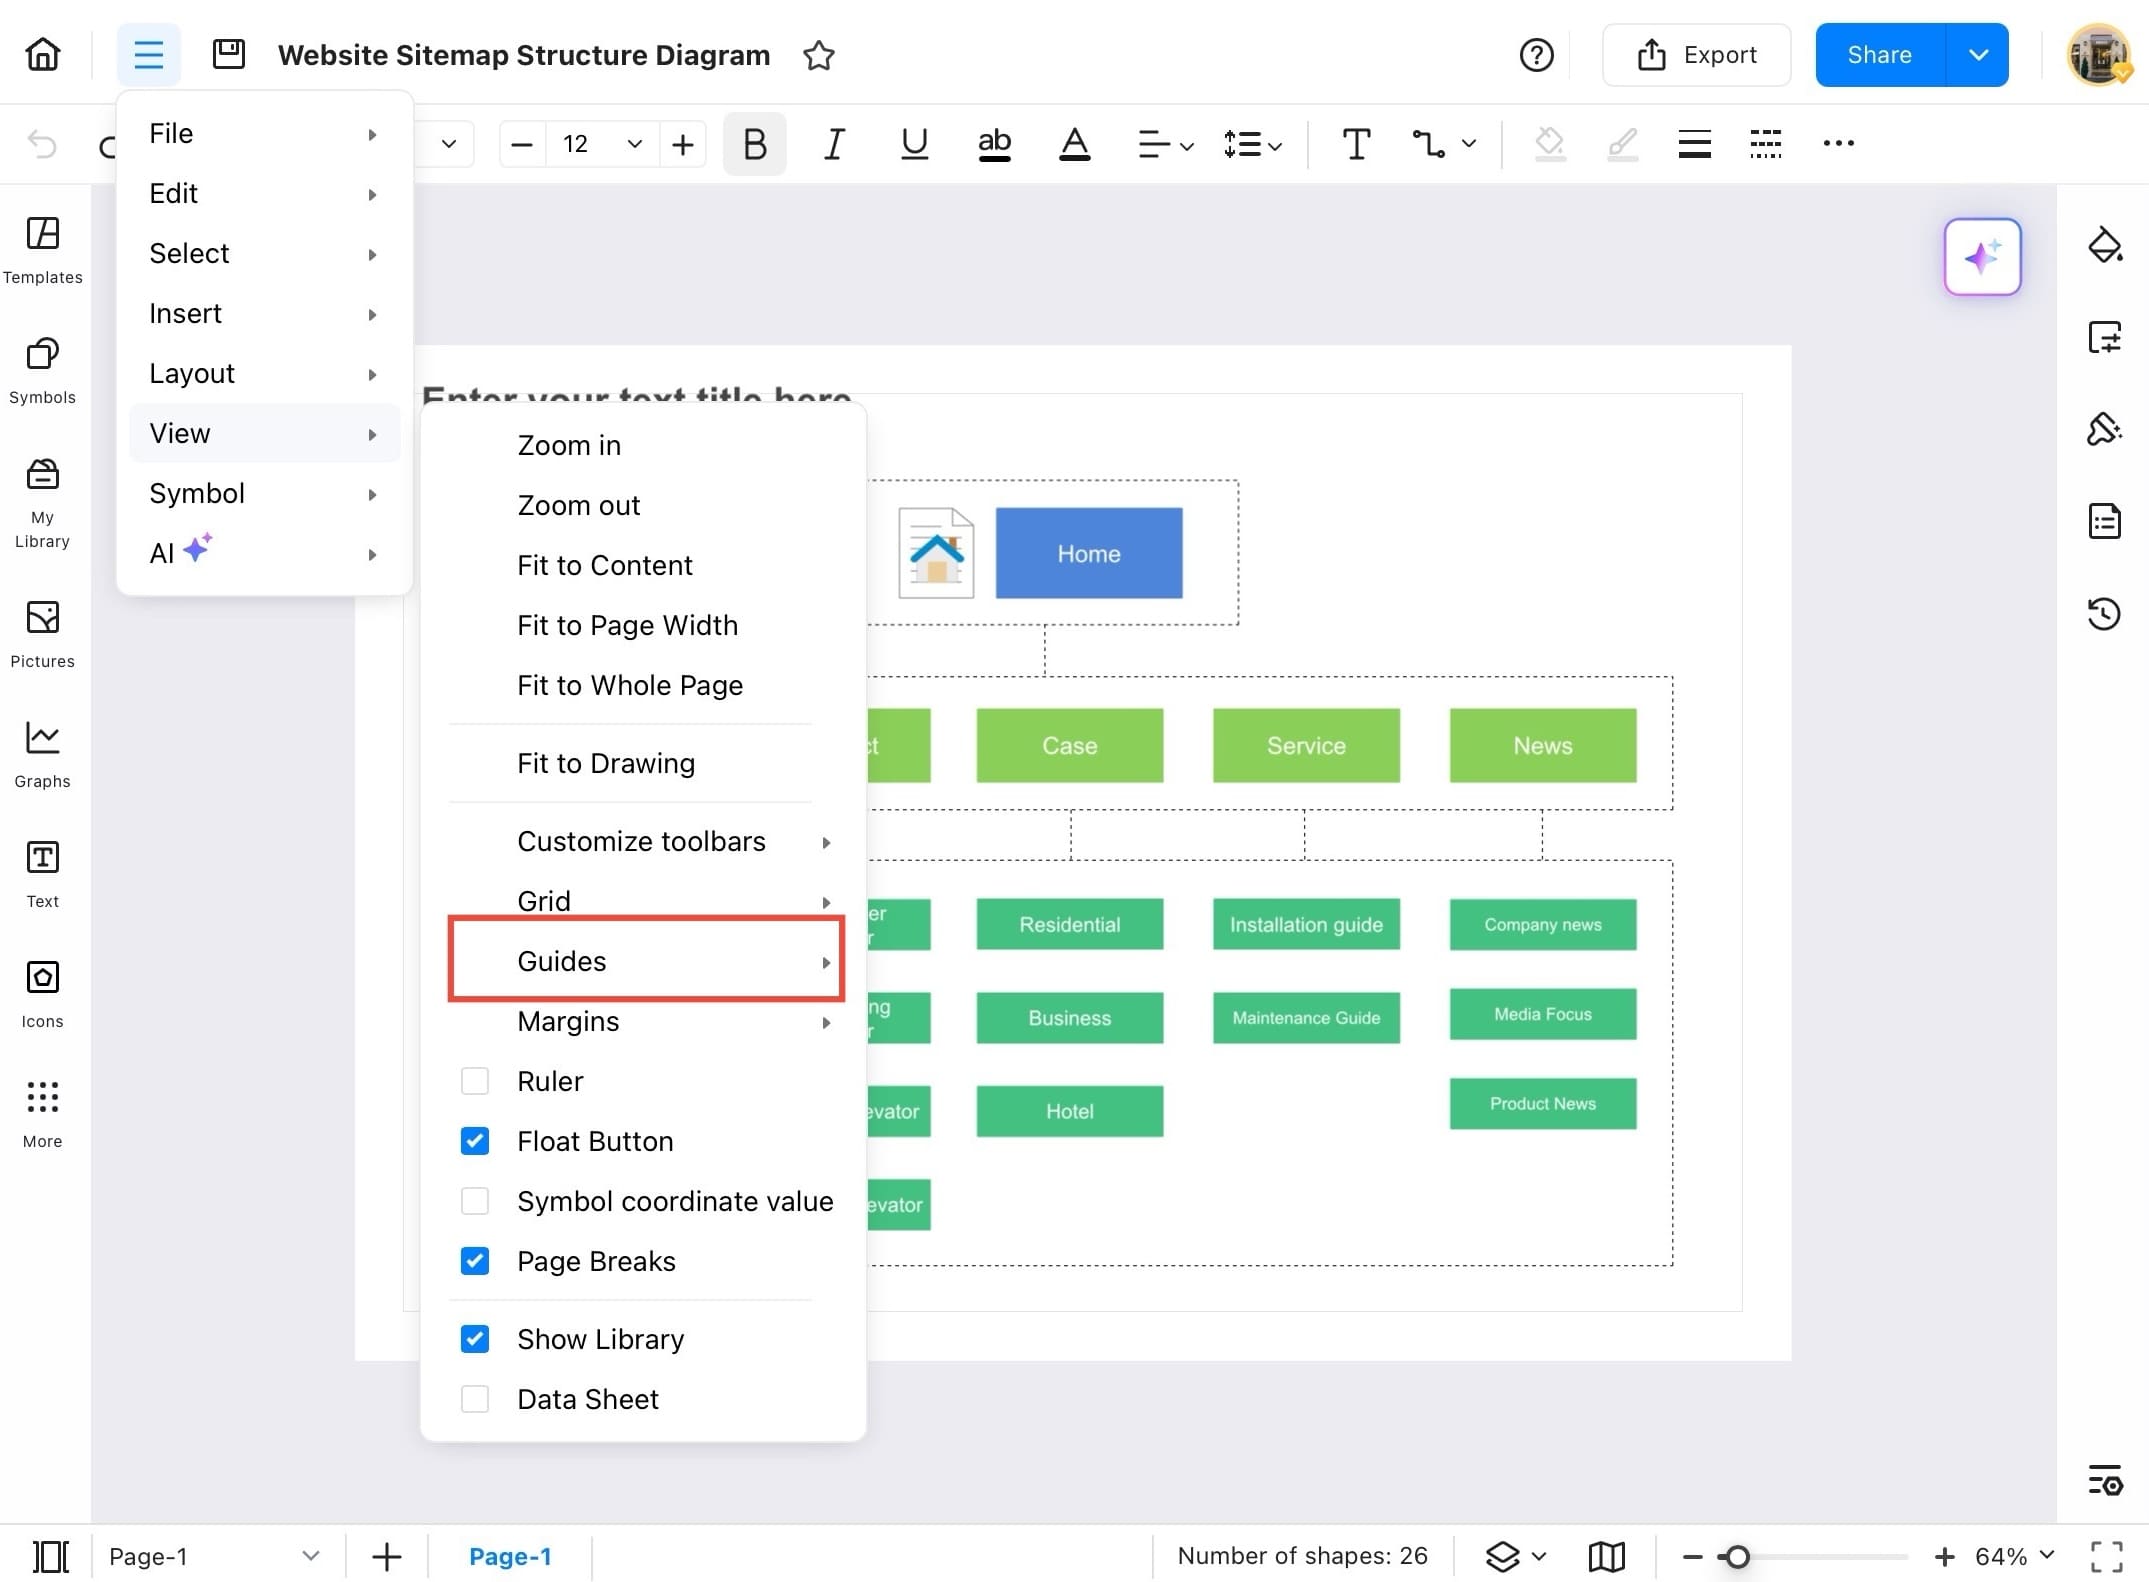
Step ❺ Tap Guides
- Tap Guides from the View options. This will activate guide lines on the canvas for better object alignment.
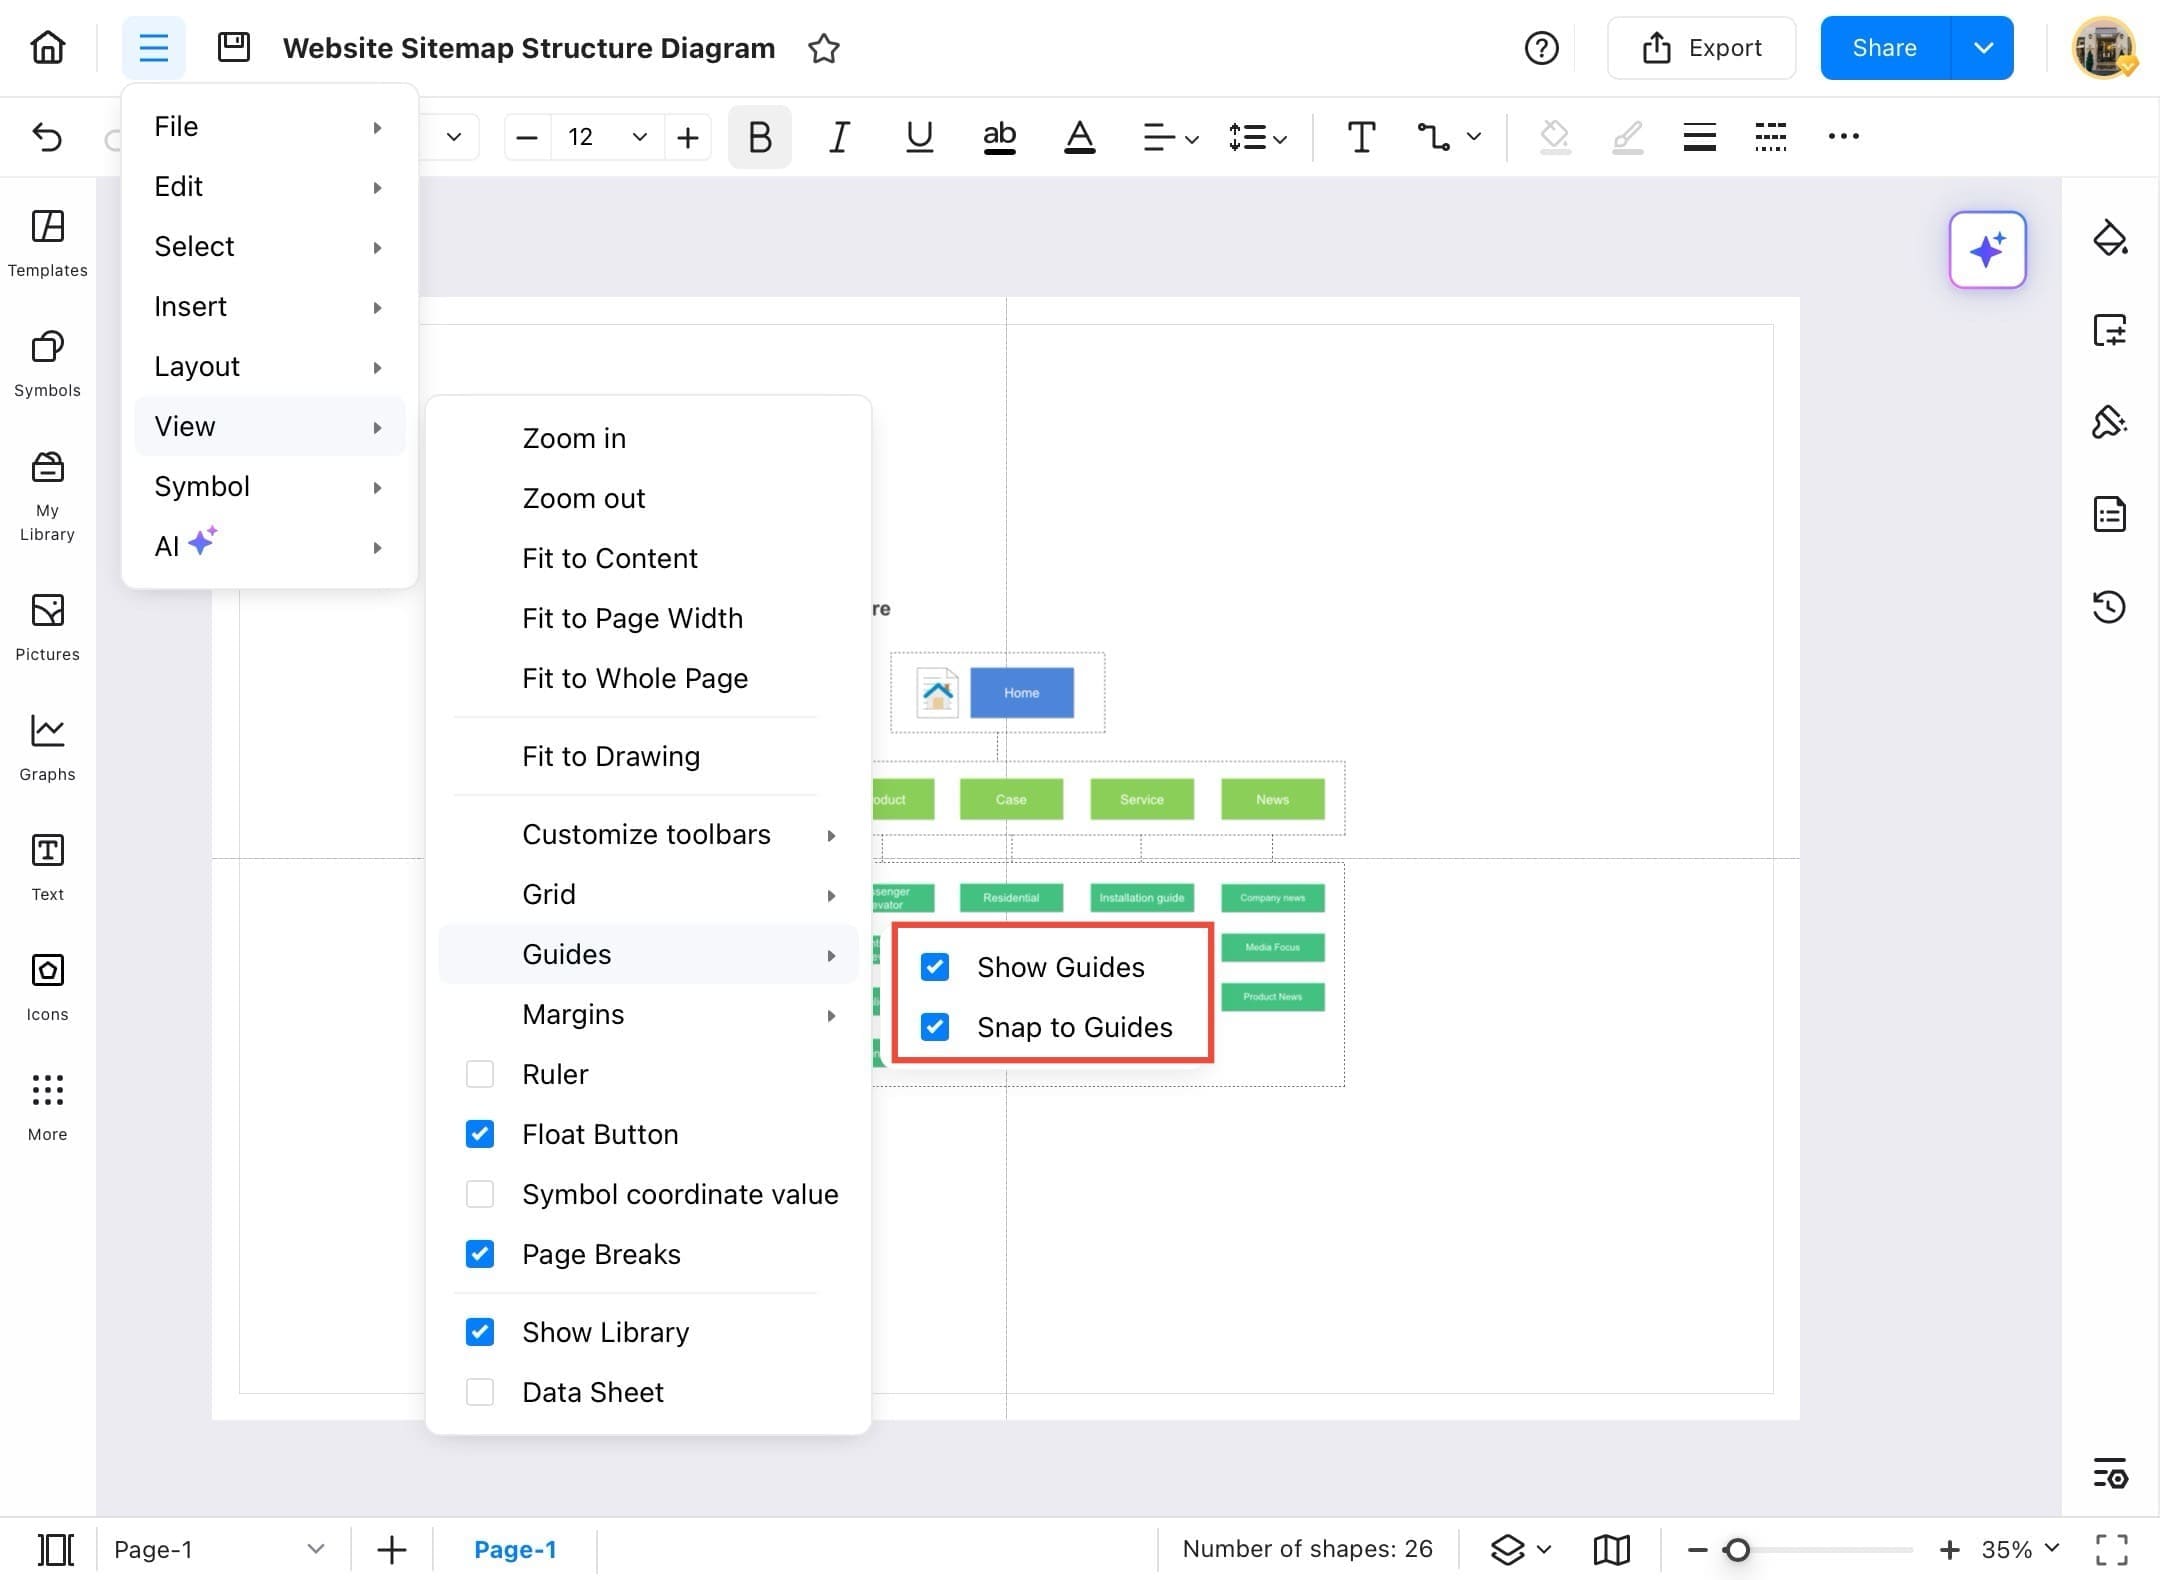
Step ❻ Select Show Guides and Snap to Guides
- Tap the small arrow next to Guides, then select Show Guides and Snap to Guides.

Step ❼ Confirm options are ticked
- Make sure both boxes: Show Guides and Snap to Guides are ticked. This enables snapping and makes alignment easier.
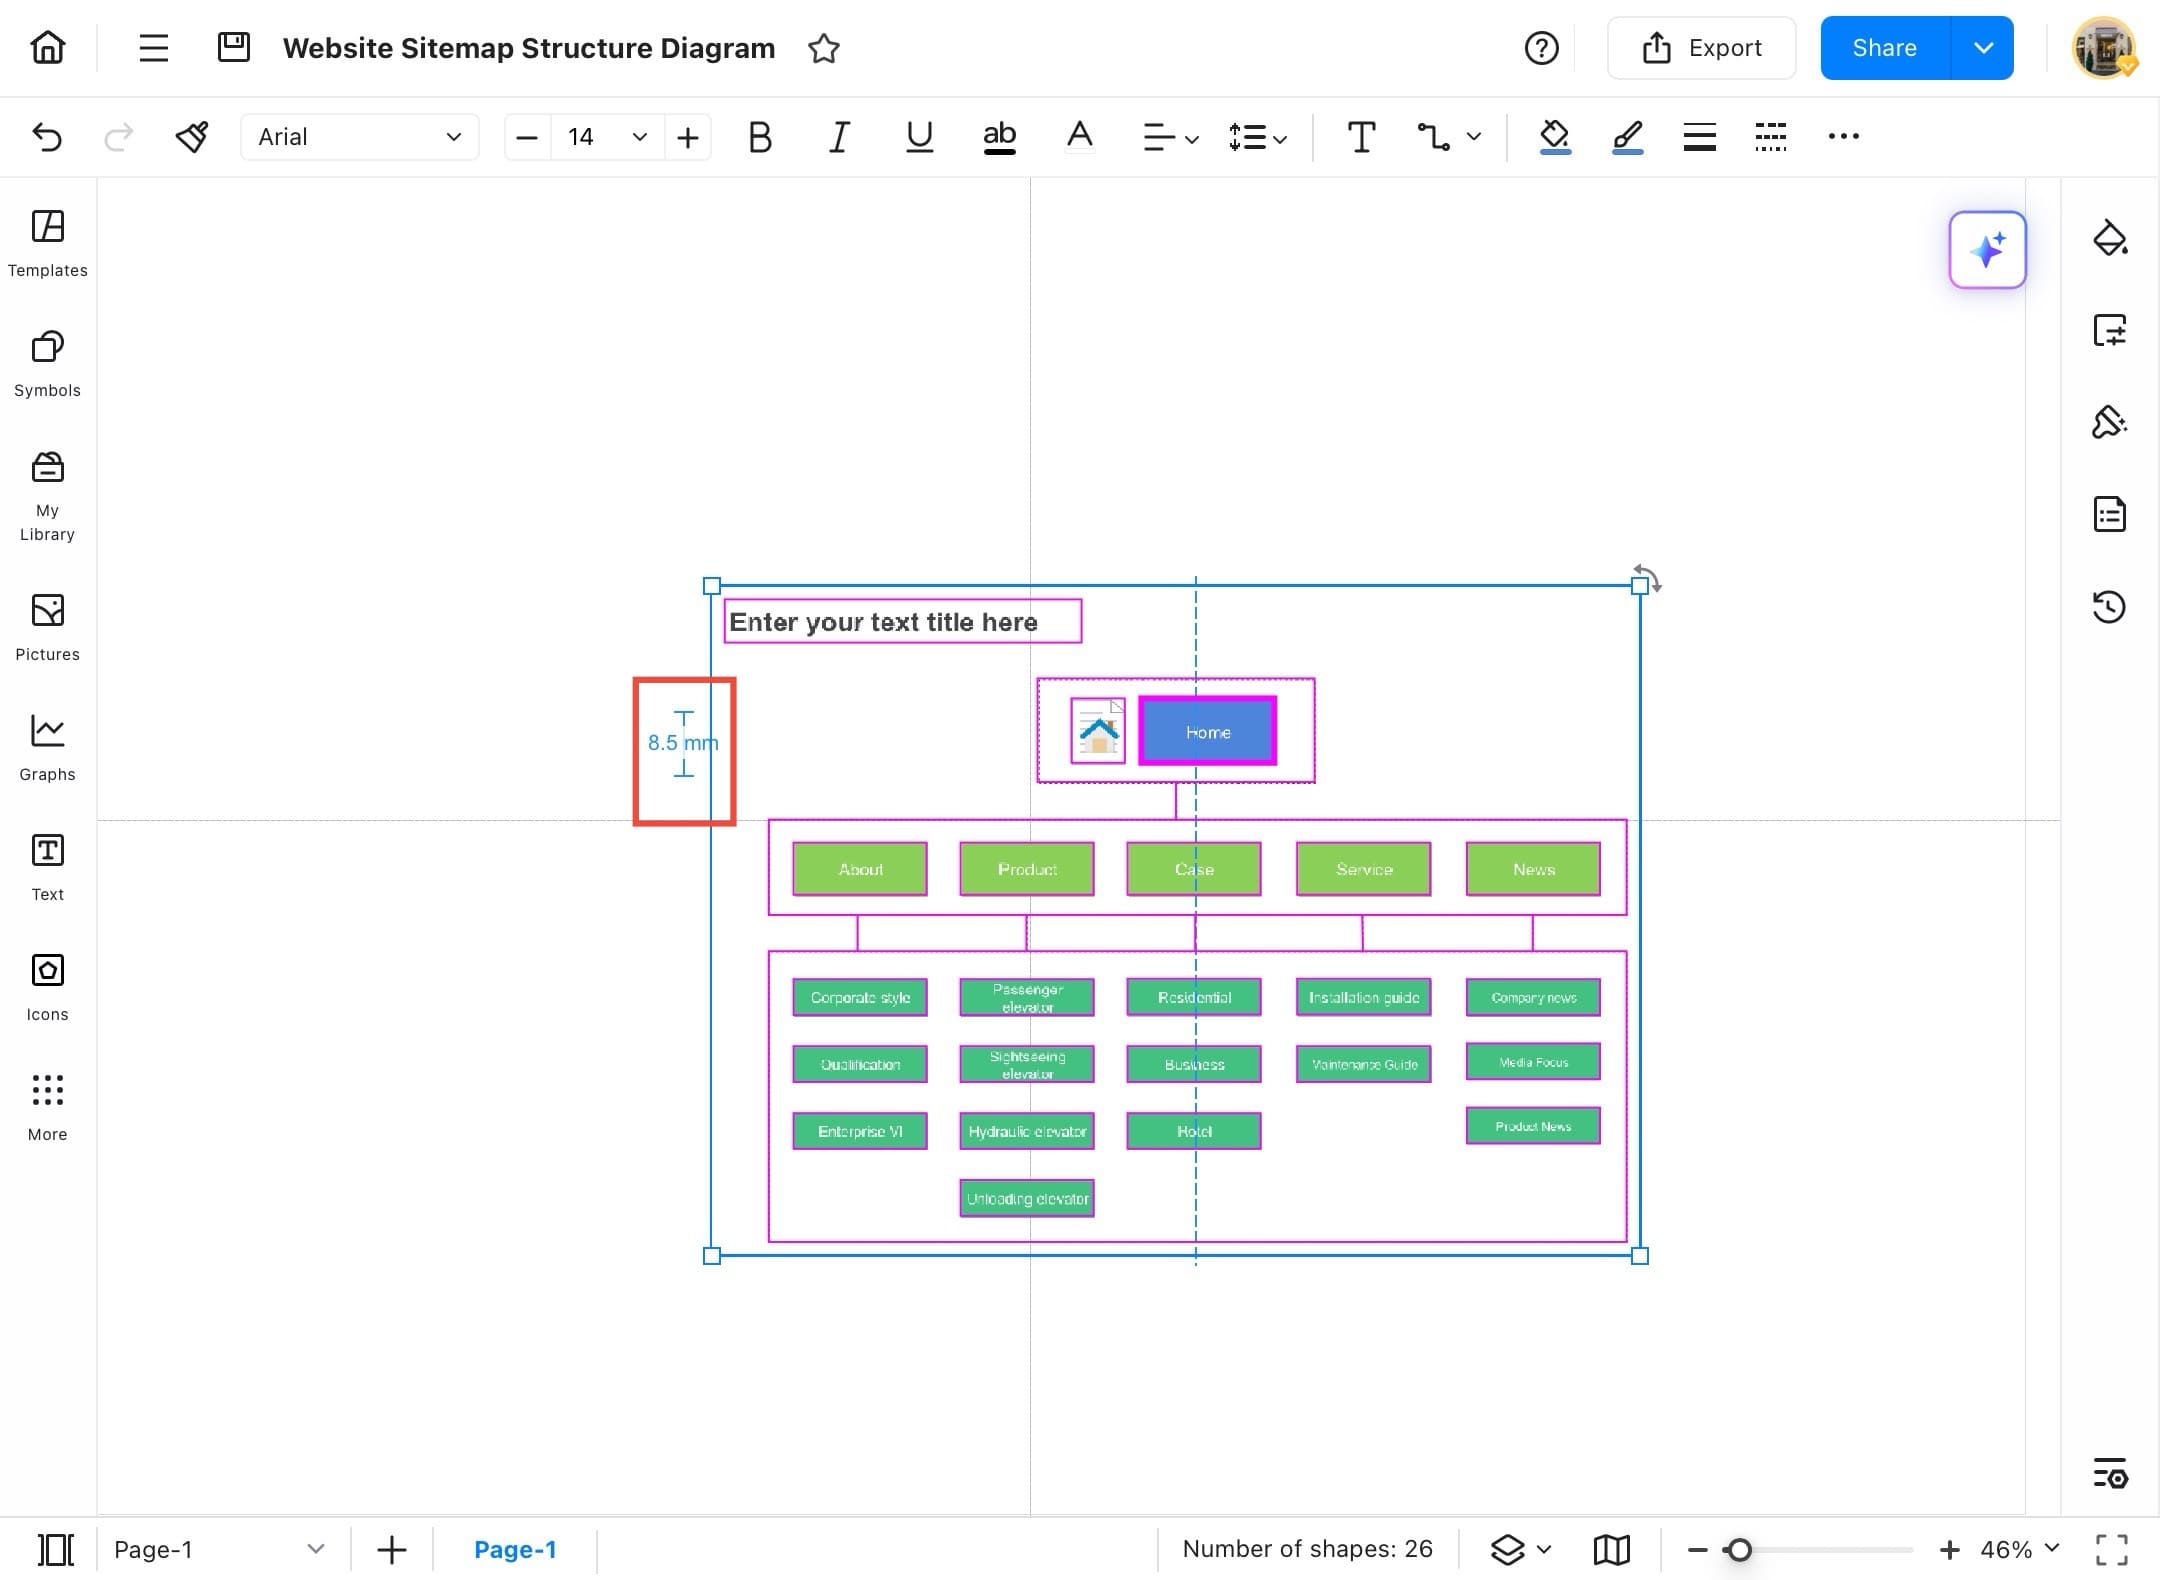
Step ❽ View the guide lines
- Now you’ll see vertical and horizontal guide lines on your canvas. You can drag and align objects precisely using these guides.
Margins
Adjusting margins in EdrawMax helps you manage spacing around your diagram, especially when preparing for print or exporting. Follow the steps below to adjust them:
Step ❶ Open EdrawMax
- Open EdrawMax on your device.
Step ❷ Open your project
- From the Recent tab, tap on the project you want to work on.
Step ❸ Tap the menu icon
- Once the project is open, tap the menu icon (three horizontal lines) at the top-left corner.
Step ❹ Tap View
- From the dropdown, hover over View to open the viewing options.
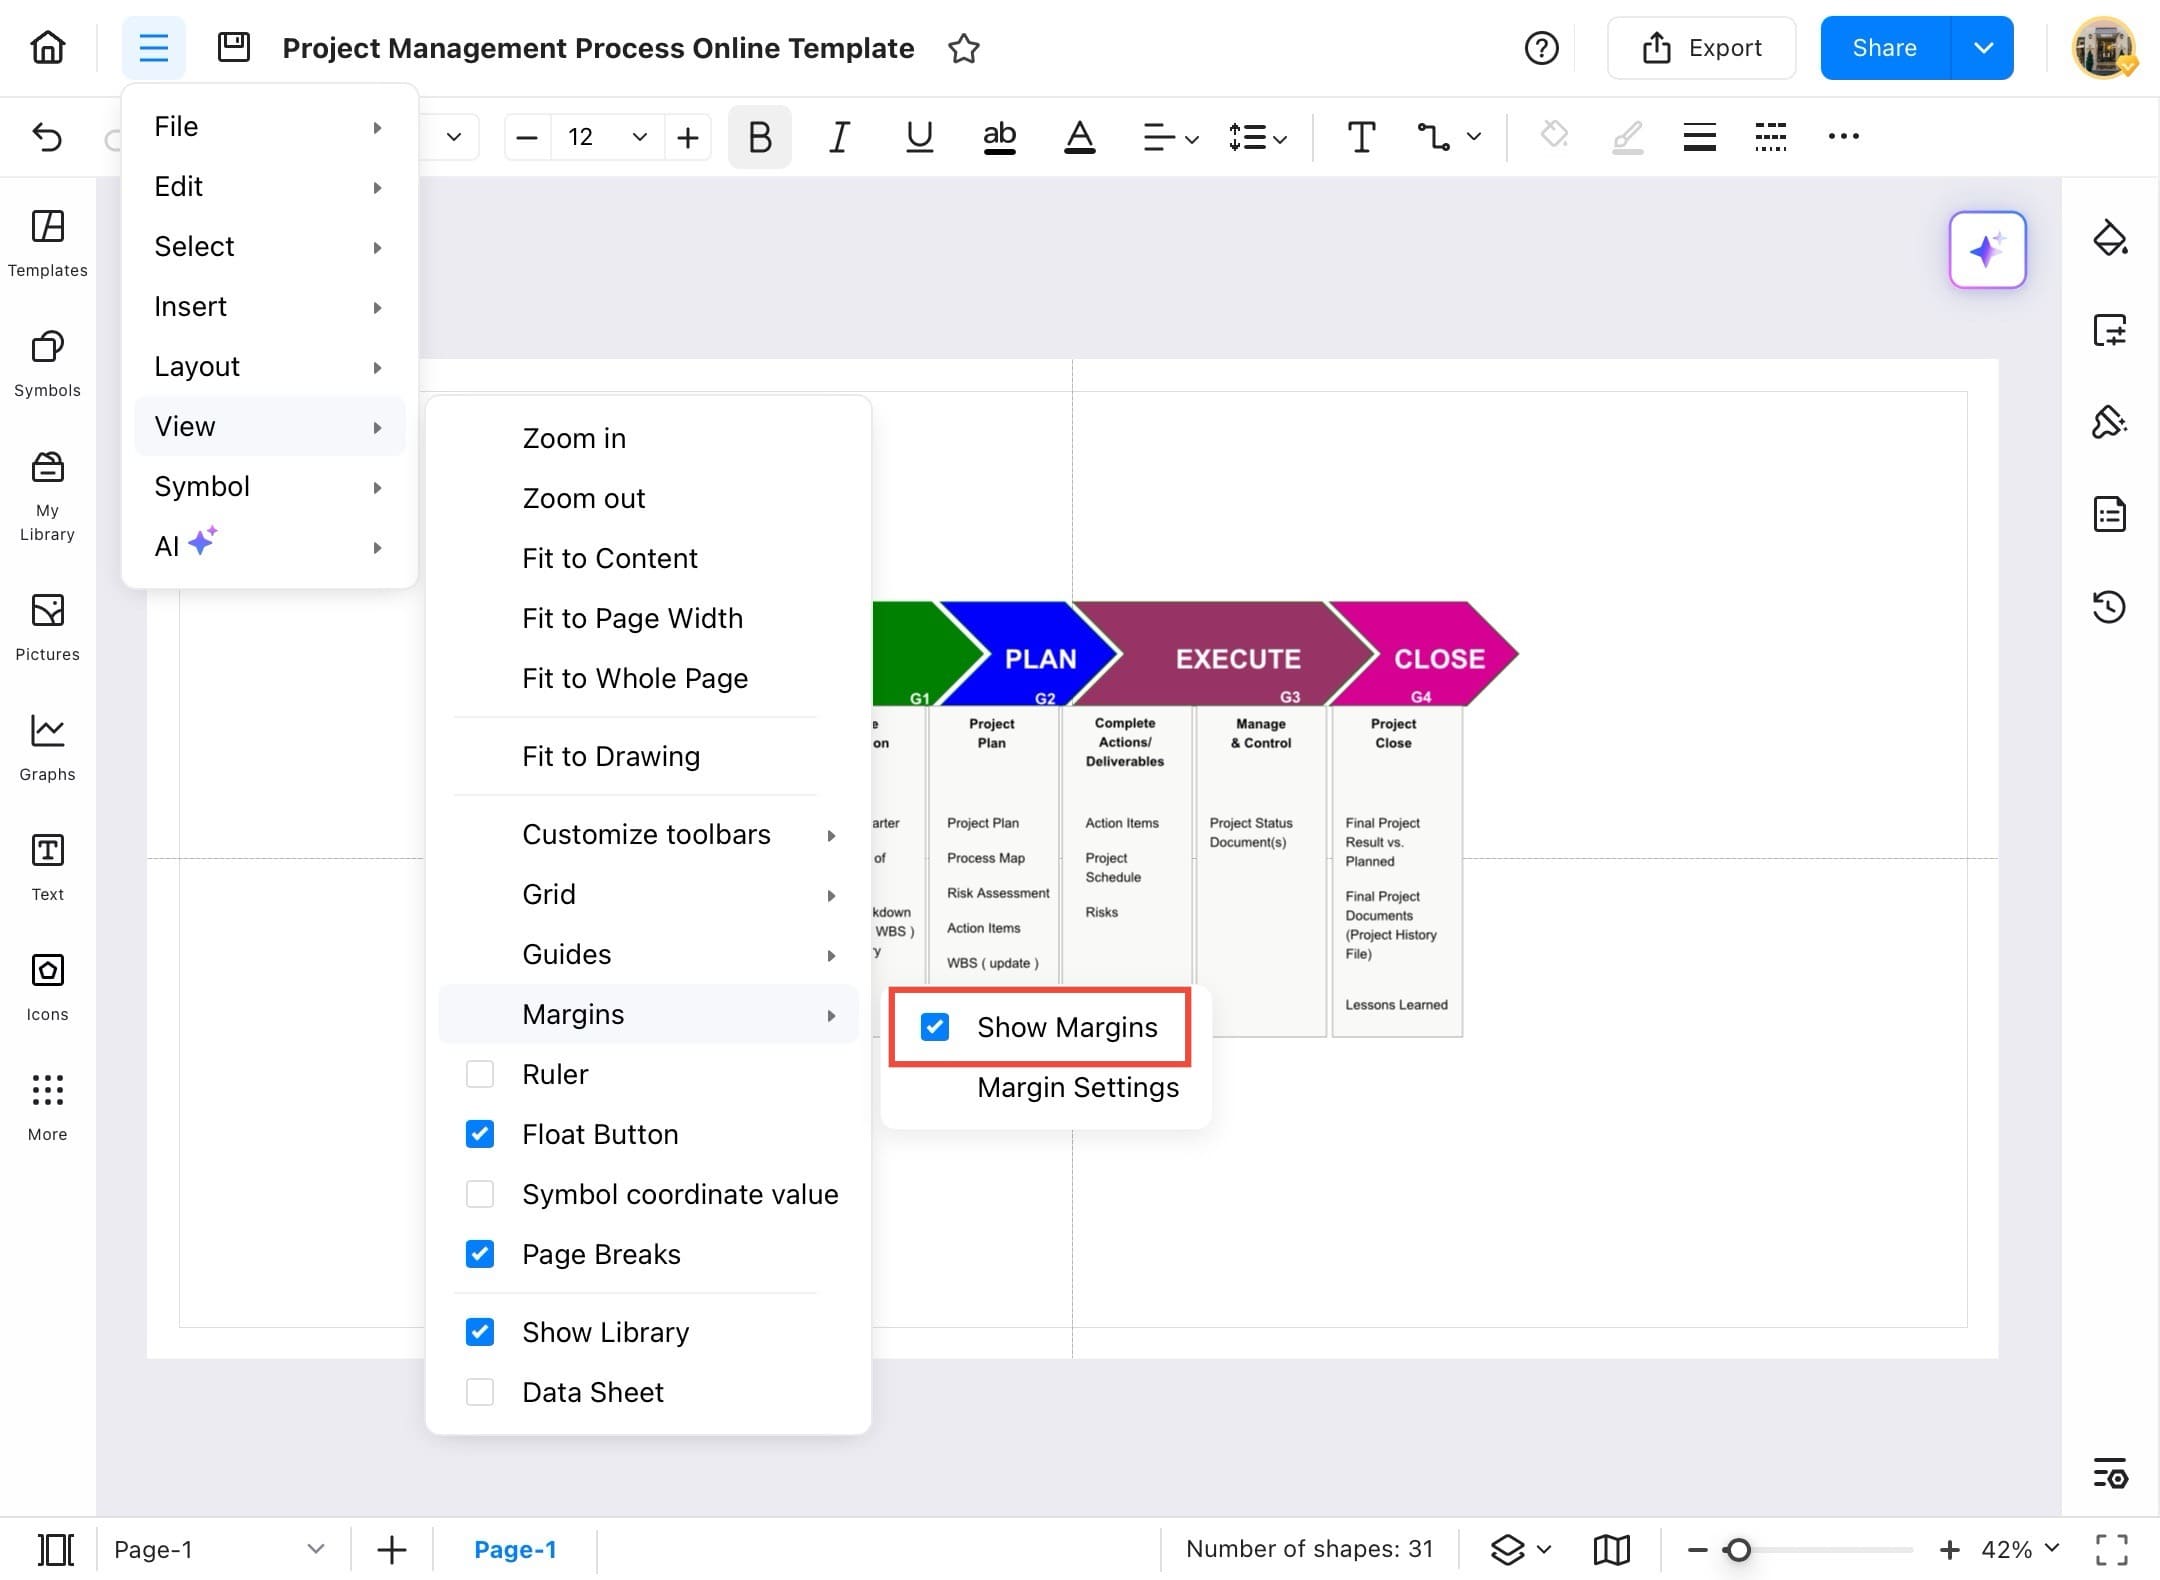
Step ❺ Tap Margins
- From the View menu, hover over Margins to expand the options.
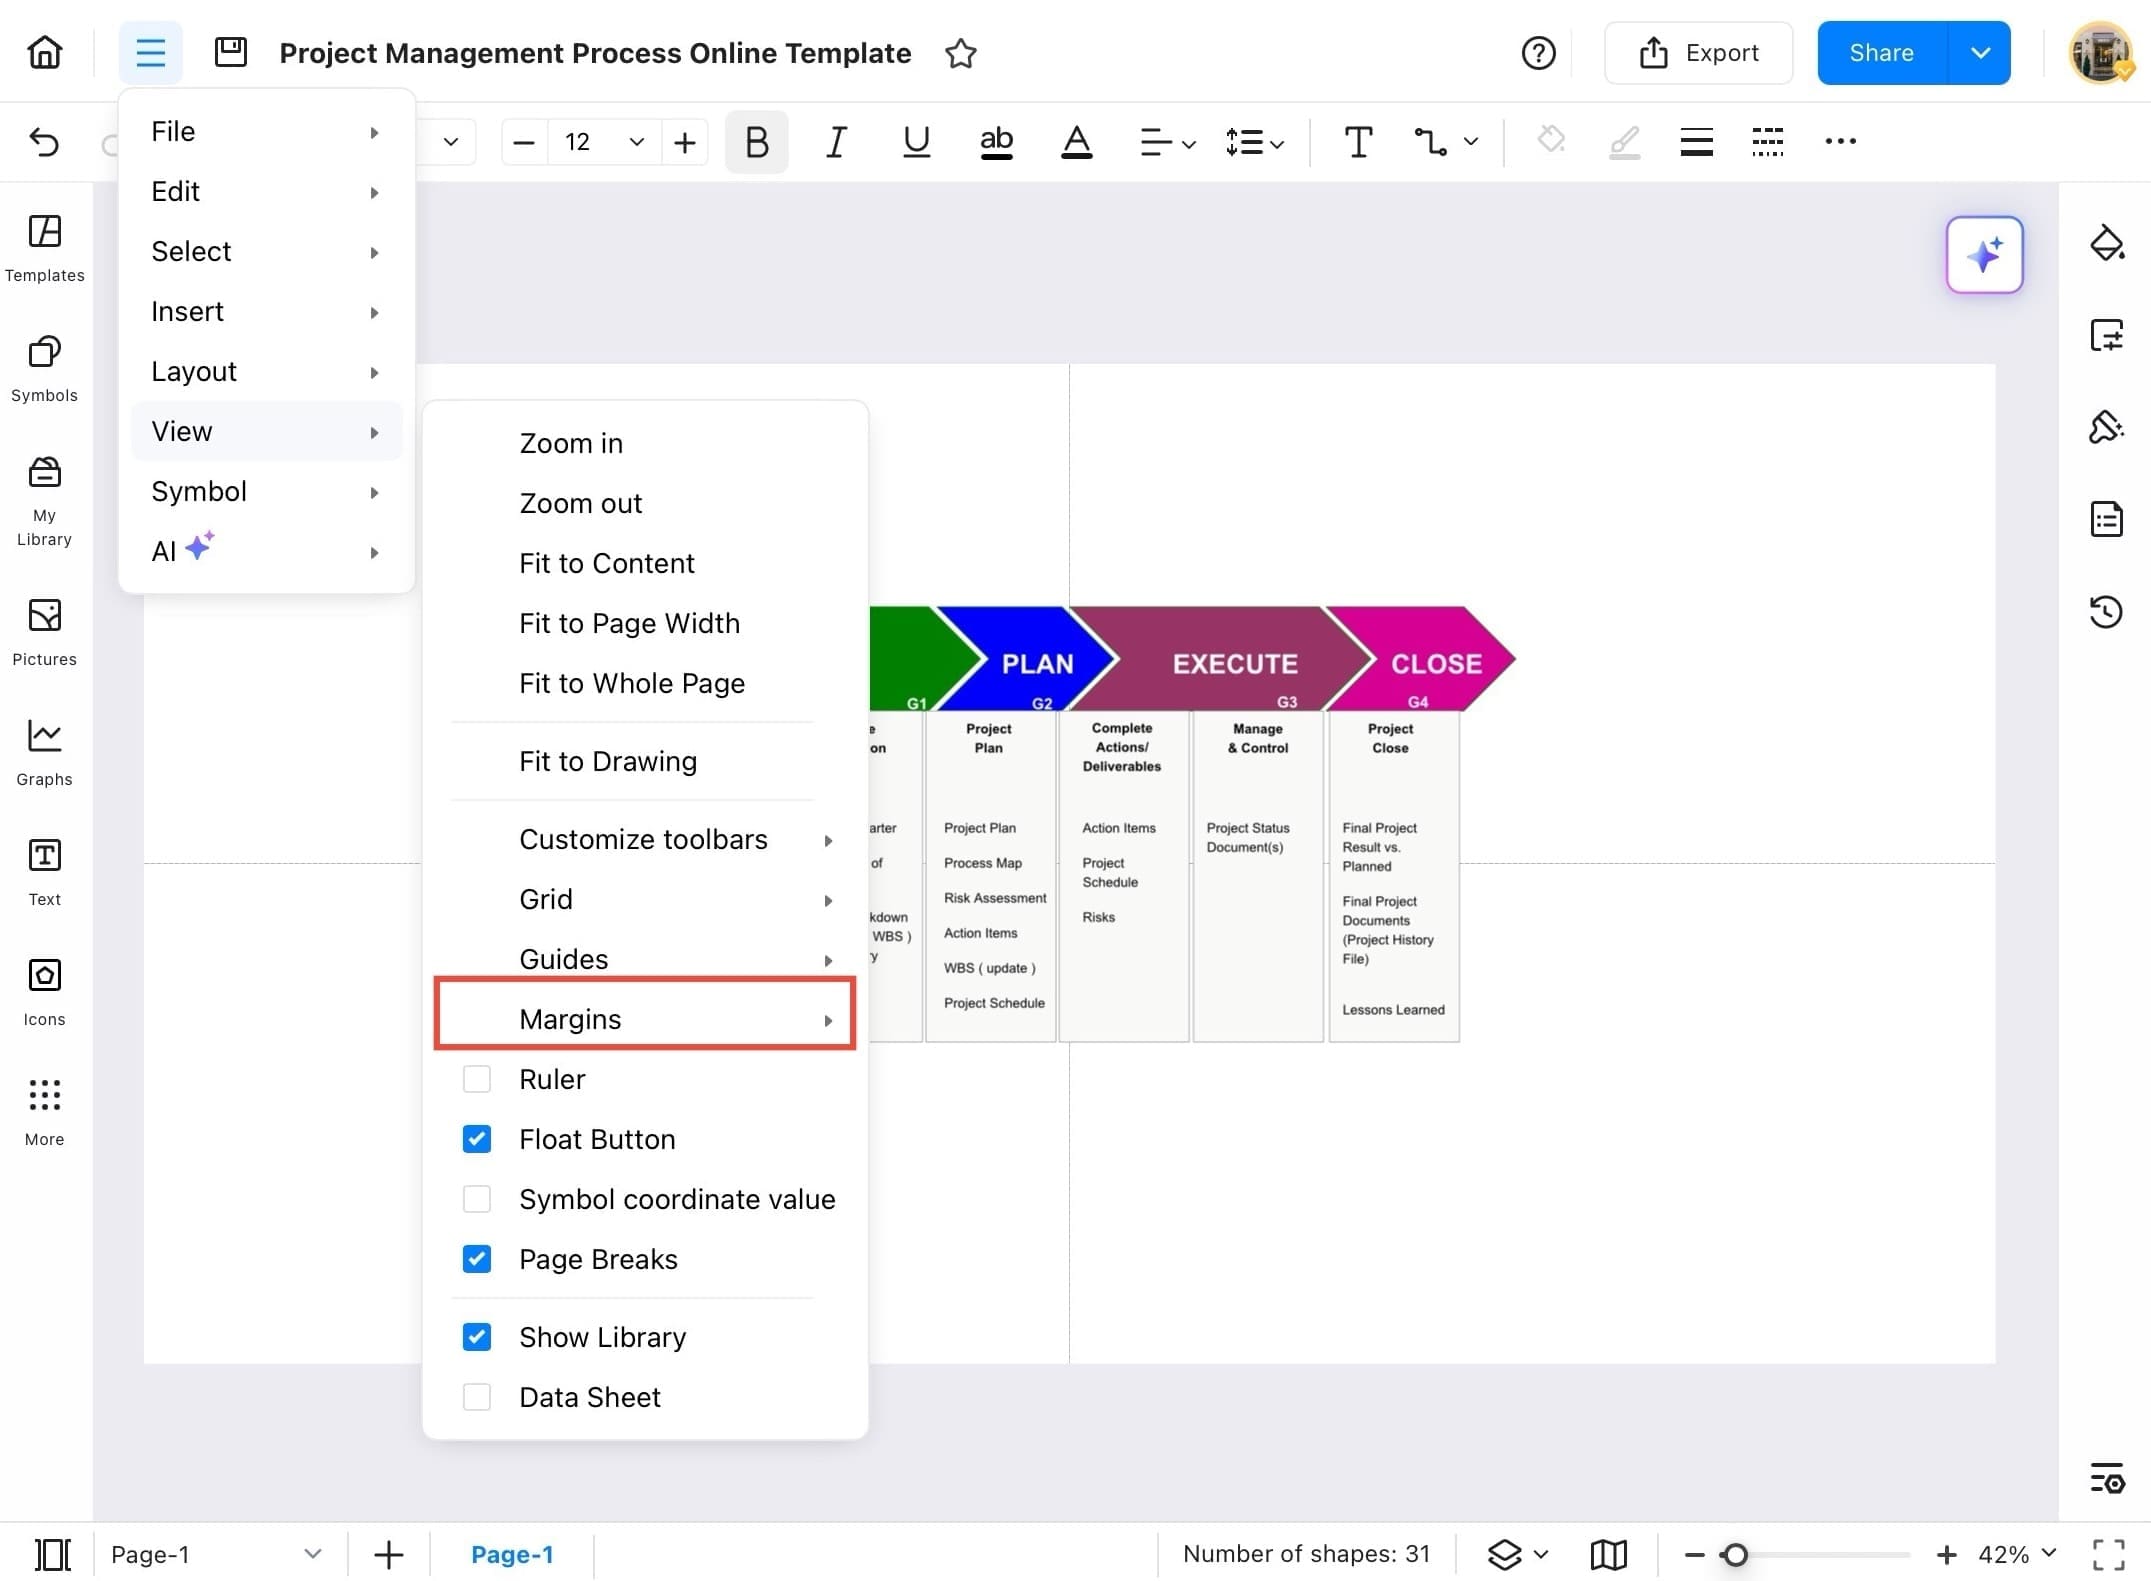
Step ❻ Tap Show Margins
- Tap Show Margins from the expanded menu.
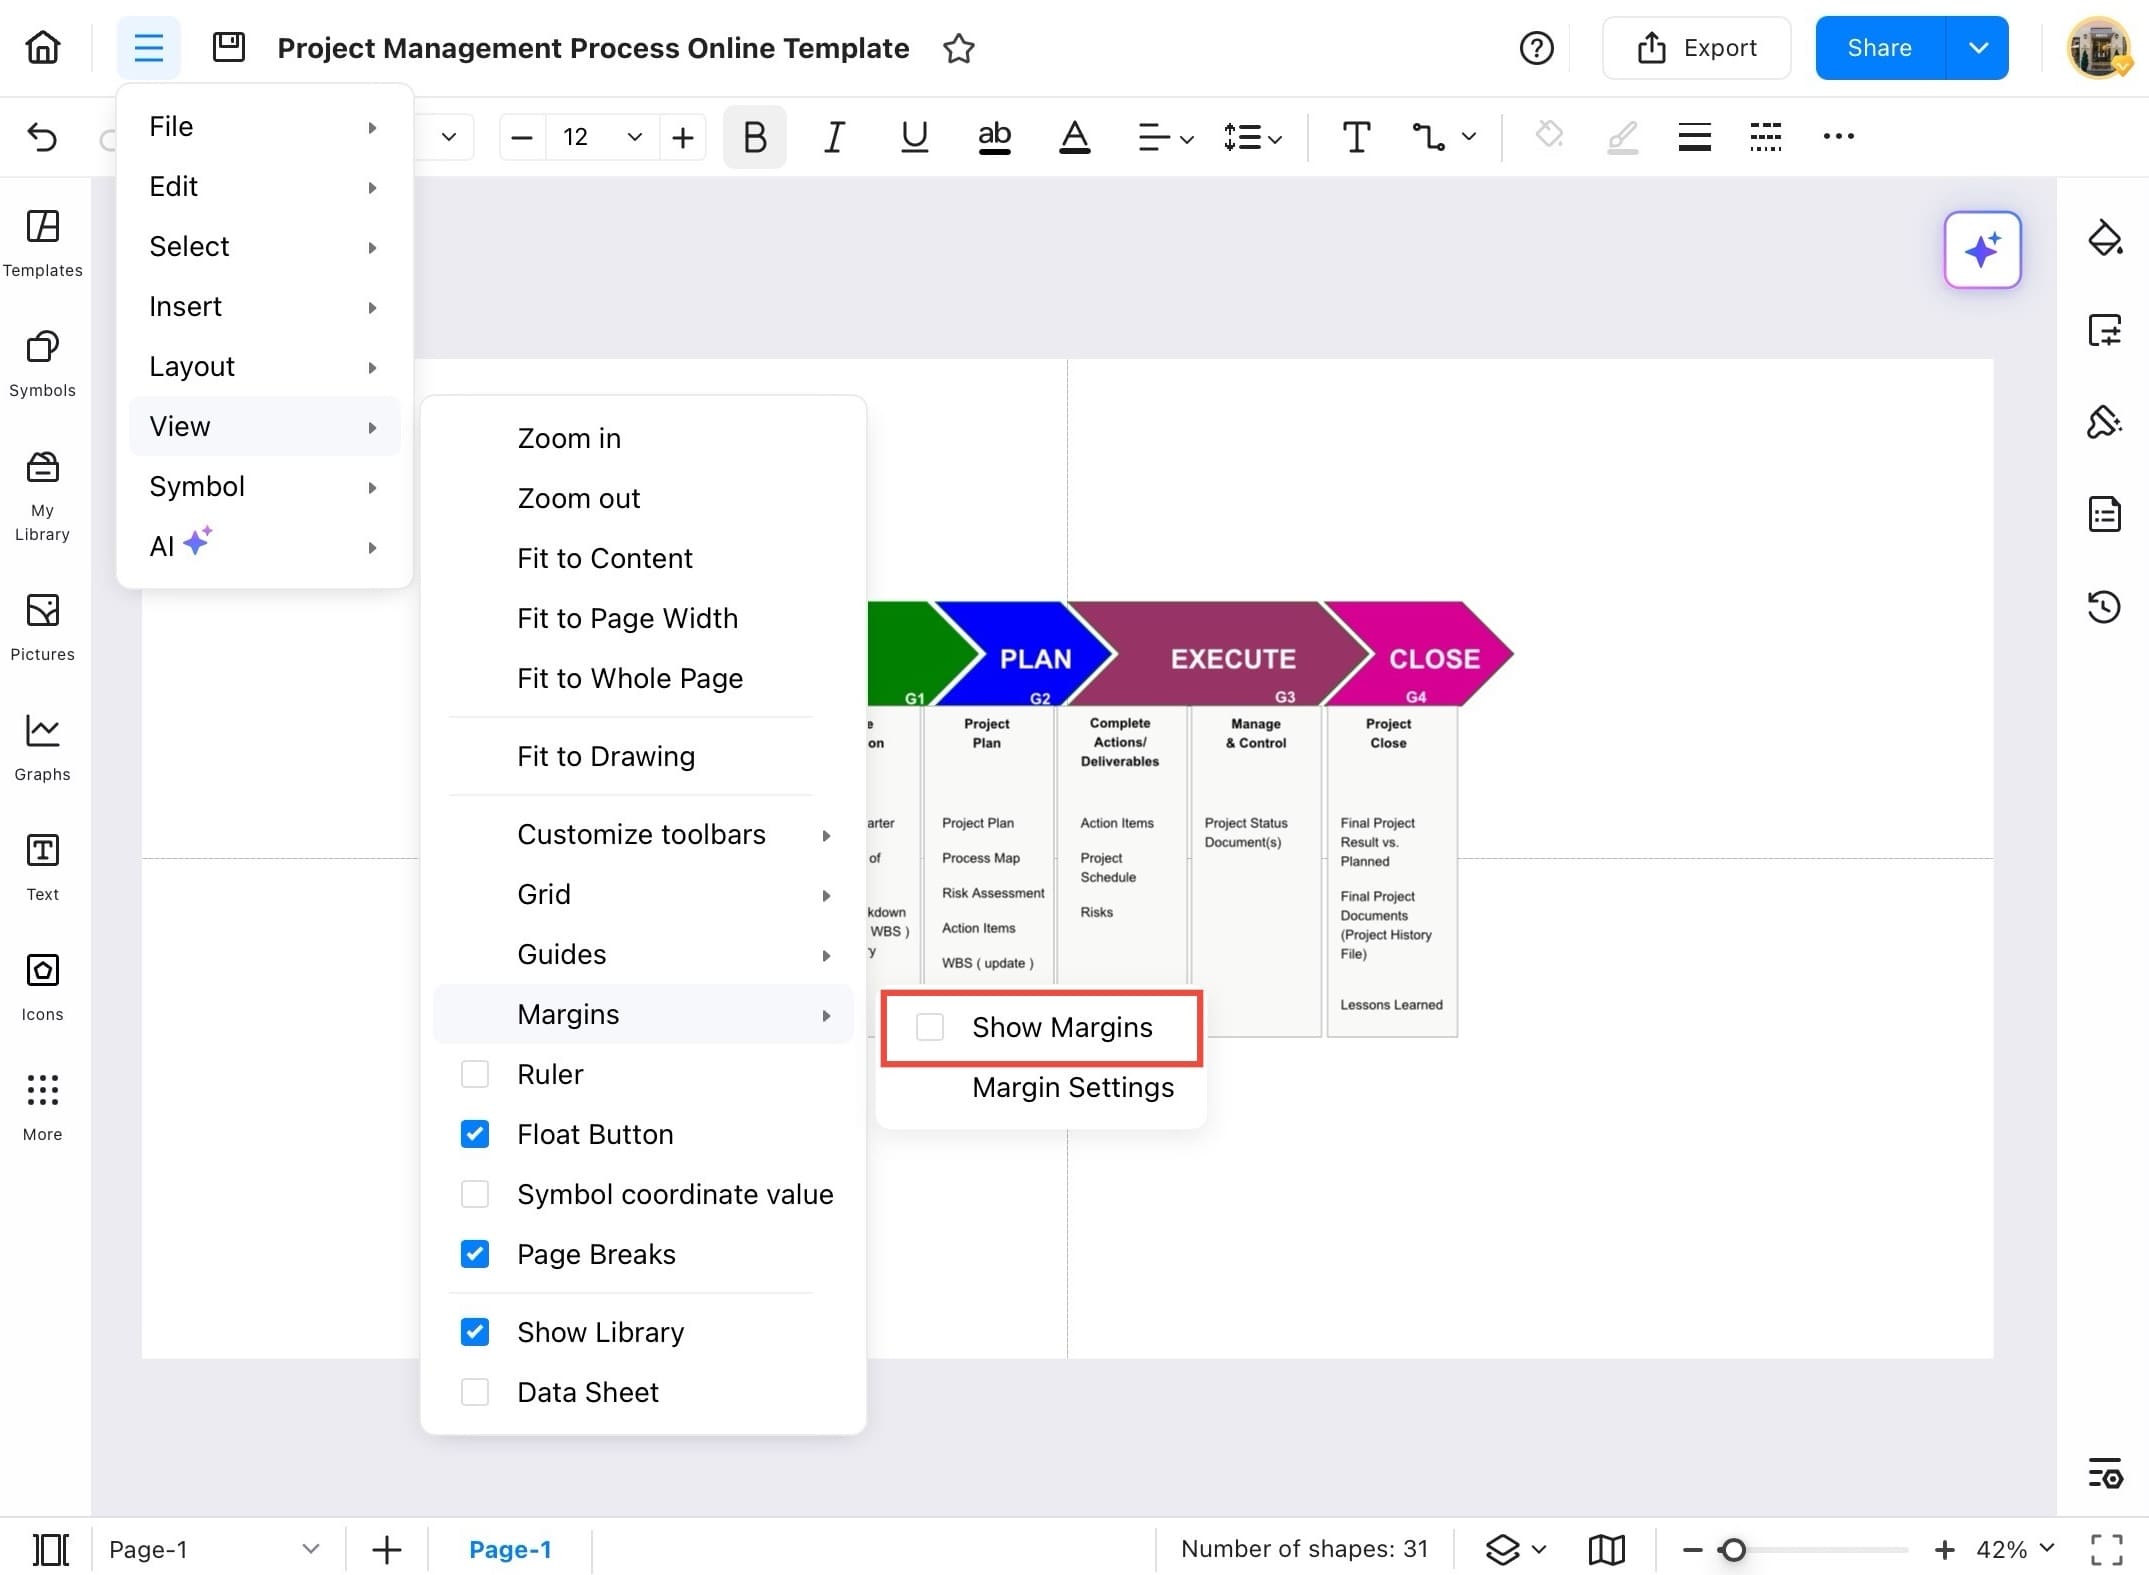
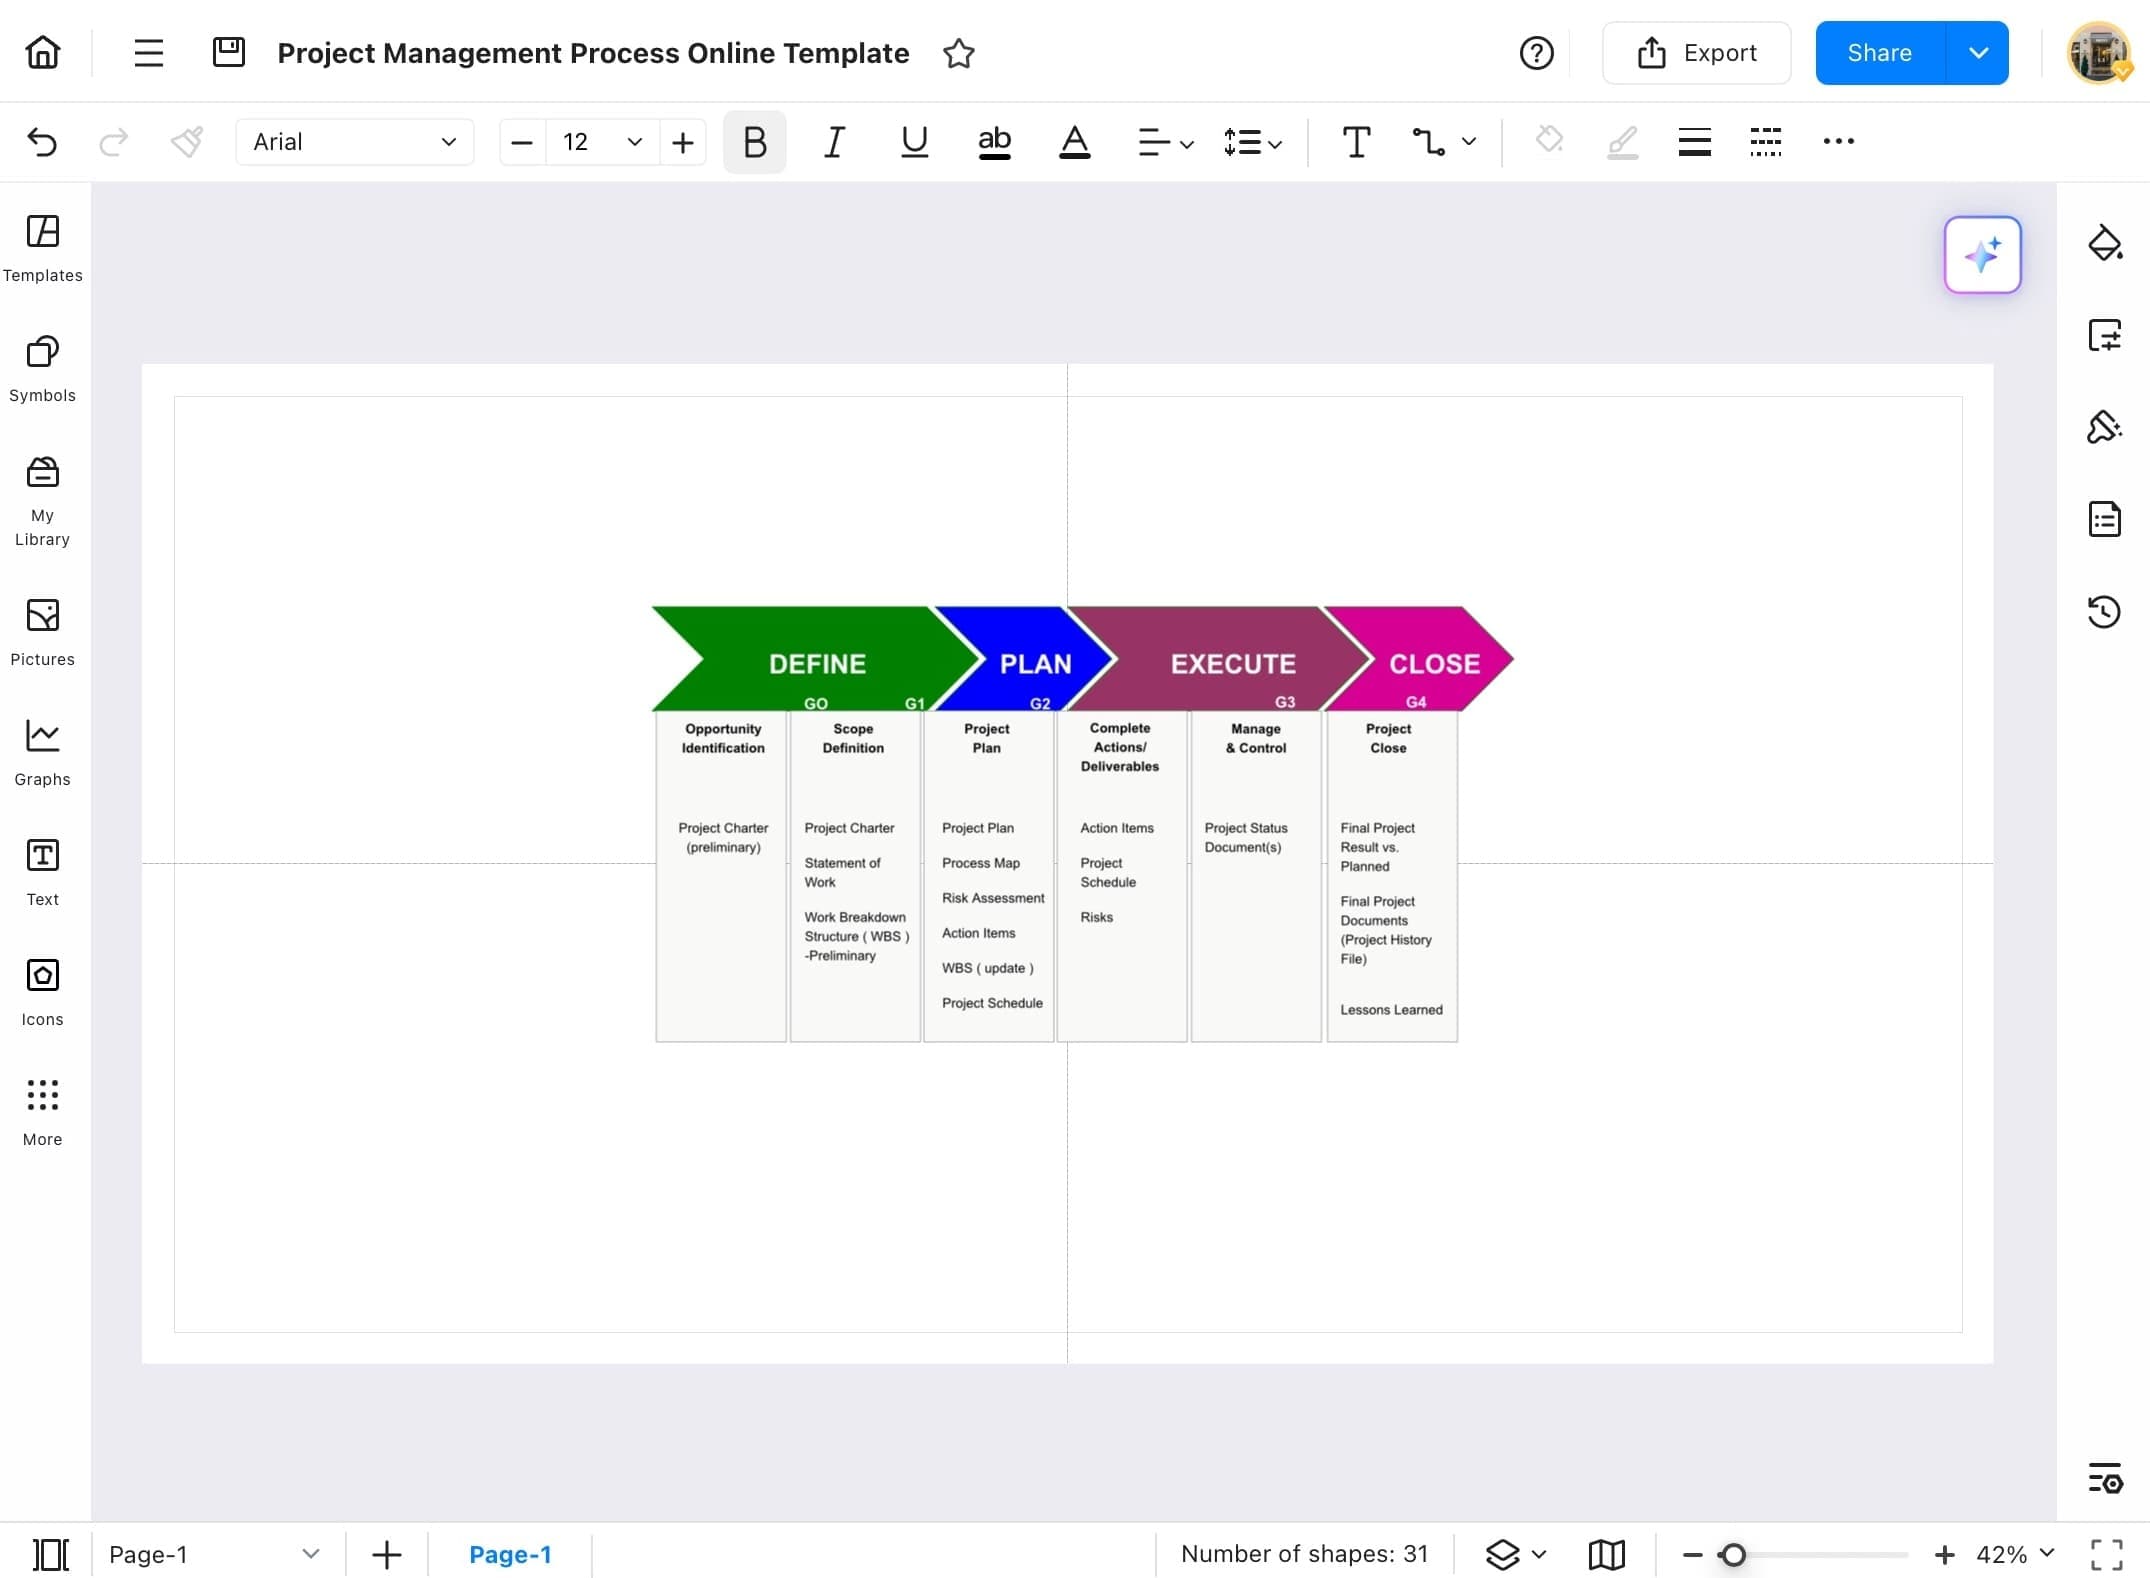
Step ❼ Option is ticked
- You’ll now see a checkmark next to Show Margins, and the margin lines will appear on your canvas.
Step ❽ View the margin lines
- The margin lines are now visible around your canvas. These help you align your content neatly within printable areas.
Ruler and Page Break
EdrawMax’s **Ruler** provides a helpful measurement tool for arranging objects with accuracy. **Page Breaks** display the print layout, letting you design with page limits in mind. These features are essential for creating print-ready diagrams or posters with clean structure. Follow these simple steps to use them effectively:
Step ❶ Launch EdrawMax
- Launch the EdrawMax app on your device.
Step ❷ Select your diagram
- From the left panel, tap Recent, then select your diagram.
Step ❸ Tap the menu icon
- Your selected diagram will open in the EdrawMax editor. Then tap the hamburger icon on the top-left side.
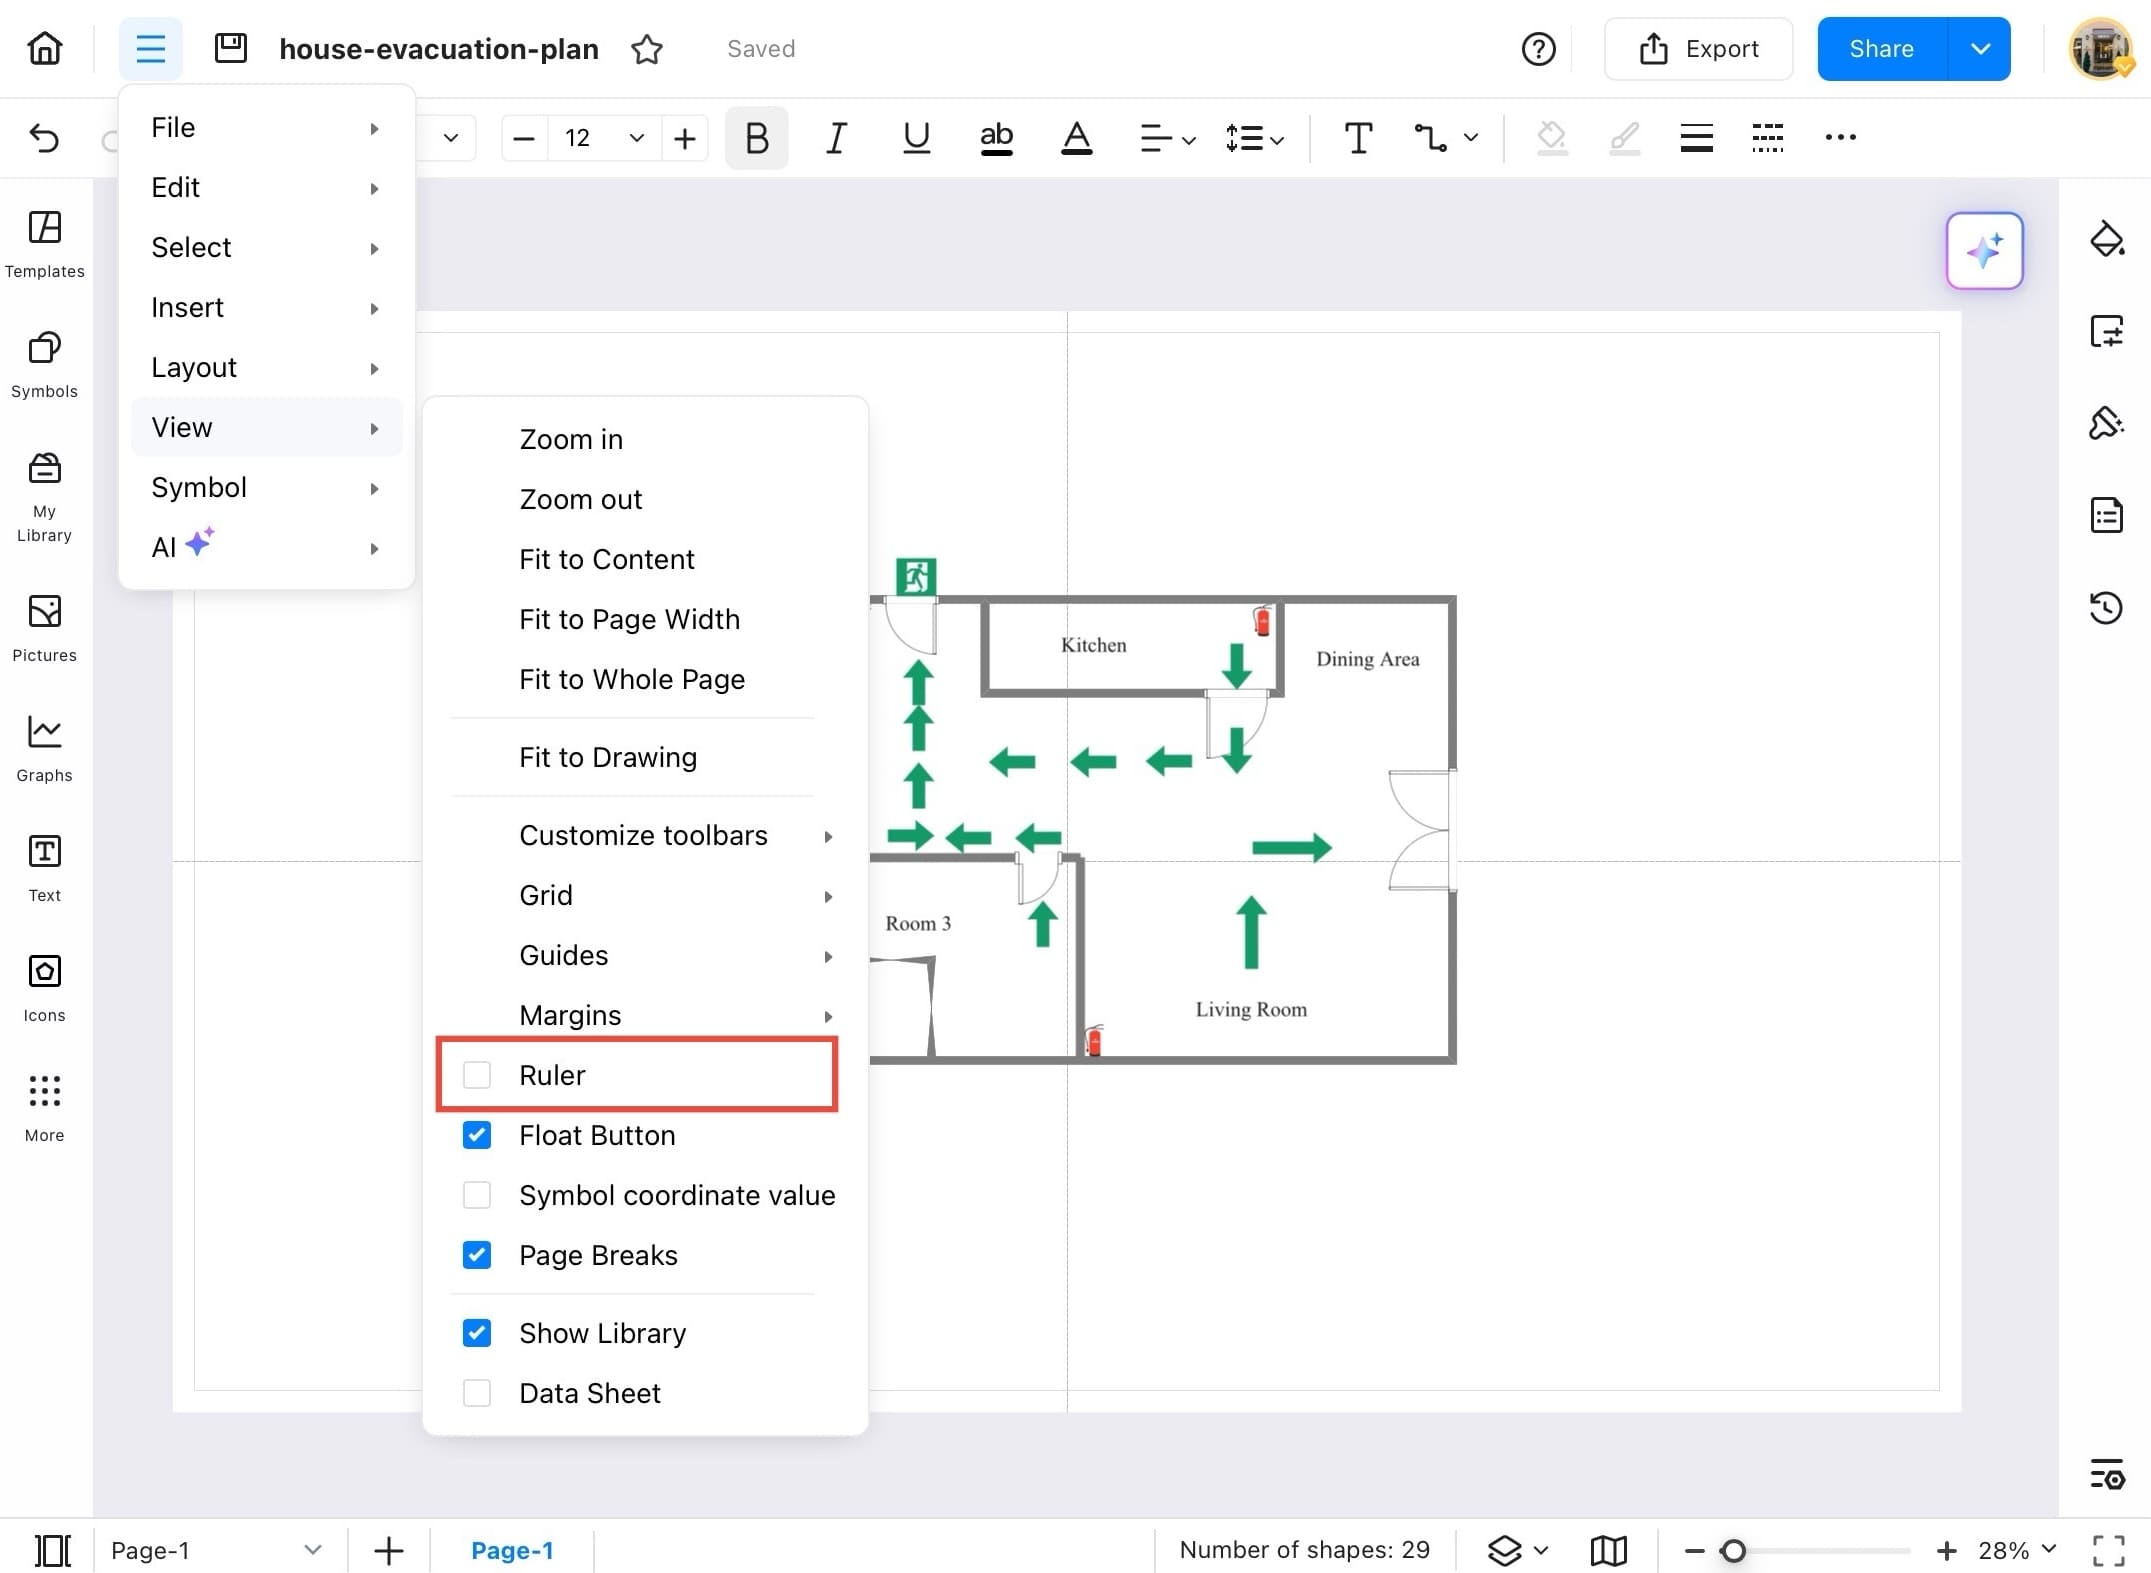
Step ❹ Go to View
- After tapping on the three-line menu on the top left, go to View.
Step ❺ Tap Ruler
- From the View dropdown, tap Ruler to activate it.
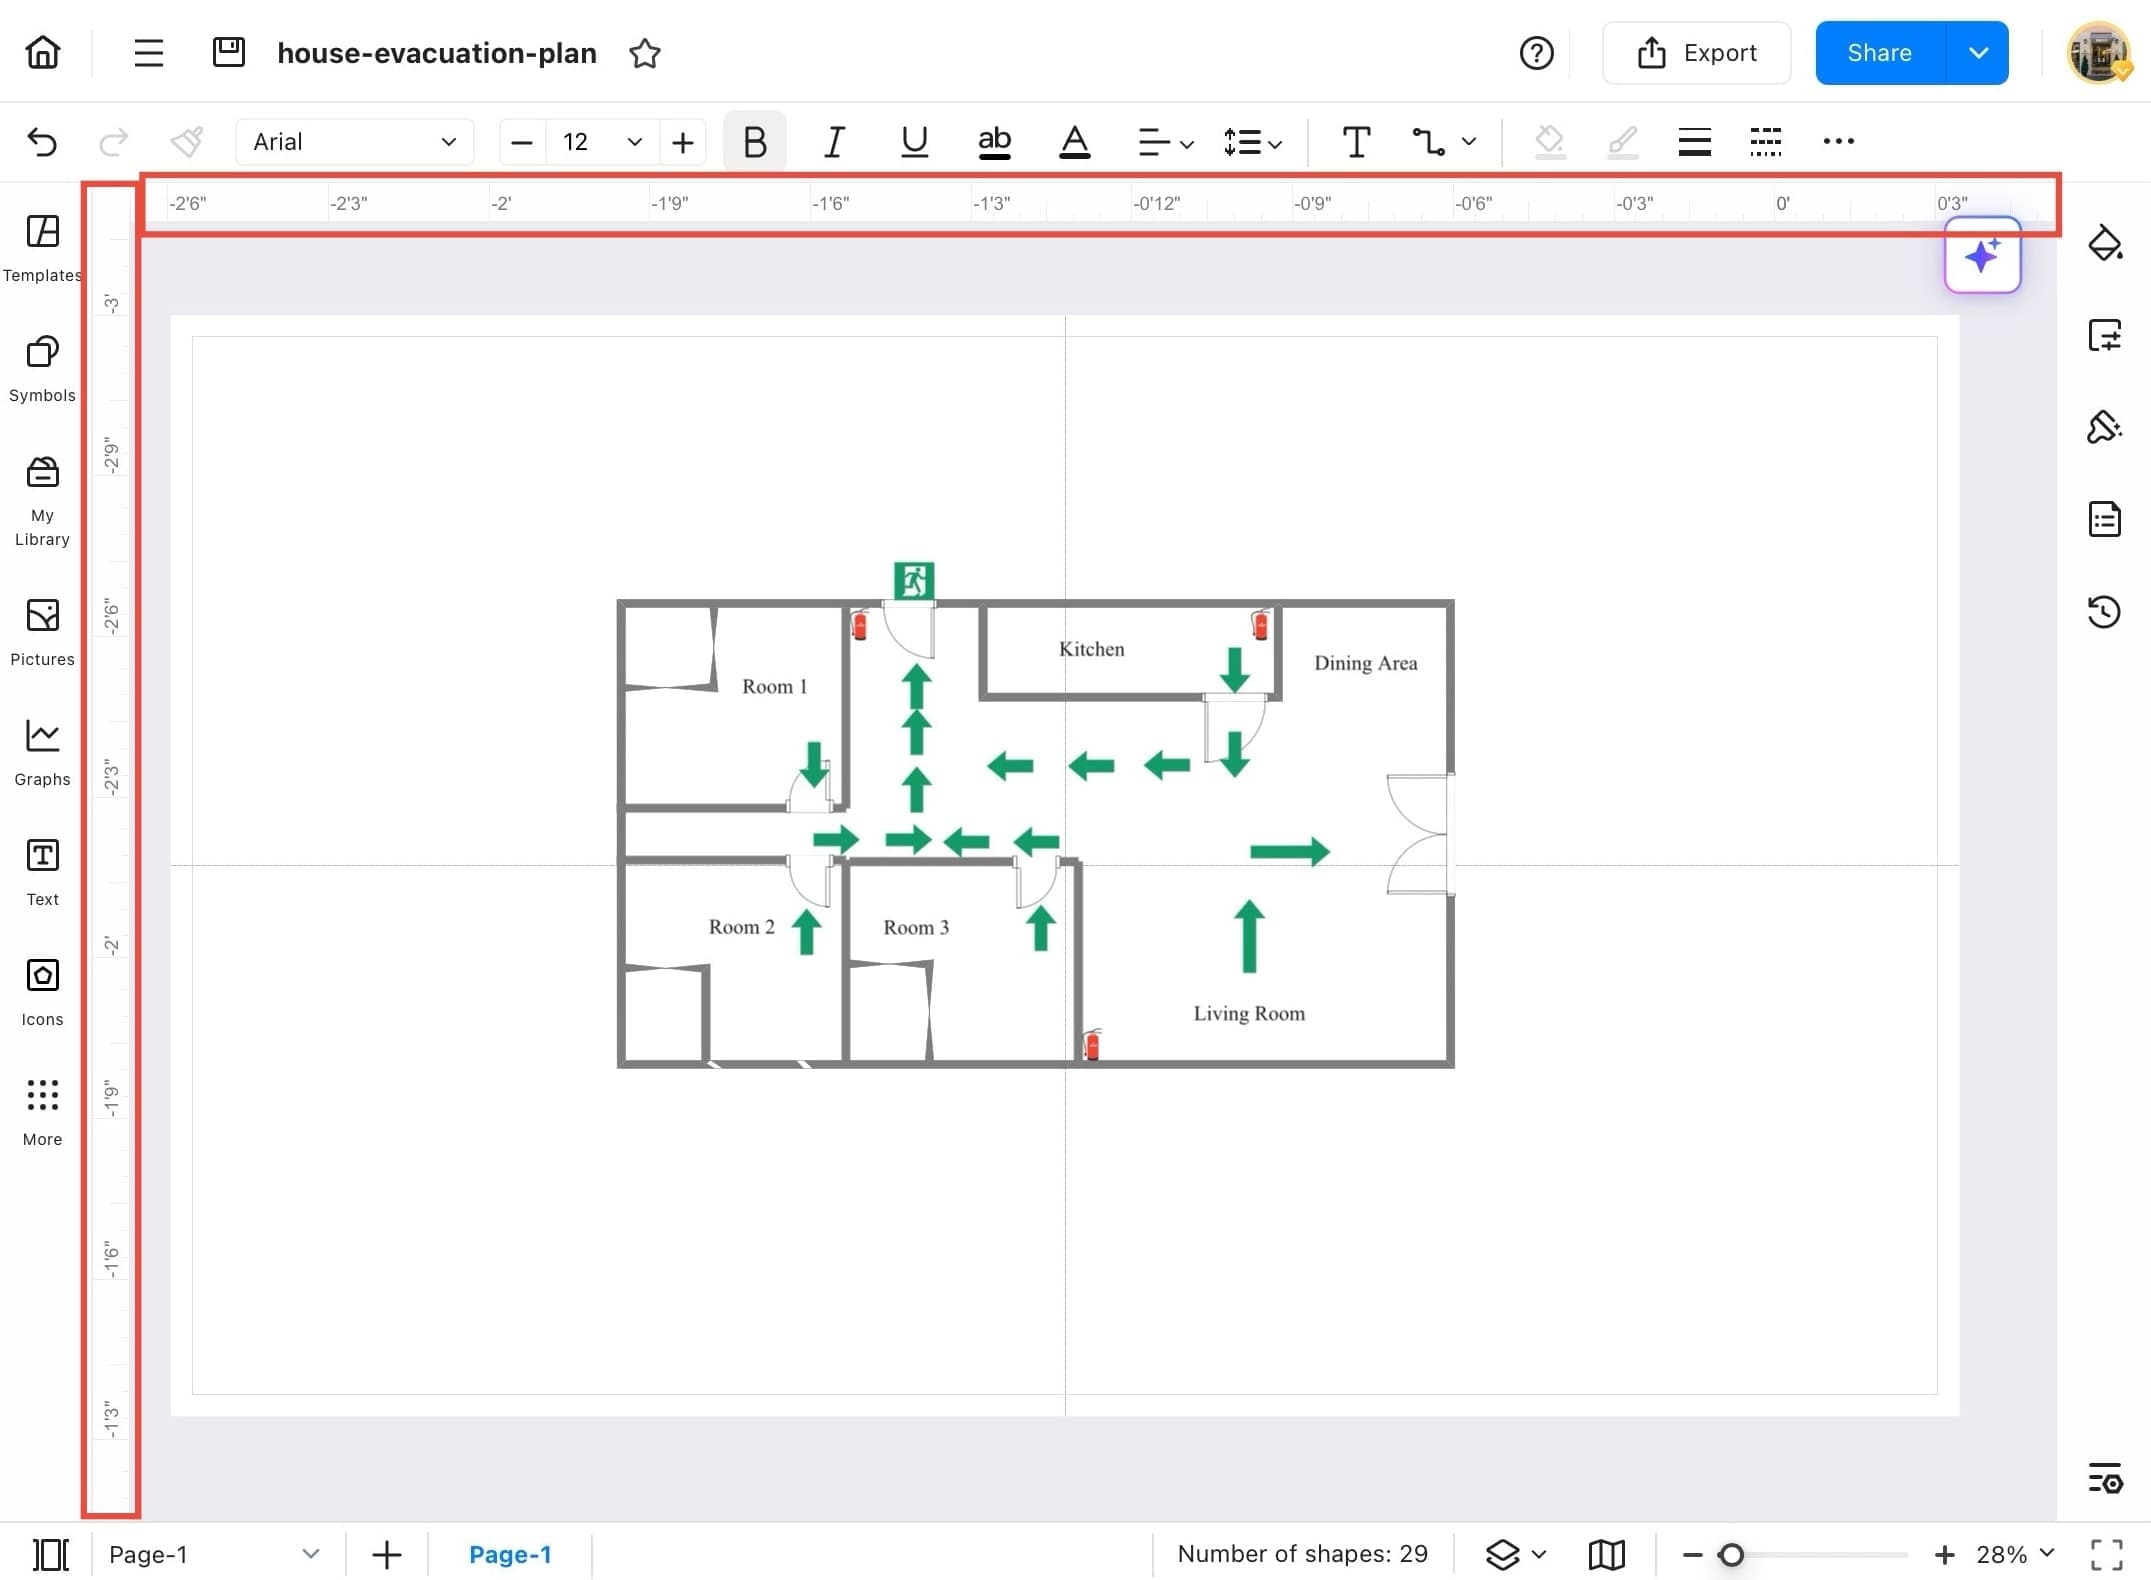
Step ❻ View the rulers
- You’ll now see the horizontal and vertical rulers appear along the top and left side of the canvas.
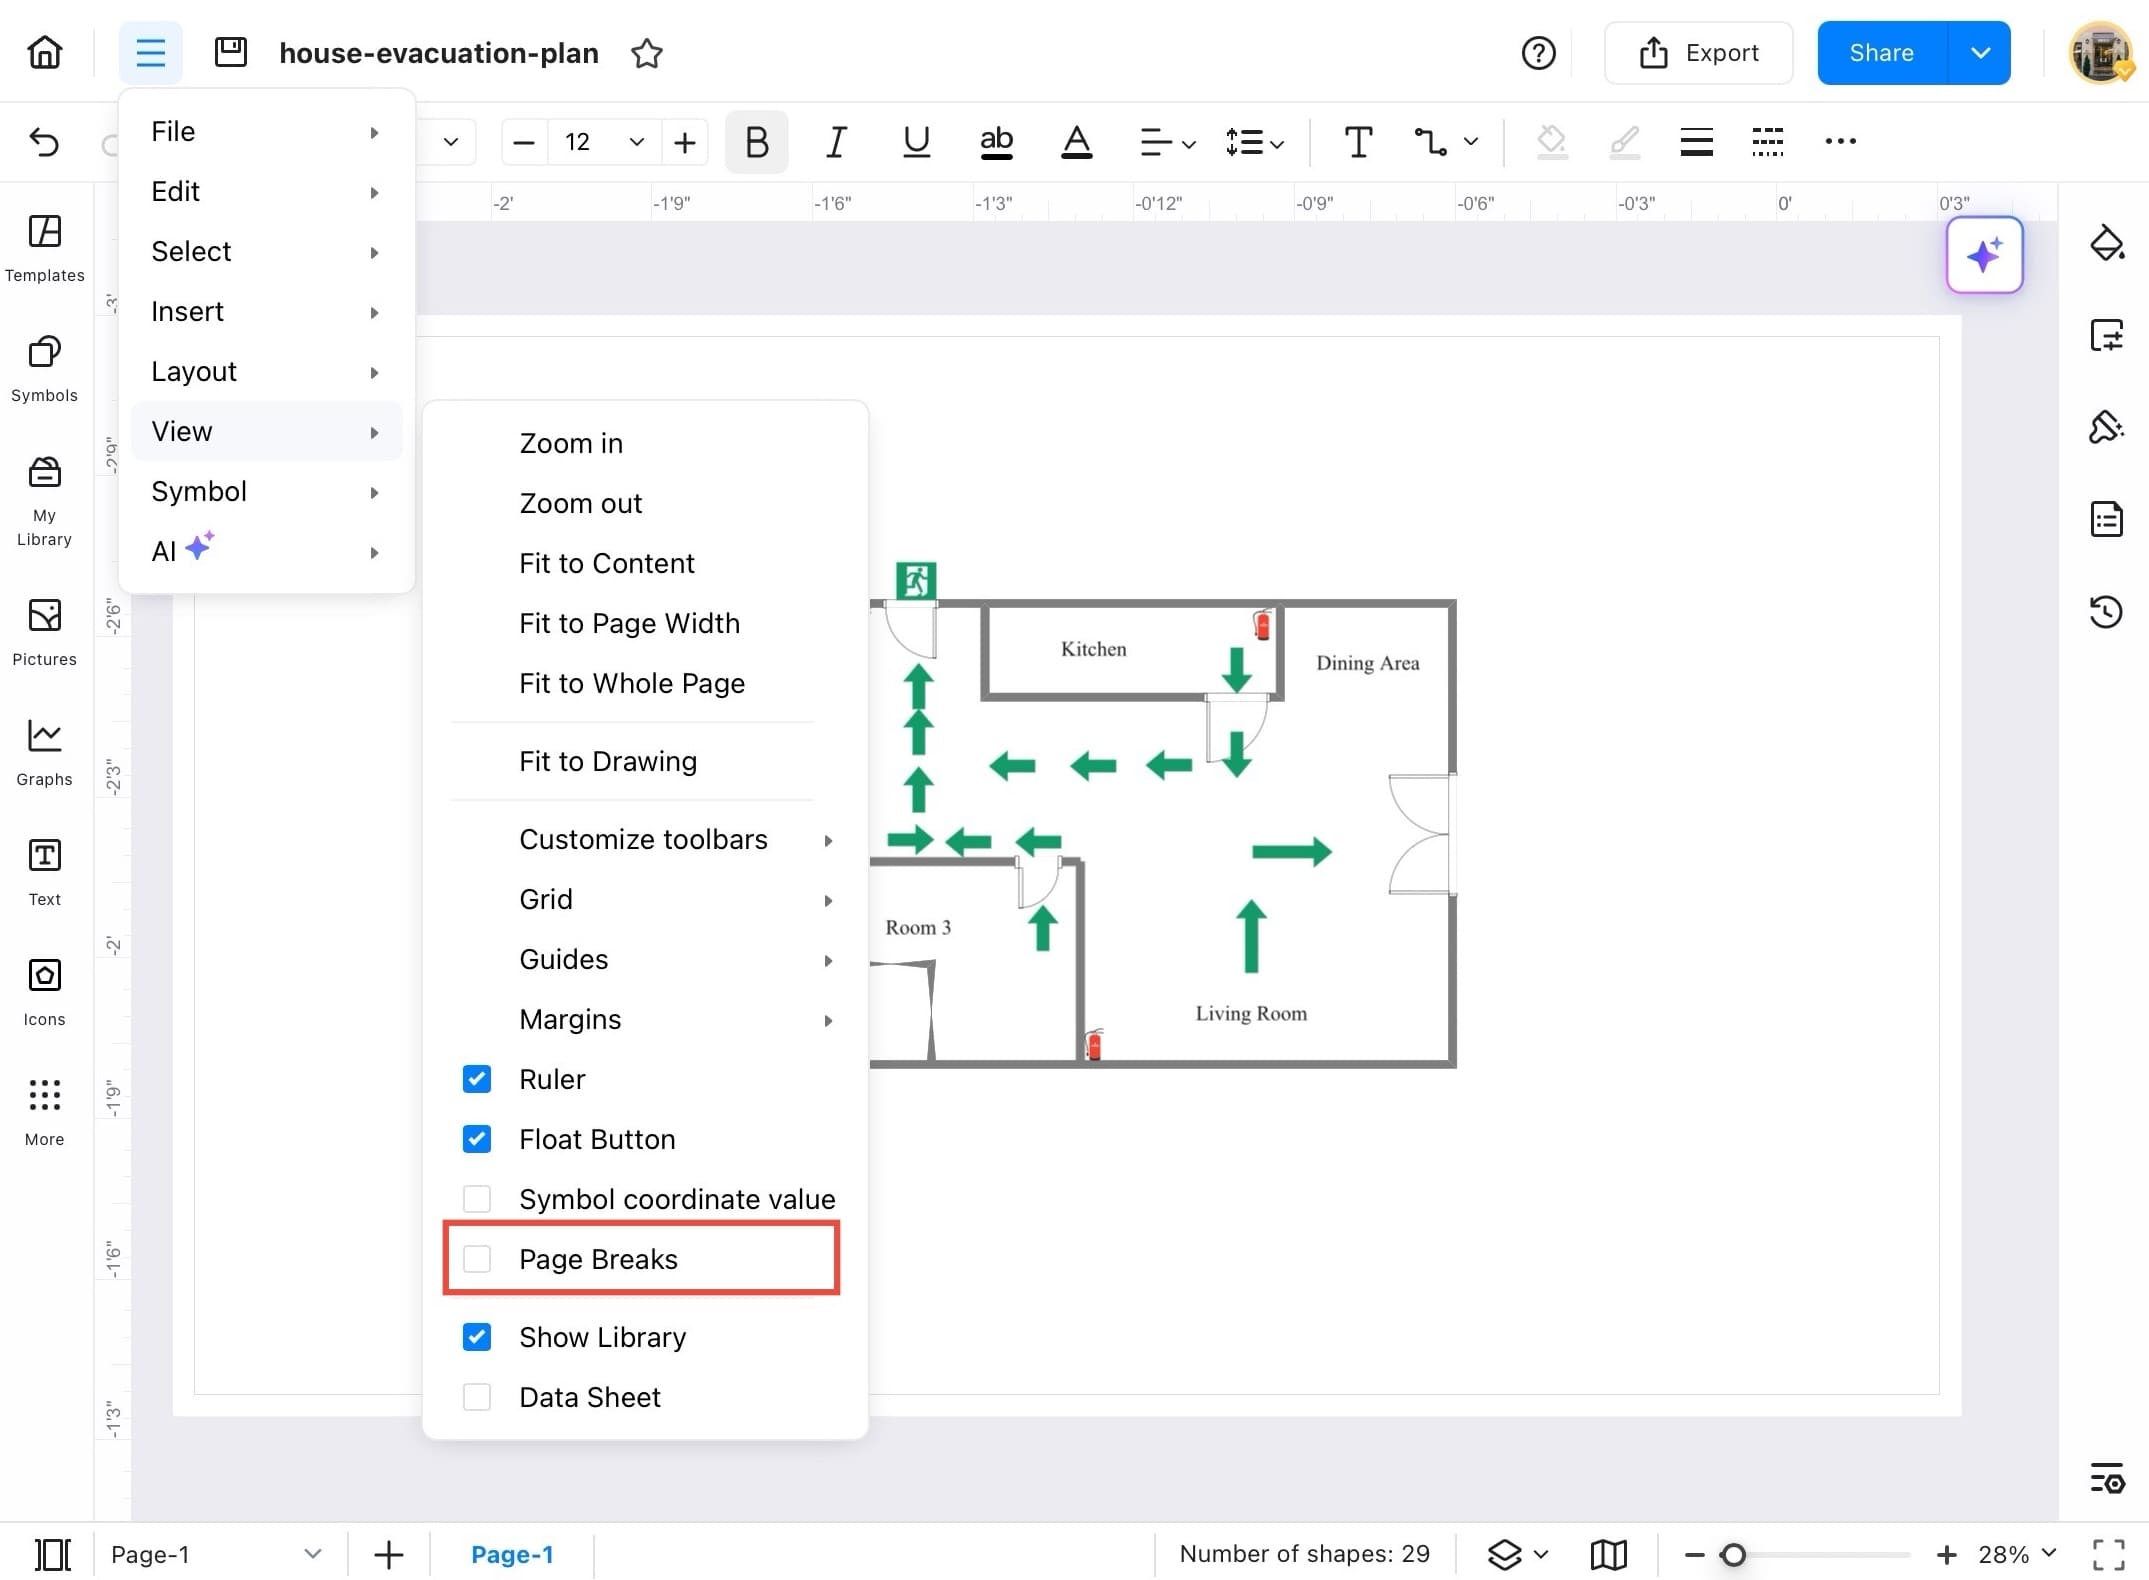
Step ❼ Tap Page Breaks
- Tap the three-line menu again, go to View, and select Page Breaks from the dropdown.
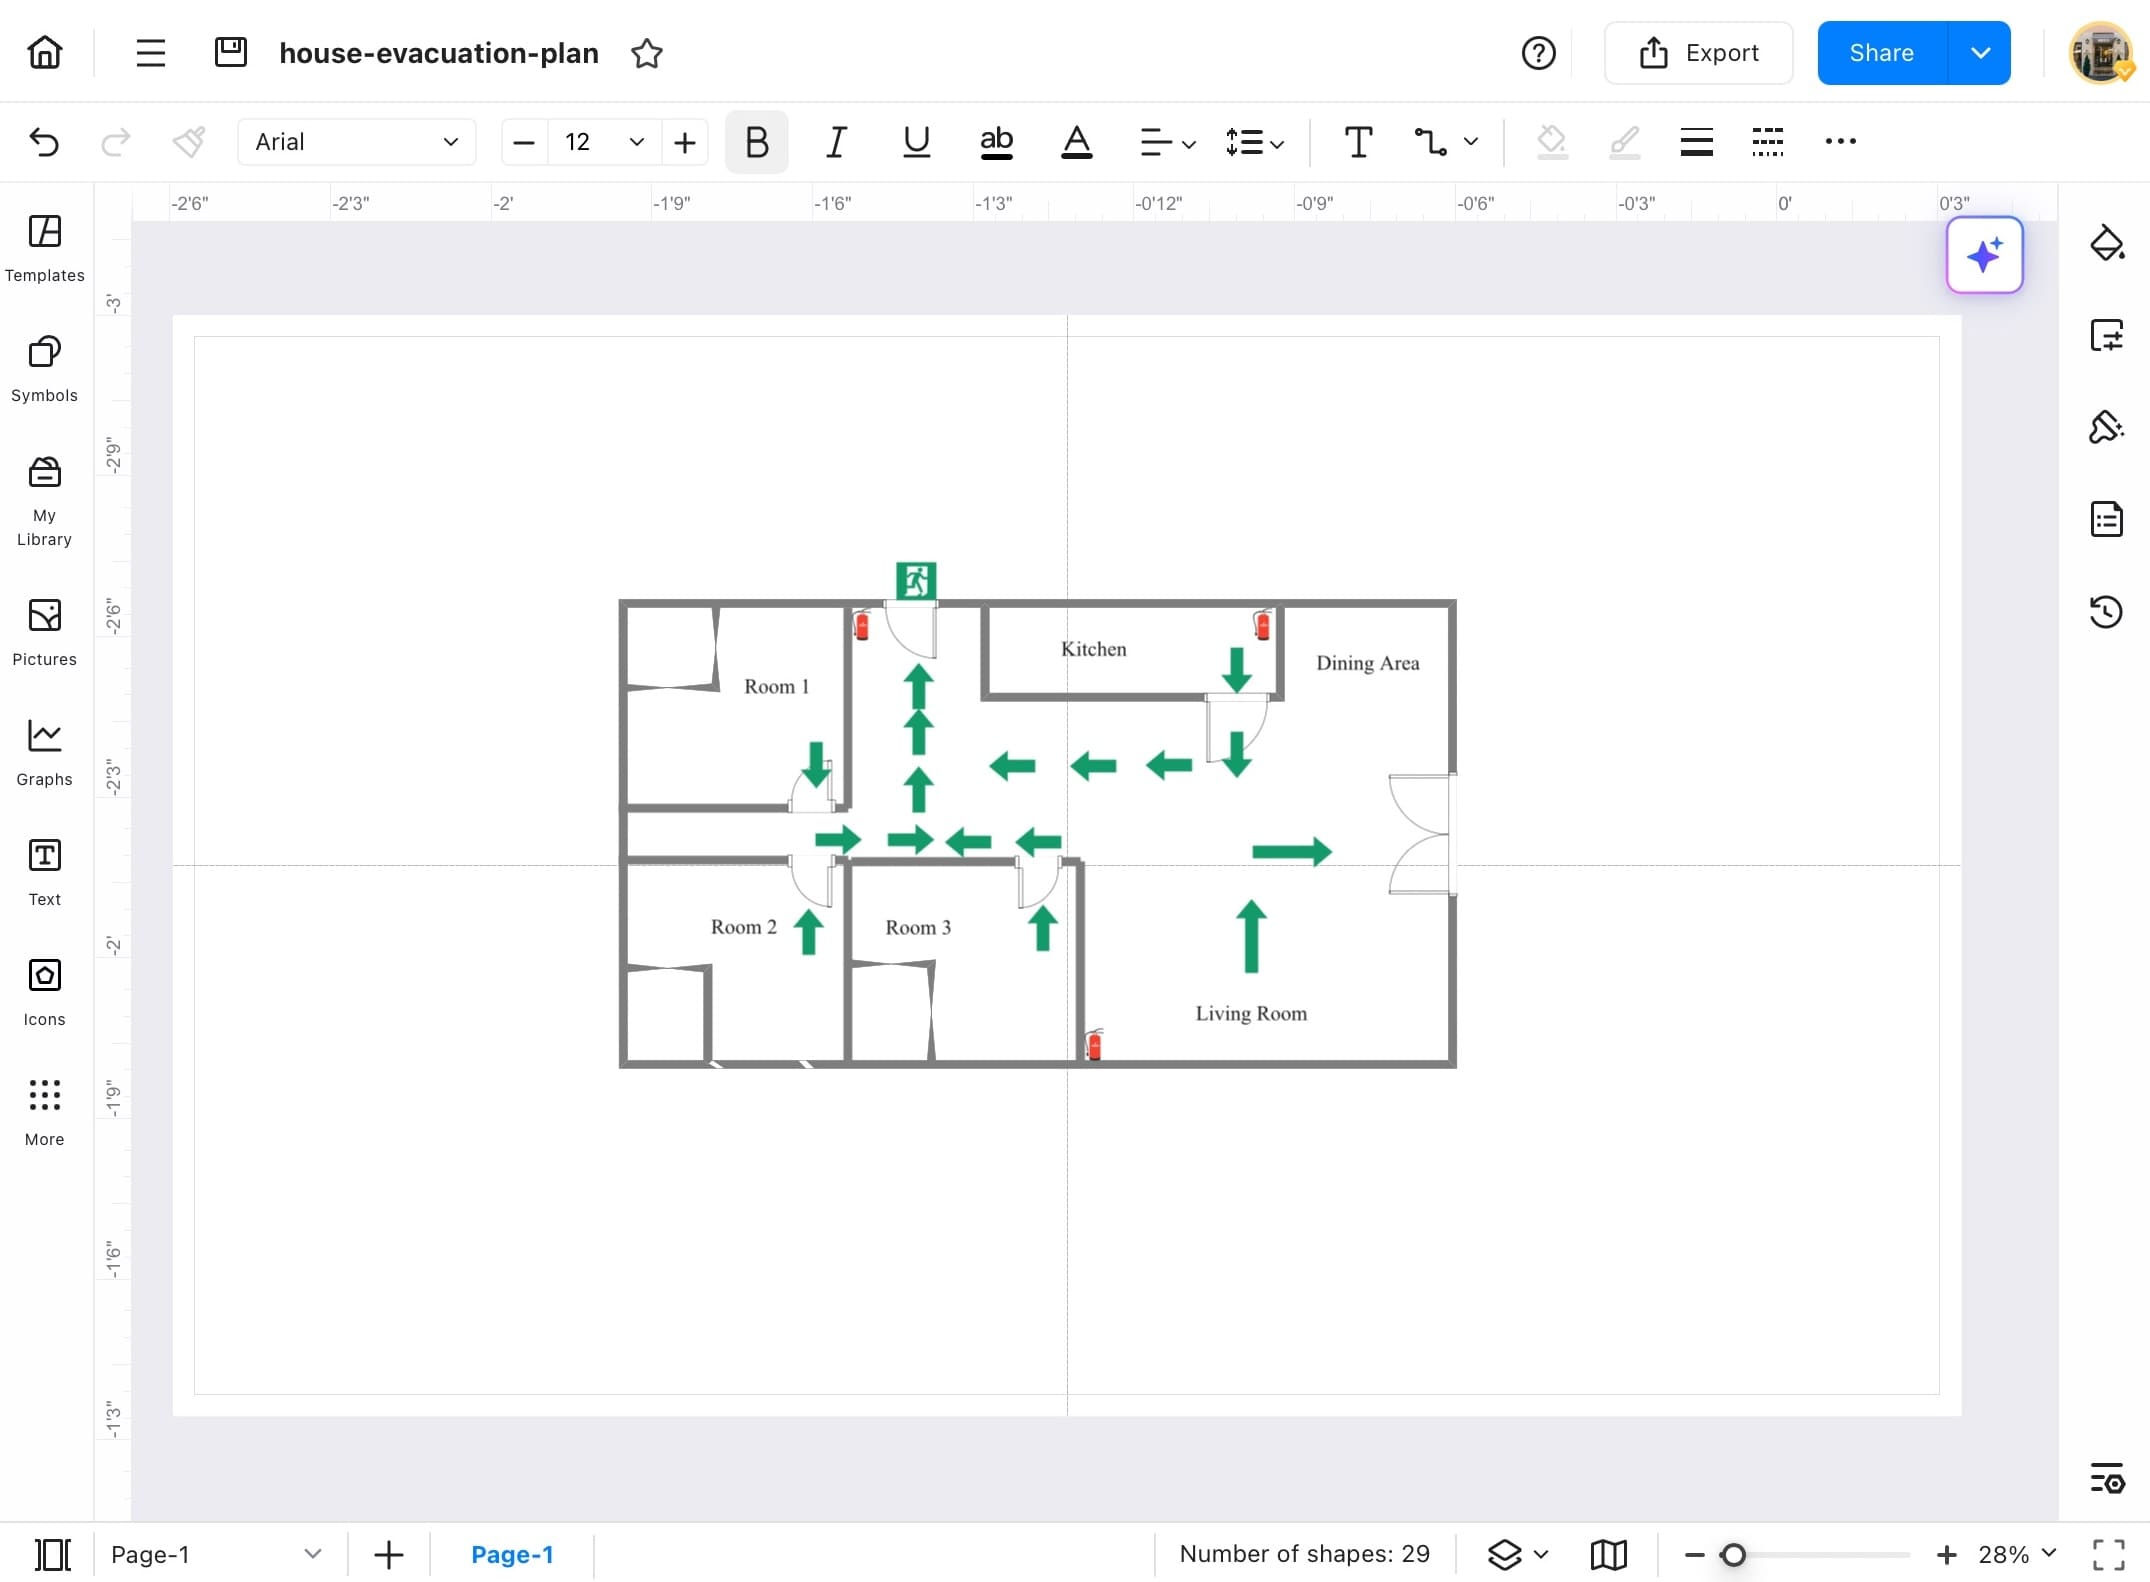
Step ❽ View the page break lines
- You’ll now see page break lines appear, dividing your diagram into printable pages.
Float Button
The **Float Button** in EdrawMax offers quick access to useful editing tools and layout options. It appears near selected objects, saving time by placing commonly used actions right at your fingertips. Follow the steps below to use the **Float Button** effectively.
Step ❶ Start EdrawMax
- Start EdrawMax on your tablet.
Step ❷ Select the diagram
- From the Recent section, select the diagram.

Step ❸ Tap the menu icon
- Tap the menu icon at the top left corner.
Step ❹ Tap View
- From the dropdown, tap View to open display options.
Step ❺ Select Float Button
- Scroll down and select Float Button to enable floating tools.
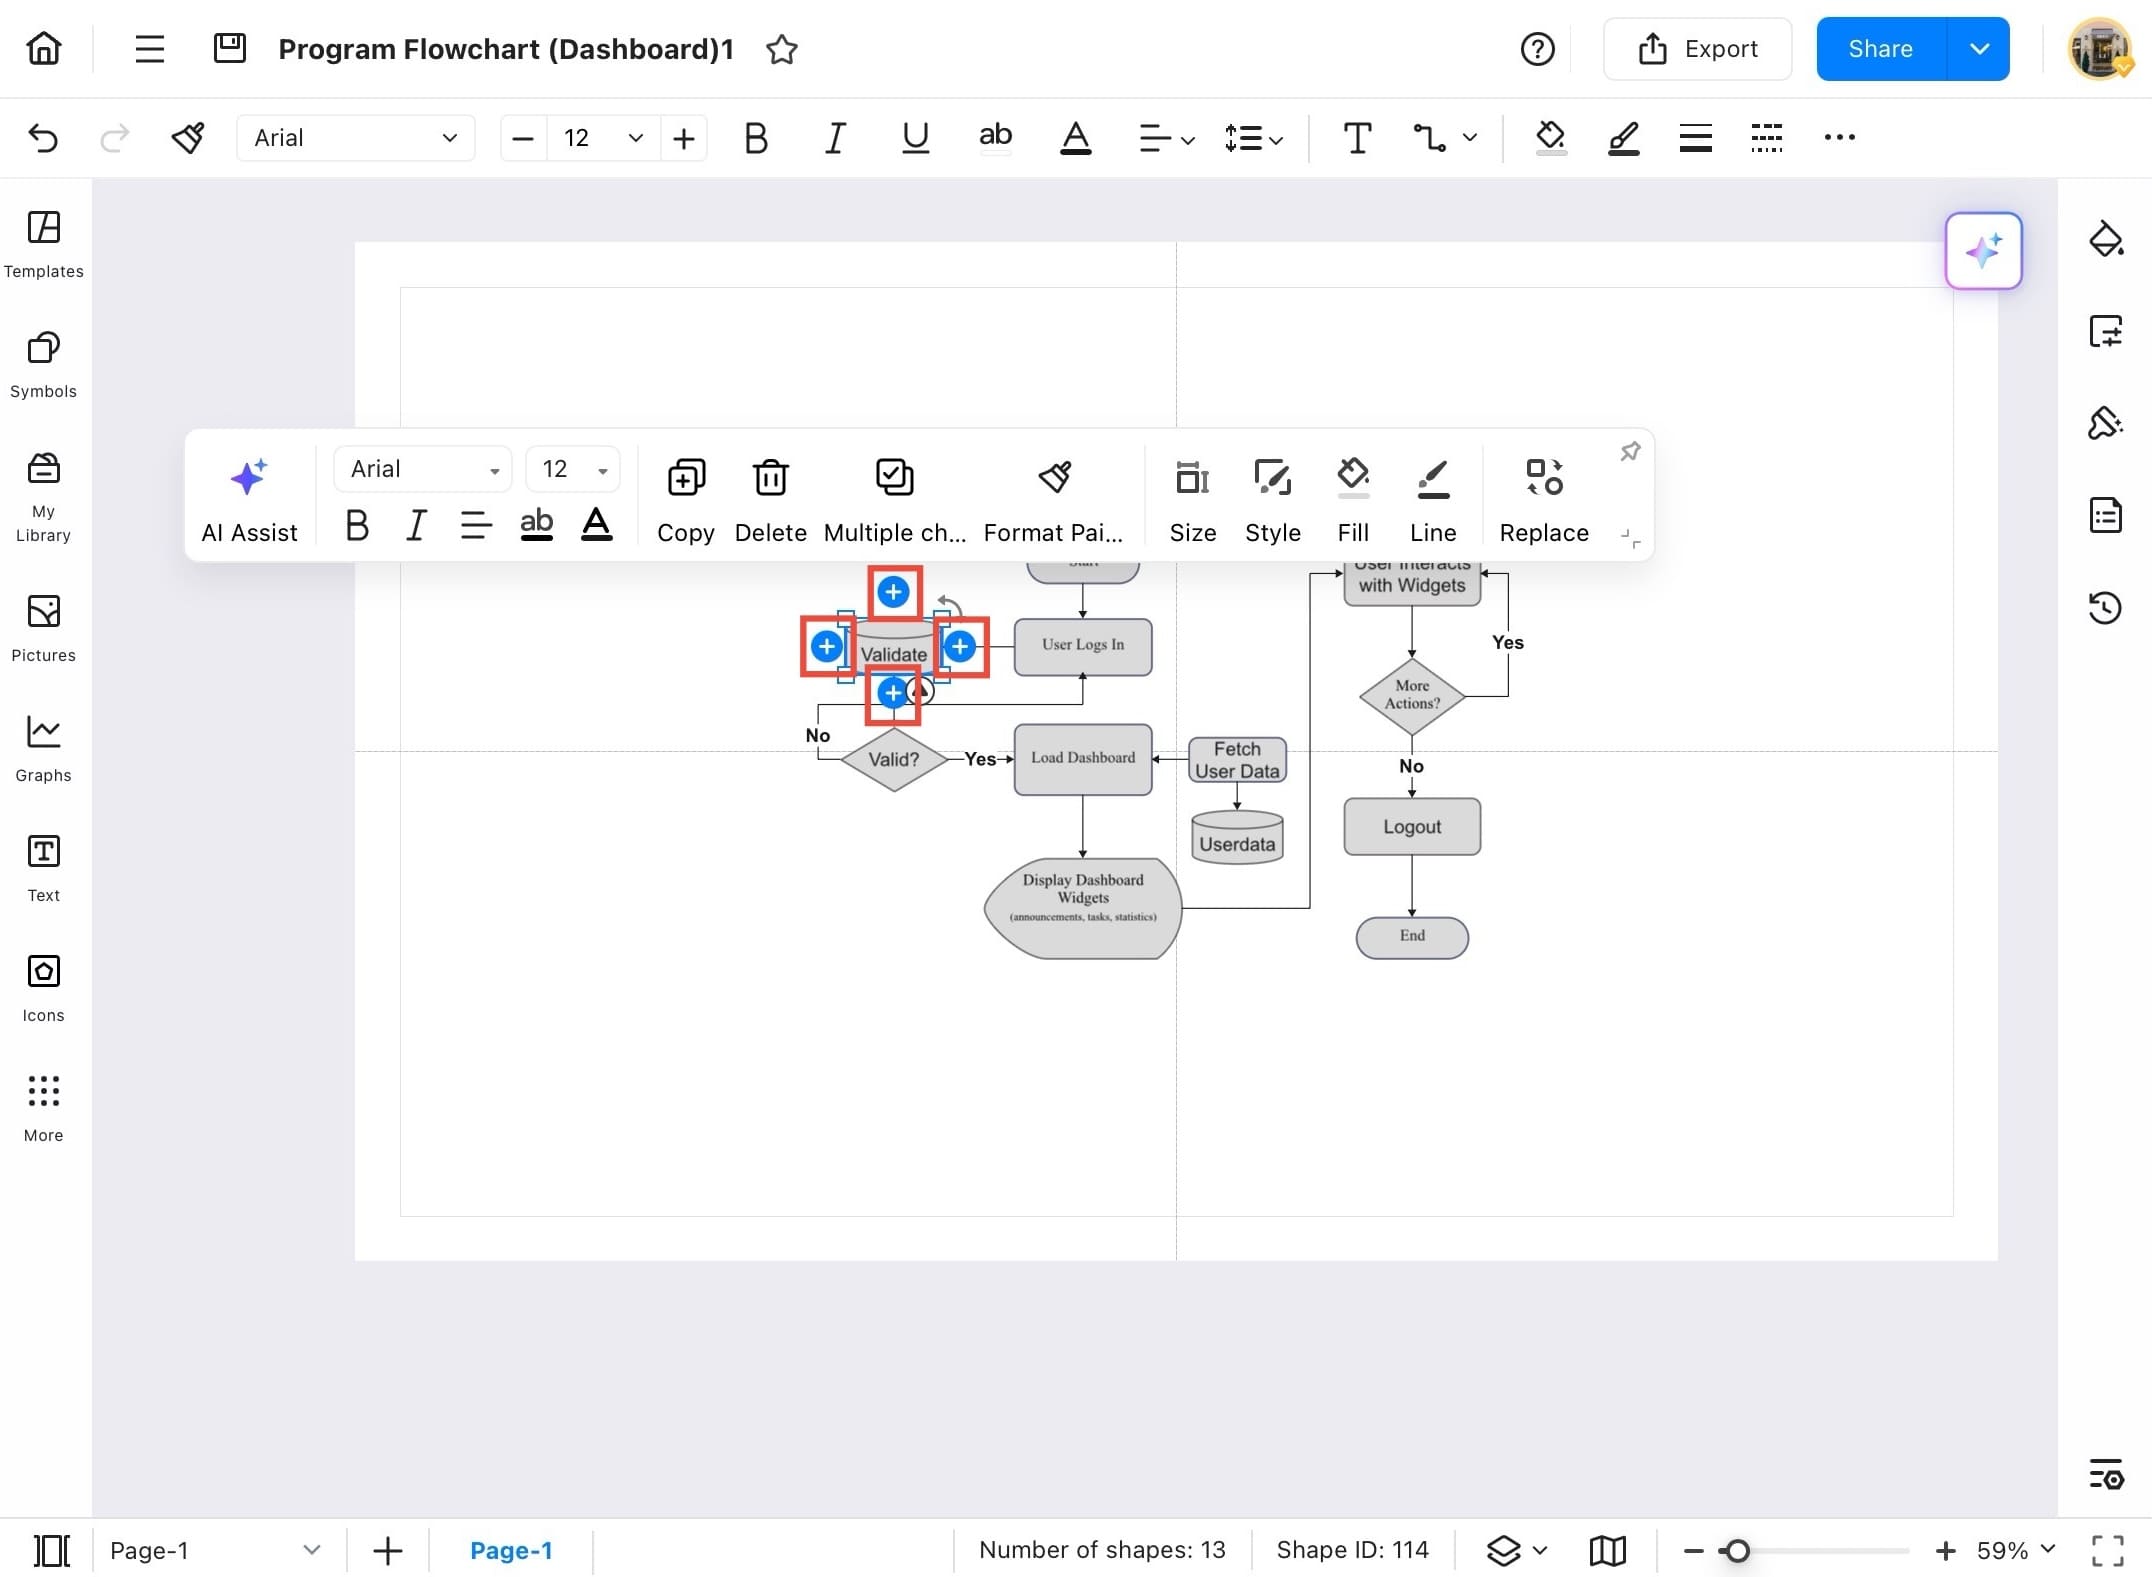
Step ❻ Tap any shape
- Tap any shape on the canvas to activate the float button options.
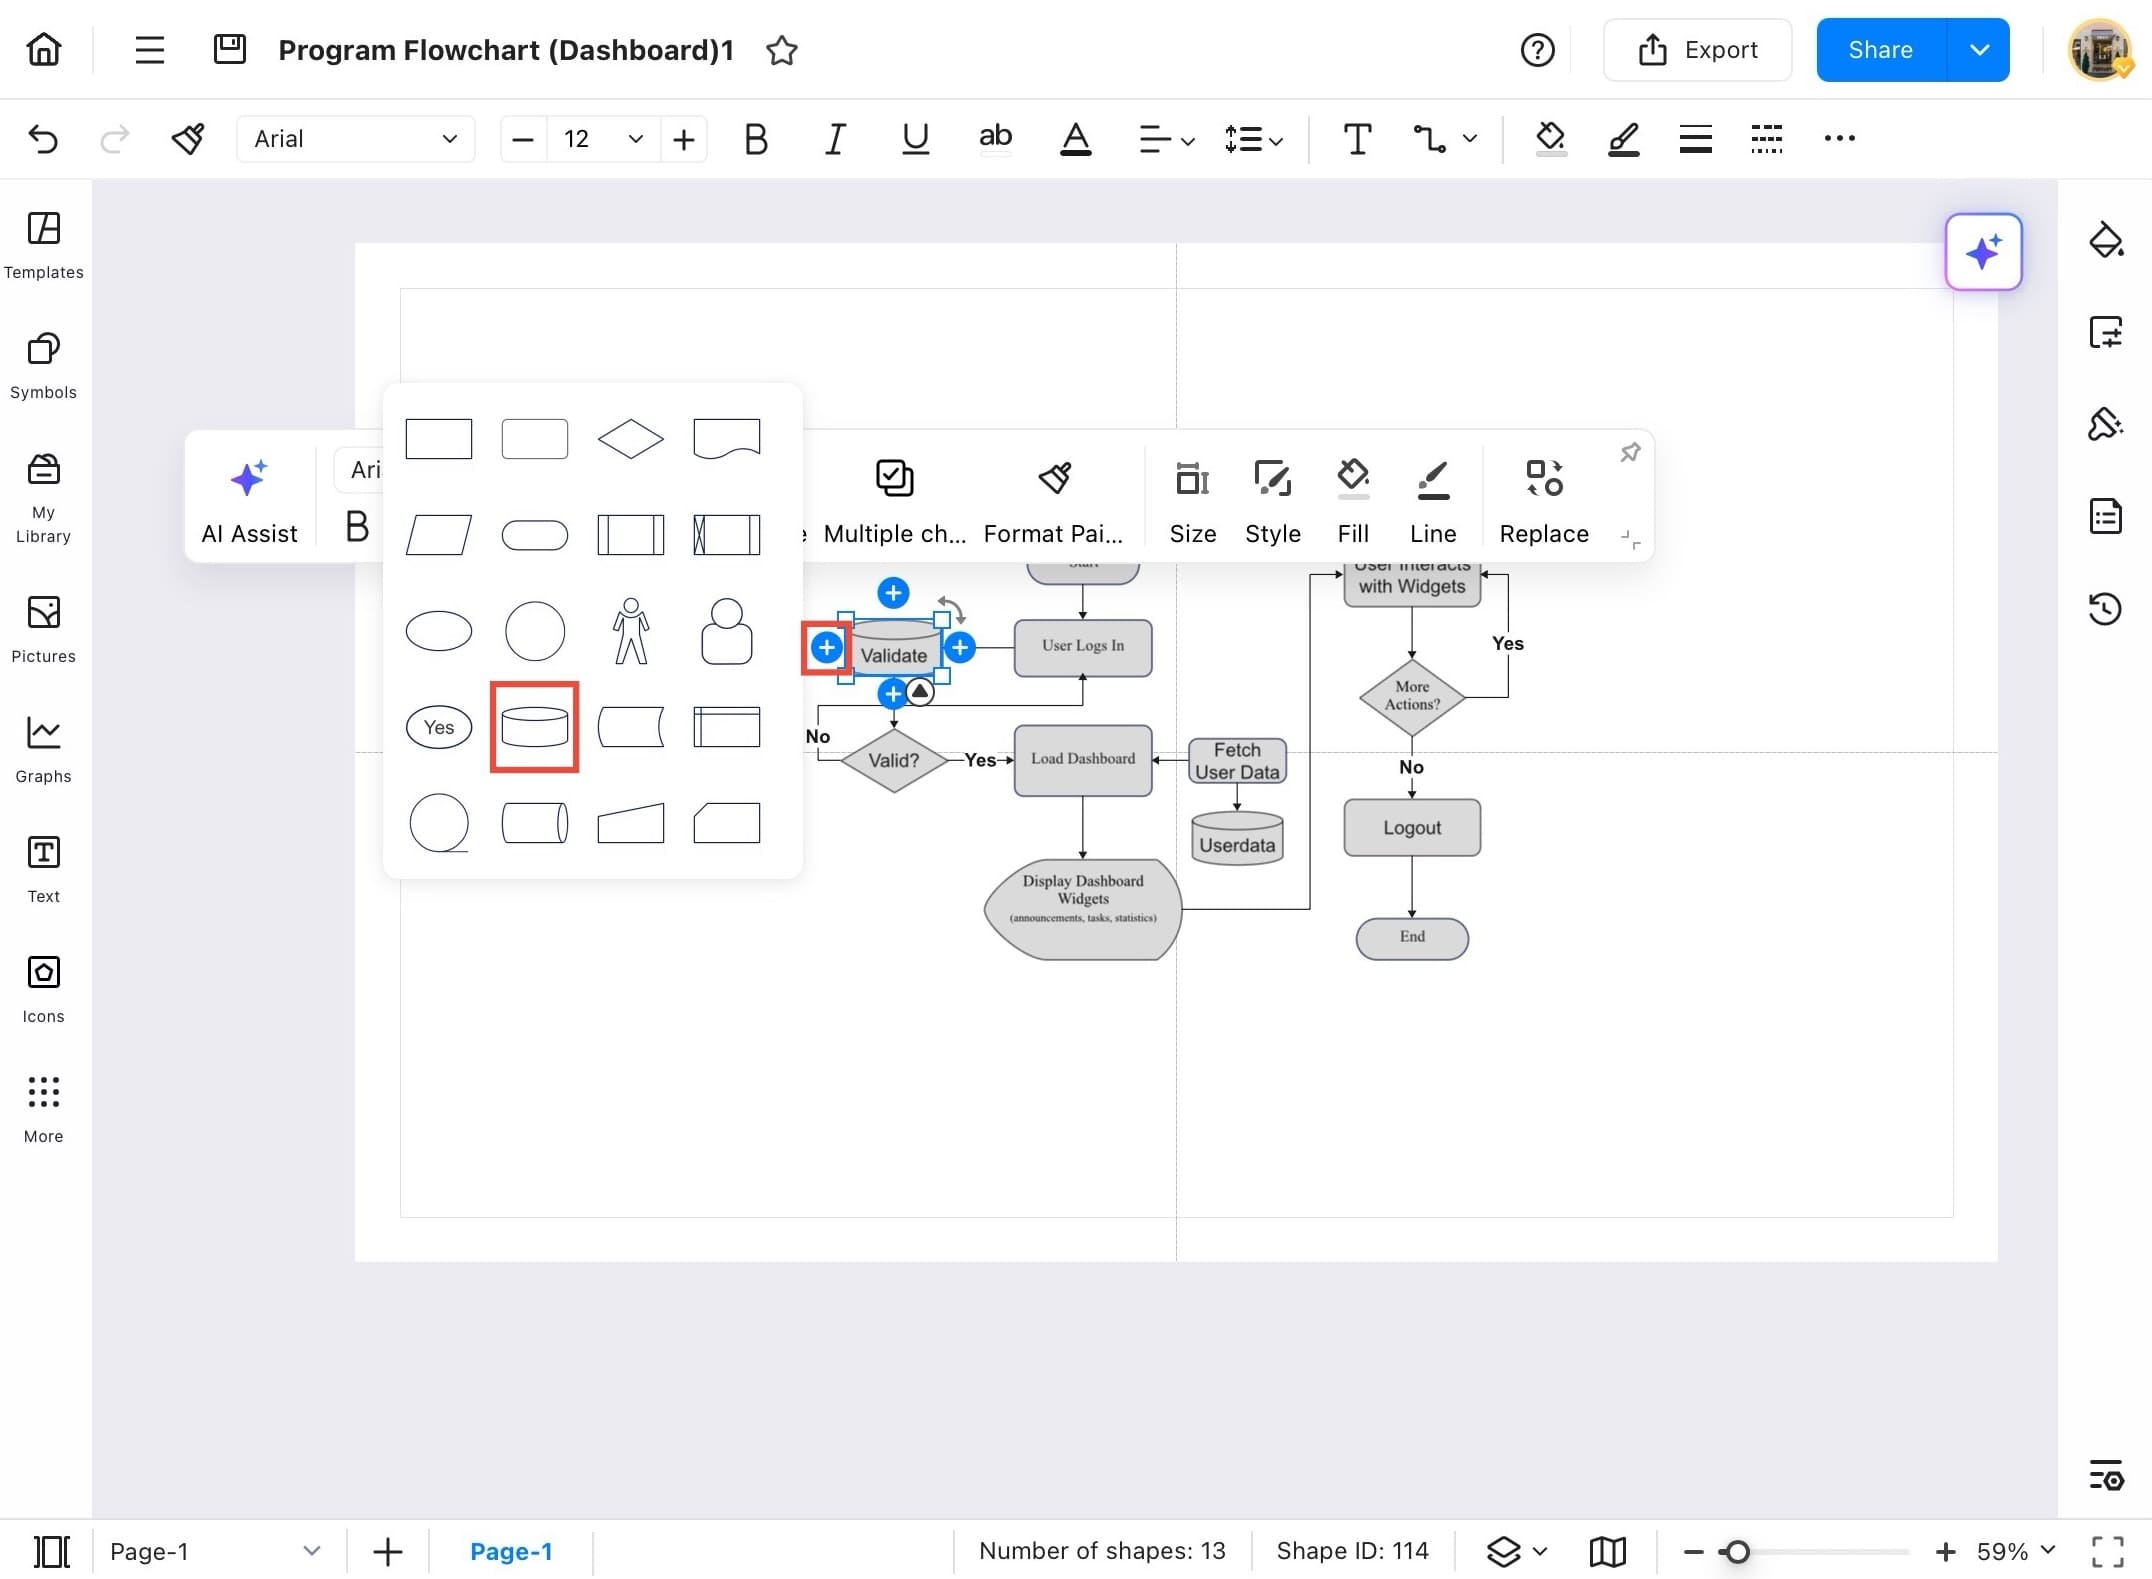
Step ❼ The float button appears
- The float button appears around the shape. Tap the icon to add or connect shapes.
Step ❽ Select the desired shape
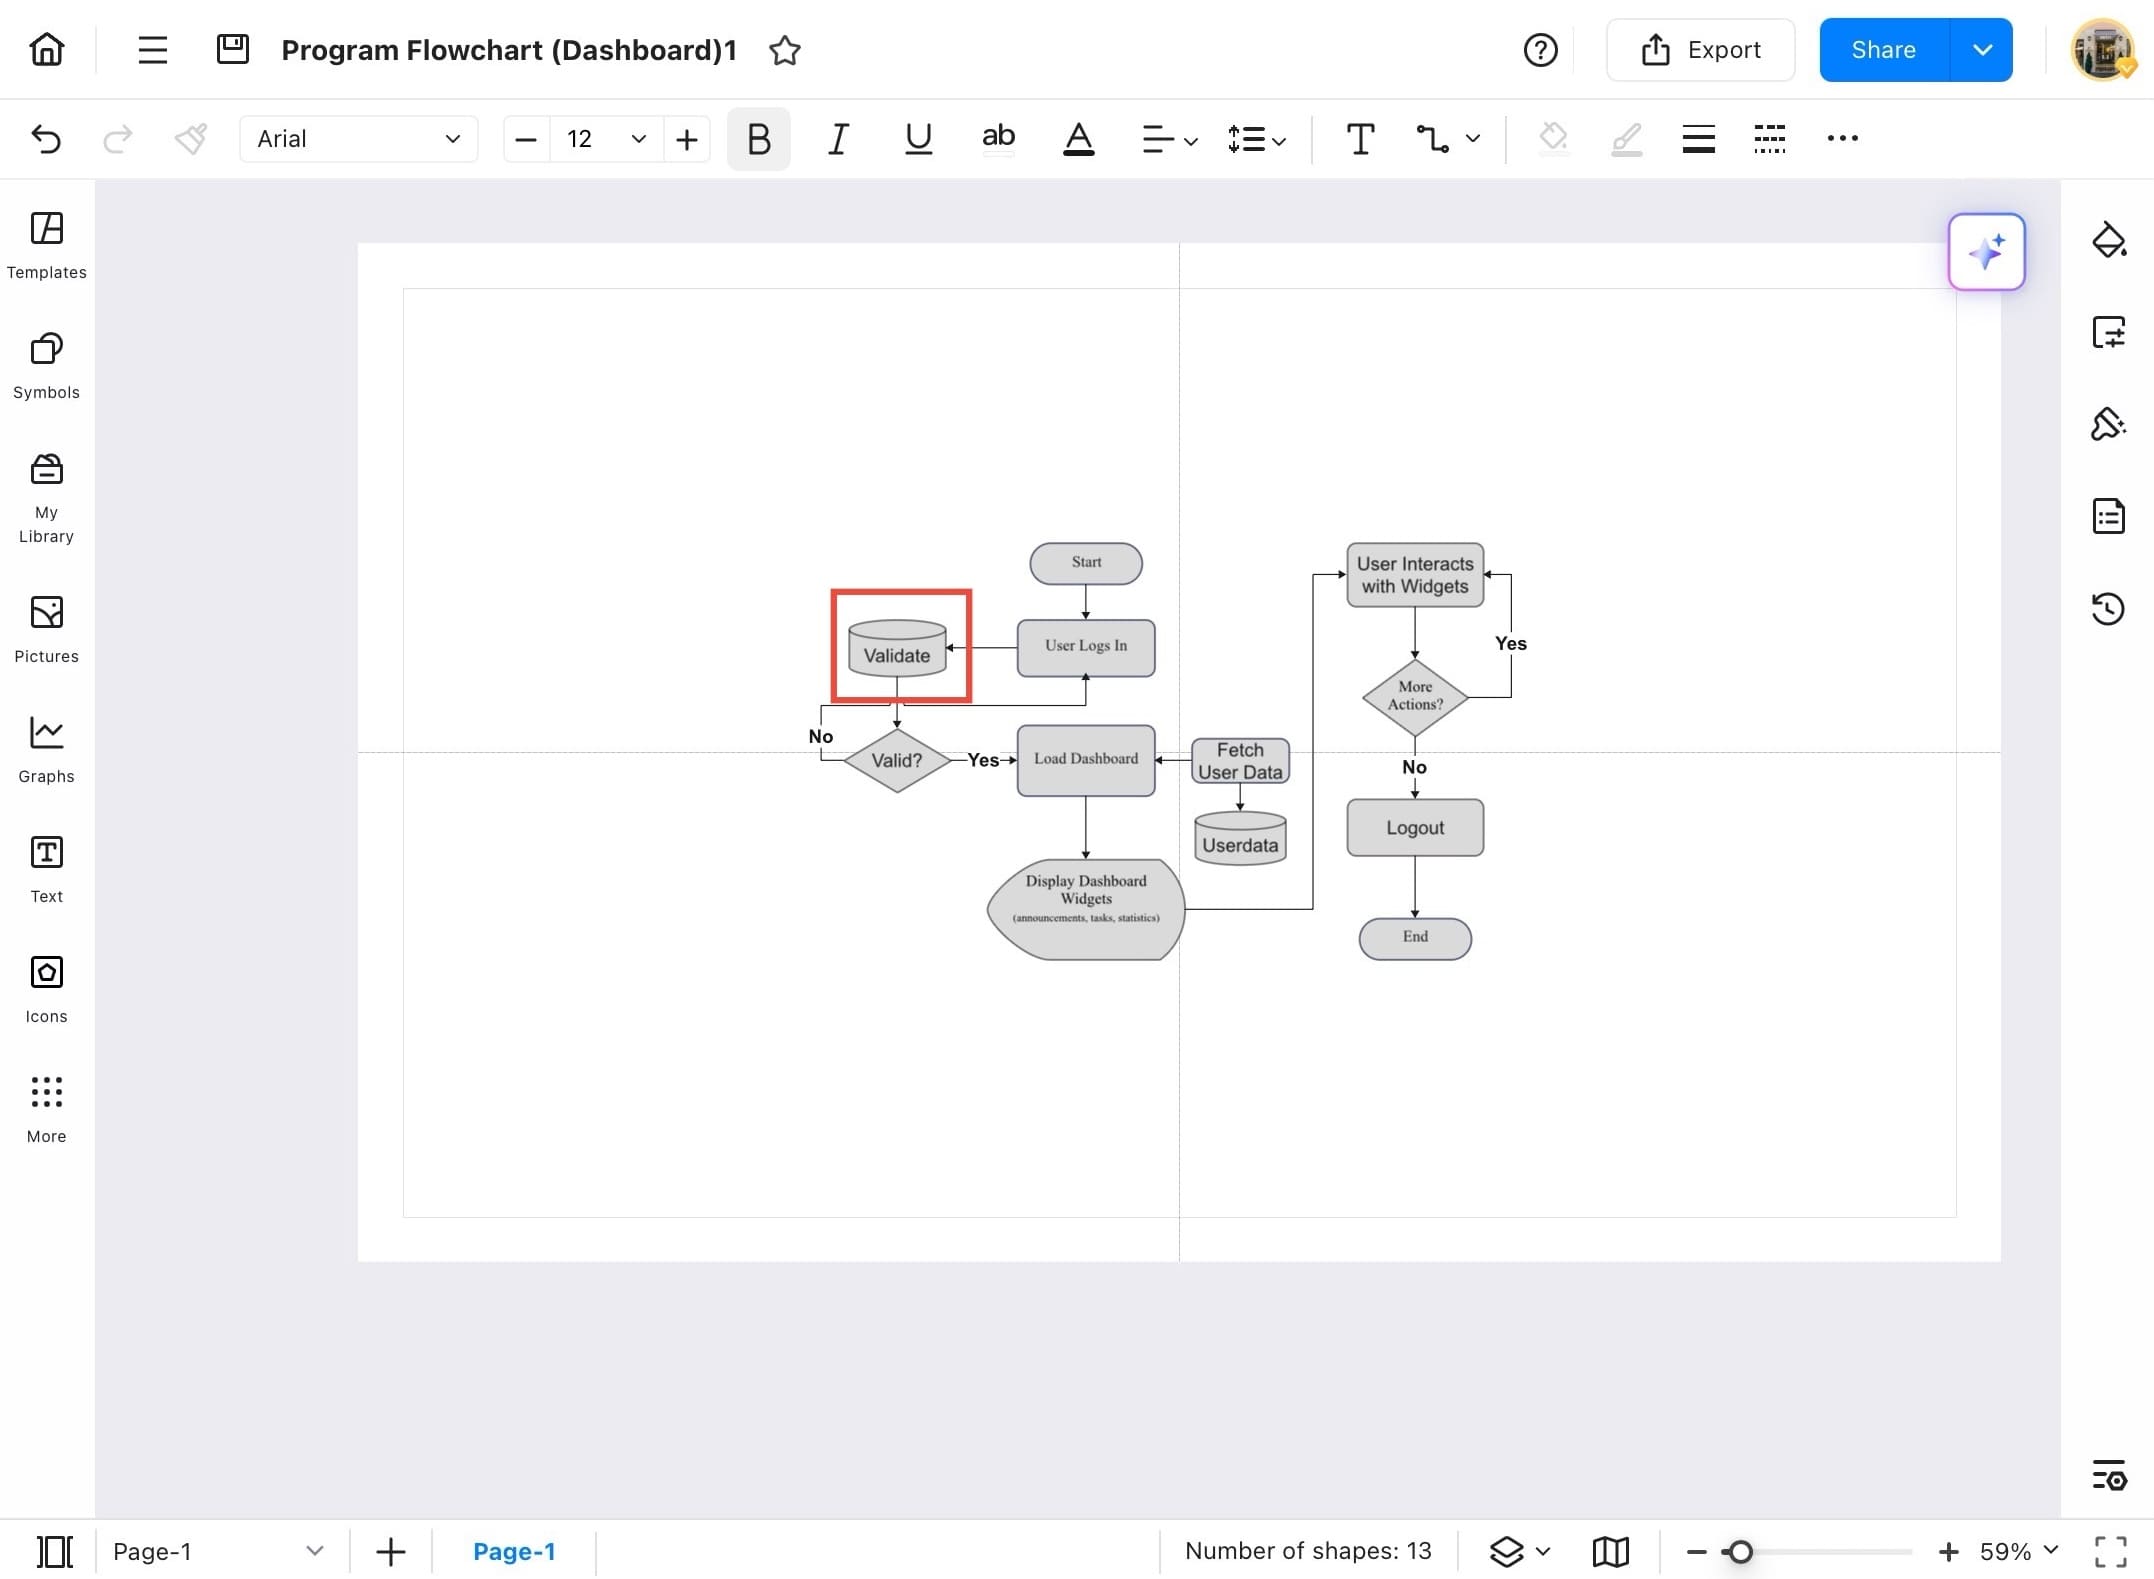
- From the pop-up shape menu, select the desired shape to insert.
Step ❾ Tap on the float button again
- Tap on any float button again to add a connecting line or shape based on your needs.
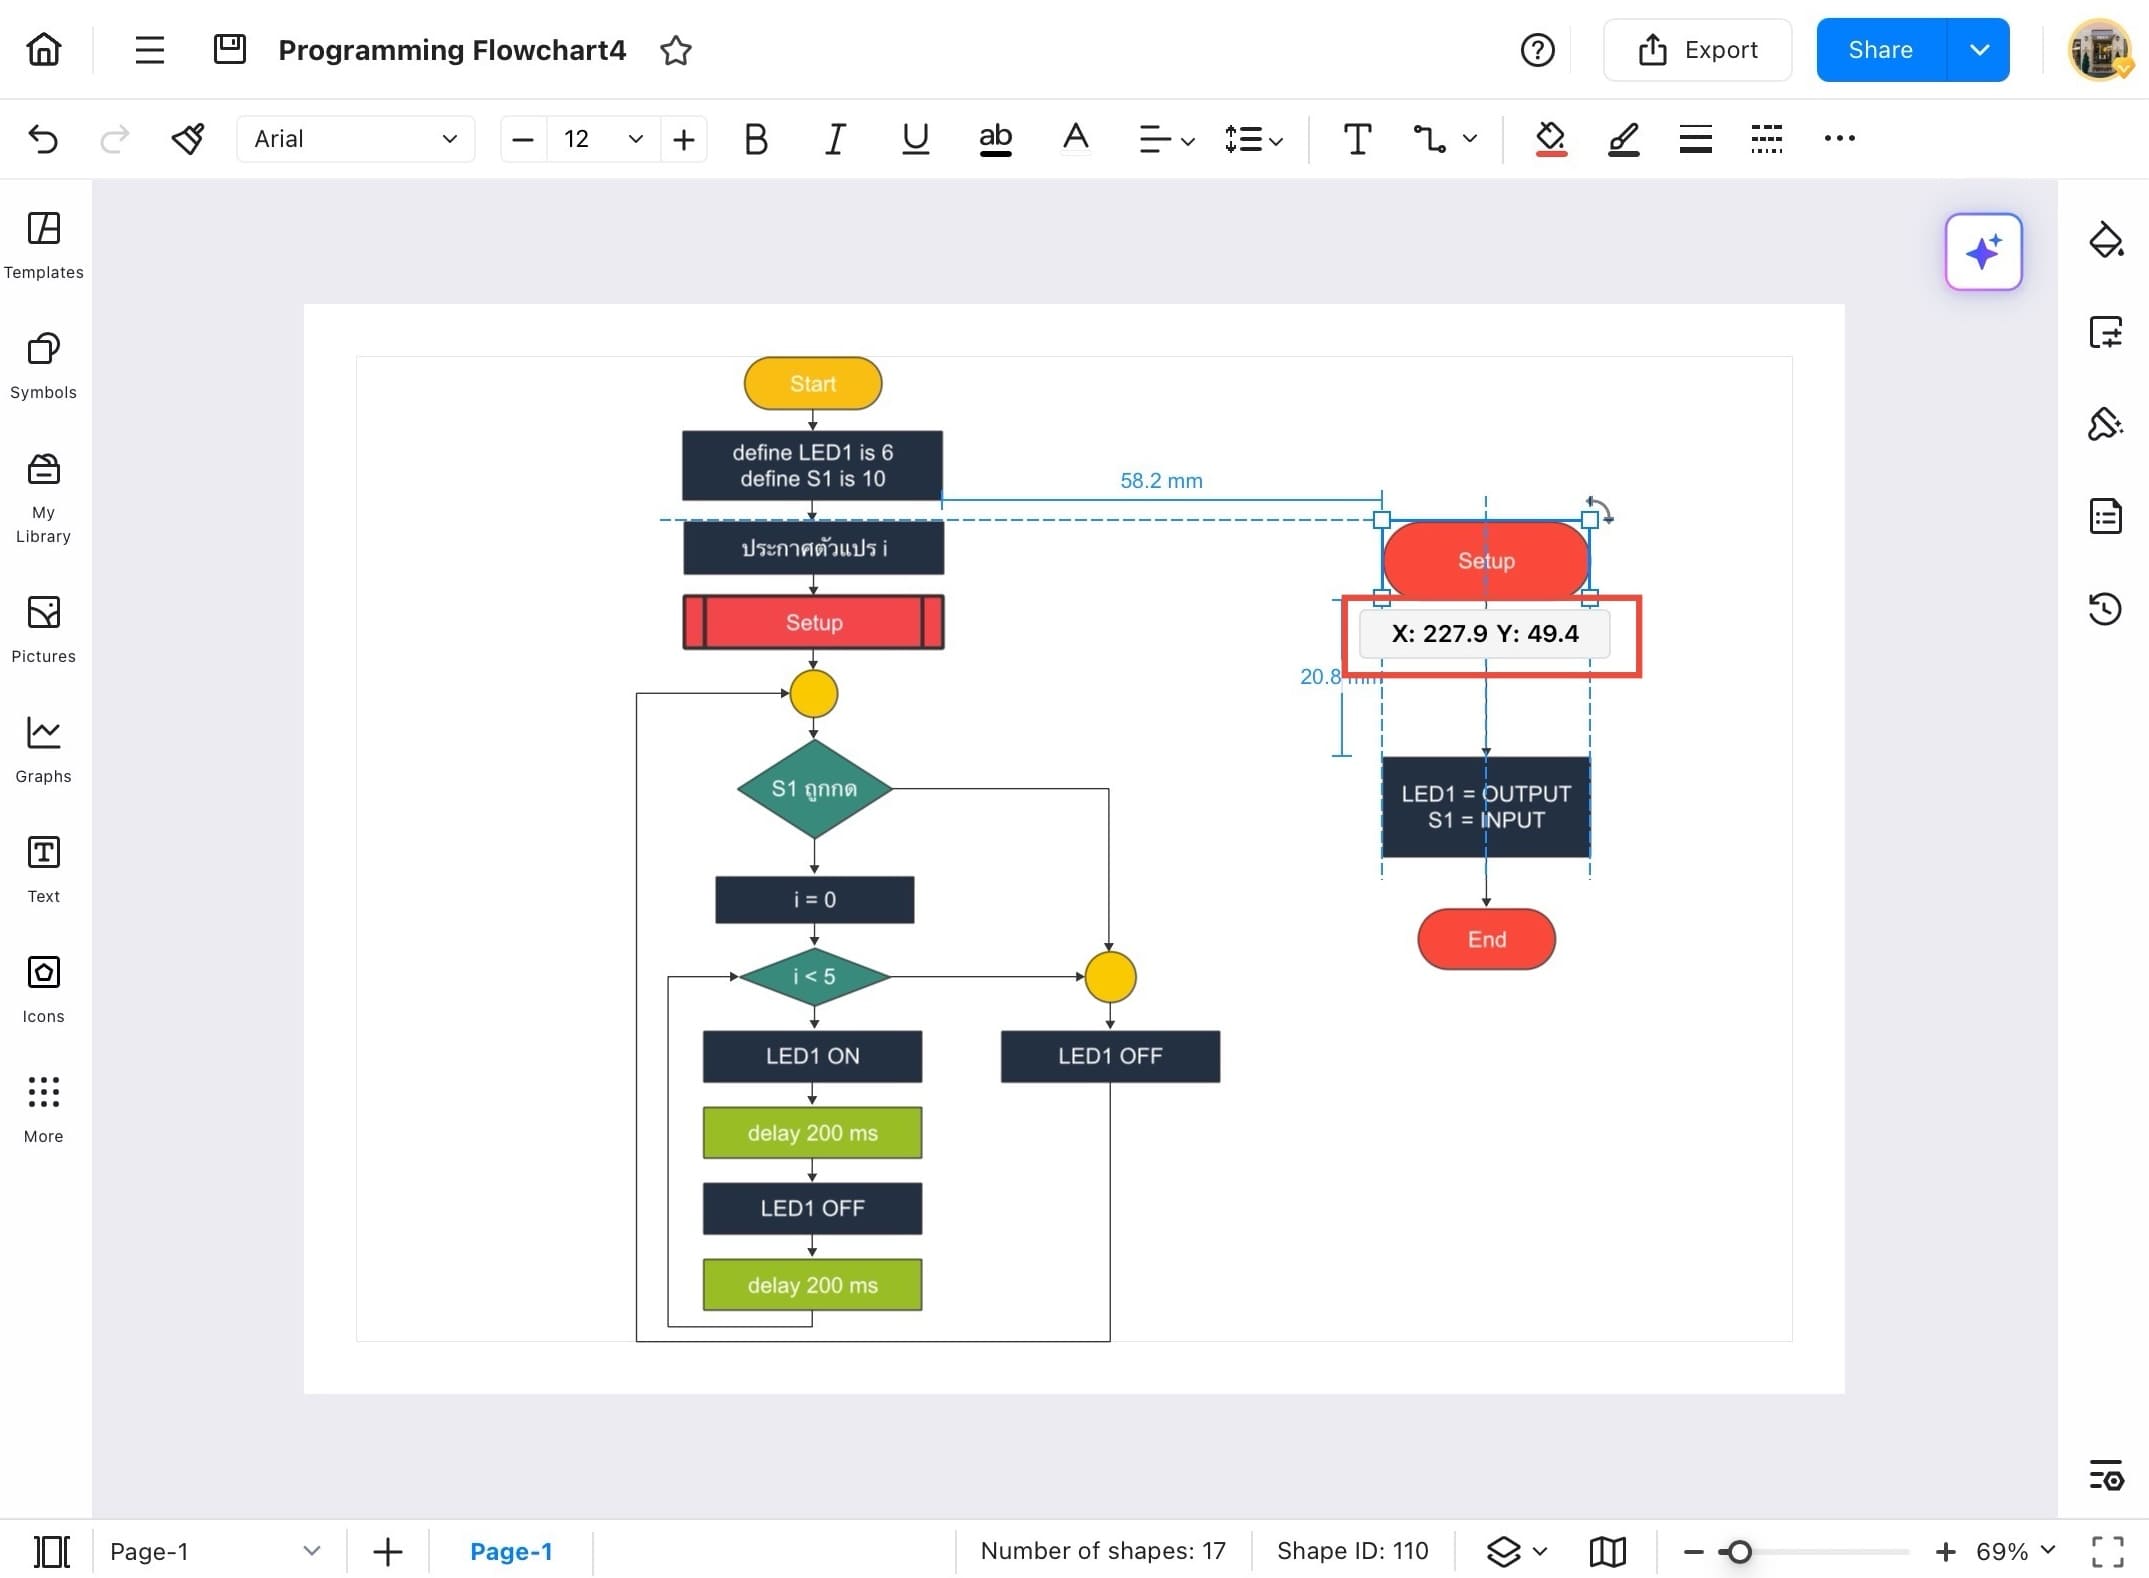
Symbol Coordinates Value
The Symbol Coordinates Value feature in EdrawMax lets you view and control the exact position of any object on the canvas. This is helpful for aligning elements precisely, especially in technical or professional diagrams. Follow the steps below to use it:
Step ❶ Open EdrawMax
- Open the EdrawMax app on your tablet.
Step ❷ Select a diagram
- Tap Recent, then select a diagram.
Step ❸ Tap the menu icon
- Once opened, tap the menu icon on the top left.
Step ❹ Tap the View option
- Tap the View option from the left-side menu.
Step ❺ Tap Symbol coordinate value
- From the dropdown, tap Symbol coordinate value under the View options.
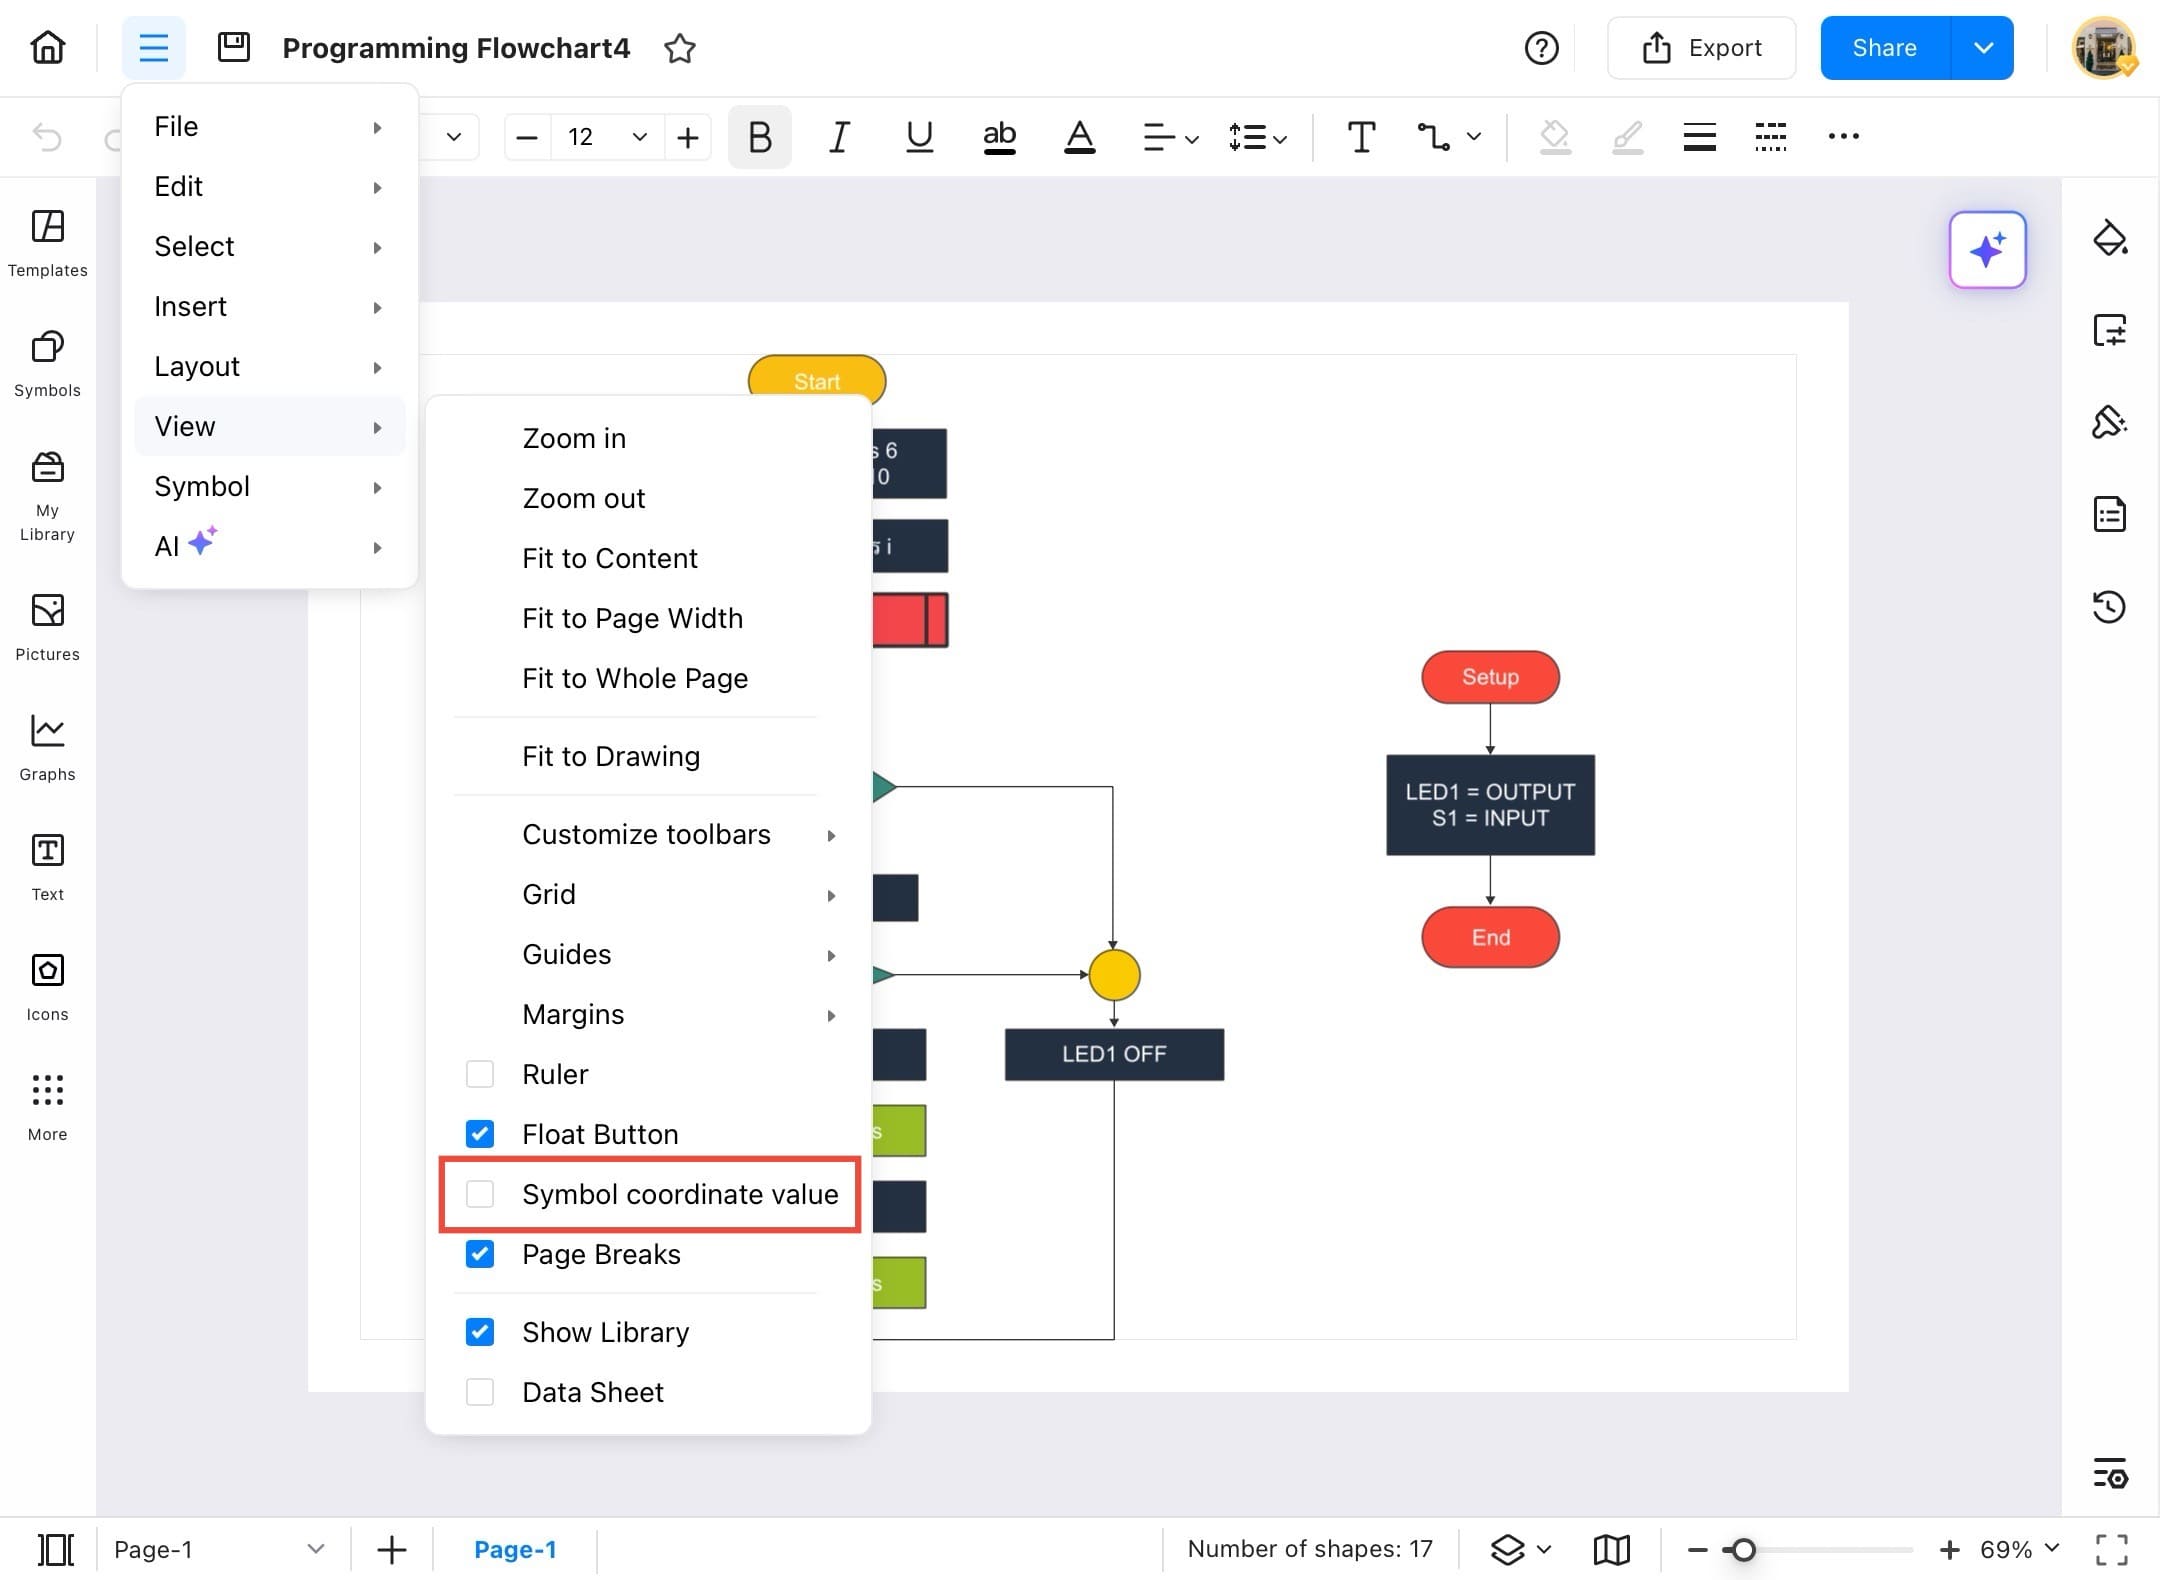
Step ❻ Option is ticked
- A checkmark will appear next to Symbol coordinate value, confirming it's activated.

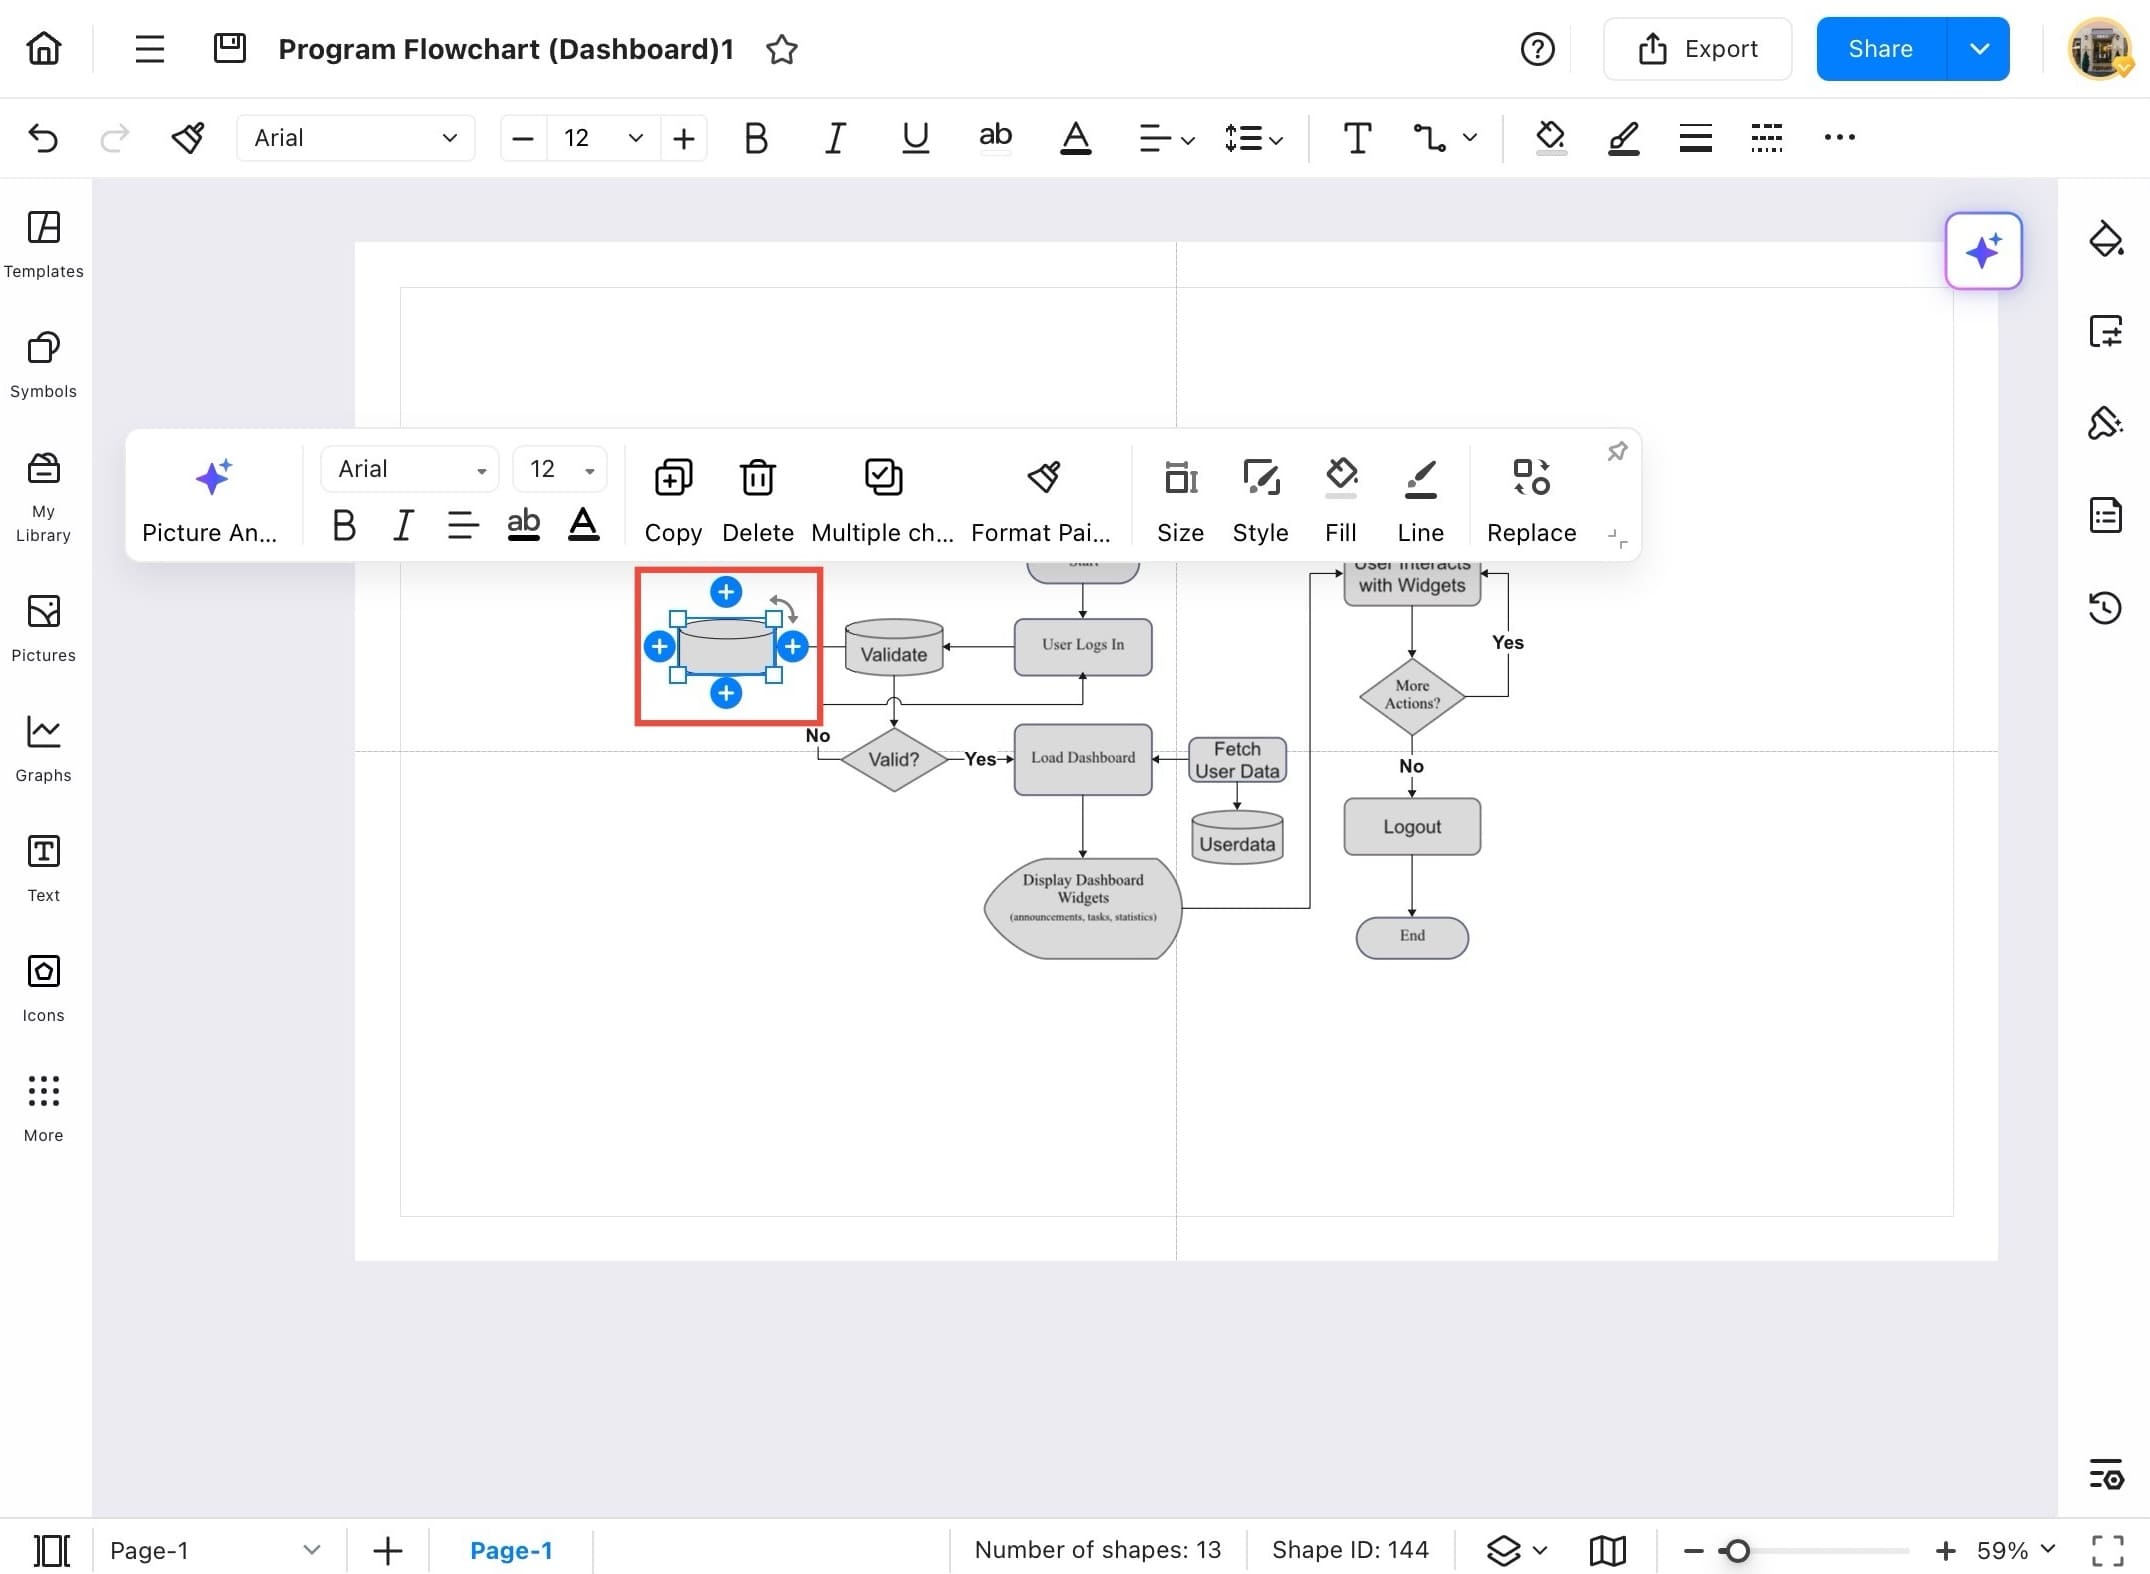
Step ❼ Drag the shape
- Tap and drag the shape to reposition it in your diagram.

Step ❽ View X and Y coordinates
- As you move the shape, X and Y coordinates will display, showing its exact position on the canvas.
Library
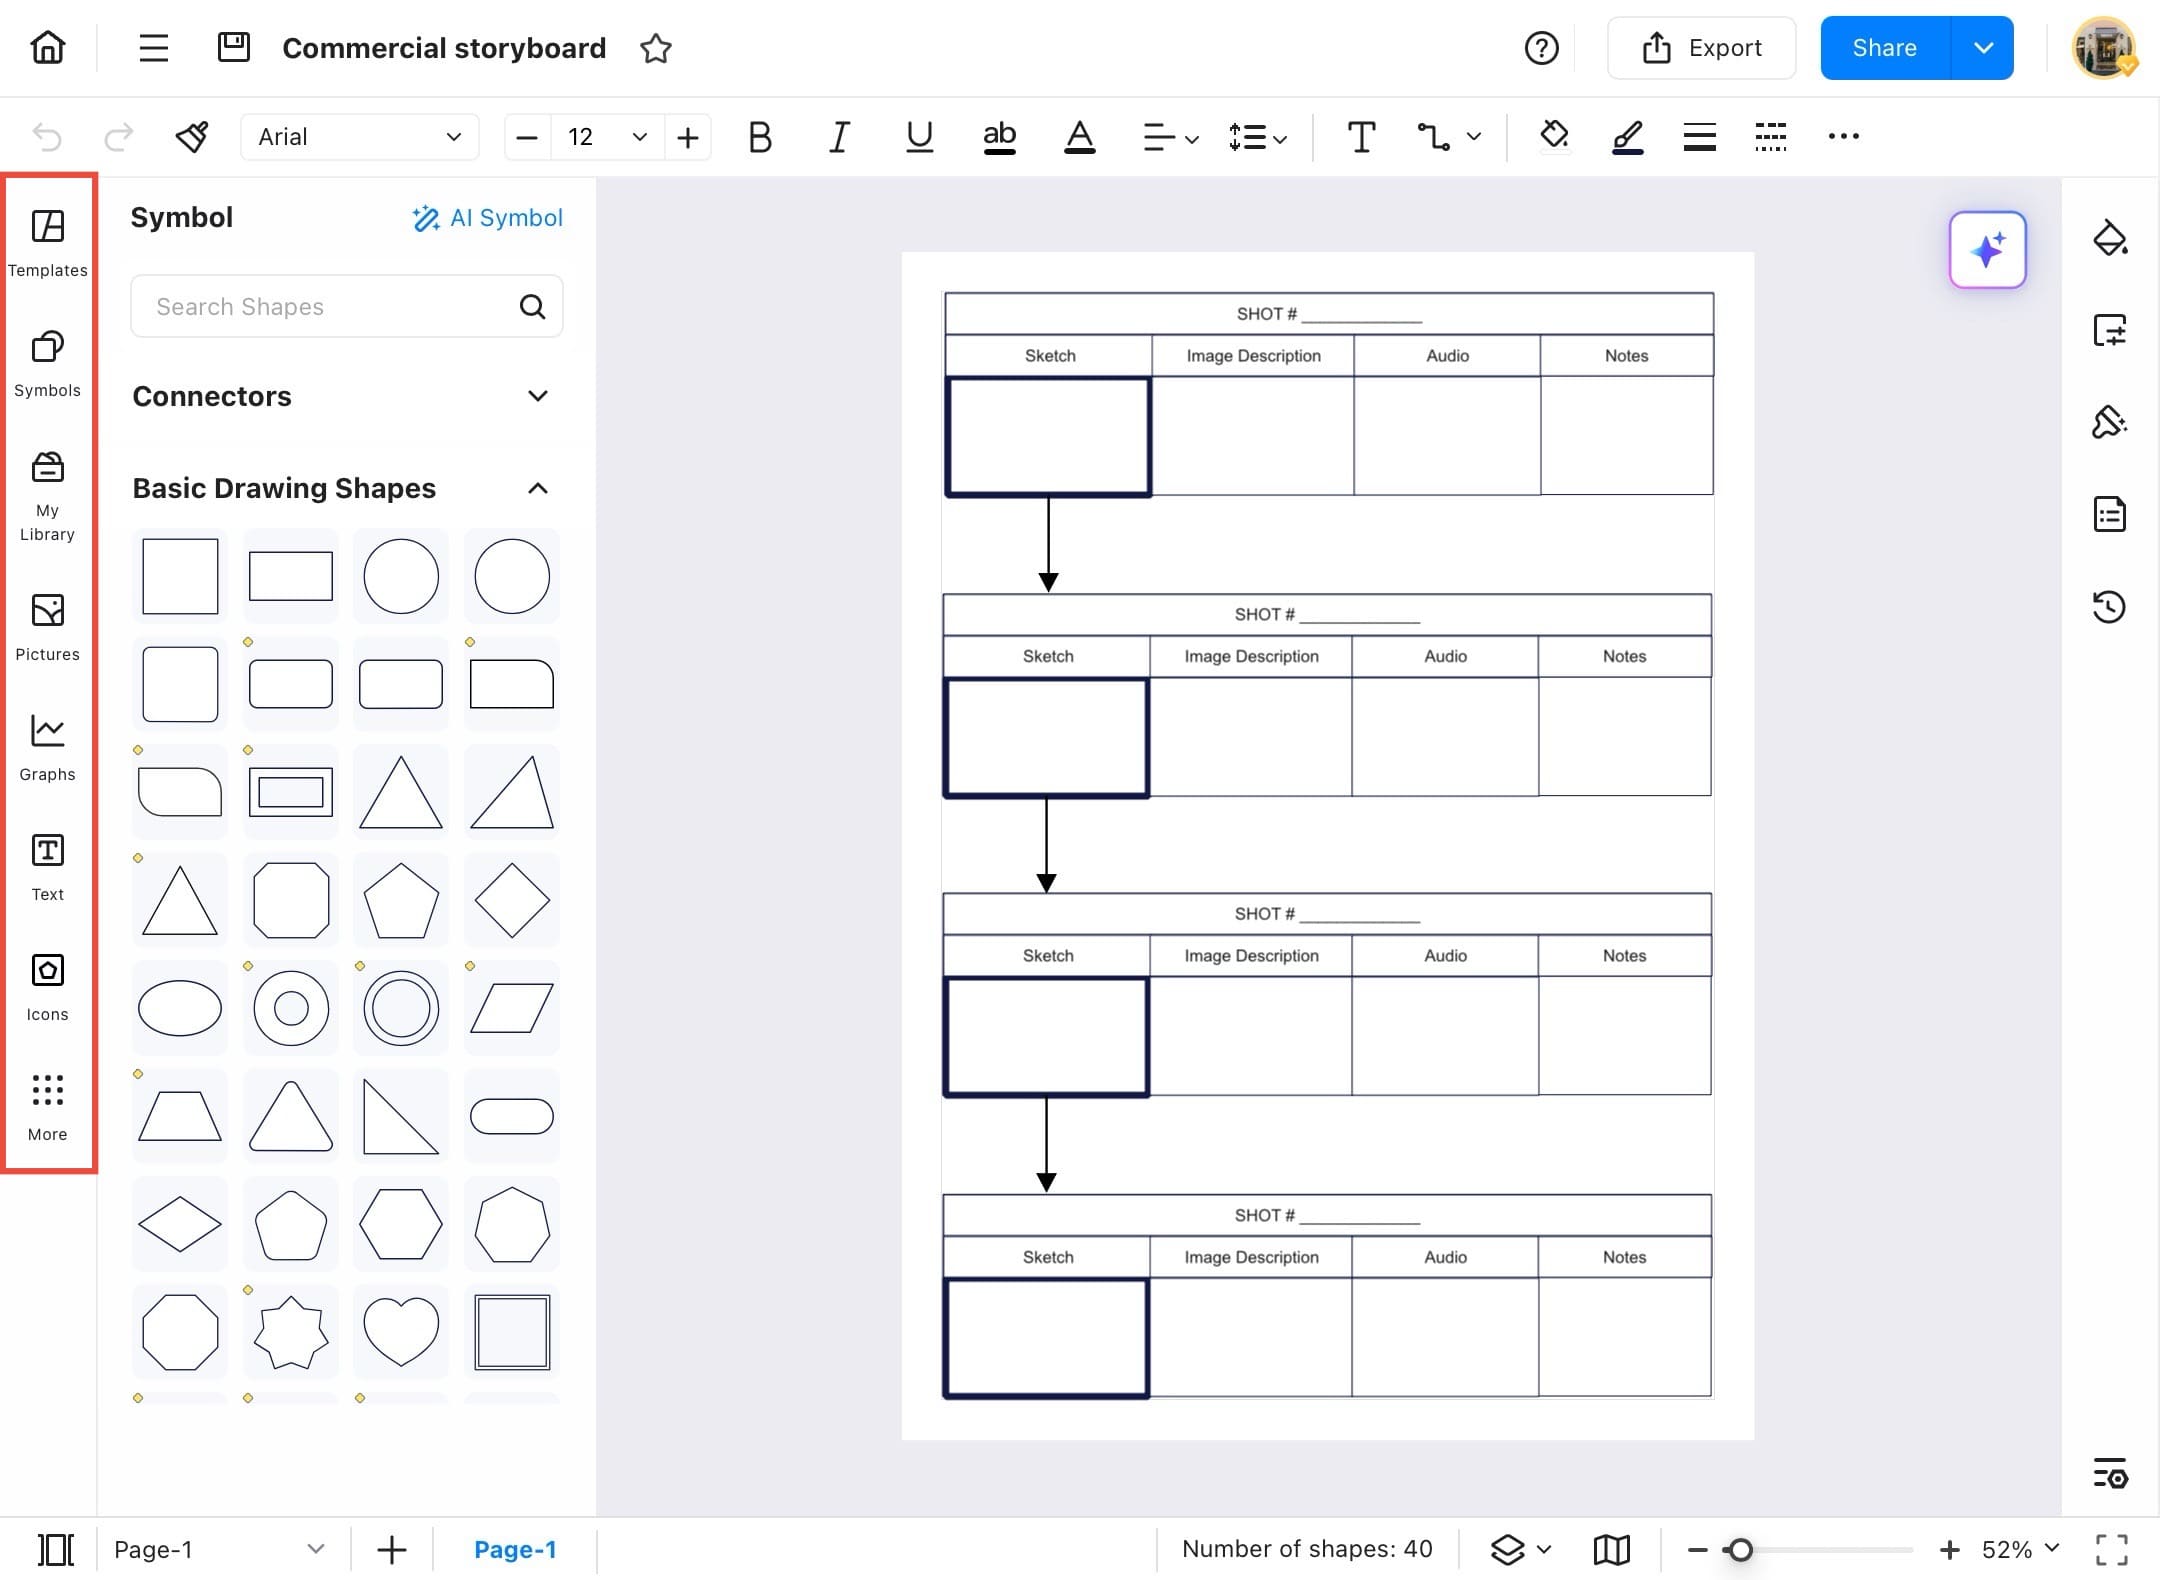
The **Library** in EdrawMax contains thousands of ready-made shapes, icons, and symbols you can use in your diagrams. Whether you're creating flowcharts, mind maps, or infographics, the Library gives you instant access to all the visual elements you need.
Step ❶ Launch EdrawMax
- Launch the EdrawMax app on your tablet.
Step ❷ Select a project
- Select a project from the Recent list to open the diagram and access the library.
Step ❸ Tap the menu icon
- Tap the menu icon (three horizontal bars) in the top-left corner of your open diagram.
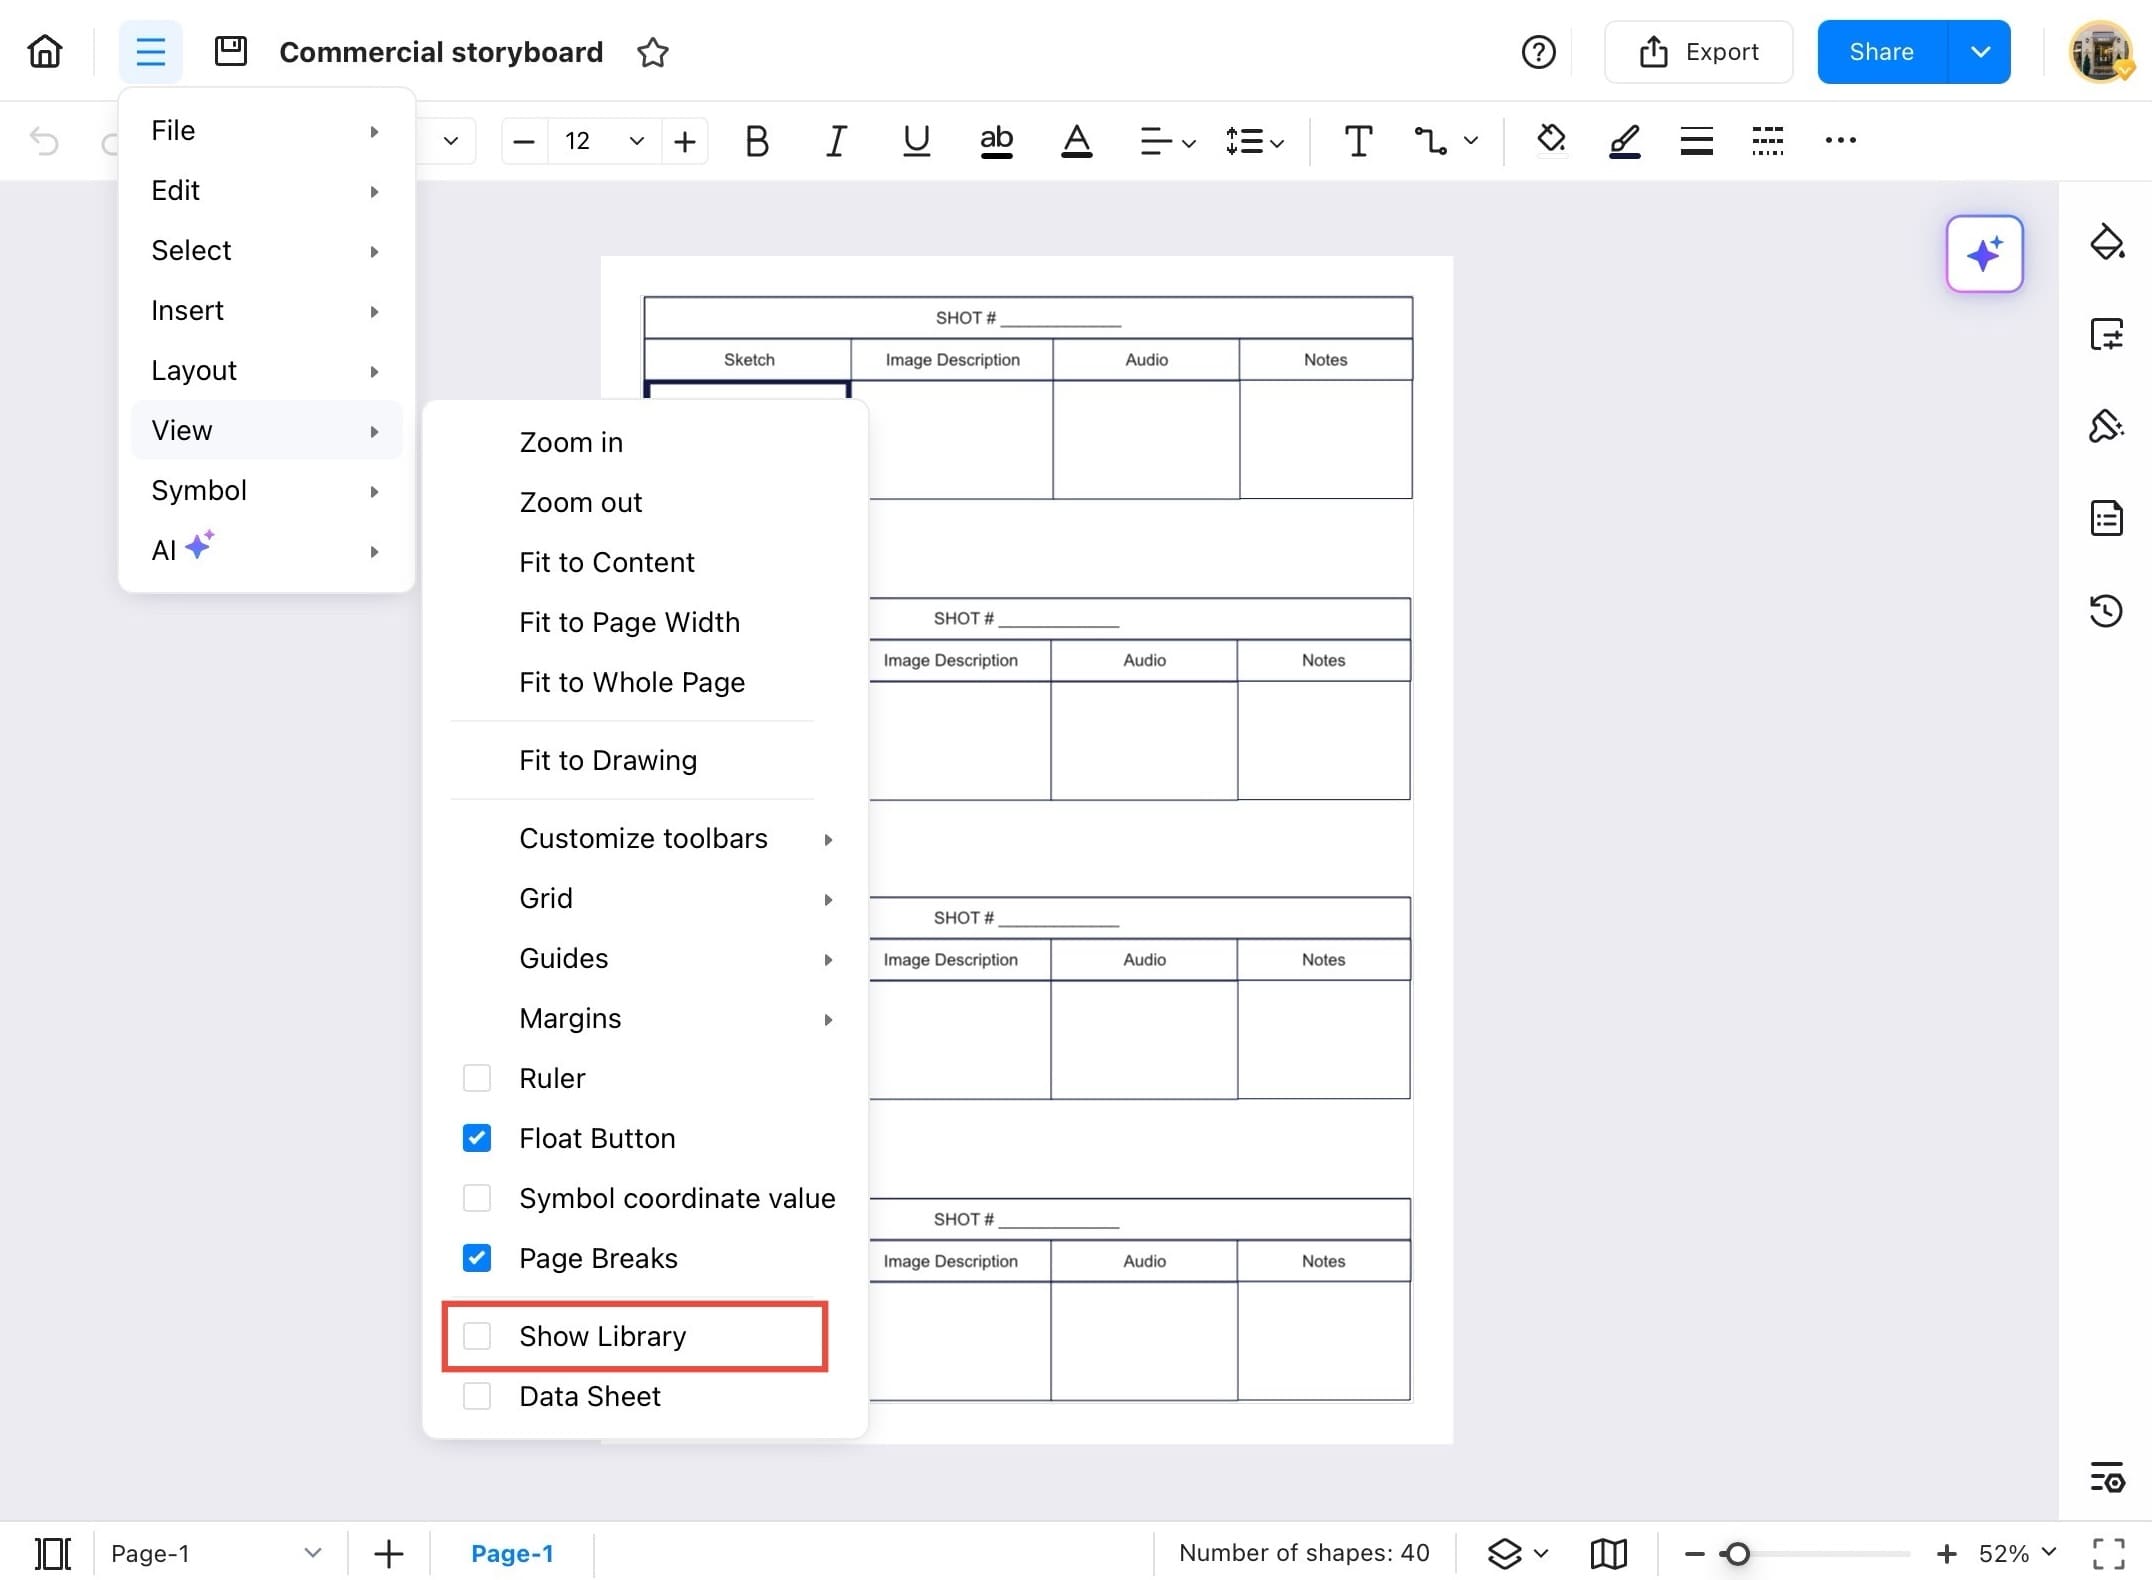
Step ❹ Tap View
- From the dropdown, hover over or tap View to open display options.
Step ❺ Tap on Show Library
- Tap on Show Library from the list to open the symbol and shape libraries on the left side of the screen.
Step ❻ View the Library
- Once the Library is enabled, all available shapes and symbols will appear on the left-side panel. You can drag and drop them into your diagram.
Date Sheet
The Date Sheet in EdrawMax is a data table that stores and manages information linked to shapes or charts. It helps you organize, edit, and analyze content efficiently, especially when working with charts or diagrams that rely on structured data. Here's how to use it:
Step ❶ Start EdrawMax
- Start EdrawMax on your device.
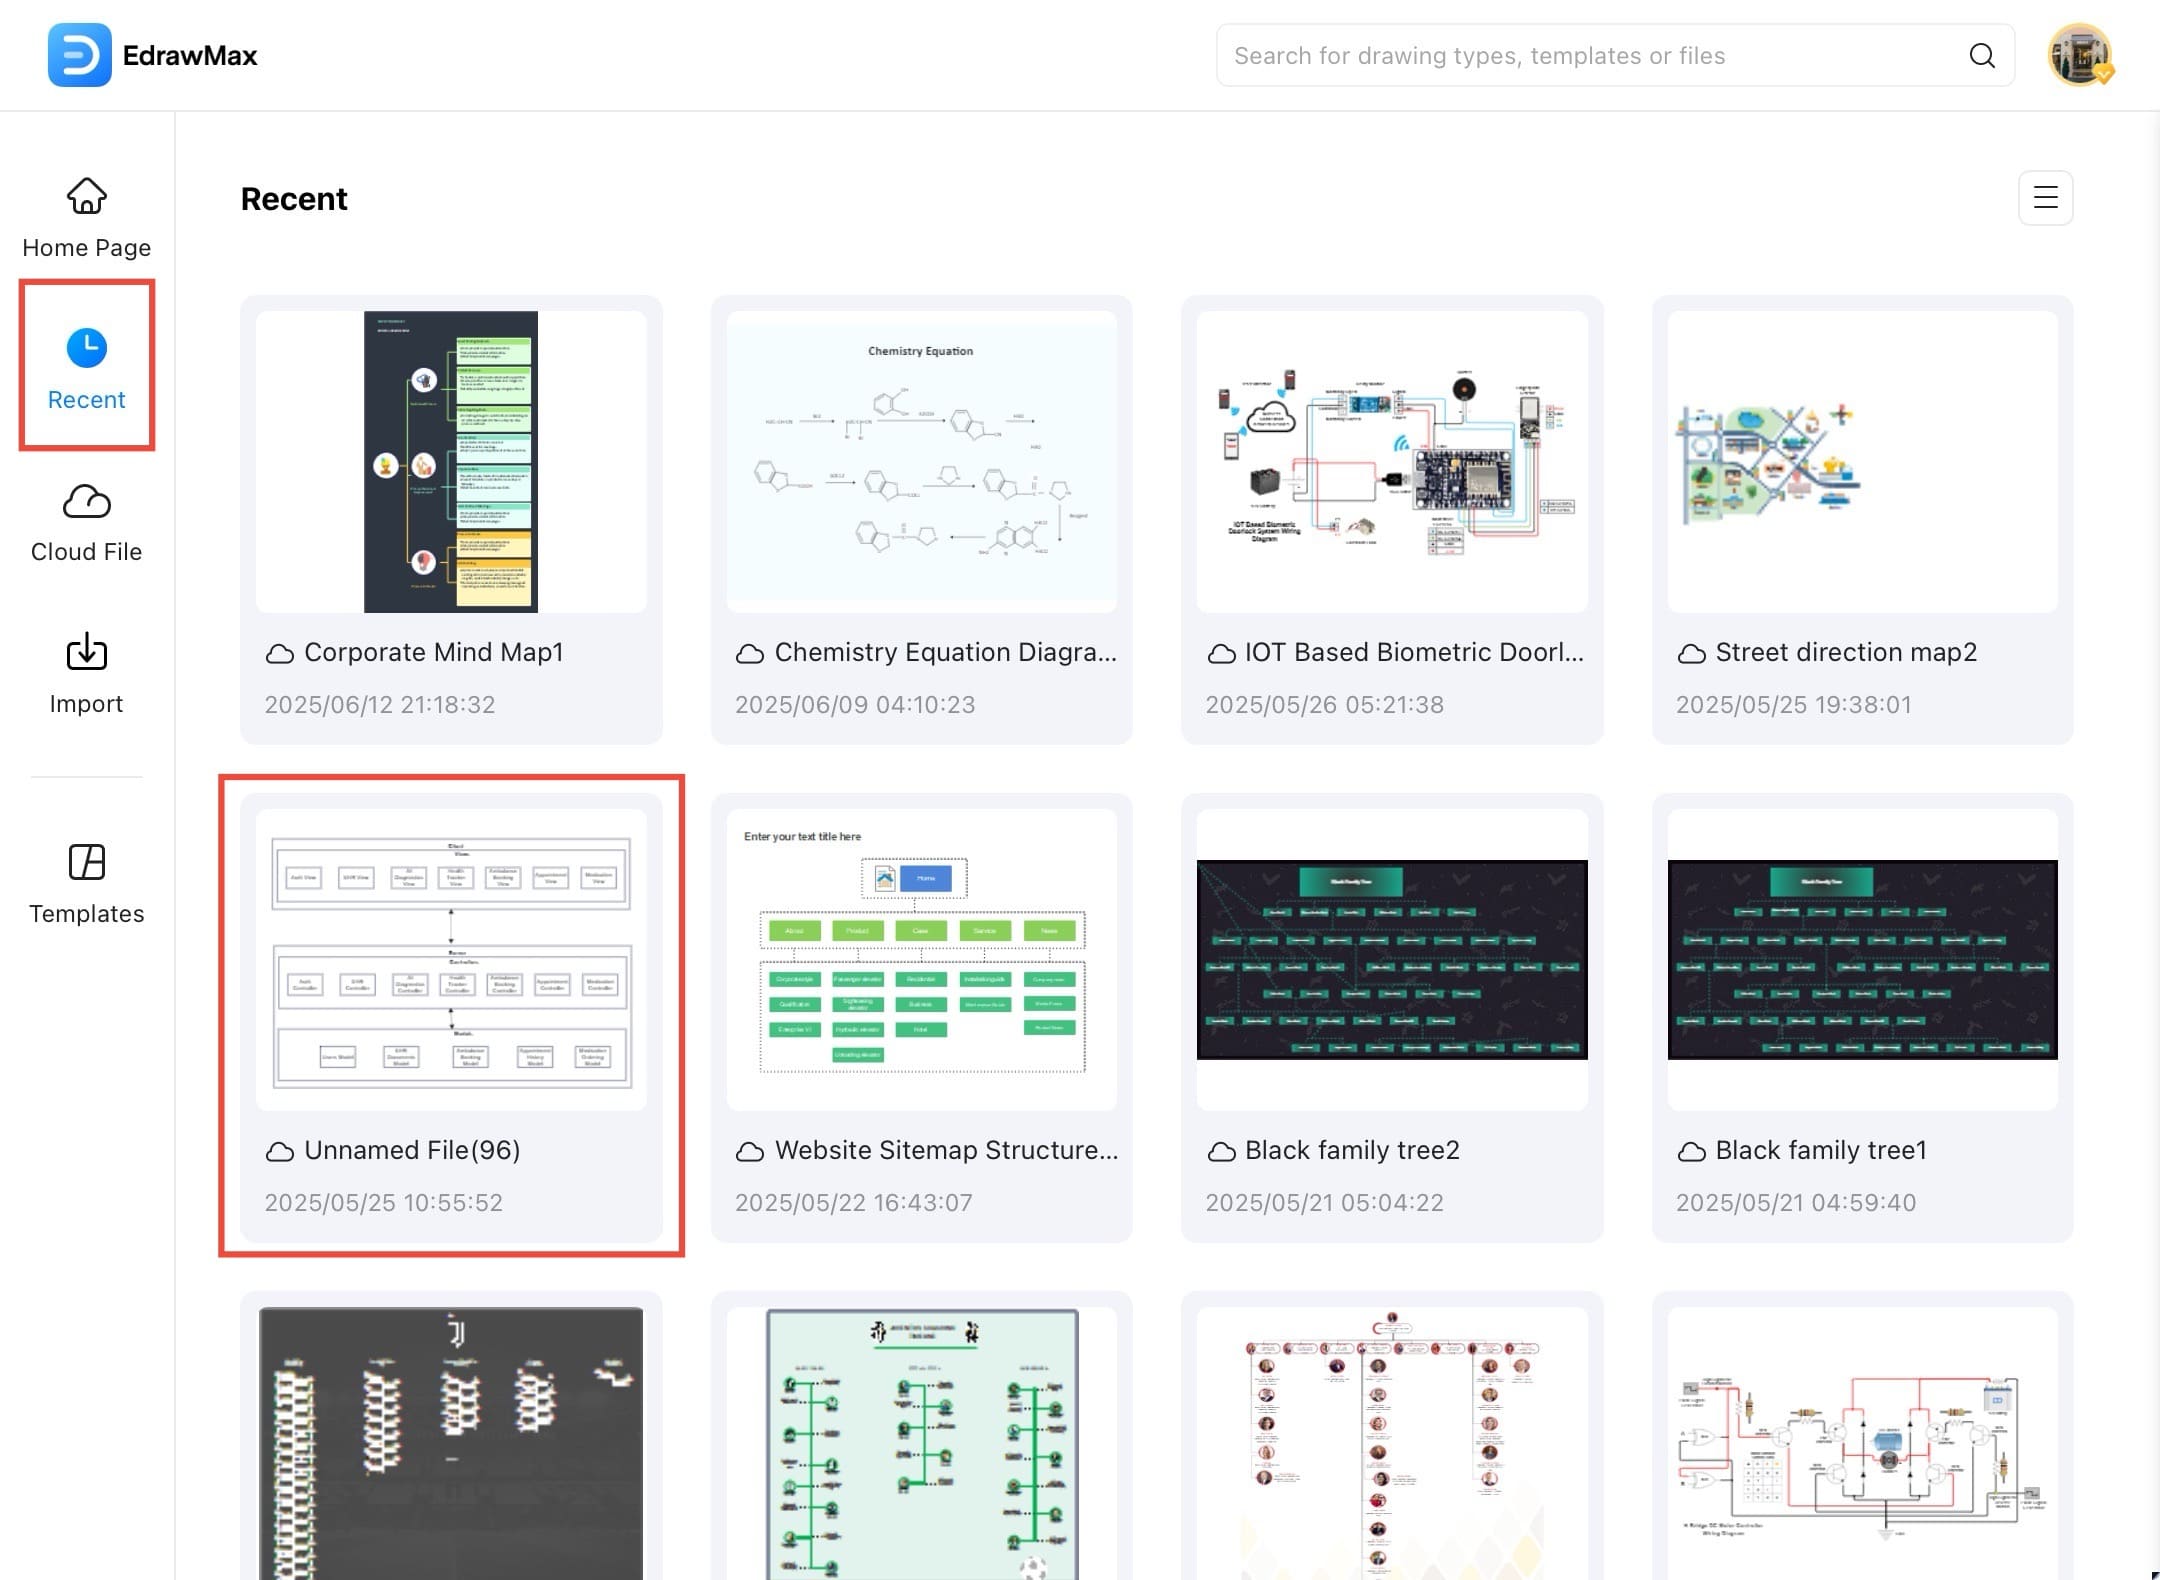
Step ❷ Open a file from Recent
- On the EdrawMax Home Page, tap Recent from the left sidebar.
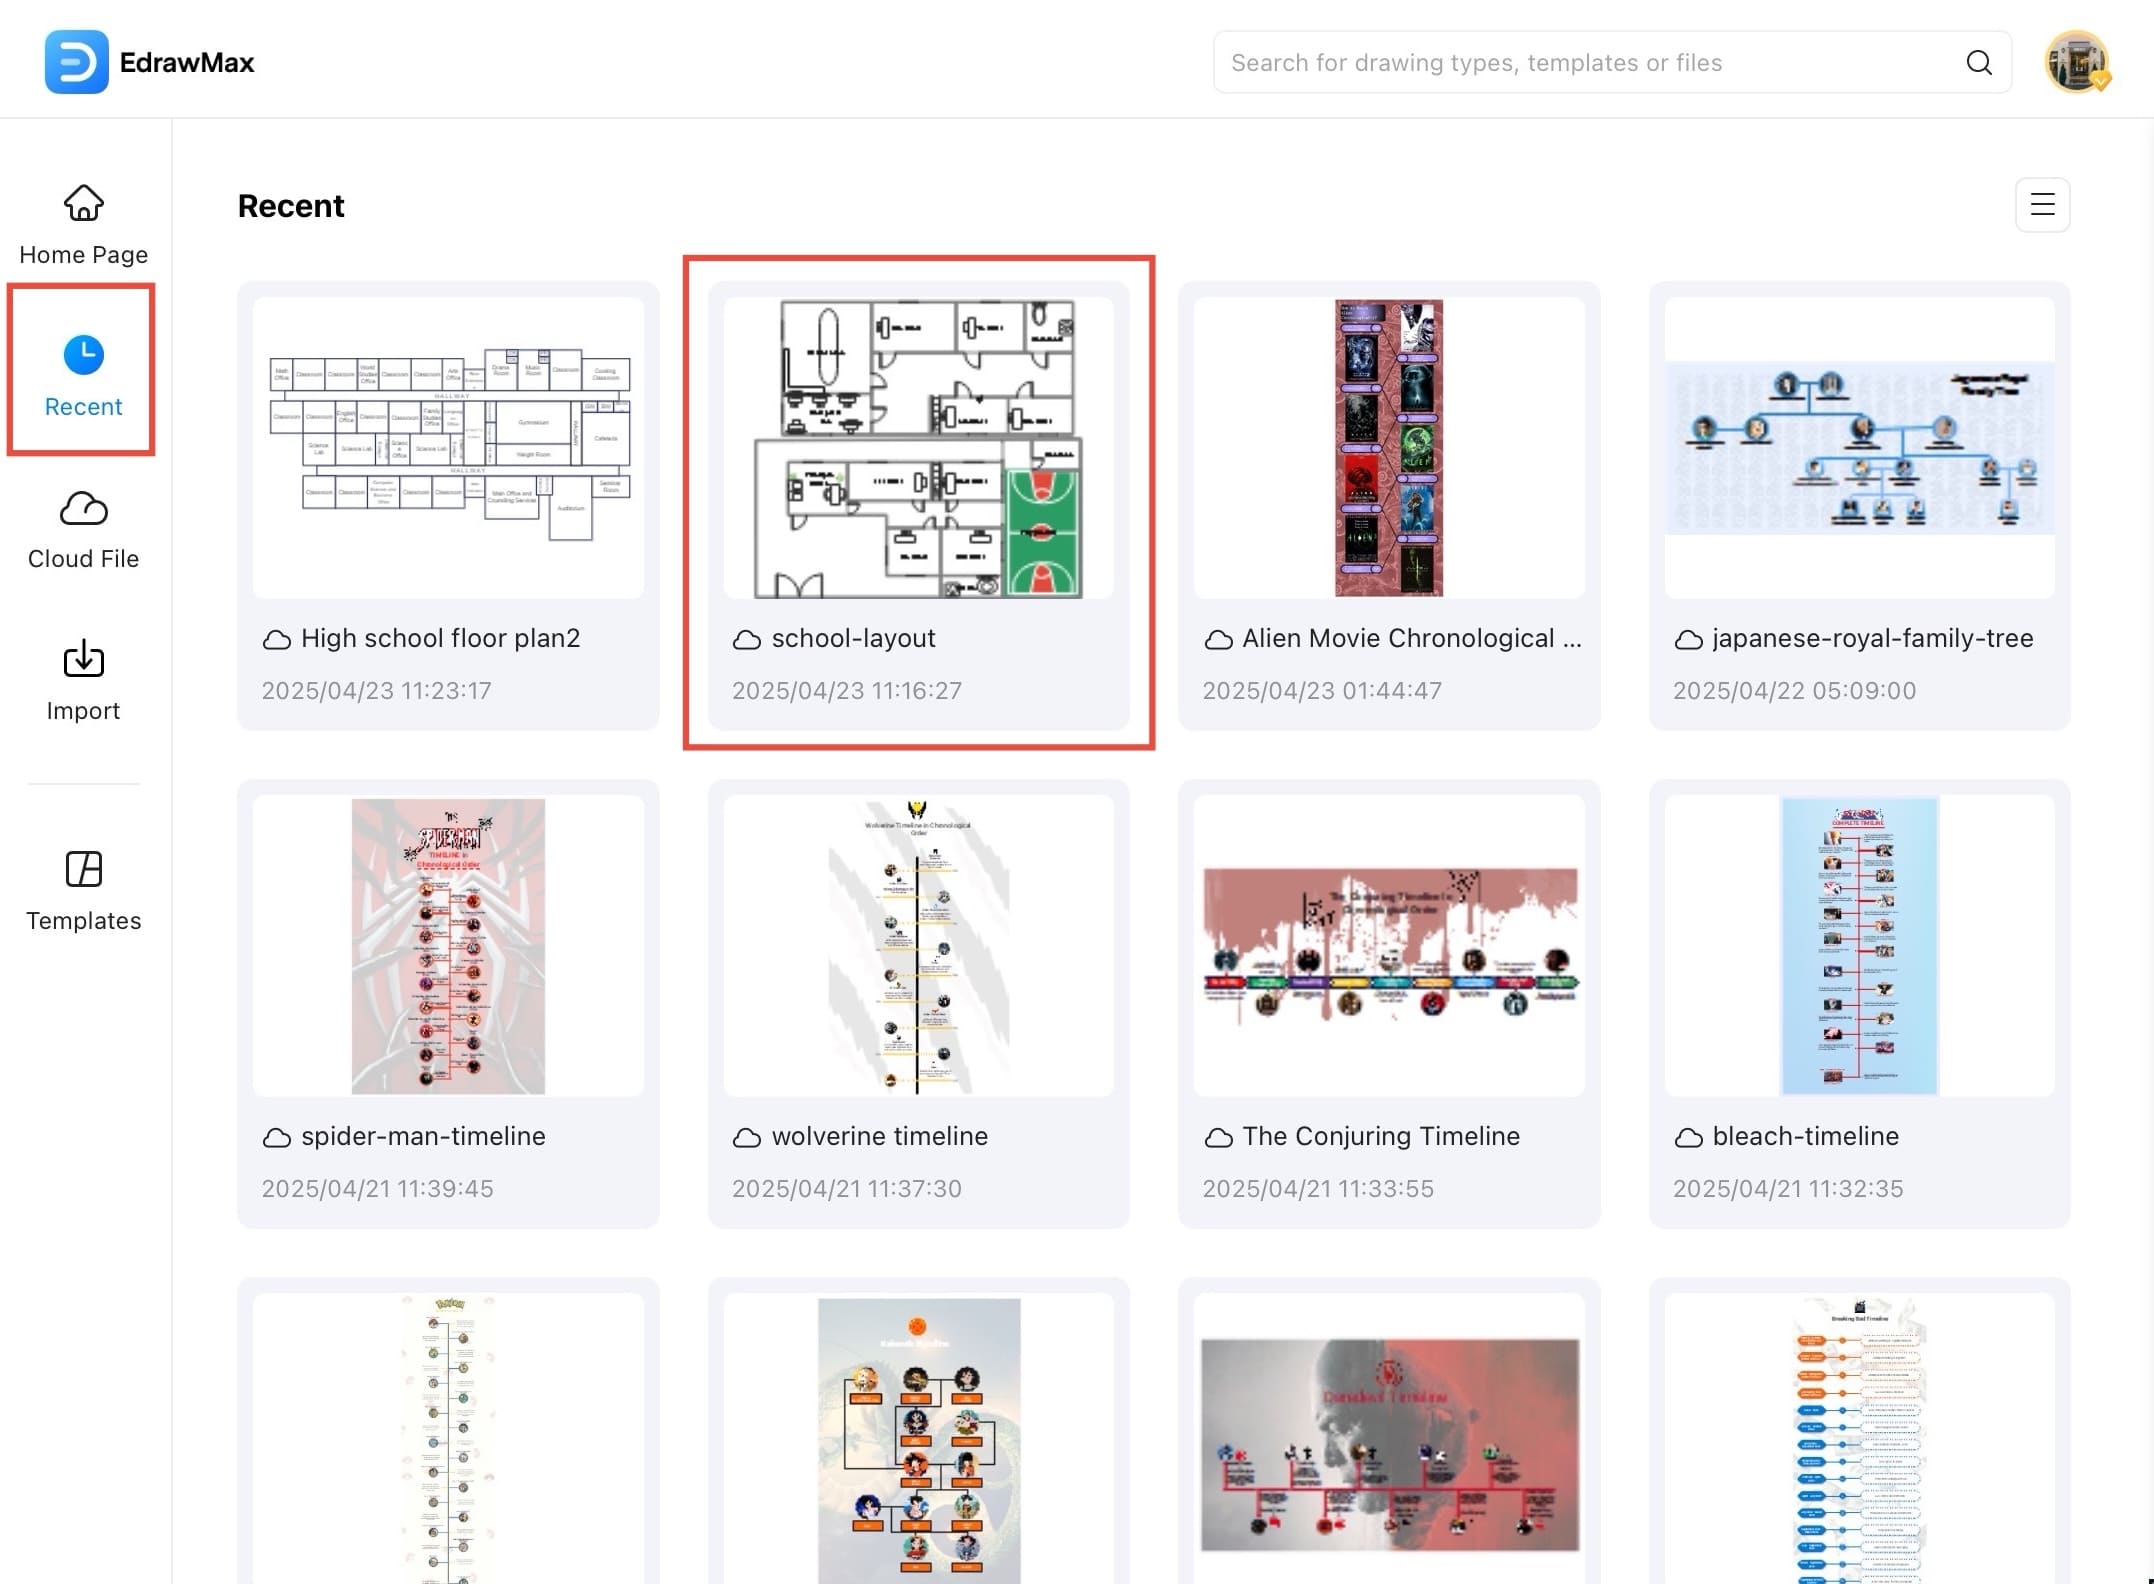
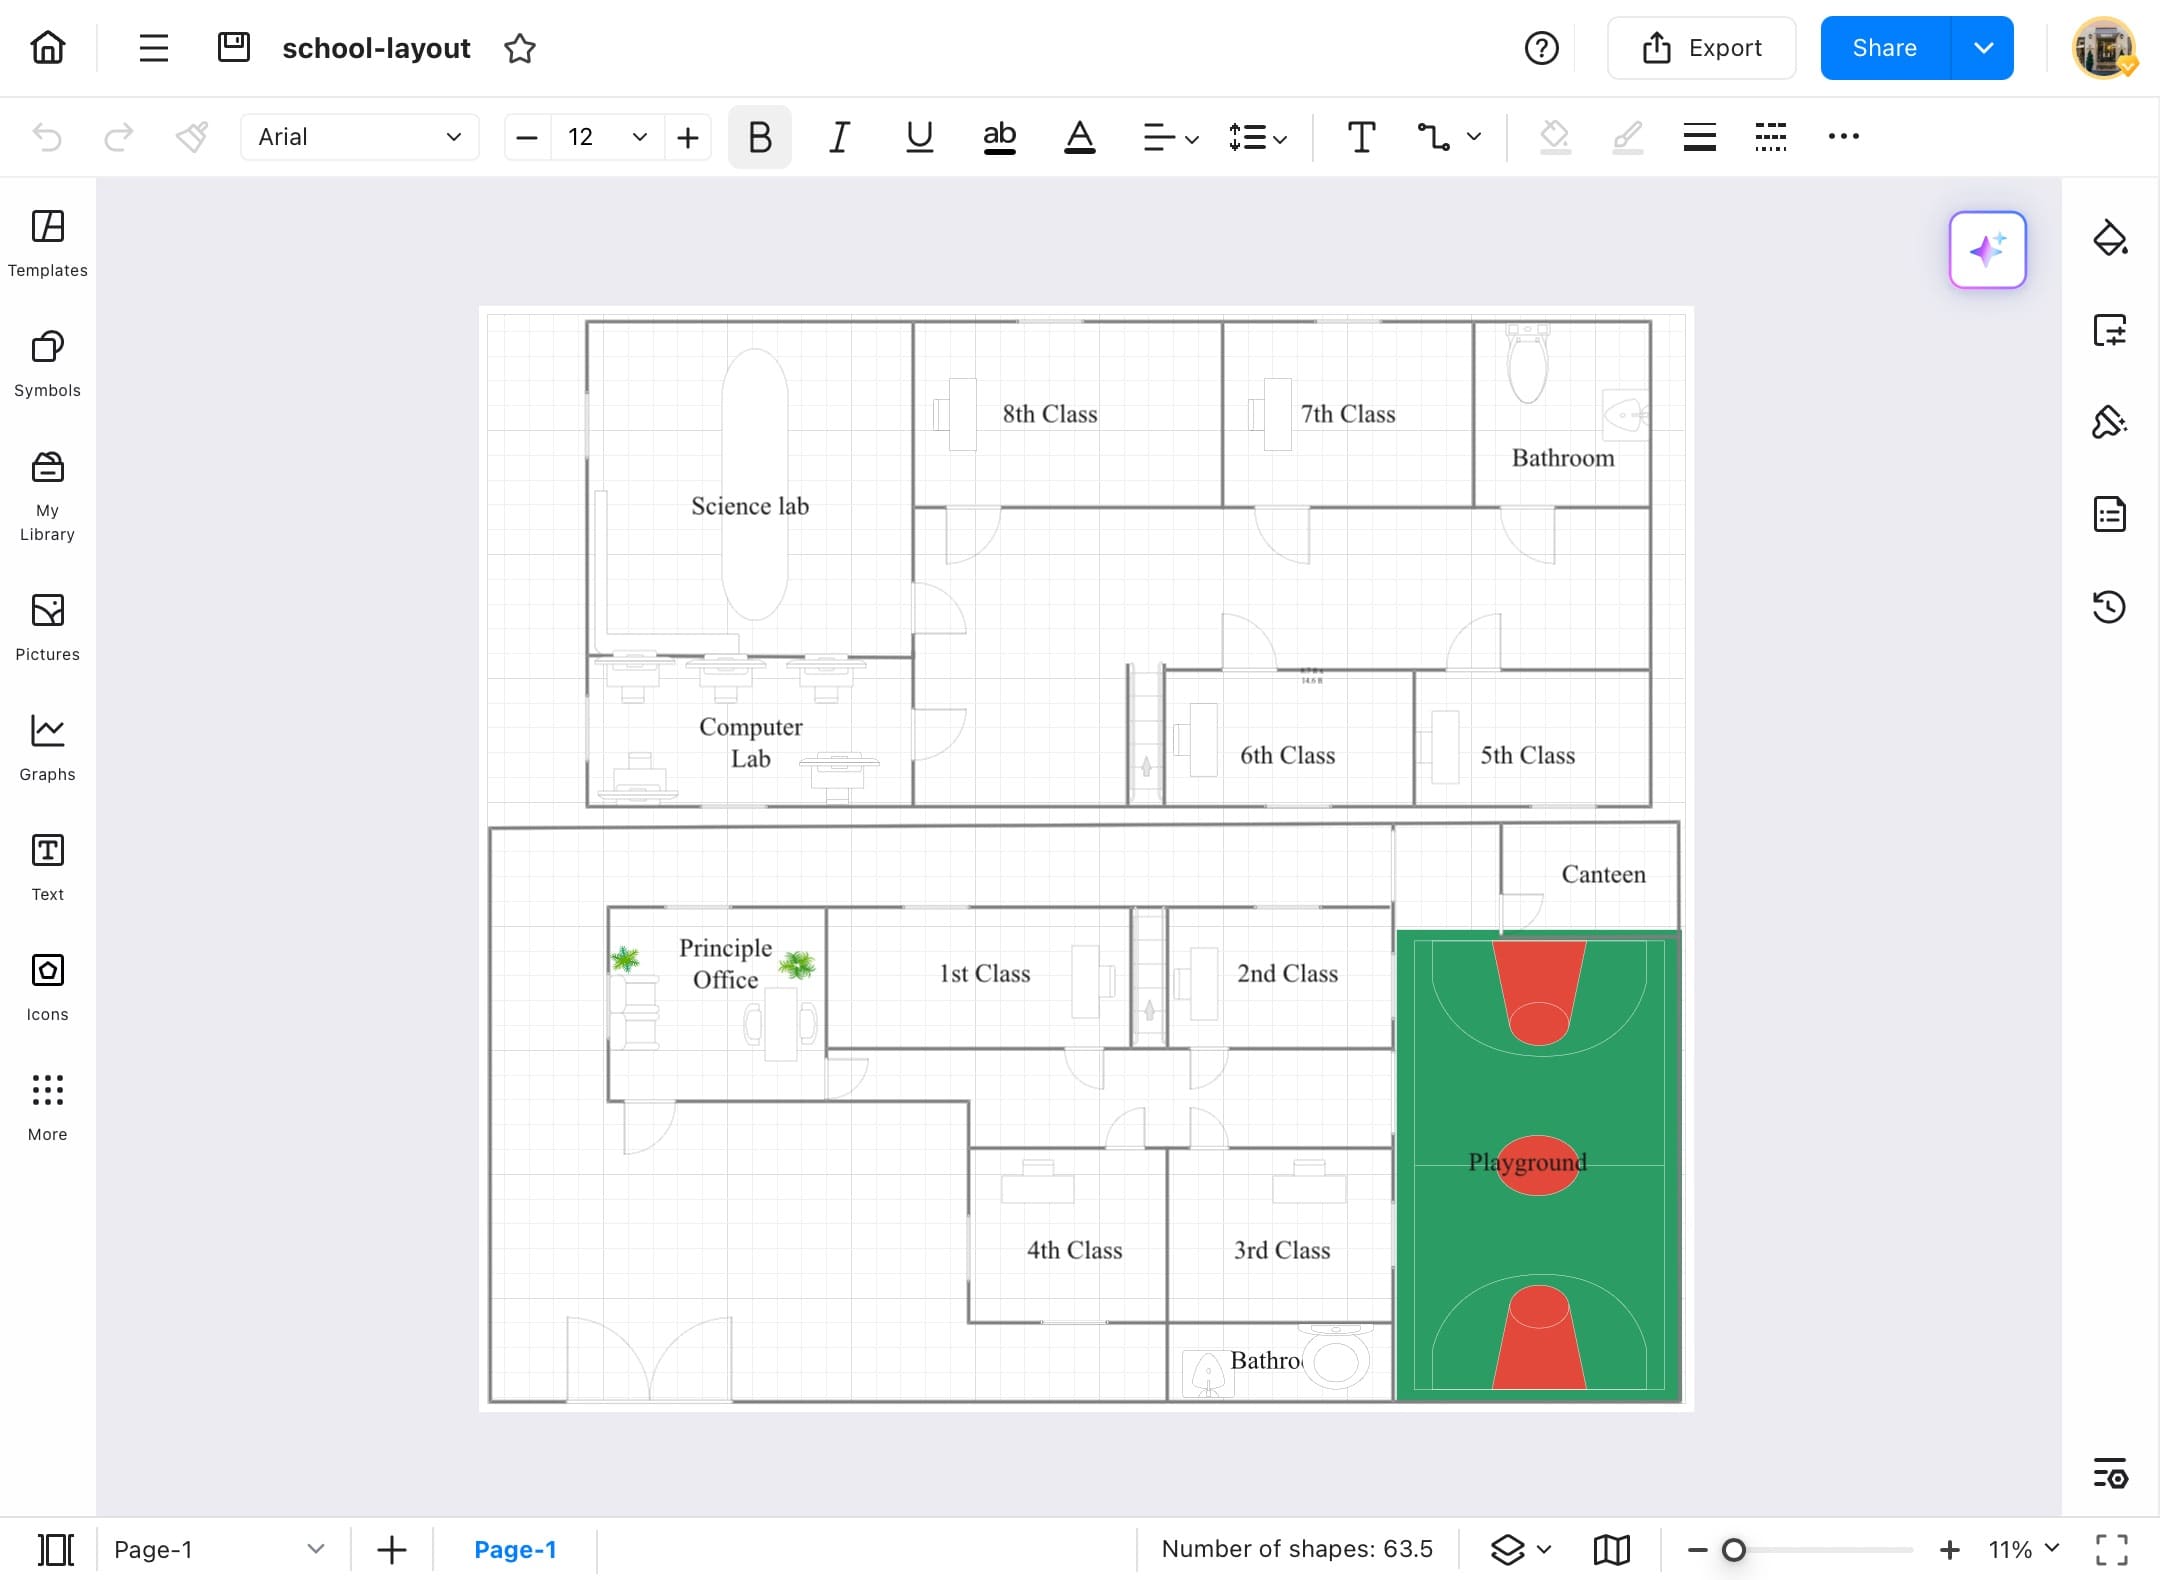
Step ❸ File layout is visible
- Once opened, the layout with labels will be visible.
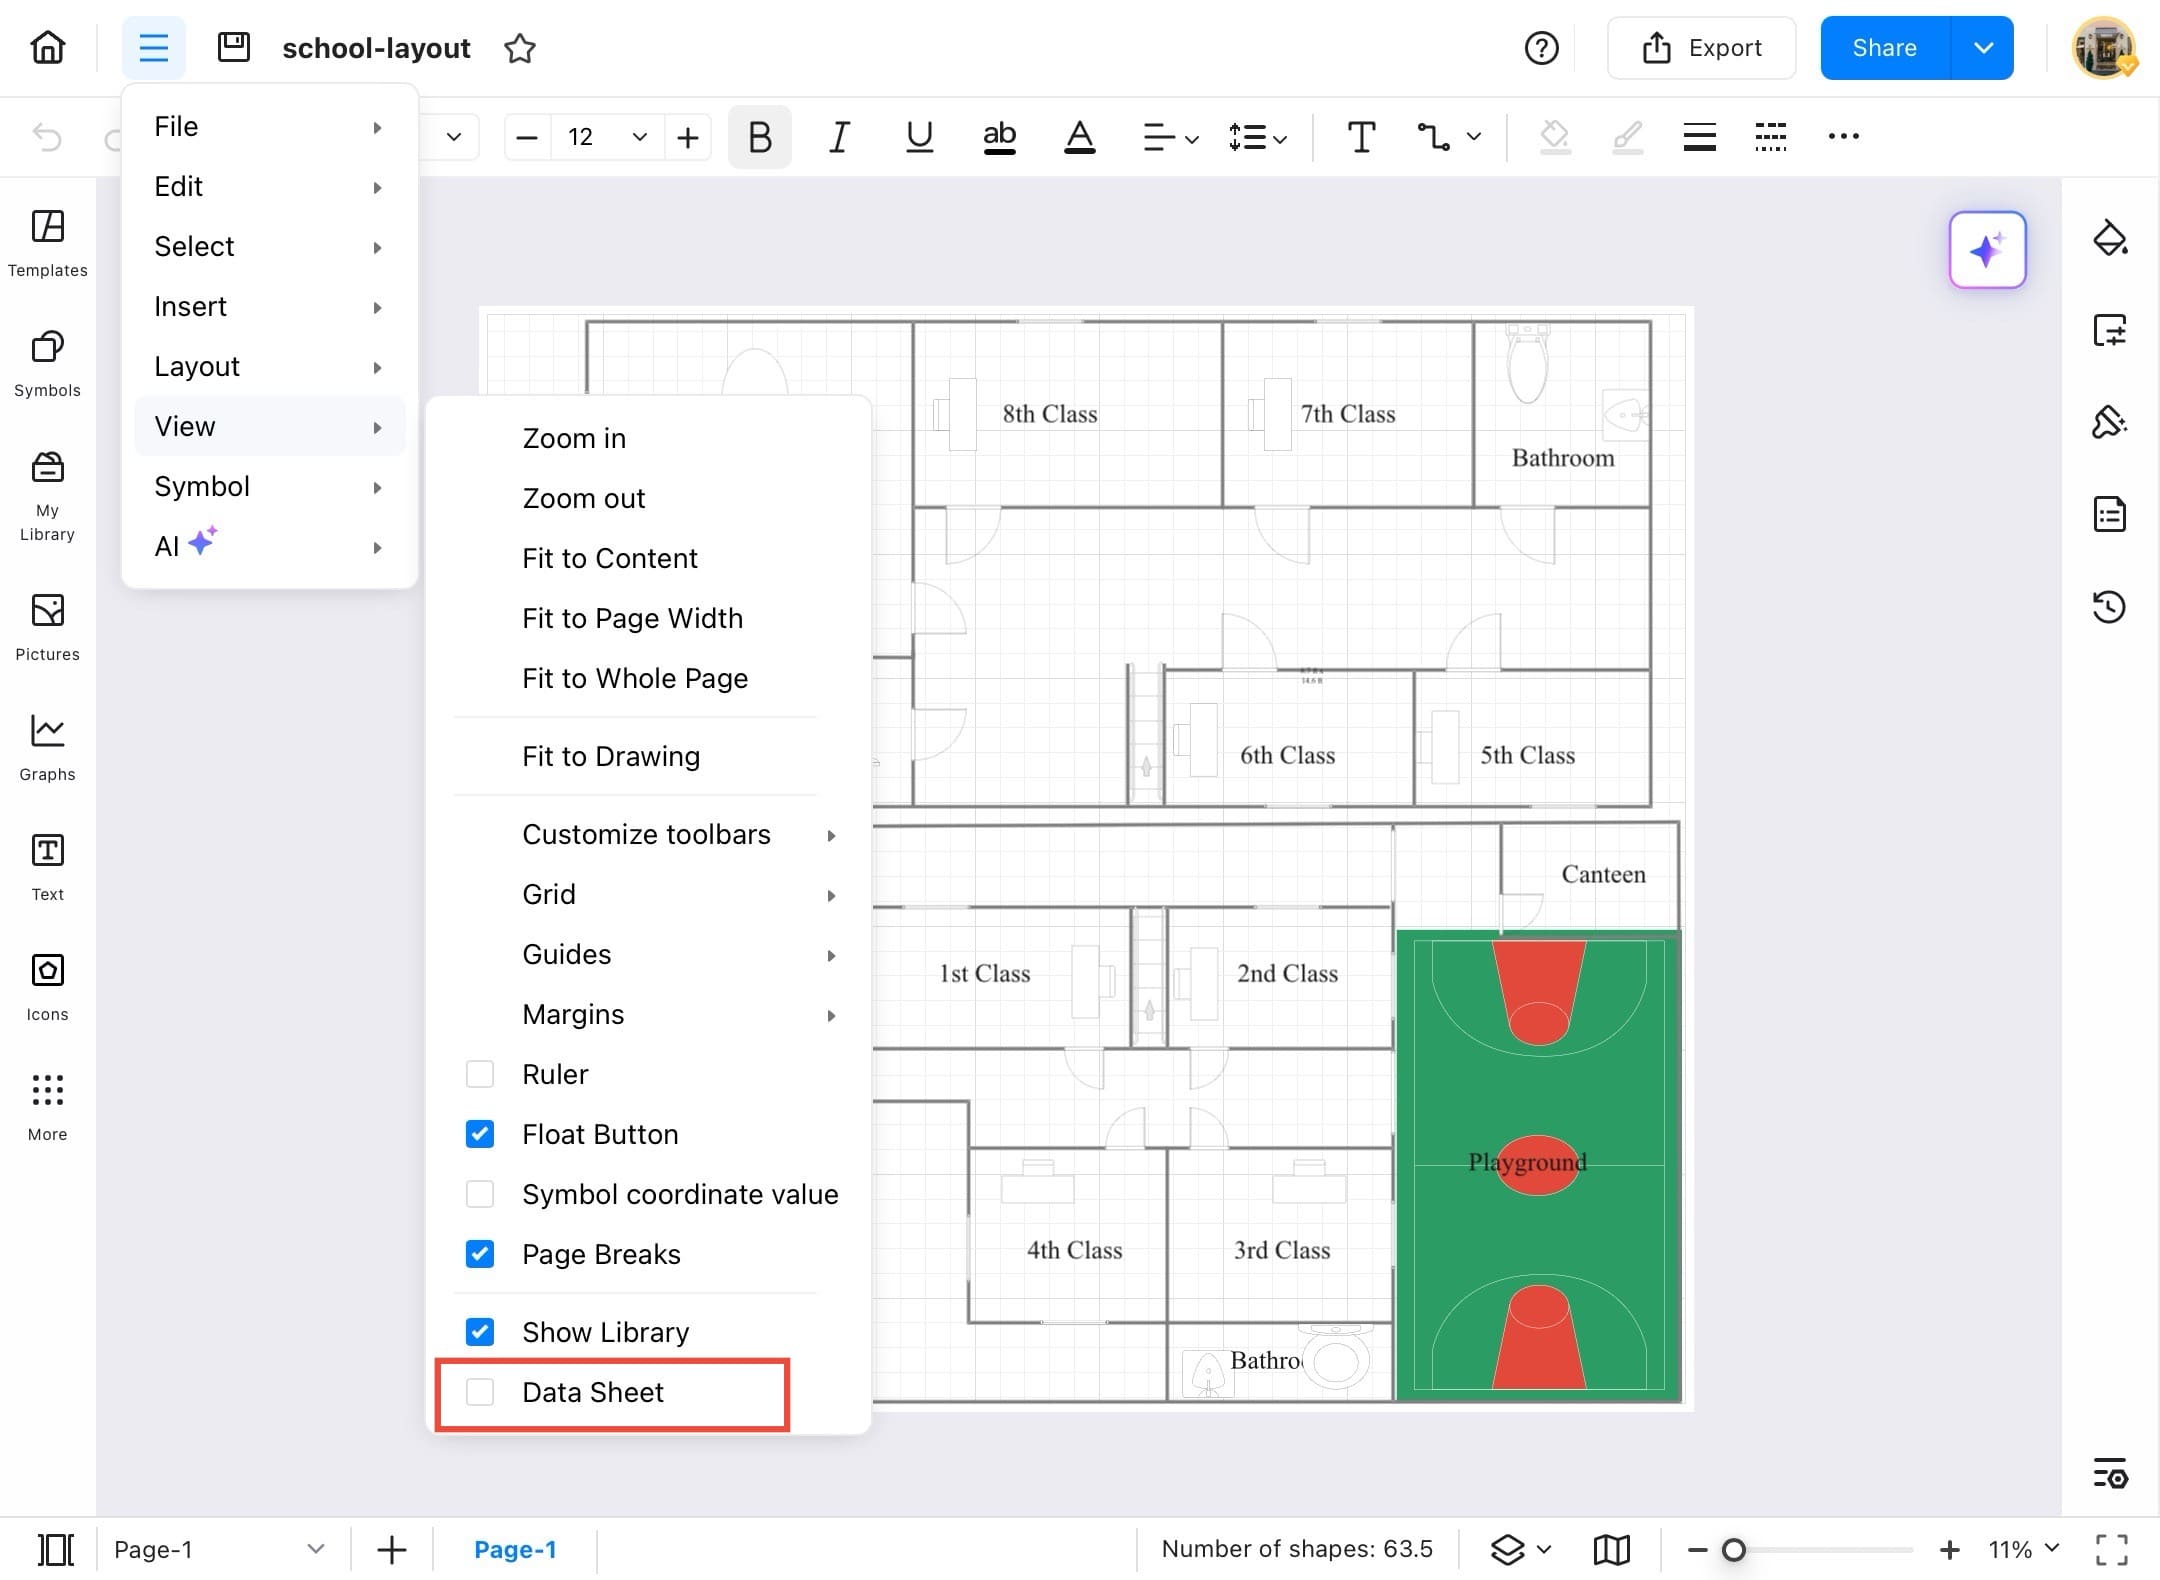
Step ❹ Go to the View menu
- Go to the View menu from the top menu bar.
Step ❺ Select Data Sheet
- From the dropdown, select Data Sheet to open the data editing panel.
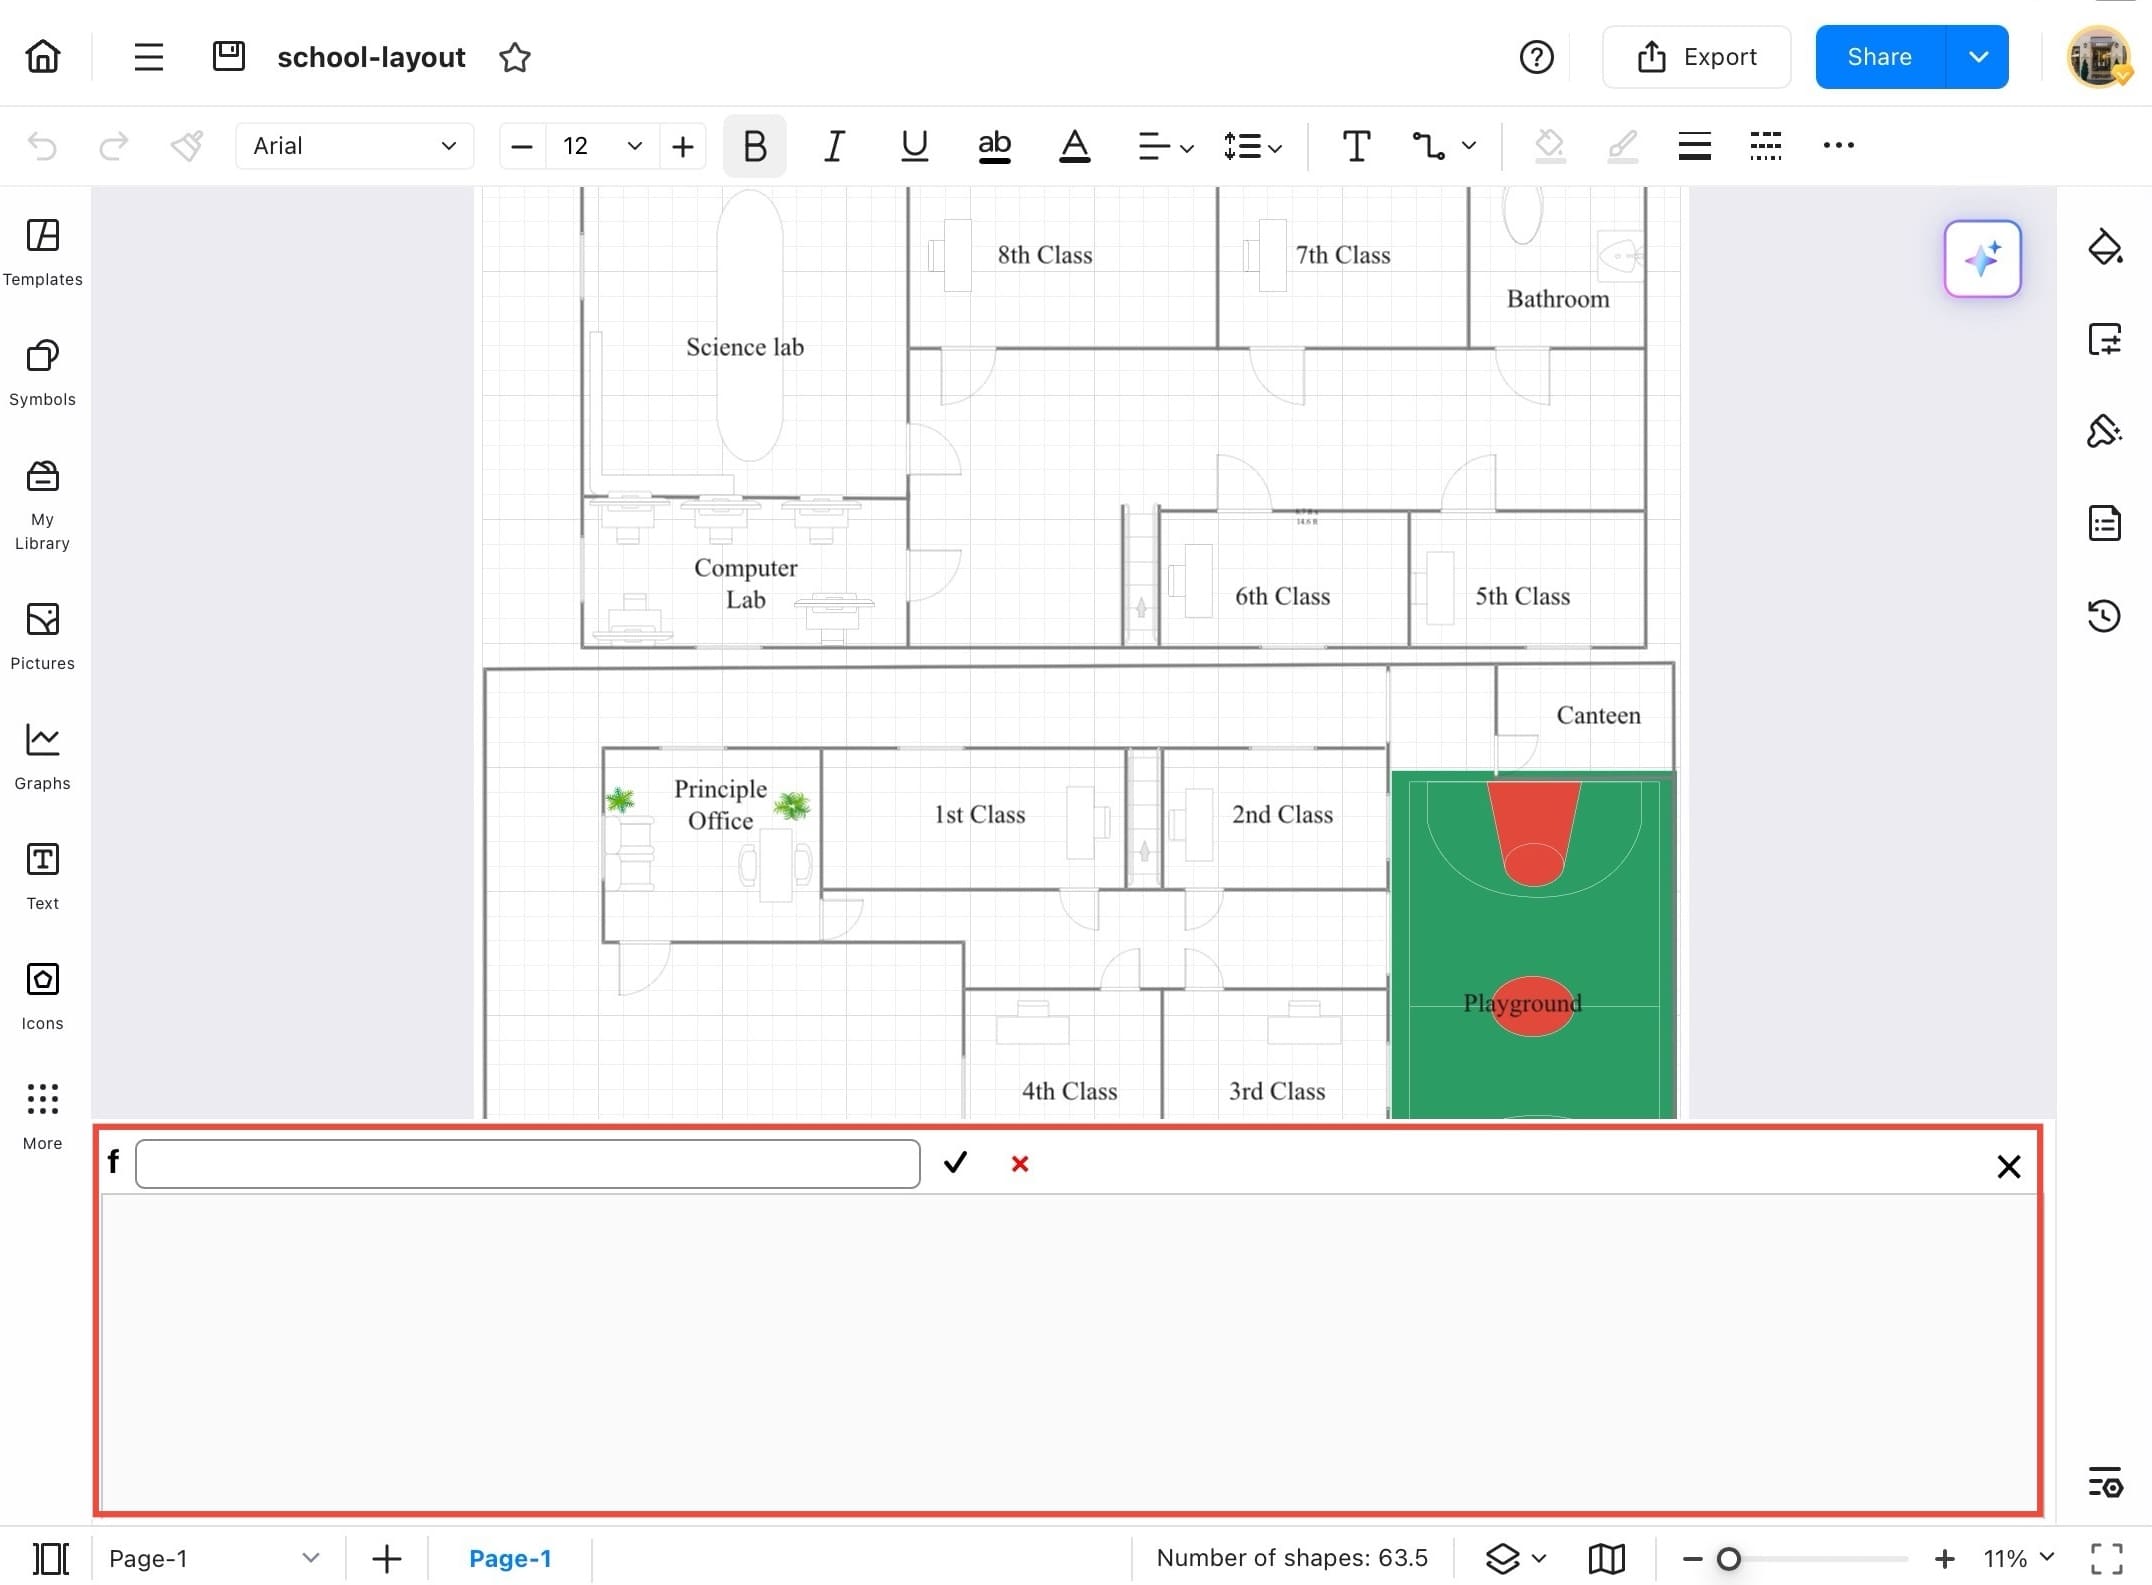
Step ❻ Data Sheet panel appears
- The Data Sheet panel will now appear at the bottom, where you can view and edit values linked to your diagram.
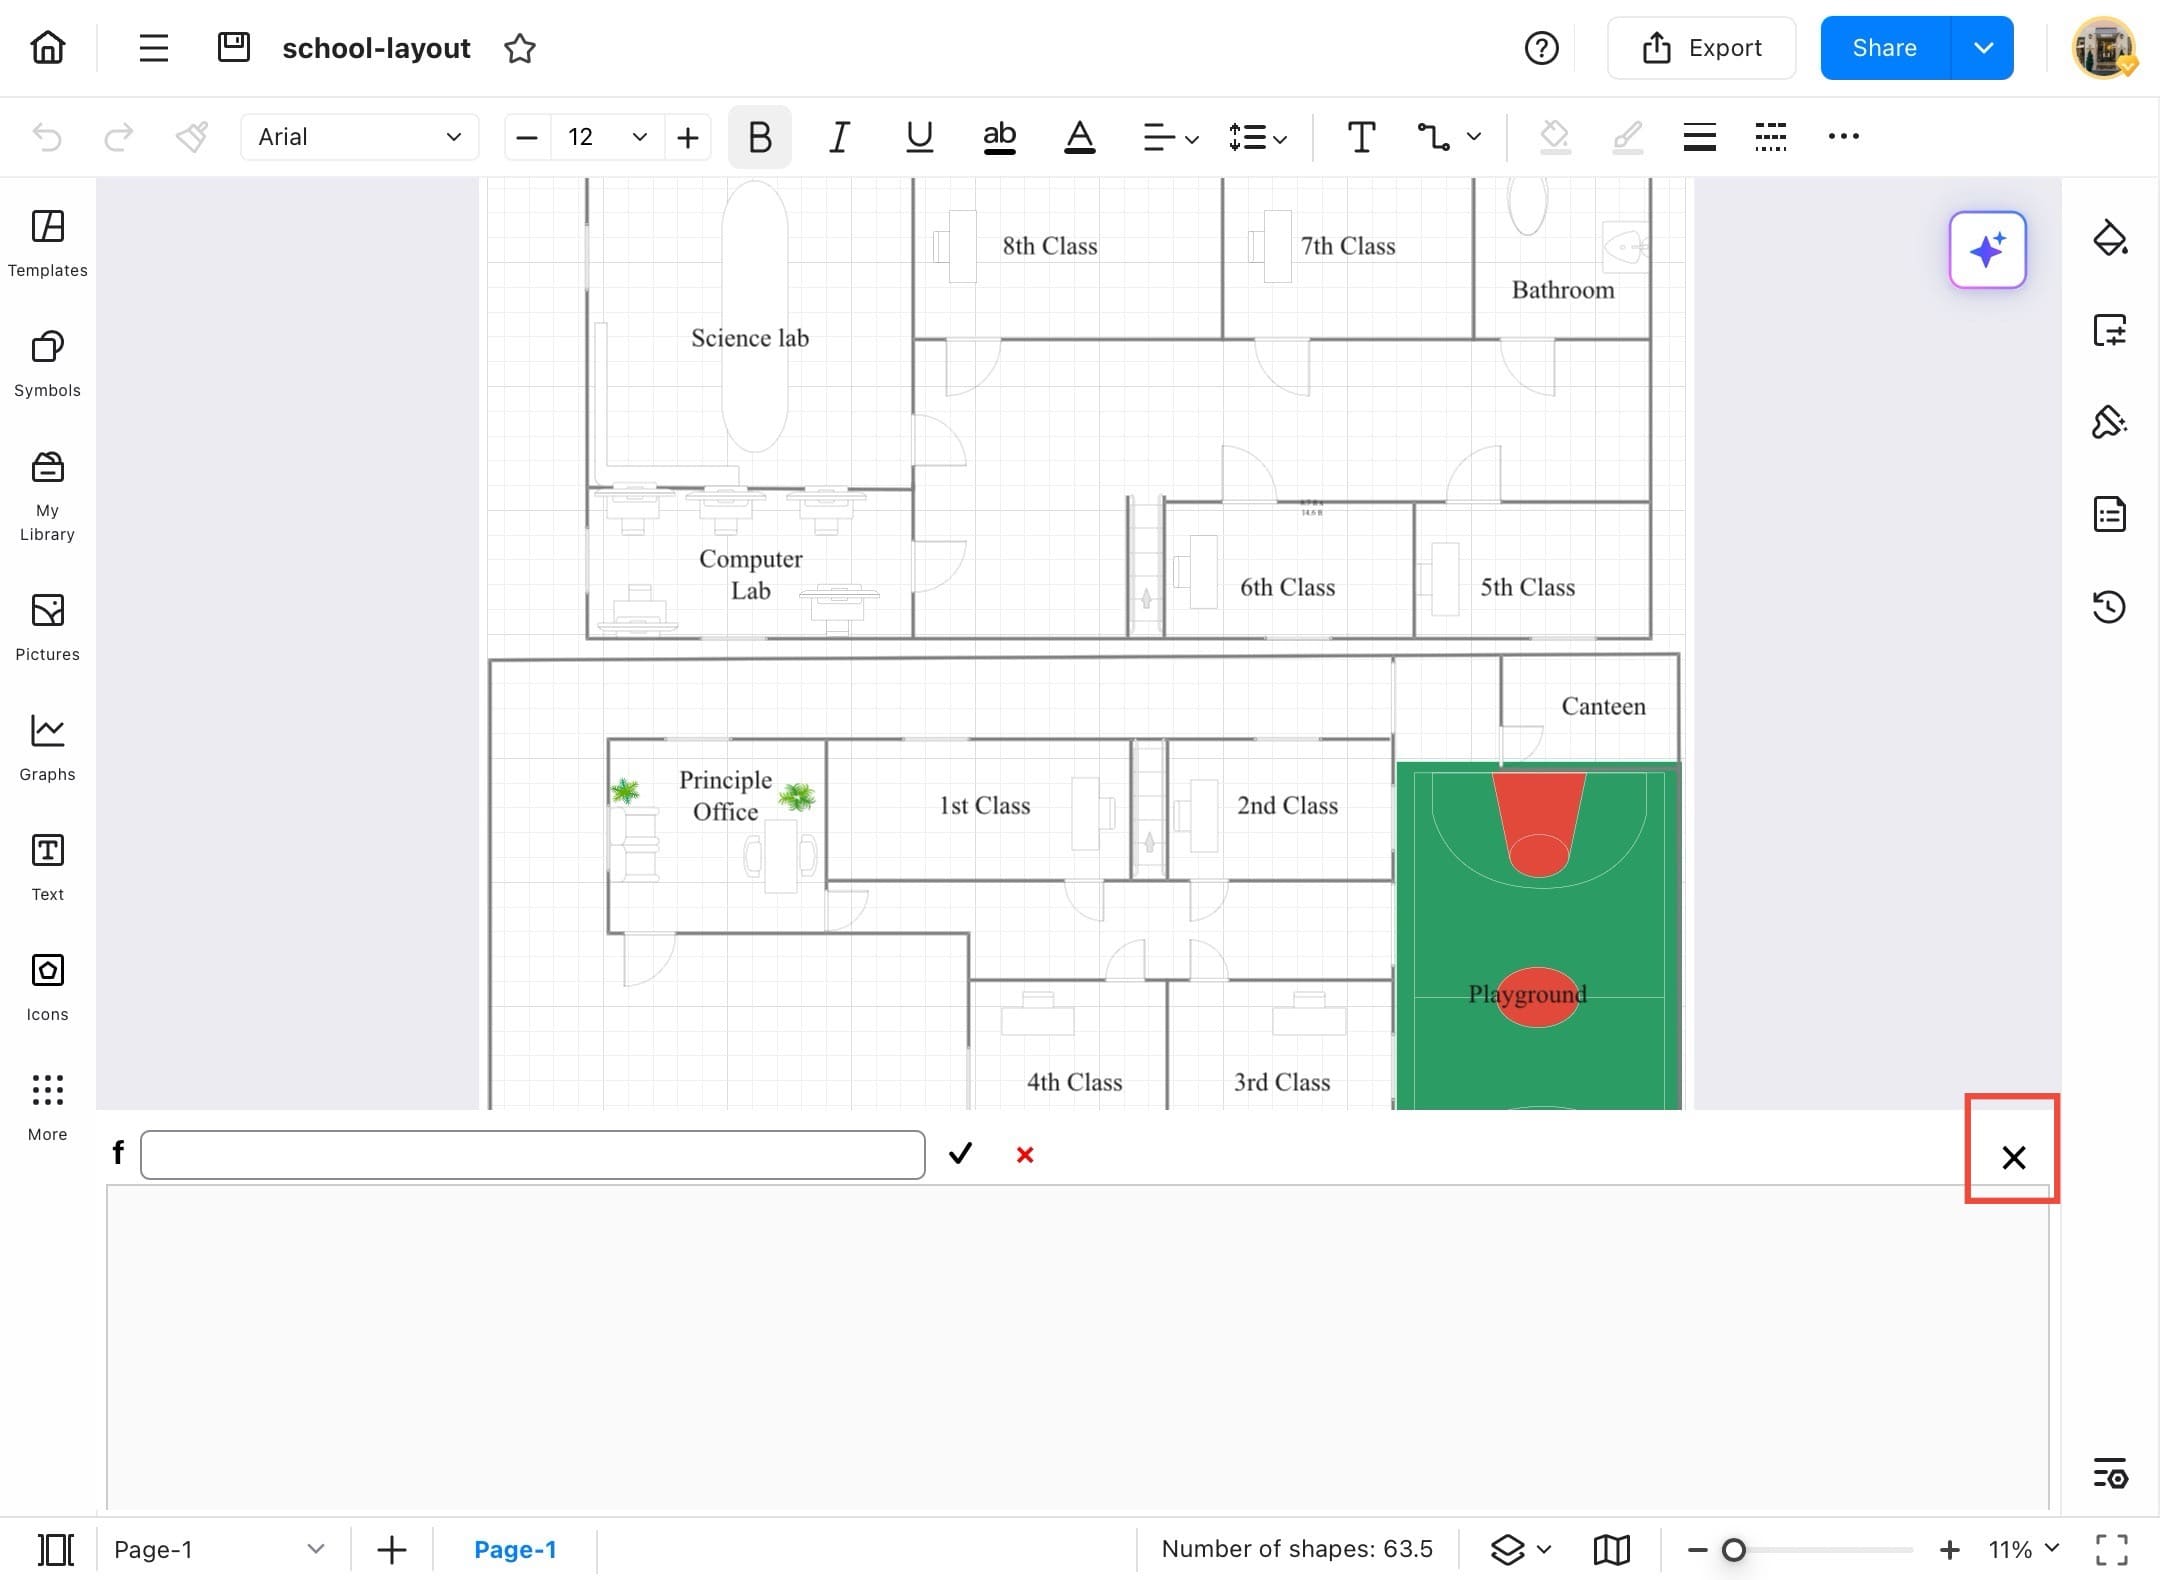
Step ❼ Tap the X button to close
- To close the Data Sheet panel, tap the X button on the top-right corner of the panel.
Step ❽ Data Sheet is closed
- The panel will be closed, and your diagram will return to full view.