


Visio is Microsoft’s diagramming application. While using the SmartArt features in Word, Excel, PowerPoint, or other Office apps may work, those who need more advanced features can rely on Visio.
Professionals and people in various industries rely on this tool to create their visual aids, such as Gantt charts. However, there is one gripe that you or everyone else can relate to: Visio is frustrating to access.
Even visiting the website itself can be confusing, especially for those looking to use it on a Mac, where there is no native Visio app.
In this article
How To Access Microsoft Visio on Mac
Visio doesn’t have a native Mac tool. This brings the question, then, of how to use Visio on Mac. Well, the solution lies in your browsers: might it be Safari or Edge?
However, it doesn’t stop once you’ve learned to look for the Visio website and access the online app.
You’ll find that a Visio Plan 1 subscription is necessary for Mac users, whereas a Visio Plan 2 may incur unnecessary expenses. It’s really a confusing matter.
Thus, in this section, you can see how to access Visio on a Mac. Please ensure your Mac browser is ready as you follow the steps.
The Two Types of Visio Plans
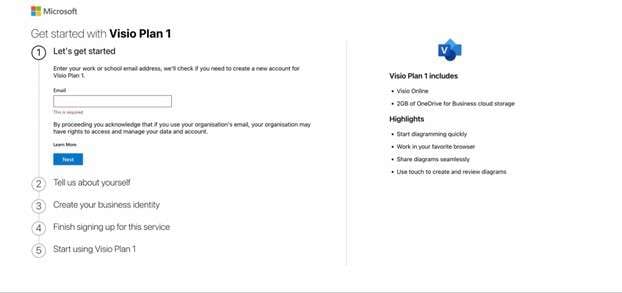
Microsoft offers two different types of Visio subscription plans. You’ll have to choose Visio Plan 1, as Visio Plan 2 is significantly more expensive. However, to give you an overview of the two different plans of Visio:
- Visio Plan 1. This is a web-only subscription that allows you to view and create diagrams directly in your browser. This is potentially what Mac users need, as it eliminates the unnecessary payment for the desktop app.
- Visio Plan 2: Visio Plan 2 likewise has a web version. However, if you only have a Mac, it’s not a good deal, especially since its main features are included in the desktop version.
Regardless of your choice, the key point is that Visio offers nearly identical features in both plans. The only upside of Visio Plan 2 is that it has a regularly updated desktop version.
However, if you plan to use Visio on a Mac, then Visio Plan 1 appears to be the right option.
How To Access Visio on Mac
Here are the steps you should follow to load Visio for the first time on your Mac.
Step1
Navigate to visio.microsoft.com in your preferred web browser.
Step2
Then, click the See plans and pricing button. Complete the purchase properly.
Step3
After that, navigate back to visio.microsoft.com again or go to m365.cloud.com.microsoft/apps and look for Visio from your app list.
What Types of Diagrams Can We Make Using Visio on Mac
Visio on a Mac is a versatile tool for creating diagrams. However, if you’re still on the edge of whether you should buy this tool, here’s a list of common diagrams that people usually make with the tool.
After finding out that the tool offers most of the diagrams you need, you’ll find that it’s worth it as well.
Visio Plan 1 is only US$5 per month, and being able to create almost any type of diagram can be really worth it, especially considering its integrations with other Microsoft apps

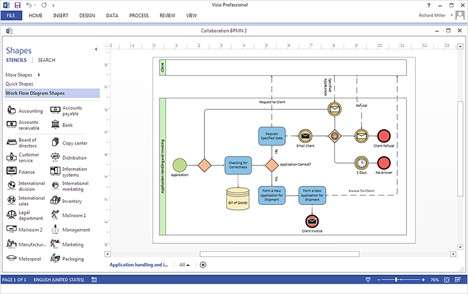
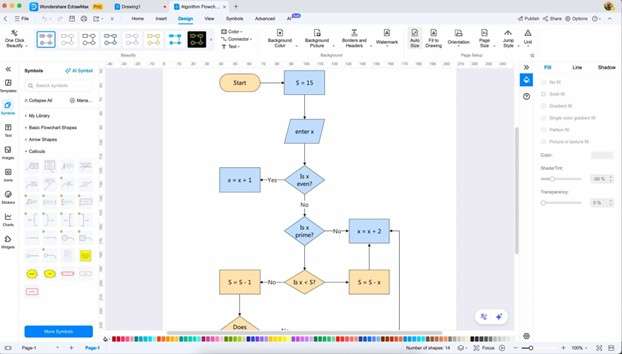
Flowcharts
Flowcharts are among the most common diagrams in Visio, and any other tool for that matter.
Almost any industry can benefit from creating a flowchart. It can serve as guidance for customers, clients, or the HR department as they onboard new hires.
Organizational Charts
This one’s a classic. Every company uses organizational charts to signify hierarchy. This can also be used to showcase to employees who they should report to, and it gives investors confidence because it demonstrates the leadership of a corporation.
Network Diagrams
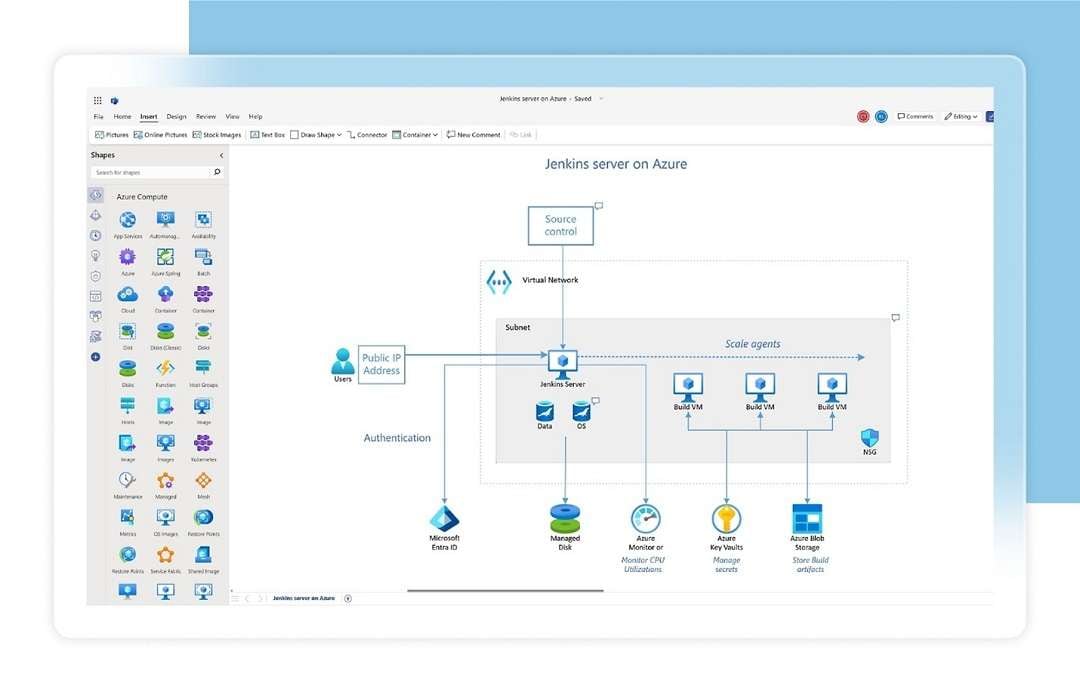
For IT professionals, a network diagram is almost always used—these map out computer networks or server configurations. Visio specifically added shapes for routers, switches, firewalls, and maybe even other network components that you may find extremely useful.
UML Diagrams
Another sweet deal for software developers or IT professionals is that Visio offers ways to create UML diagrams. Visio supports creating class, sequence, and use-case diagrams. This way, they can plan and document software behaviors.
Floor Plans
For the engineers or architects out there, you’ll be glad to know that Visio likewise supports the creation of floor plans. It’s not limited to basic diagrams like flowcharts. It has precise tools that help you create pixel-perfect plans for the next construction project.
How To Use Visio on a Mac To Create a Diagram
Learning about the diagrams in Visio on Mac can make it one thing, but making them yourself is another. By actually immersing yourself in the tool, you’ll also be able to discover other features that might not be covered throughout the article.
To fully appreciate a tool, you’ll really have to explore and use it hands-on. Thus, this part will get you jump-started on the few steps you have to follow to make your first diagram.
Step1
After signing in to visio.microsoft.com, create a New blank drawing.
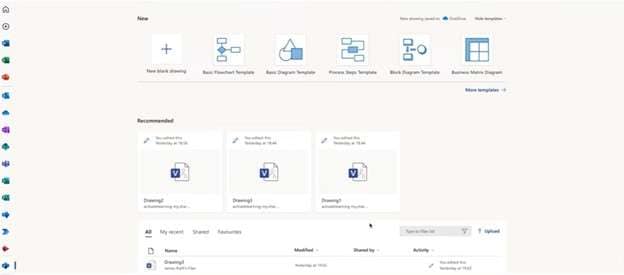
Step2
On the left-hand panel, you’ll see different shapes. What you’ll need to do is drag-and-drop them to the canvas. Repeat until you have the desired structure for your diagram.
Step3
Then, add relationships by connecting the shapes with different lines. You can do this by hovering over a shape until you see connection points, marked by small blue marks and dots. Then, click and drag it to the shape you want to connect.
Step4
Once complete, you can refine your diagram to make it look more professional. Change the colors of the shapes, add supporting text, and more.
Step5
After designing your flowchart or diagram, export it to your desired file type.
Tips When Using Visio for Mac
Using Visio on Mac offers convenience because you won’t have to switch to a Windows PC whenever you need to use the tool.
However, you’ll have to face the fact that using a web tool isn’t as smooth as a native app.
Thus, here are some tips on how you can improve your Mac Visio experience. As your diagram grows, it will be much more trouble to manage hardware.
- Use browsers with hardware acceleration. To boost your performance, use a browser with hardware acceleration like Chrome or Edge. What it does is use your Mac PC’s GPU to increase the overall performance of the Visio web app.
- Enhance with browser extensions. This can affect performance, but using extensions like Grammarly can help you catch typos in your diagrams. Since you’re in the browser, might as well make the experience a lot better.
- Import and export strategically. You’ll find that one of Visio's greatest strengths is its flexibility with file formats. It can even import or convert text files or CAD files into the right diagrams. So, make use of this feature.
- Master keyboard shortcuts. Learning keyboard shortcuts is essential for anyone looking to master a tool. The same goes for Visio. Here’s a quick guide on Visio keyboard shortcuts.
- Integrate with other Microsoft tools. One great thing about using the Microsoft suite is that each app is designed to work with the others. For example, you can embed your Visio diagrams into a Word file.
How to Make a Diagram on Max Easier
Again, Visio on Mac can be great on web browsers. However, the lack of a native app can really mean trouble in case you don’t have internet access.
For example, what if you’re in an airport and you have to create a diagram immediately for work?
There are many problems, aside from the above, that using a tool without a native offline app can give.
Thus, if you're looking for an alternative to Visio on Mac that supports native installation, consider the popular tools available on the market. One example is Wondershare EdrawMax.
What Is Wondershare EdrawMax?
- Extensive Template Library. EdrawMax has thousands of professionally designed templates. Aside from the pre-built ones, you have 30,000+ templates that you can access from the Templates Community. It’s a neat way to get started immediately.
- Support for 210+ Diagram Types. While Visio covers the common diagram types well, EdrawMax goes further with support for over 280 different diagram types. This includes everything from flowcharts and mind maps to business-needed Gantt charts.
- AI-Powered Tools. EdrawMax features several AI tools that can significantly enhance your workflow. For example, it has an AI copywriting tool that can instantly improve a write-up in your diagram. Or a diagram generator that works in one click.
How To Create Your First Diagram in EdrawMax
These AI features aren't gimmicks. They genuinely save time, especially when you're working on complex diagrams or need inspiration.
Step1
From the homepage, go to New > Blank Drawing.

Once you've installed EdrawMax on your Mac, creating a diagram follows a straightforward process. It’s really easy once you try it. You’ll find that it also has a similar interface to Visio on Mac.
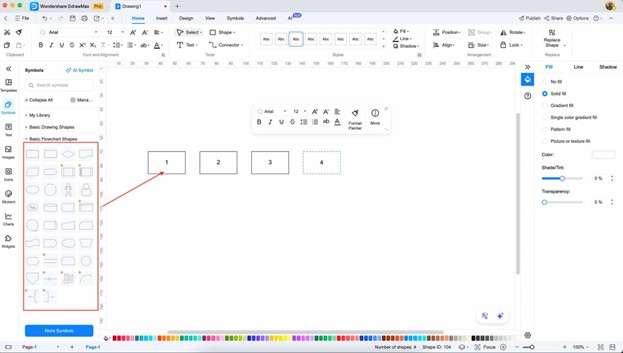
Step2
Then, from the left-hand panel, drag any shape that you like and form the structure of your diagram. Then, double-click the nodes to add text inside them.
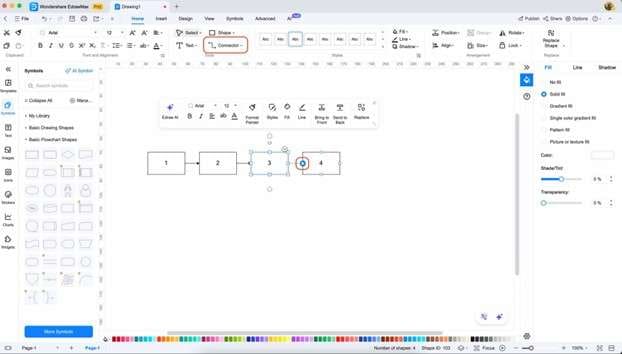
Step3
Add the lines by clicking the small arrow buttons when hovering over a shape, or use the Connector tool on the main ribbon.
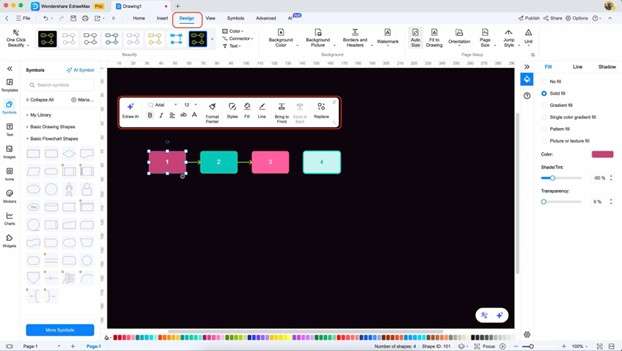
Step4
After finishing the structure, design your diagram. You can use either the floating customization bar when it appears or explore the tools under the Design tab.
Step5
Once done, simply Export your content to your desired file type.
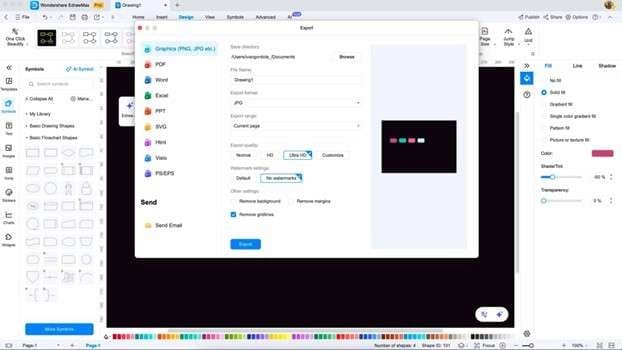
Pro Tip: You can export your diagram as Visio format!
Conclusion
At the end of this article, you’ll have found out about the ups and downs of using Visio on a Mac. As a Microsoft tool, it’s expectedly polished and perfect for any professional work. There’s a reason why Visio remains supported by many.
However, if you’re looking for a powerful, native alternative for Mac, then try out Wondershare EdrawMax. It features AI tools, templates, and numerous customization options that can enhance your diagramming experience, making it more creative and elevated.
AI Diagram Generator
Enter your prompt. Upload files if needed. Generate diagrams, charts, or slides instantly.


