


A timing diagram is a UML interaction diagram representing the change in value of one or more elements over time. It focuses on timing constraints and how the objects interact with each other. The components of a timeline diagram include a lifeline that portrays an individual element, a state timeline representing the state of a classifier, a duration constraint that is a constraint of an interval, etc.
Visio timing diagrams are helpful for engineers as they provide a way to analyze and understand digital signals within a system. To create a timing diagram in Visio, you need to follow a process that includes laying the foundation, adding milestones, adding details to sections, and much more.
In this article
Part 1: How To Create a Timing Diagram in Visio?
Creating a timing diagram in Visio helps you to plan project schedules. It represents project phases and deadlines easily and understandably. Here is a step-by-step process to make a timing diagram in Visio:
Step 1:
First, sign in to MS Office and install or select the Visio app. To choose a template, go to file → new, enter timeline in the search box, select the timeline template, and select create.
Step 2:
The next step is to select a timeline shape that will act as the foundation of the diagram. You can insert milestones and events into it. You can choose cylindrical, line, or block styles. Add the project's start and end dates from the "period tab." Choose a time scale unit under the "scale" option.
Step 3:
Drag and drop the milestone shape on top of the timeline. In the configure dialog box, select the date and time and type a milestone description in the description box. You can also choose how you want the dates to look from the date format list.
Step 4:
To move the text in the timeline, click the yellow control handle to select the interval and drag it to move the text. A bracket will mark the beginning and end of the interval. To change the type of bracket, right-click on the bracket and select the set interval type.
Step 5:
Drag the expanded timeline shape from the timeline shapes section to show details for a section. On the period and time format tabs, specify your options for the expanded timeline and click OK. The expanded timeline displays shared milestones and intervals and a gray dashed line to combine two timelines.
Step 6:
If multiple elements are on the page, you can synchronize specific intervals across the timelines. To do this, drag a synchronized interval onto the timeline. In the synchronized dialog box, open the drop-down list and select the interval you want to sync. Select a date format and click ok.
Step 7:
In response to changes, you can revise and refine project dates, the number of divisions, visibility, etc., in your Visio timeline. After saving your file as a graphic file, PNG, or SVG file, export it.
While Visio has excellent built-in capabilities, there are some challenges one might experience while creating a timing diagram in Visio, such as:
- It can limit what a user can do within the tool and restrict collaboration.
- Spacing and borders can sometimes create issues and cause limitations regarding visual options.
- For systems engineering, Visio has a potential area of improvement in teamwork and collaboration capabilities.
- It could provide more automation to display and give a real-time data update.
- Visio could provide users with more features in 3D. However, connecting objects can also be tricky due to connector issues.
Part 2: EdrawMax: Best Alternative to Visio for Creating a Timing Diagram
Wondershare EdrawMax is an online diagram-making tool that helps you plan, visualize, and collaborate better. It covers all visual needs, from flow charts to circuit diagrams, and offers more than 210 diagram types.
The diagrams in EdrawMax enhance your data into information-oriented visual tools for a smooth process. A superior alternative solution to Visio, EdrawMax also has an online template community with over 20,000 generated templates and enterprise-scale security to safeguard your data with the highest level of SSL encryption.
Features of EdrawMax
- EdrawAI: The EdrawAI feature enables you to create diagrams in a single click. Integrating your creativity with AI-driven innovation allows you to analyze gantt charts, generate compelling visuals and content, create flow charts, and more.
- Symbol Libraries: The intelligent symbol library is a pre-built library in EdrawMax that assists in creating diagrams and customization by importing your symbols.
- Multi-Format Compatibility: Once you finish creating your diagram, you can export your file in multiple formats, including Office, PDF, Visio, HTML, JPG, Excel, GIF, TIFF, JPG, and more.
- Smart Shapes: The smart shape feature is accessible from the essential toolbox in EdrawMax. With a single click, you can automatically transform any shape into a smart shape and set the layout, style, and numbers.
- Rich Templates: Various templates are available for every type of diagram, such as flow charts, UML sequence diagrams, electrical diagrams, organizational charts, and floor plans.
Ratings
EdrawMax has consistent users, and due to its simple and user-friendly interface, it has received many positive ratings from users.
- G2: 4.3 out of 5.0 (based on 61 reviews)
- Capterra: 4.6 out of 5.0 (based on 203 reviews)
- GetApp: 4.6 out of 5.0 (based on 203 reviews)
Step-by-Step Guide to Make UML Timing Diagram
A UML timing diagram shows objects' behavior and interactions over time using graphs and waveforms. With the help of EdrawMax's intuitive platform, you can create your timeline diagram following this step-by-step guide:
Step 1:
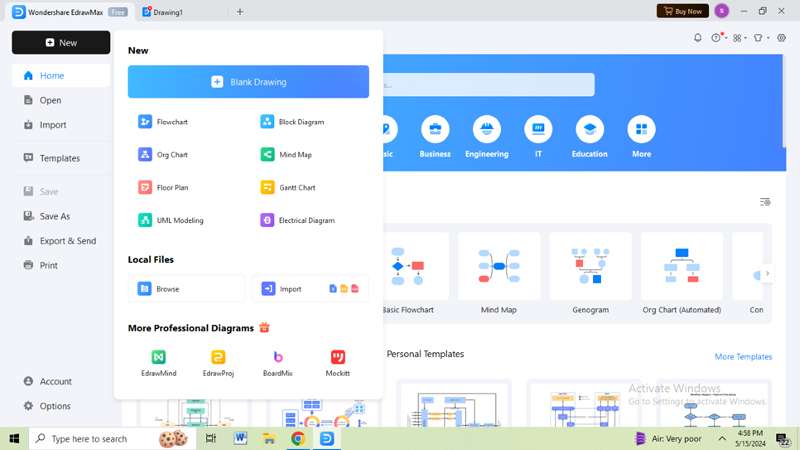
The first step is to install the EdrawMax desktop version on your system. EdrawMax is accessible on Windows, Mac, Linux, and the Web. You can also create new files using the online version of EdrawMax.
Step 2:
On the left sidebar, click "templates" to choose a pre-built template. To start from scratch, click the "new" option to find various diagrams. From that, select "UML modeling." You can also manually enter UML modeling in the search bar, and it will redirect to a blank page.
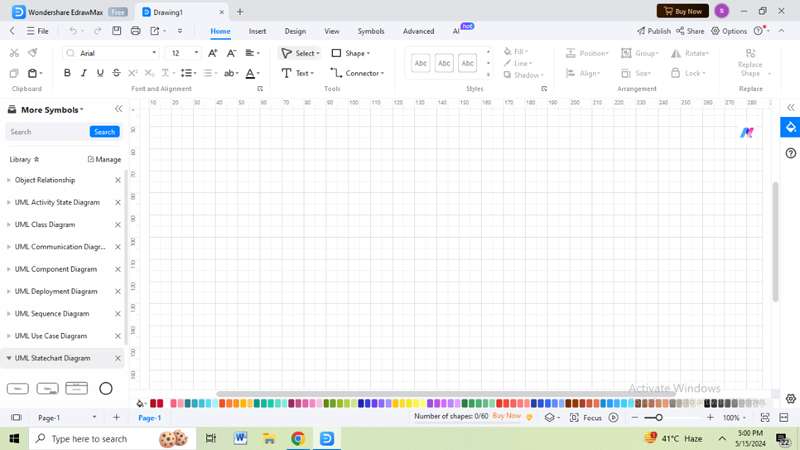
Step 3:
Once redirected to a new document, you will find a symbol library on the left panel. You can choose symbols relevant to the timing diagram from the various UML diagrams, such as the UML activity state diagram, class diagram, or communication diagram. Select the symbols and drag them onto the document to start creating.
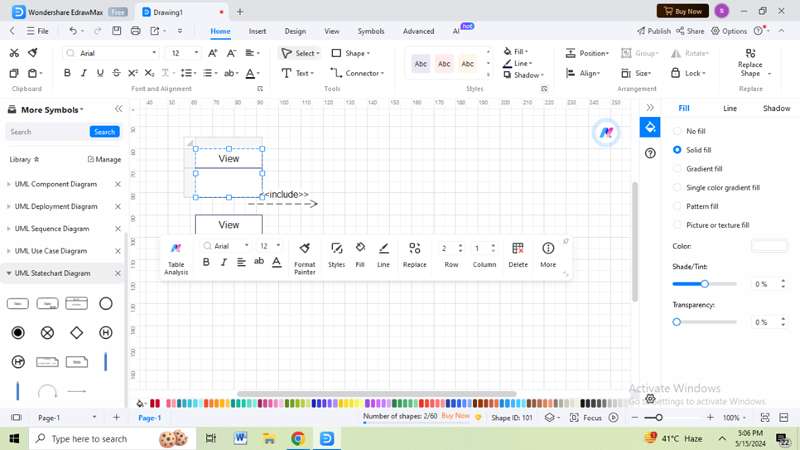
Step 4:
Once you have created your timing diagram, customize each element according to your needs. You can customize shapes, lines, and colors from the right panel. If you click on a component, a floating toolbar will appear, which can help you change text size, font, or style. You can also change the design of an element from the top navigation panel.

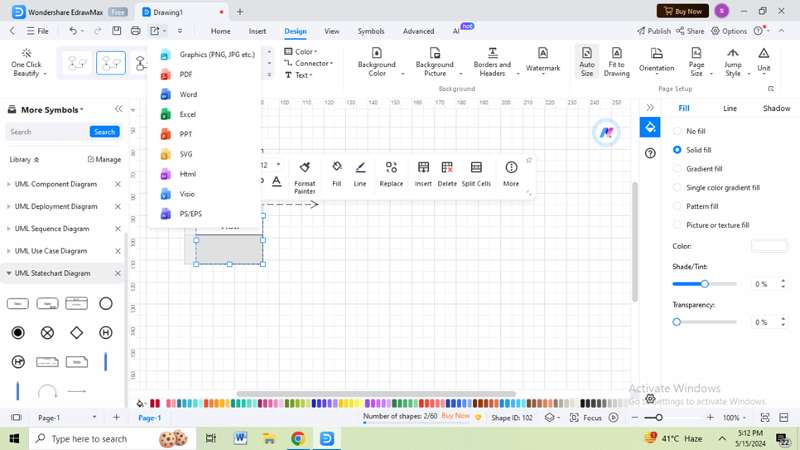
Step 5:
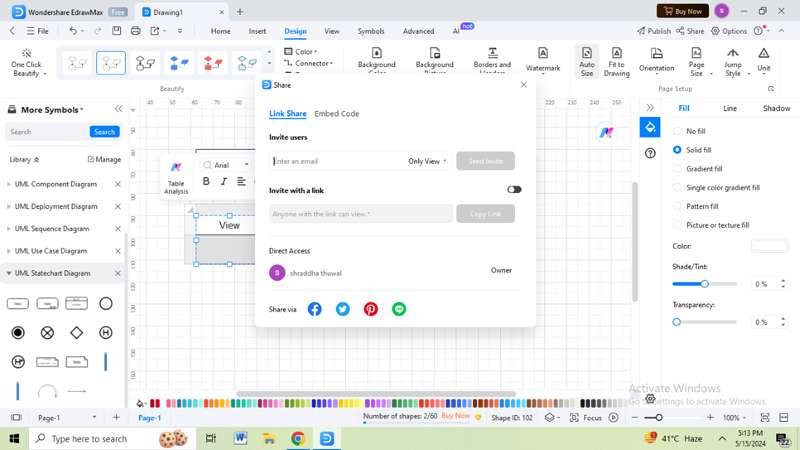
After saving your file, export it to your preferred formats, such as graphics, PDF, Word, Excel, and more. A share option in the top right column allows users to invite others to view or edit the file.
Timing diagrams may look simple to understand but are challenging to draw. However, EdrawMax's intuitive and user-friendly interface makes the process easy, even for beginners.
Part 3: Timing Diagrams In EdrawMax
A timing diagram is a unique sequence diagram representing interactions over a while. System engineers and project managers use timing diagrams to track every change that occurs in the system. Users can know which step in a process takes how long and streamline the process as a whole.
Various online tools help create timing diagrams. Learning how to create a timing diagram in EdrawMax is beneficial as it offers an intuitive platform with various templates and symbols. The versatility of EdrawMax allows you to customize your diagram as per your needs.
EdrawMax supports various diagram types and enhances collaborative efforts among teams. With its multi-format compatibility and cloud-based options, teams can work from different locations.
