


Maps help visualize streets, roads, and landmarks to guide users from one place to another. They show routes, landmarks, and key points of interest. You can use them for travel plans, business deliveries, property layouts, or event guides.
With custom maps, you decide what to display and how it appears. This article explains how to create maps in just a few steps. You will learn how to add streets, mark key points, and customize your map to fit your needs. Following these steps, you can make map designs that are useful for any purpose.
 below.
  below.
 How To Create a Custom Map
To make a custom map for free, we need Wondershare EdrawMax. This is a professional location map maker, and it offers road map templates for you to edit. You can customize with lines, symbols, graphics, color, and more. You can also add your logos, pins, and map assets. The infinite canvas allows you to create map layouts of any size you need. Use these maps in documents, presentations, websites, or creative projects. You don’t need advanced design skills to create maps that match your needs.
Here’s how to easily create a map with EdrawMax:
Step 1Choose a Map Template
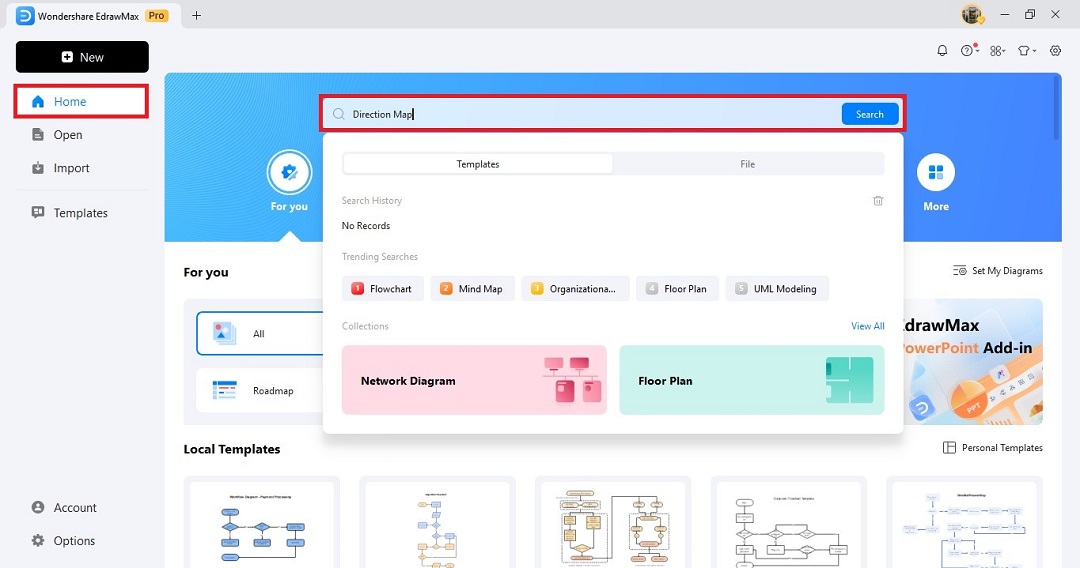
Start by downloading the EdrawMax map maker on your desktop or directly embark on your exploration journey in EdrawMax Web in your web browser, then, sign in to your EdrawMax account to access the templates.
Once you're in, enter "Direction map" in the search bar to find suitable street or directional map templates.
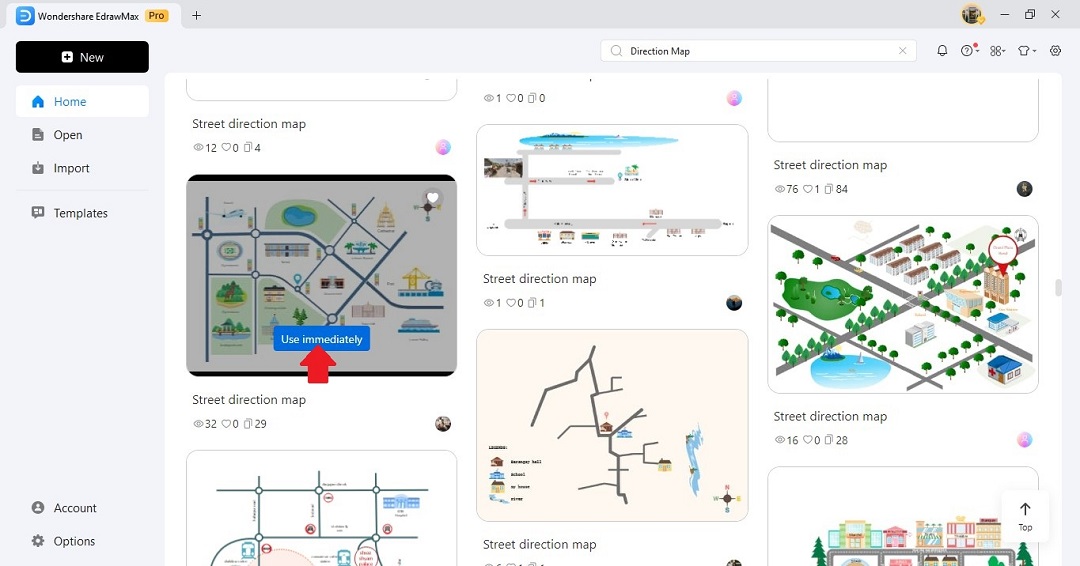
Click Use Immediately to open the chosen map on the editing canvas. This step sets the foundation for your custom map, so select one that closely fits your intended location and map style.
Step 2Insert Roads and Key Locations
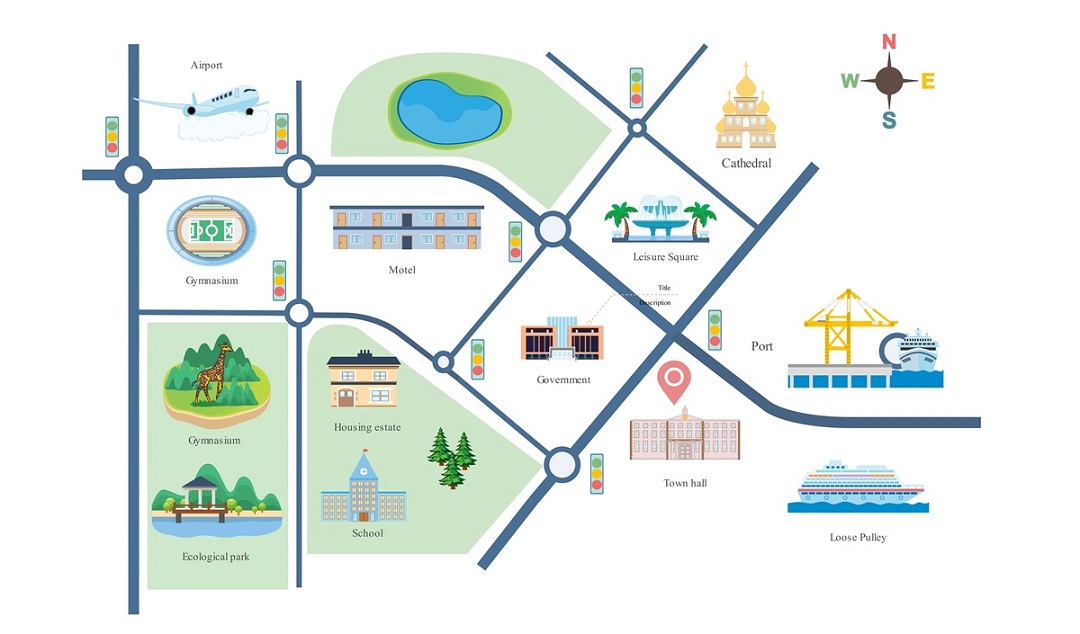
Once the map template is open, start building your map by adding roads and other elements. You can drag and drop lines anywhere on the canvas or resize and reposition them to match the real-world layout.
To add more road segments, open the Symbols panel on the left side. Look for the 2D Directional Maps dropdown menu, then drag the desired line style onto the canvas. Place them to form streets, avenues, and highways.
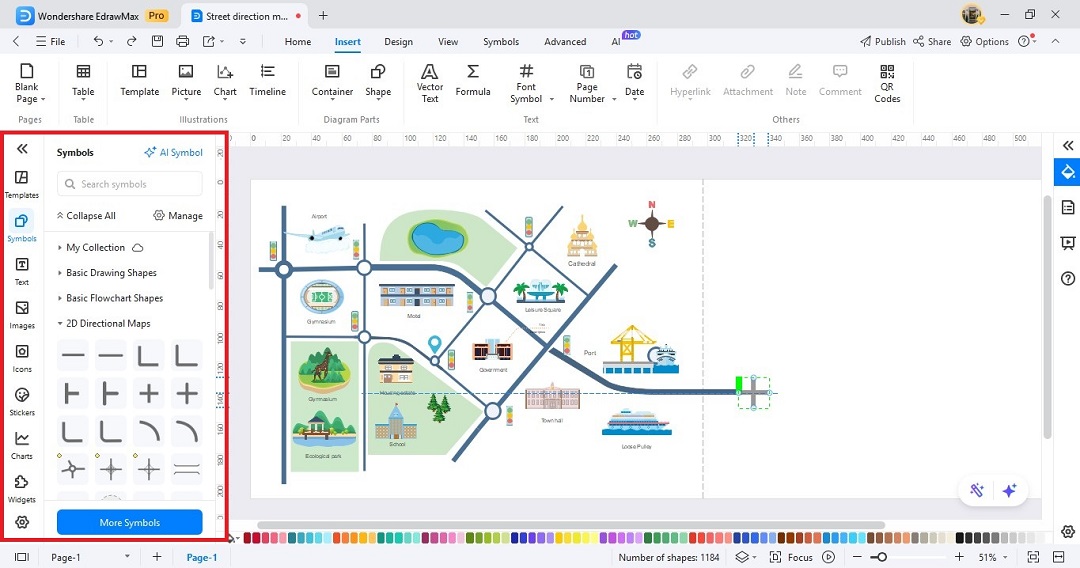
Adding landmarks and buildings is simple, too. Go to the Stickers section on the left panel and choose graphics such as buildings, parks, or other icons relevant to your map’s location.
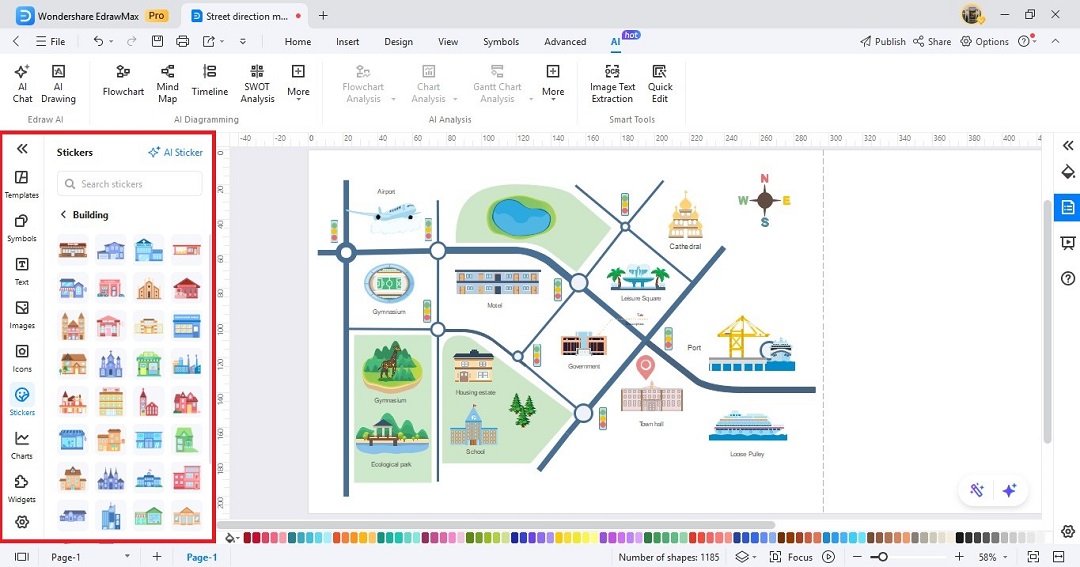
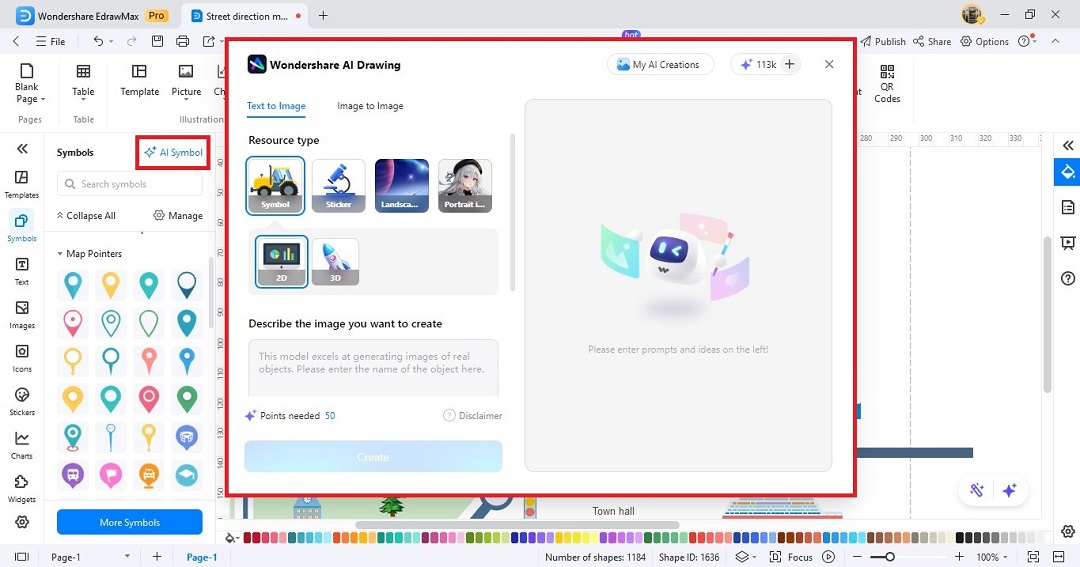
Note: If you cannot find the graphics you need, the AI Symbol or AI Sticker generator can help you make map elements automatically.
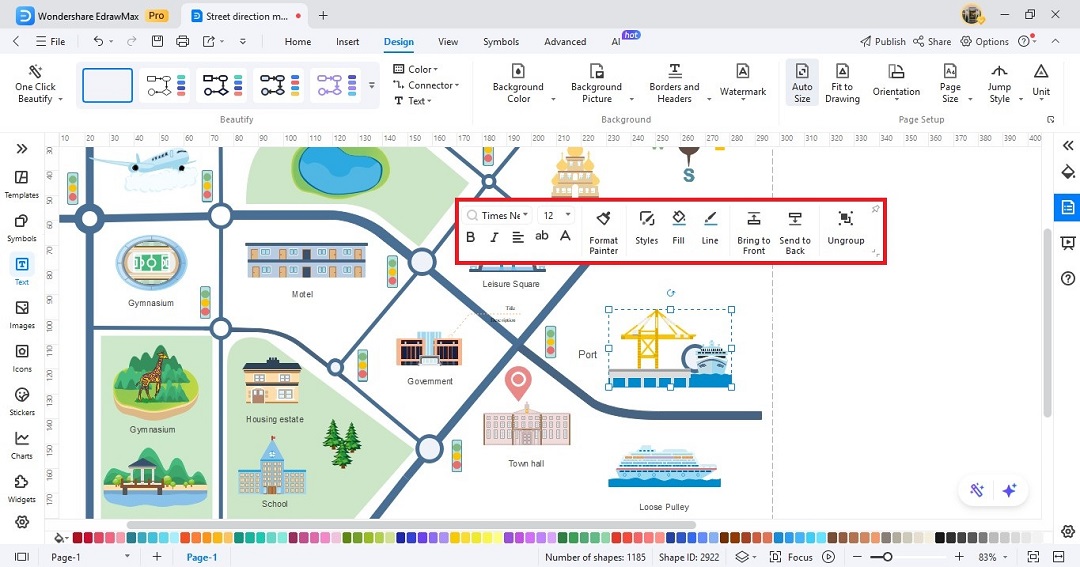
Color coding can separate neighborhoods, zones, or service regions. Select an element or group of shapes, then use the floating toolbar to pick a color fill.
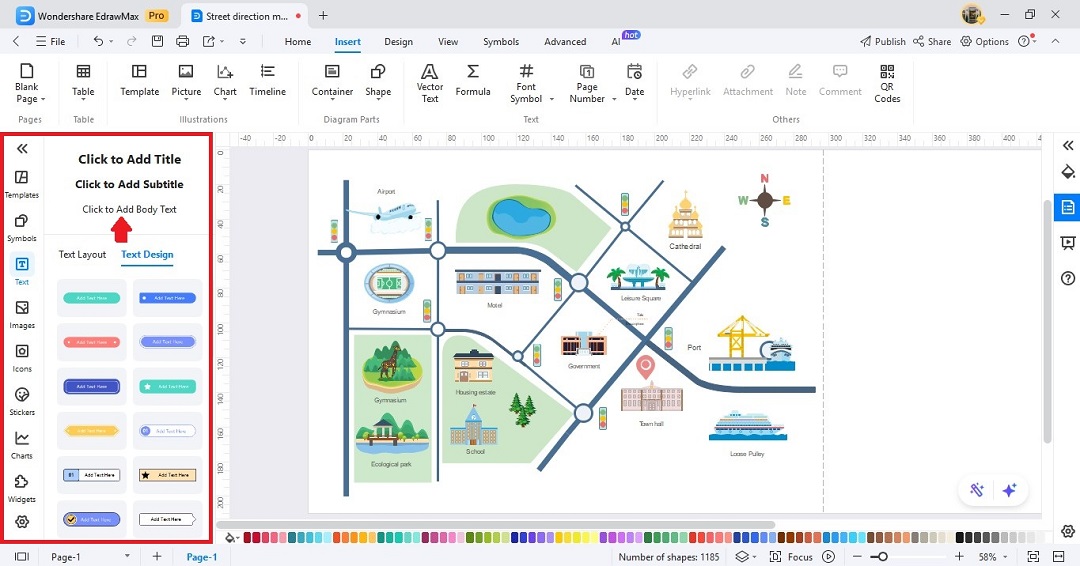
Step 3Label the Map
Labels add important context to your map.
Go to the Text panel on the left and click the option to add body text. Place labels, captions, or descriptions to highlight streets, landmarks, or other key locations.
You can find more free templates by downloading EdrawMax on your PC or go to EdrawMax Web in your web browser.
Also, adding a compass helps users understand the map’s orientation. You can find it in the Symbols panel by searching for “compass.” Drag and drop it onto your map to mark north.
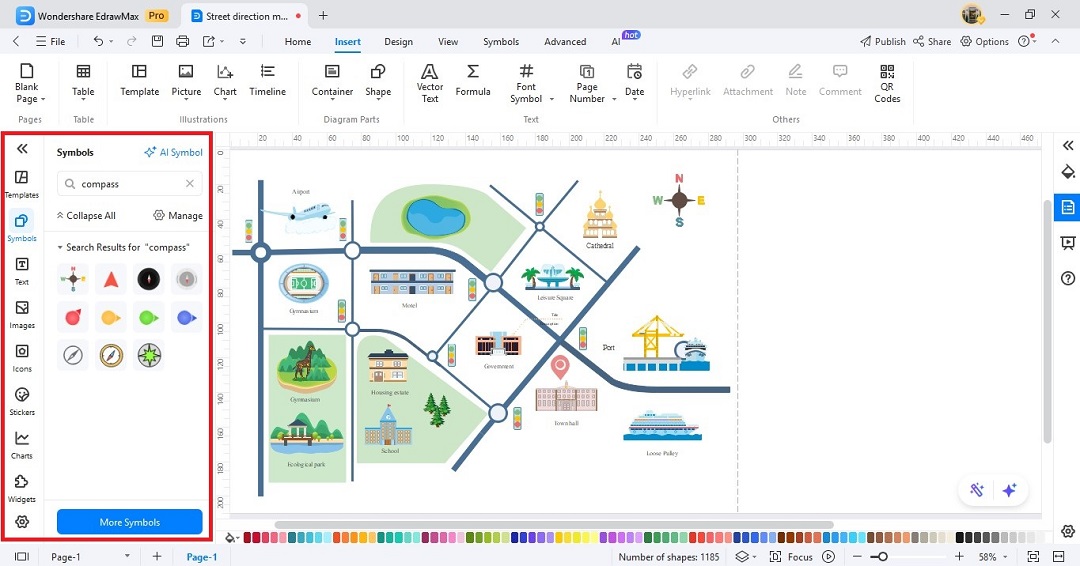
Step 4Include Map Pointer
Next, mark important locations. Go to the Symbols panel on the left, then choose one from the Map Pointers dropdown menu.
Drag a pin, icon, or graphic onto the canvas. Position each marker at the right spot on your map.
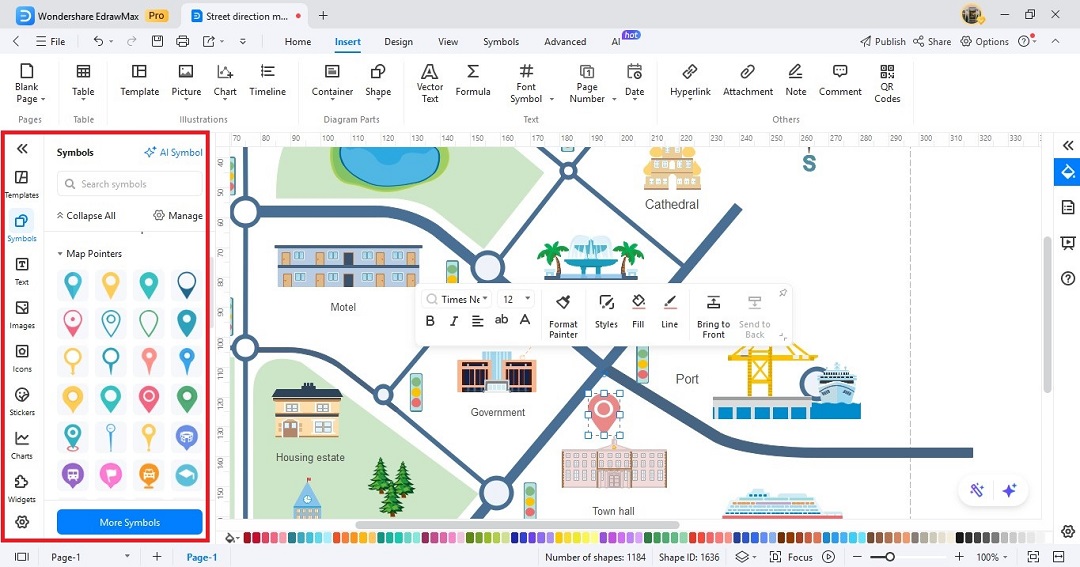
You can create a legend box explaining these symbols so users can quickly identify locations or routes on your custom map.
Step 5Download, Share, and Print Your Map
After completing your design, save your map in various formats like PDF, PNG, or Word. Go to File > Export or Share. You can print your map or embed it in documents and websites. This step lets you make map designs available to anyone who needs clear street directions.
Conclusion
Creating custom maps has never been easier with EdrawMax's intuitive tools. Simply pick a template, then drag and drop roads, landmarks, and buildings onto your canvas. No design experience needed, the platform handles the complexity while you focus on customization. Add labels, colors, and map pointers to highlight important locations.
When finished, export in multiple formats for printing or digital sharing. The streamlined process transforms map creation from a tedious task into a quick, enjoyable experience that delivers professional results every time.
AI Diagram Generator
Enter your prompt. Upload files if needed. Generate diagrams, charts, or slides instantly.


