A timeline is a diagram that displays events or milestones in chronological order along a single column. It works as a powerful visual tool for displaying the order of historical or chronological events in an acceptable and structured way.
Timelines are useful tools for presenting the sequence of events and highlighting current events, whether you're a history enthusiast, project manager, teacher, or event planner. However, it can be tricky to create a complicated timeline at times. That's why this article will teach you how to create a timeline that can captivate your audience.
In this article
Part 1. How to Pick a Timeline Maker
To make a timeline, we need a timeline tool like Wondershare EdrawMax.
EdrawMax is a versatile diagram maker that supports the creation of over 210 types of diagrams. It is known for its intuitive UI and rich resources including templates and symbols.
Users may easily generate a variety of visual components, including timelines, using the flexible and user-friendly timeline infographic maker of EdrawMax. It provides the freedom to work on timelines from any device with an internet connection
From students and teachers to business executives and designers, EdrawMax offers a broad platform for user groups. EdrawMax software has an outstanding user rating of 4.5 out of 5. It is the best option for anybody looking for a flexible and user-friendly diagramming solution. EdrawMax Online includes all the tools you need to create flowcharts, mind maps, organizational charts, and timelines.
Part 2. How to Make a Timeline
You can create a timeline with Edrawmax. Follow the steps below and make a timeline in 5 easy steps.
Step 1: Sign in to EdrawMax Online
Try EdrawMax online for free. Alternatively, you can also download it. Log in with an account of Wondershare, Google, Facebook, or Twitter.
Step 2: Create a New Timeline Document
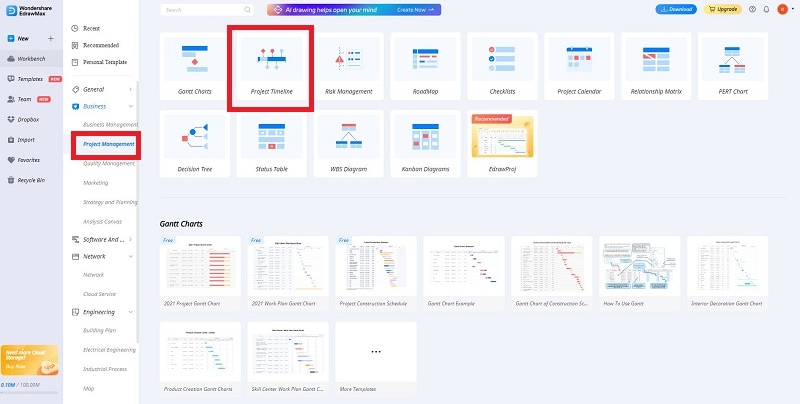
Click on business, and then a dropdown occurs. Choose project management from the options. Move your cursor to the project timeline and click on it to create a new file.

Step 3: Add Timeline Icons and Symbols
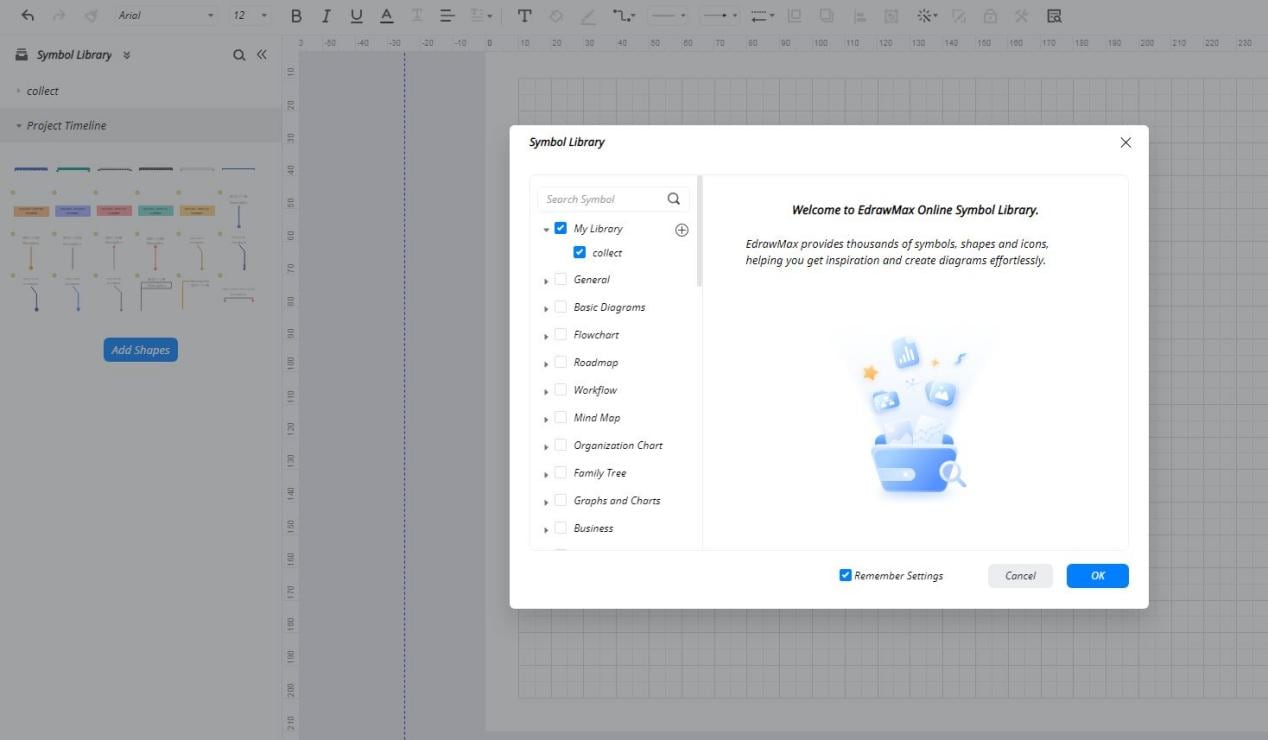
Choose the "Symbol Library" icon on the left sidebar. With this, a box displaying different symbol classifications will appear. These might have symbols for milestones, deadlines, milestone dates, events, and more. Browse the collection, then when you find an icon you like, drag it to add it to your canvas.

Step 4: Add and Customize the Timeline Bar
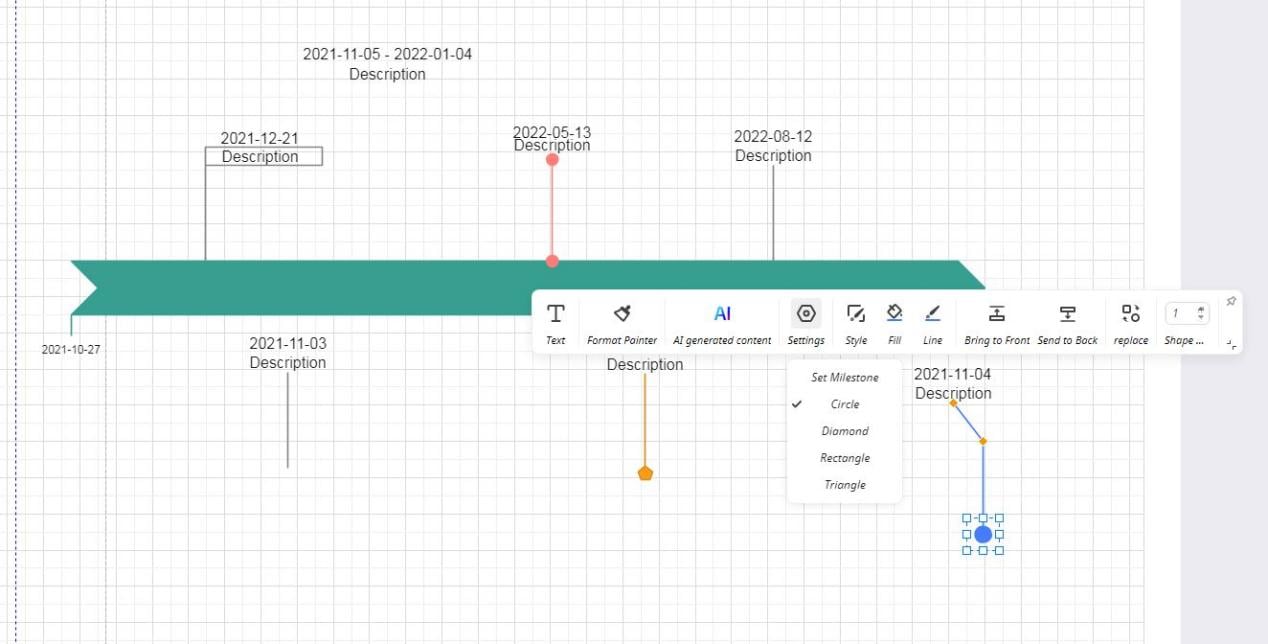
Drag the project timeline to the main page to customize it. Click on the timeline, and after that, click on settings. Choose the set time bar option and adjust the date according to your requirements. You can adjust the starting and ending date of the project. You can also customize your timeline by changing its color or style.

Step 5: Add and Customize the Milestones
Place the milestones from the timeline library on your project canvas. You can add the description on each placeholder and also change the shape, color, and line of the timeline. Click on settings and change the shape of the node. You can add as many milestones as you want.
You can also insert a watermark and other features from the toolbar. Click on the style button from the right corner and transparency, size, angle, and other options.

Part 3. Free Timeline Templates
Apart from making a new timeline out of nothing, using a timeline template directly is fast and easy.
Below are three common and free timeline templates provided by EdrawMax Library. Check them out and download as you like.
History Timeline
Timelines are used by historians and researchers to arrange information and identify current events. Timelines in project management help in task planning and tracking while companies highlight their success and expansion. History timelines are also used in educational circumstances, such as history classes, to help students in learning the chronology of events and the larger historical context.
Modern technology has made it simpler to develop interactive and dynamic historical timelines online as compared to traditional paper-based timelines. Use EdrawMax online to create historical timelines easily and elegantly. It offers a variety of templates and symbols that make it simple to make interesting timelines. Customization is easy because of the tool's intuitive UI and AI-powered features.
Project Timeline
An essential tool for efficient project management and planning is a project timeline. It gives you a graphical representation of the project's tasks, deadlines, and milestones so you can stay organized, monitor the progress, and make sure outcomes are delivered on time. Project managers and team members can identify possible bottlenecks, distribute resources effectively, and make wise decisions to keep the project on track with the help of a well-structured project timetable.
Project managers and teams can efficiently plan, carry out, and monitor projects with EdrawMax, which leads to successful outcomes and on-time project completion. The best tool for making a comprehensive and visually appealing project timeline is EdrawMax, no matter whether you're in charge of a small team or a big project.
Baby Growth Timeline
A baby growth timeline is essential for parents and other caretakers because it enables them to track and keep track of their children's development. Recording these milestones—from the first giggle to the first steps—assures the baby's healthy development while helping to create priceless memories. The timeline may also be used by parents to identify any developmental delays or issues, allowing them to quickly seek out professional advice.
Part 4: How to Make a Timeline In General
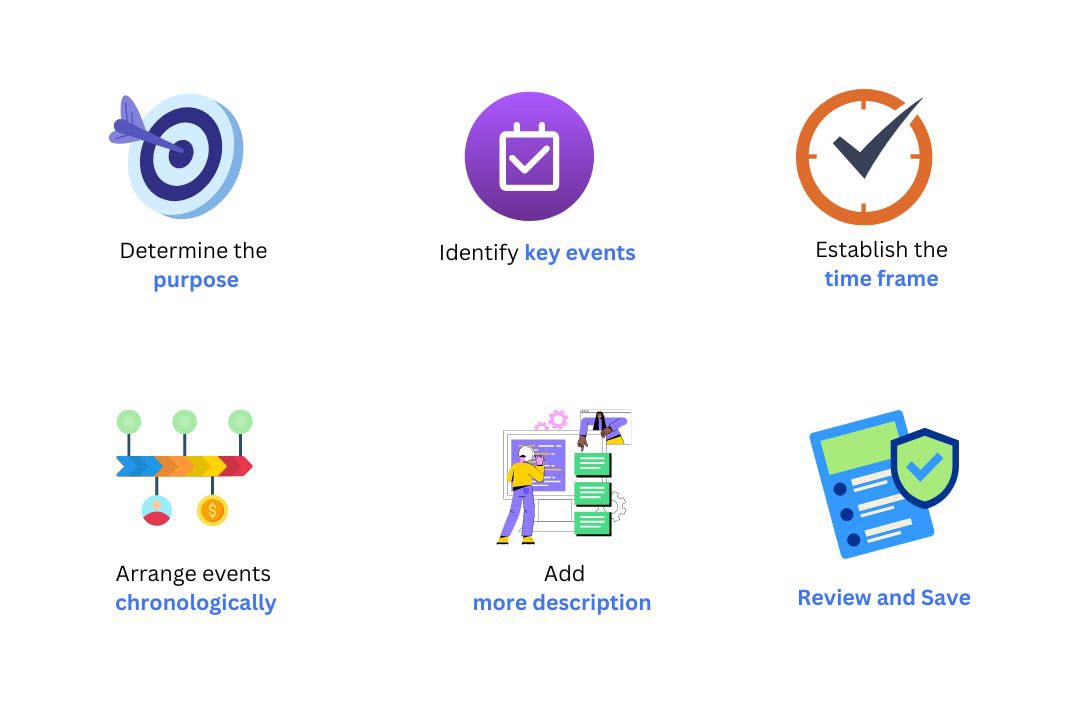
Step 1: Determine the Purpose
Define the primary goal of the timeline you want to create. Are you depicting historical events, creating a project timeline, or mapping life events? It will assist in identifying the limits or areas of focus that the timeline’s content and organization should cover.
Step 2: Identify Key Events
Don’t forget to include all recognizable milestones or events that are relevant to the timeline's purpose. These should be the most intensive events that assist in explaining or summarizing the narrative or purpose respectively.
Step 3: Establish the Time Frame
Determine how you want to include the time frame in your timeline. Depending on the intended function, It could take days to years or even centuries. Assigning specific dates to each event is helpful to map out one’s day, week, or month.
Step 4: Arrange Events Chronologically
Arrange each event from left to right or top to bottom using the line format. For actual time intervals, space the events proportionally.
Step 5: Add Descriptions
Be sure to give short descriptions for each event to give the reader an idea of what is happening. You can also add the dates, the main points, and figures or results.
Step 6: Review and Adjust
Now, go through the timeline carefully and see if it is accurate and whether or not information is missing. Some small modifications must be made to make the text smooth and understandable. If necessary, pass it on to others to achieve its intended goal.

Tips for making timelines
- Define the purpose clearly: State the purpose of using the timeline, whether for a project, memorizing significant dates, or marking individual accomplishments. This will assist you in determining what type of information to present about the creation of the purpose.
- Organize chronologically: Ensure that all the events are lined up sequentially not to confuse the audience. This allows the viewers to understand the concept of the timeline and the content even better.
- Use consistent formatting: Maintaining consistency in fonts, colors, and elements on the timeline is important to avoid its messy look. It should be brief and not inconsistent in its tone and language.
- Highlight key events: To make an event special, use symbols, icons, or colors in the organizational theme. This grabs attention to important features and helps in understanding.
- Simplify visuals: Keep the timeline simple, and do not use too many visuals as it can be confusing for the audience and for you to understand later. If you’re adding any visuals, make sure they are clear and understandable.
- Check for accuracy: Always double-check everything, such as dates and details, to minimize mistakes. Incorrect timing contributes to low credibility.
- Get feedback: Encourage others to view your timeline and give their opinion on accomplishing this purpose. A different set of eyes can bring a new perspective regarding certain errors or general enhancements.
Conclusion
In conclusion, we discussed the techniques of generating timelines and the groundbreaking features of EdrawMax. It makes it possible for users to create a simple timeline for multiple uses. This outstanding software will meet all of your timeline-making requirements. EdrawMax has covered all things, whether you're a parent documenting your child's developmental stages or a professional creating detailed project timelines.
With its ability to work across multiple terminals, and AI-assisted diagram perfection, EdrawMax differentiates itself as an effective and user-friendly diagramming tool that offers extensive users. The benefits of EdrawMax are impressive. Users can freely design visually appealing timelines for any event using a wide library of themes, symbols, and icons.


