Lucidchart is a reliable tool for drawing charts and diagrams with your colleagues. It's super easy to use and has tons of cool stuff to help you. You can work on stuff together in real-time, and they've got templates for almost anything you want to draw. Plus, they've got a bunch of shapes and lines you can use to make fancy charts. It updates everything right away as you make changes.
You can use Lucidchart to plan projects, design software, check out business stuff, or even learn. In this article, you'll learn how to create mind maps using Lucidchart. Two valuable alternatives will also be introduced, so keep on reading.

In this article
Part 1. How To Create A Mind Map in Lucidchart
Get started on this Lucidchart tutorial on creating mind maps without further ado. This section will involve setting up your Lucidchart app, an overview of the primary interface, and how to create your mind maps.
Step 1: To begin your journey, access the Lucidchart website. Then, click Sign up free and follow the prompts to create an account. If you already have one, then click Log in.

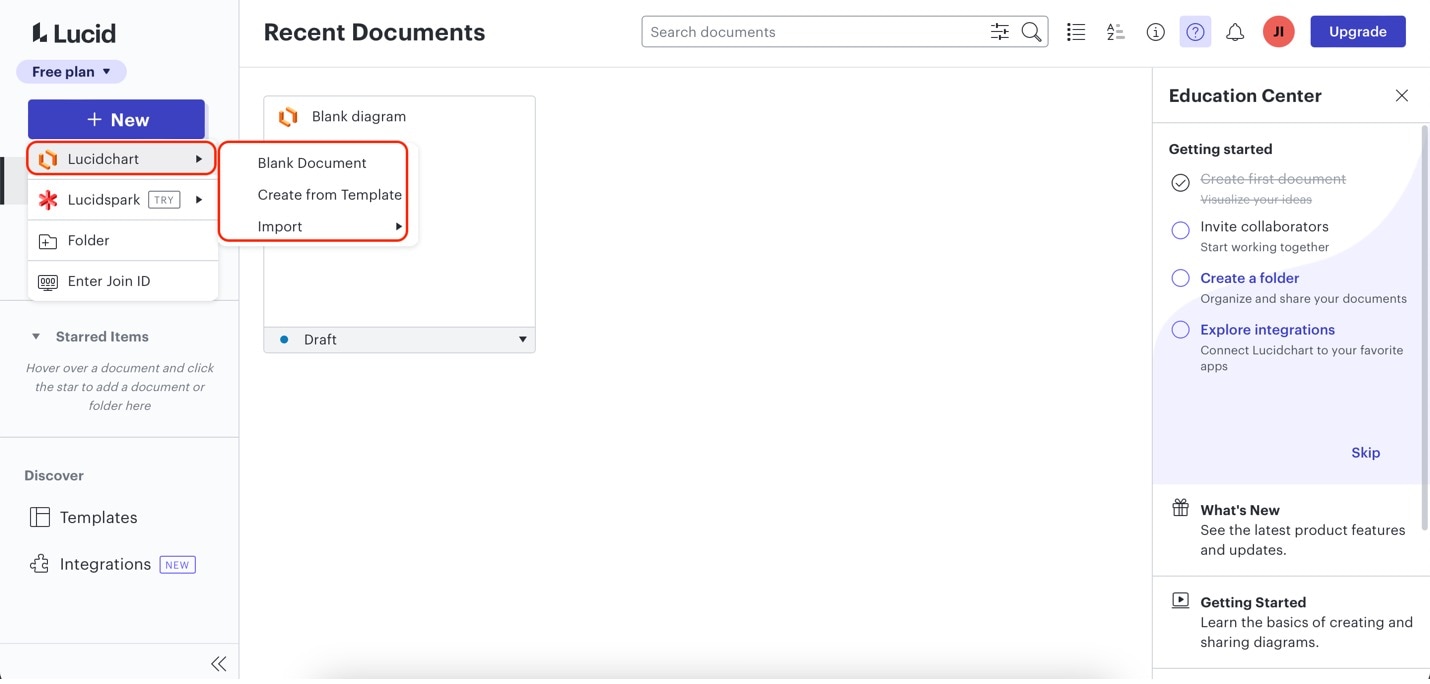
Step 2: Once you're in, look for the + New button, click Lucidchart, then create a Blank Document or Create From Template.
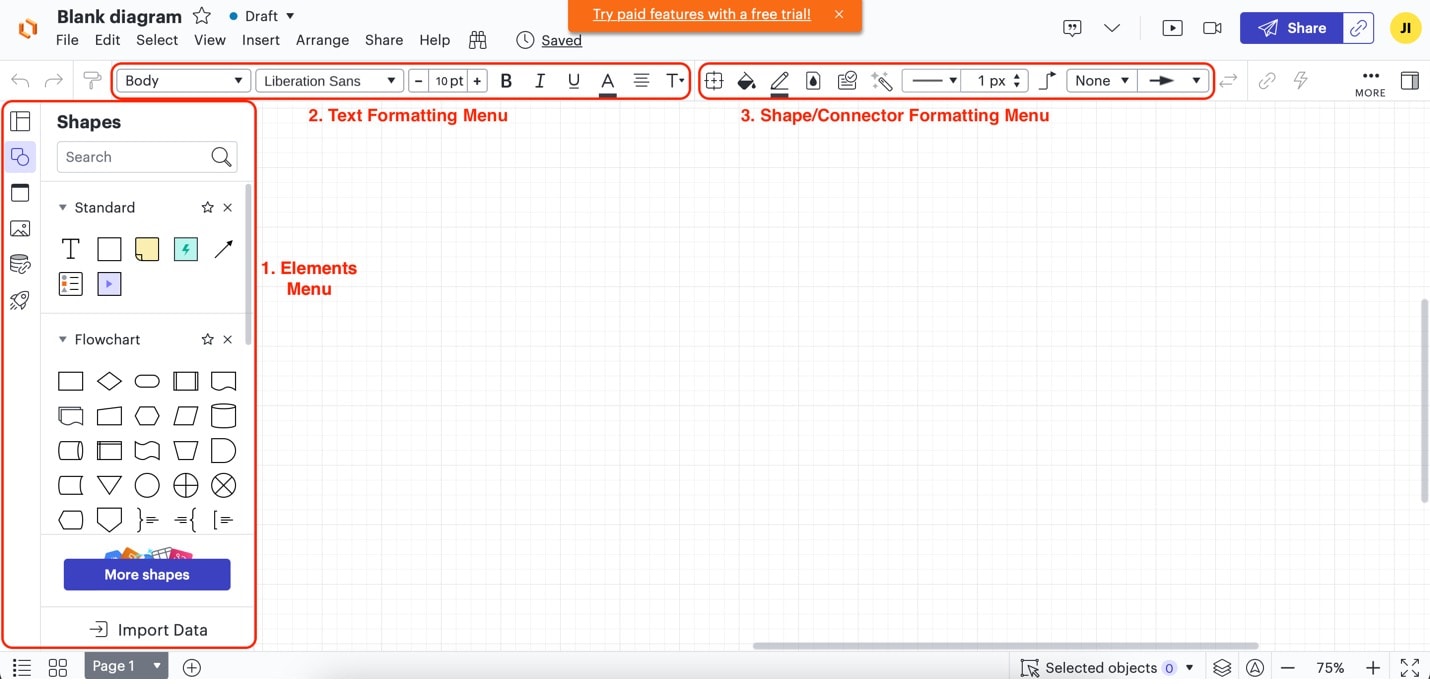
Step 3: You should now be in the Lucidchart canvas. Here's a basic overview of its features and features you should take note of:
- Elements Menu. From this panel, you can add different shapes or upload images that you can use for your mind map. Drag and drop any of the elements to the canvas to add them. Moreover, the template gallery can also be accessed from this menu. That means you can diagram templates to your canvas from here.
- Text Formatting Menu. Your mind maps are bound to have text content. Use this menu to edit font styles, colors, and sizes. Be creative with the styling of your texts.
- Shape/Connector Formatting Menu. This feature works as an overall element style editor. You can use it for shapes, tables, or connectors. Change their color, size, and more from this menu.
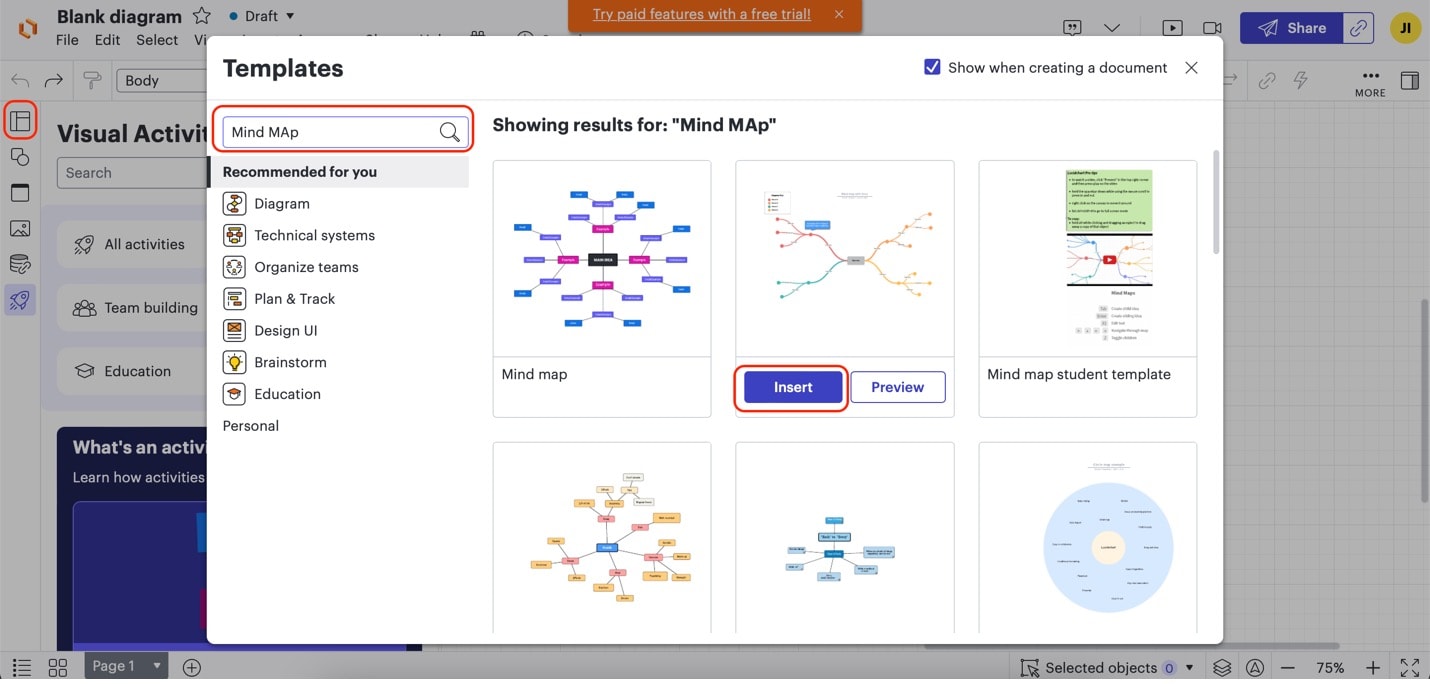
Step 4: Now, it's time to create your mind map. Begin by adding a template to your document to make things easier. Click Template Gallery from the Elements Menu. It should bring up a pop-up window. Use the search bar to look for "Mind Maps." Then, click Insert on a template that you like.
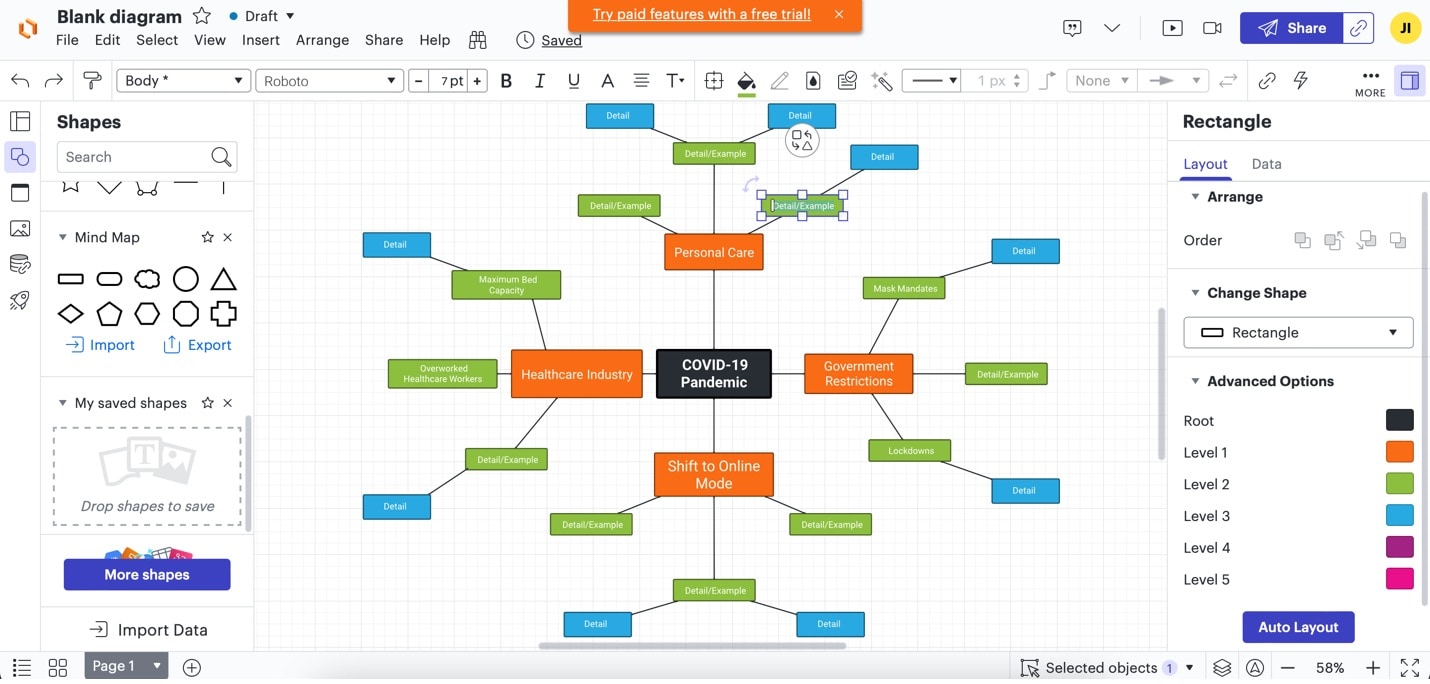
Step 5: Now, you can begin customizing your mind map template. Use these steps:
- Double-click the nodes to edit them.
- Press the Delete button on your keyboard to remove shapes or other elements that you don't need.
- Drag and drop elements from the Elements Menu to add more profiles as needed.
- Use the Shape/Connector Formatting Menu to change the appearance of the selected nodes.
Part 2. How To Make a Mind Map in Wondershare EdrawMax
If you're looking for a robust alternative or simply more options to create mind maps, consider giving EdrawMax a try. EdrawMax is a powerful diagramming tool that offers a wide range of features to make mind map creation a breeze. Here are some key features that set EdrawMax apart:
- Vast Library of Templates: EdrawMax provides an extensive collection of mind map templates, allowing you to kickstart your project quickly.
- User-Friendly Interface: Its intuitive interface makes it suitable for beginners and professionals, ensuring a smooth and productive diagramming experience.
- Cross-Platform Compatibility: EdrawMax is available across various platforms, including Windows, macOS, and online, offering flexibility in your work.
- Advanced Formatting: You can customize your mind maps with different fonts, colors, shapes, and more, giving your diagrams a personalized touch.
- Collaboration: EdrawMax supports real-time collaboration, making working on mind maps with team members in different locations easy.
How To Create Mind Maps Using EdrawMax
To see the power of EdrawMax, follow the steps below to create your mind maps using the application. The steps are quick and easy. This guide will feature EdrawMax Online. You can also use the EdrawMax desktop version by downloading it here.
Step 1: Access EdrawMax Online by visiting the website. Click Workplace and log in using your Wondershare credentials. If you don't have one, sign up.

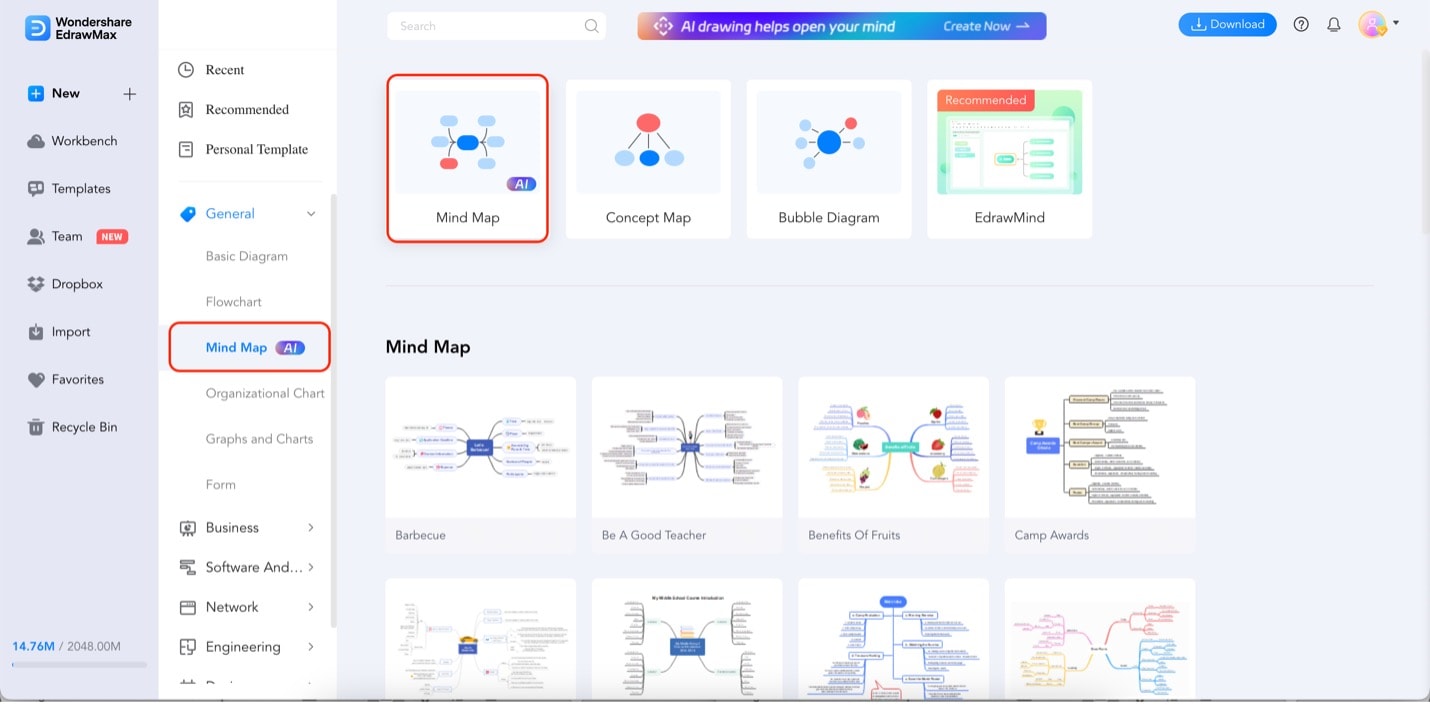
Step 2: Once you're in, click Mind Map under General. Then, click the Mind Map option on the menu.
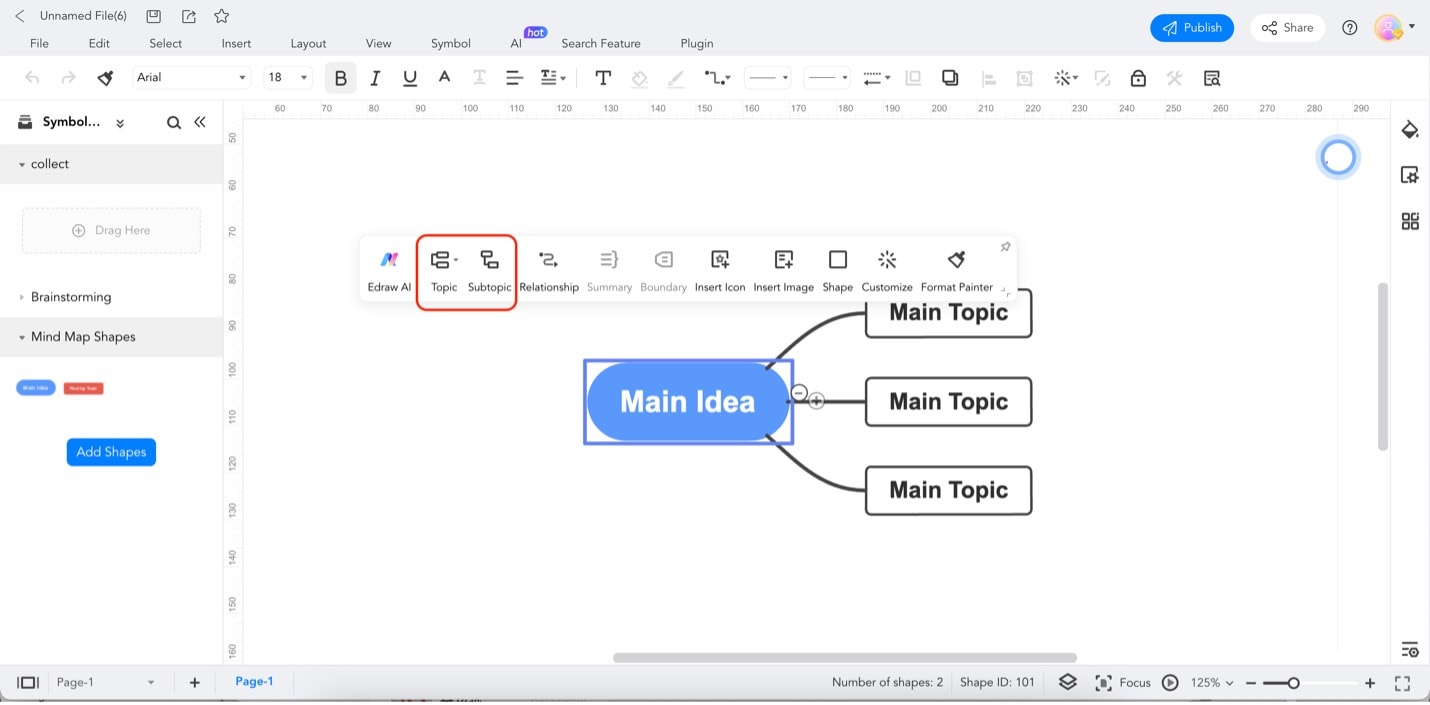
Step 3: Begin by adding relationships to the default chart. Click the Main Idea or Main Topic nodes. Then, click Topic or Subtopic. This will add new relationships to the nodes. In contrast, press the Delete button on your keyboard to remove nodes that you don't need.
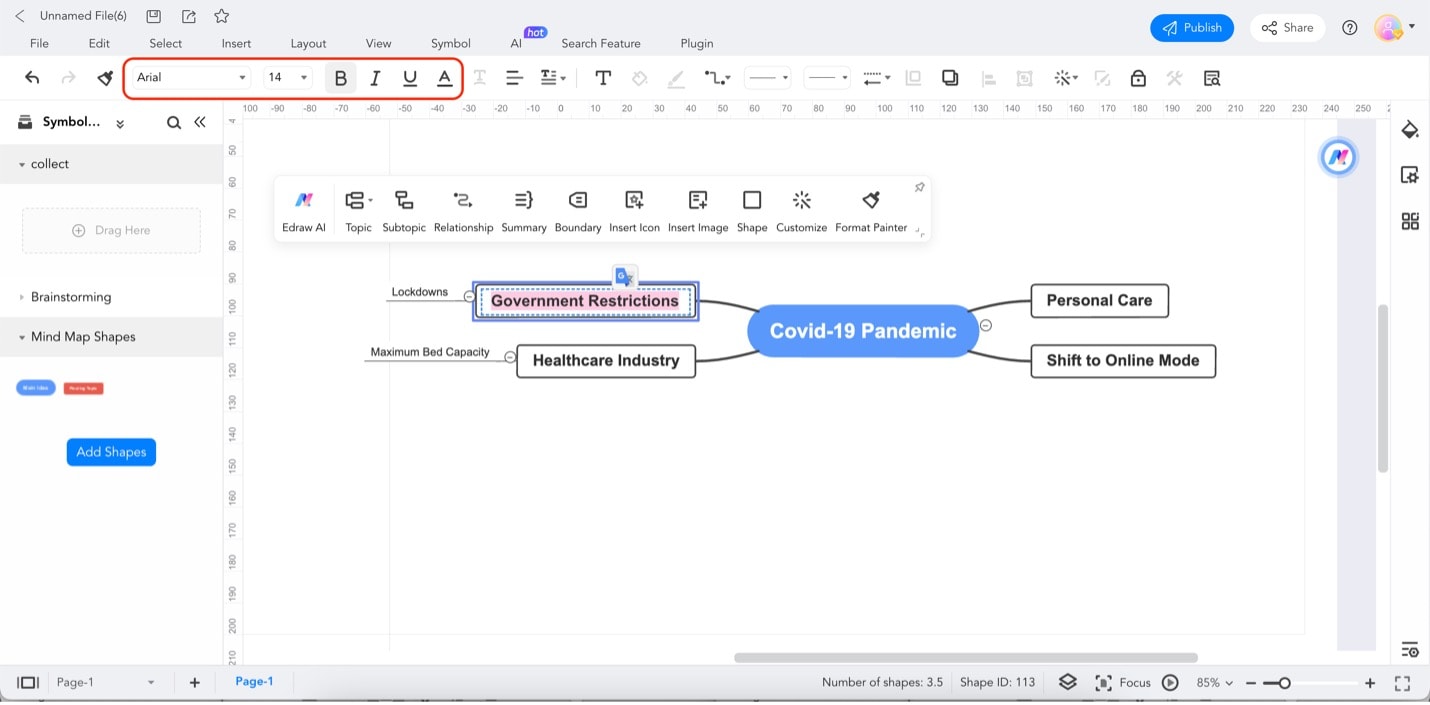
Step 4: Start editing your content by double-clicking on the nodes. Edit the text styles by using the text formatting menu as highlighted below.
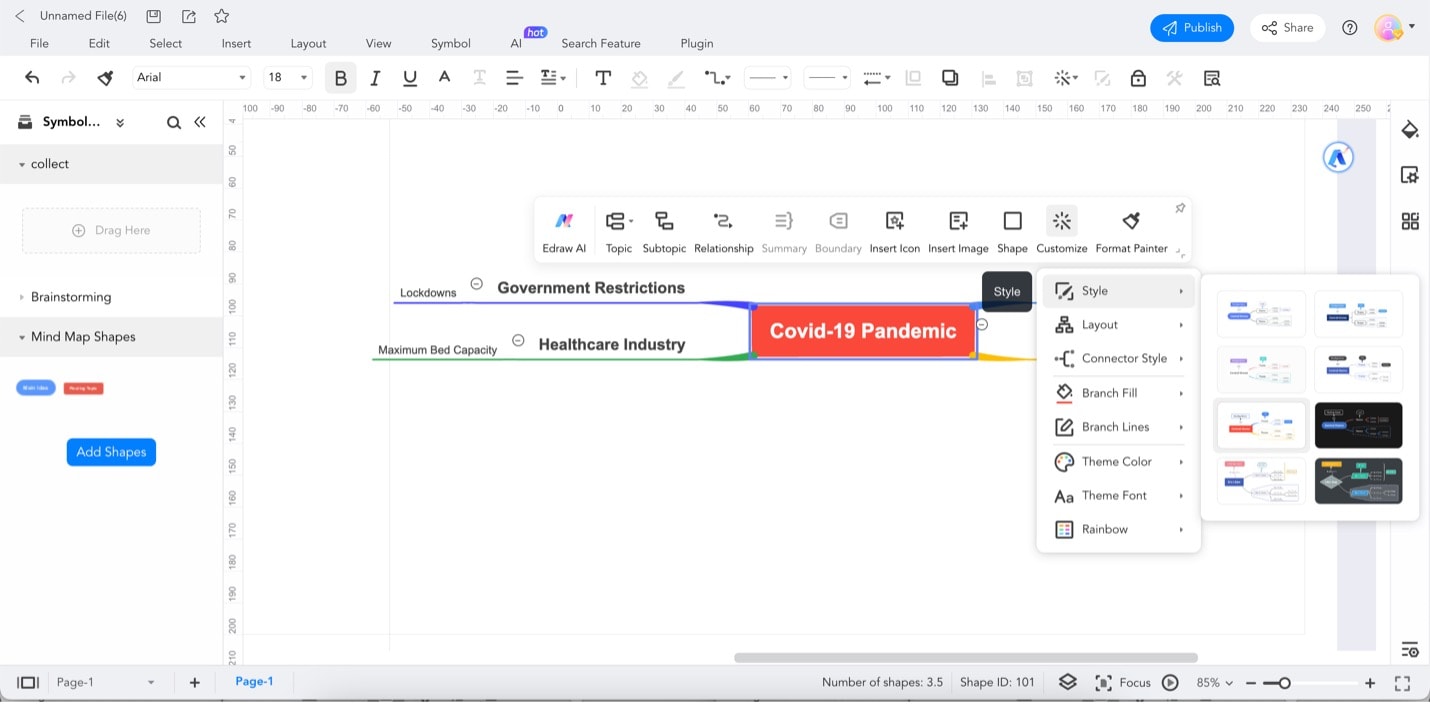
Step 5: Customize your mind map using the Customize option found when you click the main node. Here's an overview of what each feature can do:
- Automatically. change the appearance of the whole mind map based on the chosen design.
- Layout. Change the structure of your mind map; arrange the nodes based on the layout chosen.
- Connector Style. Change the appearance of the connectors.
- Branch Fill. Change the fill colors of the subtopics.
- Branch Lines. Change the colors of the connectors from the main topic.
- Theme Color. Automatically sets the mind map nodes and connectors into a color scheme.
- Theme Font. Change the font styles for all nodes.
- Rainbow. Similar to Theme Color, it changes the mind map's colors based on certain criteria.
Part 3. How To Make a Mind Map in Wondershare EdrawMind
If you're still searching for a Lucidchart alternative for mind maps, EdrawMind is another excellent option. EdrawMind is a comprehensive and user-friendly mind-mapping software that enables you to create visually appealing and highly informative mind maps effortlessly. Here are some of its standout features:
- Rich Template Library. EdrawMind provides many templates and symbols tailored to various industries and purposes.
- Versatile Layout Options. With EdrawMind, you can choose from various mind map layouts, such as tree, radial, and fishbone structures.
- Powerful Editing Tools. Customize your mind maps with ease using EdrawMind's powerful editing tools.
- Multimedia Integration. Go beyond text and incorporate multimedia elements into your mind maps.
- Convenient Export Options. Once your mind map is complete, EdrawMind offers multiple export options, including PDF, PNG, JPEG, and more.
How To Create Mind Maps Using EdrawMind
EdrawMind is a dedicated mind-mapping software from Edraw and Wondershare. To see its capabilities, check out the step-by-step guide below. It will also use the online version of the program.
Step 1: Access the EdrawMind website. Click Workspace and log in with your Wondershare account.

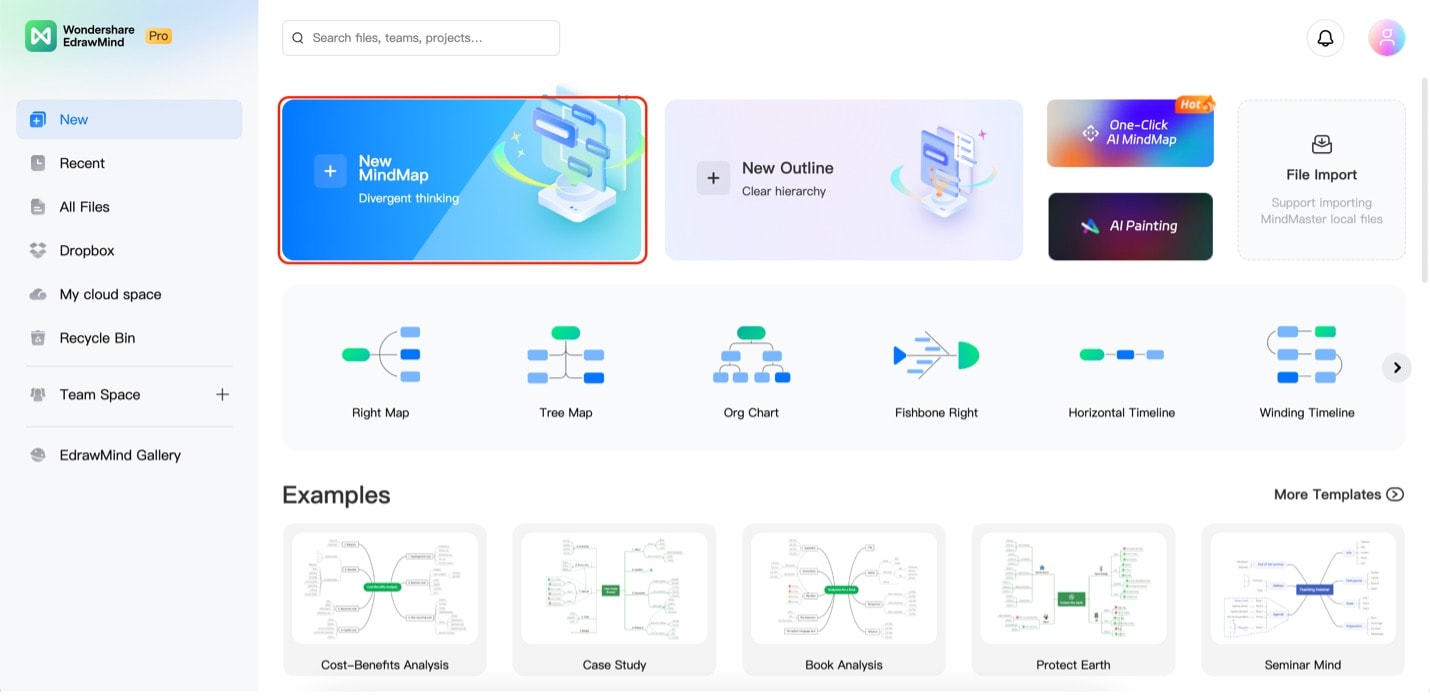
Step 2: Click New MindMap on the app's homepage.
Step 3: Choose a layout under the Branch button when you click on the main idea node.

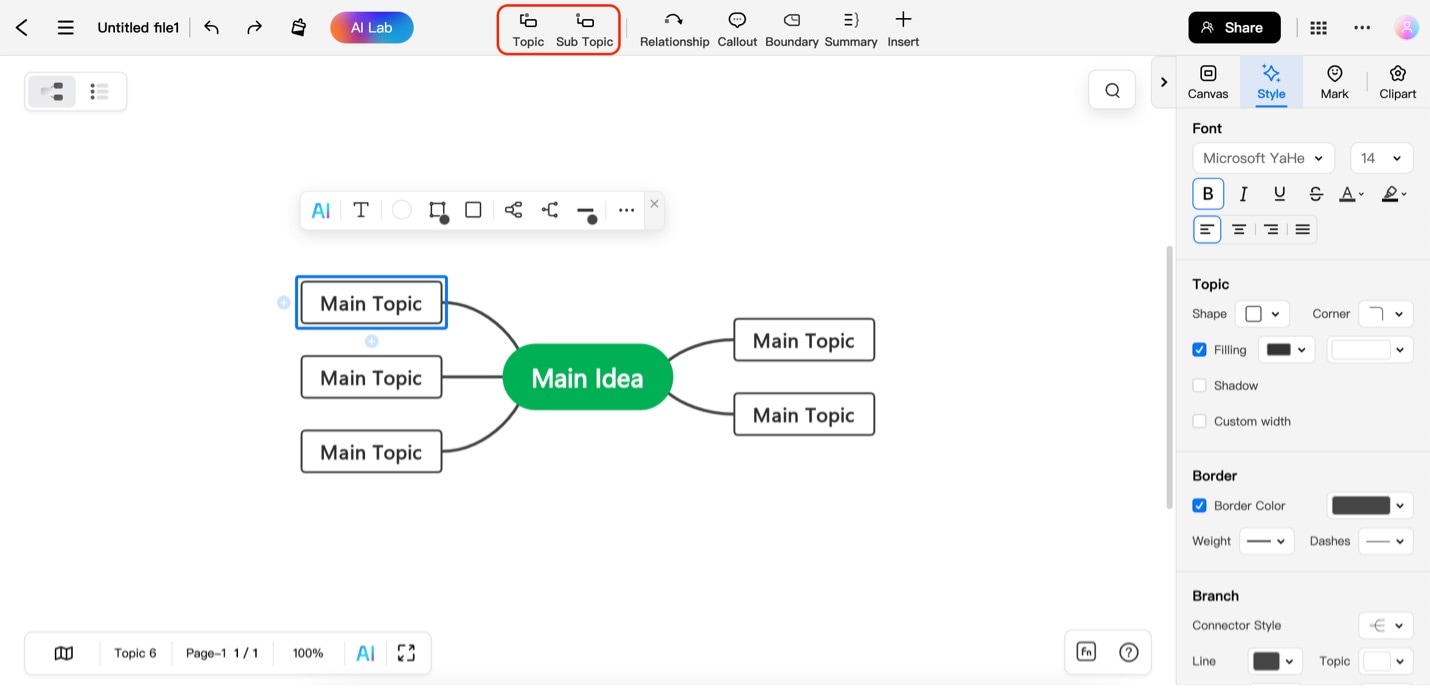
Step 4: Add topics and relationships using the Topic and Subtopic buttons. Use Topic to add main topics and Subtopics to add subtopics after the Main Idea and Main Topics.
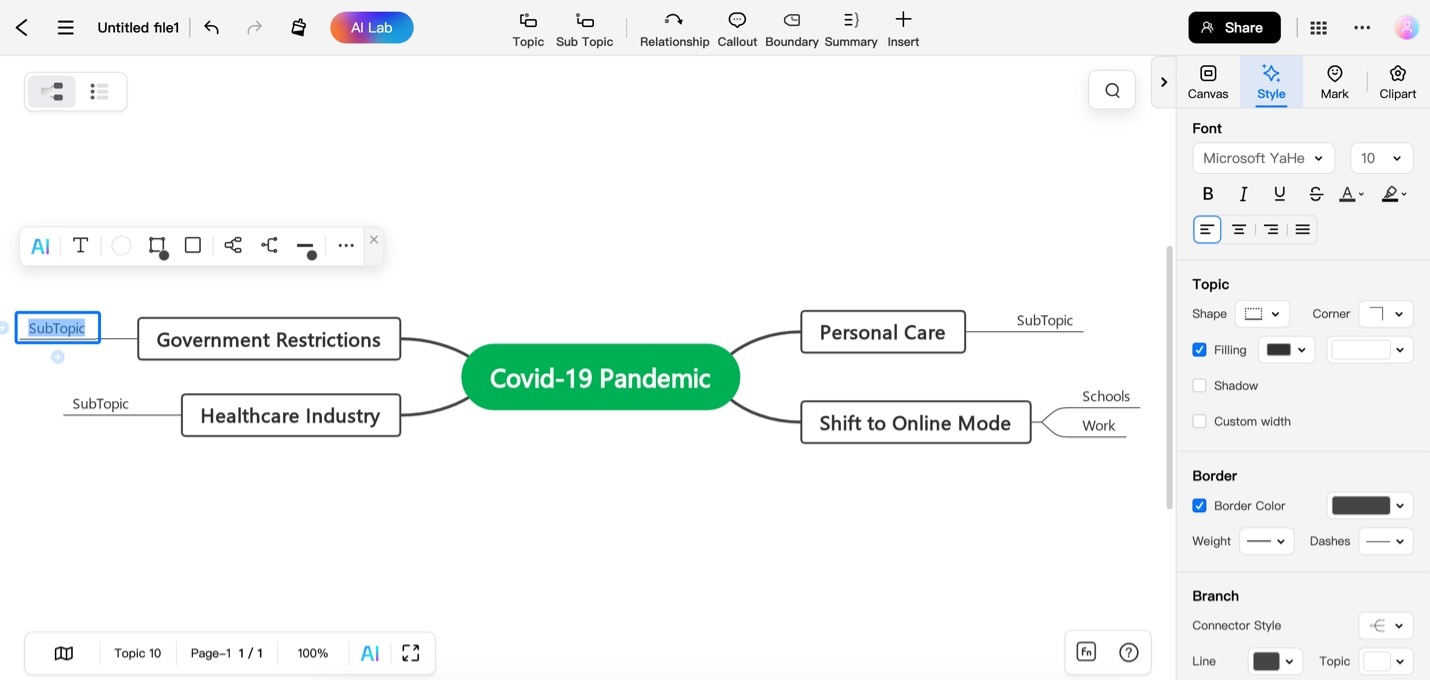
Step 5: Edit the content by double-clicking on any of the nodes.
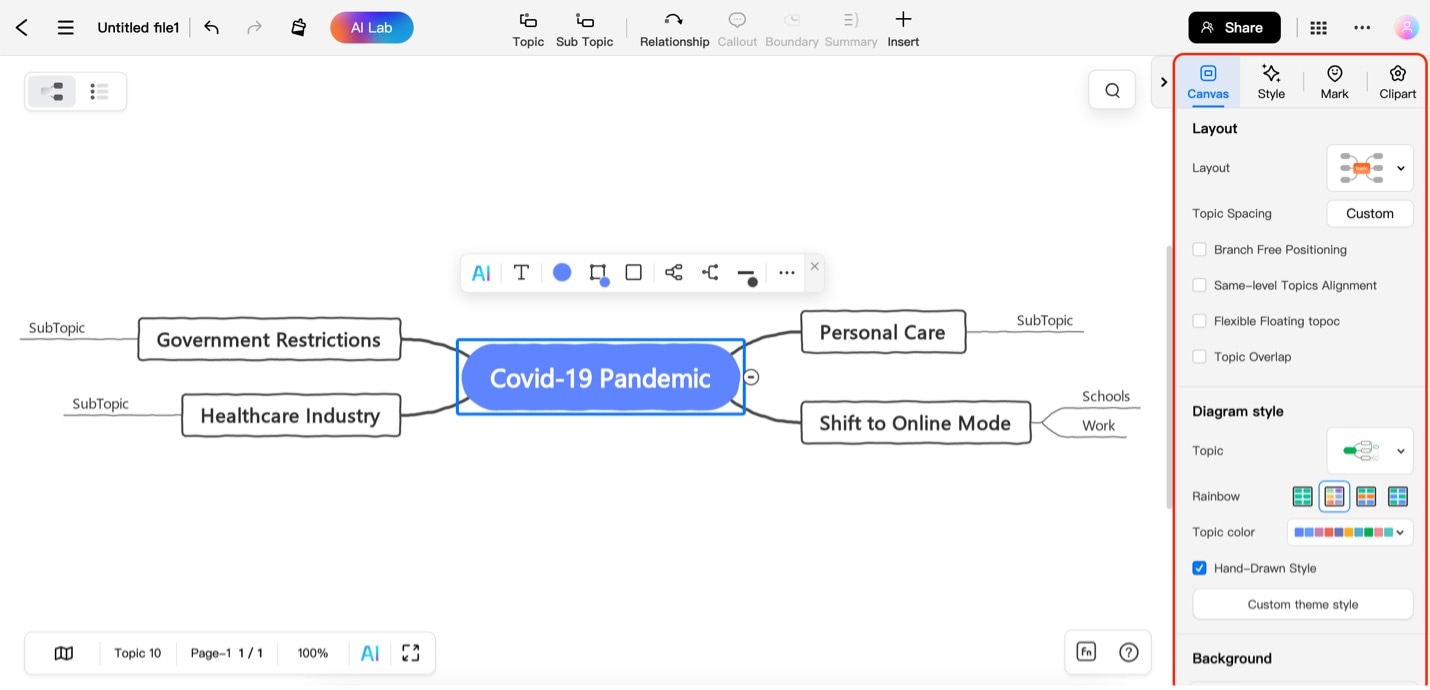
Step 6: Customize your mind map using the customization panel on the right. The Canvas menu offers options to edit the mind map, while the Style menu offers individual styling options for each element. To use the Style menu, click on any element and use the options accordingly.
Conclusion
Mind-mapping tools like Lucidchart, EdrawMax, and EdrawMind are powerful with distinct advantages. Lucidchart offers a balanced feature set and pricing, providing ease of use, templates, symbols, and more. EdrawMax is the most comprehensive, beyond mind maps to flowcharts, org charts, and more, ideal for businesses. EdrawMind excels in mind mapping with various layouts and export options.
Mind maps enhance productivity by visualizing ideas, revealing connections, prioritizing tasks, simplifying complex problems, and tracking progress. Regardless of what mind mapping tool you use, maximize the benefits of mind maps for your work or study.


