


A storyboard is an indispensable asset for animation production, video development projects, and conceptual development. It helps you plan the scenes and visualize the flow of the narrative, ensuring that each shot is clearly defined. By outlining the sequence of events, characters' actions, camera angles, and visual elements, a storyboard serves as a roadmap for the entire project.
PowerPoint, on the other hand, is a powerful solution that can help you develop basic yet effective storyboards that you can use for multiple projects. With its familiar design and multitude of features, you can quickly structure your thoughts and develop the chronological sequence for your projects.
This article explains the methods you can use to build a storyboard in PowerPoint: from a template, from scratch, and an EdrawMax add-on (the most efficient method of all).
In this article
Method 1: Make a Storyboard in PowerPoint Using a Template
Step 1
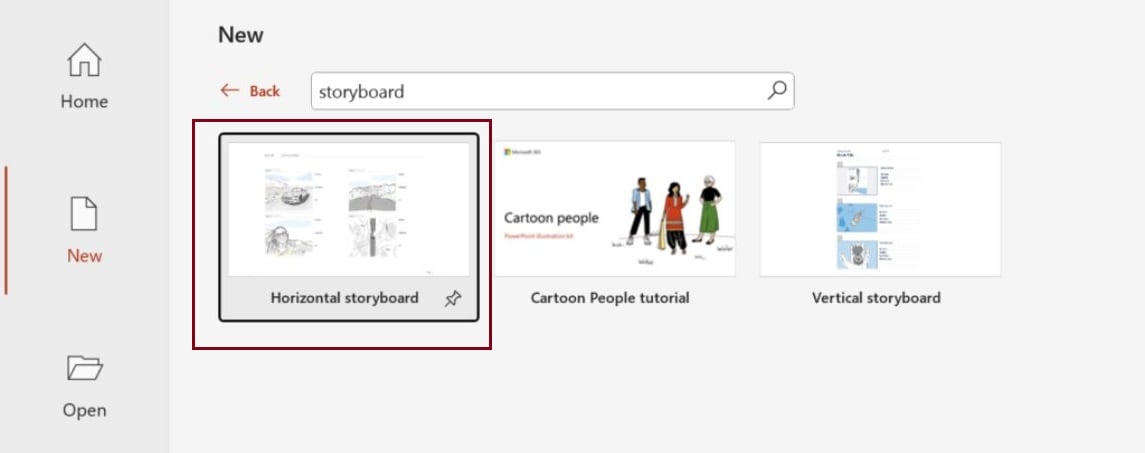
Open PowerPoint and click New from the left panel. Then, search for the storyboard template in the search bar and select from the available templates. This opens the template into the PowerPoint slide for customization.
Step 2
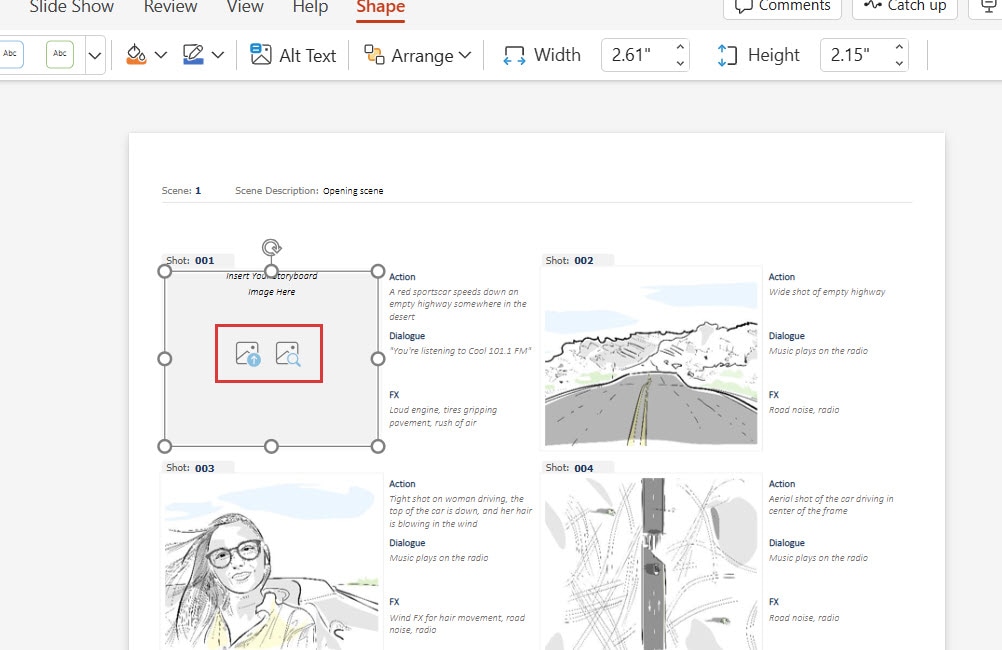
Replace the images with the ones that align with your story. To do this, right-click the image and click Cut, then upload the new image by selecting one of the two options: insert pictures from the device or insert stock images.
Step 3
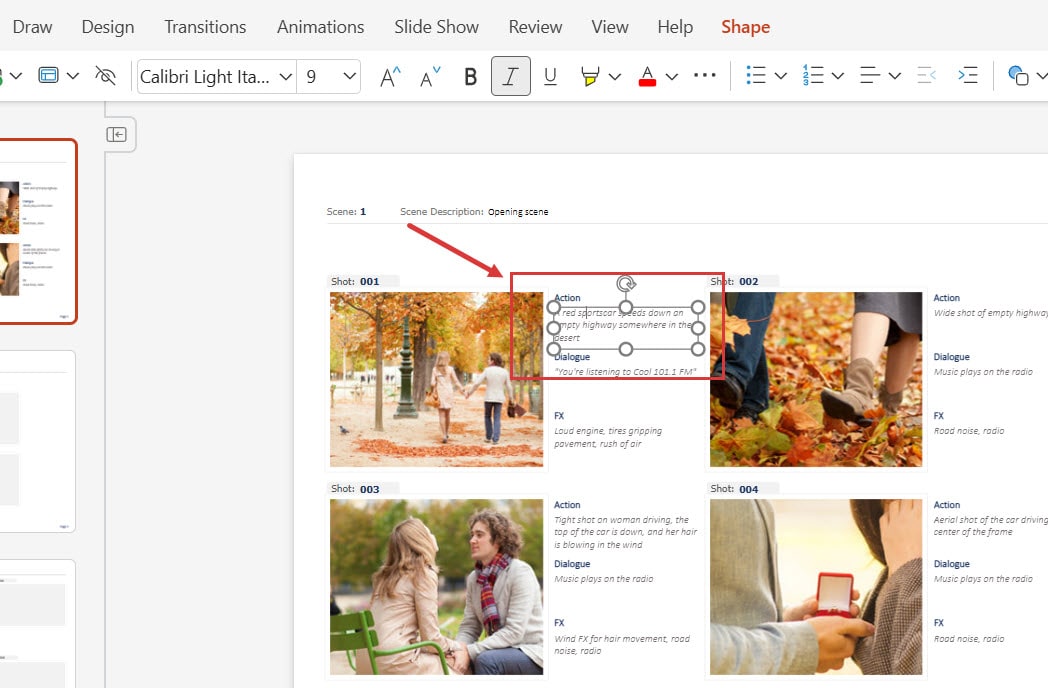
Now, update the text in the storyboard by simply clicking on the text and replacing it with the text that describes your images.
Step 4
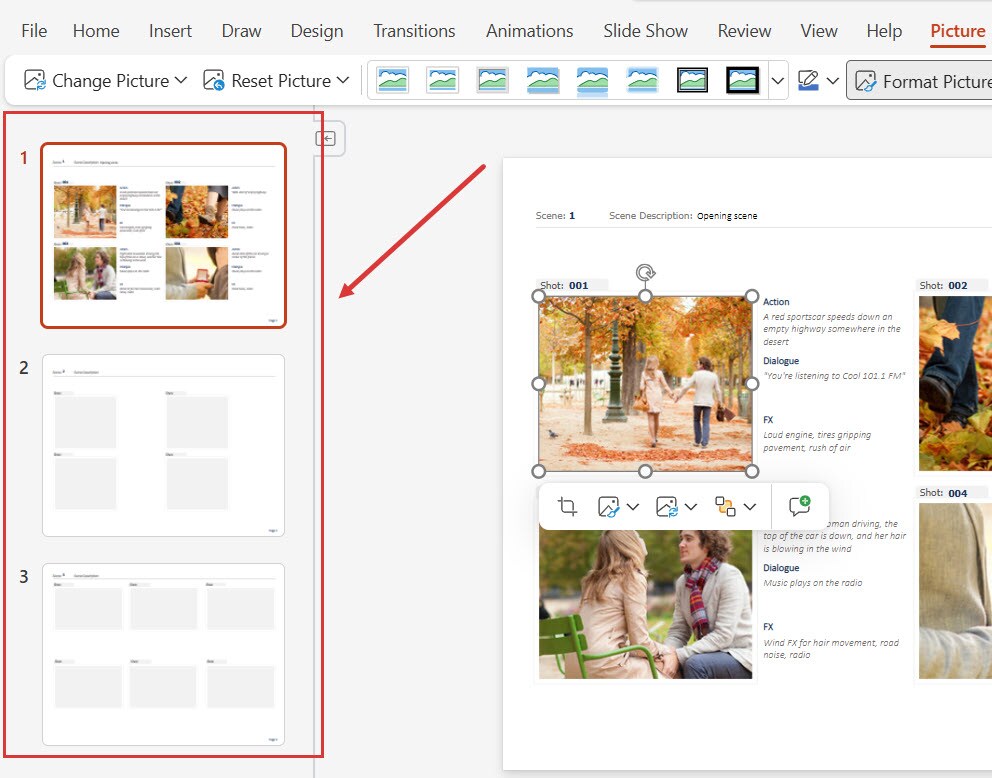
You can follow similar steps for the rest of the slides added to the storyboard and remove the extra ones.
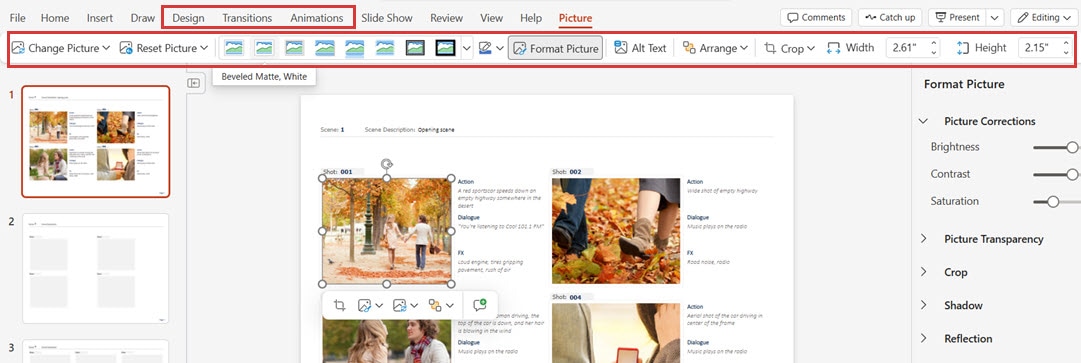
Step 4
Once you are done making all the major changes, you can use the options from the top panel to customize the layout of the images or the background design.
Method 2: Create a Storyboard in PowerPoint From Scratch
If you want to explore your creative self and create a storyboard in PowerPoint from scratch, you can follow the steps given below:
Step 1
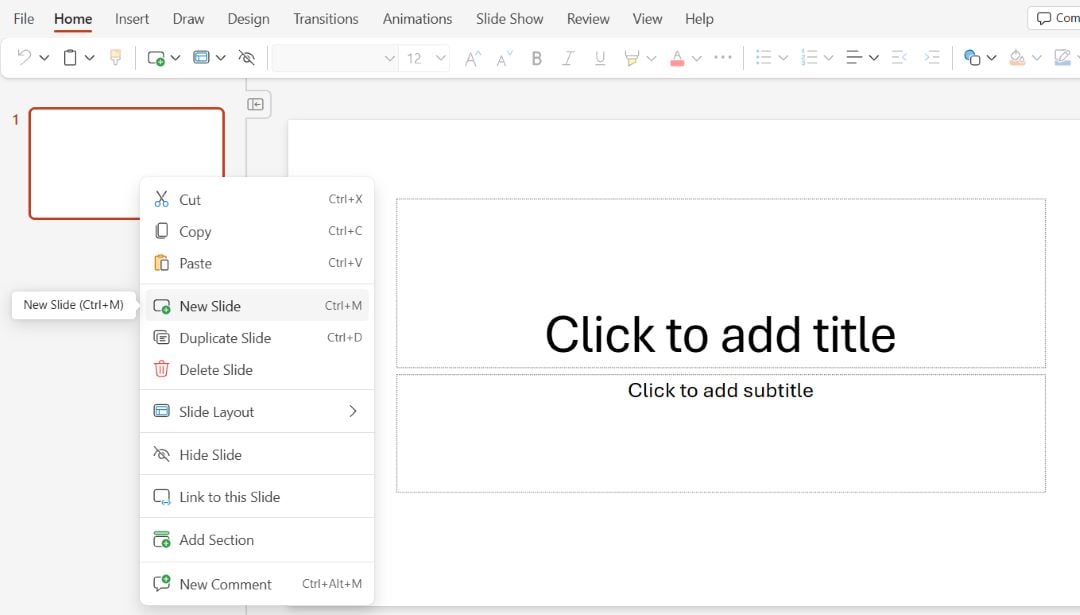
Open PowerPoint on your device and add a New slide to your presentation. Add as many slides to your presentation that would entirely cover your story.
Step 2
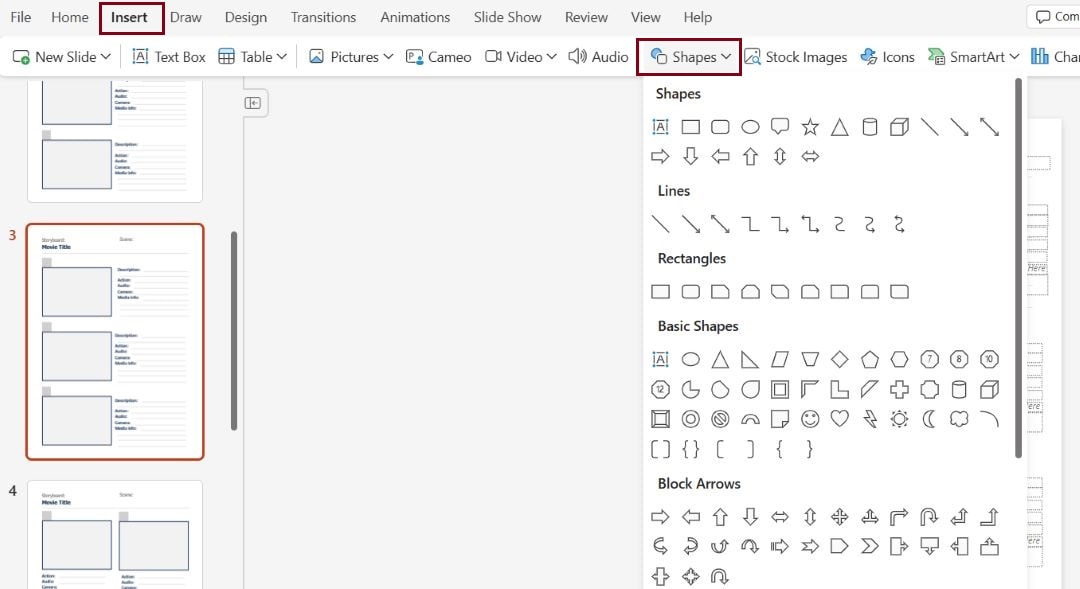
Add shapes to your slide as placeholders for your storyboard frames. To do this, select the Insert tab and choose from the available shapes- you can choose a rectangle, square, circle, or any other shape of your choice and replicate it for all slides.
Step 3
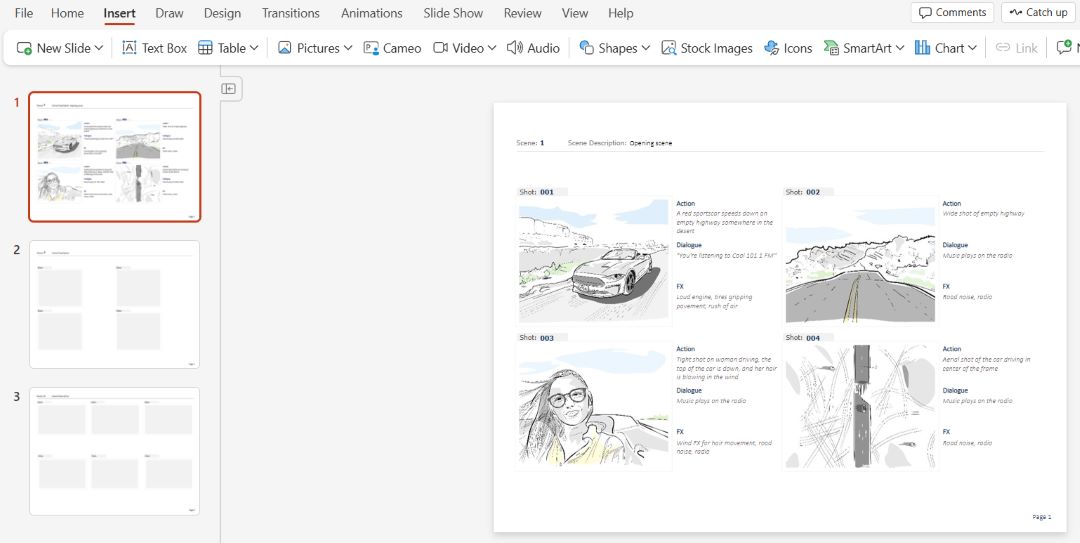
Add images and text to the placeholders to describe the scenes in detail. This adds more depth to your storyboard and makes it easier to comprehend.
Step 4
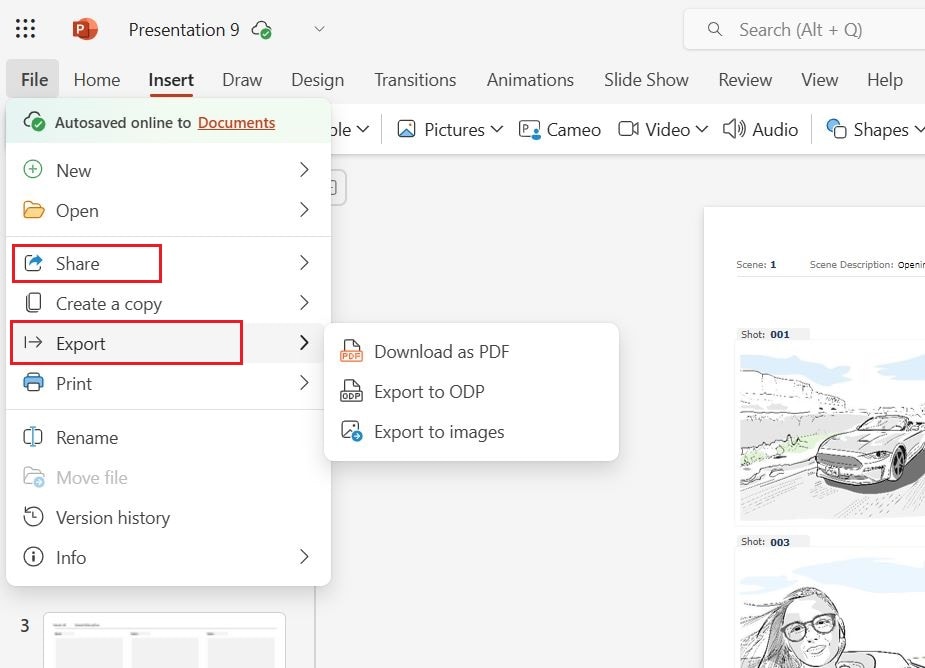
Once you’ve uploaded the images and added the text, review all slides one by one to make sure everything is in position. Once satisfied, Export this file or Share it with stakeholders or friends for review.
Make a Storyboard for PowerPoint with Free Templates
Working on a storyboard project can seem overwhelming, especially if you do not have any guidelines to start with.
However, the EdrawMax Storyboard Maker makes the brainstorming process easier than ever: you can start with a mind map, outline key scenes, and adjust the flow—all in a collaborative space. Once everything is set, you can export it directly to PowerPoint for final touches.
To do this, follow these steps:
Step 1Open EdrawMax
Download EdrawMax or click Start Diagramming Now and log in using your social media credentials.
Step 2Search for Template
Click Templates from the left panel and search for the storyboard. EdarwMax has multiple pre-built templates you can customize and make according to your story. Choose any available templates that match your project so you don’t have to spend much time customizing.

Step 3Customize the Template
After selecting the template, start customizing it according to your storyline. Add the text for each shot by clicking directly on the area. To add the image to the storyboard, click on the Image option from the left panel and upload the photos that match your story scene.
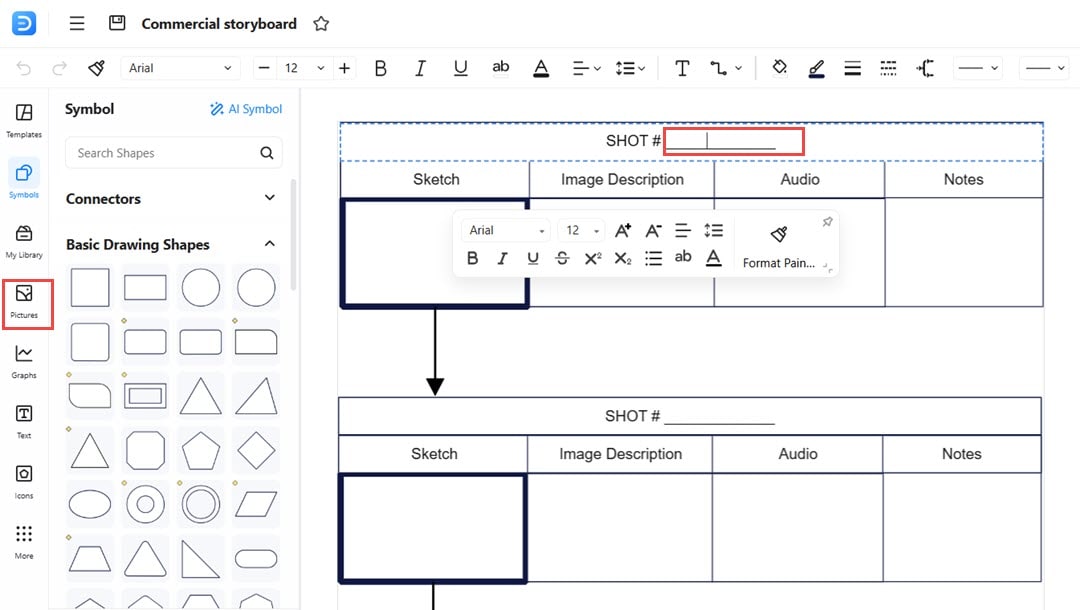
You can update the theme, background color, and text color from the right panel options.

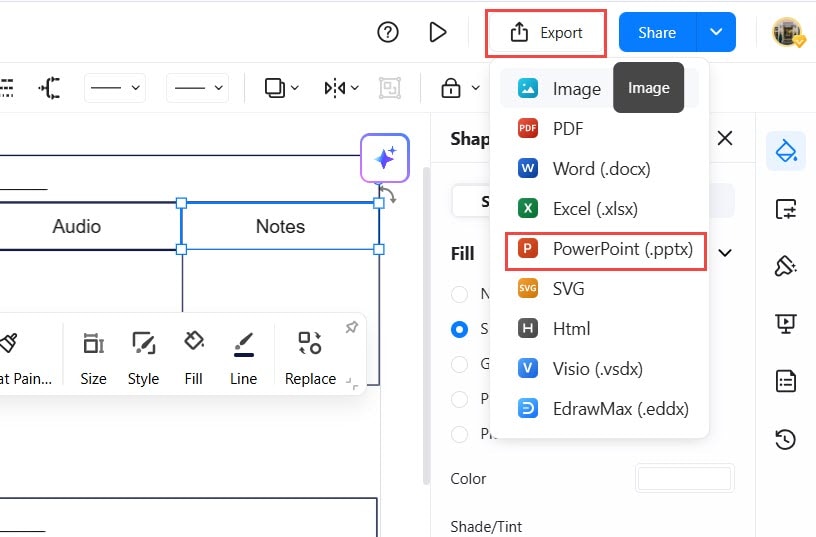
Step 4Finalize and Export
Once you've finished creating your diagram, you can save it and choose to export it. EdrawMax gives you the option to export your diagram as a PowerPoint file, allowing you to seamlessly integrate it into your presentations. Simply click on Export and select the PowerPoint (.pptx) format from the list of options.
Tips When Making a Storyboard in PowerPoint
A storyboard developed in PowerPoint provides an efficient method for displaying project sequencing in various applications, including video, presentation, and other types of storytelling. PowerPoint storyboard creation benefits from the following few guidelines:
- Use slide layouts: You can benefit from the different layout templates that PowerPoint provides to organize your storyboards. Blank slide designs let you stay flexible, but structured slide templates ensure constant presentation quality.
- Simplify visuals: The images should stay basic while remaining easy to understand. All significant components should be depicted using placeholder graphics or simple shapes instead of complex designs throughout the slides.
- Maintain consistency: All graphics in your storyboard must coordinate through the same block of colors, standard font types, and graphical elements. The unified structure of your presentation will become more accessible when using these strategies.
- Add text annotations: Brief notes with the visuals to explain the slide content. This helps provide context.
- Use transitions: The transition tools available in PowerPoint allow users to track visual element movement between scenes or steps in storyboard design.
- Organize with sections: Your storyboard should include sectional divides, which create better navigational understanding. Group the content into sections by using titles and headers.
Conclusion
You can use PowerPoint to quickly create basic storyboards, yet people needing advanced features should consider EdrawMax an outstanding alternative. Through its advanced features, EdrawMax helps users create professional storyboards by enabling intricate design work, better templates, and complete customization.
AI Diagram Generator
Enter your prompt. Upload files if needed. Generate diagrams, charts, or slides instantly.


