


Billions of cells die in the human body every day as part of normal growth, maintenance, and repair. This continuous process allows new cells to replace old, damaged, or unnecessary ones. However, not all cell death occurs in the same way.
In biology, cell death mainly occurs through two mechanisms: apoptosis and necrosis. Apoptosis is a controlled and regulated process, while necrosis results from sudden injury or severe stress. Understanding the differences between these two mechanisms is essential for studying development, disease, and tissue health.
This guide explains apoptosis and necrosis in a clear and structured way, using diagrams, comparisons, and simple explanations to support learning.
In this article
What is Apoptosis?
Programmed Cell Death
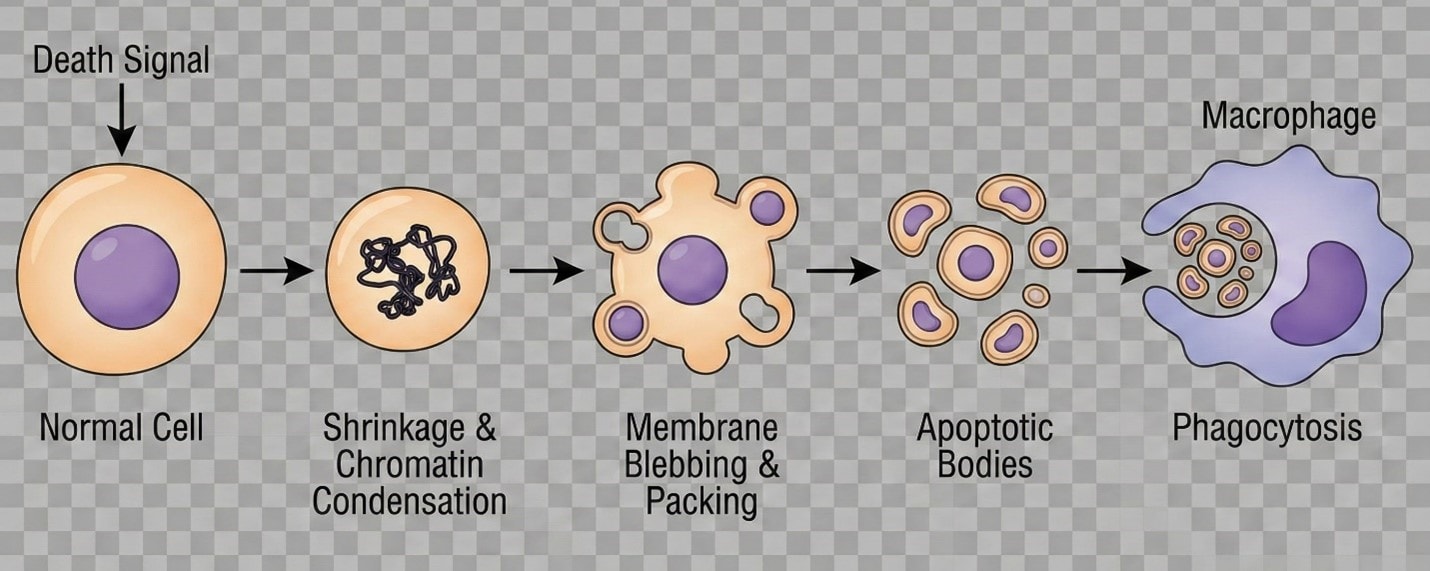
Apoptosis is a regulated form of cell death that allows the body to remove unwanted or damaged cells without harming surrounding tissues. Because it follows an orderly sequence of events, it is often described as programmed cell death.
The process begins when a cell receives internal or external signals indicating that it should be removed. These signals may arise due to aging, DNA damage, or changes in tissue requirements.
During apoptosis, the cell gradually shrinks, and its chromatin becomes condensed. The cell membrane remains intact but forms small protrusions called membrane blebs. Eventually, the cell breaks into small, membrane-bound fragments known as apoptotic bodies.
These fragments are quickly recognized and removed by phagocytic cells such as macrophages through a process called phagocytosis. Because the cell contents remain enclosed, apoptosis does not trigger inflammation or damage nearby cells.
Key feature: Apoptosis is controlled, energy-dependent, and non-inflammatory.
What is Necrosis?
Accidental Cell Death
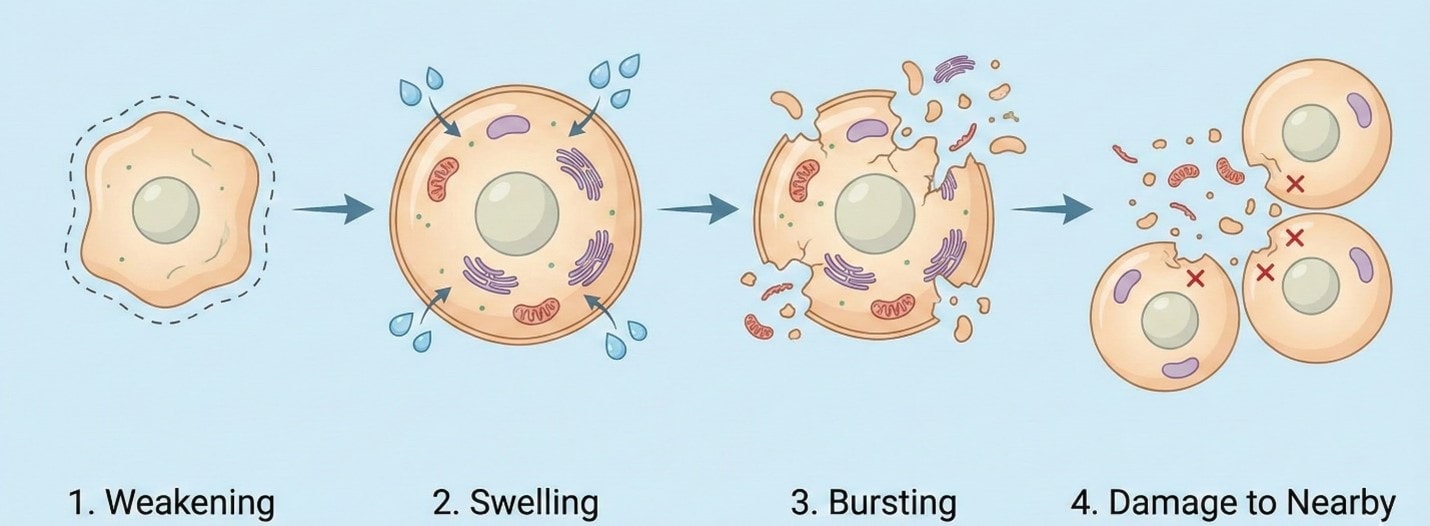
Necrosis is an uncontrolled form of cell death that occurs when cells are exposed to severe damage, such as trauma, infection, toxins, or lack of oxygen. Unlike apoptosis, necrosis is not a planned process and often affects groups of cells.
In necrosis, the cell loses its ability to maintain normal functions. Water enters the cell, causing it to swell. As the plasma membrane weakens, it eventually ruptures.
When the membrane breaks, the cell’s contents are released into the surrounding tissue. These substances can damage neighboring cells and activate the body’s immune response. As a result, necrosis is usually accompanied by inflammation, including redness, swelling, heat, and pain.
Necrosis often indicates underlying tissue injury and may require medical intervention to prevent further damage.
Key feature: Necrosis is uncontrolled, disruptive, and inflammatory.
Key Differences Between Apoptosis and Necrosis
Cells can die through apoptosis or necrosis, but these mechanisms differ significantly in both structure and biochemical pathways.
Morphological Differences
| Apoptosis: Planned and Clean Cell Death | Necrosis: Accidental and Harmful Cell Death |
| In apoptosis, the cell changes in a very neat and controlled way | Necrosis looks completely different because it is uncontrolled and harmful |
|
|
Molecular Pathway (What Happens Inside the Cell)
| Apoptosis | Necrosis |
|
|
In apoptosis, activation of caspases leads to the orderly breakdown of cellular components. In necrosis, loss of ATP and membrane pump failure result in ionic imbalance, swelling, and cell rupture.
Why Diagrams Help in Understanding Cell Death
Cell death involves structural changes that are difficult to visualize using text alone. Diagrams make it easier to understand differences in cell shape, membrane integrity, and organelle behavior during apoptosis and necrosis.
Comparison diagrams are especially useful because they present both processes side by side, allowing learners to quickly identify key differences.
Create Cell Death Diagrams for Learning
To study apoptosis and necrosis effectively, students often create labeled diagrams that show morphological changes and molecular pathways. Digital diagramming tools can simplify this process by providing ready-made shapes, connectors, and templates.
General steps include:
- Drawing the basic cell outline
- Illustrating changes in cell size and membrane condition
- Adding organelles and key molecular events
- Labeling each stage clearly
Tools such as Canva, BioRender, and EdrawMax offer editable templates that can support this learning approach without requiring advanced drawing skills.
How to Create a Cell Death Diagram with EdrawMax?
If you are looking for a beginner-friendly tool that offers high-quality templates to help you quickly get started, EdrawMax might be what you want. It provides rich, editable vector shapes, icons, and science templates to choose from for drawing a biology drawing. And if you like, you can also choose to use Nano Banan Pro to generate an illustration within EdrawMax.
You can draw a biology diagram easily on EdrawMax by following these simple steps:
Step1 Open the Tool and Get Started
- Open EdrawMax on your desktop or open the web-based version and sign in to your account.
- From the dashboard, choose “New” and select a blank canvas or search for a biology or comparison diagram template.
- Set up your workspace by adjusting page size, orientation, and background to ensure enough space for both apoptosis and necrosis sections.

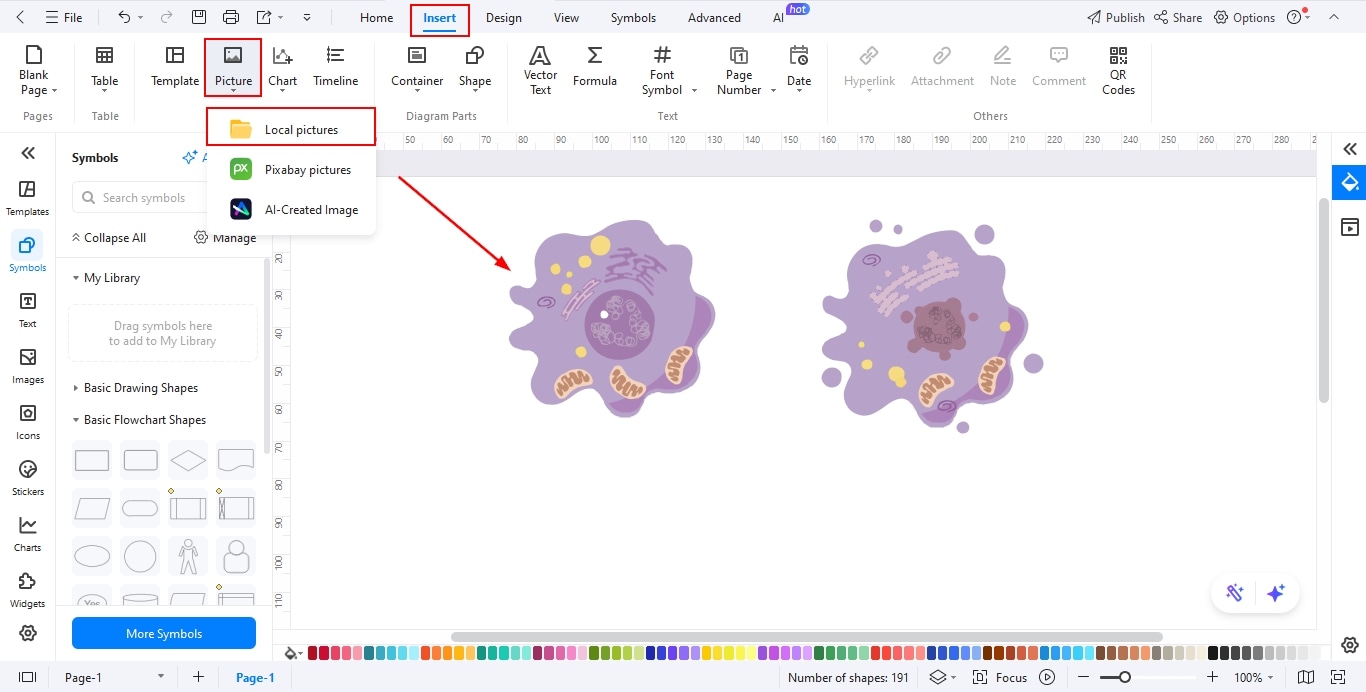
Step2 Insert Images
- Navigate to the Symbols Library and search for cell biology or medical icons relevant to apoptosis and necrosis.
- Insert images representing key features such as cell shrinkage, membrane blebbing, cell swelling, and membrane rupture
- You may also upload external images from your computer to enhance visual clarity and realism.
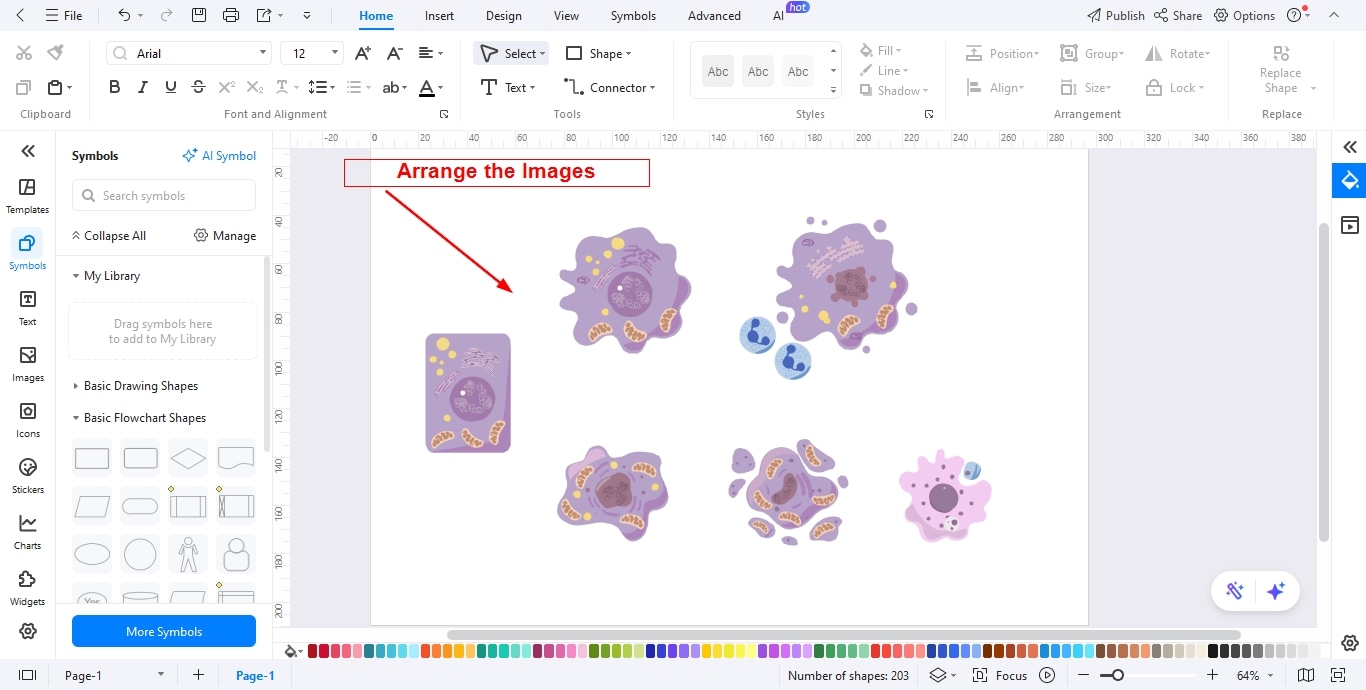
Step3 Arrange the Images
- Place apoptosis-related images on one side and necrosis-related images on the other to create a clear side-by-side comparison.
- Use alignment tools to evenly space images and maintain a clean, professional layout.
- Resize and rotate visuals as needed so each phase is easily distinguishable and visually balanced.
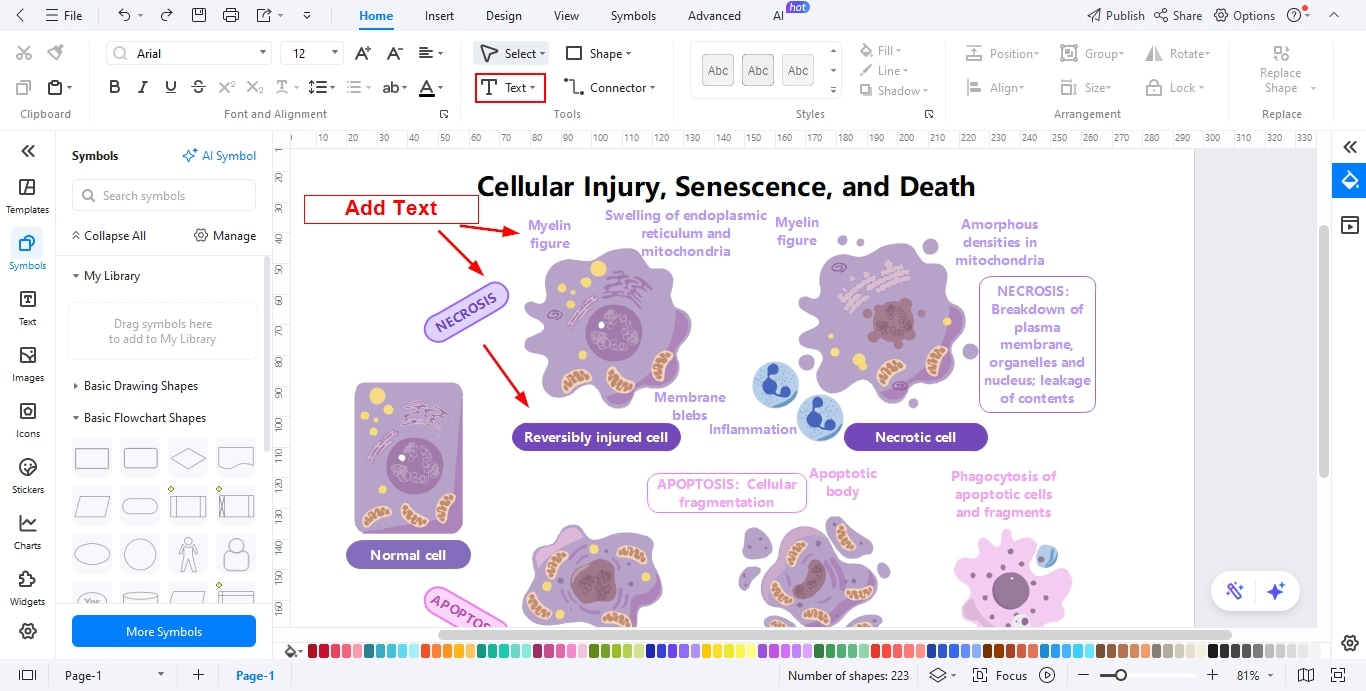
Step4 Add Text for Each Phase and Important Notes
- Use text boxes to label each process clearly, such as “Programmed Cell Death (Apoptosis)” and “Uncontrolled Cell Death (Necrosis)”.
- Add brief descriptions under each image explaining the biological changes occurring at that stage.
- Include important notes highlighting key differences, such as energy dependence, inflammation response, and effect on surrounding tissues.
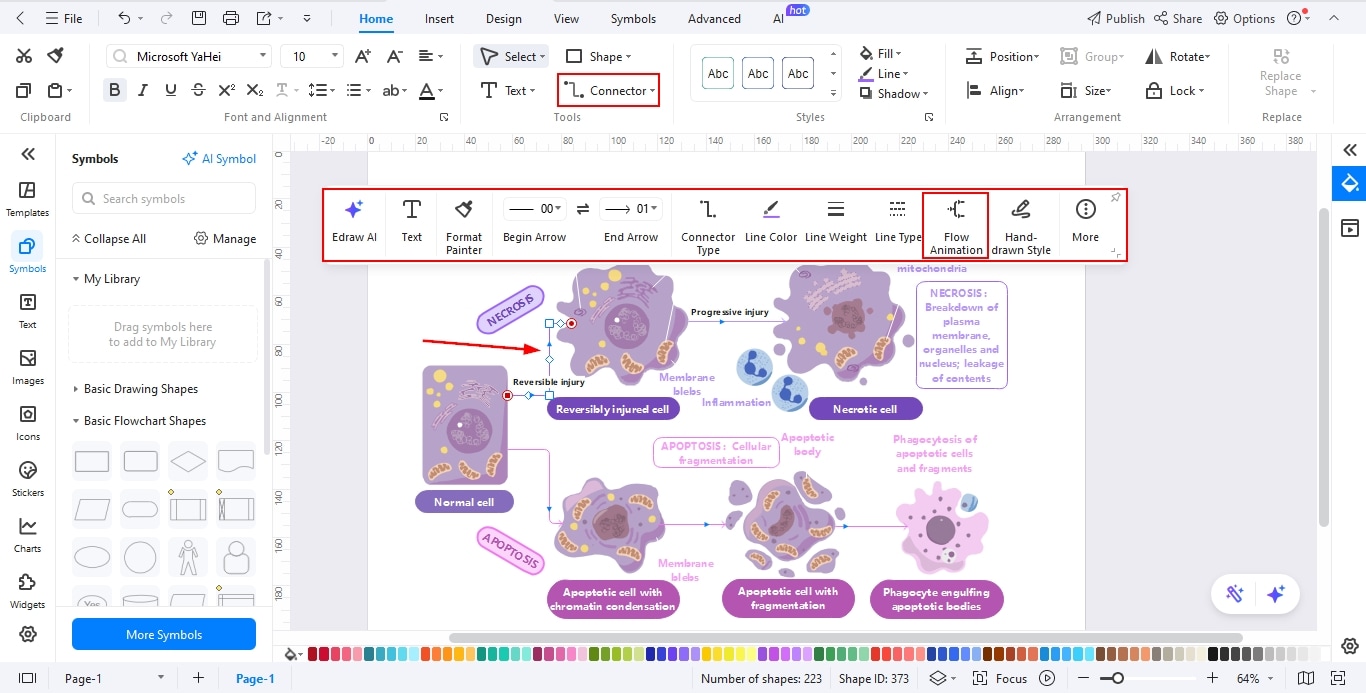
Step5 Add Relationships Among Different Phases
- Use the Connector Tool to link images and text, showing progression within each process.
- Apply arrows or lines to indicate cause-and-effect relationships or sequence of events.
- Customize connector styles with colors or dashed lines to visually separate apoptosis pathways from necrosis pathways.
Step6 Export Your Design
- Review the diagram to ensure accuracy, clarity, and proper labeling.
- Go to export options and choose your preferred format, such as PNG, PDF, Word, or PowerPoint.
- Save your final diagram for presentations, assignments, or educational materials.

Nd if you want, you can also choose to export the diagram like this one below:
Ending Notes
Apoptosis and necrosis represent two fundamentally different ways cells die—one controlled and protective, the other disruptive and injury-related.
Understanding these mechanisms is essential for studying normal development, disease processes, and tissue damage. Clear explanations combined with simple diagrams can greatly improve comprehension of these important biological concepts.
AI Diagram Generator
Enter your prompt. Upload files if needed. Generate diagrams, charts, or slides instantly.


