


A mind map is a powerful visual representation of ideas and concepts. Mind maps allow you to organize and connect information in a non-linear, intuitive manner. It's an essential tool for brainstorming, problem-solving, and knowledge retention. It simplifies complex information into a clear and structured format. They make it easier to grasp relationships and concepts. The article below explores how to create mind maps in Microsoft Word.
The page guides you through harnessing Word's features to craft appealing and structured mind maps. Discover the potential of Word as a mind map generator. Learn how to make mind maps that are both informative and engaging. Read on below to also learn about tips and tricks on how to optimize your mind mapping experience.
In this article
Part I: How To Make a Mind Map in Word
Creating a mind map in Microsoft Word is a straightforward process. While Word is not designed for mind mapping, it offers a range of tools that help you create a basic mind map. Here's how.
Step 1: Launch Microsoft Word on your computer. Ensure you are using the latest version of Word for the best experience.
Step 2: Start by typing your central idea or main topic in the center of your Word document. This will be the core of your mind map.
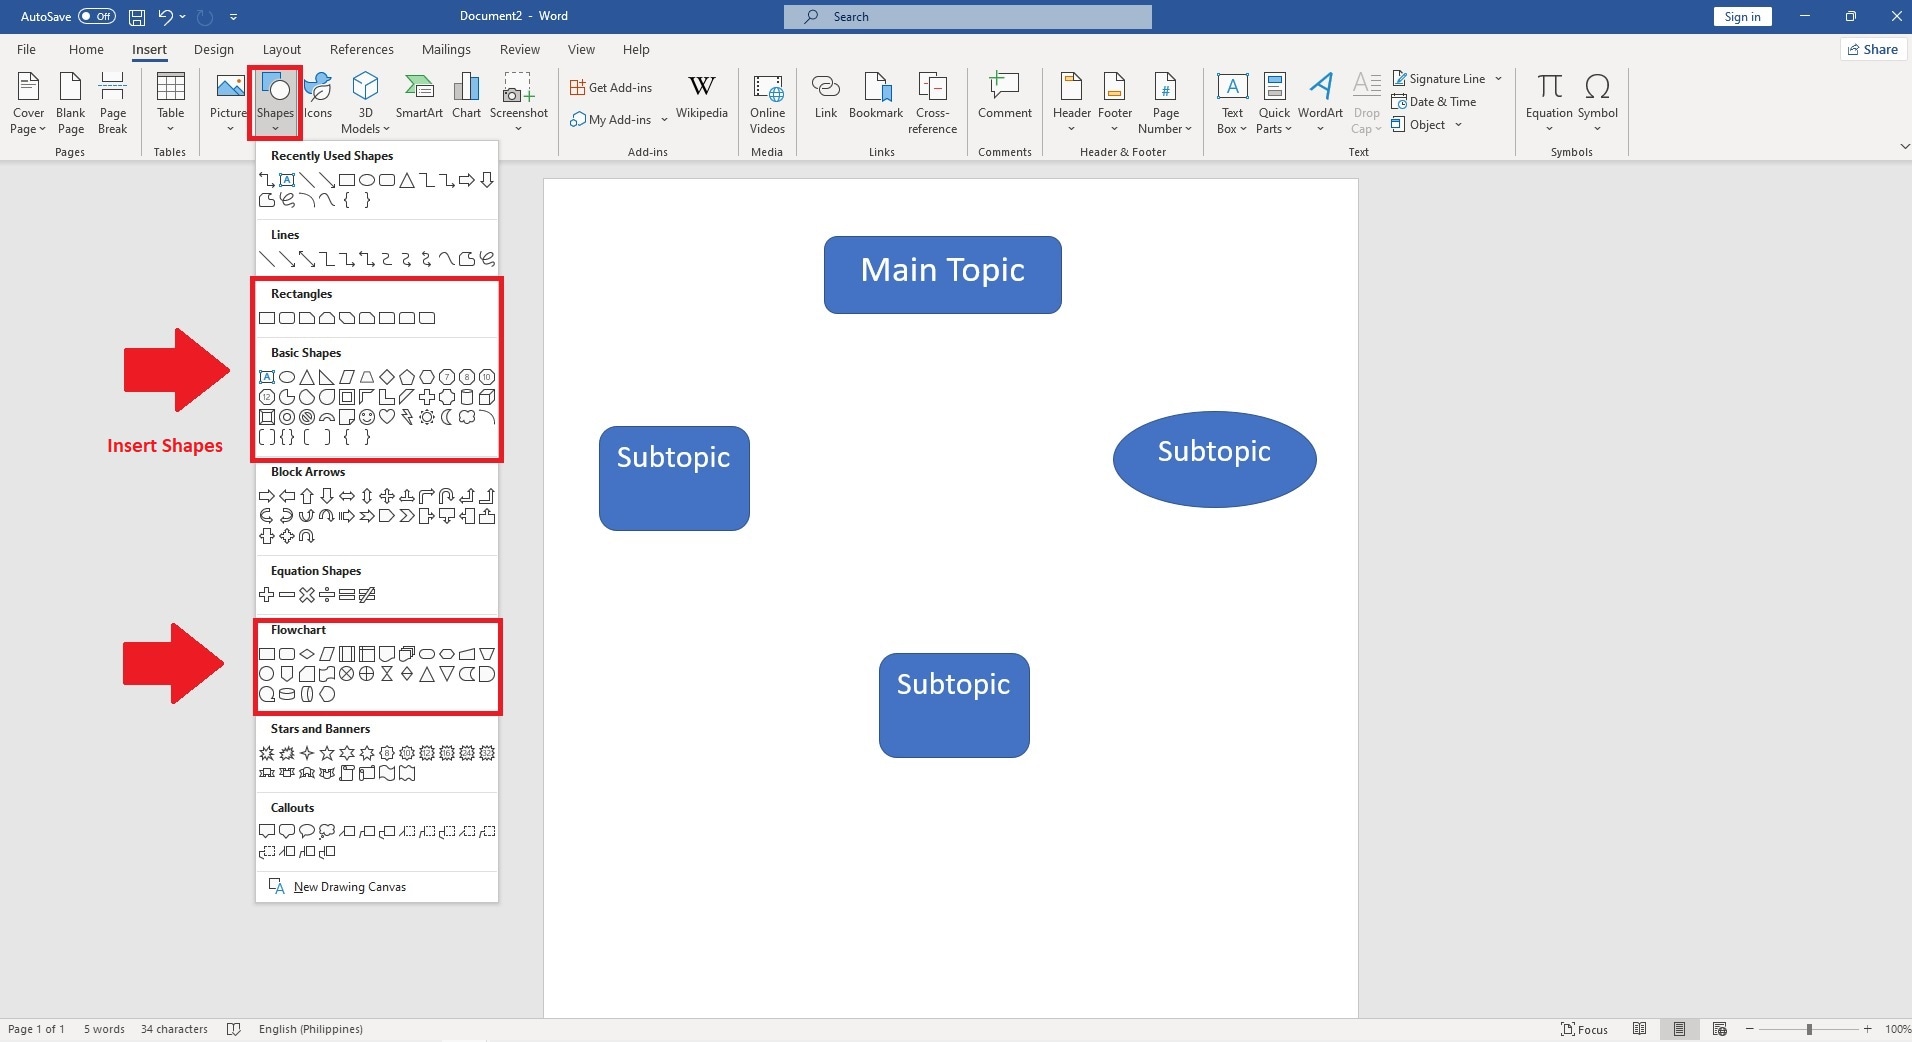
Step 3: Add branches to your mind map.
- To create branches for your mind map, use the Shapes Go to the Insert tab and select the Shapes. Pick the shape you want to use for your branches, like rectangles or ovals.
- Click and drag your mouse to draw the shape on your document. You can resize and customize it by right-clicking the shape and selecting Format Shape. This is where you can change the color, add text, and adjust the shape's style.
- Label each branch with related ideas or subtopics. To add text, click inside the shape and start typing.
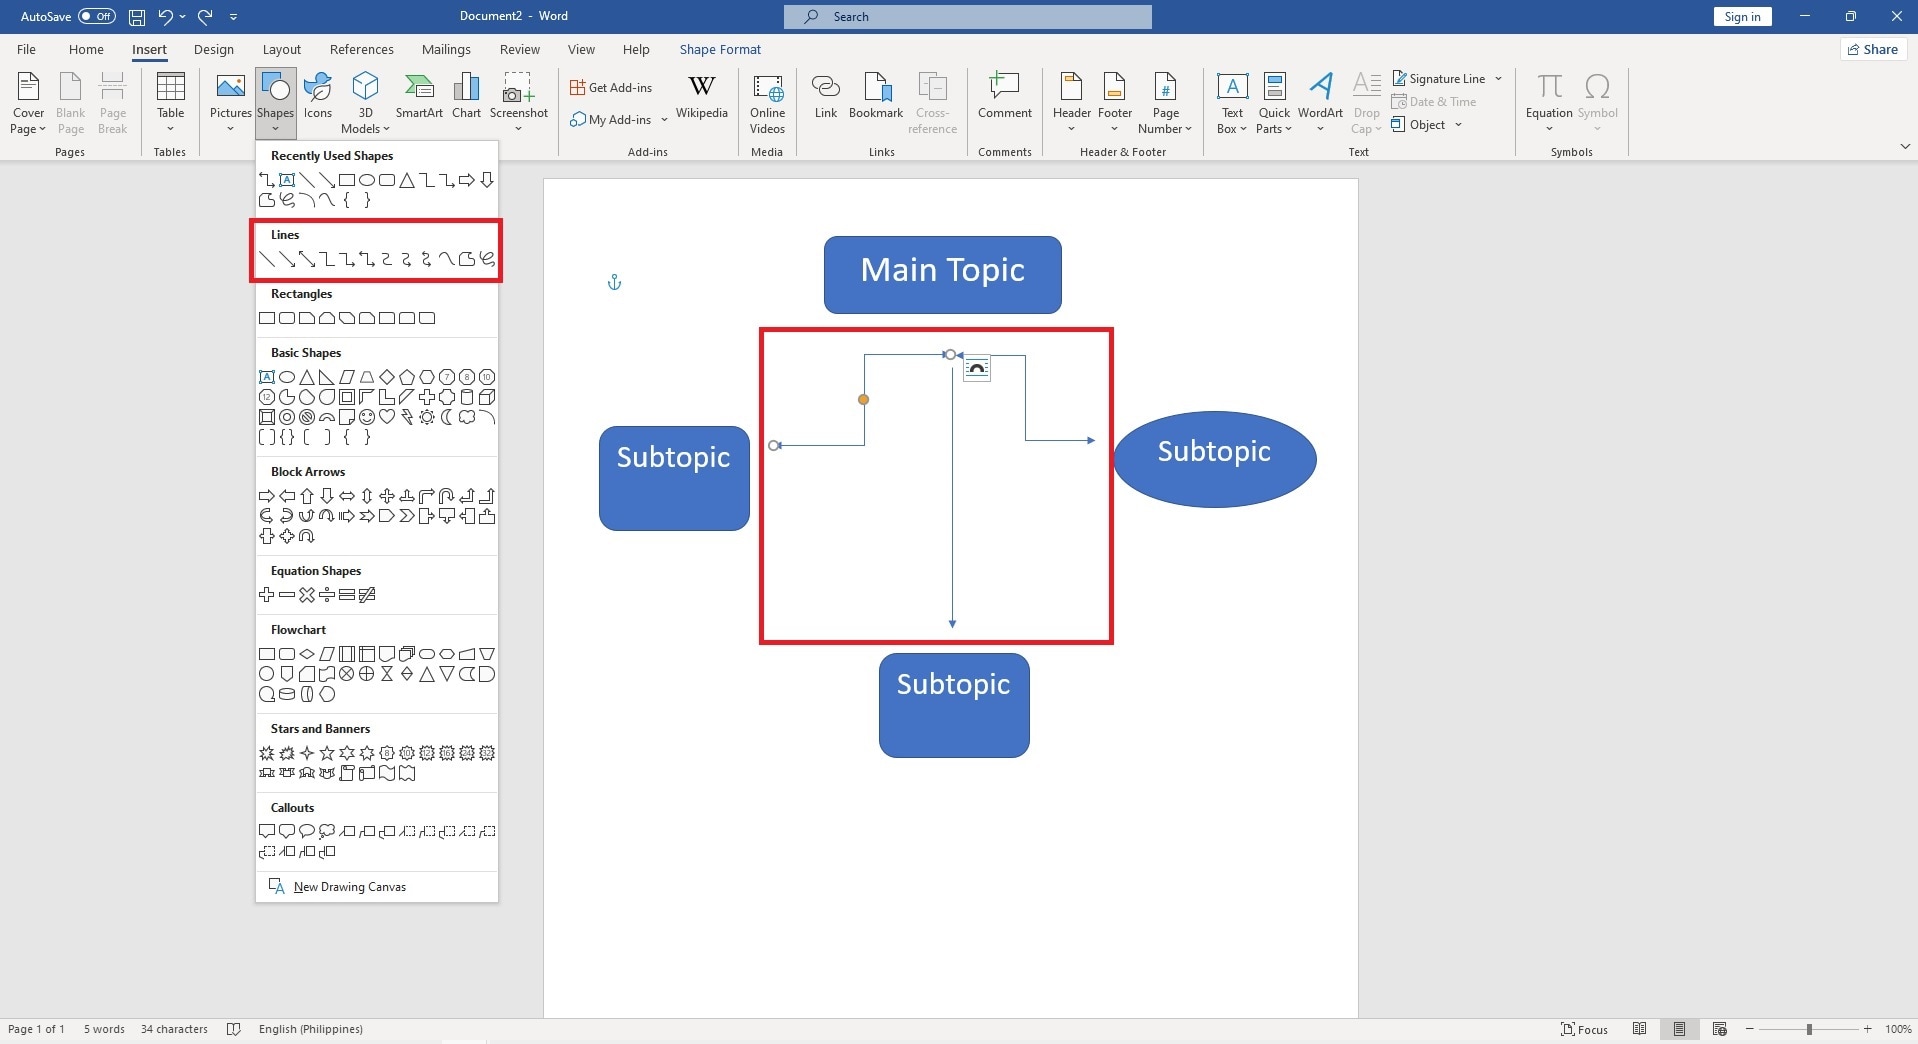
Step 4: To connect your branches, use lines. Return to the Shapes menu and select the Line tool. Draw lines from the central idea to each branch, connecting them.
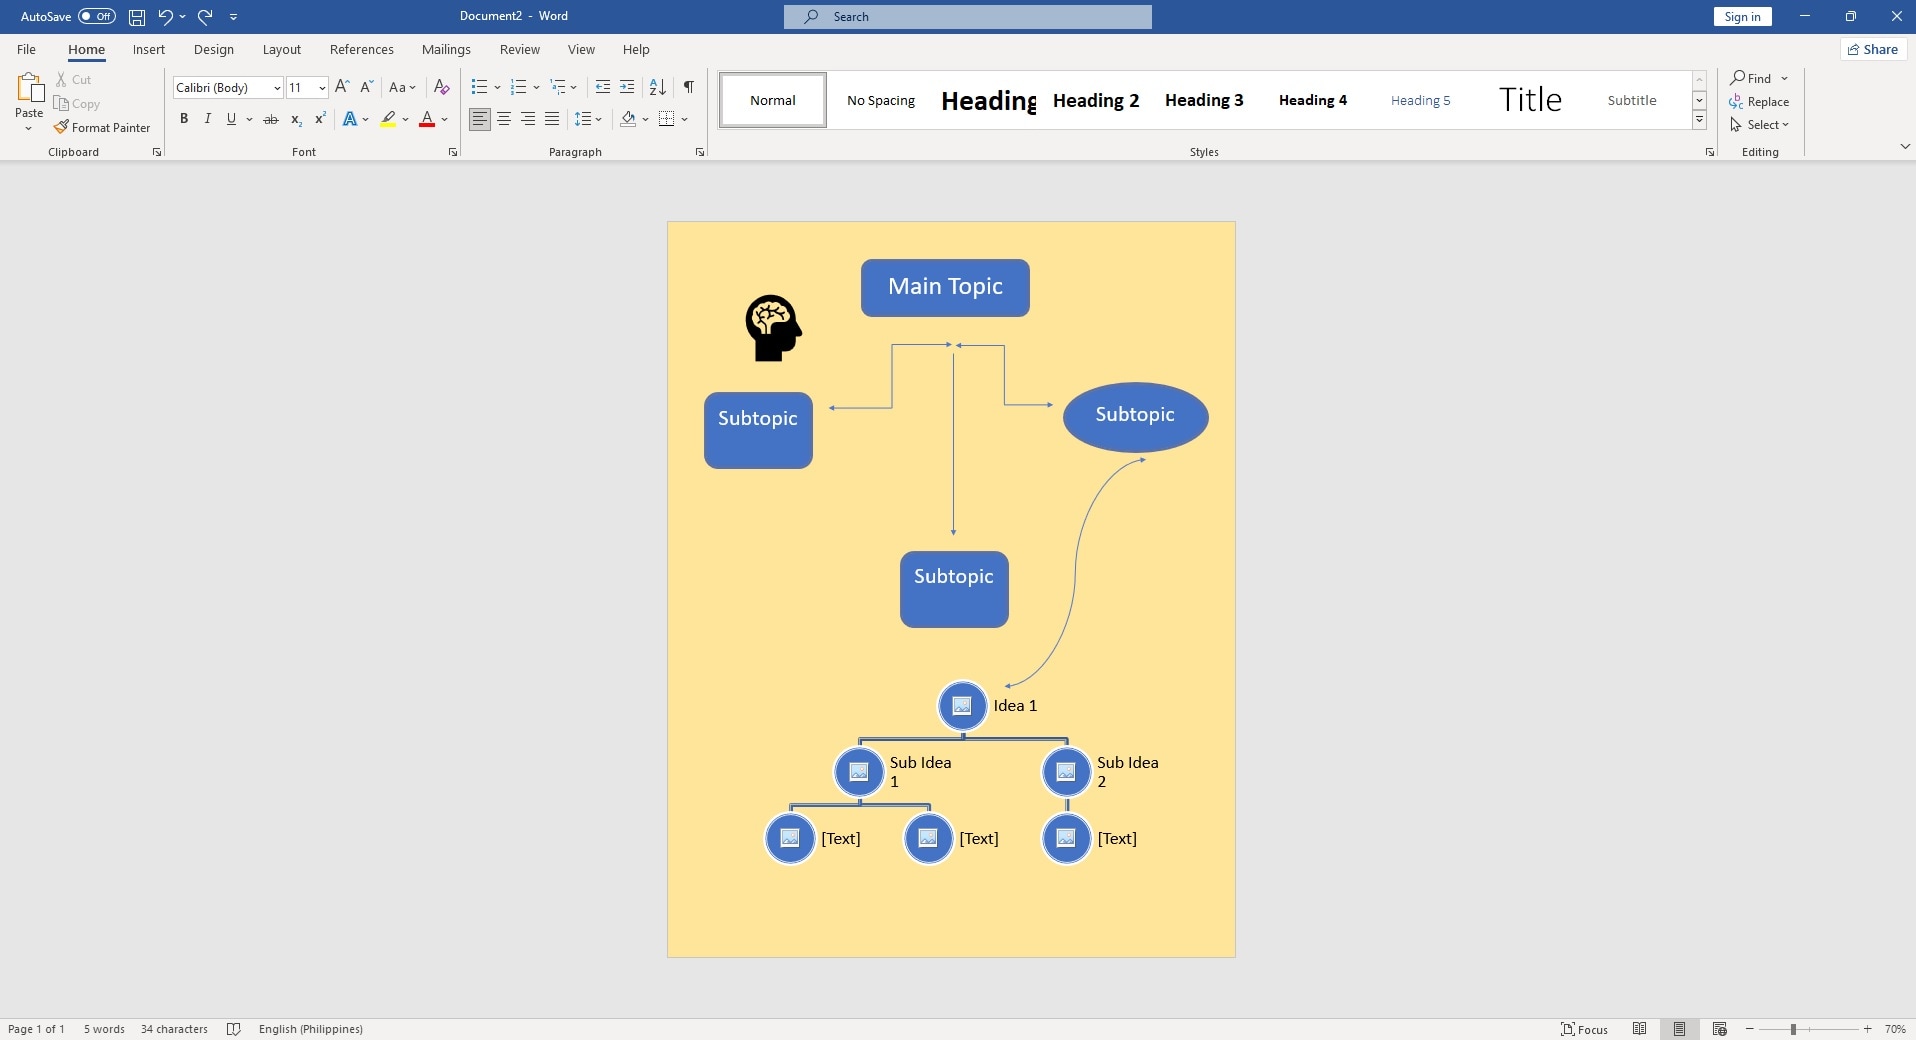
Step 5: Expand and Organize.
- Continue to add more branches and subtopics as your mind map grows. Use the same steps to create shapes and lines for these new elements.
- To reorganize or reposition branches, click and drag the shapes and lines. The flexibility allows you to rearrange your mind map as needed.
- Customize your mind map further by adjusting the formatting, adding colors, and using Word's features like bold and italics for emphasis.
While Word can help you create a basic mind map, it may lack some advanced features and flexibility of dedicated mind mapping software. Tools such as Wondershare EdrawMax simplify the process with pre-designed mind map templates. It has an intuitive interface, enhanced design options, and more efficient solutions for intricate and engaging mind maps.
Part II: Tips for Effective Mind Mapping in Word
Creating mind maps in Word can be productive if done effectively. Here are seven tips to make the most of your mind mapping in Word.
- Use Word's Shapes and Lines. Microsoft Word provides a range of shapes and lines that can be instrumental in building your mind map. Use these tools to create nodes and connections between ideas. They keep your mind map organized.
- Customize Shapes and Colors. Make your mind map appealing and informative by using different shapes, colors, and fonts. Customize nodes to represent the importance of ideas and group-related concepts and enhance clarity.
- Utilize Headers and Subheaders. Apply Word's heading styles to create a hierarchy in your mind map. Larger font sizes and bold formatting can make key ideas or categories stand out.
- Insert Hyperlinks and Attachments. Insert hyperlinks to external resources or attach relevant documents within Word. It provides quick access to additional information. They enhance the functionality of your mind map.
- Group and Ungroup Elements. Group elements together, making moving or resizing entire sections of your mind map easier. It's useful for organizing complex maps.
- Use Tables for Grid-based Mind Maps. If you prefer a grid-based mind map, consider creating tables in Word. Each cell can represent an idea, allowing you to structure your thoughts.
- Regularly Save and Back up. Don't forget to save your work. Word's AutoSave feature can be a lifesaver, but creating manual backups is wise.
Part III: How To Make a Mind Map in EdrawMax
Creating a mind map in EdrawMax is a seamless and efficient process. Here's a step-by-step guide on how to make a mind map in EdrawMax.

Step 1: Begin by downloading and installing EdrawMax. Follow the installation instructions for your operating system. Once the installation is complete, launch EdrawMax.
Step 2A: EdrawMax offers two starting points for creating a mind map. You can create one from scratch or select a pre-designed template from the Templates Community. To create from scratch, click the New button to start a new project. In the Template Categories, select Mind Map and choose a blank template. Click Create to begin with a blank canvas.

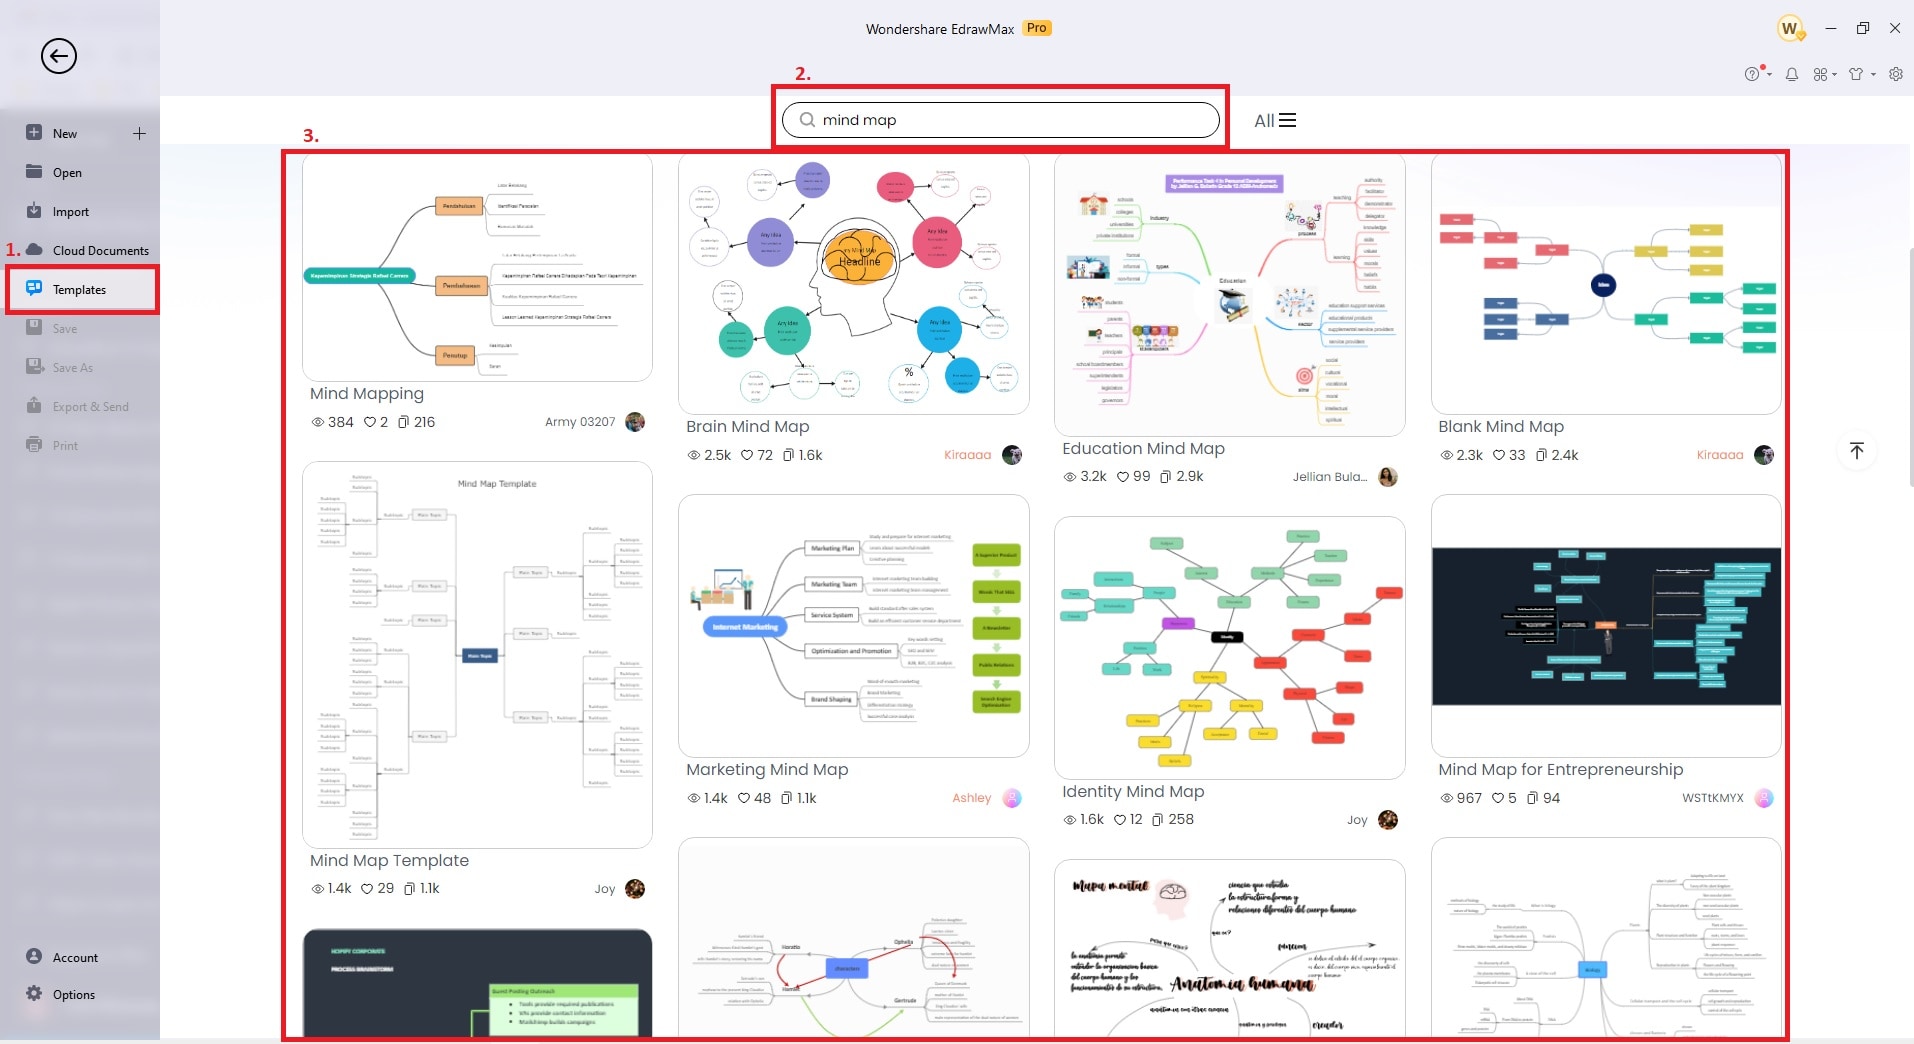
Step 2B: Alternatively, you can access the Templates Community to browse and select from a wide range of pre-designed mind map templates. Click Templates the start page and type Mind Map on the Search Bar to generate a mind map in one click.
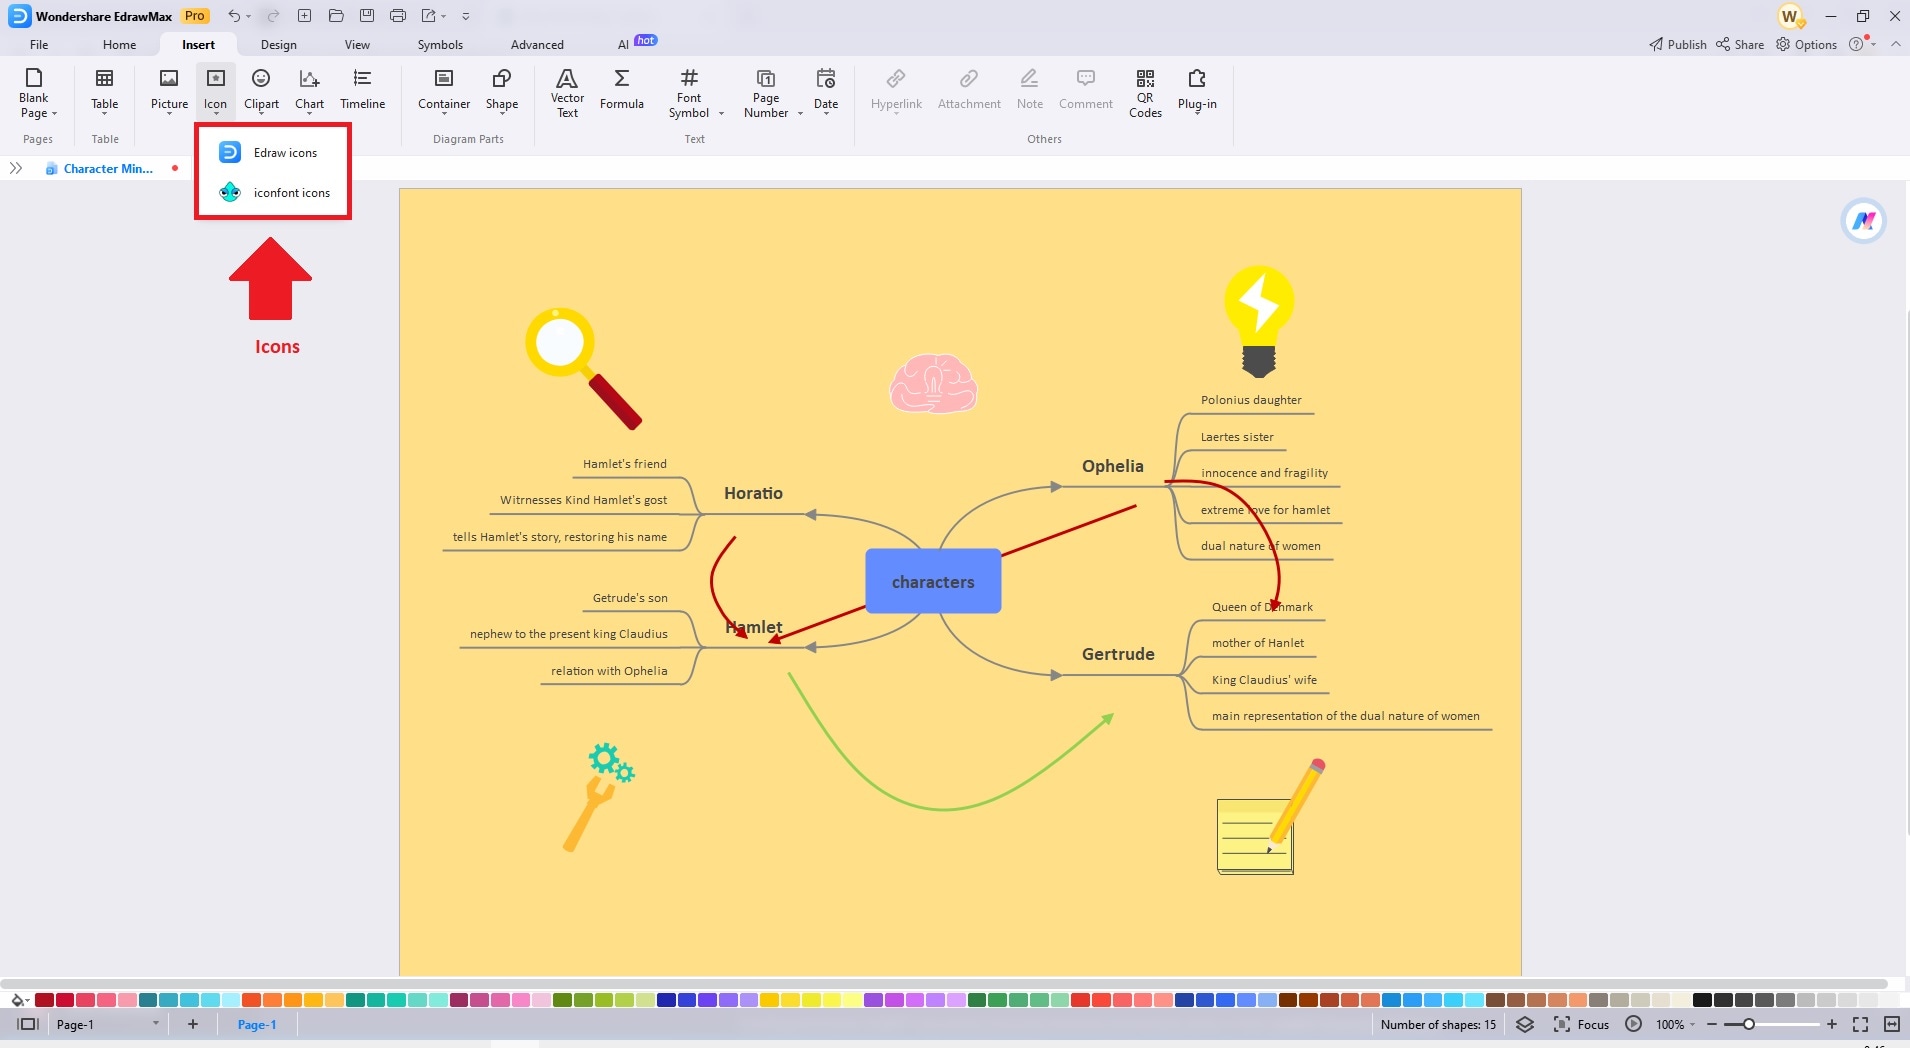
Step 3: Once in the mind map editor, click the central idea and type your main topic. Add branches and subtopics using the Symbols Tab on the left panel. Customize each shape with text, colors, and styles using the Design toolbar. To add other elements like icons, clipart, and photos, click the Insert tab in the toolbar and choose the appropriate element you want.
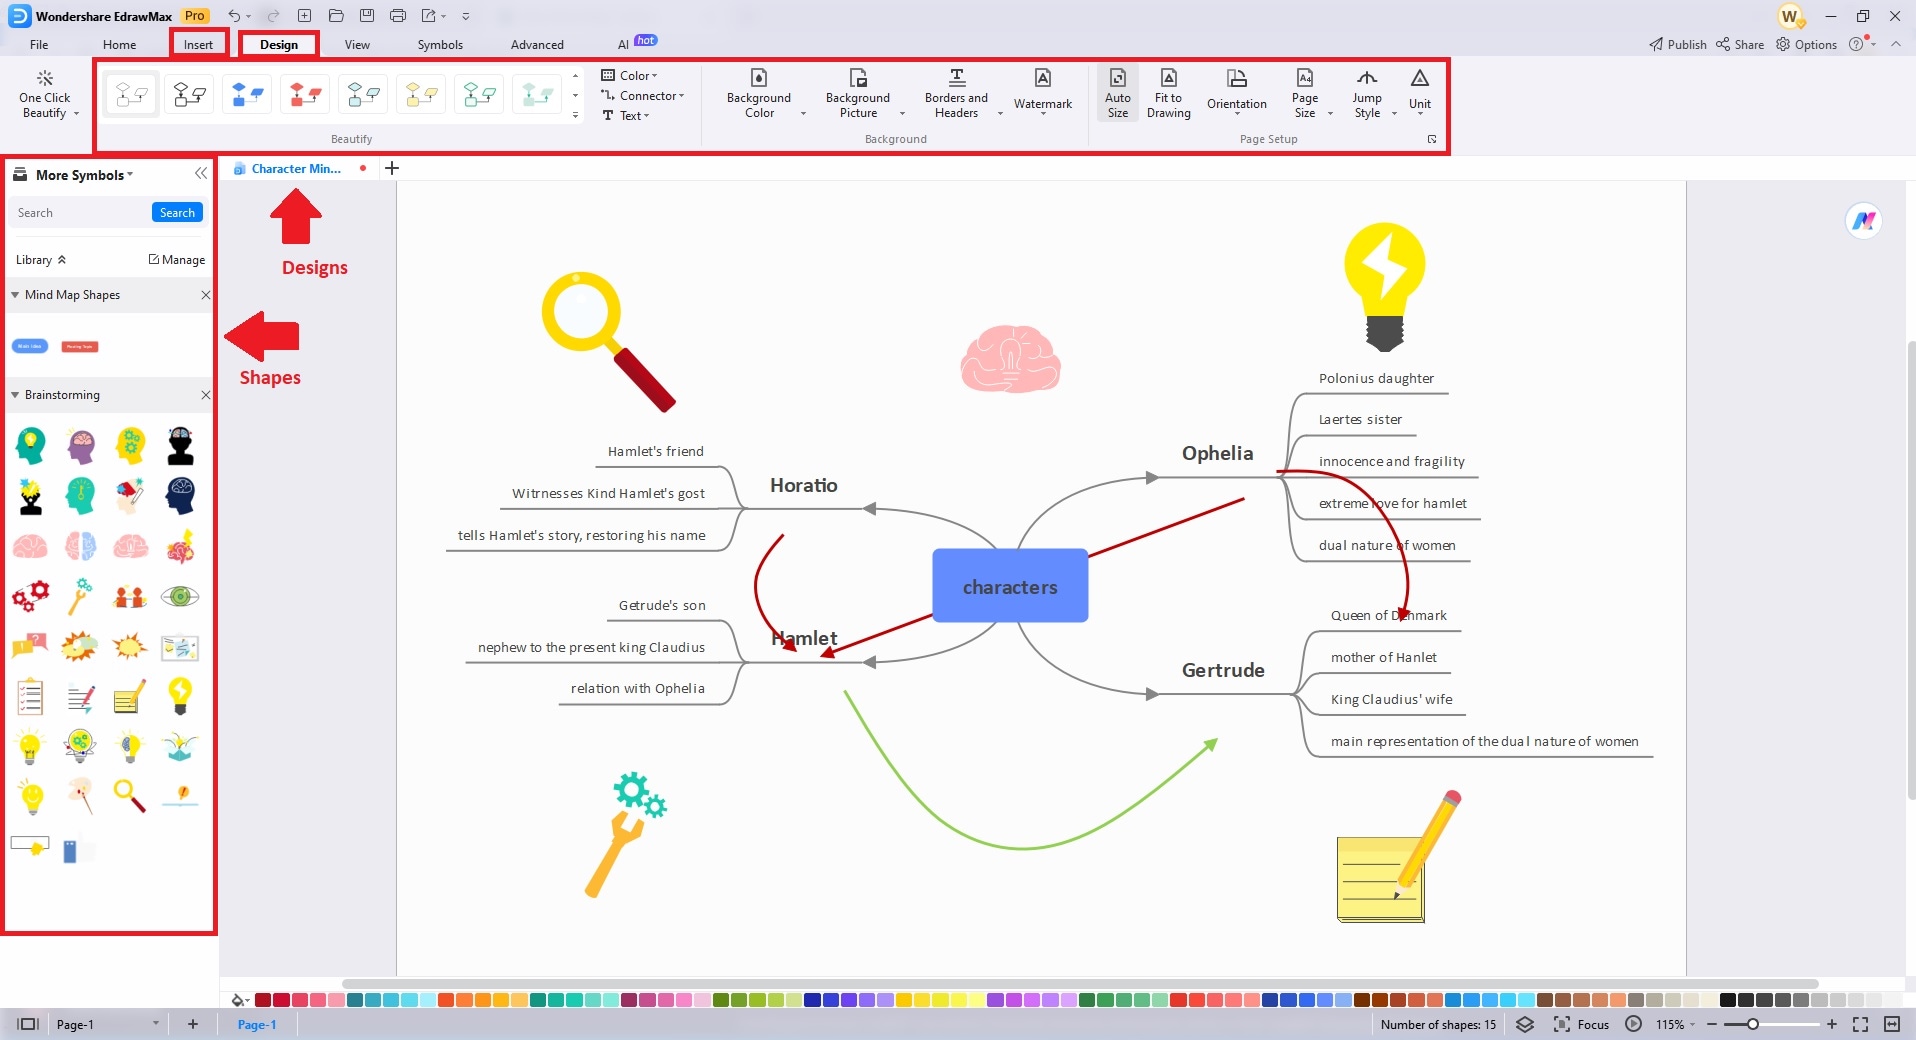
Step 4: Use tools such as lines and arrows to connect ideas. Illustrate relationships and customize the design by changing colors, fonts, and shapes and adding images. Group-related ideas for a more organized structure. Take advantage of EdraMax's and Iconfont icons to beautify your mindmap. Enhance your diagram further until you're satisfied.
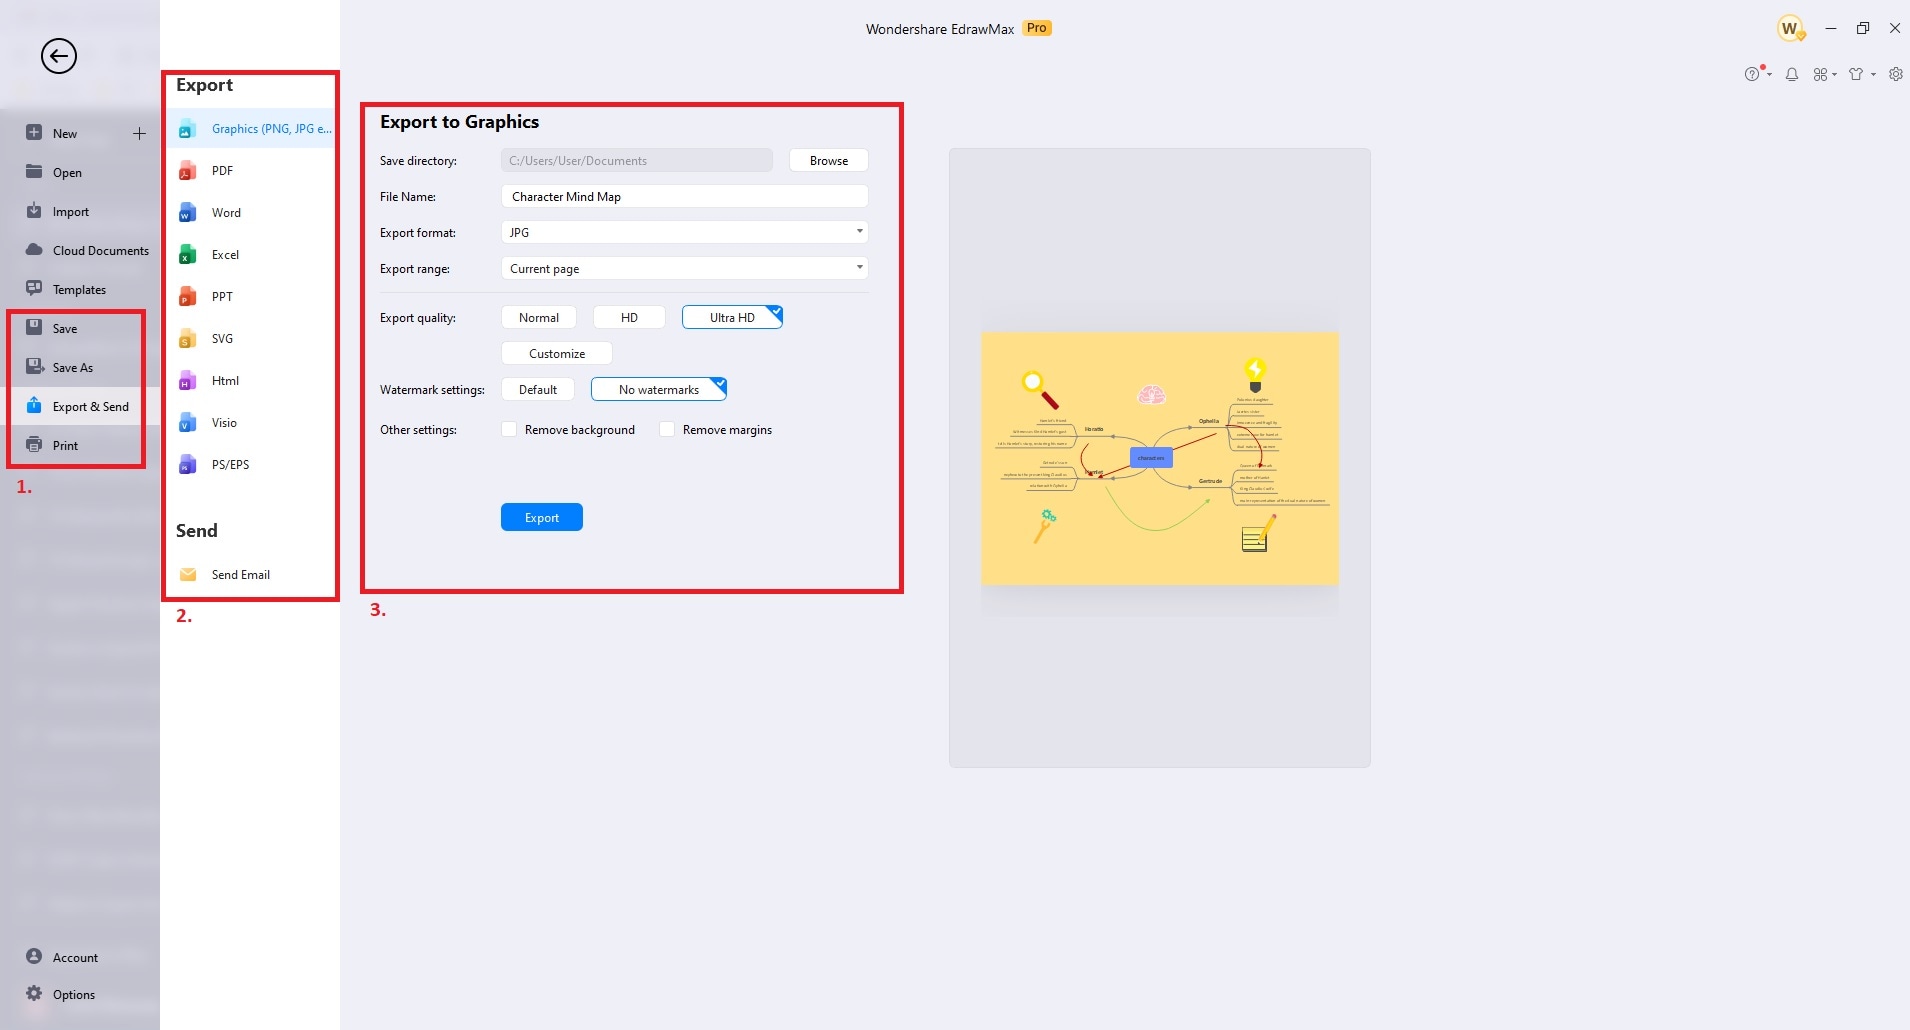
Step 5: Once you've completed your mind map, saving your work is essential. Click File and select Save As to choose your preferred file type. To share your mind map, click Export & Send. You can export your mind map in different formats, share it via email, or print it.
Part IV: Free Mind Map Maker
EdrawMax is a versatile diagramming software that offers various features for creating mind maps. Here's an in-depth look at its key capabilities.

Templates Community
EdrawMax provides access to a vast library of mind map templates. It enables you to kickstart your projects with ease. These templates cover diverse categories. The platform makes finding the perfect layout and style for your specific needs is simple.
AI Diagramming
With EdrawMax's AI diagramming, you can generate mind maps in a single click. The feature streamlines the creation process by offering intelligent suggestions for connections and layouts. It reduces the time and effort required to build intricate and detailed mind maps.
Cross-Platform Support
EdrawMax offers a seamless experience by supporting multiple platforms. It supports both desktop and mobile operating systems. The cross-platform compatibility ensures you can work on your mind maps from anywhere. You can also collaborate with team members regardless of their preferred devices.
Presentation Mode
EdrawMax simplifies the transition from mind map to presentation. You can create professional presentation slides directly from your mind map. It eliminates the need to switch to a separate tool like PowerPoint. Presentation Mode ensures your mind maps are informative and engaging when shared with your audience.
Conclusion
Designing mind maps in Microsoft Word reflects the software's versatility. However, making mind maps in Word is an intricate process that demands a good deal of manual effort and design skills.
If you're looking for a more efficient and user-friendly experience, EdrawMax is a good choice for an alternative. With its Templates Community and AI assistance, it streamlines the mind map creation process. The platform offers an extensive library of templates and intelligent suggestions for connections and layouts. It saves time and ensures your mind maps are professionally designed and appealing.
AI Diagram Generator
Enter your prompt. Upload files if needed. Generate diagrams, charts, or slides instantly.


