


A power supply unit is used to lower the voltage levels from one source and change them into another for further operations. Most devices run on the Direct Current that uses low voltage levels. For example, a computer or a laptop uses direct current. The power supply unit changes the alternating current, making it favorable for the computer. Most of the mobile devices are charged through Direct Current.
This article will discuss the power supply unit through its block diagram. How does a power supply unit work, and what are the main parts involved in its operation? All of these are going to be discussed in this article.
In this article
Part 1. What Is a Power Supply Unit?
A power supply unit is a device that uses alternating current (AC) having 220 volts or higher and lowers the voltage levels to 12 Volts, making it a Direct Current (DC). This device is used in mobile phone chargers, computers, and other electronic devices.
Different types of capacitors are used to convert the AC to DC. The supply uses AC, and with the help of capacitors and other devices, this AC is converted into DC, which is a requirement of our devices like TVs, Computers and Chargers.
The device needs almost 330 watts to operate and is quite useful. We might see it on your computer; a fan must be attached to the power supply. The fans are used internally in a few modern power supply units; you will only see them when the machine is opened.
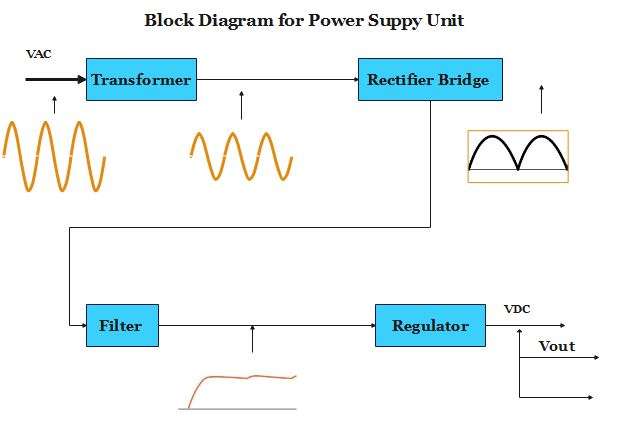
Block Diagram of the Power Supply Unit
The block diagram for a power supply unit is easier to understand and draw. Here is how you can draw it.

This diagram shows all the basic components of the power supply unit, including the transformer, rectifier bridge, filter, and regulator. All these components serve different purposes. Let's discuss them one by one.
Transformer
A transformer has two types of winding: primary winding and secondary winding. It receives AC voltage at the primary and lower AC voltage at the secondary winding. The peak value obtained at the secondary winding is closer to 12.69 volts. This value is our actual requirement, but the Voltage drops at different stages of the functions in the power supply unit.
Rectifier Bridge
Rectifier Bridge neglects the negative wave firm of the Voltage as shown in the block diagram. Rectifier bridge changes the secondary winding from lower AC voltage to Pulsating DC voltage. This rectifier bridge shortens the wave signals and makes it processable for the filter.
Filter
Filters are usually capacitors that help the wave to be smoother and neglect any alternating current in the circuit. The capacitors are charged to the maximum voltage value and discharged when the Pulsating signal disappears.
Regulator
A regulator receives the signal from the filter, and this regulator keeps the Voltage steady. The regulator doesn't depend on the voltage drops at the transformer, rectifier or filter. Its job is to keep the Voltage steady.
These regulators are of different types. They are used to maintain the AC voltage as well. People use these regulators to keep the voltage fluctuations away. These regulators used in computers serve different and are of smaller sizes.
Part 2. Power Supply Parts
What's inside the power supply is important, but you should not neglect the other parts of the unit. Here are a few of the parts attached to the back of the power supply in a computer. Most of the power supply systems must have these parts as well.
Fan
The fan is one of the most important parts in the computer's power supply. It is used to throw heat out of the system and allow it to run smoothly. There are too many operations that a computer runs at the same time, so the system could get heated. The fans help the system to cool down a bit.
Power Cord Connection
The power supply unit is attached to the computer through this cord. This cord collects the AC from the plus and brings it into the power supply unit. If this part is removed, your system will turn off automatically.
Red Switch
A red switch at the back end of the power supply alters the voltage levels. In the case of the computer, you don't need to do much as the system is run on the pre-installed settings. However, many power supply units can also change Voltage to a desired level. This red switch comes into play when such requirements are necessary.
The Rocket Switch
This switch is used to turn off the power supply unit. For example, if you want to operate an air cooler that runs on DC, you just need to connect your power supply unit to the cooler and plug in the power supply to your home switch that uses AC. This power supply rocket switch will help you to turn your ON and off through this button.
Part 3. How to Draw Such a Block Diagram?
Block diagrams are made through these two most useful methods. Let's discuss them one by one.
Method 1: Starting from Scratch
You can draw your block diagrams in EdrawMax. For this, you need to use tools that are quite helpful and save a lot of time for you.
Step 1: Open EdrawMax, and if you don't have it, download it now.
Step 2: Click New Project>Block diagram or Blank Drawing.

Step 3: Use symbols available at the left side of the screen and drag them on the canvas.

Step 4: Adjust the sizes of the blocks according to the need and label them all.
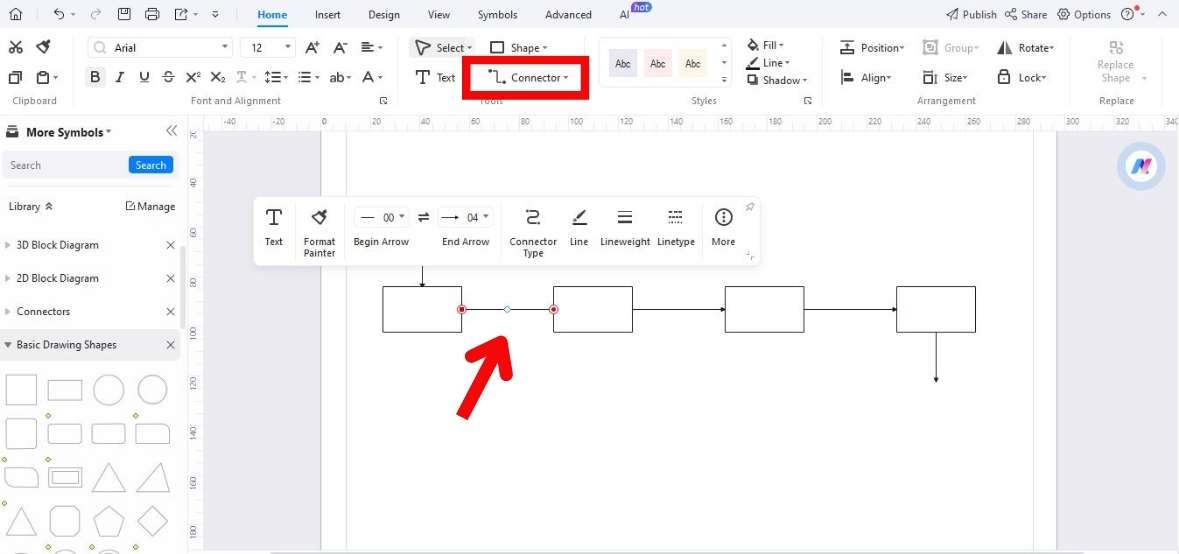
Step 5: Use a connector to draw relationships among all the blocks. The shape of the connectors could be changed, too.
Step 6: Add colors to the diagram and background if you want it to look good. You can use backgrounds available in EdrawMax or upload your own from your computer.
Method 2: Start with a Template
A template is quite useful and relaxes you a little more. It allows you to move things here and there and saves time. You will have the liberty to choose the style and edit the Template to your needs. Here are a few steps to take while using a template.
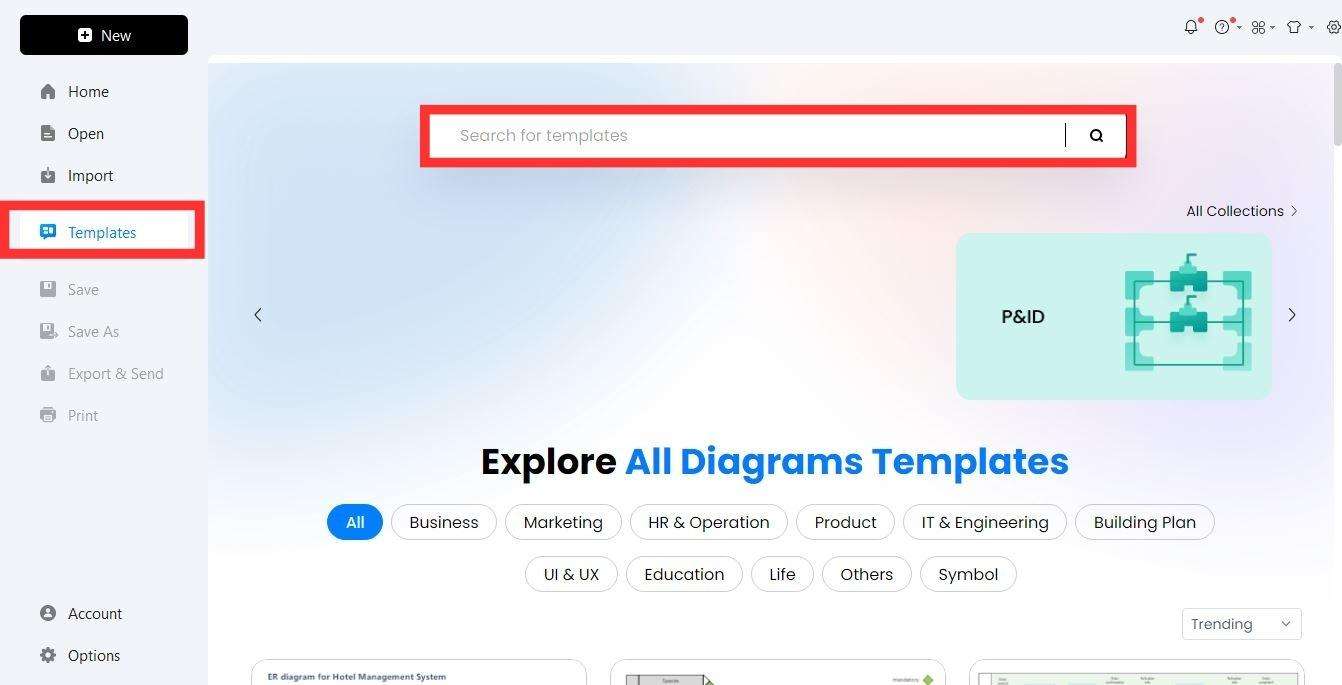
Step 1: Click templates on the left-hand side of the screen and write a block diagram in the search bar at the top of the screen.
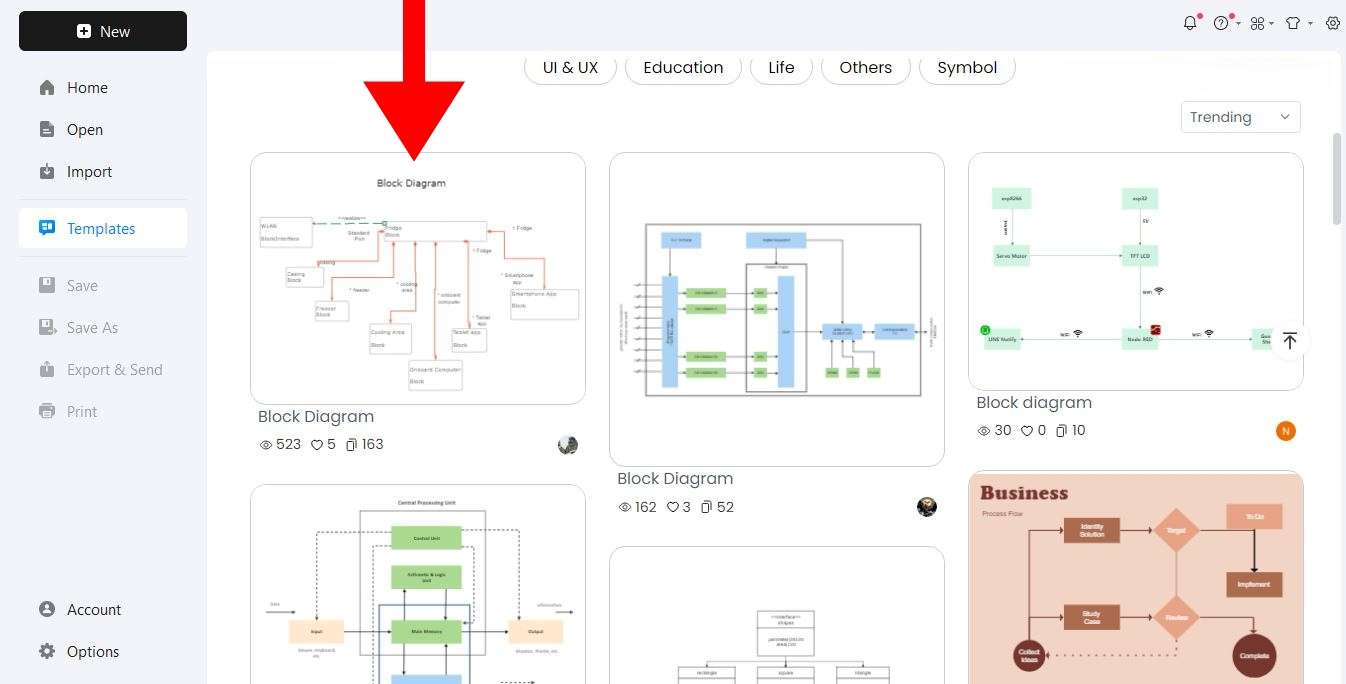
Step 2: Choose a suitable Template for your design and click use immediately. It will bring the Template to the canvas available to edit the design.
Step 3: Delete all the unwanted elements from the Template and make changes according to your needs.
So, that’s much easier than making conventional designs for you. All you need to do is just a few clicks to maneuver things, and your diagram is ready.
Conclusion
A power supply unit is a helpful device used in our daily appliances. It is being used at industrial levels, too. The Voltage we use at home is also reduced with the help of power supply units, as the Voltage that a transformer releases is too high for a device to run on. This is explained in the block diagram for a power supply unit given above.
If you want to draw such a block diagram for a power supply unit or any other system, you can get help from Edrawmax, which has all the tools needed to create a block diagram. So, it is worth trying to use EdrawMax and have quality block diagrams.
[没有发现file]AI Diagram Generator
Enter your prompt. Upload files if needed. Generate diagrams, charts, or slides instantly.


