
In today's digital world, clear and organized content is key. Imagine having the power to create easy-to-navigate, user-friendly Microsoft Word checkboxes. These simple yet essential elements are the secret to making your documents more interactive and reader-friendly.
No one likes scrolling through endless pages of text. With checkboxes, you can break down information into manageable chunks, making it a breeze for your readers to follow along. This guide will show you the ropes of adding a check box in Word, empowering you to create content that stands out in the cluttered digital landscape. Let's get started!
In this article
Part 1: What Are Checkboxes in Word?
Checkboxes in Word are like tiny interactive boxes that you can tick or untick. They help you organize information and make your documents user-friendly. These little boxes are commonly seen on forms, surveys, or to-do lists. When you need to mark things as done or make choices, checkboxes are your friends.
They make your Word document less like a long, boring story and more like a clear map your readers can follow. So, if you're ready to learn how to create these helpful checkboxes, you're in the right place. Stay tuned and learn it step by step.
Part 2: How To Create a Check Box in Word
Creating checkboxes in Word is as easy as pie, and this guide will show you how it's done. Here's a simple step-by-step guide to get you started.
Method 1: Using the Developer Tab
This method is the most efficient way to create a check box in Word. Simply follow the steps outlined below, and you'll immediately have your Microsoft Word checkboxes!
Step 1: Open your Word document and go to the File tab.
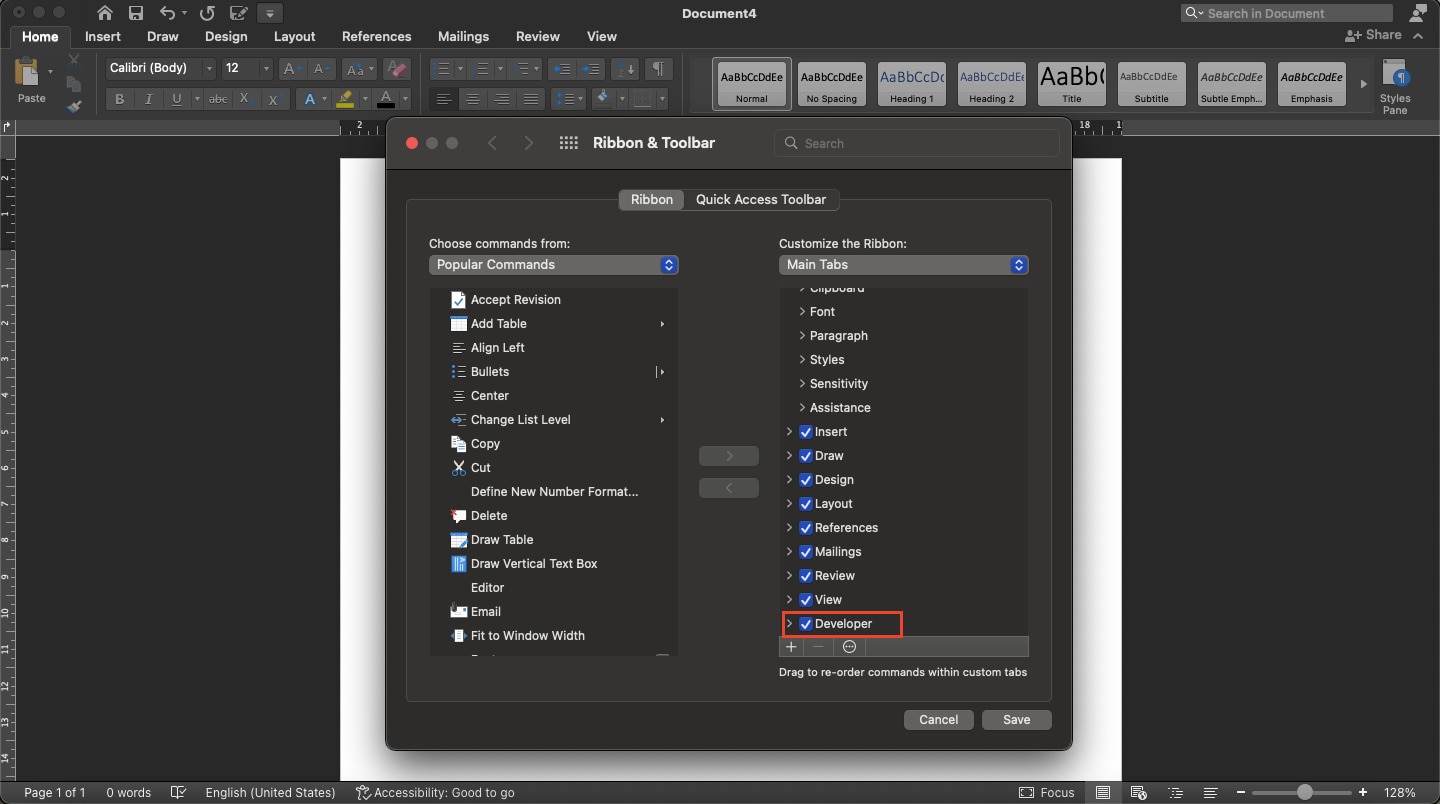
Step 2: Choose Options, then in the Word Options dialog, select Customize Ribbon.
Step 3: Check the Developer option and click Save. You will now see the Developer tab on the ribbon.
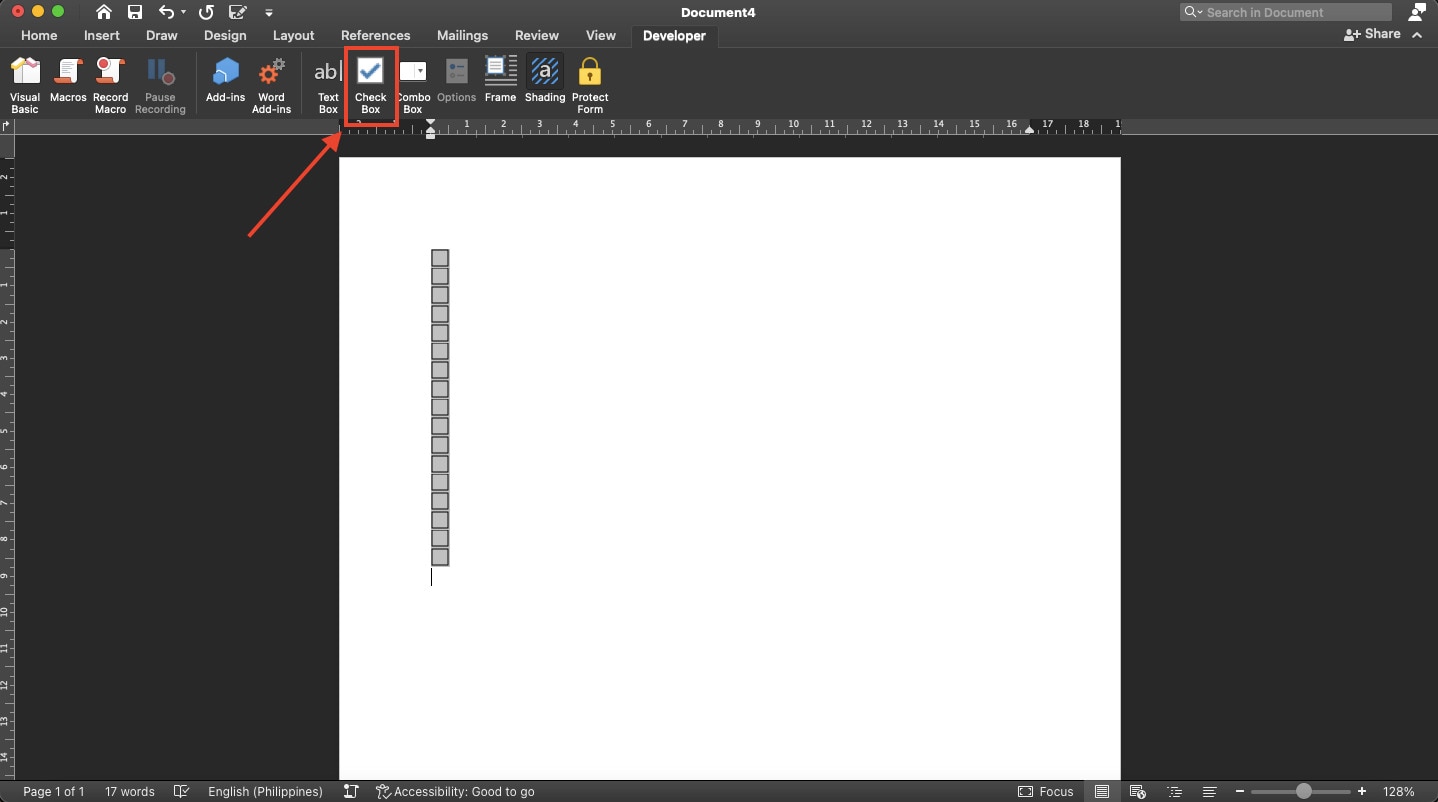
Step 4: Now go and click the Developer tab. Find the Check Box button and click it. A check box will then appear on your document. Click the Check Box button again to add more checkboxes.
Method 2: Using AutoCorrect (For a To-Do List)
When it comes to creating a checkbox for a to-do list in Word, there's a nifty trick that can save you time and effort. This method uses Word's AutoCorrect feature to turn simple text into handy checkboxes.
Step 1: Open your Word document.
Step 2: In the Developer mode, type an "x" enclosed in square brackets like this: "[x]".
Note: You can make more checkboxes by typing "[x]" and hitting space again.
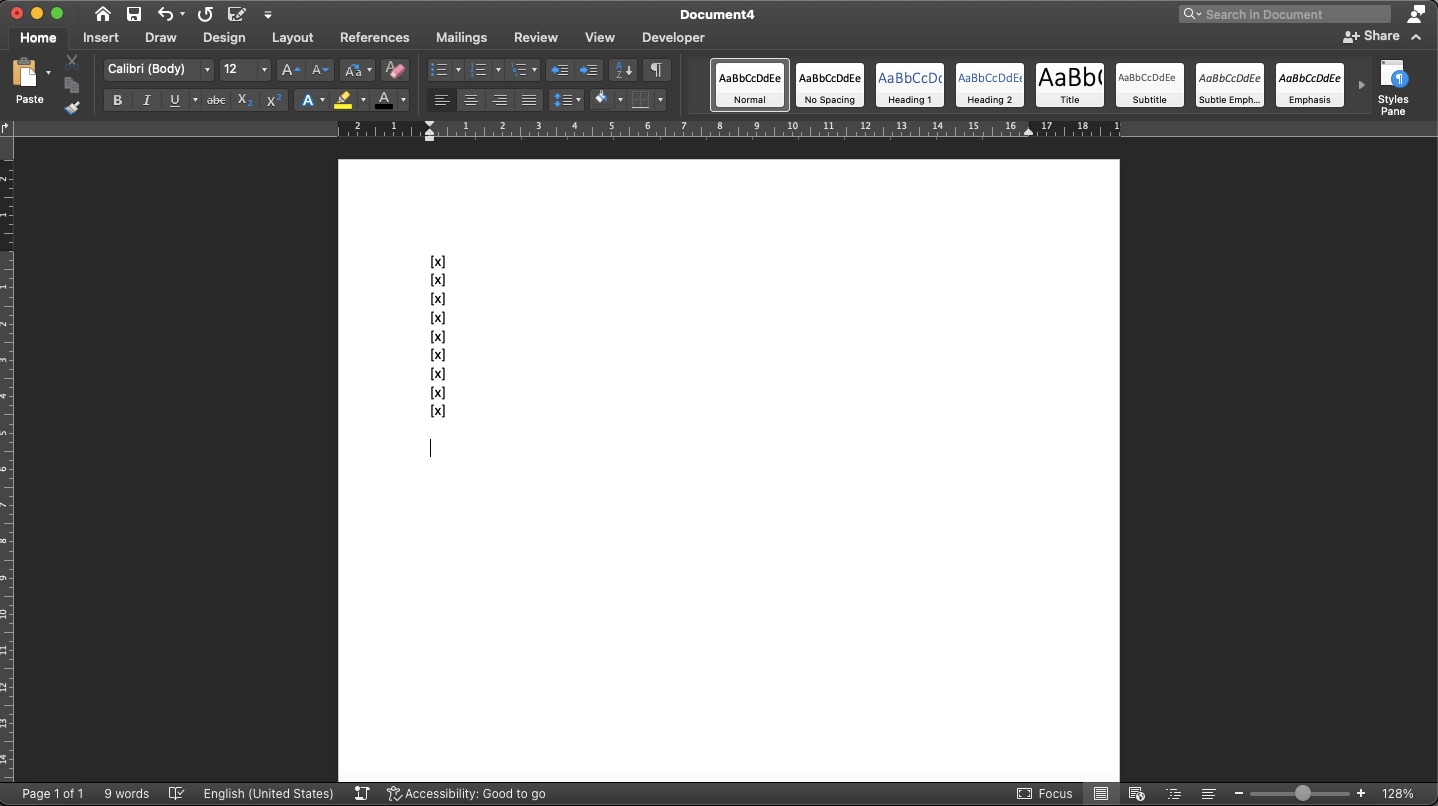
Step 3: When you hit the spacebar after typing "[x]," it will automatically turn into a check box.
And that's it! You've just learned how to create a check box in Word using different methods. Choose the one that suits you best, and you'll make neat, organized documents in no time. Now, let's move on to exploring a much easier way to create a check box using the user-friendly tool, EdrawMax!
Part 3: How To Create a Check Box Easier
Creating checkboxes can be even easier with the help of Wondershare EdrawMax, a user-friendly diagramming tool. This section will guide you through a simple step-by-step process to make your checkboxes effortlessly.
Step 1: Start by navigating to EdrawMax's website on your browser and clicking the WORKPLACE button.
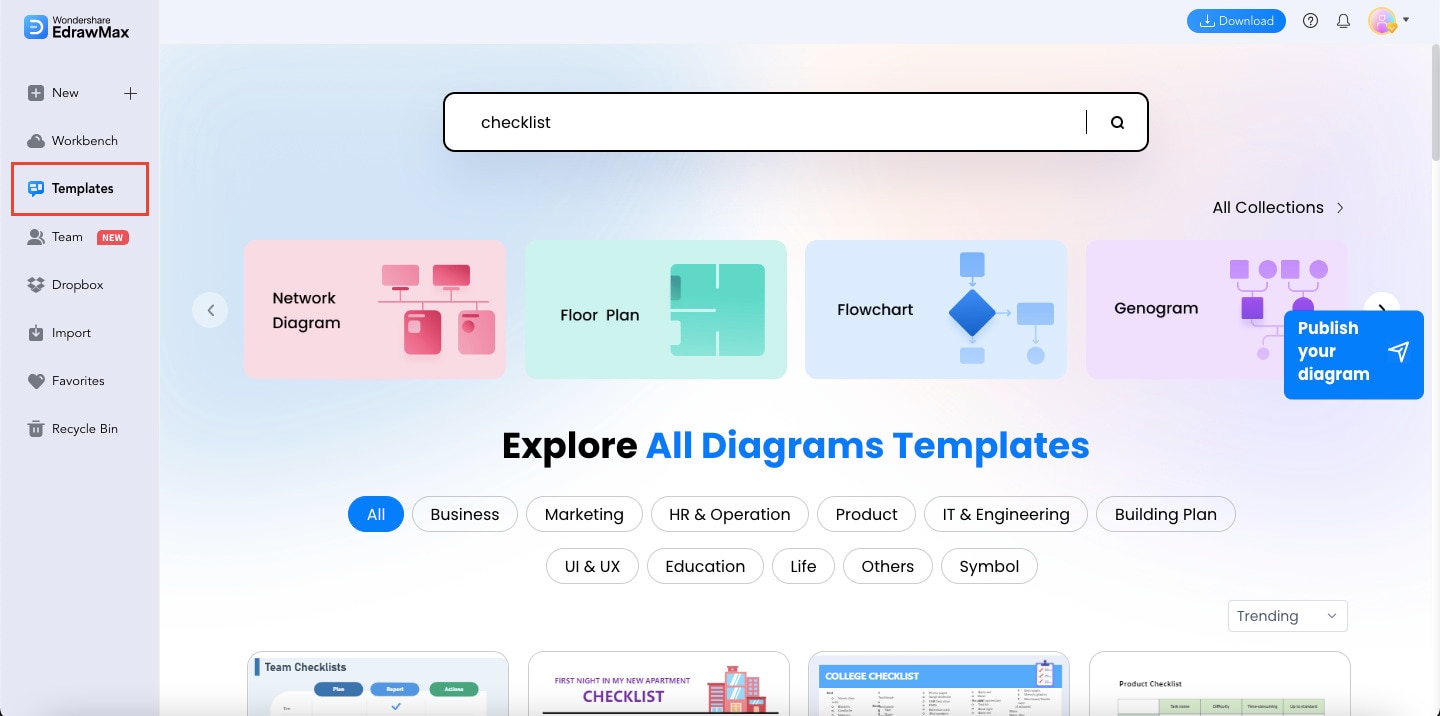
Step 2: One of the best features of EdrawMax is that it offers a wide range of templates. You can find these templates in the Templates tab. Search for "checklist" on the "search bar" and choose one that suits your document's style.
Step 3: Once you've selected your template, you may customize it by navigating to the Symbols library. Find the check box shape and drag it to your document.
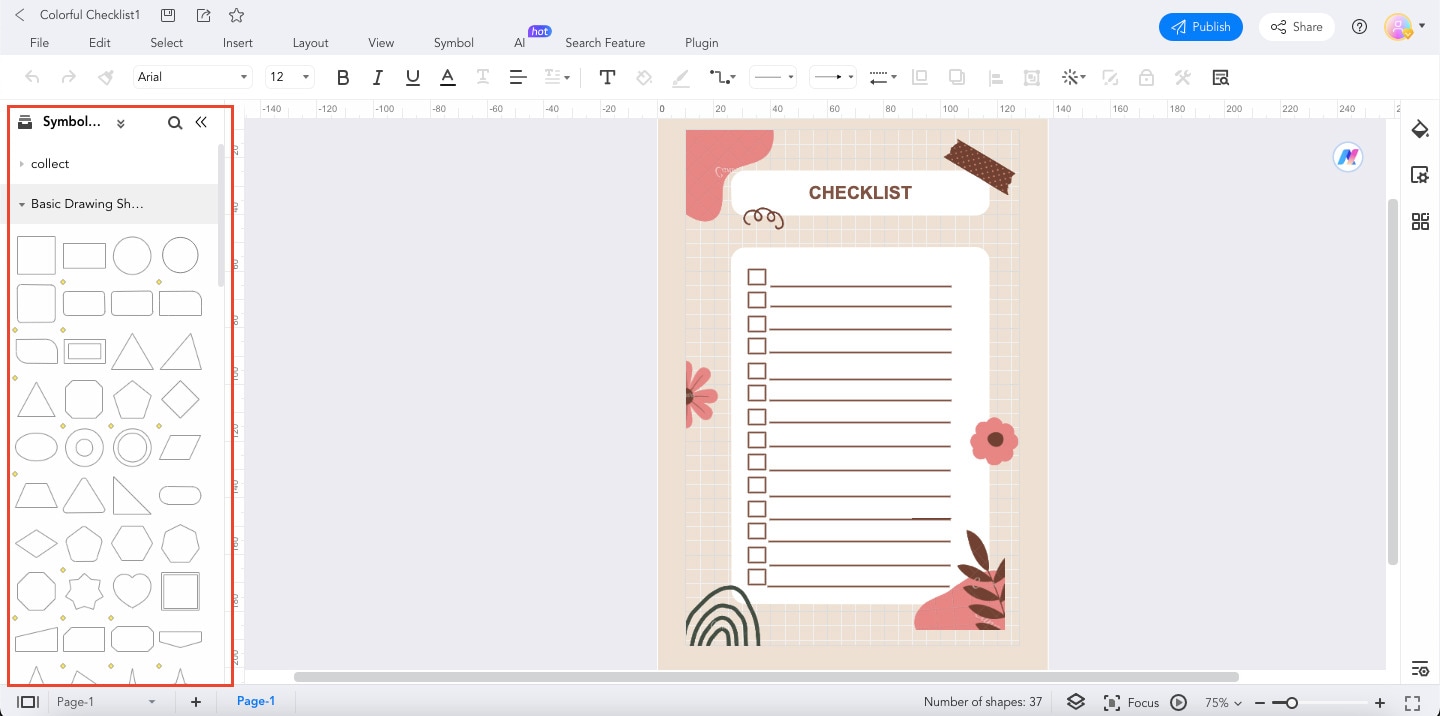
Step 4: Click the check box to customize it. You can change its size, color, or style to match your document's design.
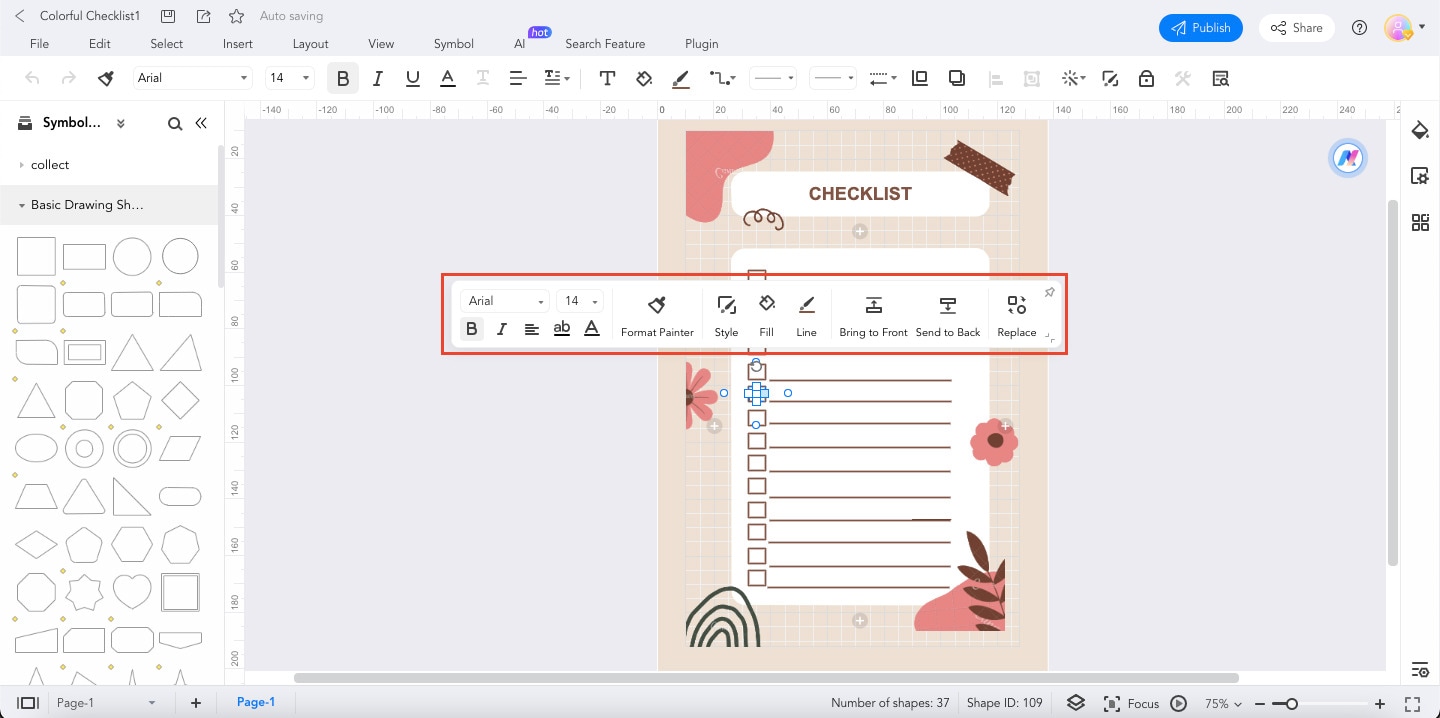
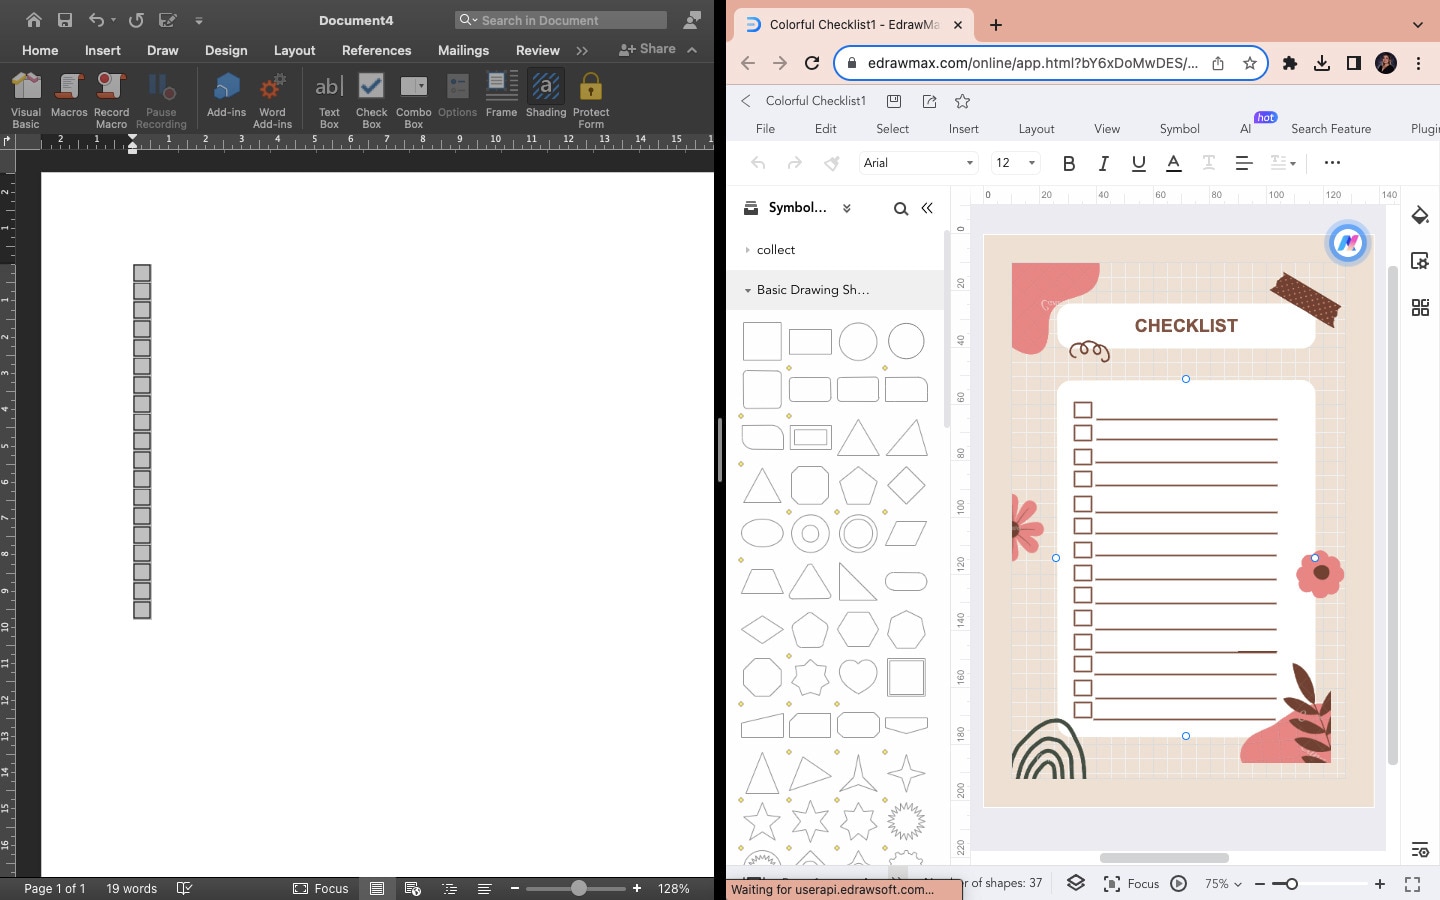
Step 5: If you need multiple checkboxes, duplicate the one you've customized and place them wherever you want in your document.
And that's it! EdrawMax simplifies creating checkboxes, making it a breeze for anyone. Whether you're designing a survey, form, or to-do list, this method will help you achieve professional results without the hassle. Now, let's move on to the next section, where you'll learn about the best practices in designing your checkboxes!
Part 4: Best Practices for Checkbox Design
When it comes to designing checkboxes, keeping things simple and user-friendly is the way to go. Here are some easy-to-follow design tips to ensure your checkboxes are clear and intuitive:
- Size matters. Make your checkboxes large enough to click easily. Small checkboxes can be frustrating for users.
- Clear labels. Always provide clear and concise labels next to your checkboxes. Users should know what each checkbox represents.
- Adequate spacing. Leave enough space between checkboxes to prevent accidental clicks. White space is your friend.
- Visual consistency. Keep the style and appearance of checkboxes consistent throughout your document. It helps users recognize them easily.
- Smart placement. Position your checkboxes logically so users can easily associate them with the related content.
- Group related checkboxes together. It helps users understand the context and purpose of each checkbox.
- Always test your checkboxes with potential users to ensure they find them user-friendly. Make adjustments based on their feedback.
Remember, a clean and intuitive layout makes your checkboxes more user-friendly, enhancing the overall experience of your document. Following these design best practices will ensure that your checkboxes are easy to understand and a pleasure to interact with.
Part 5: Microsoft Word vs. EdrawMax
Regarding creating checkboxes, both Microsoft Word and EdrawMax have their strengths. Let's break down the pros of each in simple terms:
| Microsoft Word | EdrawMax |
|
|
Choose Microsoft Word for simple tasks, and opt for EdrawMax when you need advanced design and layout options. The right tool depends on your specific needs.
Conclusion
Checkboxes in Word are more than just little boxes you tick. They are the key to creating organized, user-friendly content. Whether you're making to-do lists, surveys, or interactive forms, check boxes simplify the reader's experience and help you convey information more effectively.
Don't underestimate the power of this simple feature. Embrace it and make your documents stand out in the digital crowd. Following the easy steps outlined in this guide, you can effortlessly add a check box in Word documents, creating clarity and order in your content.
And if you're looking for a tool that takes creating checkboxes to the next level, consider EdrawMax. It offers a wide range of checkbox design options and shapes to enhance your documents and diagrams. With these resources at your disposal, you're well-equipped to create content that engages and informs your audience.
FAQ
Let's dive into some common questions about using checkboxes in Word:
- Can I use checkboxes in Word for both personal and professional documents?
Absolutely! Checkboxes are versatile and can be used in both personal and professional documents. Whether for a to-do list, a survey, or a business report, checkboxes help you organize content and make it easy for readers to interact with your document.
- How do I create custom checkboxes in Word?
Creating custom checkboxes is simple. You can use different methods, including the "Developer Tab" and Autocorrect options mentioned earlier in this guide. Choose the one that best suits your needs.
- Are there any accessibility concerns when using checkboxes in Word?
Yes, it's important to consider accessibility. Ensure you provide clear labels for your checkboxes, making them understandable for everyone, including those who use screen readers. Additionally, maintain adequate spacing between checkboxes to prevent accidental clicks and make them easy to interact with. These practices will ensure that your documents are accessible to a wider audience.


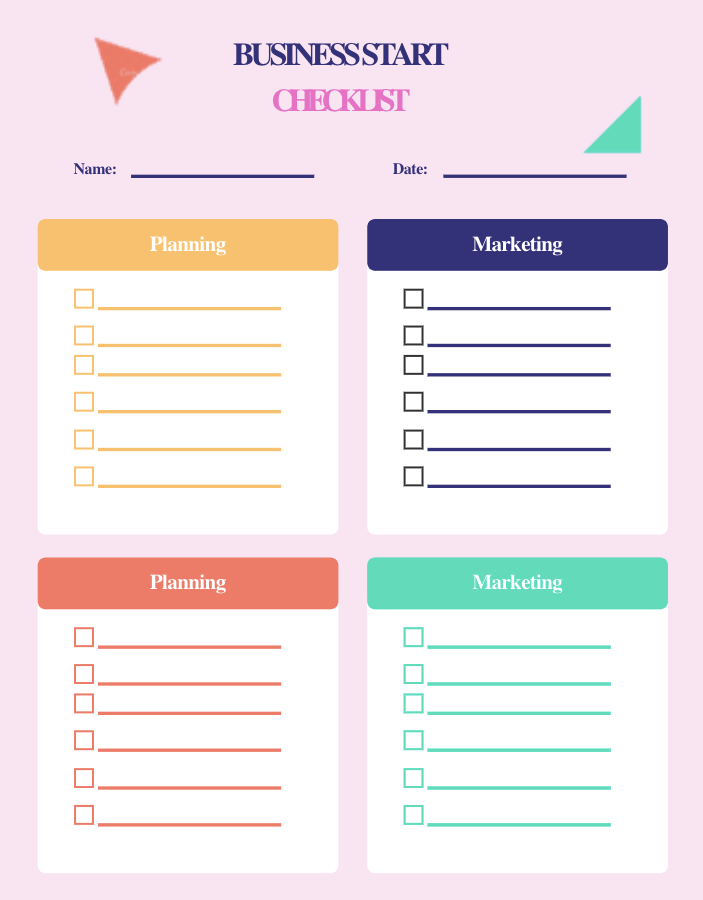
 below.