The use of technology has become an essential component of productivity and efficiency. Microsoft Office 365 Visio is one such technology that has revolutionized the way organizations create and share diagrams and flowcharts. Here, we will provide a comprehensive overview of Visio in Microsoft Office 365, discuss the benefits of using it, and more.
In this article
Part 1. Overview of Microsoft Office 365 Visio
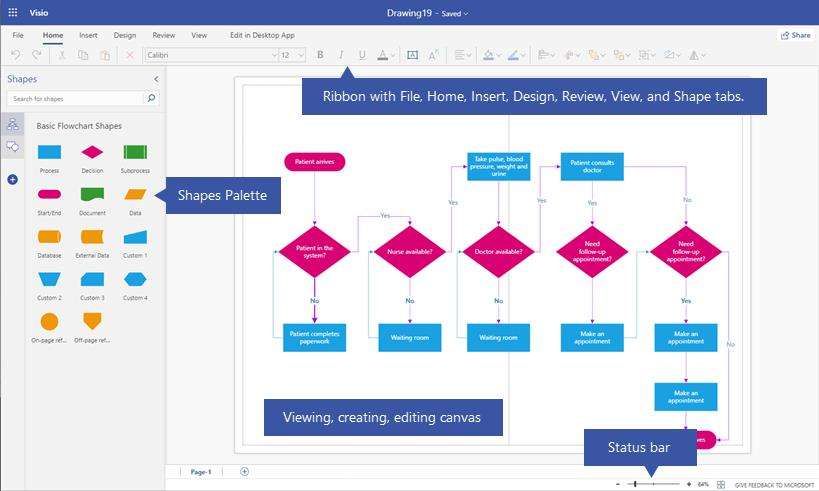
Visio in Microsoft 365 is a powerful tool that is part of the Office 365 suite, designed to enable users to create professional diagrams and flowcharts with ease. It offers a wide range of templates and shapes that allow users to visualize complex information and communicate ideas effectively. With its integration with Office 365, Visio provides seamless collaboration and sharing capabilities, making it an indispensable tool for businesses and organizations.
Part 2. Benefits of Using Microsoft Visio in Office 365
There are several Visio users in Office 365. Using Microsoft Visio O365 has a lot of benefits.
- Improved Collaboration:One of the key benefits of using Microsoft Visio in Office 365 is the enhanced collaboration it offers. Users can work on diagrams and flowcharts simultaneously, making real-time edits and comments, which fosters teamwork and boosts productivity.
- Integration with Office 365:As part of the Office 365 suite, Visio seamlessly integrates with other Microsoft applications such as Word, Excel, and PowerPoint. This integration allows for easy insertion of diagrams into various documents and presentations, streamlining the workflow.
- Cloud-Based Accessibility:Office 365 Visio is cloud-based, which means that users can access their diagrams and flowcharts from anywhere, at any time, and on any device with an internet connection. This flexibility is particularly beneficial for remote teams and professionals who need to work on the go.
Part 3. Key Features of Visio in Office 365
There are many useful features of Visio Microsoft 365. These features make creating flowcharts easier.
- Versatile Templates:Visio in Office 365 offers a wide range of templates for various types of diagrams, including organizational charts, process flow diagrams, network diagrams, and more. These templates provide a starting point for creating professional-looking visuals.
- Customizable Shapes and Styles:Users can customize shapes, colors, and styles to create visually appealing and informative diagrams. This flexibility allows for the creation of tailored visuals that effectively convey complex information.
- Data Linking:Visio in Office 365 allows users to link their diagrams to external data sources such as Excel, SharePoint, and SQL Server. This feature enables the automatic updating of diagrams when the underlying data changes, ensuring accuracy and consistency.
Creating effective flowcharts is important. With some essential tips, one can create effective flowcharts using Microsoft Visio Office 365.
- Utilize Templates:Take advantage of the diverse range of templates available in Visio to jumpstart your diagramming process and save time.
- Collaborate Effectively:Leverage the real-time collaboration features of Visio in Office 365 to work seamlessly with colleagues and stakeholders, gathering feedback and making edits in real time.
- Explore Data Linking:Experiment with linking your diagrams to external data sources to create dynamic and interactive visuals that reflect real-time information.
Part 4. Create a Flowchart Using Wondershare EdrawMax
When it comes to creating a flowchart, there is no better tool than Wondershare EdrawMax. It offers a user-friendly interface, a vast library of customizable templates and symbols, and advanced features like automatic diagramming and data linking. It is the go-to tool for creating professional and visually appealing flowcharts. Here are the steps to create a flowchart using the tool:
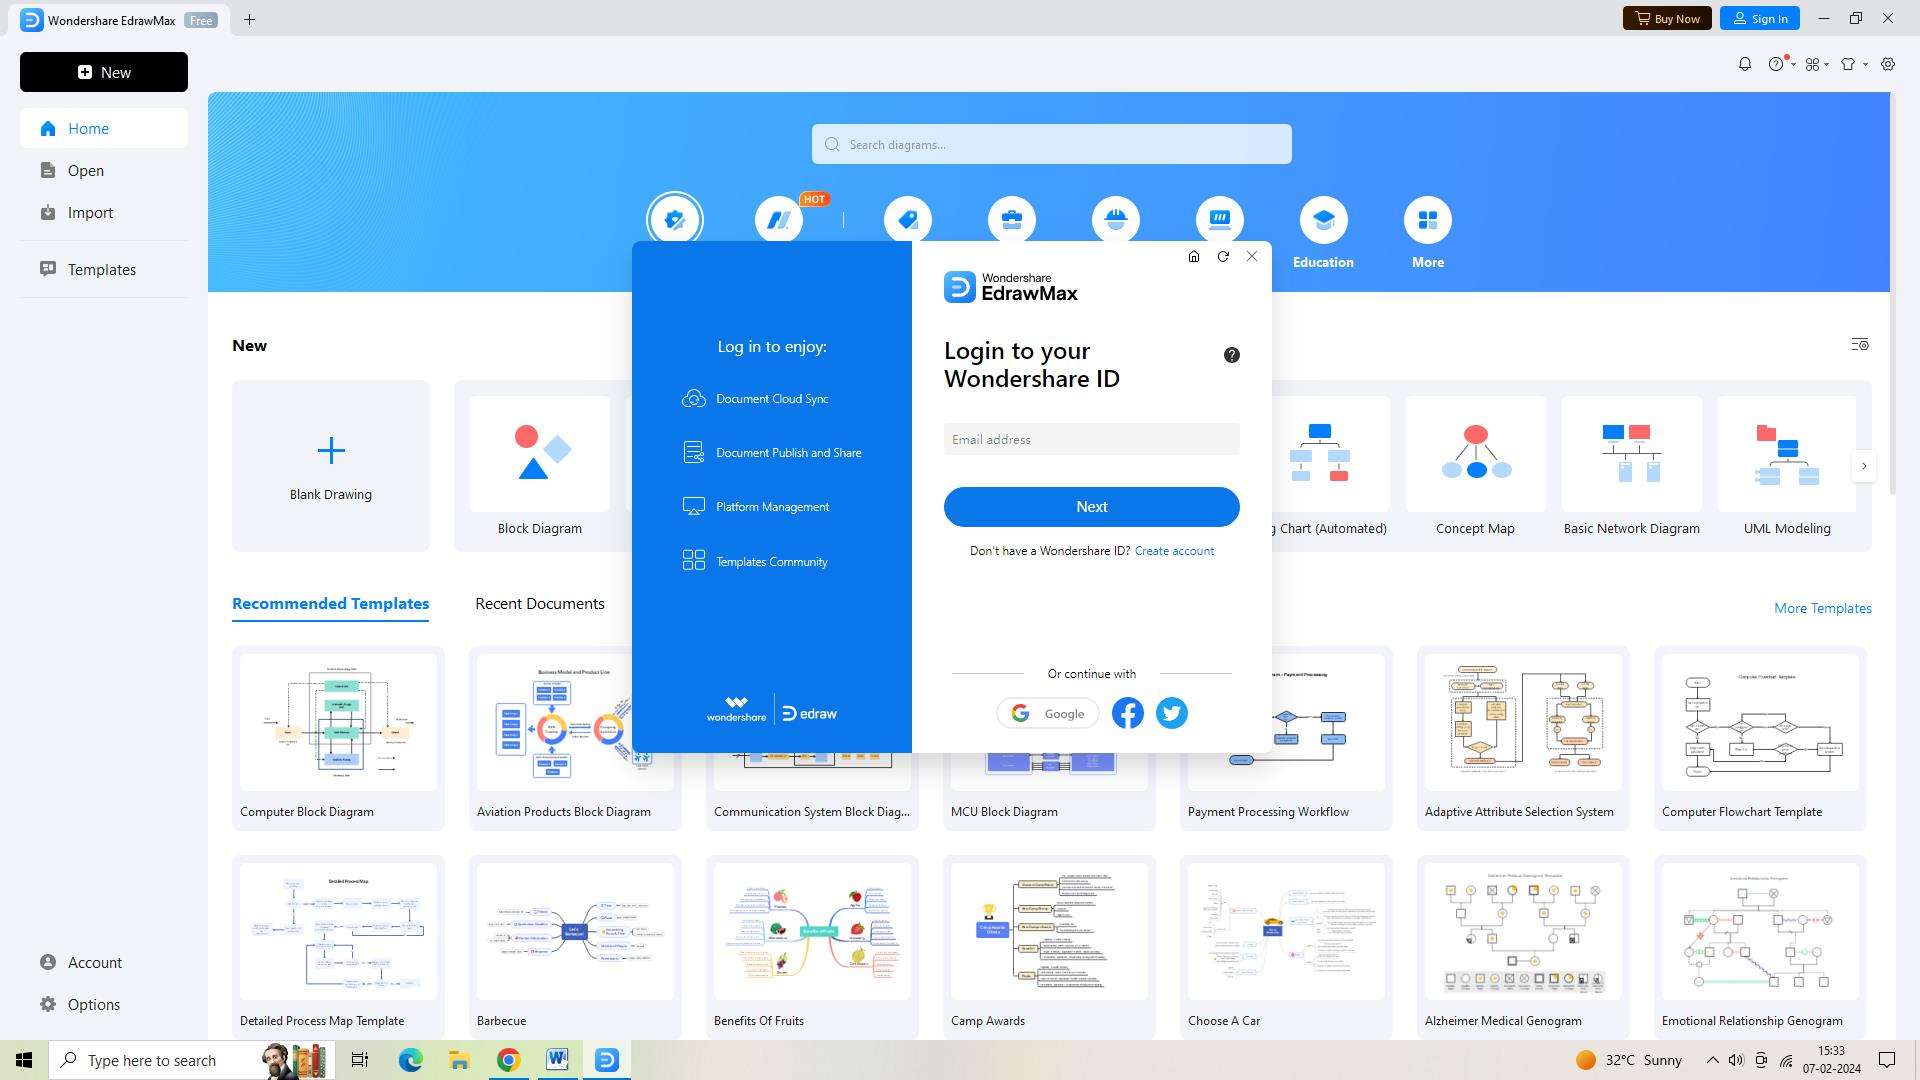
Step 1: Open Wondershare EdrawMax and log in before starting to create a flowchart. You can register for an account on their website if you don't already have one.
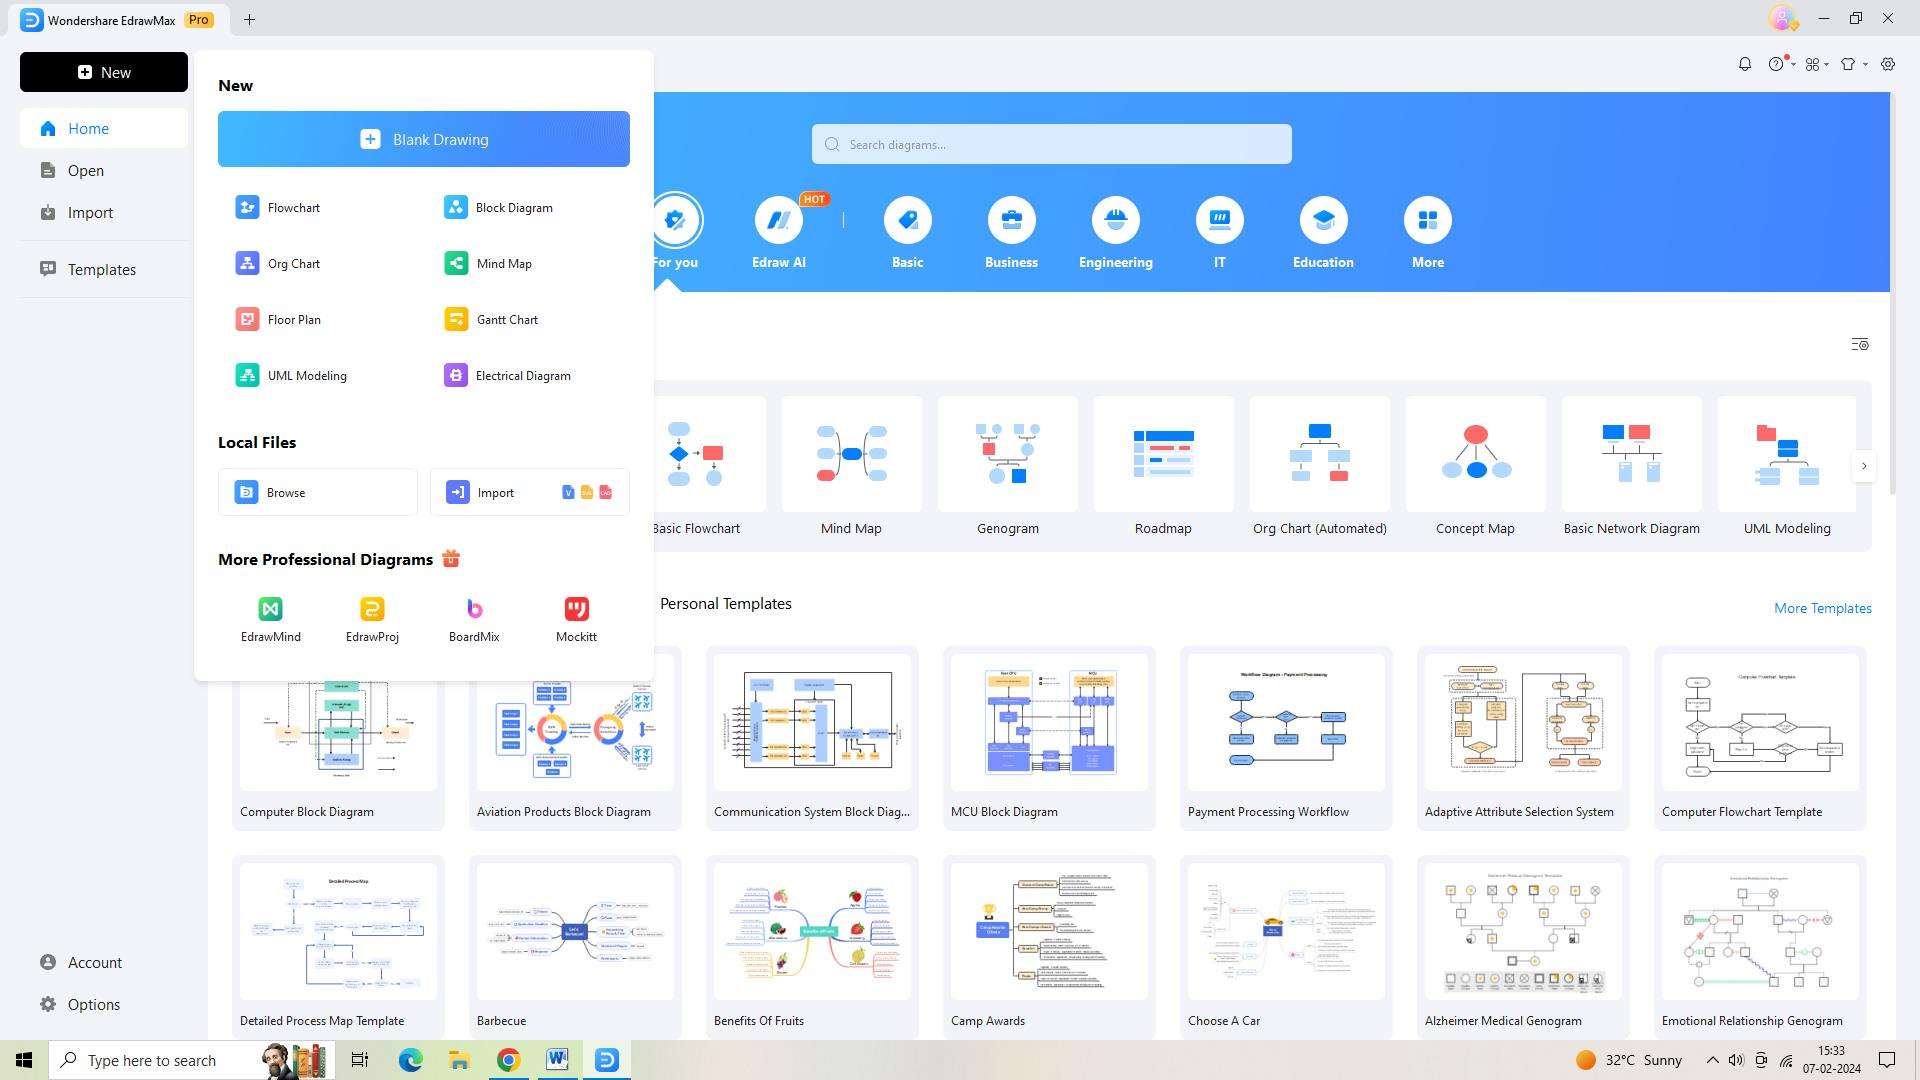
Step 2: Select the 'New' button located in the upper left corner of the screen after logging in. You may work on a new, blank document after doing this.
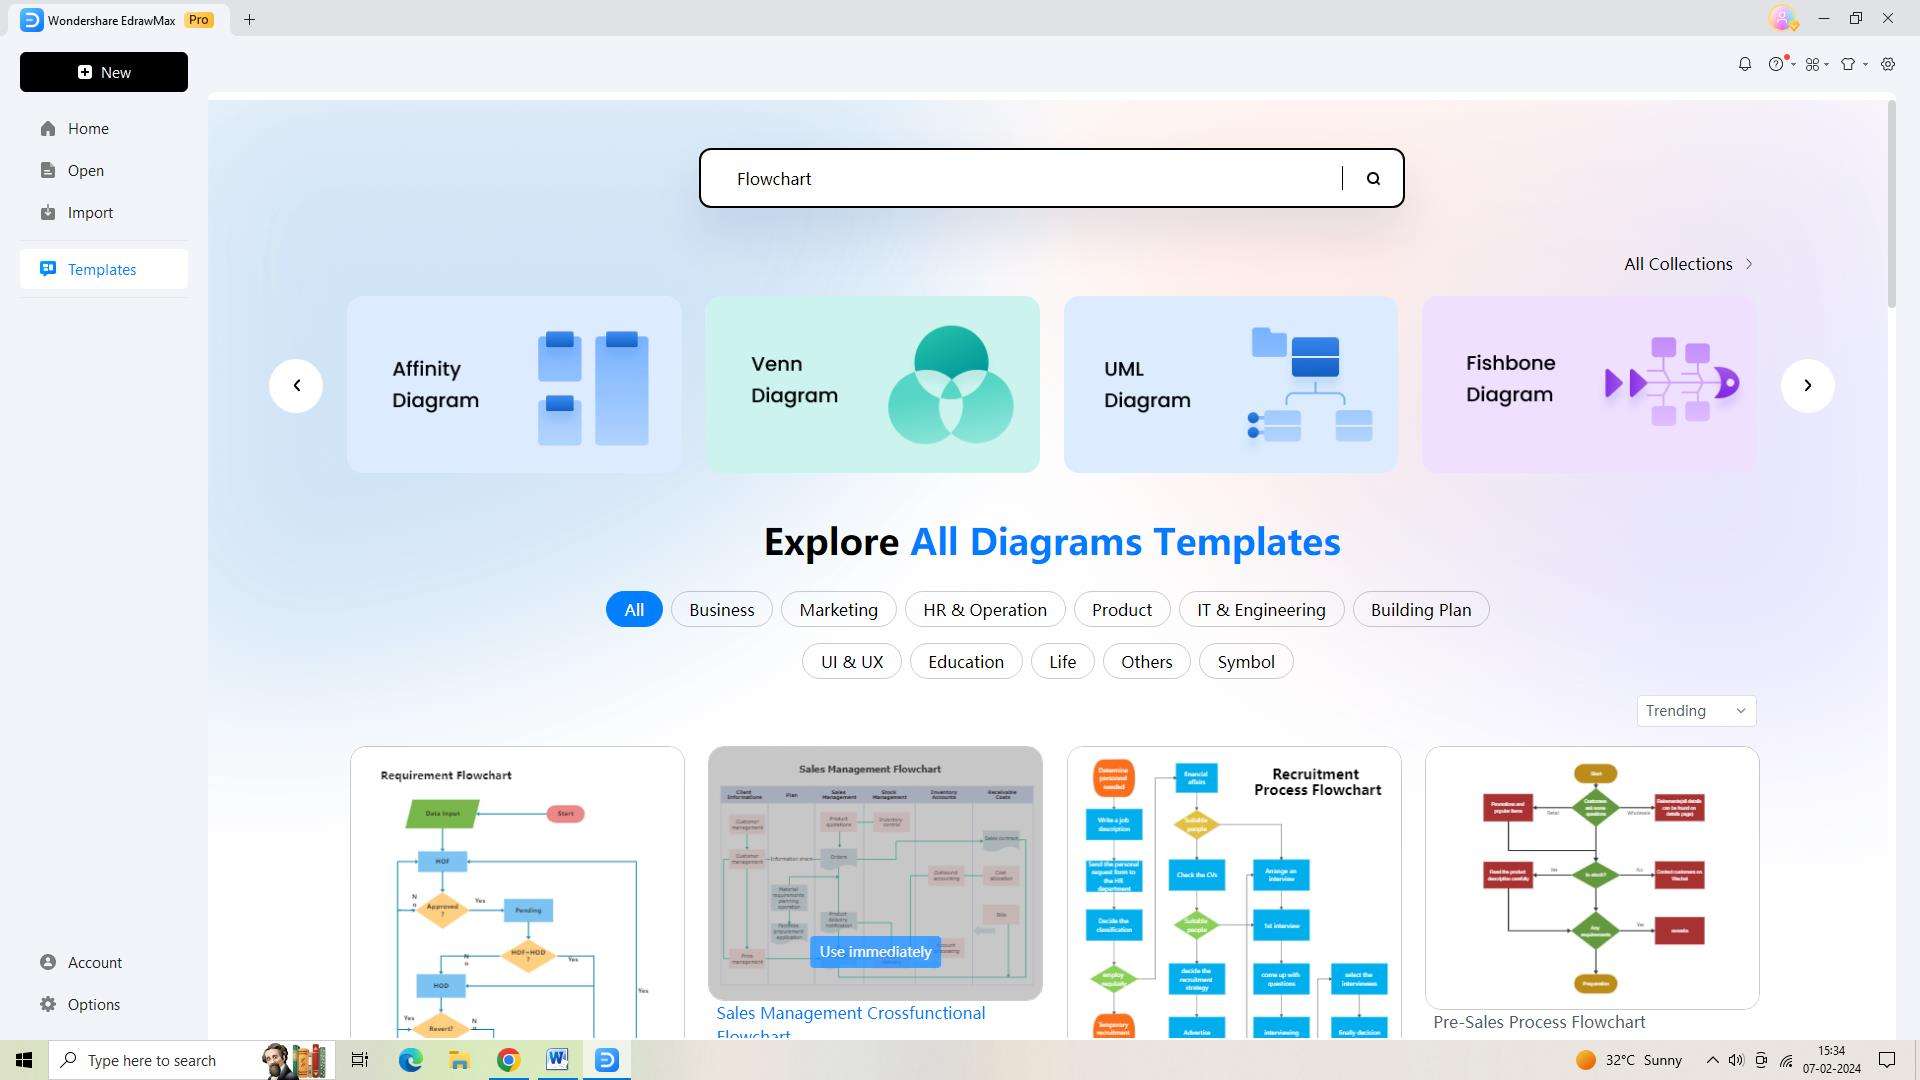
Step 3: After that, choose the "Templates" button located on the screen's left side. A library of templates will appear as a result. Once you locate the "Flowchart" template, scroll down and click on it.
Step 4: After choosing the template, it's time to modify the flowchart to meet your particular needs. You may personalize your flowchart by using the pre-made forms, icons, and connectors included in this design.
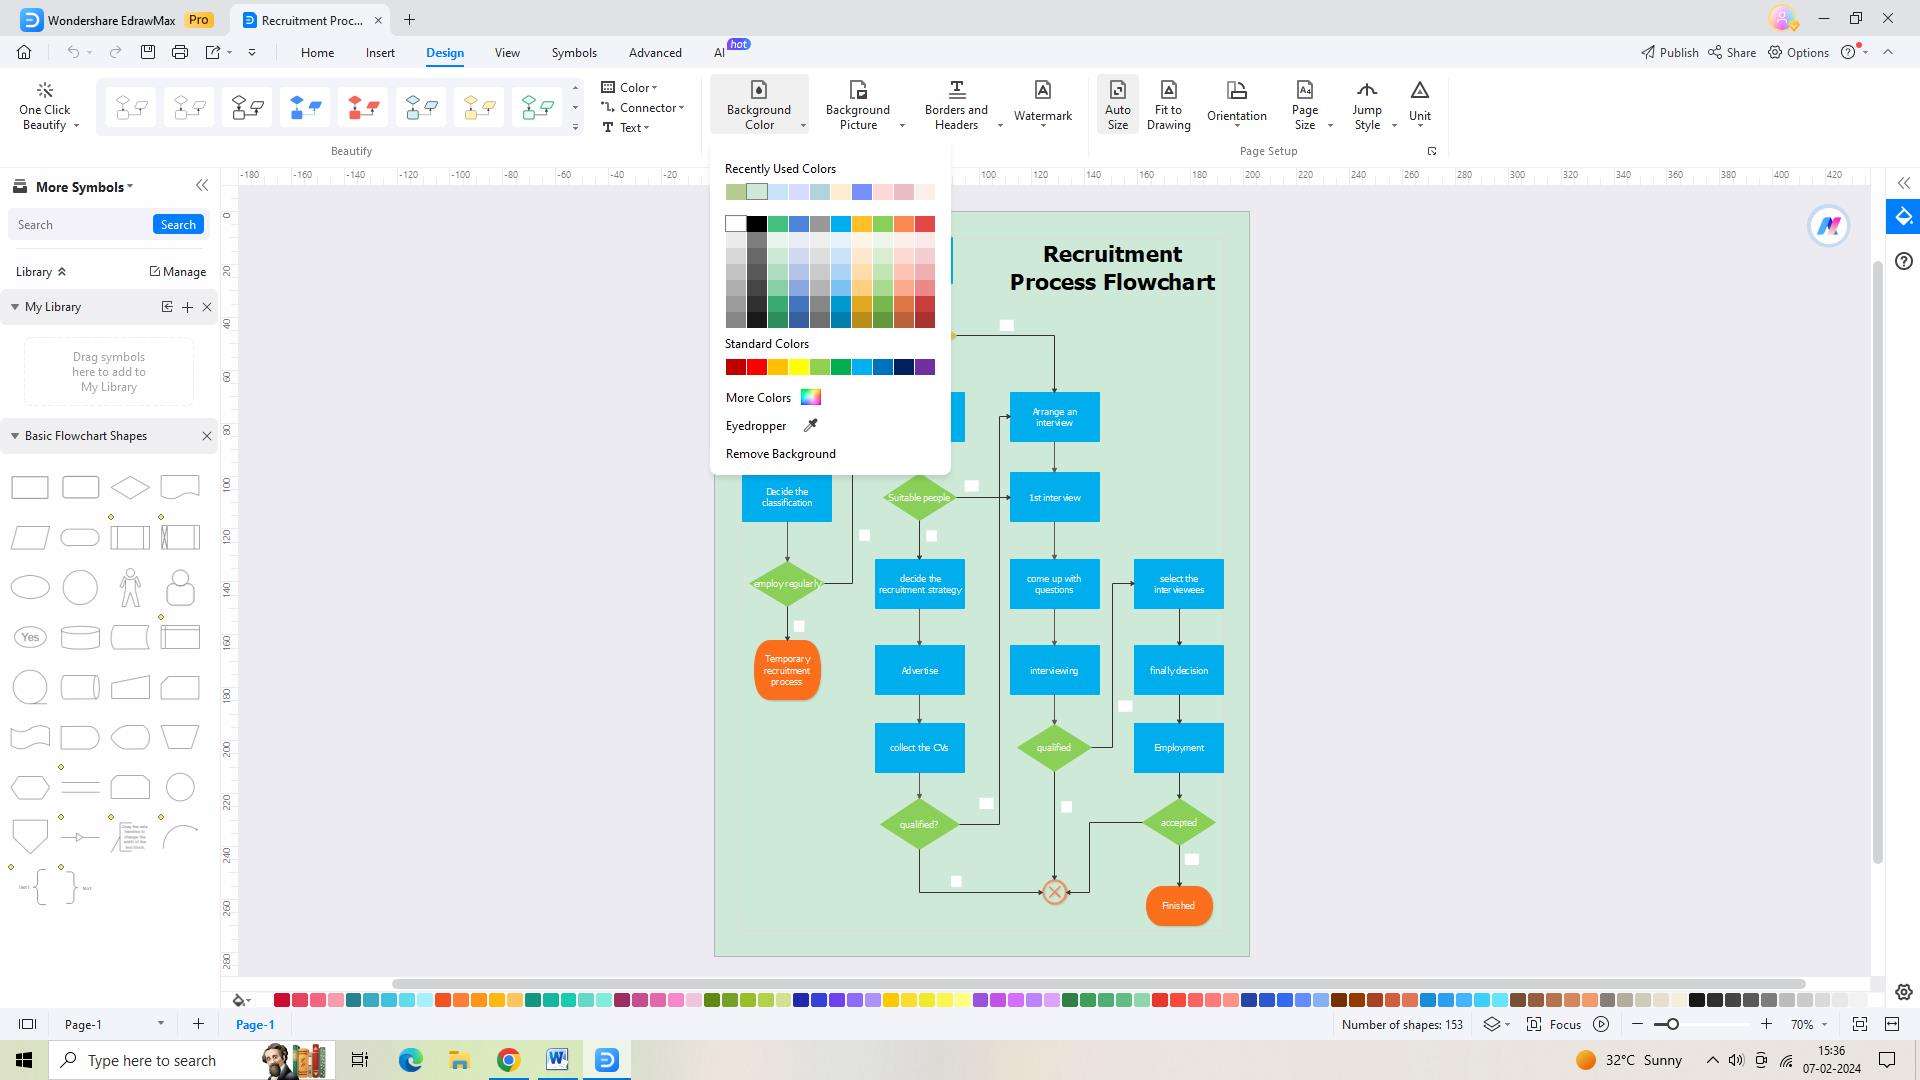
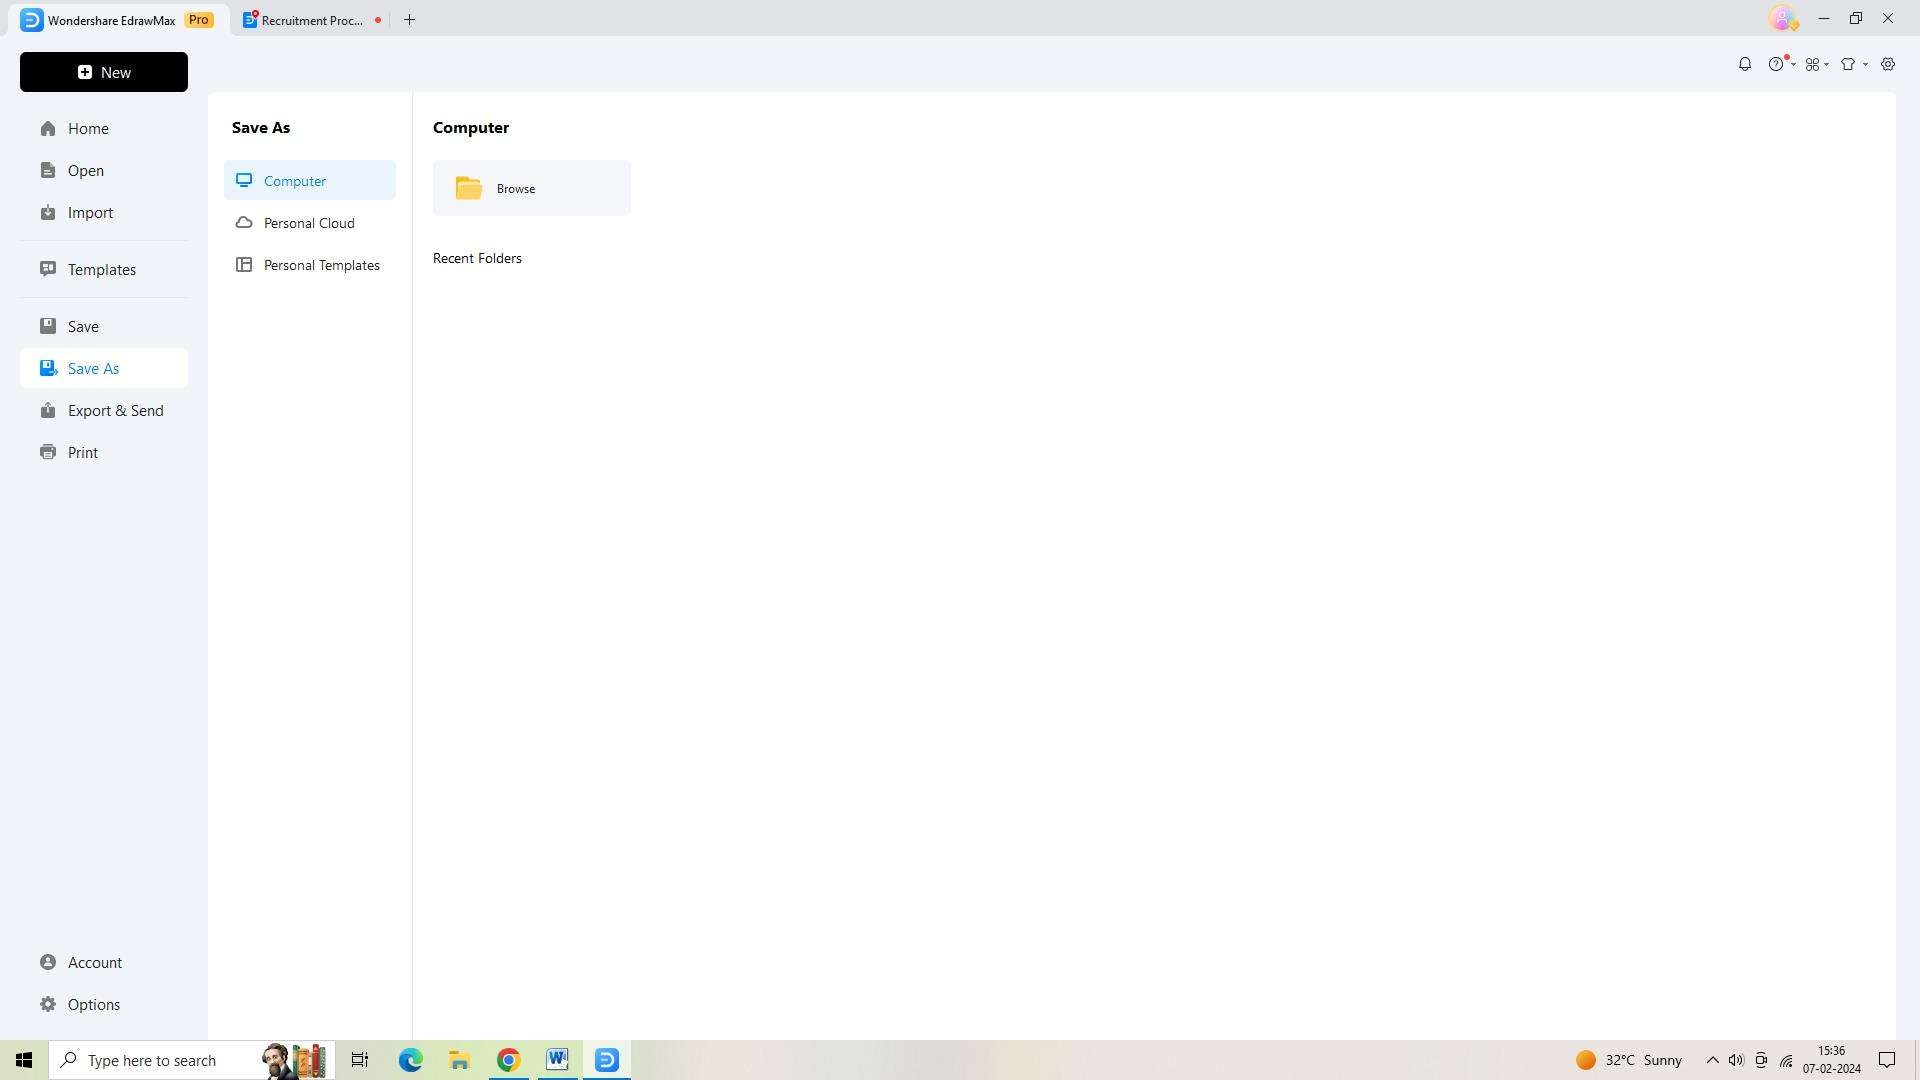
Step 5: Save your flowchart when you've finished creating it. Click the "Save As" icon in the upper toolbar to accomplish this.
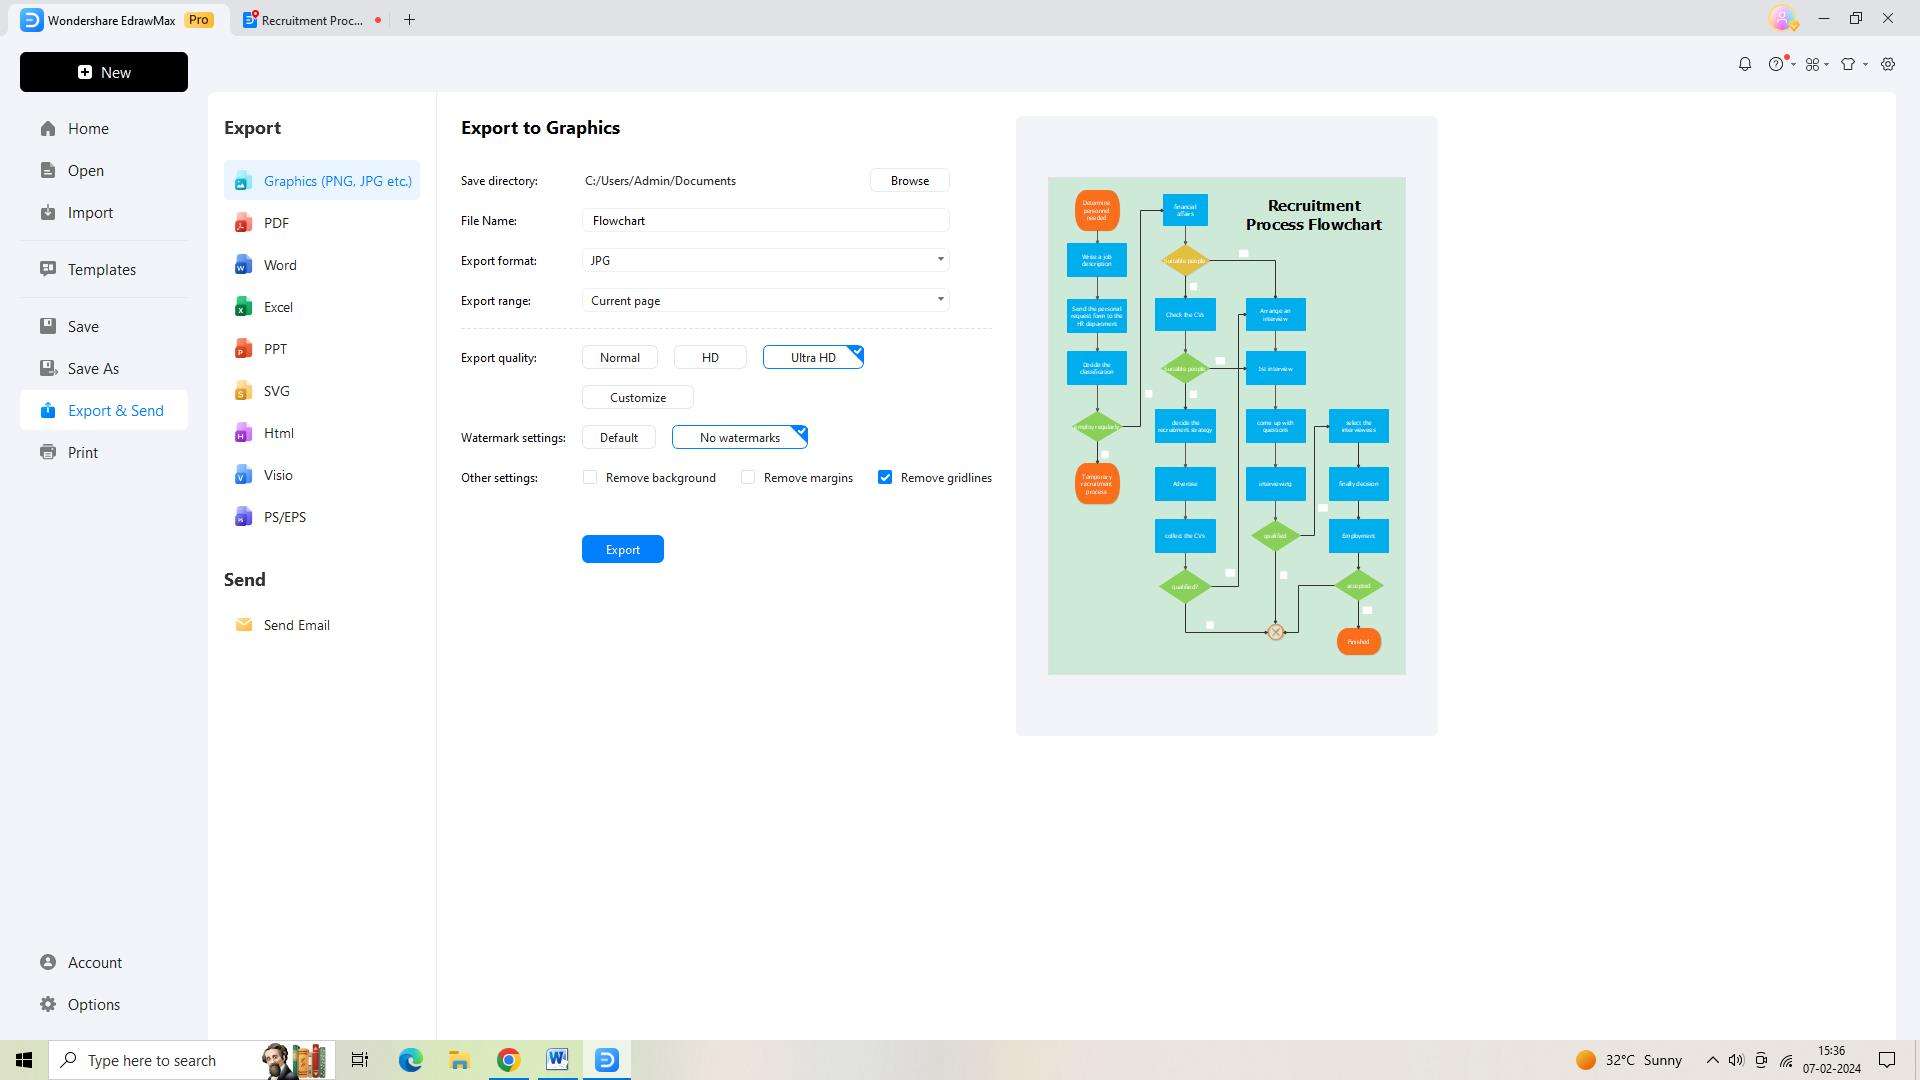
Step 6: Lastly, sharing your flowchart with your team or everyone else involved is made simple by exporting it in several file formats. On the upper toolbar, choose the "Export and Send" icon by clicking.
Conclusion
MS Visio Office 365 is a valuable tool that offers numerous benefits. Its integration with Office 365, versatile templates, customizable features, and cloud-based accessibility make it an indispensable asset for businesses and organizations. By following the tips for using Visio in Office 365, users can maximize their productivity and create impactful visuals that effectively communicate complex information.


