


Creating an org chart in Visio seems easy on paper. Place shapes, join them, and you're finished.
That's what I expected at first. But I spent time fixing hierarchy issues, aligning boxes, and adjusting formatting to prevent the chart from appearing cluttered.
In this article, I'll show you how to create an org chart using Visio the right way and discuss a quicker tool that gives even better results.
In this article
When to Use an Org Chart
Growth and Restructuring
When teams grow rapidly or undergo changes, an org chart helps them maintain order. It clarifies reporting, stops duplication, and shows where new hires or vacancies fit. Startups may skip it early, but once a team tops ten, confusion creeps in.
Onboarding and Development
New hires learn more effectively when they see who is responsible for approvals, feedback, and support. Trainers use charts to develop programs tailored to each role's specific duties.
Managing Communication
Remote teams often lack personal contact. An organizational chart reveals the structure and the exact path for communication. Managers also use it during meetings to confirm team placement.
Leadership and Budgeting
Leaders rely on organizational charts for budgeting, succession planning, and strategic planning. They notice leadership gaps, map overlaps during mergers, and verify reporting during audits. Finance teams use them to allocate costs accurately.
Project and Client Clarity
Cross-functional projects benefit from a chart that identifies leaders and reporting flows. Client-facing teams can quickly answer responsibility questions or find the right contact in an emergency.
How to Make an Organization Chart in Visio
Creating an organization chart in Visio may seem confusing at first. After you learn the steps, it's simply a matter of adding shapes and maintaining a clear hierarchy. Here's how I set it up.
Step1 Choose the Org Chart Template
Open Microsoft Visio and select New.
Type Organization Chart in the search bar if it isn't listed.
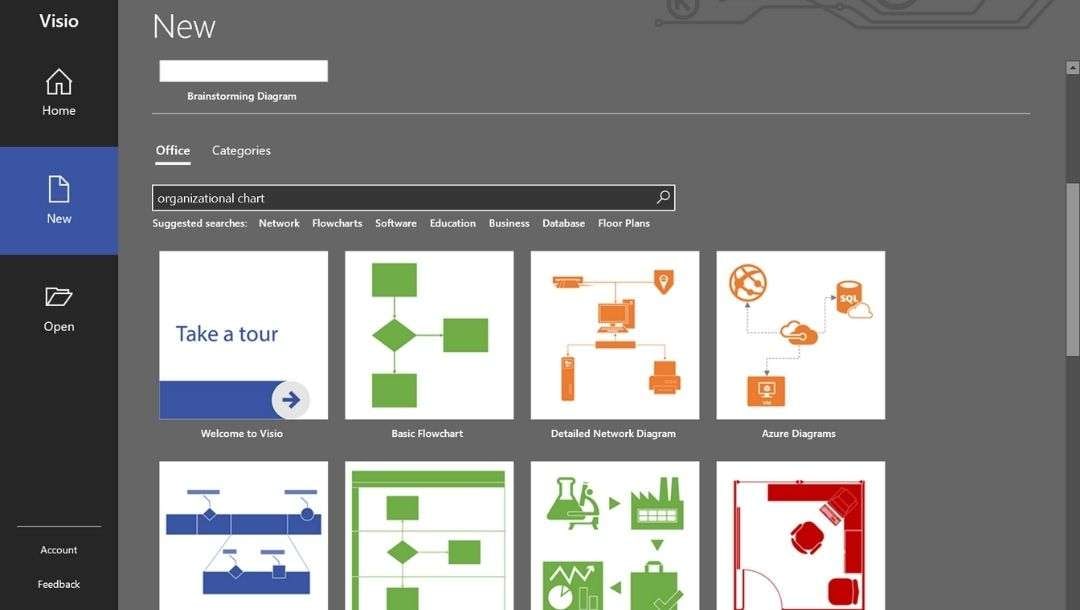
Two options appear:
- Basic Organization Chart – best for a clean chart with names and roles only.
- Organization Chart with Pictures – adds employee photos for onboarding or external documents.
Click the one you need, select the suitable option from the org template varieties that appear in the following pop-up window, and hit Create.
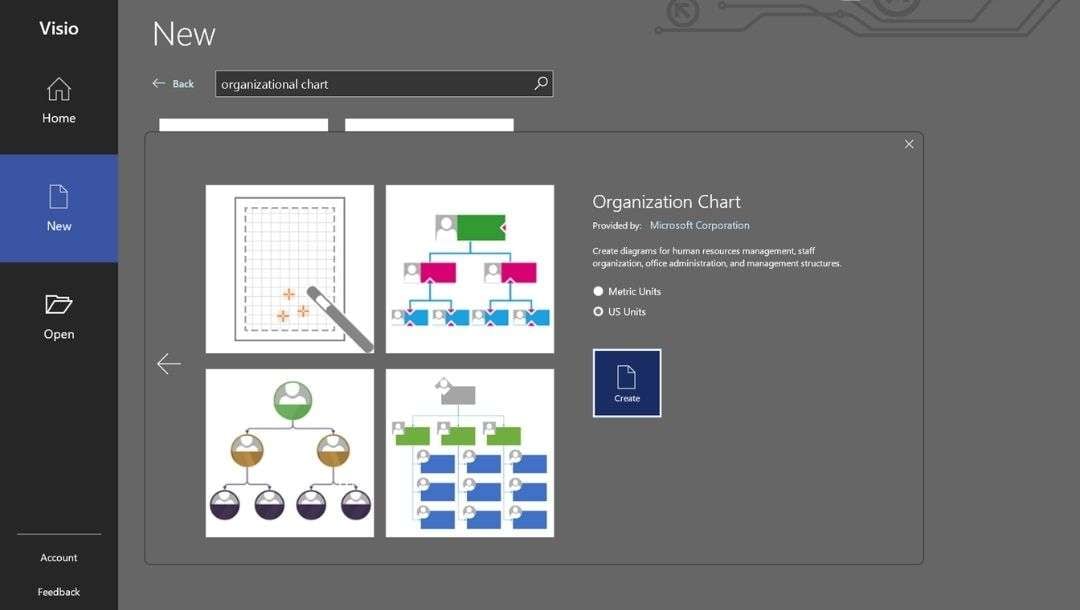
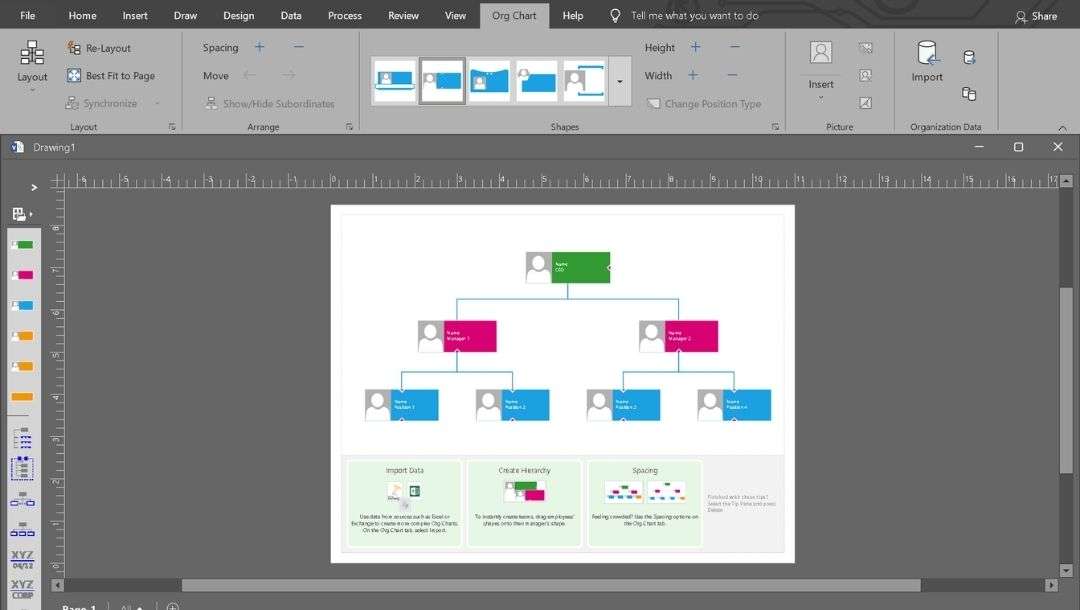
This template includes shapes for the CEO, managers, and other subordinate positions, allowing you to get started without further setup.
Step2 Add Positions and Employees
The Shapes pane on the left contains different role options, including Executive, Manager, Position, and Assistant.
Expand it with the arrowhead at the top of the pane to see shapes in detail.
Visio's leading edge is its automatic connectors. Drag a subordinate shape onto its manager, and the reporting line appears right away.
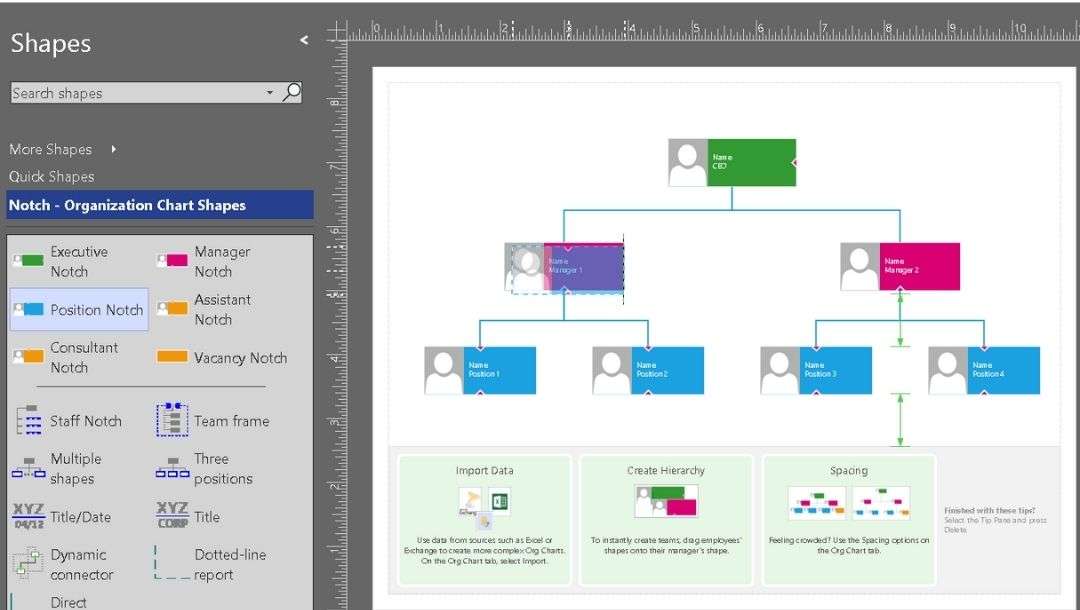
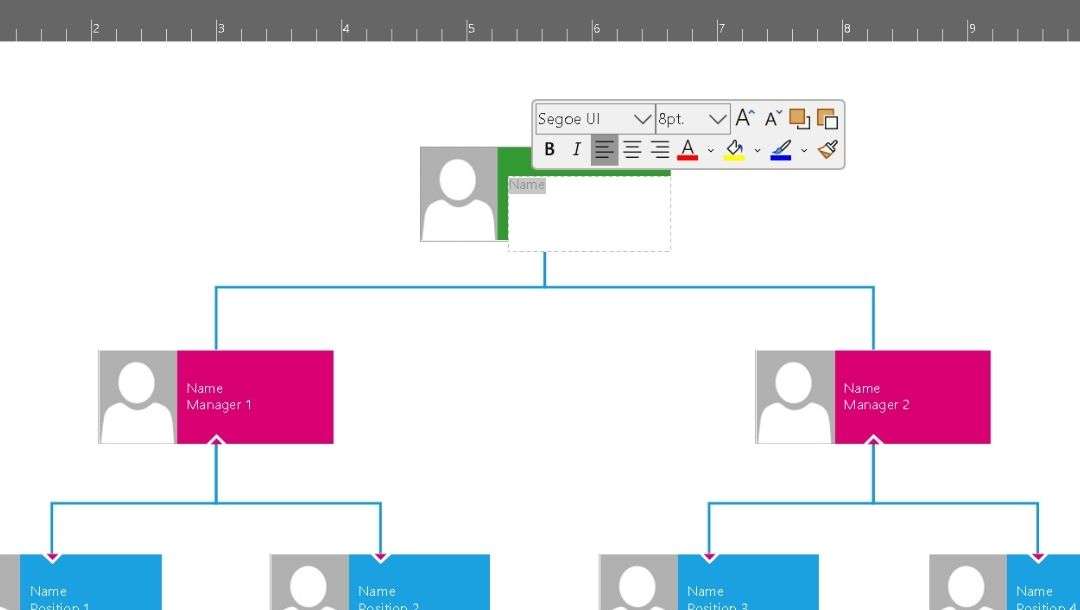
Double-click any shape (text box) to edit the placeholder name, job title, department, etc.
Select any text and use the pop-up menu to customize font size, style, alignment, color, and more.
Step3 Customize and Format the Chart
Once your data is complete, you'll want the chart to be easy to read at a glance. Here's how I usually fine-tune it:
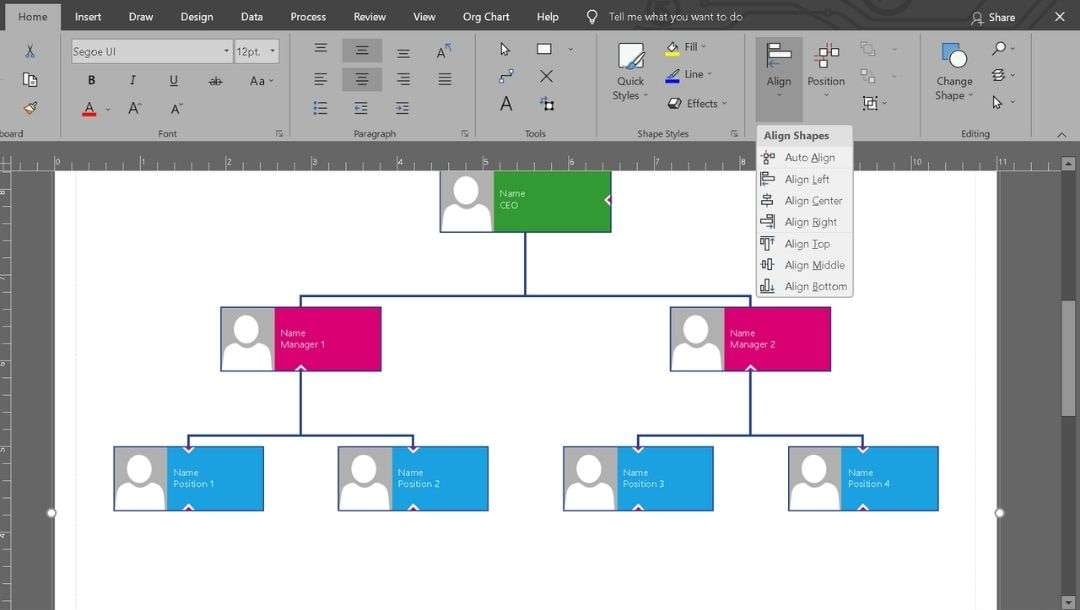
- Use Auto Align (Home → Align) and Auto Space (Home →Position) to distribute shapes evenly.
- Regularly zoom in and out to ensure reporting lines are consistent and there's no overlap between departments.
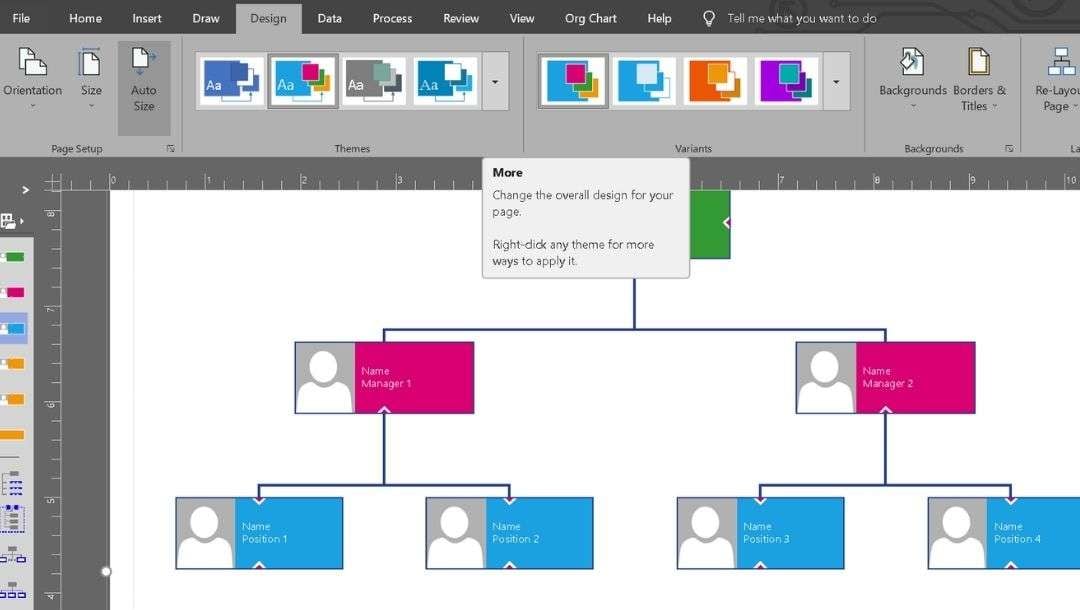
Go to the Design tab and choose a theme.
Themes instantly auto-adjust fonts, colors, and line styles.
Use Variants to test color schemes quickly.
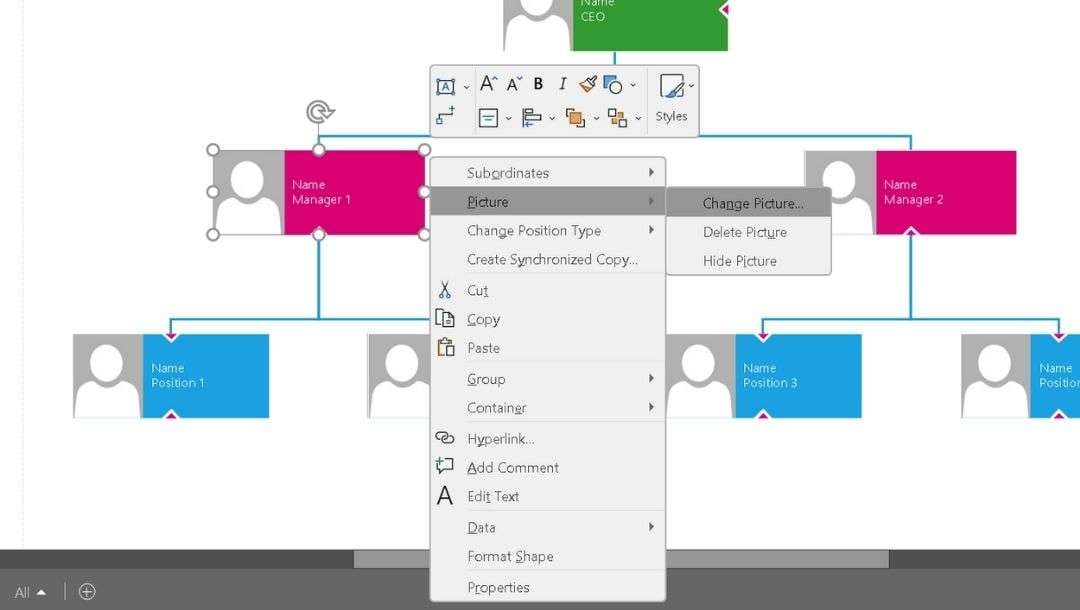
Use the right-click menu to modify features such as Subordinates, Picture, Change Position Type, and more.
For instance, Picture→ Change Picture and choose the required image.
Adding headshots helps new employees learn names faster.
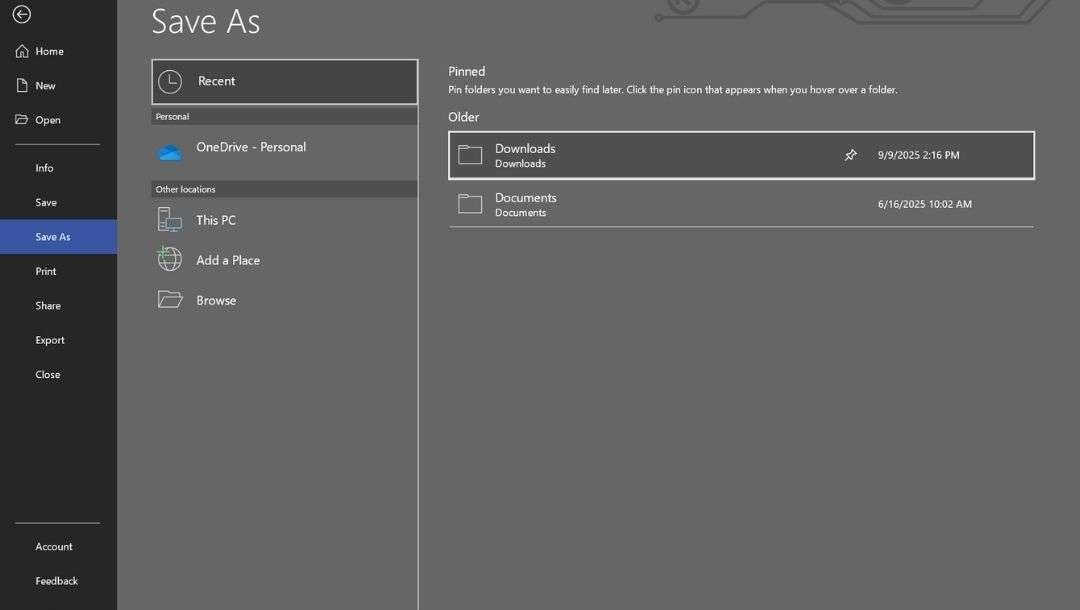
Step4 Save, Export, or Share
The final step is to save and share your final organizational chart.
- Download a .vsdx file to keep it editable.
- Use the CTRL + S feature and choose the required settings and file name for saving.
- For colleagues who don't use Visio: Export as PDF to email or print, or PNG/JPG for quick sharing.
- For data analysis, export the chart in Excel format to run reports or track updates.
How to Make an Organization Chart Easier
Creating an org chart in Visio requires much effort before you even start drawing. EdrawMax cuts that setup with built-in tools made for faster and easier org chart creation.
Drag-and-Drop Interface
Visio is feature-rich but feels heavy for a simple org chart. EdrawMax offers direct drag-and-drop editing. Rearrange roles anytime, and connectors don't get messed up.
Pre-Built Templates
Visio allows you to start from scratch or choose from basic templates. EdrawMax offers a full library of org chart templates with ready placeholders for names and titles. Fill them in and start working right away.
AI-Assisted Layouts
Large teams can be challenging to arrange in Visio because shapes require constant manual adjustments. EdrawMax AI helps you automatically reorganize reporting lines. Add a new role, and it seamlessly integrates into the hierarchy without disrupting the layout.
Cross-Platform Support
Visio primarily runs on Windows and offers limited online options. EdrawMax is compatible with Windows, macOS, Linux, and the web. You can start on a desktop and continue editing from any browser, maintaining the same formatting.
Steps to Creating an Org Chart in EdrawMax
Follow these steps to build a complete org chart quickly without struggling with manual adjustments:
Step1 Open the Org Chart Template
- Open EdrawMax and head to New. Click Organizational Chart.
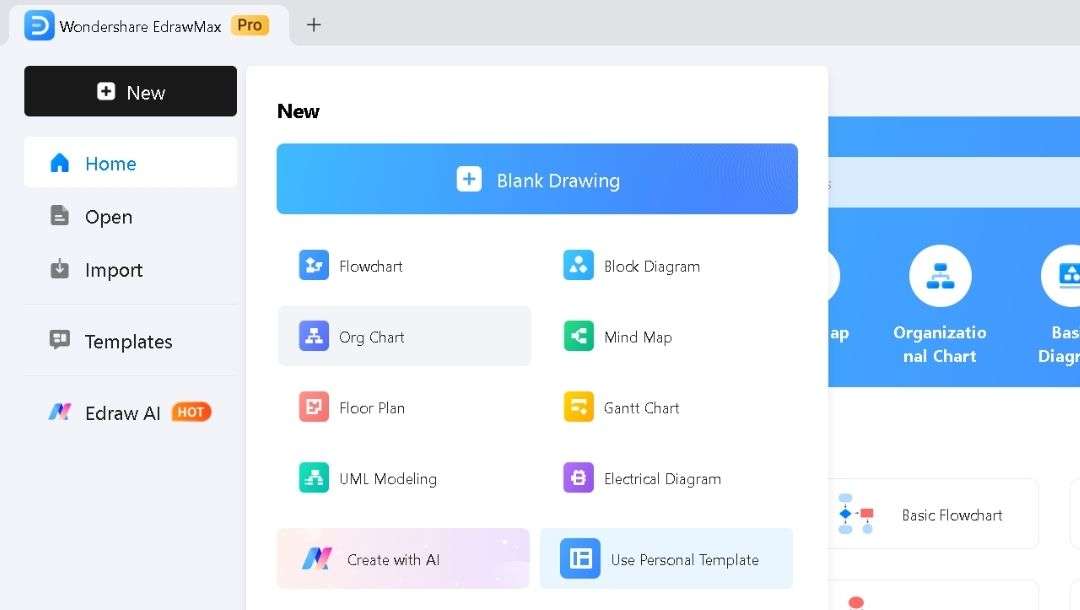
- Browse through the available templates and select one that fits your team's layout.
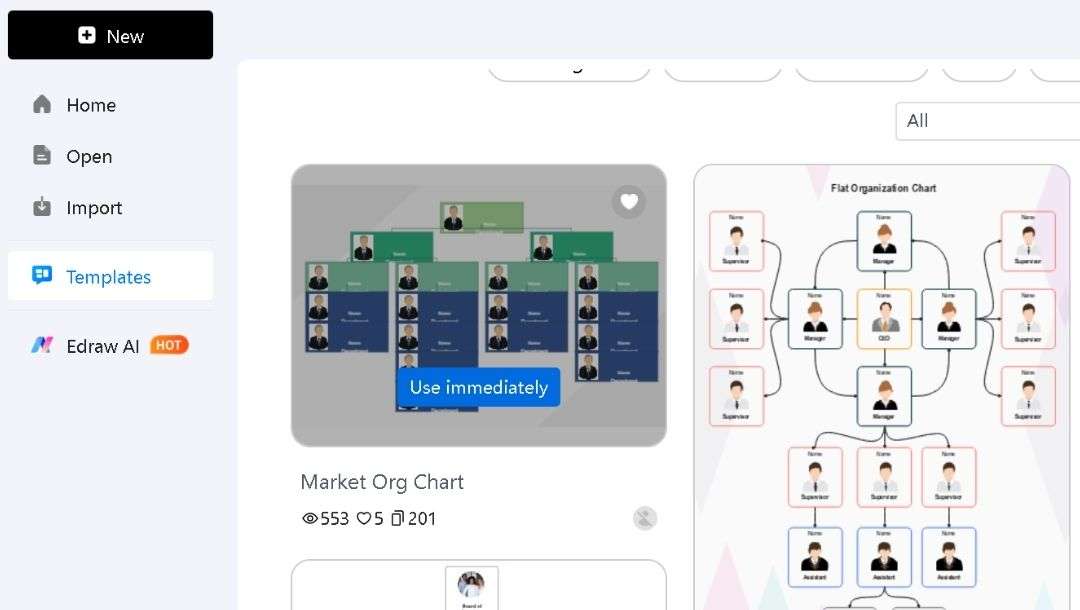
- For extra designs, hit More Templates and browse the community library.

- Scroll until you find one.
- Hit Use Immediately to load it into Canvas.
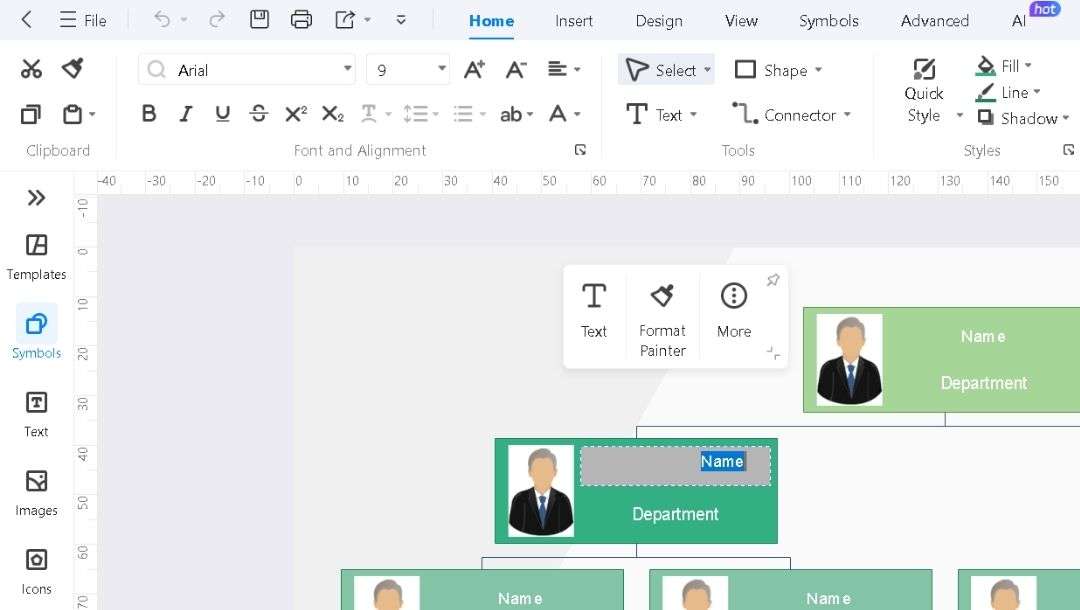
Step2 Replace Placeholder Text
- Each template comes with predefined positions and reporting lines.
- Double-click any box to replace the placeholder text with the employee's name, title, or department.
- Modify the text, style, font, color, and more from the Home tab.
- Continue until the main structure reflects your team.
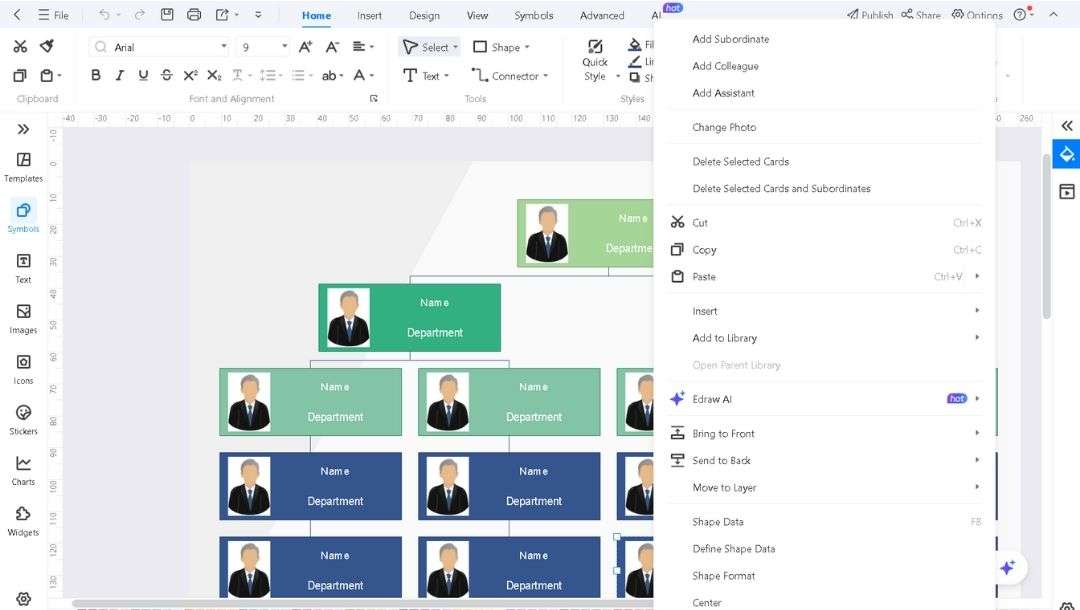
Step3 Add or Remove Roles as Needed
- Right-click a box and select Insert Subordinate, Insert Coworker, or Insert Manager to expand the chart.
- To remove roles that are no longer needed, click the shape and press Delete.
- The connectors adjust automatically, so you don't need to realign anything.
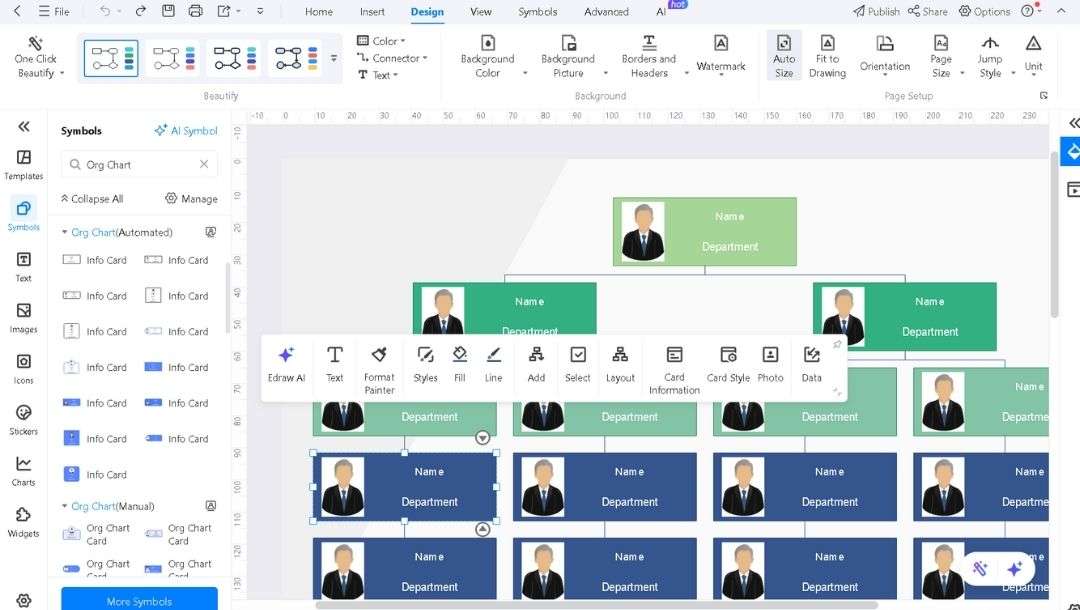
Step4 Customize the Design
- Go to the Design tab and try pre-made themes or use the One-Click Beautify button.
- Select any element and apply consistent colors, layout, fonts, and shapes across the chart from the pop-up menu.
- If required, add symbols from the left side library easily.
- Insert profile photos into boxes for better onboarding charts.
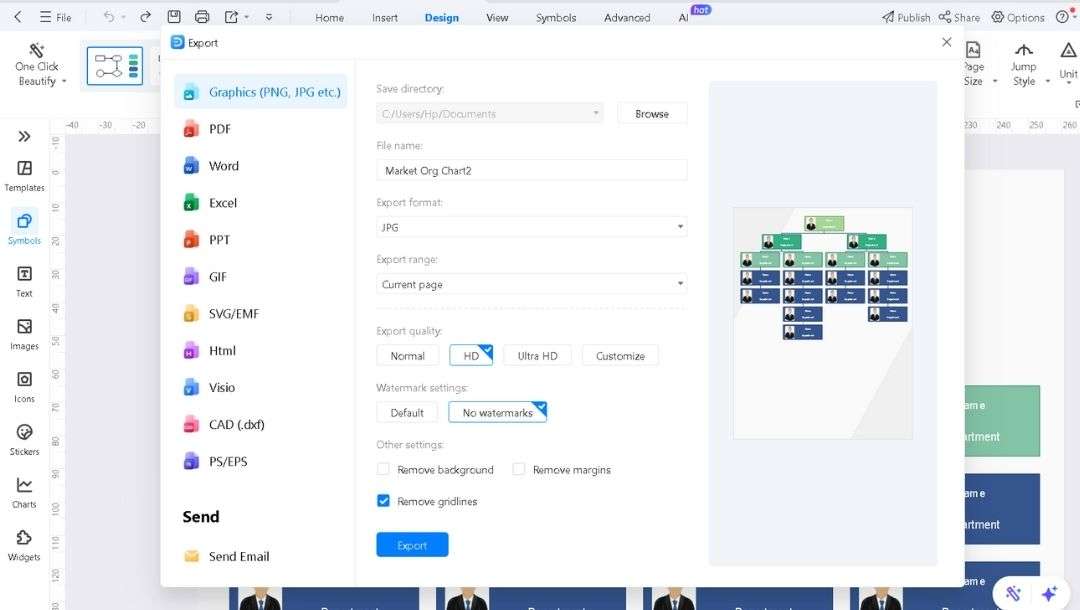
Step5 Export, Save, and Share
- Save (Ctrl+S) the finished chart in EdrawMax format to update later.
- Click the export icon in the top bar to download the file as a PDF, PNG, or Excel format, if you need to present or print it.
- If you're using EdrawMax Online, generate a share link to let colleagues view the chart in their browser.
Tips for Making an Effective Org Chart
Define the Coverage
Agree on what the chart should include: leaders only, whole departments, or every single role. Set this early to avoid later rewrites.
Standardize Role Names
Use the same titles throughout. Mixing terms like 'Lead' and 'Manager' blurs reporting levels.
Choose a Clean Layout
Pick a design that matches team size. Vertical works for small groups. Horizontal or departmental layouts are suitable for larger organizations. Keep lines straight and separate.
Identify Special Roles
Highlight contractors, vacancies, or critical positions with a border or bold type. Include a legend for clarity.
Plan Ahead
Leave room for growth. Use uniform fonts, strong contrast, and simple shapes so the chart is readable on any device or print.
Keep It Alive
Assign HR or operations to update it regularly, such as every quarter. Share a digital version via email or profile links for everyday use.
Final Words
An organization chart is only useful when it's easy to create and update.
Visio handles it, but EdrawMax makes the process far more practical. You start with a complete template, edit roles directly, and let the layout adjust itself.
Try EdrawMax if you need a chart you can build fast and share without endless reformatting.
AI Diagram Generator
Enter your prompt. Upload files if needed. Generate diagrams, charts, or slides instantly.


