


A 3D floor plan shows how a space looks, but not how to build it. Contractors need measurements. Permit offices need technical drawings. Printers need 2D layouts that scale correctly.
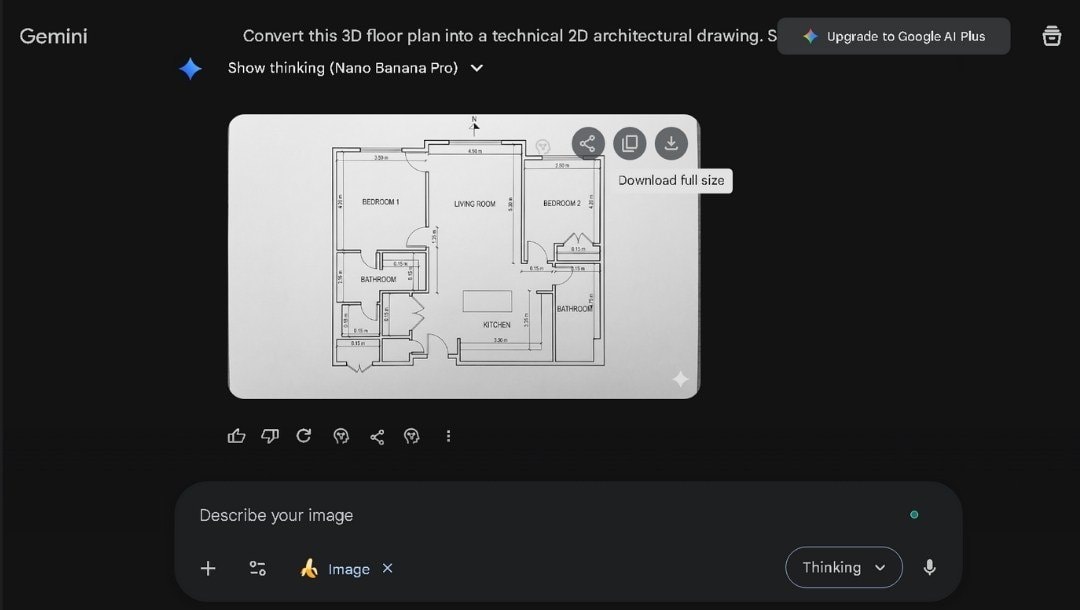
Nano Banana Pro converts 3D floor plans into 2D layouts with clear walls, doors, and room edges. They're suitable for permits, printing, and sharing with contractors.
Here, I'll cover the entire process and provide prompt templates with practical ways to create 2D plans from 3D models.
In this article
The Real Reasons People Still Need 2D Plans
Construction Crews Work From Flat Drawings
Builders don't frame walls looking at a 3D render. They need dimensions, wall thicknesses, and door swing directions. A 2D plan gives them exactly that. Every measurement remains legible for builders while holding a tape measure.
Permit Applications Require Technical Documents
Building departments require scaled floor plans. Not 3D visualizations. Not rendered images. They want flat drawings with room labels, square footage, and door widths. Only a proper 2D plan gets approved.
Printing and Scaling Work Better in 2D
A 3D floor plan at 24 x 36 inches loses detail. Walls overlap. Furniture blocks views. A 2D plan at the same size shows everything clearly. Contractors pin it to the wall. Clients mark it with notes. It works as a working document.
Cost Estimates Need Clear Room Dimensions
Flooring quotes depend on square footage. Cabinet bids depend on linear feet. HVAC sizing depends on room volume. All of this comes from 2D plans with labeled dimensions. A 3D render tells you what a room looks like. A 2D plan tells you what it costs.
CAD Software Needs Flat Input
Most design tools import 2D files. If you start with a 3D render, you need to trace it manually. Converting to 2D first saves that step. The flat layout can be imported directly into AutoCAD, SketchUp, or any drafting program.
Convert a 3D Floor Plan Into a 2D Floor Plan with Nano Banana Pro
Here’s how to turn a rendered 3D floor plan view into a simple technical 2D layout.
Step1 Prepare Your Reference File
The AI reads your 3D image and extracts the floor plan structure. A clear image produces a clear output.
Before uploading:
- Choose a 3D view that shows the full layout from above.
- Avoid angled perspectives that hide rooms behind walls.
- Remove furniture if possible, or use a version with minimal staging.
- Save as PNG or JPG at high resolution.
A top-down or isometric 3D view works best. Side angles and walkthroughs confuse the extraction.
Step2 Write a Conversion-Friendly Prompt
- Your prompt tells the AI what to extract and how to present it.
- Start with the core instruction: "Convert this 3D floor plan into a 2D technical layout."
- Specify the output style:
- Line type: "black walls on white background"
- Wall thickness: "medium weight lines for walls, thin lines for doors"
- Labels: "label each room with its function"
- Dimensions: "include room dimensions in meters" or "no dimensions, clean layout only"
- Add technical requirements:
- Scale: "suitable for 1:50 printing"
- Orientation: "north arrow at top"
- Door symbols: "show door swings as arcs"
Step3 Generate the 2D Output
- Upload your 3D floor plan image. Paste your prompt.
- Enable the Nano Banana Pro feature in the tools, then hit Enter or tap the send button.
- Review the output against the original:
- Are all walls in the correct positions?
- Do room proportions match the 3D view?
- Are doors and windows marked?
- Is the layout oriented correctly?
- Regenerate with adjusted prompts if walls merge or rooms disappear.
Step4 Export the Result
- Download or share the final 2D floor plan when it matches your needs.
- Save your prompt for future conversions with similar 3D models.
Best Free Prompt Templates You Can Use Right Away
These templates handle specific professional needs. Copy one, fill in the brackets, and generate.
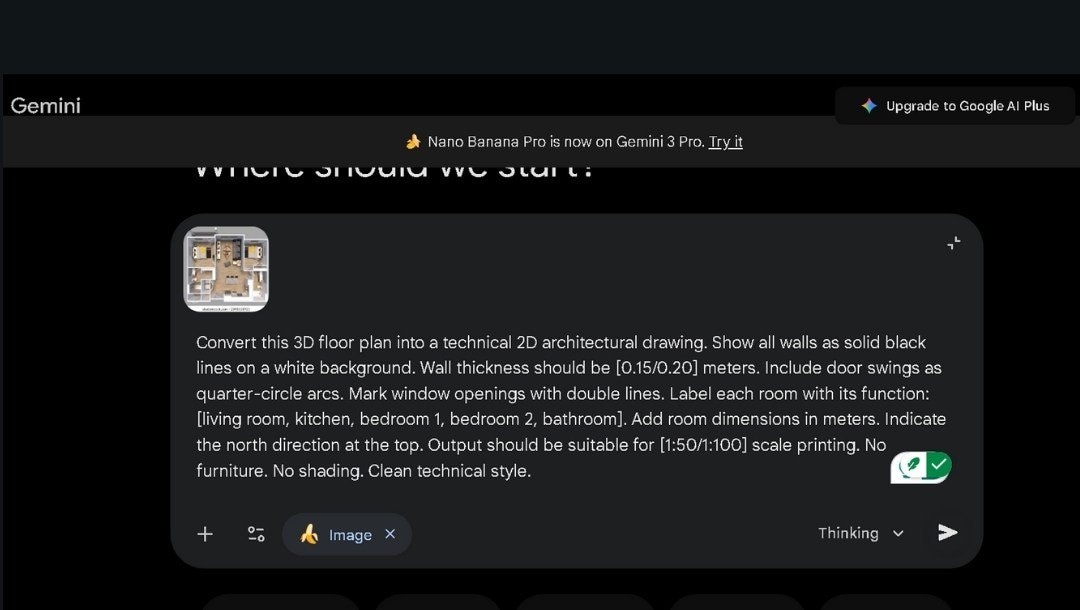
Prompt for Architects
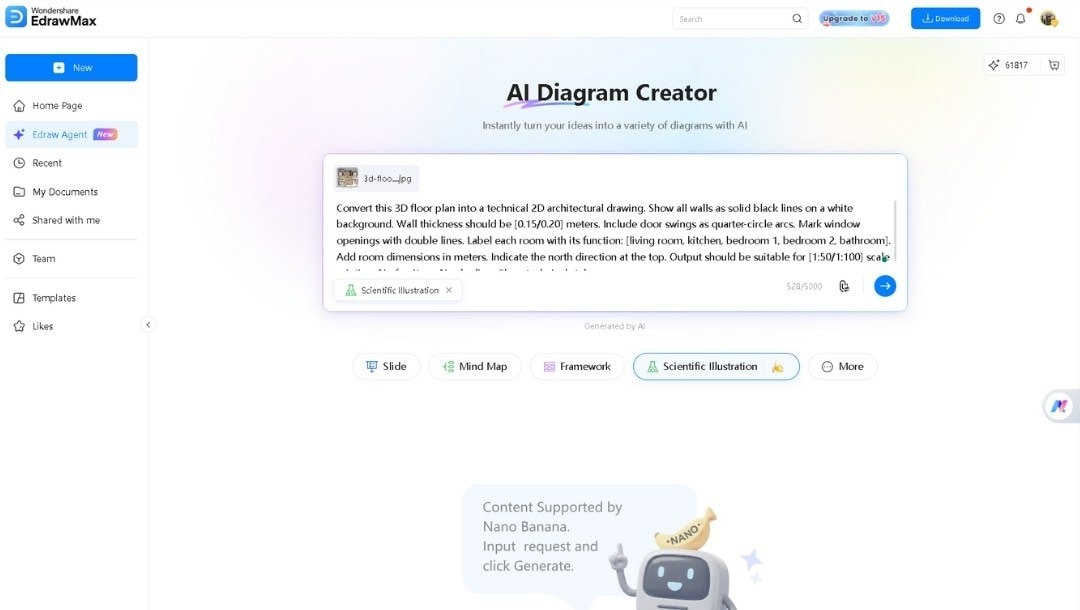
Convert this 3D floor plan into a technical 2D architectural drawing. Show all walls as solid black lines on a white background. Wall thickness should be [0.15/0.20] meters. Include door swings as quarter-circle arcs. Mark window openings with double lines. Label each room with its function: [living room, kitchen, bedroom 1, bedroom 2, bathroom]. Add room dimensions in meters. Indicate the north direction at the top. Output should be suitable for [1:50/1:100] scale printing. No furniture. No shading. Clean technical style.
When to use: Construction documents, permit applications, and CAD base files.
Prompt for Interior Designers
Convert this 3D floor plan into a clean 2D layout for interior planning. Show walls as medium-weight lines. Include all doors and windows in their exact positions. Label rooms by function. Show furniture placement zones as dotted outlines if visible in the 3D image. Use a simple line-drawing style with no fills or colors. Suitable for overlay with furniture layouts. [Include/exclude] room dimensions.
When to use: Space planning, furniture layout documents, client worksheets.
Prompt for Real Estate Marketing
Create a 2D floor plan from this 3D visualization for property marketing. Use clean black lines on a light background. Label each room with its name and approximate size in [square feet/square meters]. Show the flow between rooms clearly. Include a simple legend for doors and windows. Make the layout easy to read at thumbnail size. Professional appearance suitable for listings and brochures. No technical symbols. No construction details.
When to use: Property listings, printed flyers, online galleries.
Prompt for Homeowners Planning Renovations
Convert this 3D floor plan into a simple 2D layout I can mark up for renovation planning. Show current walls, doors, and windows. Label rooms as [list current rooms]. Use clear lines that I can draw over. Leave space around the edges for notes. Include basic dimensions if visible in the 3D view. Output should be easy to print on [A4/letter] paper. Simple style with no decorations.
When to use: Renovation discussions, contractor briefings, DIY planning.
Common Issues and How to Fix Them
Converting 3D to 2D has its own set of problems. Here's what I ran into and how I solved each one.
Walls Appear Incomplete or Broken
Some walls show as dashed or missing segments.
Fix: The 3D image probably had furniture blocking the wall line. Use a 3D view with no furniture or minimal staging. Add "show all walls as continuous lines" to your prompt.
Room Proportions Look Distorted
A square room appears rectangular. A long hallway looks short.
Fix: The 3D perspective caused distortion. Use an isometric or true top-down 3D view instead of a corner perspective. Add "maintain accurate room proportions" to your prompt.
Doors and Windows Disappear
The 2D output shows blank walls where openings should exist.
Fix: The 3D image didn't clearly show the openings. Choose a 3D view where doors and windows are visible. Add "mark all door and window positions from the original" to your prompt.
Labels Land in Wrong Rooms
Room names appear shifted or overlapping.
Fix: The AI incorrectly guessed room functions. List each room explicitly in your prompt: "Label the top-left room as Master Bedroom. Label the center room as a Living Room."
Too Much Detail Clutters the Output
The 2D plan includes textures, shadows, or decorative elements.
Fix: The AI carried over the 3D image's styling. Add "clean technical drawing style" and "no shading, no textures, no furniture" to your prompt.
Scale Doesn't Match Original
The output looks stretched or compressed compared to the 3D source.
Fix: State the expected proportions in your prompt. "This is a [length] by [width] meter floor plan" or "maintain the aspect ratio of the original image."
Tips for Getting Accurate 2D Plans
These practices improved my results consistently.
- Use True Top-Down 3D Views: Angled perspectives distort room shapes. A view straight-down provides the clearest conversion.
- Remove Furniture Before Converting: Staging hides wall lines and door positions. Use an unfurnished 3D render when available.
- State Wall Thickness in Your Prompt: "Exterior walls 0.25 meters, interior walls 0.15 meters" prevents inconsistent line weights.
- List Every Room by Name: Don't let the AI guess. "Kitchen at bottom left, bathroom at top right" produces correct labels.
- Request Door Swing Direction: "All doors swing inward" or "show swing arcs for each door" adds useful construction detail.
- Specify Output Format Early: "Suitable for 1:100 scale printing" or "optimized for A3 paper" shapes the final layout.
- Ask for a Legend: "Include a simple legend showing door, window, and wall symbols" makes the plan self-explanatory.
- Generate Multiple Versions: Run the same prompt twice. Compare outputs. Pick the better option.
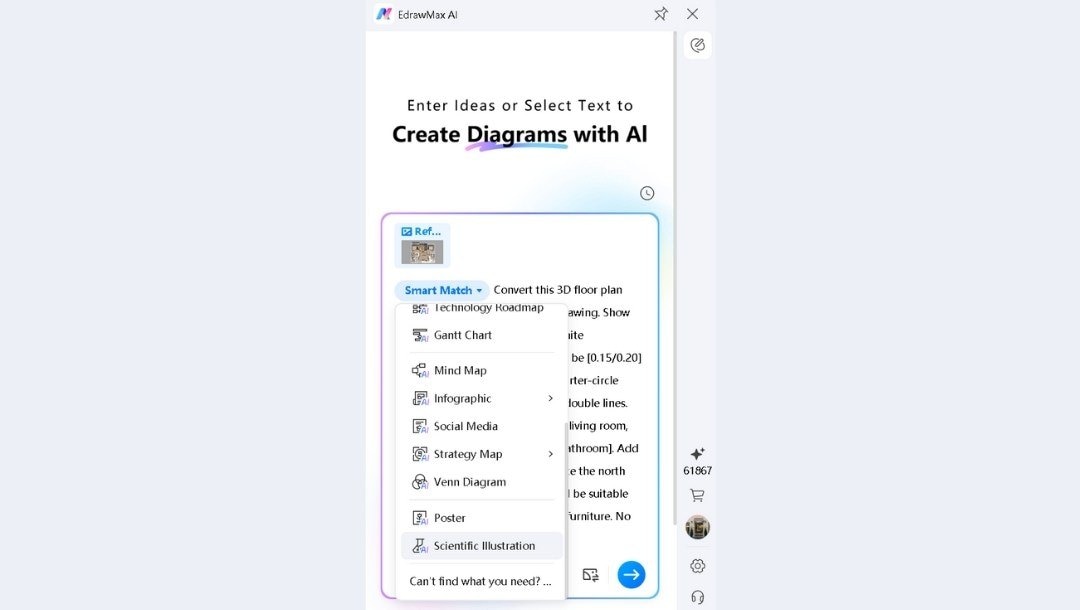
Use Nano Banana Pro In EdrawMax for Better Conversion
EdrawMax includes Nano Banana Pro for floor plan generation. Use the desktop app or the web version, depending on your setup.
Method 1: Use the AI Floating Button (Desktop)
Step1 Open the AI Panel and Upload
- Install the EdrawMax desktop if you don’t have it already.
- Click the AI Floating Ball on the right side of your screen.

- The generation panel opens.
- Select Scientific Illustration from the dropdown to access Nano Banana Pro.
- Click the Upload icon and select your 3D floor plan image.
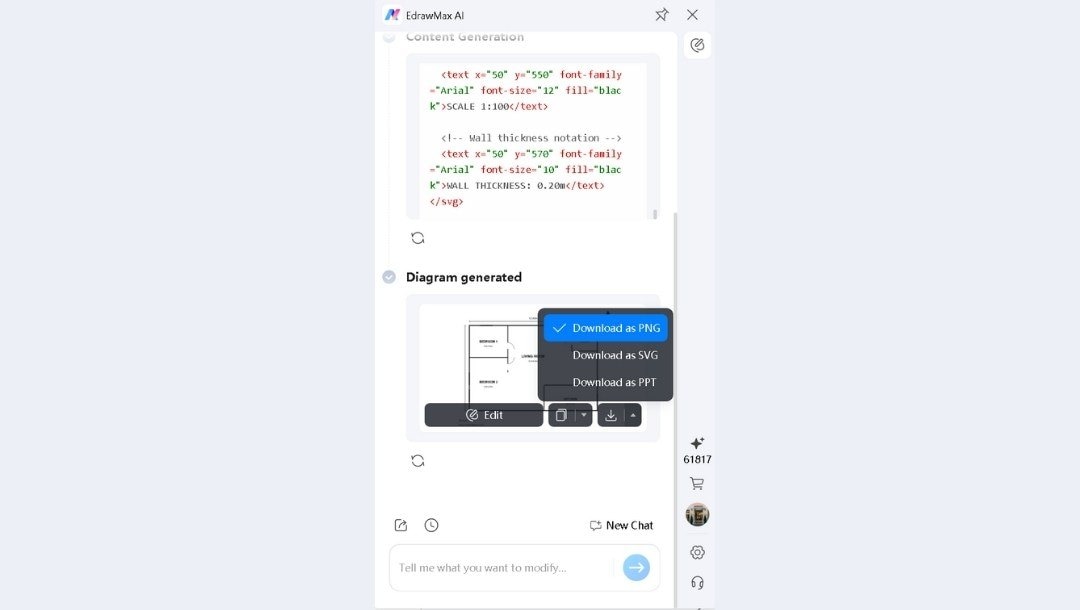
Step2 Enter Your Prompt and Generate
- Write your conversion prompt in the text field.
- Example: "Convert this 3D floor plan into a clean 2D technical layout. Black walls on white background. Label all rooms. Include door swings. No furniture."
- Press Enter or click the send icon.
- Wait for the AI to process.
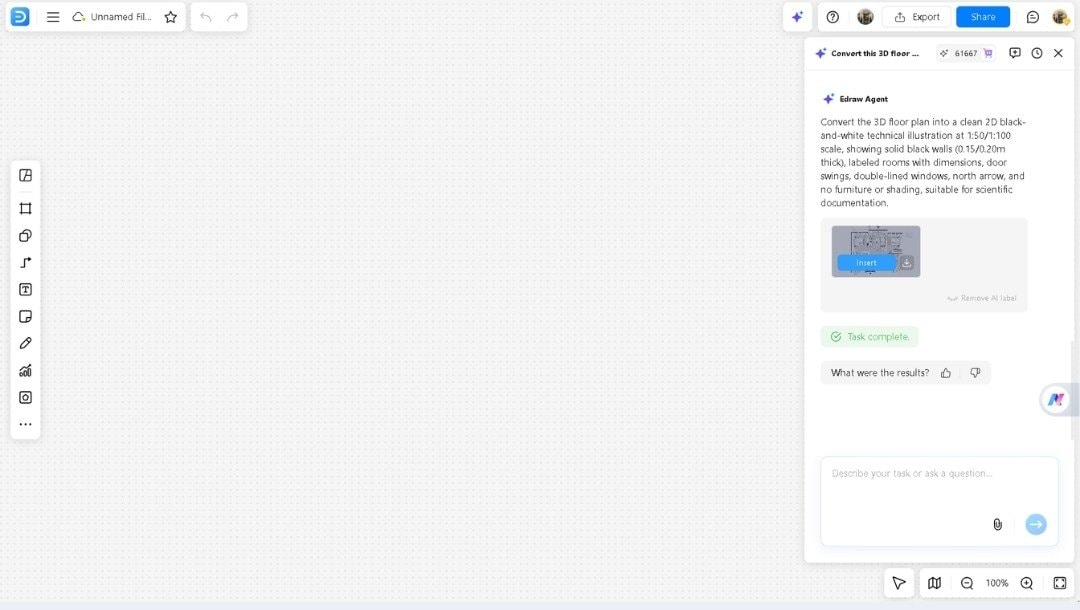
Step3 Review and Finalize
- Check the output against your original 3D view.
- Click Edit to send it to the EdrawMax canvas.
- Add dimensions, labels, or symbols from the library.
- Adjust line weights using the formatting tools.
- Export as PNG, SVG, or PDF when complete.
Method 2: Use the EdrawMax Web App
Step1 Access Edraw Agent
- Go to EdrawMax Online AI Diagram Creator.
- Click Edraw Agent on the left sidebar.
- Pick the Scientific Illustration model.
Step2 Upload and Generate
- Upload your 3D floor plan image.
- Enter your conversion prompt.
- Click Go or press Enter.
Step3 Modify and Export
- The 2D output appears on the canvas.
- Click Insert to add it to your workspace.
- Add labels, dimensions, or notes using EdrawMax tools.
- Download in the required format.
Why Use Nano Banana in EdrawMax
- Add Technical Details: The AI creates the base layout. I add dimensions, room labels, and construction notes using EdrawMax tools.
- Use Floor Plan Symbols: The library includes doors, windows, stairs, and fixtures. I drag them onto the canvas to complete the drawing.
- Scale for Printing: EdrawMax lets me set the page size and scale. The same 2D plan prints correctly on A4, A3, or architectural sheets.
- Export for Any Purpose: PDF for permit offices. PNG for emails. SVG for CAD import. One workspace handles all formats.
Wrap-Up
3D visualizations impress clients. 2D floor plans get work done. Nano Banana Pro bridges the gap in seconds.
EdrawMax takes the output further. Add dimensions. Insert symbols. Adjust formatting. Export for permits, contractors, or archives.
Whether you need flat drawings for documentation, reference sheets for job sites, or clean layouts for print materials, this workflow delivers.
Open EdrawMax with Nano Banana Pro. Convert your 3D floor plan to 2D today.
AI Diagram Generator
Enter your prompt. Upload files if needed. Generate diagrams, charts, or slides instantly.


