


Do you know that something as small as invisible to the naked eye can hijack your body cells and replicate themselves quickly? These microscopic entities, known as viruses, exploit your body for their own benefit.
Viruses cannot reproduce on their own; they need the cellular machinery of other organisms to replicate. Therefore, they attack a living organism, such as humans.
They enter their bodies and control them through their six stages of infection. The immune system responds to fight this viral infection.
Visualizing this story in a diagram can be very interesting for showing the invasion, takeover, and defence of an invisible creature.
In this blog, we will discuss the whole story of viral infection and provide a step-by-step guide to draw your own diagram.
In this article
How Do Viruses Infect Cells?
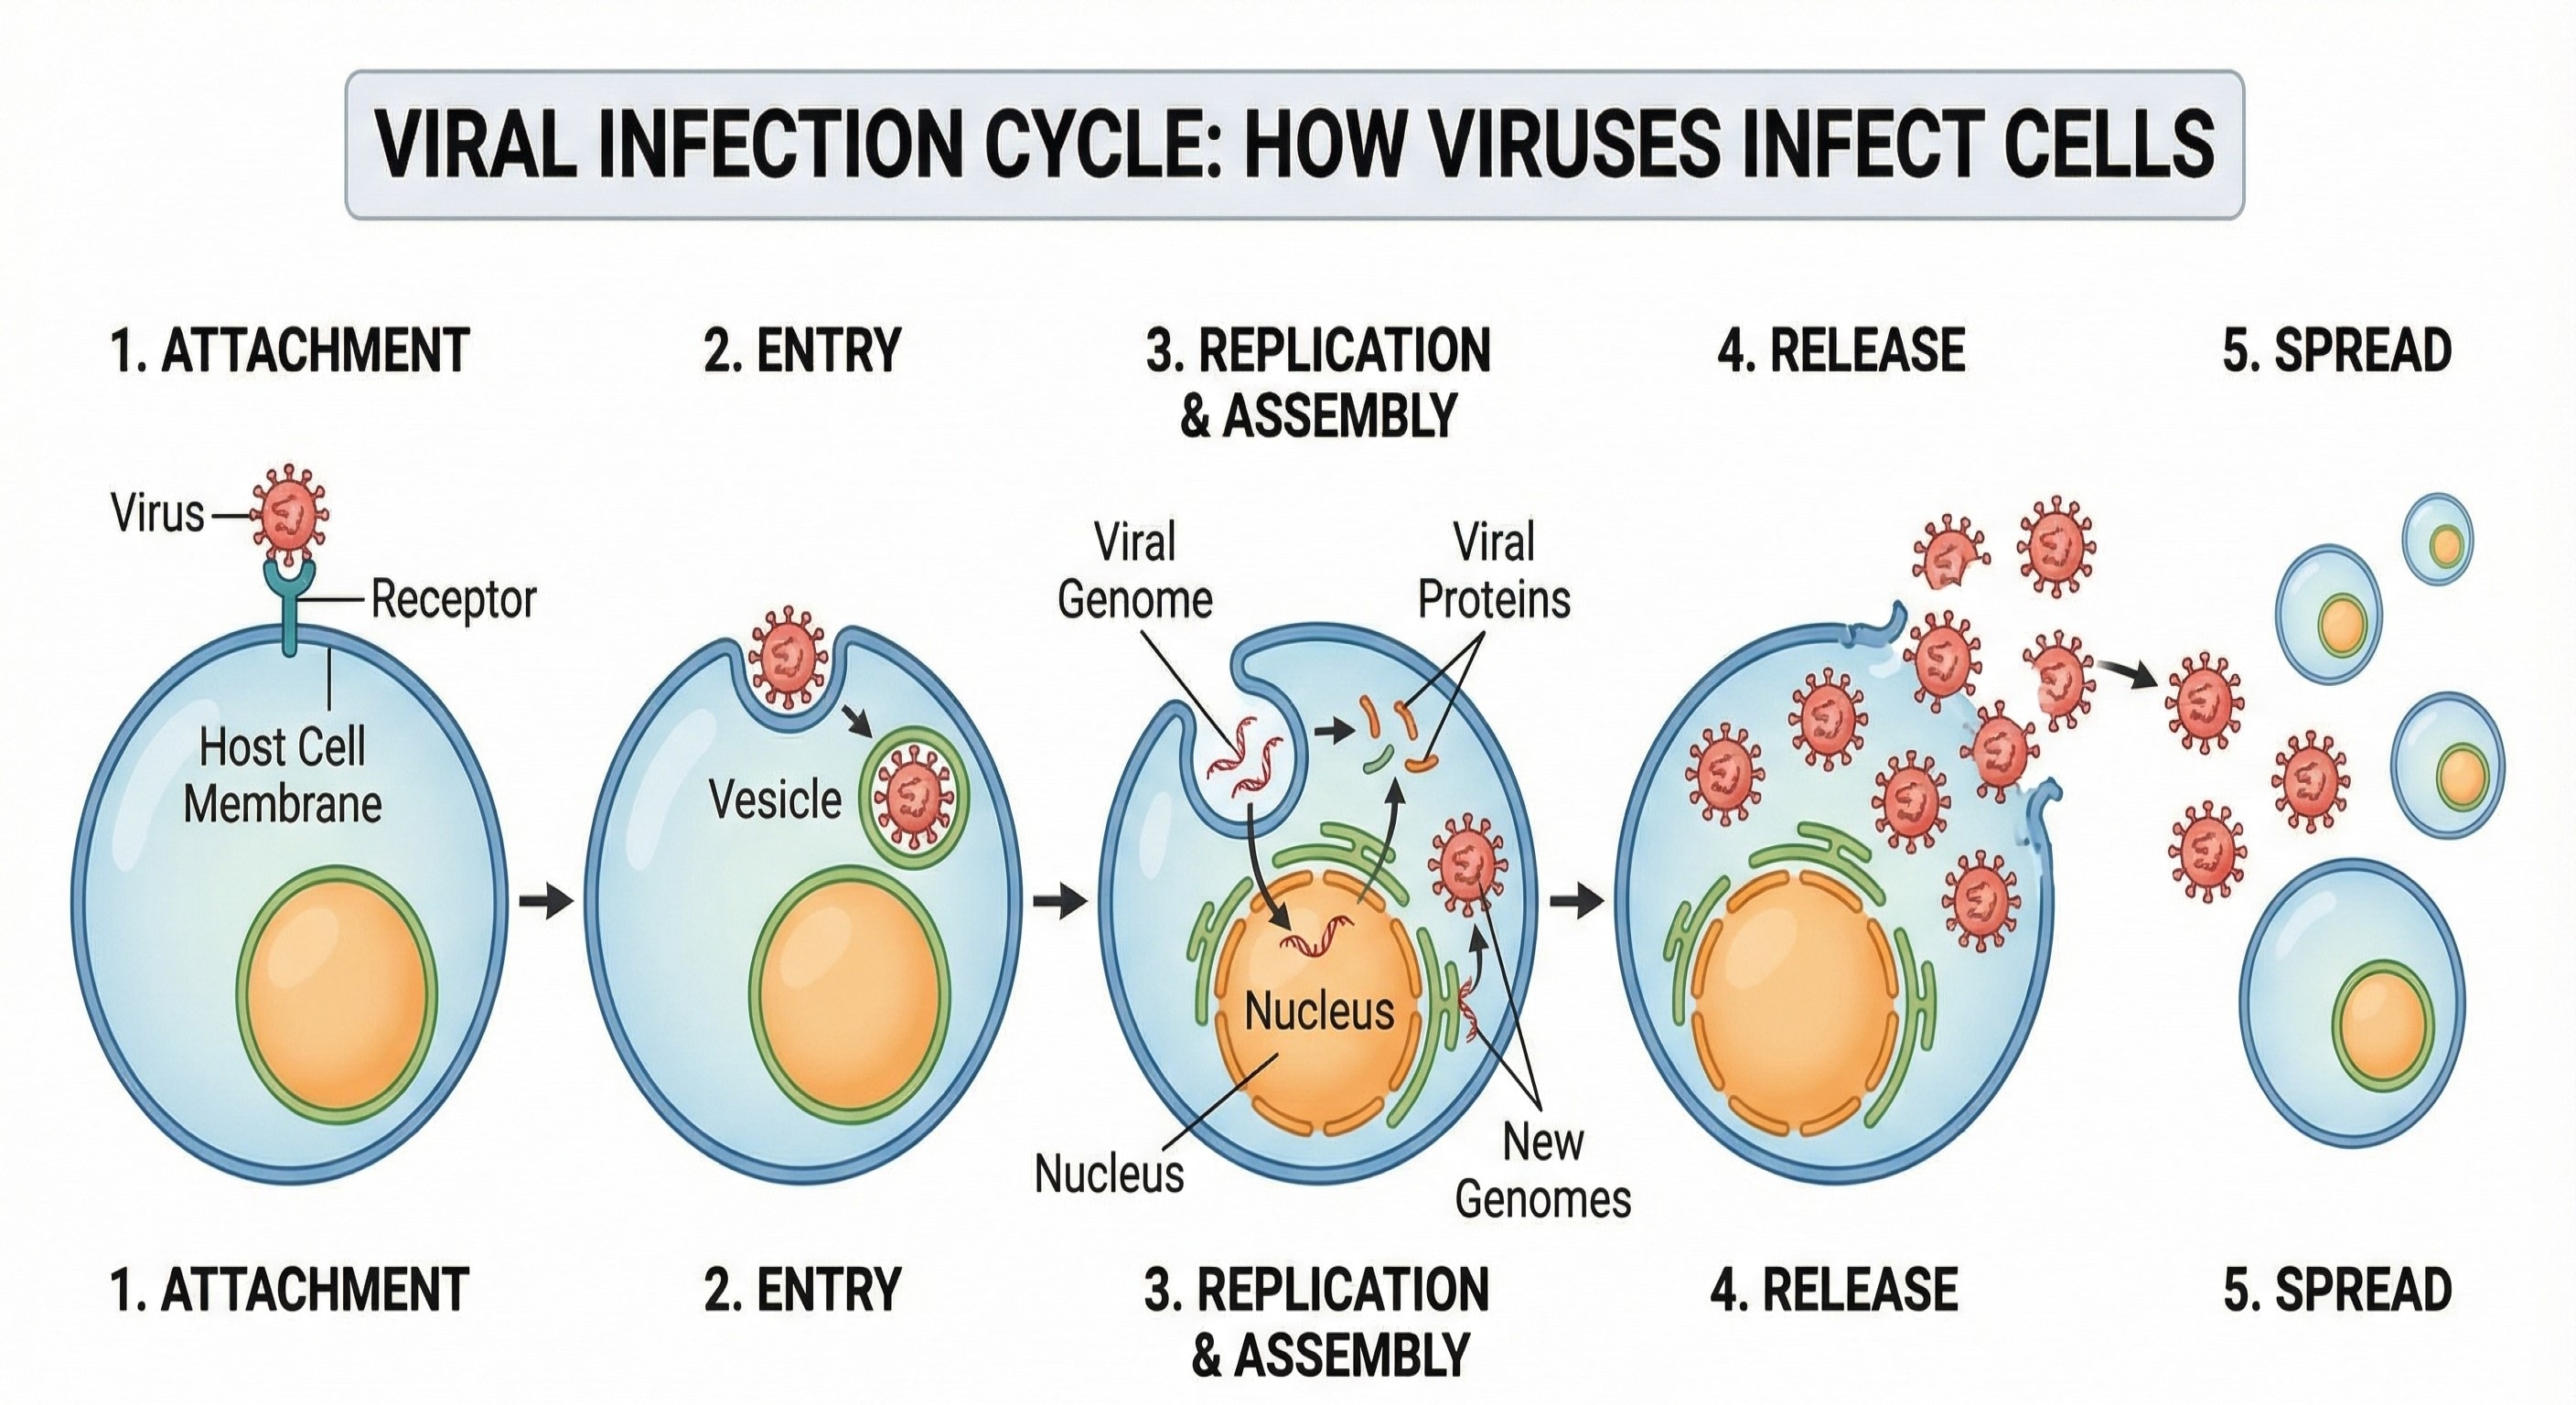
Viruses infect cells through a specific, organized process. First, a virus enters the human body through the nose, mouth, eyes, or cuts in the skin. After entering the body, the virus moves toward its target cells.
Each virus can infect only certain types of cells. This specificity arises because each virus recognizes and binds to specific receptors on the cell surface. For example, the COVID-19 virus, SARS-CoV-2, infects only cells that express the ACE2 receptor.
Attachment, Entry, Replication
The first step of infection is attachment. In this step, the virus binds to receptors on the host cell membrane using proteins on its surface. This attachment is very specific, like a lock-and-key system.
After attachment, the virus enters the cell. This entry can occur via fusion with the cell membrane or via endocytosis, in which the cell surrounds and engulfs the virus.
Upon entering the host cell, the virus releases its genetic material. This step is called uncoating.
The viral DNA or RNA takes control of the host cell machinery. The virus forces the cell to produce viral proteins and copies of viral genetic material rather than normal cellular products.
These viral components then assemble to form new virus particles. Finally, the newly formed viruses leave the host cell.
Some viruses cause the cell to burst, while others leave by budding from the cell membrane. This damages or kills the host cell and spreads the infection to nearby cells. In this way, viruses multiply rapidly inside the body.
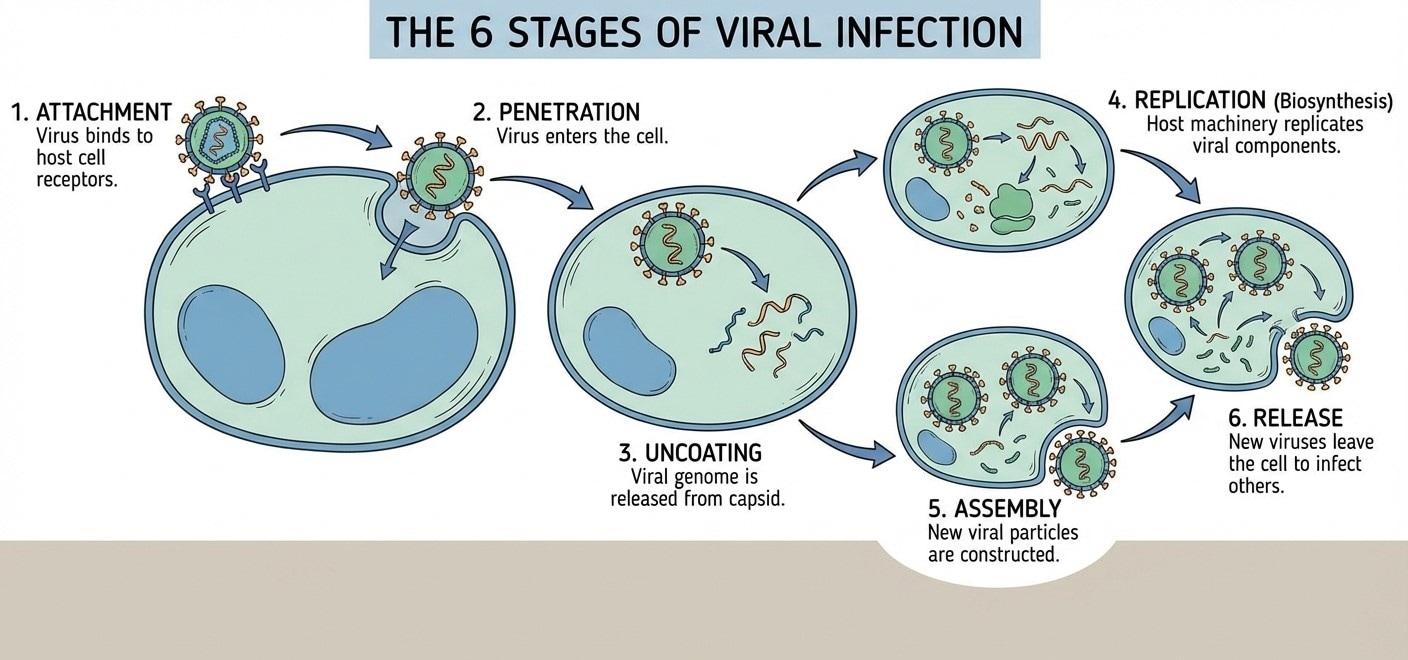
The 6 Stages of Viral Infection
Attachment Through Release
Building on the previous explanation of how viruses infect cells, it is essential to recognize that viral infection proceeds through a fixed sequence of steps. Each step contributes to the virus's ability to survive and propagate within the host.
- 1. Attachment
Attachment is the first stage of viral infection. In this step, the virus comes in contact with the host cell. Special proteins present on the virus bind with specific receptors on the cell membrane.
This binding is highly specific. Only cells with matching receptors can be infected. Attachment helps the virus identify the correct host cell.
- 2. Entry
After binding to the host receptor, the virus enters the host cell. This step is called entry. Some viruses enter by fusing with the cell membrane, while others enter through endocytosis. At this stage, the virus is inside the cell but still covered by its protein coat.
- 3. Uncoating
Uncoating is the stage in which the viral protein coat is removed. This releases the viral DNA or RNA into the host cell.
The genetic material becomes active inside the cytoplasm or nucleus. Uncoating is necessary for the virus to take control of the host cell.
- 4. Replication
In replication, the viral genetic material controls the host cell machinery. The host cell stops its normal functions and starts making viral nucleic acids and proteins. Many copies of viral components are produced during this stage.
During assembly, newly formed viral proteins and genetic material come together. They are properly arranged to form complete virus particles, called virions.
- 6. Release
In the final stage, new viruses leave the host cell. This may occur by cell bursting or budding. The released viruses infect nearby cells and spread the infection further. This is the moment when you start developing symptoms such as coughing, fever, etc.
Immune Response to Viruses
The immune system is the body’s defense system. It protects the body from harmful pathogens, such as viruses. As soon as a virus enters the body, the immune system becomes active and starts working to control and remove the infection.
Innate and Adaptive Immunity
The immune response to viruses involves two main branches: innate and adaptive immunity.
Innate Immunity
Innate immunity is the first line of defense against viral infection. It responds quickly and does not require prior exposure to the virus.
Physical barriers such as skin, mucus, and cilia prevent viruses from entering the body. If a virus crosses these barriers, immune cells become active.
White blood cells, like macrophages and neutrophils, engulf and destroy virus-infected cells. Natural killer cells play an important role by killing infected cells before the virus can multiply.
The body also releases chemicals called interferons (IFNs), which act as neighborhood alerts for cells. Just like a community watch, interferons signal danger by blocking viral replication. Fever, a part of the innate immune response, also plays a role by slowing down viral growth.
Adaptive Immunity
Adaptive immunity is specific and develops after the body recognizes the virus. It takes more time but provides long-lasting protection. This response involves lymphocytes, which include B cells and T cells.
B cells produce antibodies. These antibodies bind to viral particles, preventing them from entering host cells. Antibodies also help mark the virus for destruction by other immune cells.
T cells help differently. Helper T cells activate B cells and other immune cells. Cytotoxic T cells destroy virus-infected cells and stop the spread of infection.
Immunological Memory:
After the infection is cleared, memory B cells and memory T cells remain in the body. These cells remember the virus. If the same virus enters the body again, the immune response becomes faster and stronger.
This is why a person usually does not get the same viral disease repeatedly. Vaccination works on the same principle by creating immunological memory without causing disease.
So, it is important to understand the process of viral infection and provide a visual guide for public health.

How to Make a Viral Infection Diagram with EdrawMax
In biology, drawing is a crucial skill for understanding concepts and themes effectively. Today, education is shifting towards digitalization. So does the drawing of the biology processes.
EdrawMax is a powerful tool that offers many features for drawing biology diagrams. Here, you will see thousands of templates on microbiology, which you can use or even export for offline use.
You can draw your own diagram of a viral infection and the host response to it by following the guide.
Step1 Using EdrawMax Microbiology Templates
- You can open EdrawMax online or download its app on your PC, mobile phone, MacBook, etc.
- After opening, you can choose the template community on the left side.
- Now, you can type "Microbiology" here, and you will see many diagrams and flowchart layouts. Choose from these templates or draw your own diagram from scratch.
- You can also search for Microbiology Templates EdrawMax directly in the search engine.
Step2 Creating Step-by-Step Infection Diagrams
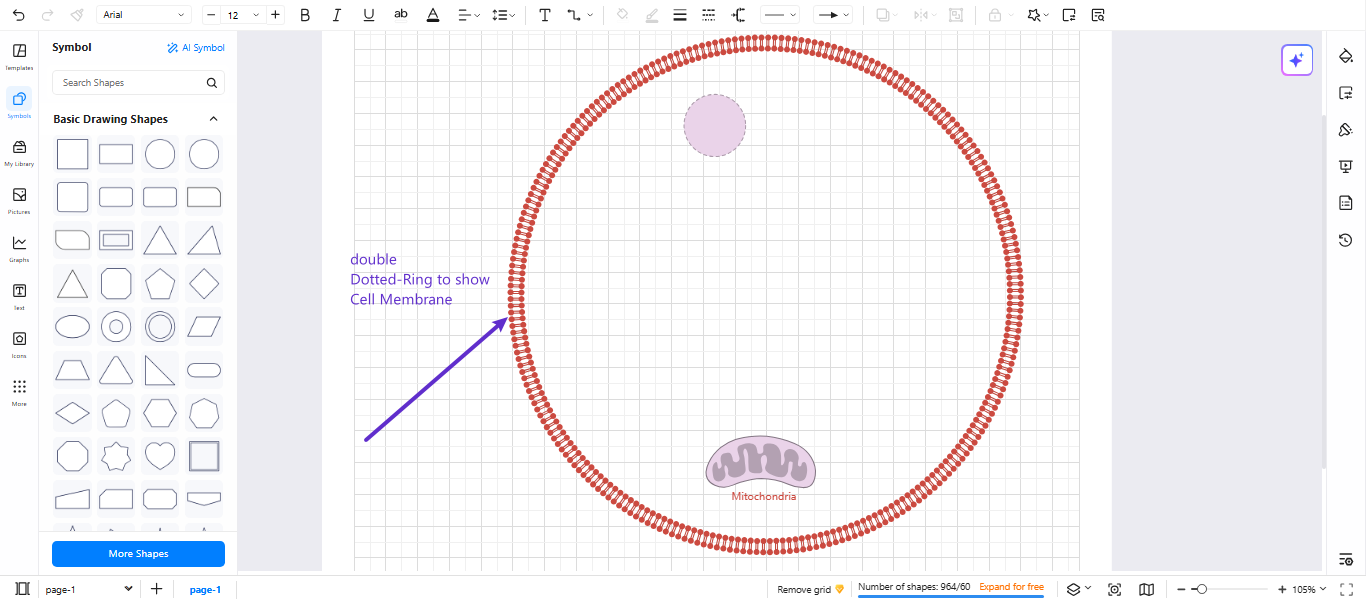
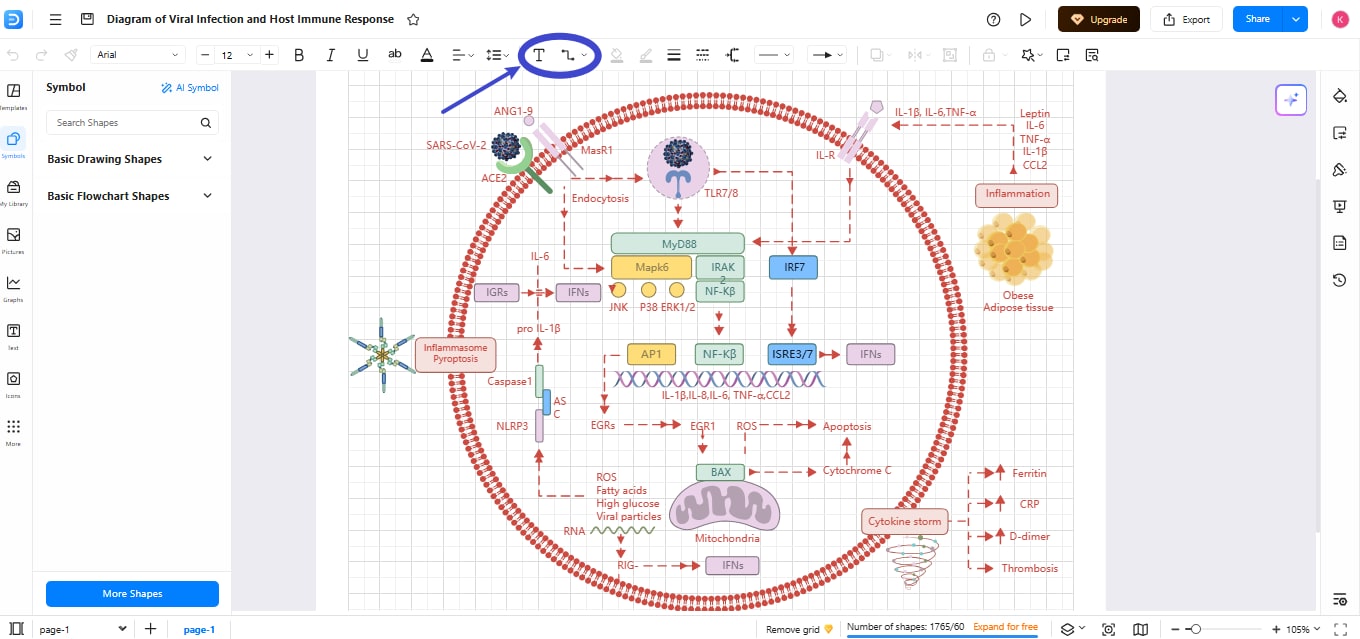
- Insert a circle shape from basic shapes, and draw a circle to show the cell membrane of the host cell.
- Duplicate it, apply the dotted ring effect, and color it. Keep this shape line thicker.
- Draw a nucleus at the top of the ring with an oval or round shape.
- Create a bean-shaped structure for mitochondria and draw its cristae
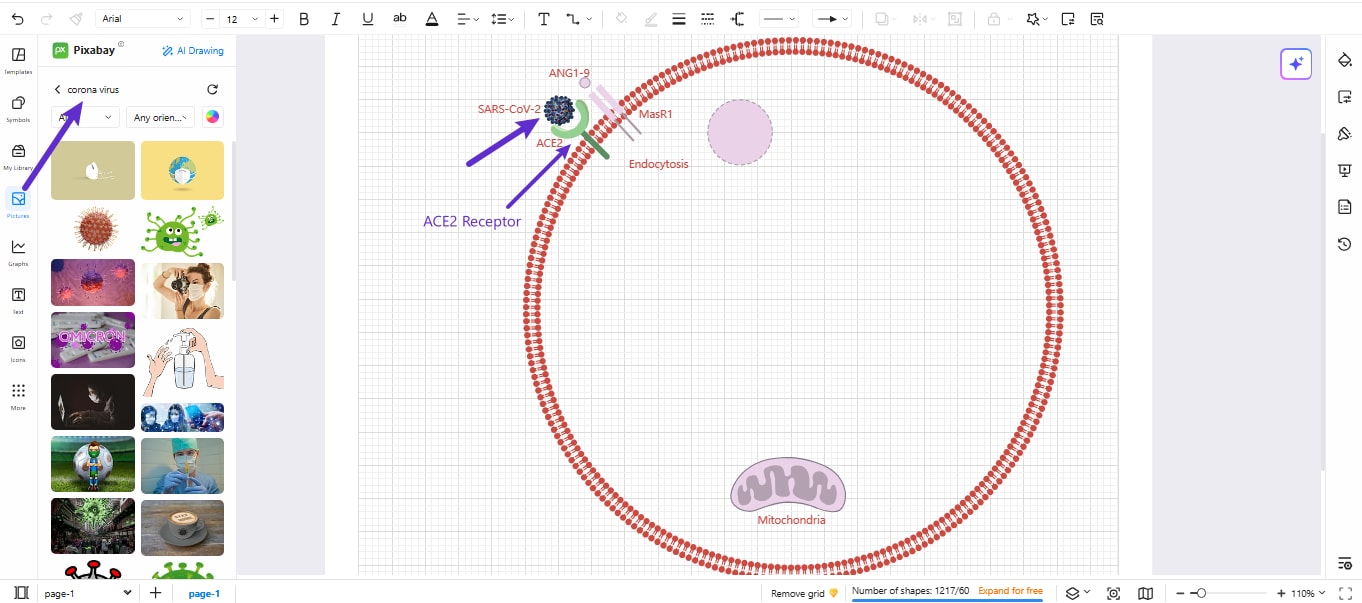
Step3 Illustrating Virus Structure
- Go to pictures from the left side menu and search for a virus or a specific virus like coronavirus.
- You can also get the virus structure search from the icons library. Or you can draw it by using basic shapes and spikes.
- Add a label for the name “SARS-CoV-2” of the virus near its structure.
- Show the entry mechanism by drawing and labeling the receptor cell “ACE2.”
- Add a label to show endocytosis.
Step4 Drawing Immune Response Components
- Draw the immune response components one by one by adding the round rectangles.
- Add recognition receptors: TLR3 (recognizes double-stranded RNA) and TLR7 (recognizes single-stranded RNA). Both are toll-like receptors that play a role in innate immunity.
- Now add signaling pathways for these receptors by using connector arrows. They are MyD88, IRAK, NF-κB, AP-1, and kIRF7, which are used in immune responses.
- On the right side, add cytokines
- Illustrate inflammasome components at the bottom right side and mitochondrial stress at the bottom.

Step5 Adding Educational Annotations
- Set the color coding and add details on the processes and components.
- Use small callout boxes near complex terms.
- Align the tools uniformly to maintain space.
- Group sections by Ctrl+G and then group all the components in a single unit.
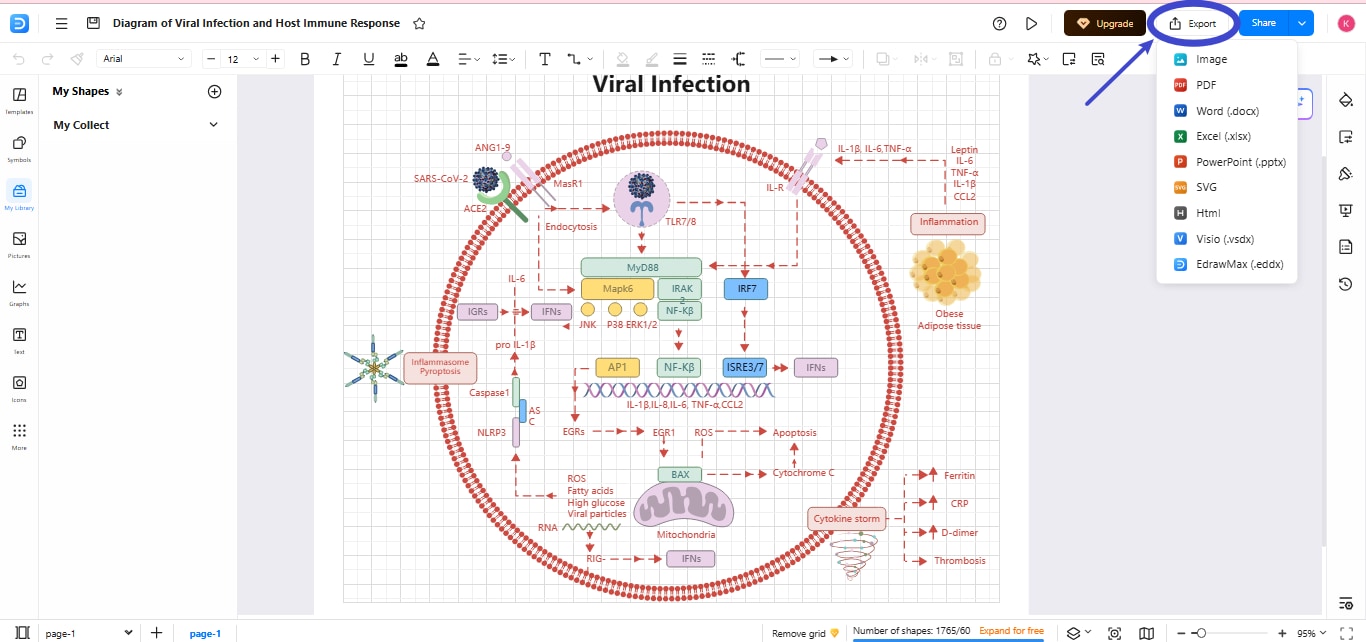
Step6 Export the Diagram
Once you are done, export the diagram from the top-right export option. You can export in various formats, such as JPG, PNG, SVG, PDF, Word, and Graphics, as needed.
AI Diagram Generator
Enter your prompt. Upload files if needed. Generate diagrams, charts, or slides instantly.


