


Clear communication is indeed the backbone of effective system design and project management. And for that, we need communication diagrams to visualize the interactions and make complex processes easier to grasp. Communication diagrams, a key component of the Unified Modeling Language (UML), provide a structured visual of how objects in a system interact and exchange messages.
This guide focuses on two powerful tools: Microsoft Visio, known for its advanced features and versatility, and EdrawMax, recognized for its accessibility and cost-effectiveness. We'll explore how to create a communication diagram in Visio, introduce EdrawMax as a free alternative, and share best practices to ensure your diagrams are both informative and easy to understand.
In this article
Part 1: How to Make a Communication Diagram in Visio?
Visio provides a comprehensive environment to create communication diagrams with ease. It supports a variety of UML diagrams, particularly communication diagrams. With an extensive collection of predefined shapes and connectors at your disposal, you can accurately represent communication flows.
Follow these instructions if you are seeking guidance on how to create a communication diagram in Visio.
Step 1: Launch Visio:
- Start by opening Microsoft Visio on your computer.
Step 2: Select the template:
- Go to File > New.
- Under Categories, select Software and Database.
Step 3:Create your diagram:
- Pick either a blank template or one of the starter diagrams to begin.
- Click Create to open a new drawing canvas.
Step 4: Set up your workspace:
- Make sure the Shapes window is open. If not, go to View > Task Panes and check Shapes.
- On the View tab, ensure the Connection Points option is selected to see where to connect your shapes.
Step 5: Add shapes:
- From the Shapes window, drag the Actor shape onto your canvas to represent users or external systems.
- Drag the Lifeline shape for each participant in the communication.
Step 6: Connect the shapes:
- Use the Connector Tool from the Home tab to draw connections between lifelines.
- For messages, drag a Message shape and connect it between two lifelines.
Step 7: Edit connector text:
- If you need to add text to a connector, select the Text Block tool from the Home tab.
- Click on the connector line and type your text.
- You can move or rotate the text by dragging it or using the rotation handle.
Step 8: Adjust the connectors:
- To change a connector type, right-click on it and select Set Connector Type.
- Choose from options like Association or Directed Association.
Step 9: Dynamic vs. point connections:
- If you expect to move shapes around, opt for dynamic connections which adjust automatically.
Step 10: Finalize your diagram:
- Review your diagram for accuracy.
- Adjust any text or connections as needed.
- Save your diagram and export or share it as required.
Part 2: How to Create a Communication Diagram on EdrawMax?
EdrawMax is an excellent alternative to Visio, especially for those who are new to creating communication diagrams. It's a free and beginner-friendly tool that offers a more accessible platform for diagram creation.
Here's how you can use EdrawMax to create a communication diagram:
Step1
Launch EdrawMax and click the New button on the left sidebar. Choose Blank Drawing from the expanded menu. Alternatively, you can select from the given options in the list.

Step2
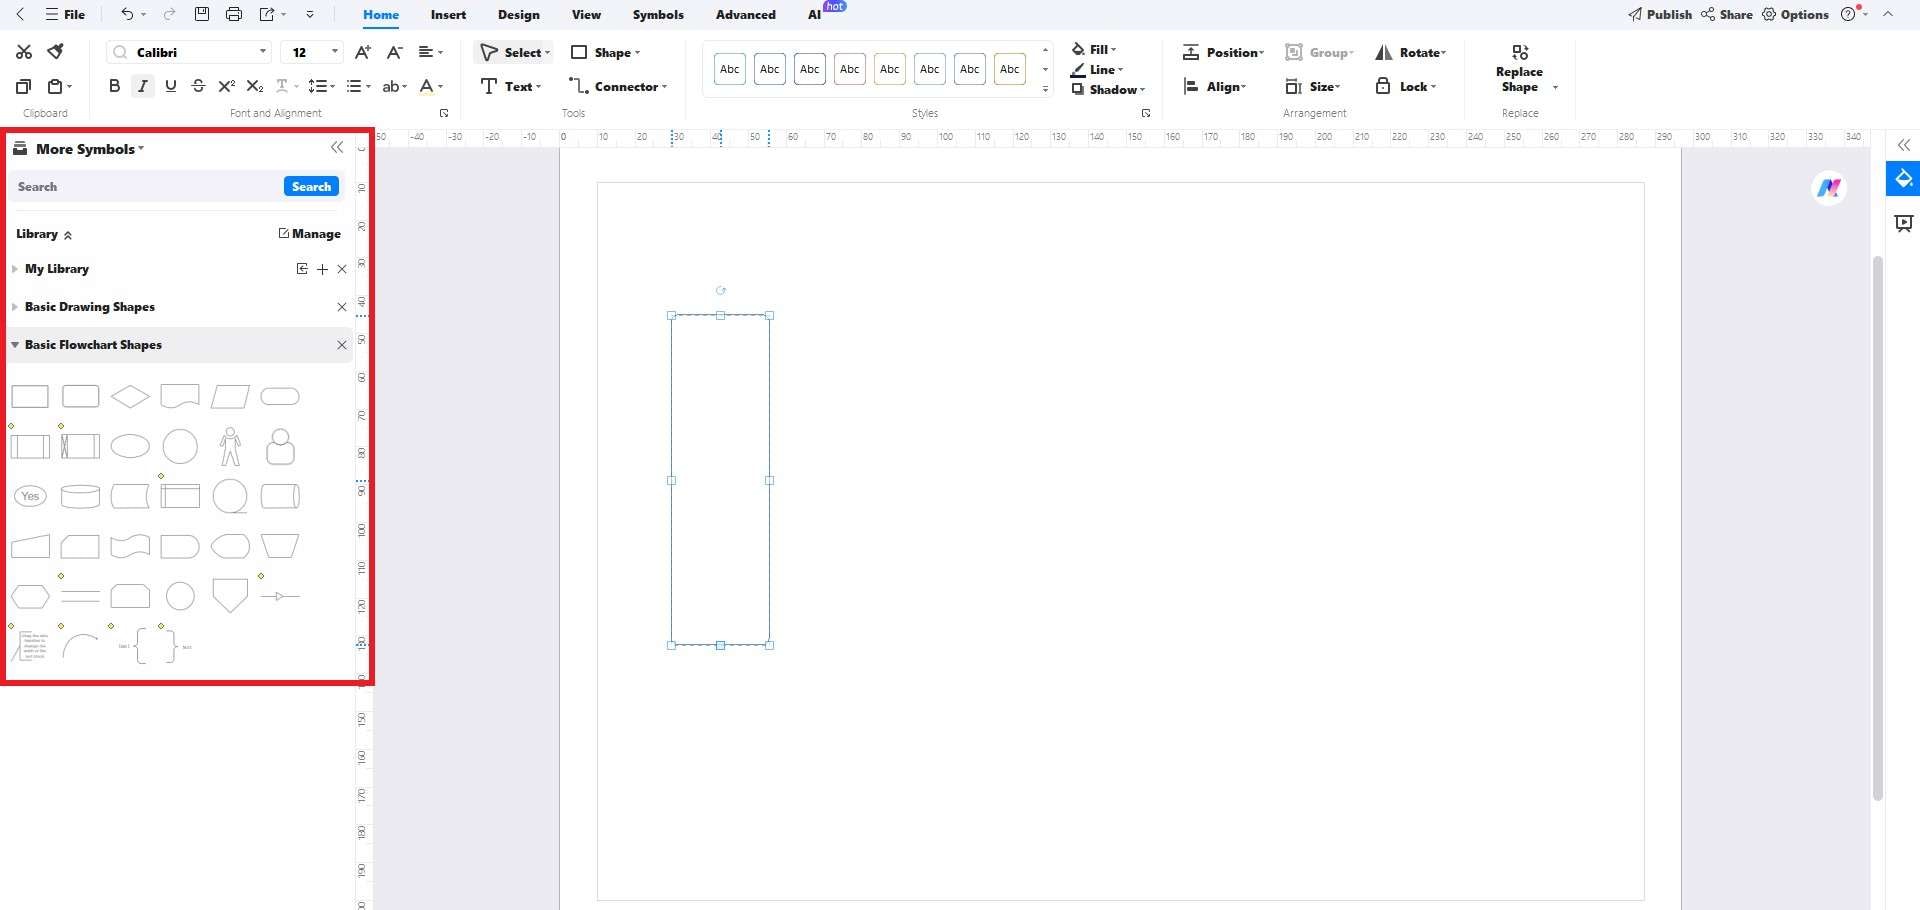
Now, a blank canvas will open up. Add some shapes from the left sidebar.
If you don’t find the symbols you are looking for, simply enter their keywords in the Search Bar. Drag the symbols you want, drop them on the canvas, and resize them according to your needs.
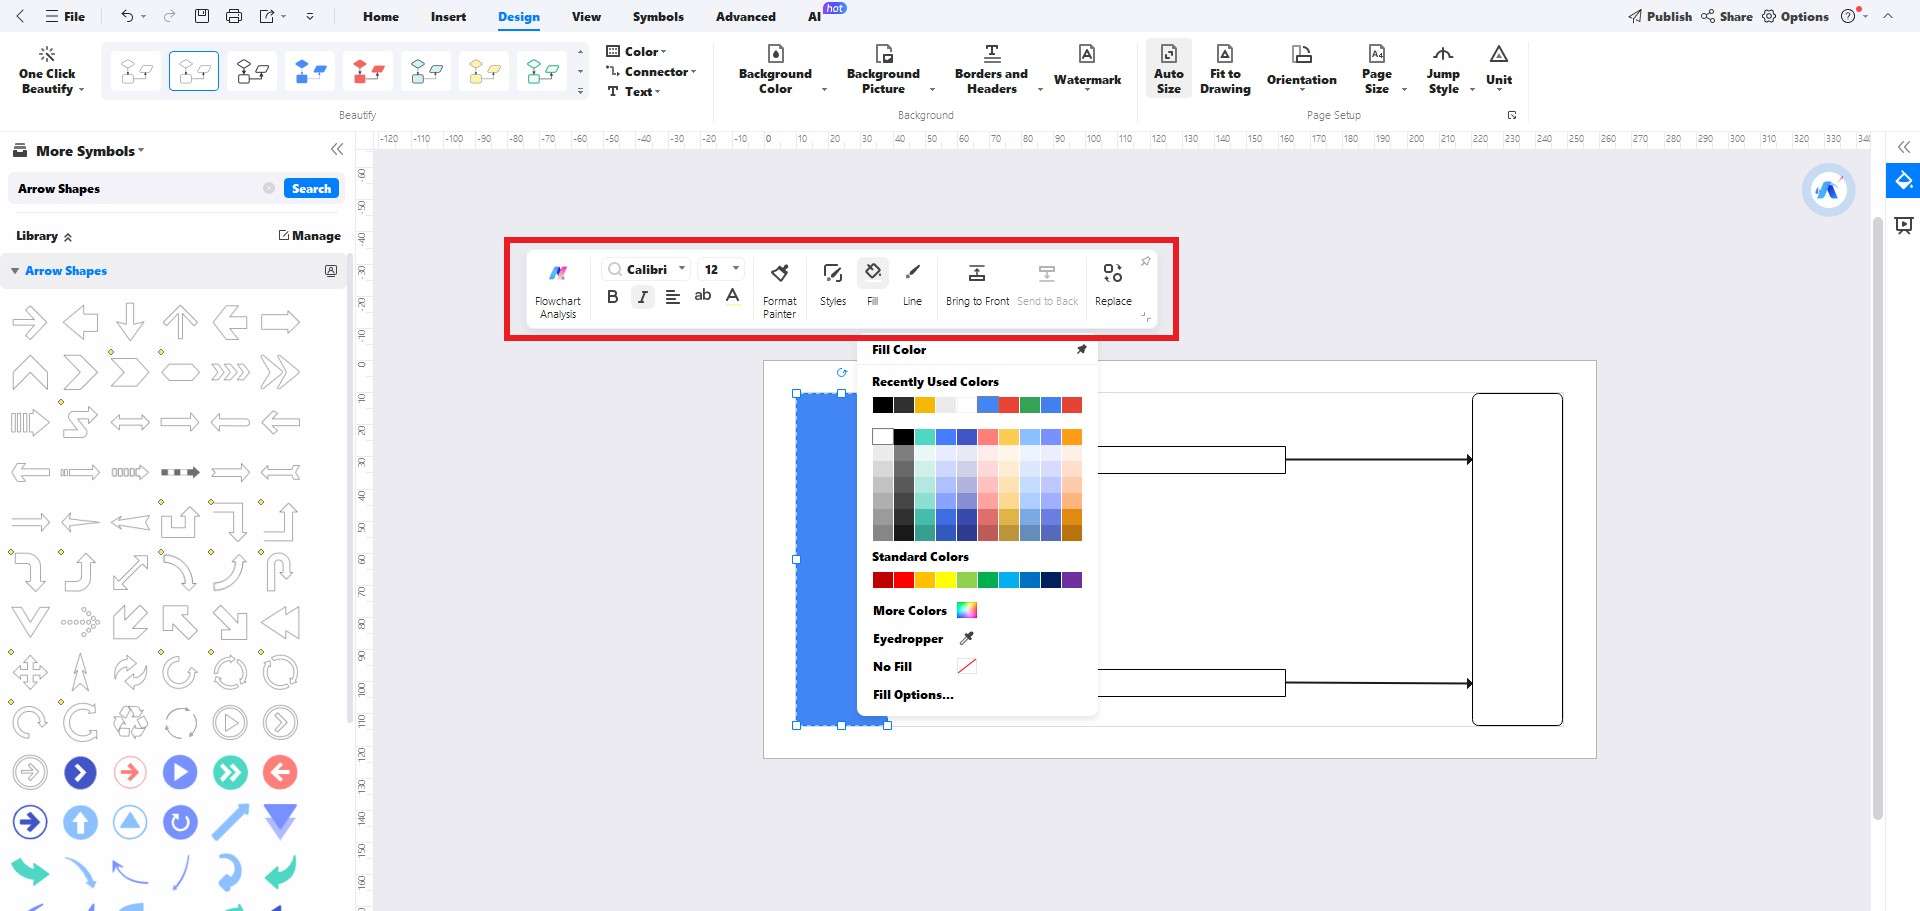
Step3
Select the shape you want to customize. You will see a floating menu once you select it. There, you can change an element’s color, style, line, font, and other settings.
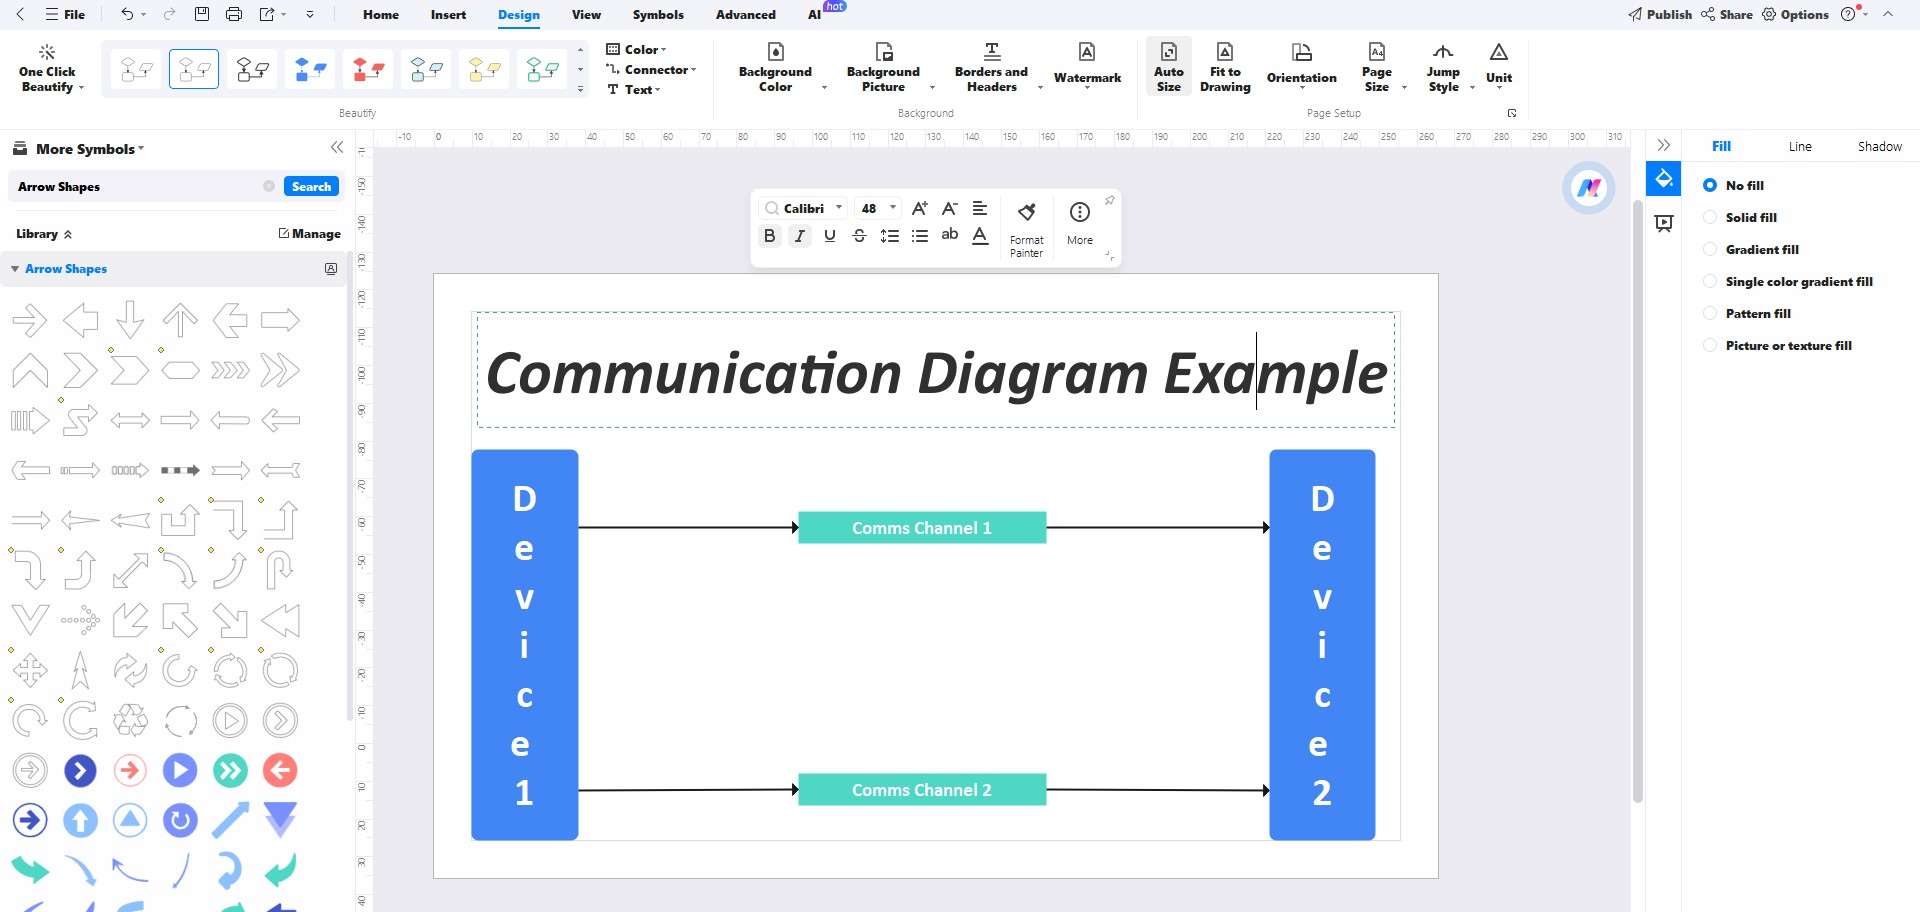
Step4
Let’s add text to our shapes. Double-click any element to add text content inside it. For example, let’s name our vertical rectangles “Device 1 and 2” and horizontal rectangles “Comms Channels 1 & 2.” Then, double-click anywhere to add a heading for the diagram.
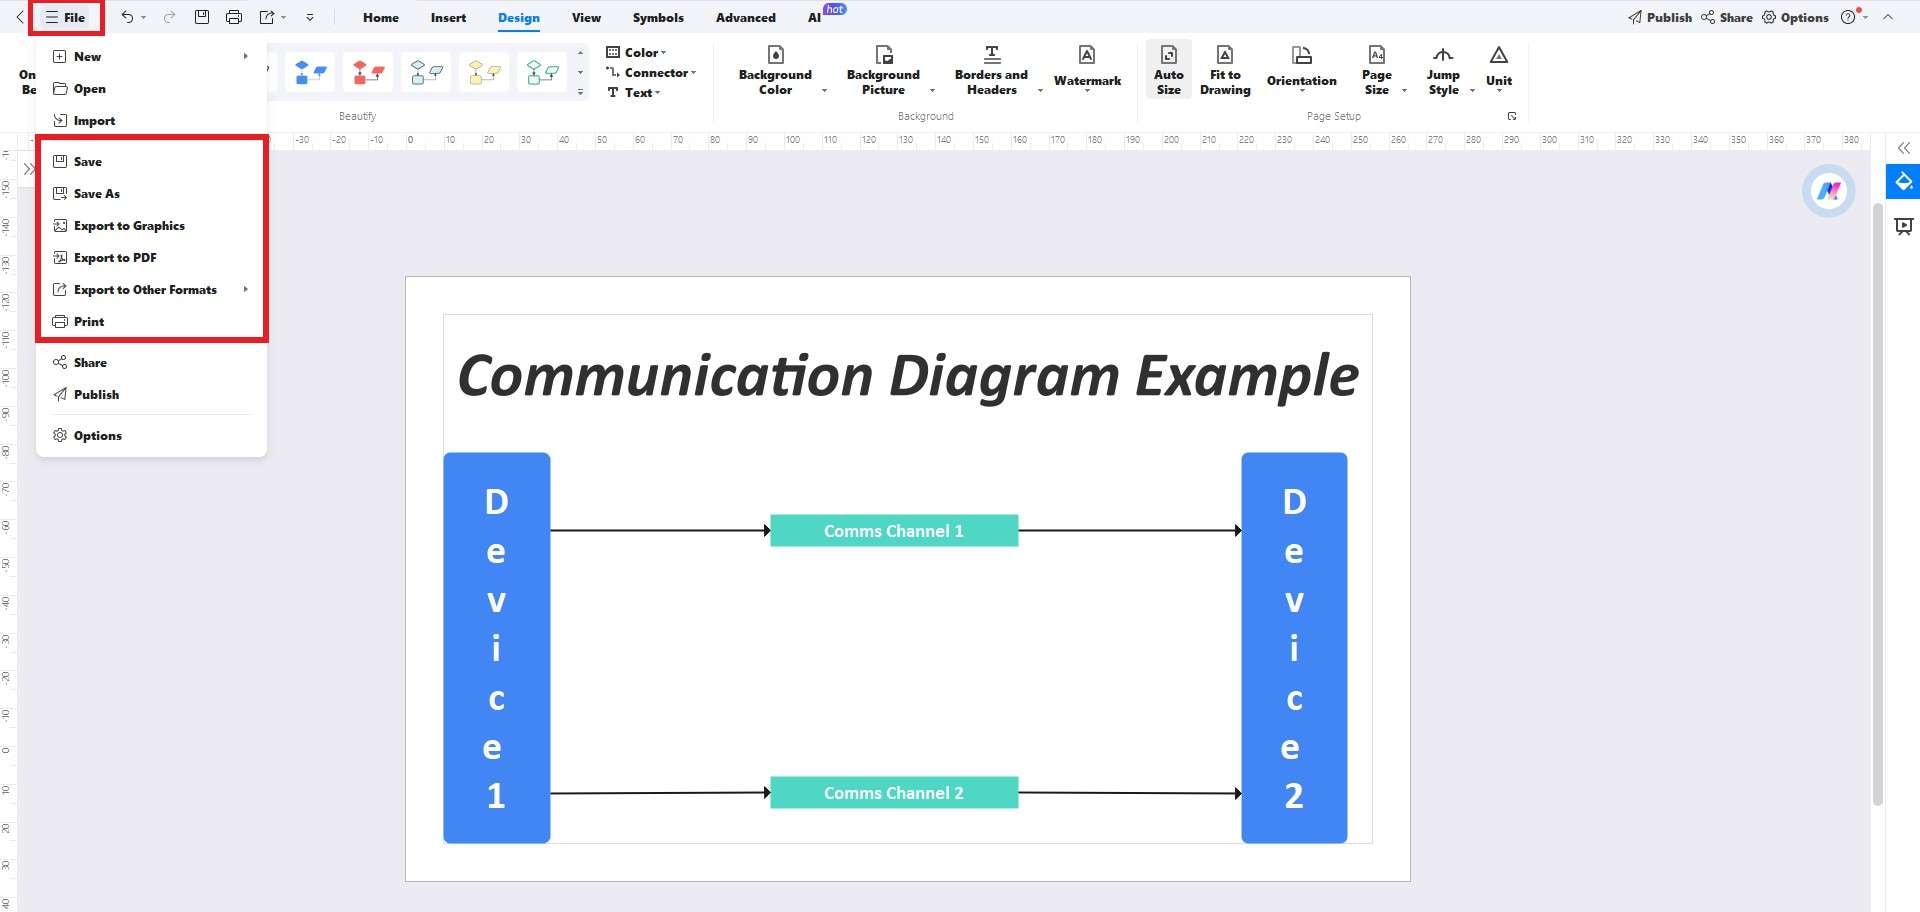
Step5
Once done, head to the File button on the top-left corner. Click Save or Export to download your file in its default or your desired file format, respectively.
What is Wondershare EdrawMax?
Wondershare EdrawMax is a comprehensive diagramming tool for newbies and professionals. It offers a wide range of features for creating various types of diagrams, including UML communication diagrams. Its intuitive interface and extensive template library can significantly speed up the diagramming process.
Features
- User-friendly interface: Simplifies the creation of diagrams with drag-and-drop functionality.
- Extensive template library: Offers a variety of pre-designed templates for different diagram types.
- Cross-platform compatibility: Works on Windows, macOS, and Linux, providing flexibility for users with different operating systems.
- Import/Export and printing: EdrawMax supports importing and exporting files in various formats, simplifying sharing and integration. Additionally, you can directly print documents from EdrawMax for meetings or presentations.
Reasons to Choose
- Affordability: EdrawMax provides competitive pricing plans, including a robust free version, making it a cost-effective solution.
- Simplicity: Designed with beginners in mind, it's easy to learn and use.
- Versatility: Capable of creating a wide range of diagrams beyond UML, such as flowcharts, mind maps, and organizational charts.
- Customization: With abundant structures, themes, and styling tools, You can personalize your charts and make them beautiful.
- Resource-rich: You can access over 700 clipart, integration with Pexels and Iconfont, and a massive emoji library to enhance the visual appeal of your charts.
Best Practices for Creating a Communication Diagram
When making a communication diagram, it's essential to focus on clarity and precision. To do that, you need to consider some of the following best practices:
- Use concise text: Keep the text within your diagram brief and to the point to avoid clutter.
- Proper labeling: Ensure that all elements and connections are clearly labeled to convey the correct information.
- Consistent layout: Adopt a consistent layout throughout the diagram to help readers follow the flow of communication easily.
- Clear connections: Make sure that the connections between objects are drawn clearly to represent the interactions accurately.
- Feedback loop: Incorporate feedback from peers to refine the diagram, ensuring it meets the intended purpose.
Conclusion
Communication diagrams are important tools for visualizing system interactions. However, these diagrams are complex and require your complete attention with access to all types of communication symbols and icons. Visio and EdrawMax provide such symbols and icons to help you out in the diagramming process. But it’s best to try out the template library of EdrawMax if it is your first time experiencing such diagrams.
Explore these tools and enhance your project management skills through the transformative potential of visual representation.
