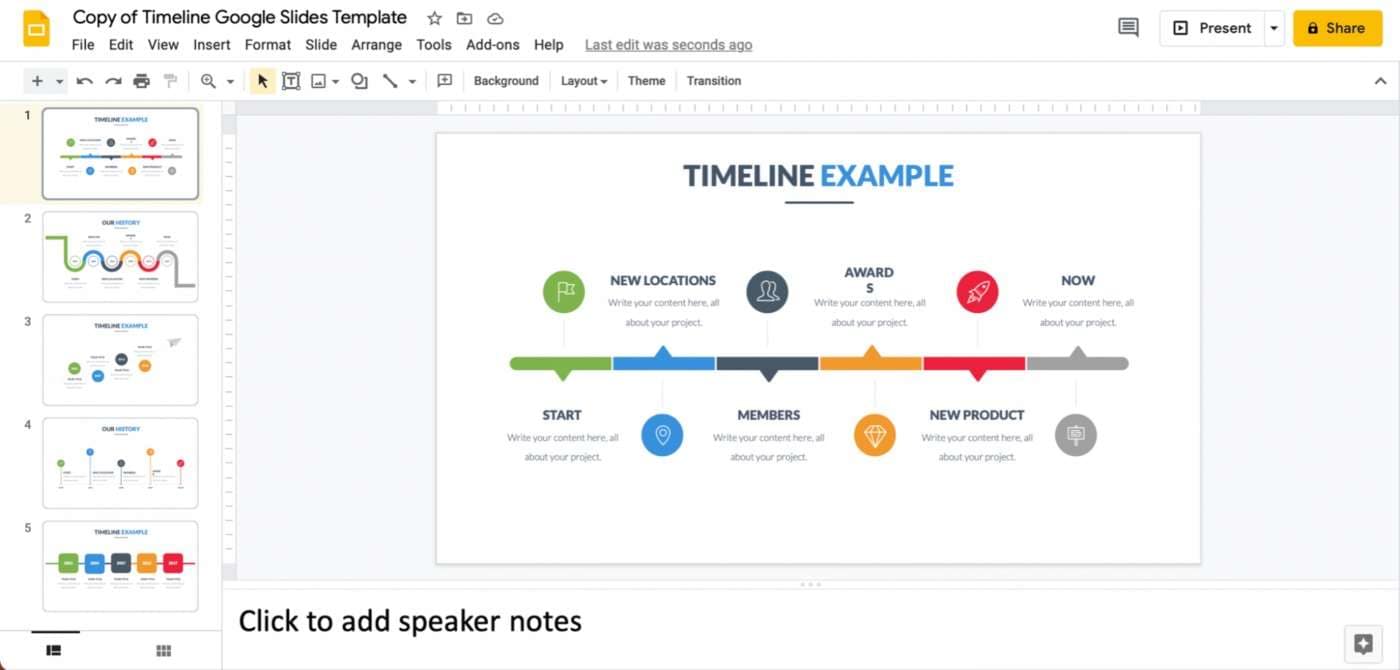
Presenting a timeline on Google Slides is a great way to depict chronology. Timelines allow you to present data with ease across various scenarios. They provide a structured way to outline historical events, project milestones, or schedules. They are essential in project management, ensuring tasks and deadlines are on track. Business presentations benefit from timelines as well, showcasing plans and developments. However, it might be hard to navigate through the timeline creation process, so this article will show how to create timelines in Google Slides.
While Google Slides is a popular tool, you might need a dedicated diagram maker to create professional timelines. In that case, consider EdrawMax, which is known for its ease of use. It is also accessible online and has a free version. Read on to learn about the tool if you are interested.
Contents of the article
Part 1. Using Google Slides to Make a Timeline
Google Slides is a versatile presentation tool. This popular app offers a seamless platform for creating captivating timelines. It's a component of the Google Workspace suite. Google Slides is designed for collaborative and dynamic presentations.
Key Features
Using these features below allows you to craft informative and compelling timelines. Creating a timeline in Google Slides empowers you to share engaging presentations. Below are its key features.
- Template Gallery. Google Slides provides a diverse array of templates. It includes specialized timeline templates. They can save you time and effort while ensuring your timeline stands out.
- Shapes and Diagrams. The Insert menu incorporates a range of shapes and diagrams that can be customized. You can leverage these shapes for timelines to construct chronological sequences and interconnections.
- Text and Formatting Tools. The intuitive text editor lets you input event details, dates, and explanations. Use formatting options like fonts, sizes, and colors. They can emphasize key elements and maintain visual consistency.
- Animations and Transitions. Google Slides offers animations and transitions to add dynamism to your timeline presentations. Slide transitions can guide the audience through your timeline's progression.
Part 2. How To Create a Timeline on Google Slides
Unlock the ability to create dynamic timelines on Google Slides. This guide transforms chronological data into engaging visual representations. Here's how.
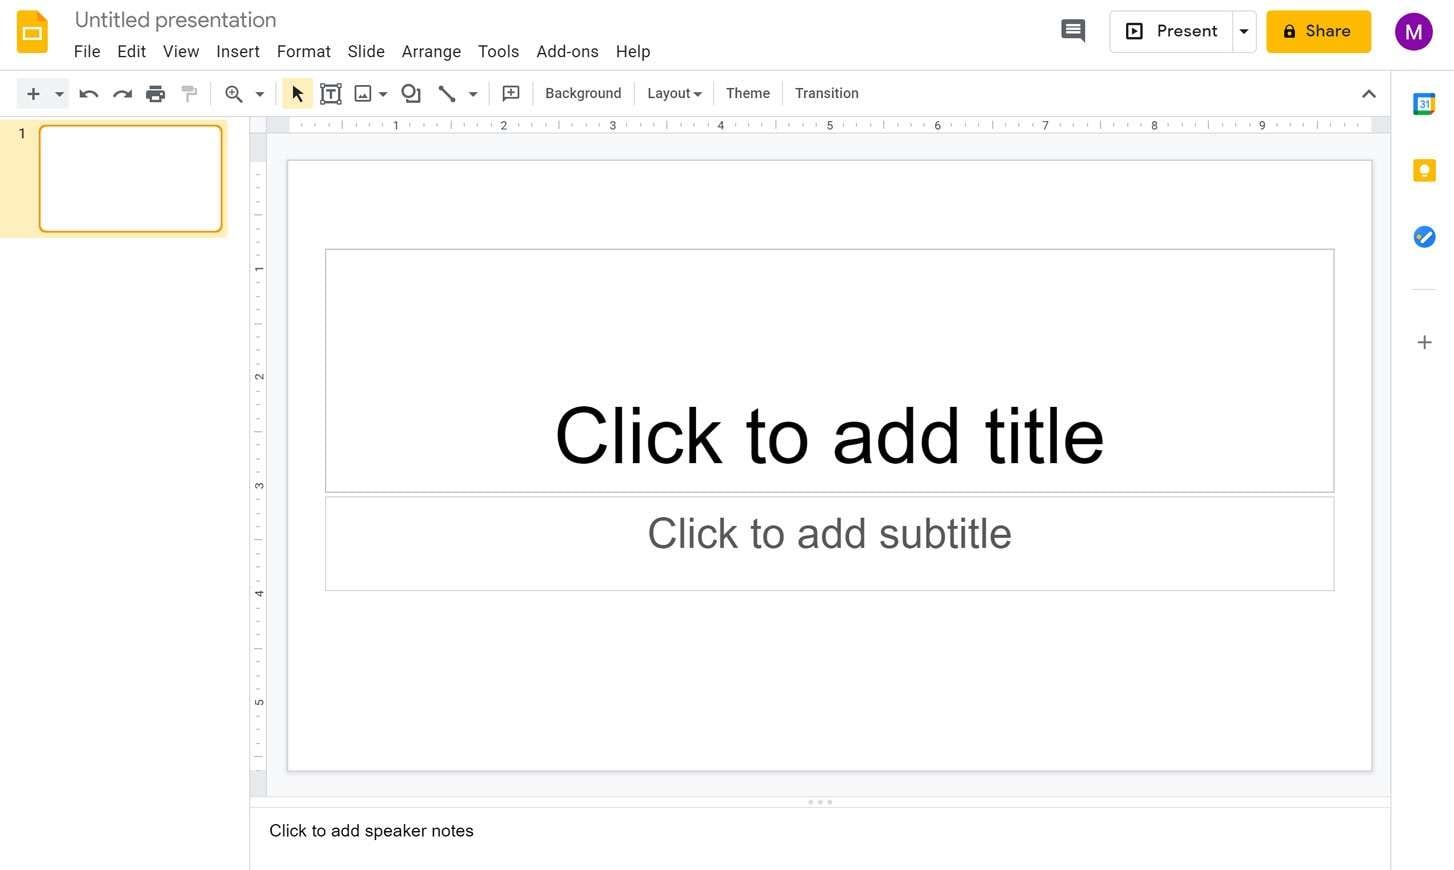
Step 1a: Launch Google Slides within your web browser. Select Blank from the Template Gallery and click on a fresh slide on the main interface.
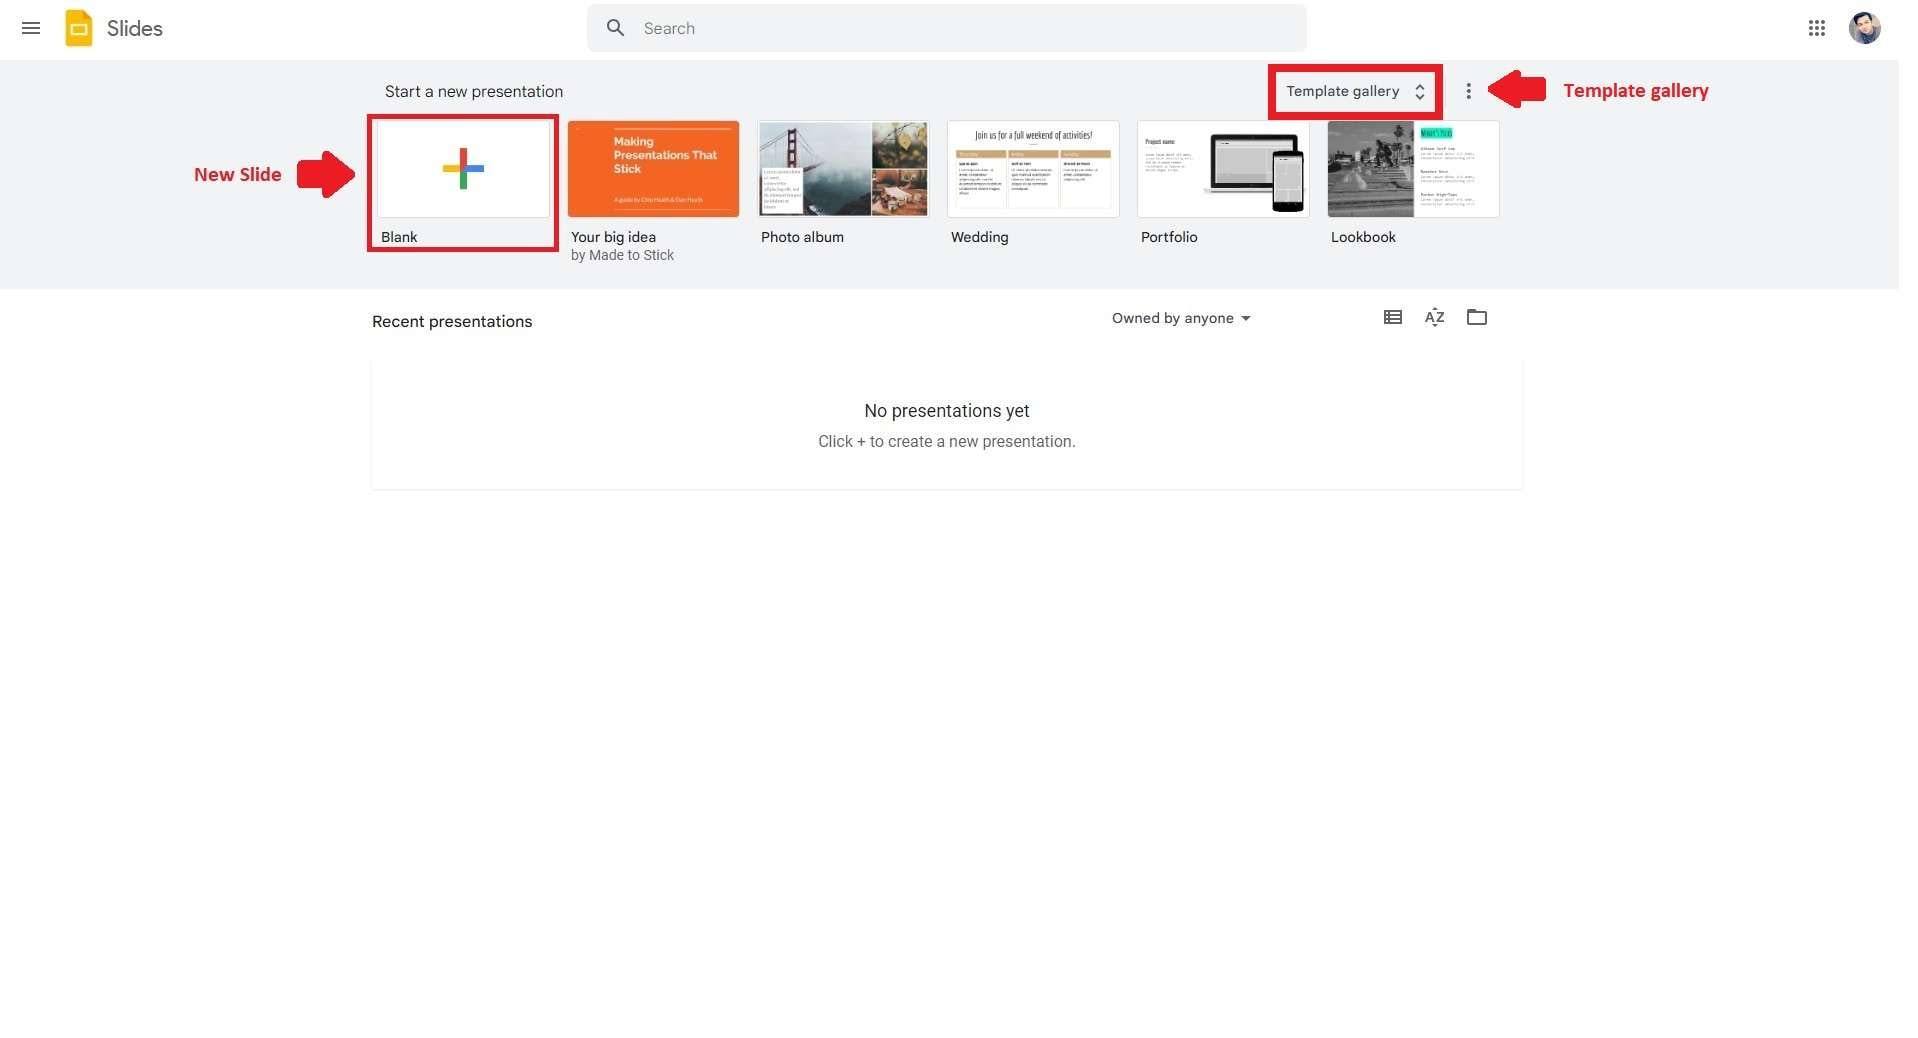
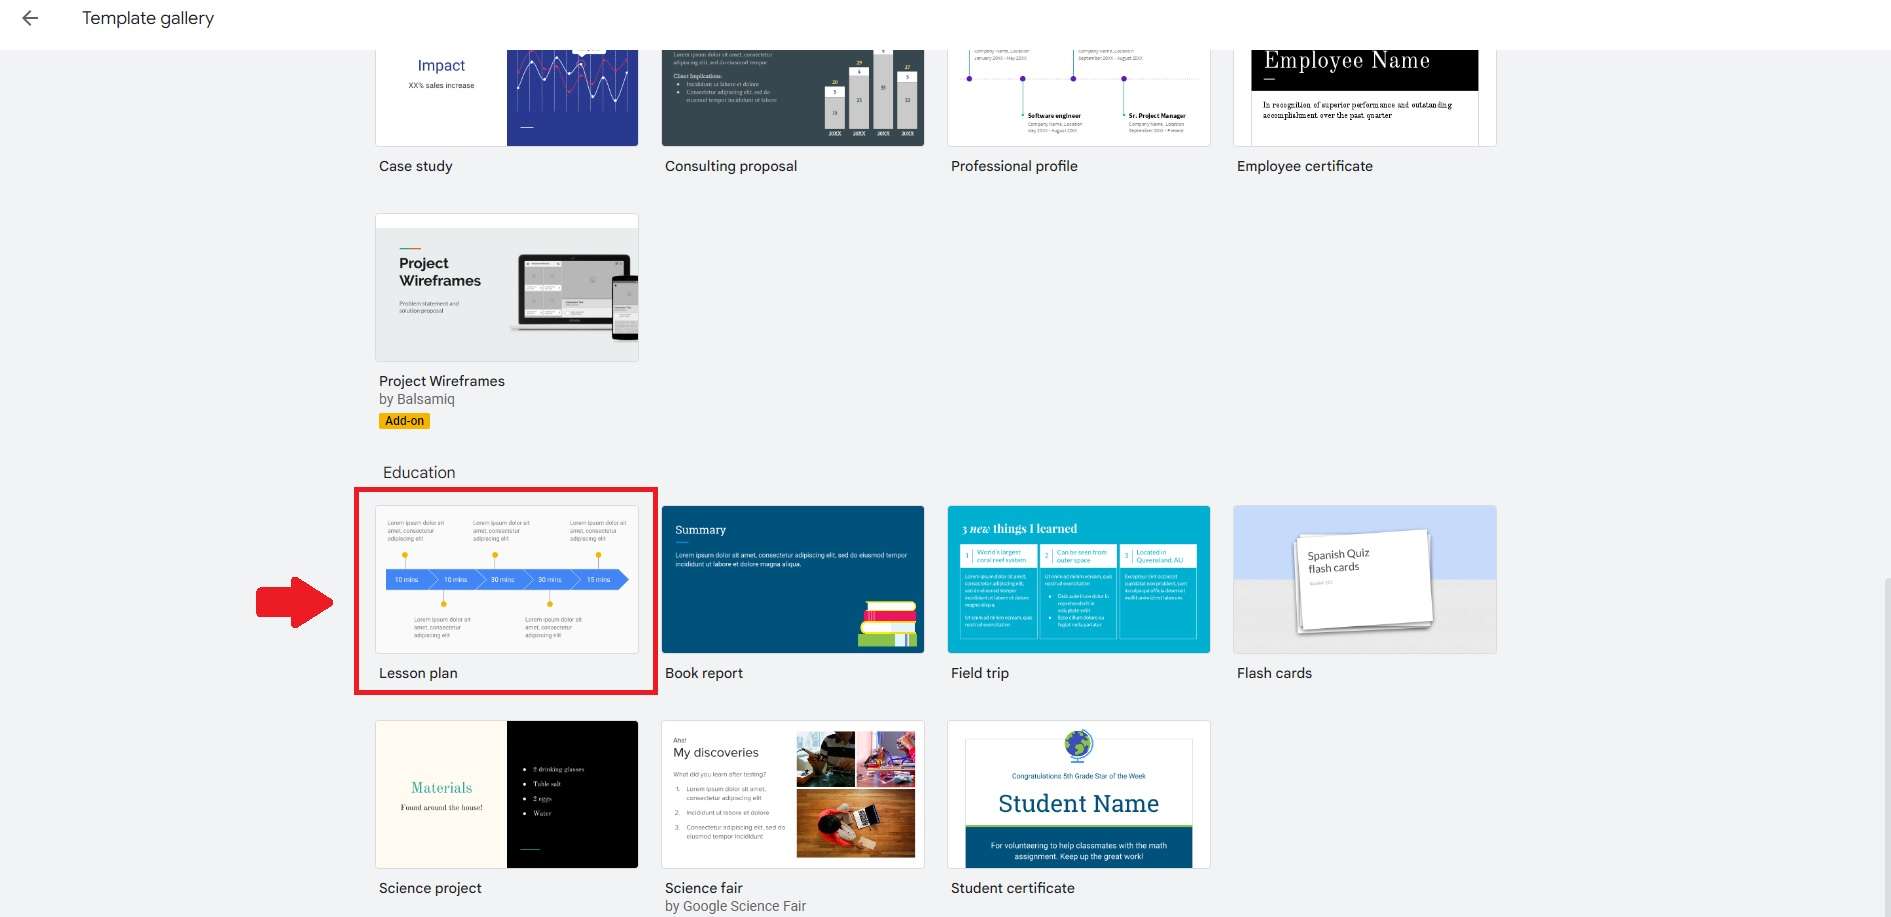
Step 1b: You can also select a template of a timeline on Google Slides. Click Template Gallery in the upper right corner of your main window. Click a timeline template that suits your preferences.
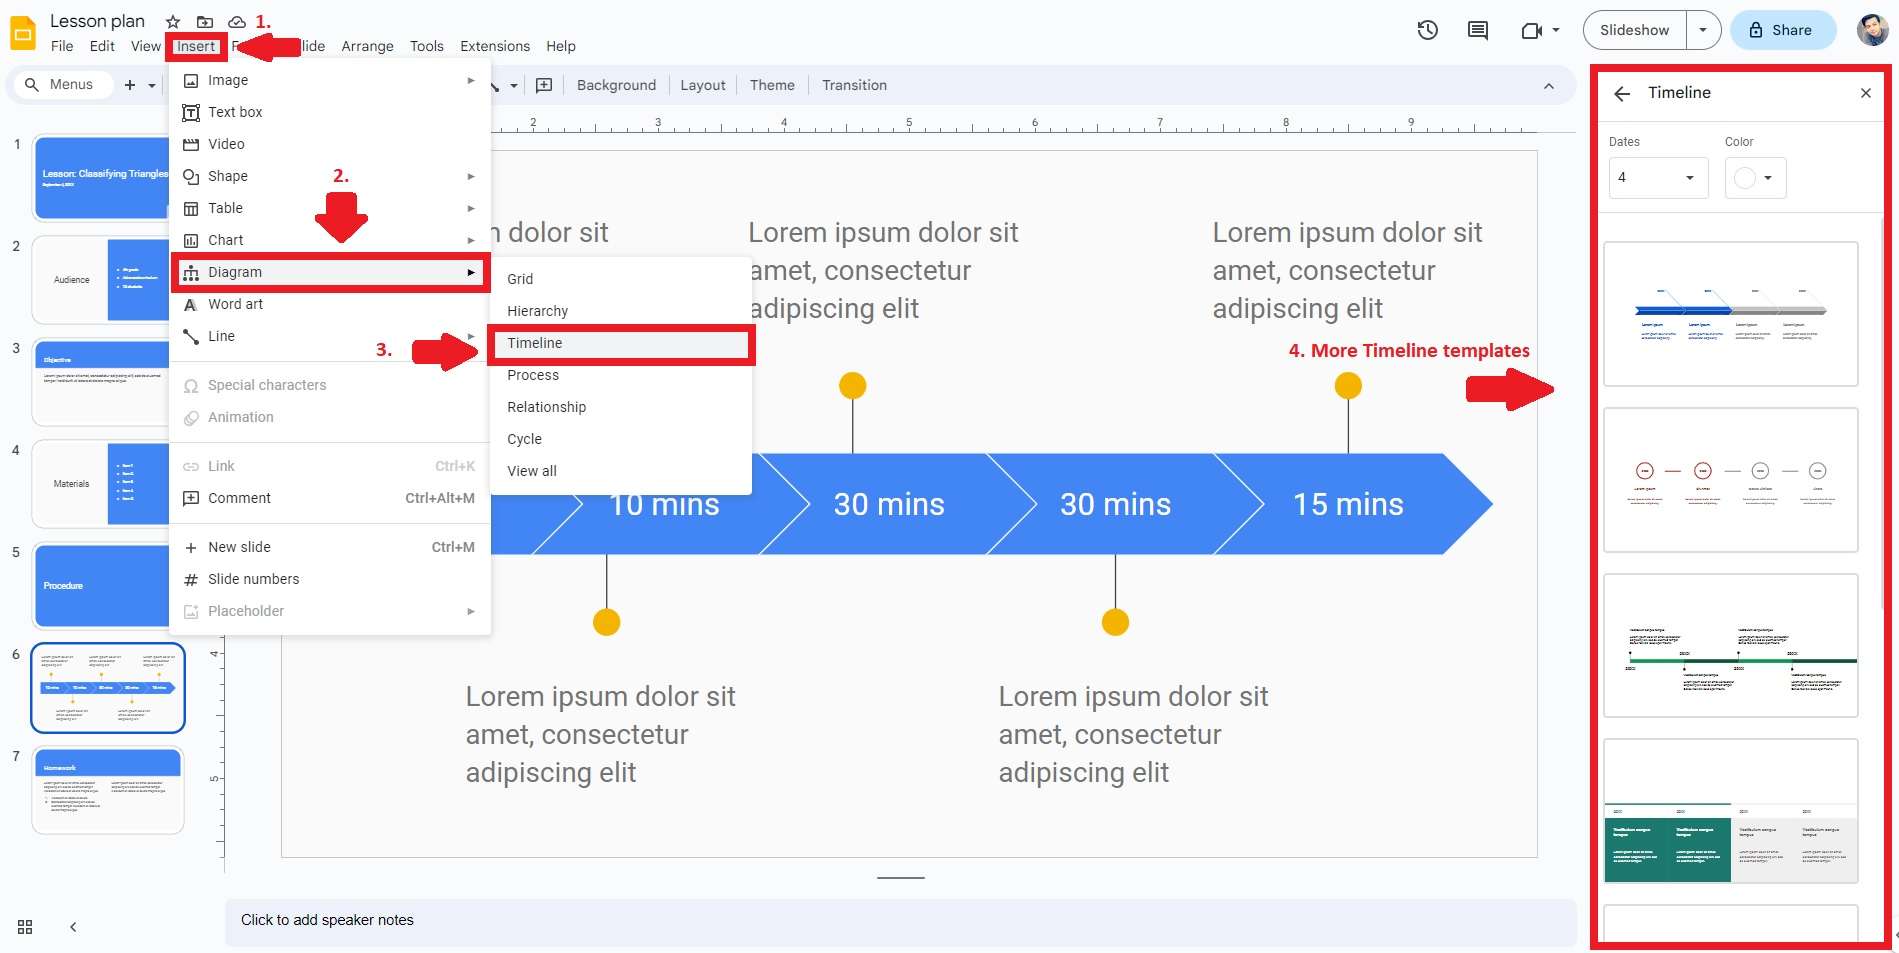
Step 2: Navigate to the Insert tab. From the dropdown menu, click Diagram. Select the Timeline option to reveal a variety of pre-existing timeline templates. Adjust the number of dates to change the number of shapes as needed.
Step 3: Proceed to input the relevant timeline content into the template. Double-click on the event details along with their corresponding dates on the timeline.

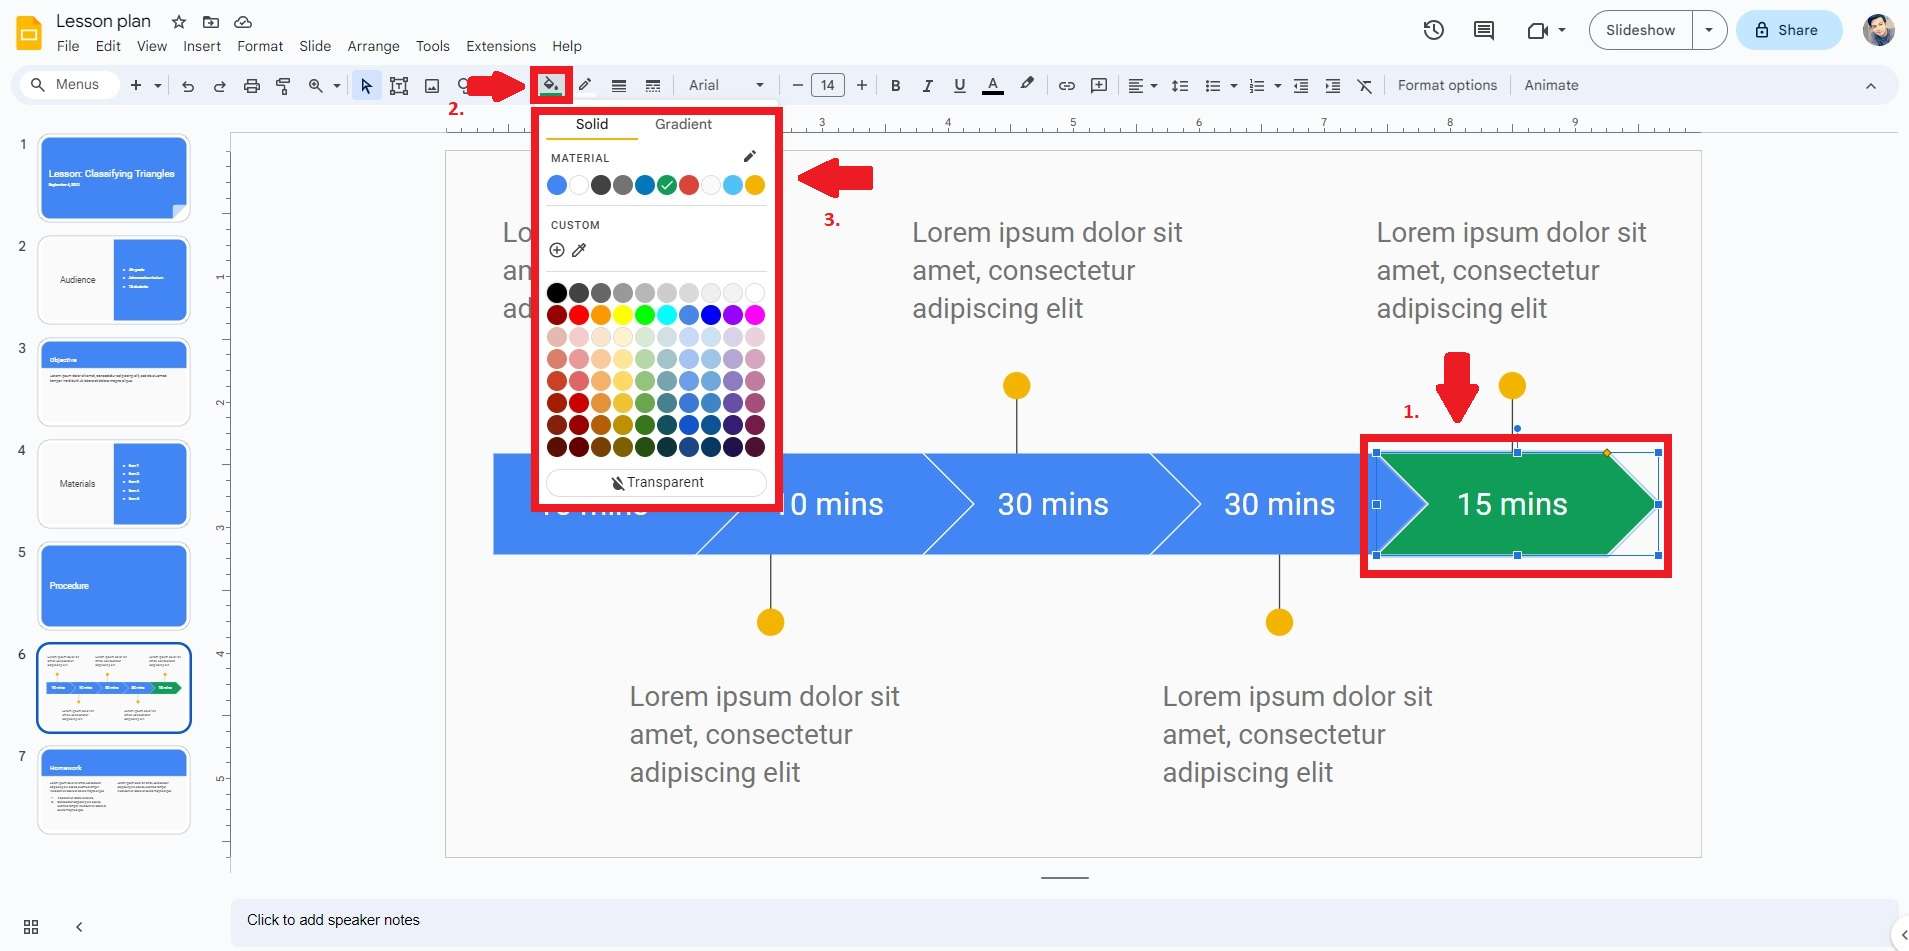
Step 4: To change the colors of the timeline, select the shape you wish to change the color. Click on the top toolbar and locate the Fill Color icon. Apply your preferred color to the desired shape with a simple click. When you finish editing, click File > Download. Choose your preferred format to save your timeline offline.
Part 3. Easily Make Complex Timelines With Wondershare EdrawMax
Although Google Slides is a versatile and powerful tool, but it is not a professional diagram maker. So if you want to make more complex timelines, consider a diagram maker like EdrawMax. In contrast to Google Slides, EdrawMax encompasses diverse visual aids at your disposal. It's equipped with all the features you need to get started right away. Powerful as it is, it is also beginner-friendly. You can easily get started even if you have never used it.
Software Basics
Below are the fundamental features that set EdrawMind apart.
- Intuitive Drag-and-Drop Interface. Differing from Google Slides, EdrawMax offers an intuitive drag-and-drop interface. It enables effortless placement of elements and content onto the canvas. The platform enhances user experience and speeds up the design process.
- Dedicated Timeline Creation Tool. EdrawMax provides a specialized toolkit for timeline creation. Unlike creating timelines on Google Slides, EdrawMax ensures precise alignment. Even the placement and styling of timeline components are spot on. This focused feature simplifies the creation of timelines. It enhances their visual appeal and accuracy.
- Versatile File Format Support. EdrawMax goes beyond Google Slides with its extensive file format compatibility. It allows seamless import and export of timelines and diagrams in various formats. Compatibility with different software applications and platforms is a major advantage.
- Online and Offline Availability. EdrawMax caters to diverse needs by offering both online and offline versions. This flexibility allows users to work on timelines irrespective of internet connectivity. It accommodates various work environments and preferences.
Why Choose EdrawMax?
Below are some more reasons to opt for EdrawMax over Google Slides.
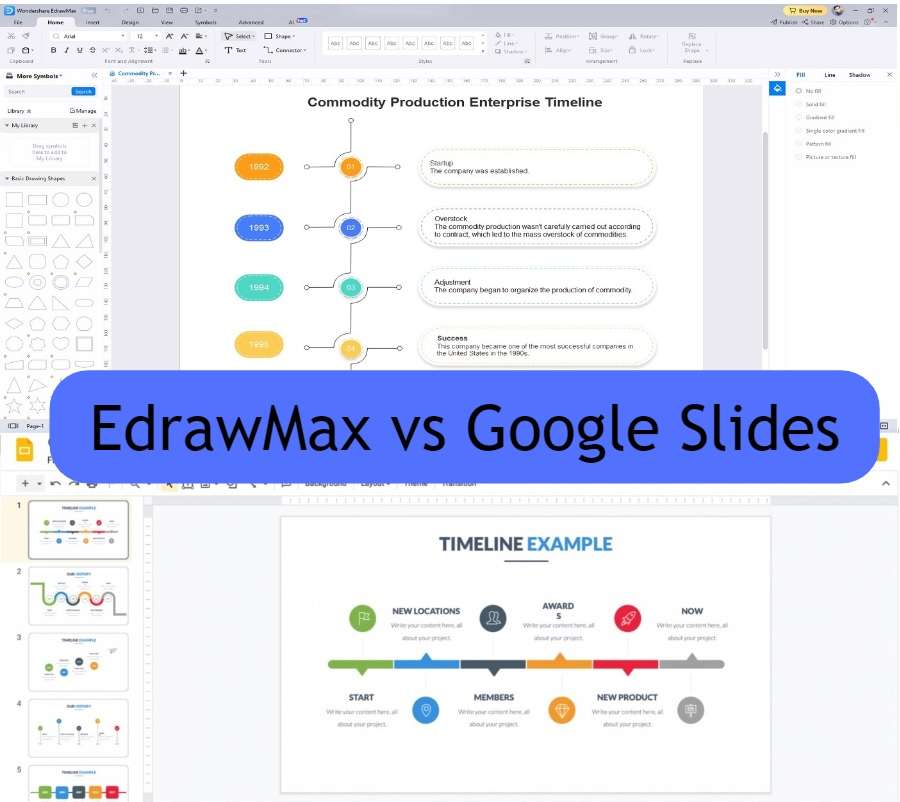
Resource-Rich Professional Diagramming Software
EdrawMax offers a comprehensive suite that goes beyond the capabilities of Google Slides. It's designed for creating intricate diagrams, mind maps, org charts, timelines, and more. This dedicated focus ensures that your visual creations are always pleasing. The diverse range of customization options empowers you to craft impactful timelines.
Enhanced Visual Elements
Unlike Google Slides, EdrawMax provides a diverse and sophisticated array of visual elements. Its extensive library creates polished and professional timelines. EdrawMax's professional features simplify the process of creating timelines. The platform ensures your content always stands out.
Free Trial With No Commitment
EdrawMax offers a "try for free" approach. It allows users to explore its capabilities without any upfront costs or commitments. It enables you to test the platform's premium functionalities before deciding. This risk-free trial empowers you to experience firsthand how EdrawMax. The platform can elevate your timelines based on your preferences.
Part 4. How to Create a Timeline in EdrawMax
With EdrawMax, making a stunning timeline become a breeze. Follow the simple steps below to make an impress diagram to amaze your audience.
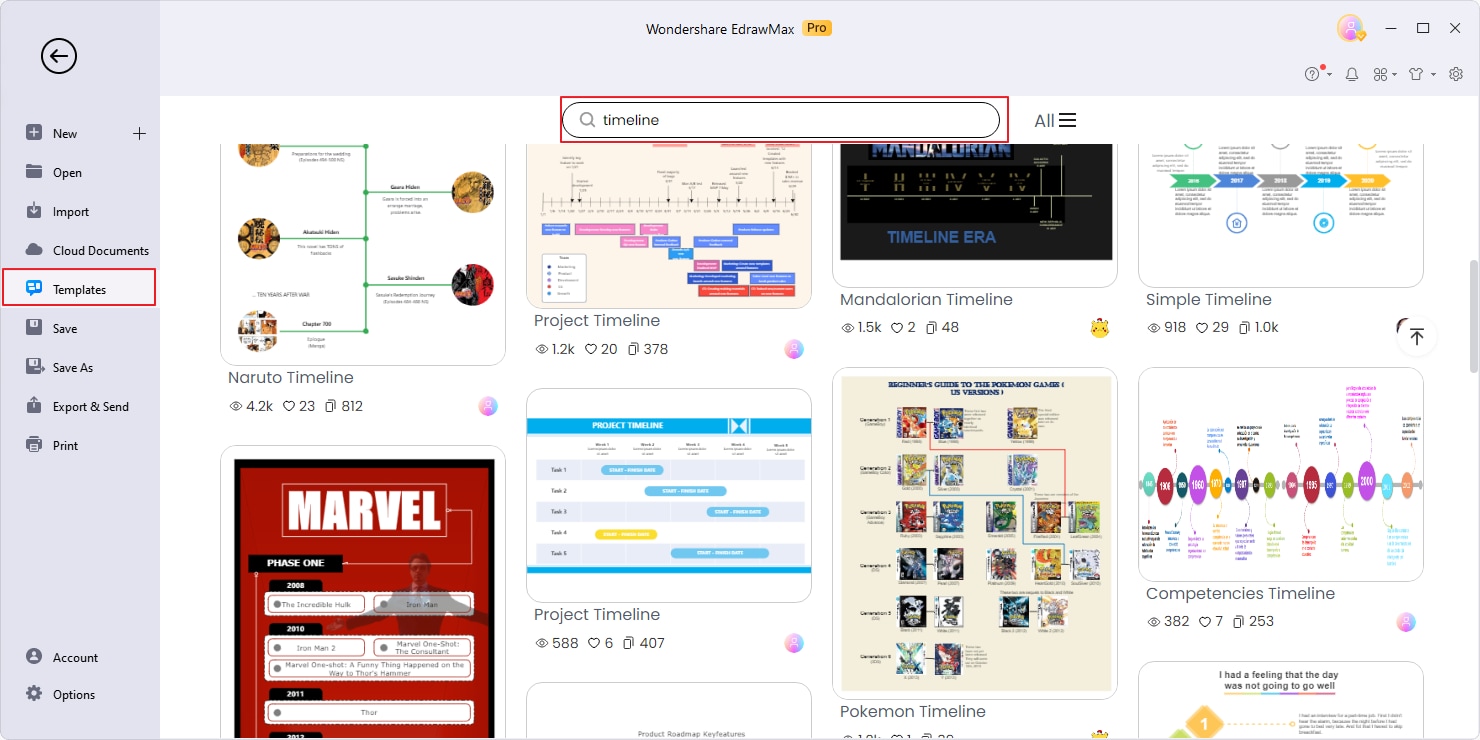
Step 1: Download, launch and open EdrawMax. Login or create a new account. Go to File > Templates and search for timelines. Pick a suitable timeline diagram to start your project.
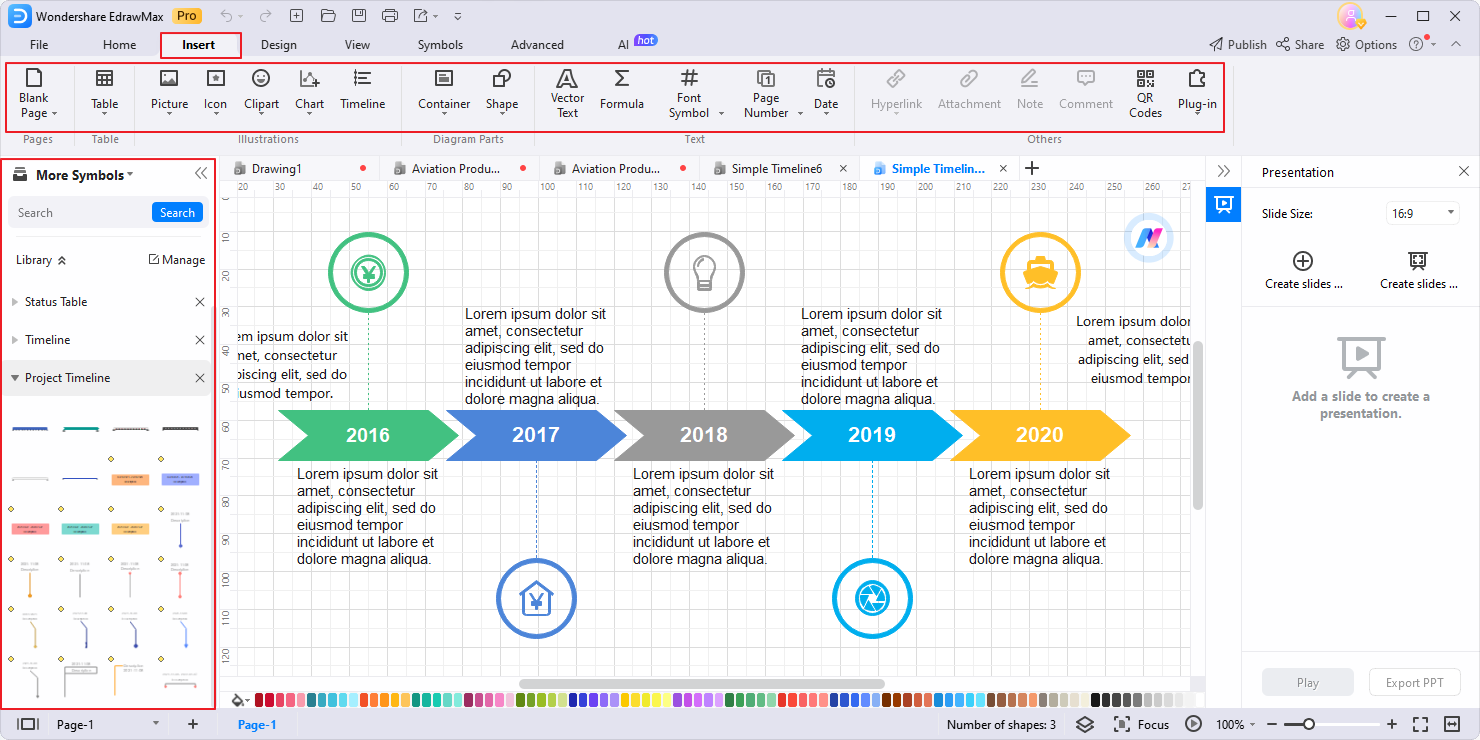
Step 2: Drag and drop symbols from the symbol libraries on the right-side panel that to the canvas. You can also insert icons, pictures, cliparts, containers, and various other objects to the canvas through the top navigation bar. Use lines or arrows to connect objects and establish connections.
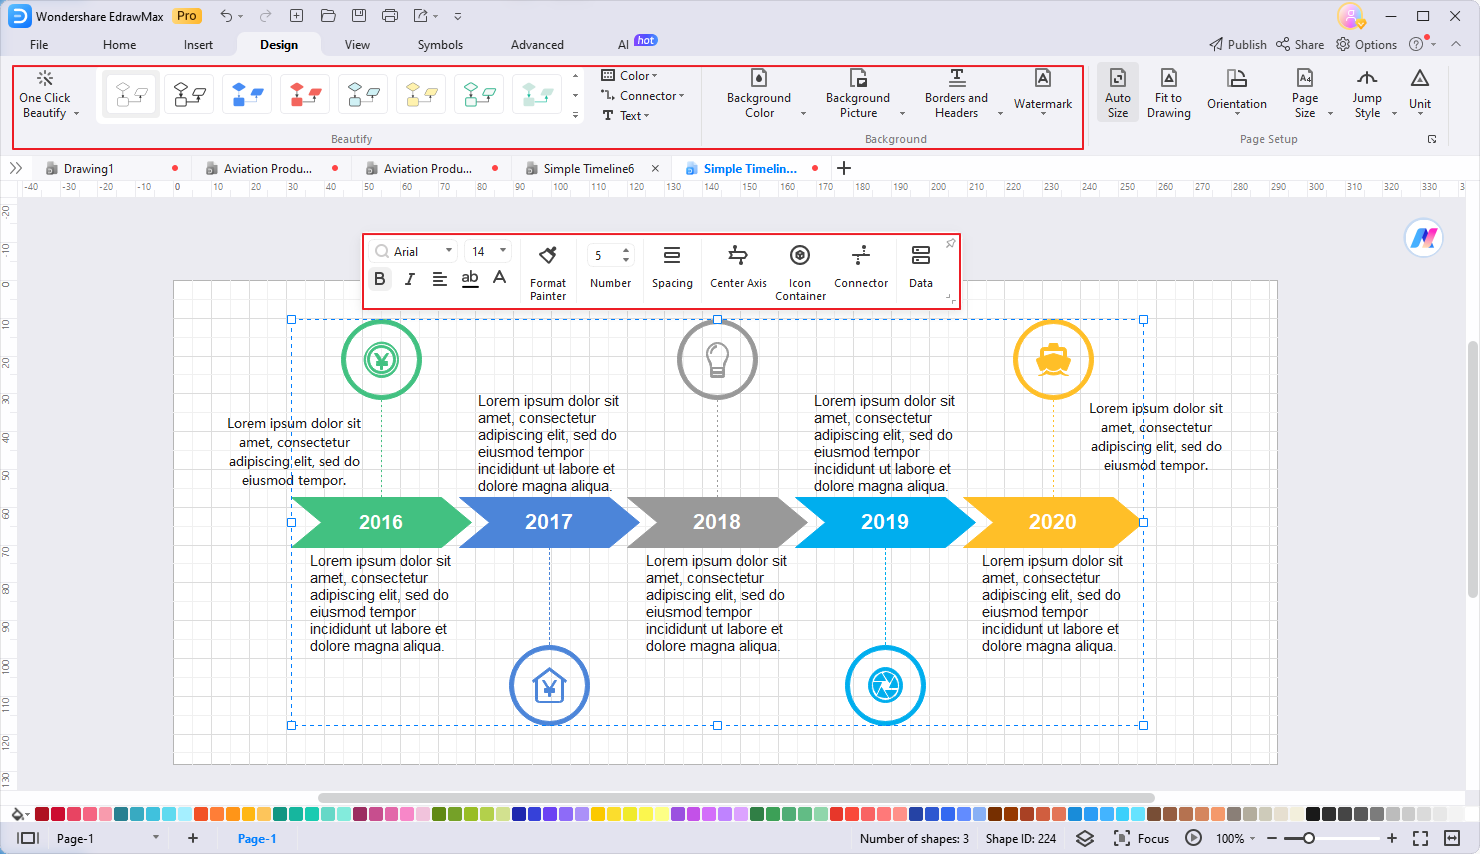
Step 3: Customize the timeline's text, background, line, and shapes through the Design menu. or floating toolbars.
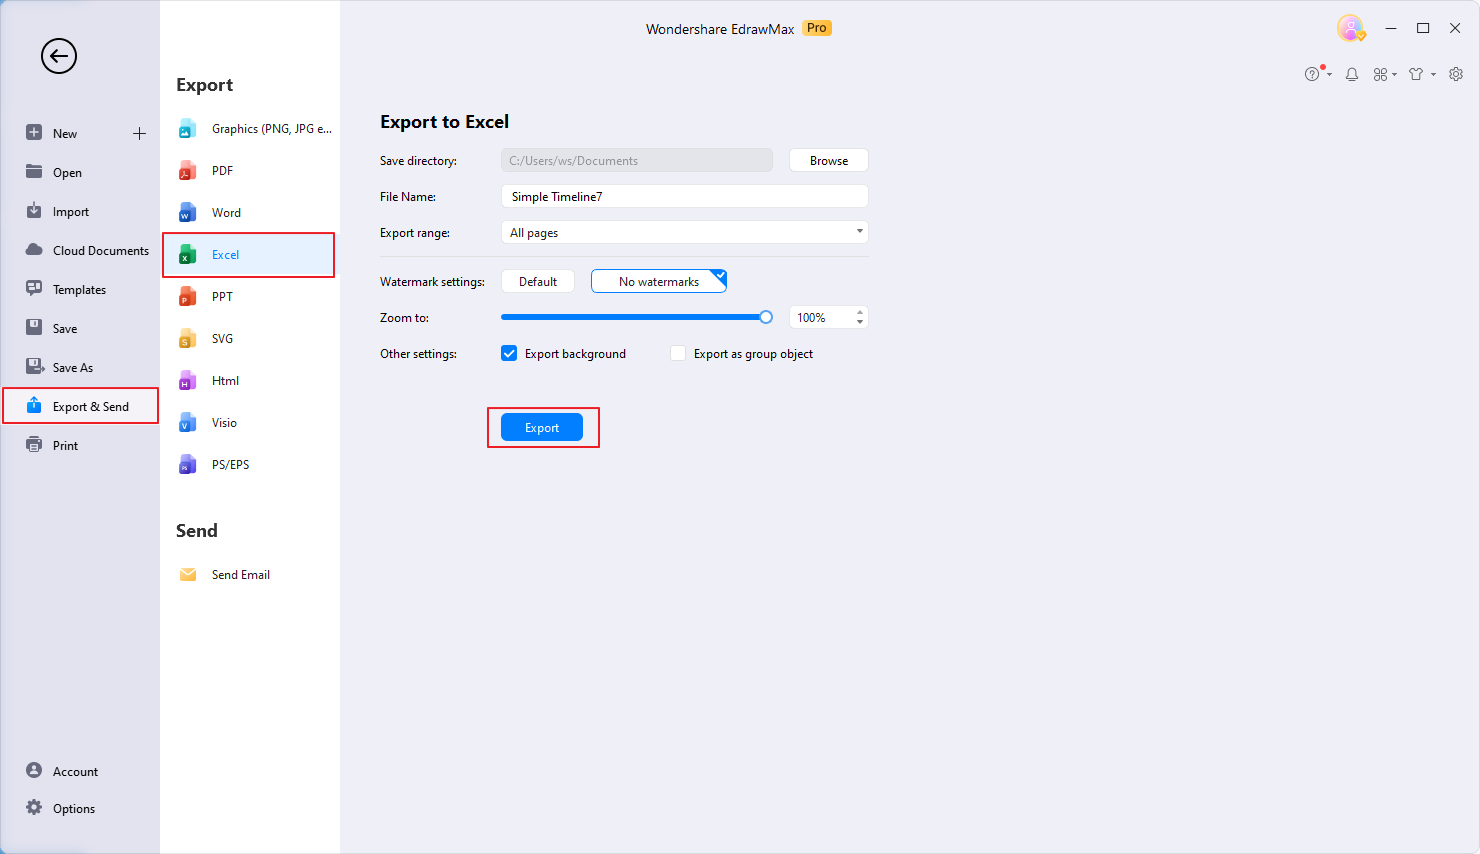
Step 4: When you're done, export the timeline in your preferred format. Click File > Export and choose your preferred format like PDF, jpg, or Office formats.
Conclusion
Creating timelines on Google Slides offers an accessible way to craft presentations. Its seamless integration with other Google apps is an advantage. However, for a more professional and comprehensive diagramming experience, EdrawMax stands out.
Its abundance of templates, symbols, and icons ensures unlimited creativity. You can even export EdrawMax-made timelines for Google Slides. To elevate your timeline creations, consider exploring EdrawMax for its enhanced features. Begin your journey to creating engaging timelines today by harnessing the potential of EdrawMax – your ultimate tool for outstanding visual storytelling.


