


Quick answer: A school layout plan is a floor plan that shows learning spaces, circulation paths, public areas, service rooms, entrances, exits, and safety routes across a school building or campus.
Best for: Use these examples when comparing classroom distribution, corridor flow, preschool layouts, full-floor plans, or school building presentations.
- Choose simple layouts for classroom distribution and detailed plans for safety and operations.
- Check entrances, exits, corridors, restrooms, labs, and shared spaces before editing decoration.
- Use EdrawMax to adjust rooms, symbols, labels, and export school floor plan views.
In this article
Best School Layout Plan Examples on EdrawMax
How to choose a school layout example: Use a simple floor plan for early concept planning, a detailed layout for classroom and corridor decisions, and a full school building plan when safety, navigation, and shared facilities need to be reviewed together.
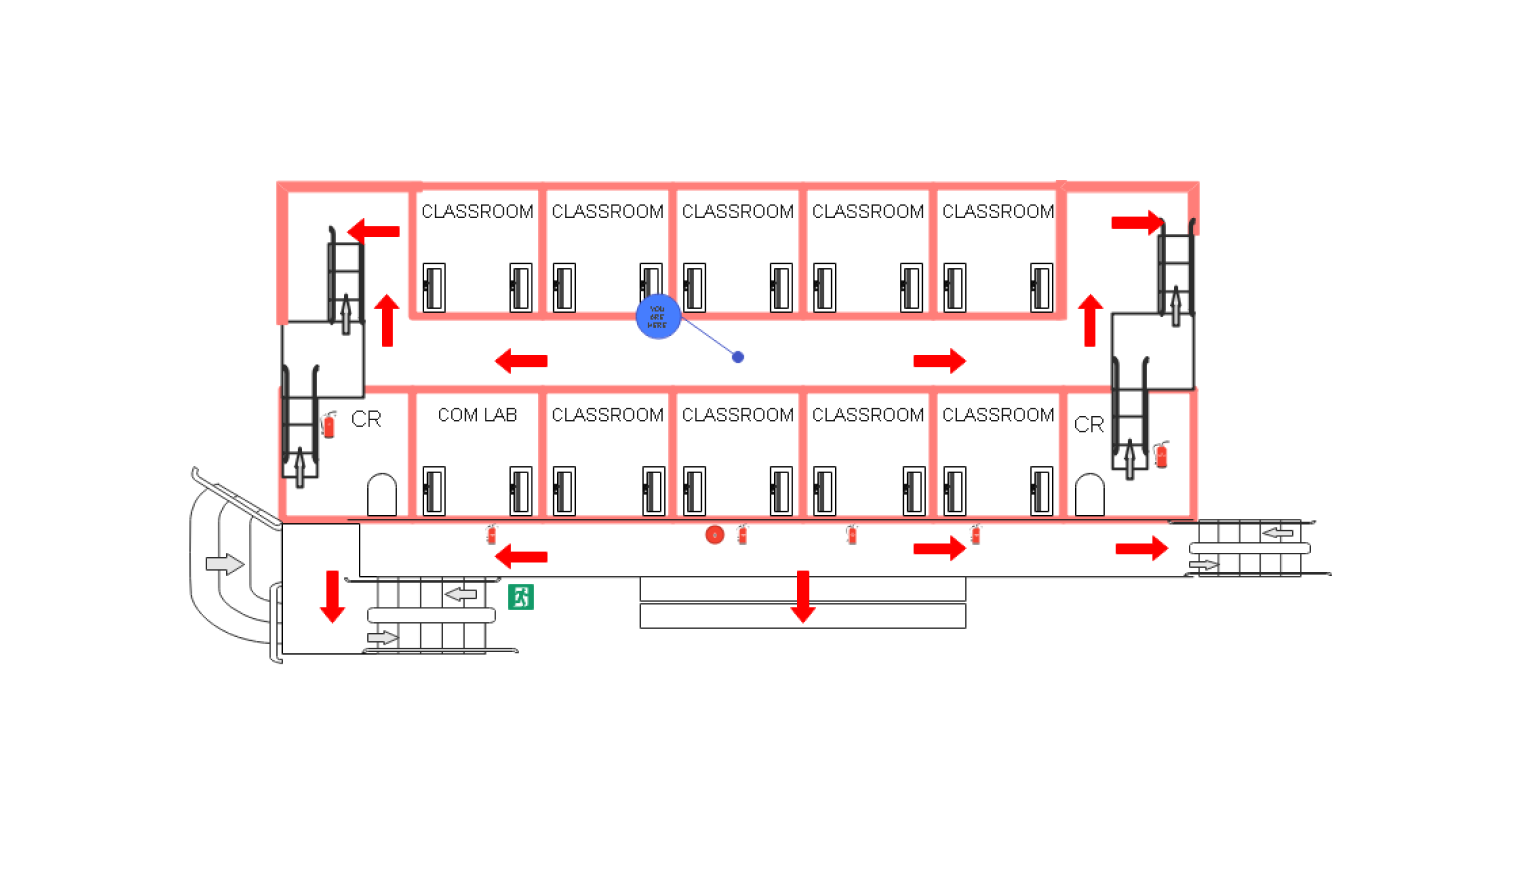
Template 1: Simple School Floor Plan
This simple school floor plan design has a hallway with red arrows indicating the direction. It also depicts nine classrooms, a computer lab, and two restrooms (CR) at each end. Moreover, entrances and exits are placed around the perimeter, with a main entry point at the bottom center near a green exit sign.
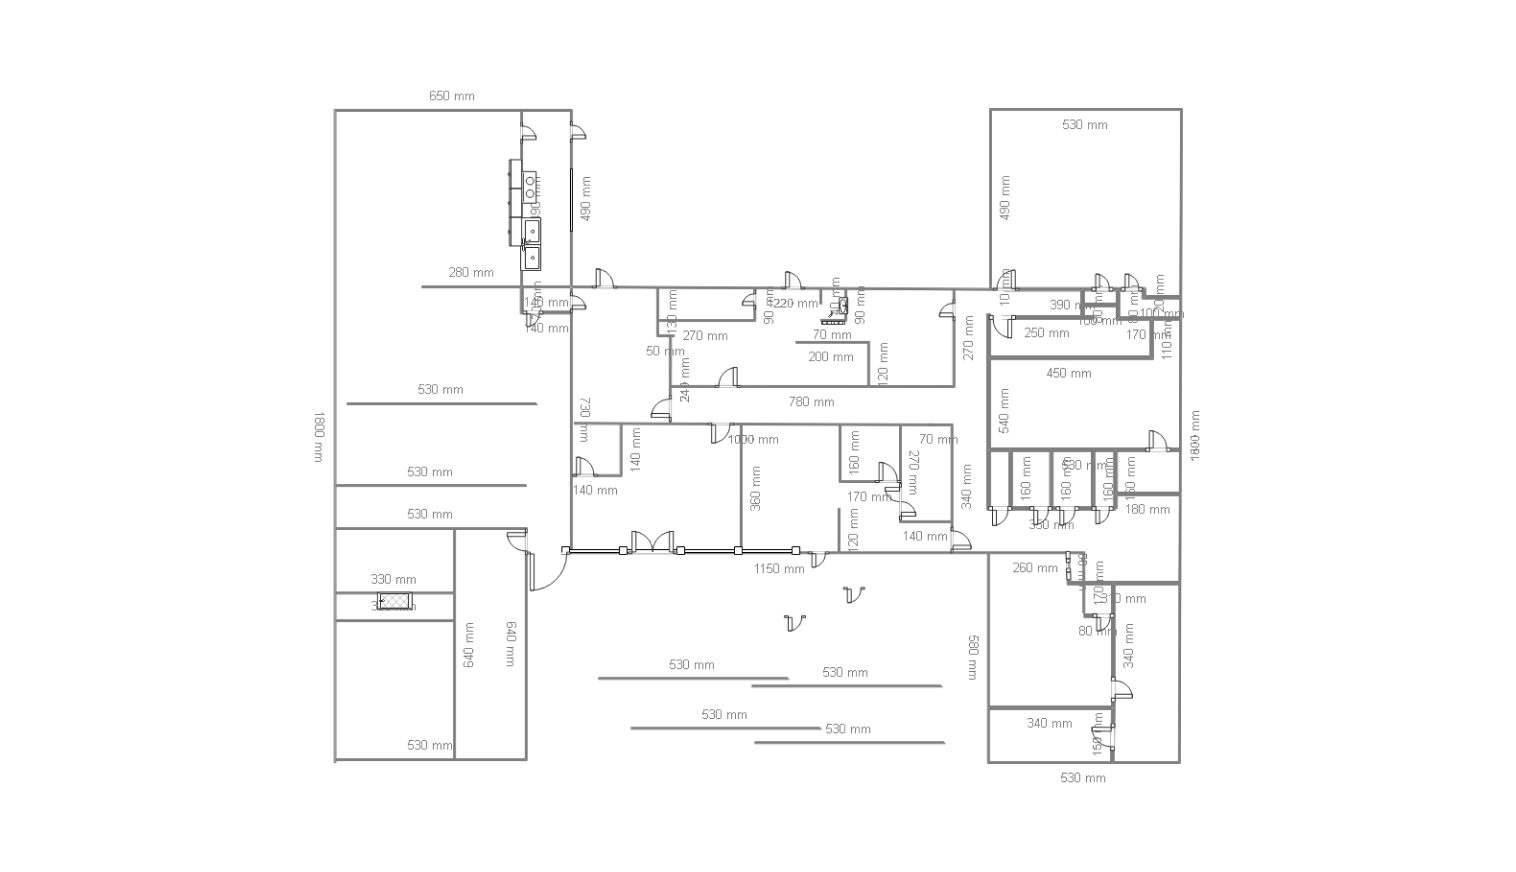
Template 2: Florida School Floor Plan
This school floor plan demonstrates the Florida-style school plan layout. It has a clear pathway with multiple sets of classrooms in the central hallway. The restrooms and other related offices are on the left and right sides of the plan. The corridor connects the classrooms, supporting organized movements between the rooms. This makes the school floor plan accessible and flexible.
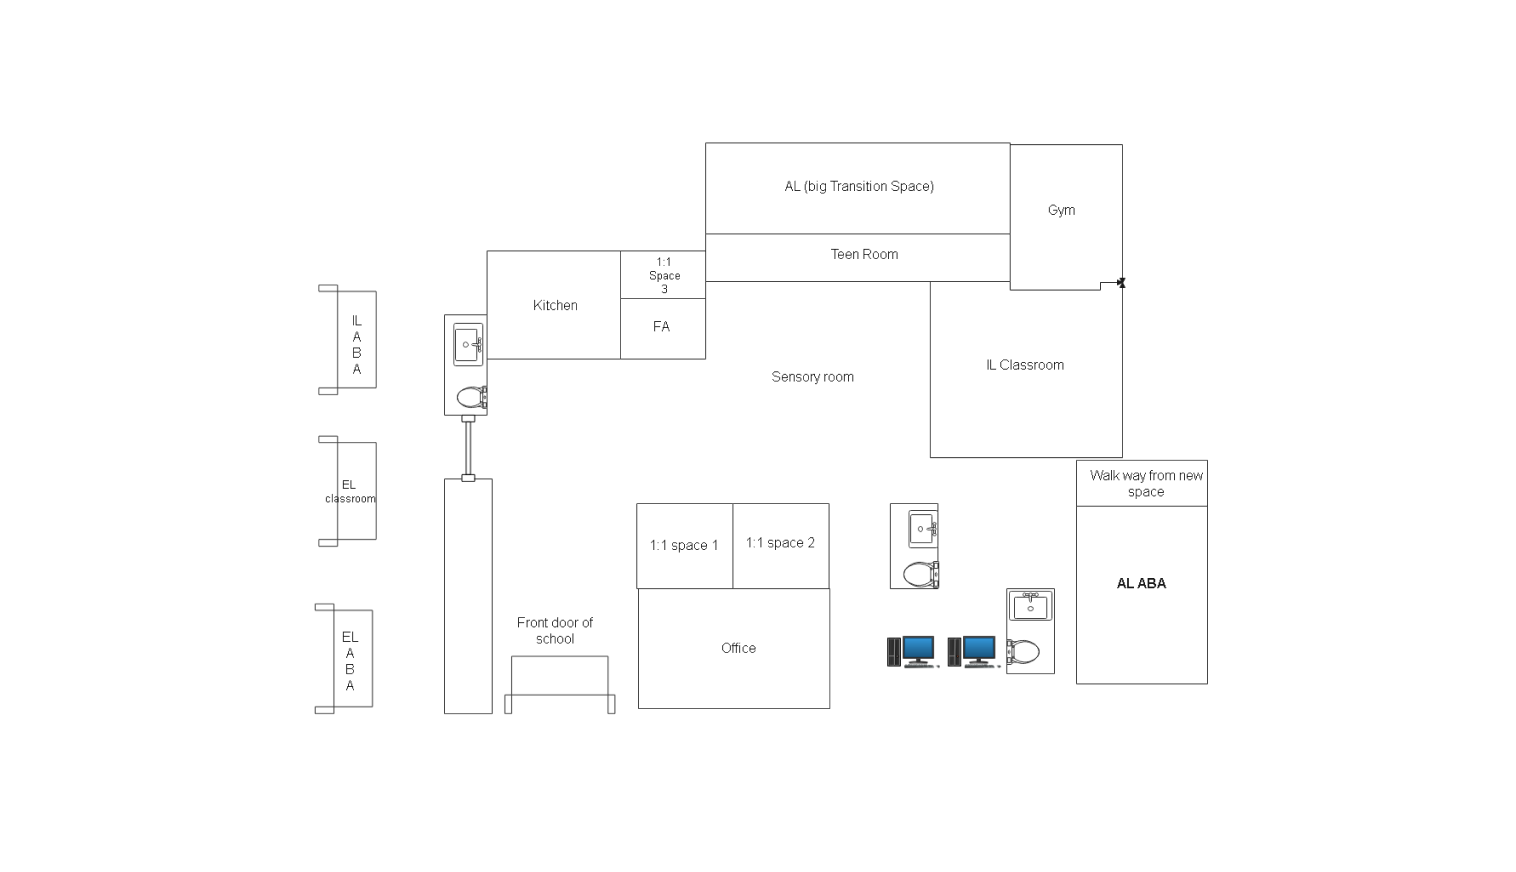
Template 3: Rectangular School Floor Plan
This school education layout plan has extra spaces to provide learning and support for the students. The entrance door leads to the office, which has additional spaces for small sessions and lectures. The right side of the plan has two restrooms, a computer lab, and an AL ABA room. The top section features a kitchen, a functional area, a teen Room, a gym, and a classroom.
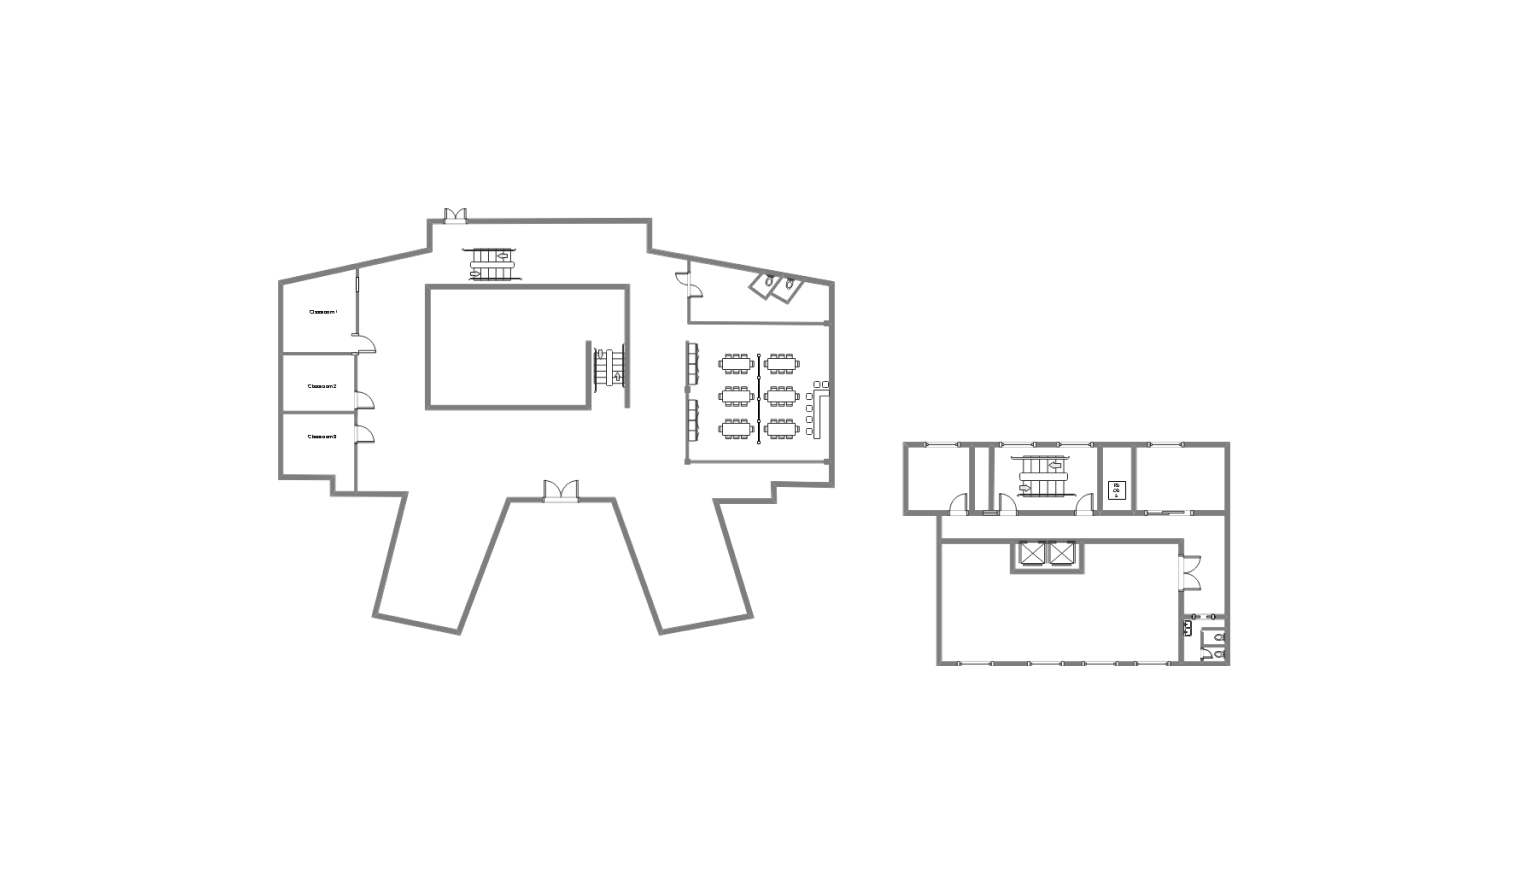
Template 4: Presentable School Building Plan
This is a two-story school floor plan illustrating a different theme. The staircase is at the entrance, leading to the first floor of the plan. The ground floor plan has a hall in the center with classrooms on the left and a large room with grouped seating on the right. The first floor plan has three classrooms with a central corridor. The restrooms in both sections are at the end of the layout.
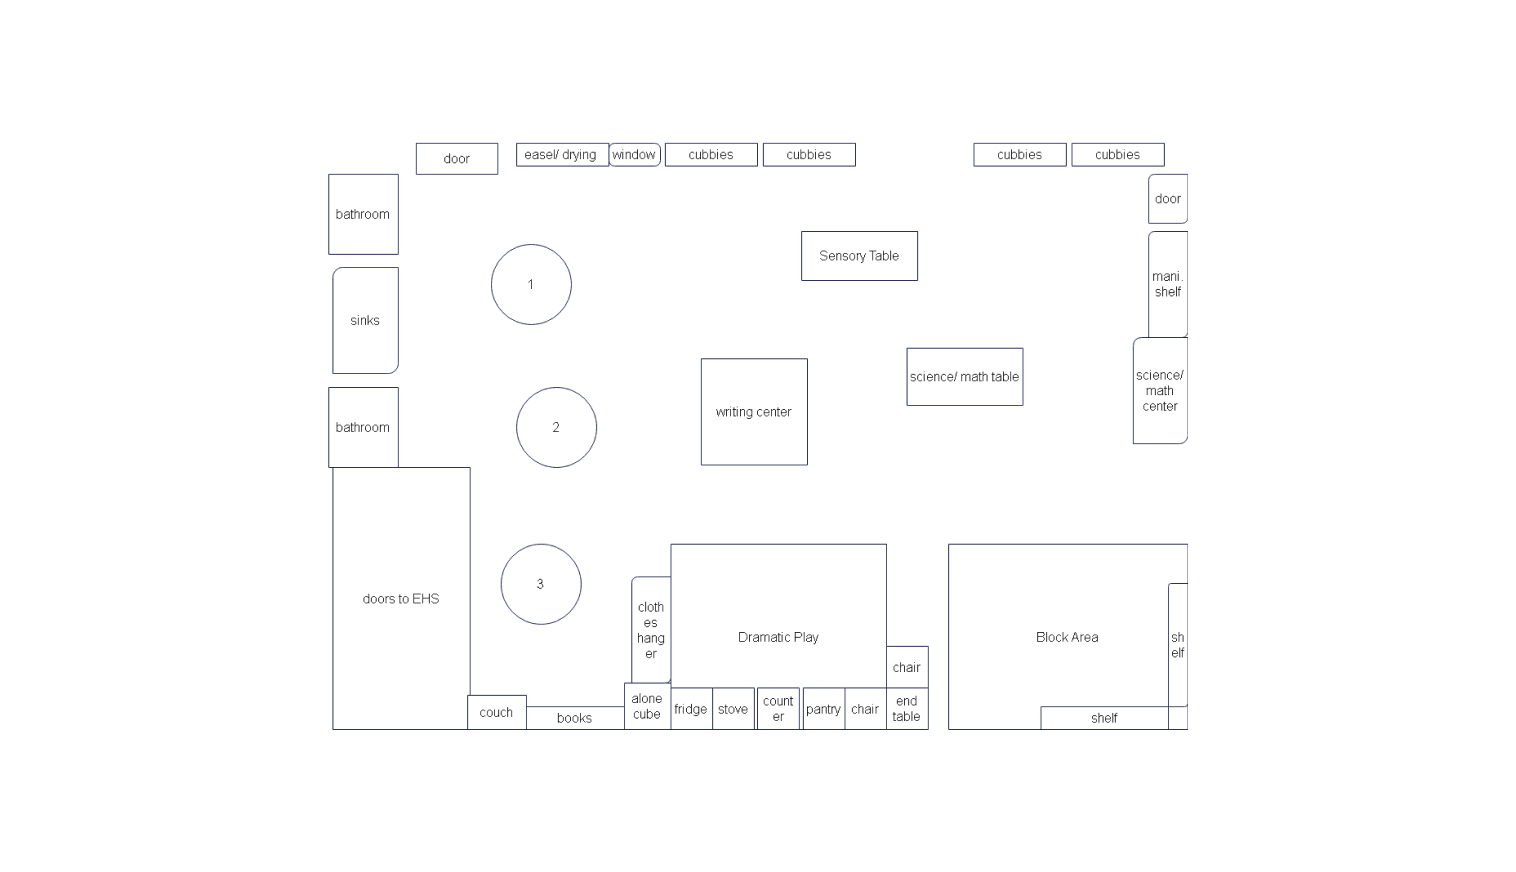
Template 5: Pre-School Layout Plan
This preschool layout features learning zones, such as a sensory table, writing center, dramatic play area, block area, and science/math centers. The left side of the floor plan includes a bathroom, sinks, and doors to EHS. The bottom area consists of a cozy spot, like a couch, and a book area.
Template 6: First Floor School Plan
This is a science school's first-floor plan with separate entrance and exit gates with designated drop-off and pick-up areas for students. It has classrooms from Grade 1 to 12, preschool, science and computer labs, a TLE lab, music room, clinic, library, canteen, and stock room. In addition, a waiting area is also available near the exit, ensuring organized flow for students and visitors.

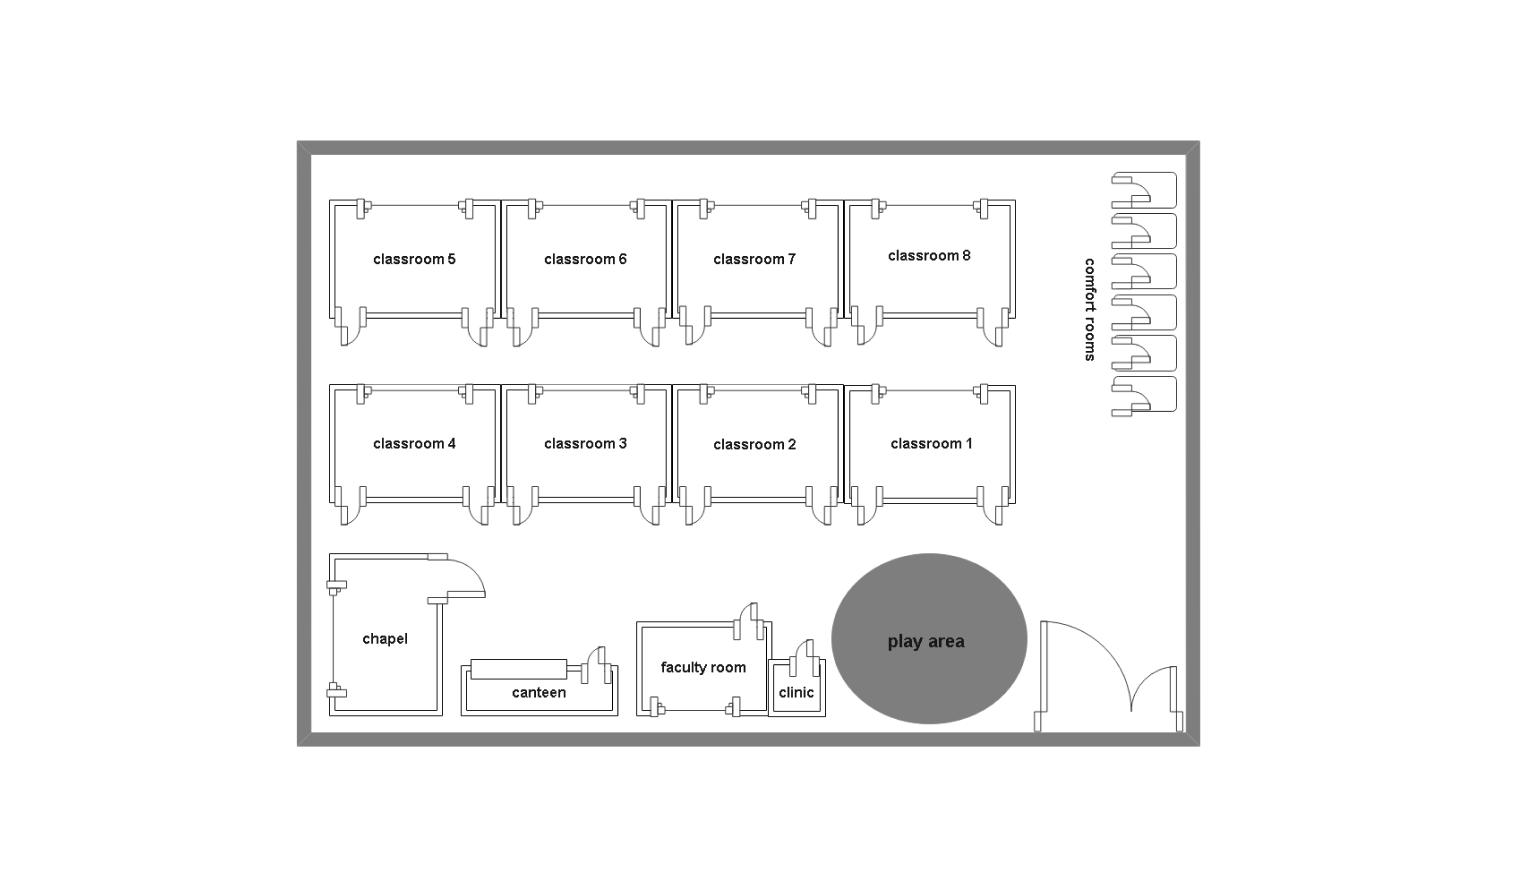
Template 7: Detailed School Layout
This is a school building layout with classrooms 1-4 in the center and classrooms 6-8 on the top. The entrance leads to the large playing area, with supporting rooms, a canteen, a faculty room, and a cliniclocated on the lower left side. The comfort rooms are in the top right corner, ensuring accessibility for students and staff.
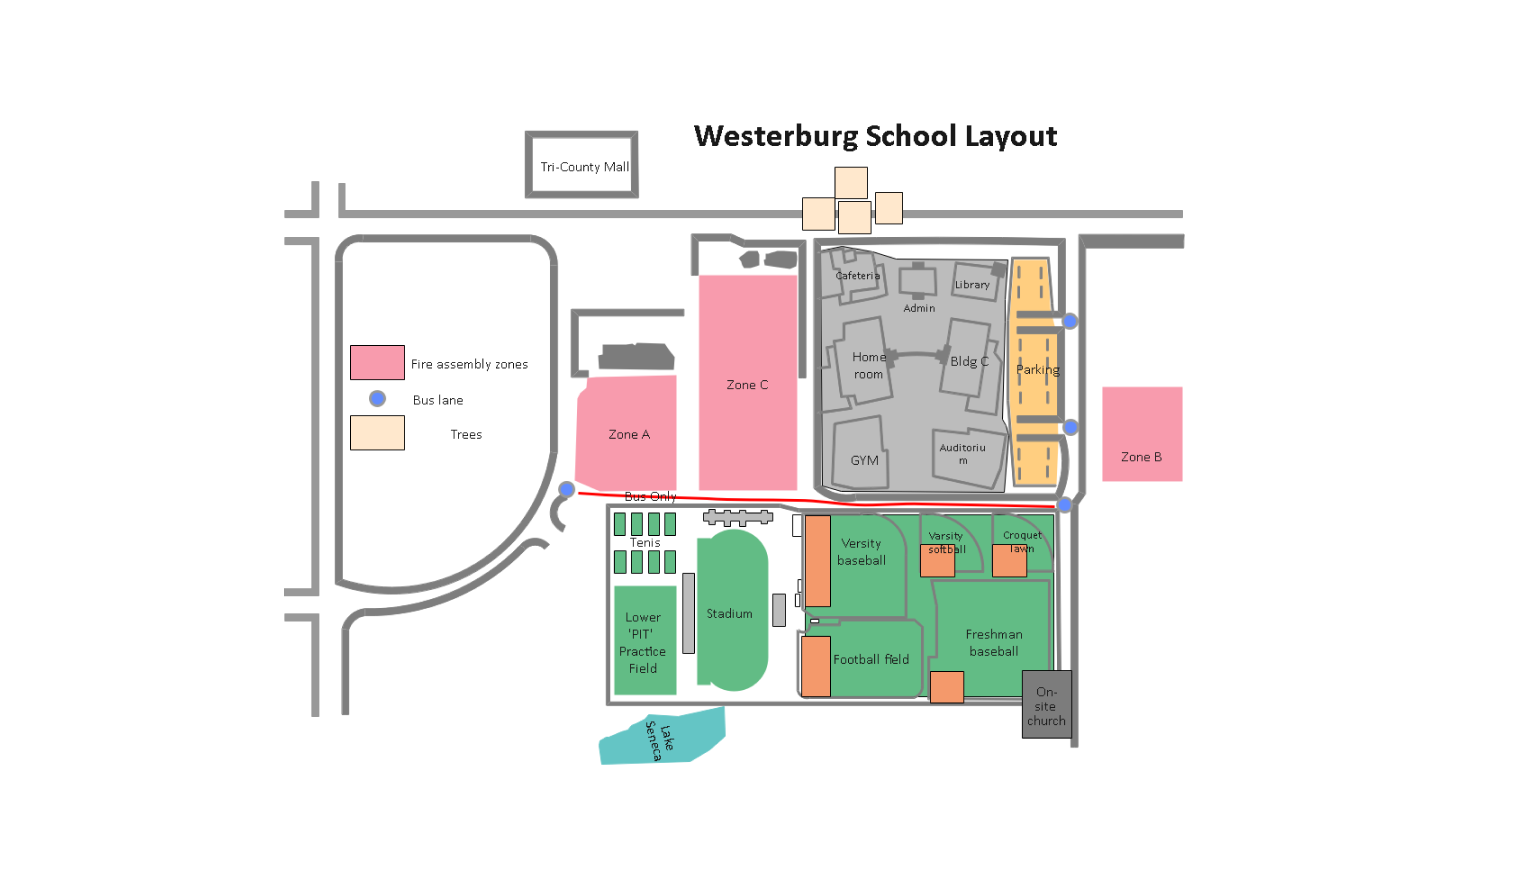
Template 8: Westerburg School Floor Plan
This is a classic example of a detailed school plan that presents key academic buildings like classrooms, labs, a library, gym, auditorium, and administrative offices. On the bottom, it depicts a sports area such as a football field, stadium, varsity, and freshman basketball. Bus lanes and trees are also marked, with mall access and entry points clearly shown.
AI Diagram Generator
Enter your prompt. Upload files if needed. Generate diagrams, charts, or slides instantly.


What should a school layout include?
It should include classrooms, corridors, entrances, exits, restrooms, labs, offices, shared spaces, service rooms, and safety routes.
How do I choose a school floor plan example?
Choose based on the planning goal: classroom distribution, student flow, safety review, preschool planning, or full building presentation.
Can I edit school layout examples in EdrawMax?
Yes. EdrawMax lets you customize rooms, symbols, labels, colors, measurements, and exportable floor plan diagrams.
