


Great ideas often stall without structure. I’ve watched writers get into stories only to hit dead ends mid-draft. Characters lose direction, plots drift, and scenes shift without purpose.
What made the difference for me wasn’t more writing; it was organizing. Narrative writing graphic organizers do exactly that. They help lock in your story’s shape before you start writing.
Whether you're planning fiction or schoolwork, these tools reduce rewrites and sharpen your focus.
In this write-up, I'll cover top narrative writing graphic organizer templates from EdrawMax, a smart but simple diagramming tool, and show how to tweak them easily.
Table of Contents
What Is a Narrative Writing Graphic Organizer?
A narrative writing graphic organizer helps me sort out a story before I start writing. It's a simple page or space where I lay out all the important parts of the story.
It usually includes:
- Characters – who’s in the story
- Setting – where and when it takes place
- Problem or Conflict – what goes wrong
- Events – what happens and in what order
- Resolution – how things wrap up
You don’t have to fill in every part right away or go in order. But once it’s complete, the whole story becomes easier to handle.
I turn to it when I need to get ideas out quickly or when I’m trying not to keep changing the opening scene. It works whether I’m following a full plot structure or just sketching loose ideas. Everything stays in one place.
Why Use Narrative Writing Graphic Organizer Templates?
Mapping stories from scratch gets messy fast. That’s exactly where narrative writing graphic organizer templates make a difference.
They give you a clear layout. You don’t waste energy wondering what to start with: setting, plot, or characters. Simply follow the structure, focus on your ideas, and record them.
It’s especially useful when you're working with time constraints or helping someone new to storytelling.
Instead of redrawing charts or listing events by hand, you just plug your details into a ready-made format. It frees you up to focus on tone, pacing, or dialogue.
And if your story starts going off-track, the template lets you spot exactly where it happened. Like having a roadmap, you still choose the destination, but you won’t get lost on the way.
Best Narrative Writing Graphic Organizer Templates
Starting a story outline doesn’t need to feel repetitive. I’ve used these templates from EdrawMax in everything from writing projects to classroom plans:
Template 1
This template makes it impossible to ignore what’s missing. If your story doesn’t have a clear conflict, it shows. If your ending doesn’t tie back to your beginning, that’s easy to see, too.
The rectangular layout breaks the story into manageable steps, forcing a logical flow. I’ve used this, especially during revisions, to check for dropped subplots or flat character arcs.
It helps you zoom out without losing detail. Whether you’re teaching or writing yourself, it gives you control over the entire arc before a single paragraph is written. That saves a lot of painful rewrites later.
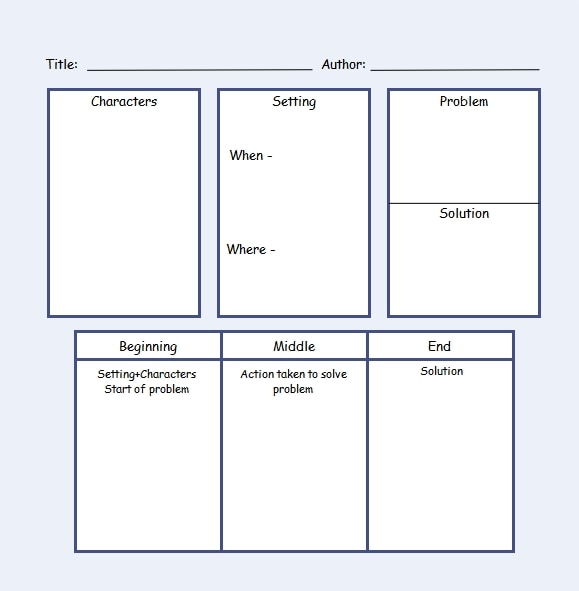
Template 2
This organizer doesn’t just separate ideas; it shows how they interact.
The top section gets you thinking about your narrative world: who’s in it, where it happens, and what the central issue is. The lower part then helps you pace that world into a proper story arc.
I’ve found it useful when a story feels flat or disconnected. Using it helps uncover gaps, like missing transitions or unresolved plot threads.
Especially helpful is the “Solution” box tied to the “Problem,” a detail many people skip but that can make or break your plot payoff.
Use it when you want every piece to click into place.
Template 3
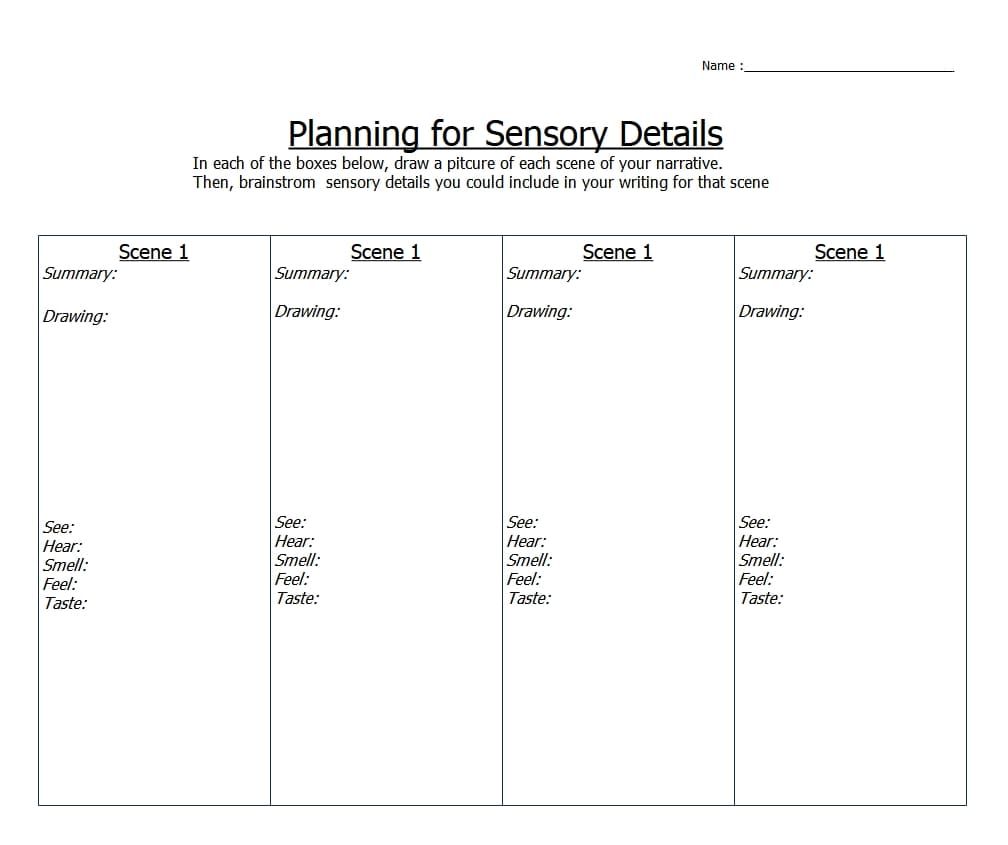
I turn to this template when I want every scene to come alive. Each column allows me to select a scene title, jot down a summary, and sketch a quick drawing. Then I work through “See,” “Hear,” “Smell,” “Touch,” and “Feel” prompts.
It stops me from relying on generic descriptions and pushes me to nail down concrete details. I’ve found it invaluable when drafting a first chapter; my characters step off the page because I’ve mapped out how a crowded market smells or how a cold breeze feels on the skin.
Use it to ensure each scene resonates with sensory depth before writing a single line.
Template 4
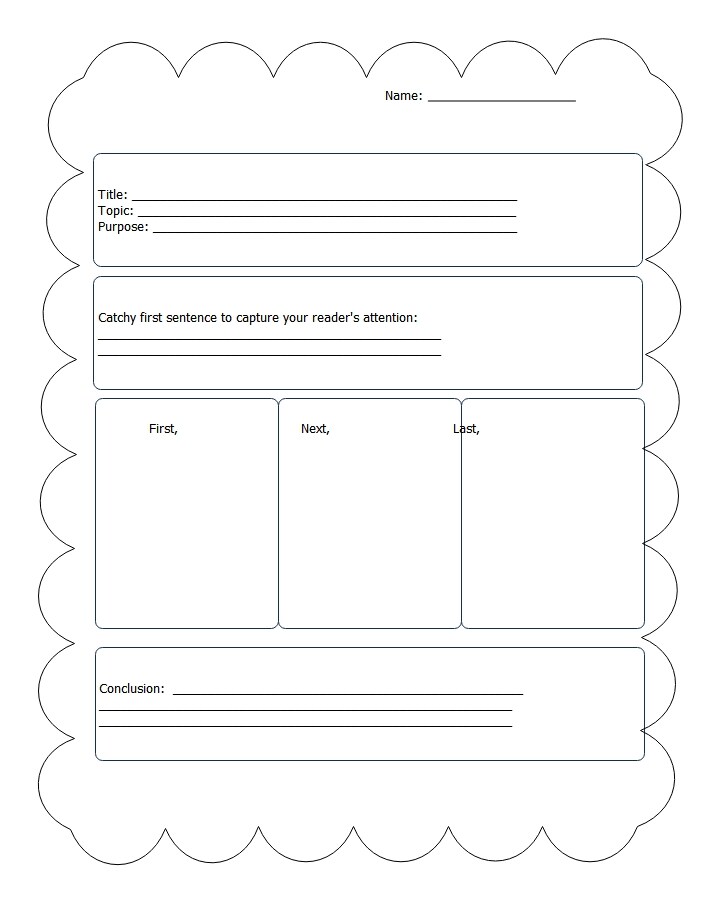
Sometimes, it's hard to write about an experience without sounding flat or jumping all over the place. This organizer helps fix that. I use it when I want to capture a moment from my day or week with clarity and detail.
It starts with a first sentence that demands attention. Then, it gives you just enough structure to guide the memory from point A to point B.
The “First, Next, Last” boxes are especially helpful if you tend to skip important parts or lose track of the timeline. The conclusion box ensures your reflection actually wraps up rather than fading out.
It’s an efficient way to shape real events into clear, compelling personal narratives.
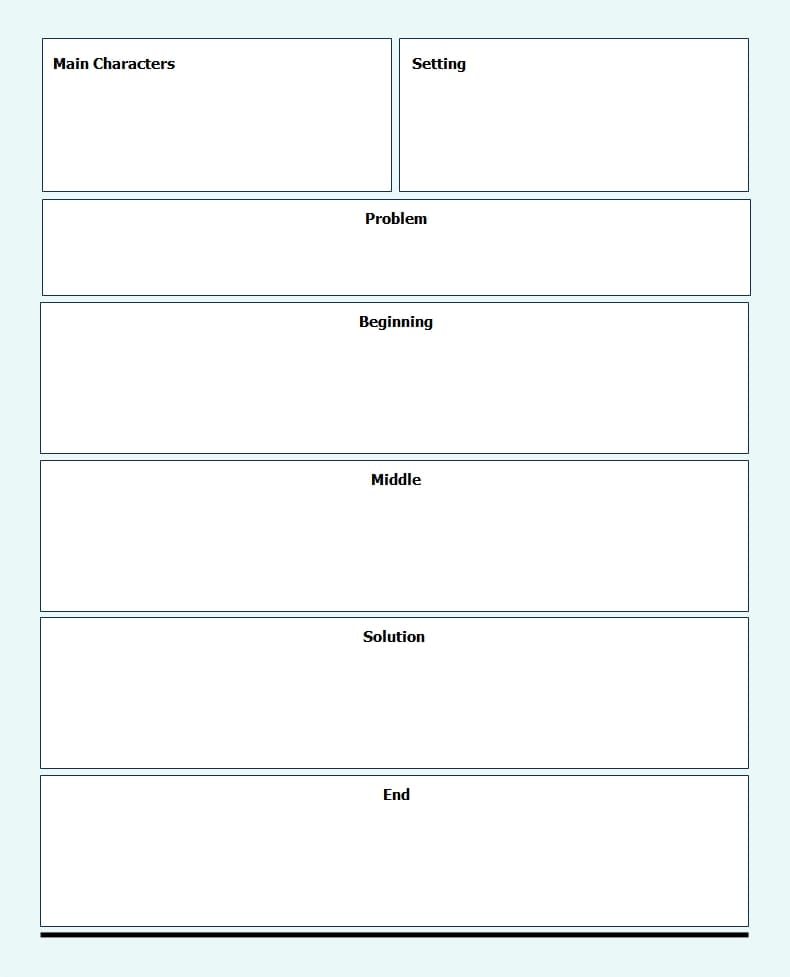
Template 5
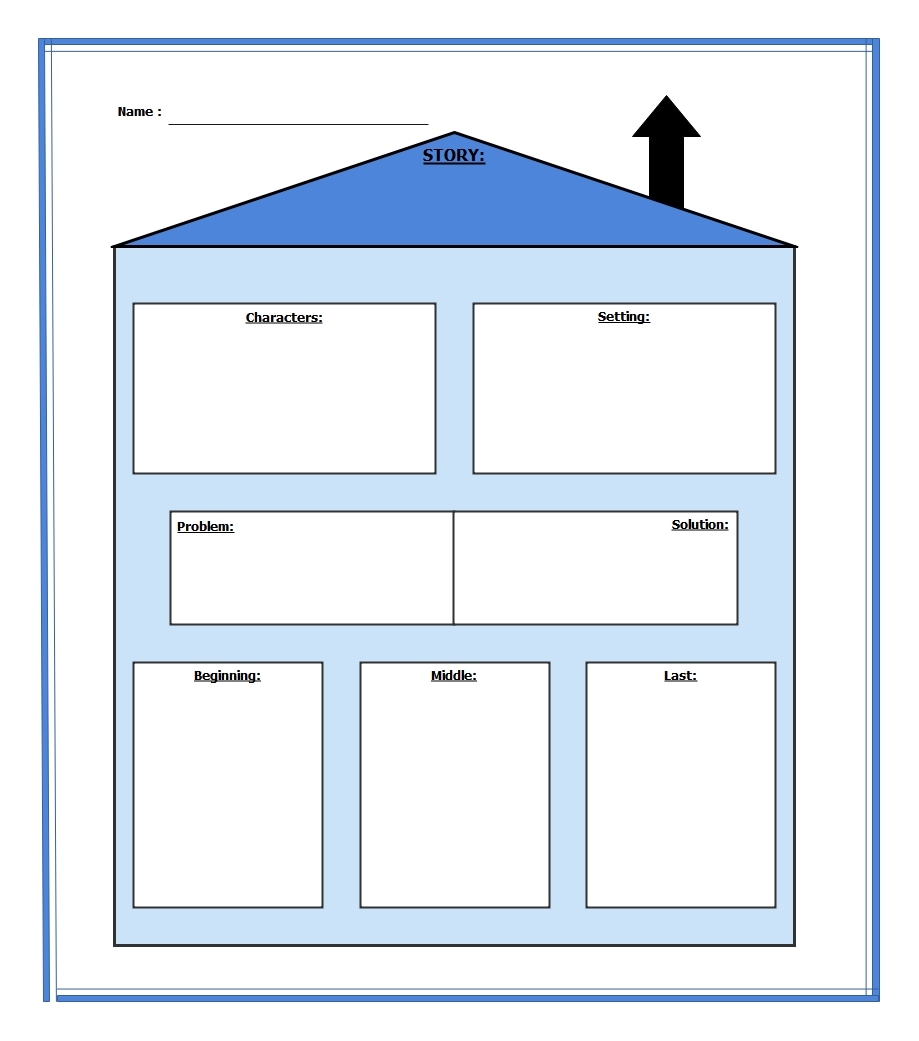
Shaped like a house, this graphic organizer helps you plan stories in a clear and organized way. Each part of the story has its own section, such as Problem, Solution, and Setting, and spaces for Beginning, Middle, and End.
The layout simplifies how stories work and helps students remember key details. It’s useful whether you’re writing your own tales or studying one in class.
It’s especially helpful for younger students, visual learners, and kids who avoid writing. The familiar structure takes the pressure off and makes getting started much simpler.
Template 6
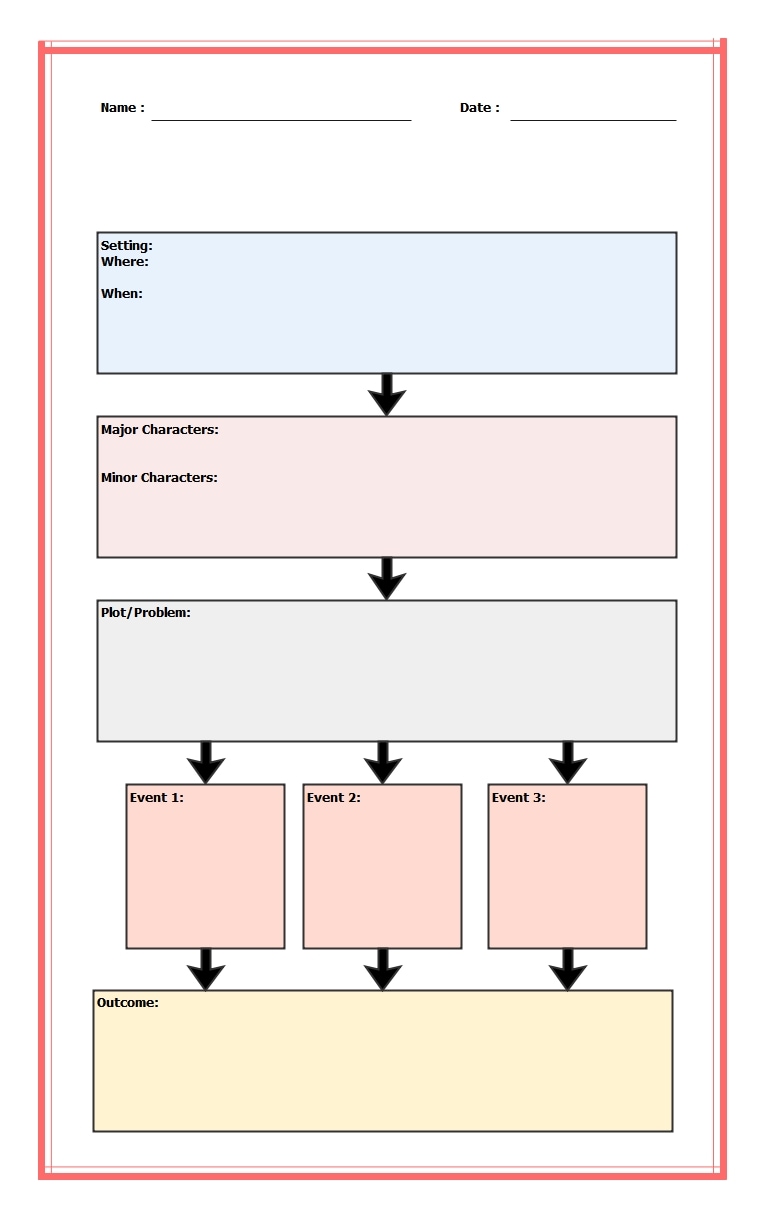
This vertical map is laid out like a flowchart, with clear sections for setting, characters, plot, events, and resolution.
You move through it step by step, jotting notes from the plot’s main problem to how everything turns out.
The layout facilitates planning stories in a structured way. It works well for short story outlines or for summarizing chapters in longer pieces.
Whether you're learning the basics or planning a full arc, this tool helps you spot gaps, organize your thoughts, and keep the story on track.
Template 7
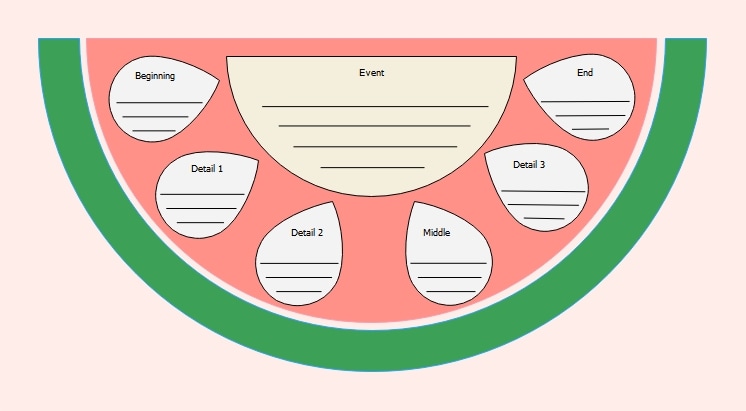
This playful watermelon-style narrative planner helps young kids organize their thoughts.
At the center is the main event, with the beginning, middle, and end spreading out like slices. Each seed-shaped space gives them a spot to add details that connect to the main event.
The layout is bright, playful, and easy to follow. It turns writing into something fun instead of something you have to go through.
Whether you're using it at school or home, it's a helpful way to teach story order, how to add good details, and how to write in a more personal voice.
Template 8
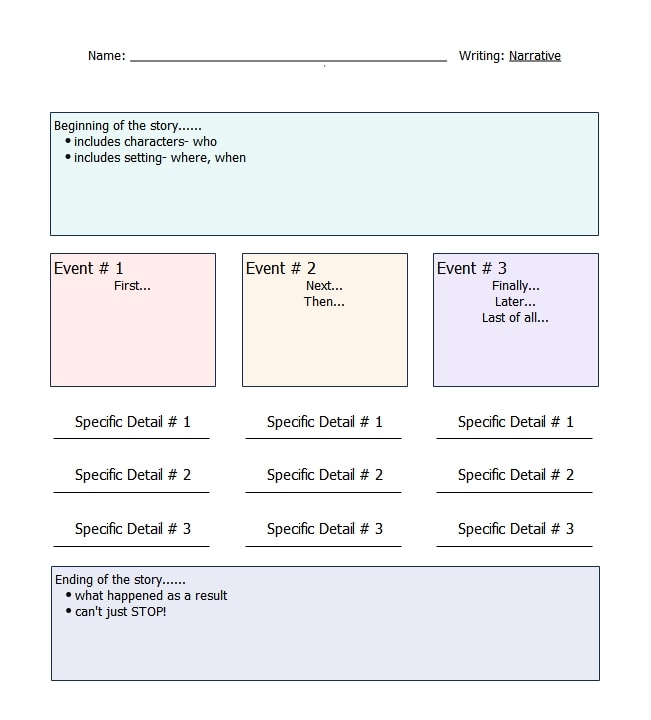
This pre-writing tool helps students map out their stories before writing. It uses color-coded sections to keep everything organized.
The first part covers the beginning, where you can jot down who’s in the story, where it happens, and when.
Next, come three boxes for the events. Each one guides you to add specific details and keep the story flowing smoothly.
The last box is for the ending. It reminds you to wrap things up rather than stopping too soon.
It also works well for classroom work, personal stories, or creative writing. With prompts and space to develop each part, it helps anyone feel more confident and write more complete, engaging stories.
How to Edit a Narrative Writing Graphic Organizer Template?
Supporting over 210 diagram types, EdrawMax is my go-to when I need to organize ideas visually. No coding, no clutter. I can just drag things into place and start building. I’ve used it for mind maps, graphs, charts, timelines, plots, lesson plans, and more.
Make a Narrative Writing Graphic Organizer Using a Template
Using templates in EdrawMax is fast and beginner-friendly. The layout is already in place; your job is simply to plug in the details, make any necessary tweaks, and move forward. Here’s how the process works:
Step 1: Select Your Template
Launch EdrawMax on your desktop and click Templates.
Use the search bar at the top and type “Narrative Writing Graphic Organizer” or “Story Map.”
Click on a template that suits your writing purpose. Once you find one that works, click Use Immediately to load it into the editor.

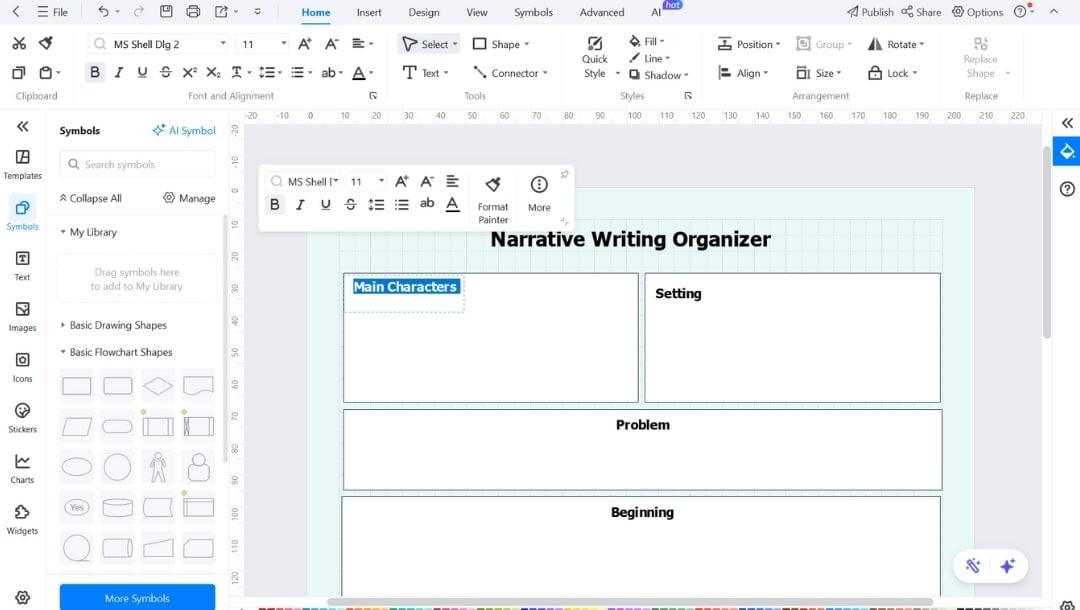
Step 2: Fill Text Fields
Double-click any text box like “Characters,” “Setting,” or “Problem,” and start typing your ideas in each box.
Select any text and use the mini pop-up menu to modify font, style, size, color, etc.
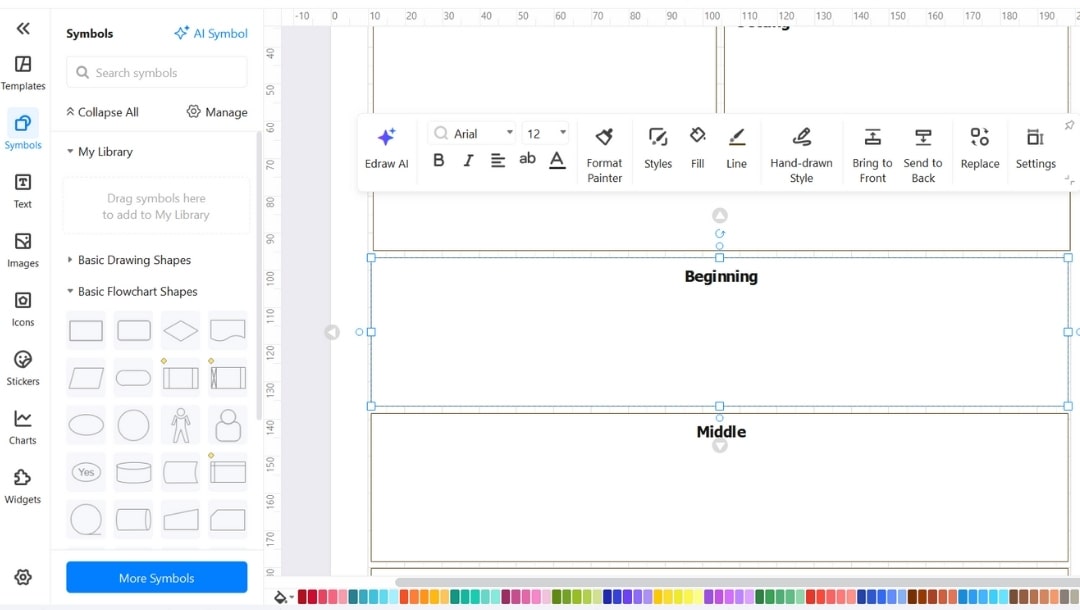
Step 3: Modify Elements
To delete an item, select it and press Delete on your keyboard.
Select and replace the shape with the available options in the pop-up menu.
You can also add a new one from the Symbols library on the left.
Use the search bar to find specific elements.
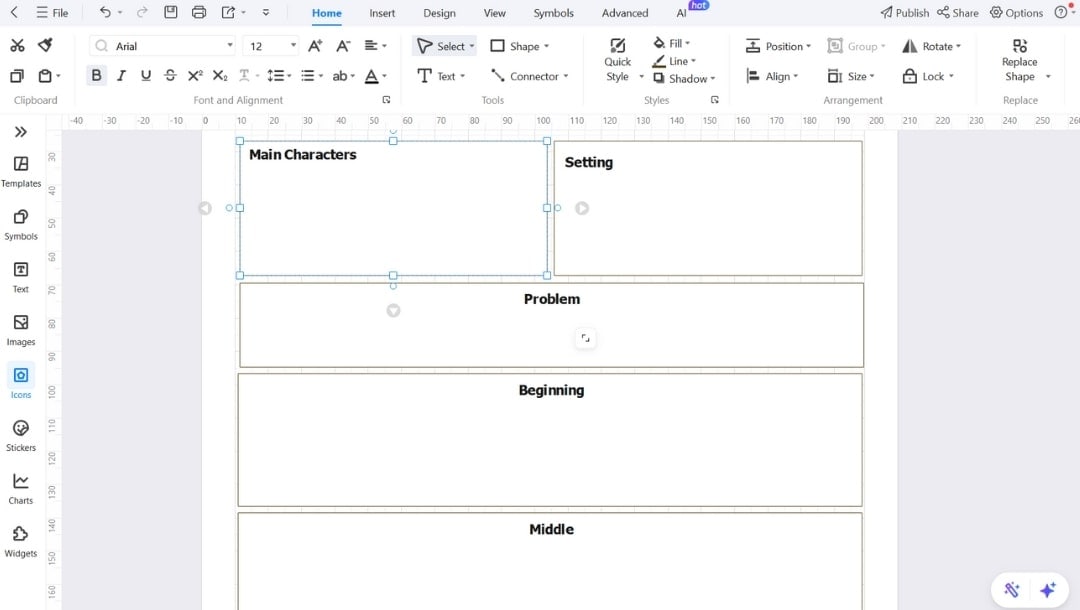
Step 4: Customize Design and Layout
Click and drag any element to reposition it. Use the edges to resize it.
The smart guides help align everything, keeping your layout tidy.
To highlight sections or improve readability, select any shape and:
Change shape colors using the Fill option on the top menu.
Adjust fonts or text sizes with the text toolbar.
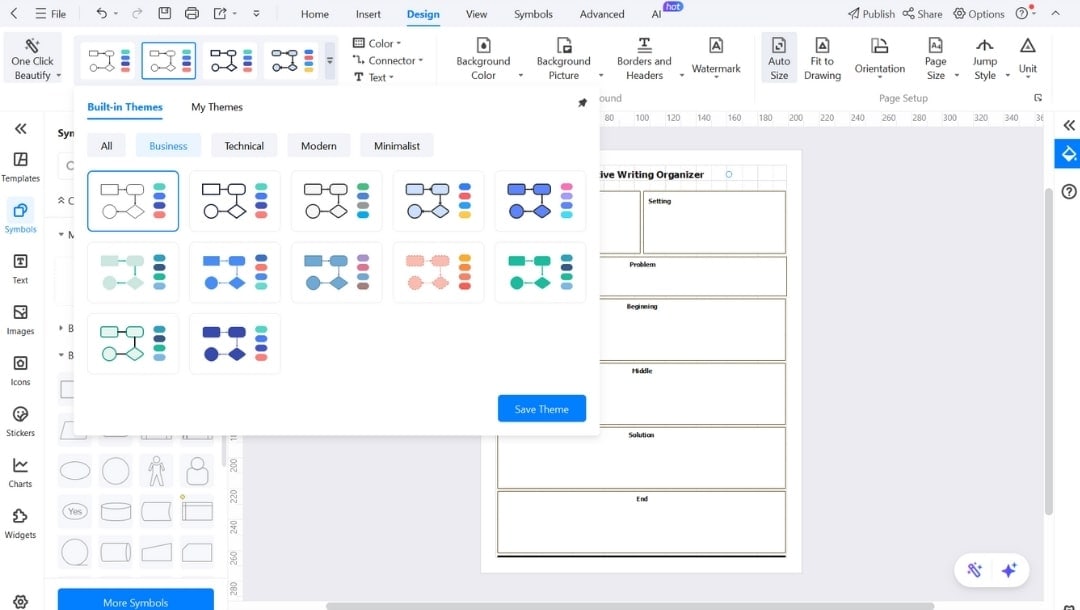
Go to the Design tab and modify the theme.
Try the One Click Beautify button for quick theme changing, or use the built-in theme styles.
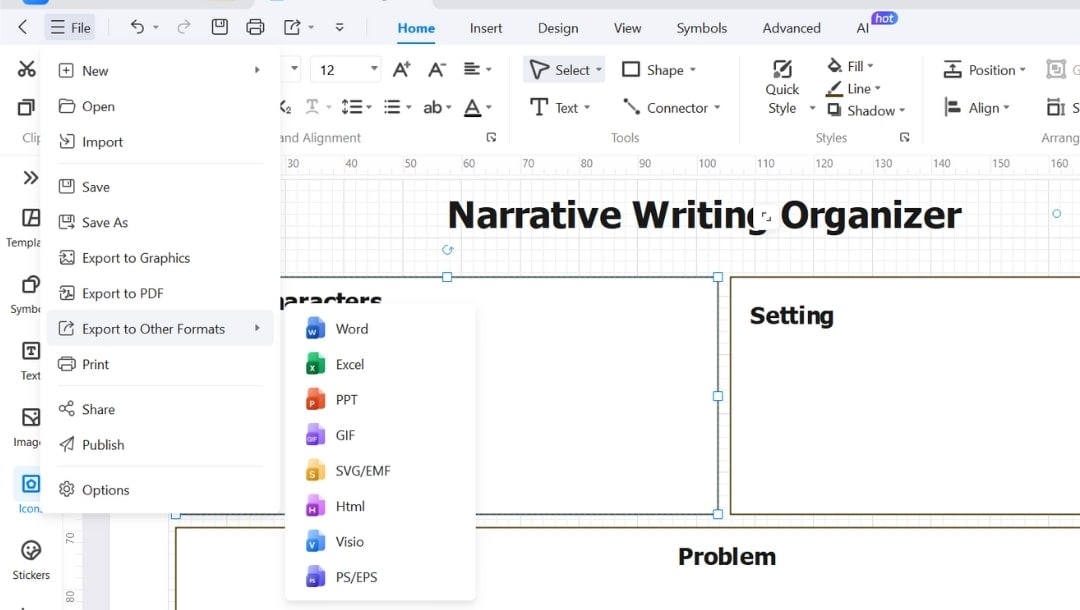
Step 5: Save or Export Your Organizer
Click File > Save As to save your project in EdrawMax format for future edits. You can also save to cloud storage if you need access from multiple devices.
Click File > Export(to Graphics/PDF/Other Formats), then choose from PNG, Word, PowerPoint, or SVG.
It’s especially useful if you're printing, submitting an assignment, or sharing your organizer with someone who doesn't use EdrawMax.
Why Choose EdrawMax?
Most tools want you to follow their format. EdrawMax doesn’t. It bends to fit your ideas. I’ve tested apps, including Canva and Lucidchart, where editing was slow, or the templates were limited. Here, everything is simple and flexible.
- Drag-and-Drop Layouts – Drop in new sections anytime without breaking the structure.
- Thousands of Ready Templates – Different narrative layouts like arcs, scene maps, and character outlines.
- Smart Layout Tools – Connectors adjust themselves when you move things.
- Custom Icons – Add your own visuals to make it personal or visually appealing.
- Flexible Exports – Save to print, digital, or collaborative formats.
Best Practices for Creating Useful Narrative Graphic Organizers
When built with care, a narrative organizer becomes a reliable guide, not just a tool.
Plan the scope first. Decide how many parts your story will have. Use fewer boxes for short pieces. For longer ones, break things into clear acts or scenes.
Be consistent with the layout. Choose a shape for each element and use it the same way across the page. That way, you don’t get lost in the structure.
Work backward. Start by deciding how your story ends. It helps guide your choices from the start and avoids extra scenes that don’t fit.
Keep boxes focused. Only put one kind of detail in each section. Let the setting talk about place and time, nothing else.
Stick to bullets. Keep it short and straightforward. Use fragments like:
- Gets lost
- Thunder rolls in
- Finds shelter
Make room for ideas. Leave blank areas to jot down extra thoughts or reminders. You’ll use them more than you think.
Use color with intention. Assign one color per story thread. Keep the tones soft, and label them clearly.
Summarize your plan. Turn each section into one short paragraph. If it doesn’t make sense on its own, go back and tweak your notes.
Final Words
Every good story has a beginning, middle, and end, but not every writer remembers that mid-draft. A solid narrative writing graphic organizer can save you from that spiral.
With EdrawMax, you bring order to your creativity. Whether you prefer a story map graphic organizer, a blank organizer, or a full narrative writing graphic organizer example, you’ll find templates that fit how you think and write.
Less confusion. More writing that works.
AI Diagram Generator
Enter your prompt. Upload files if needed. Generate diagrams, charts, or slides instantly.


