


ATMs are a part of our lives. They allow us to make cash withdrawals, check account balances, and operate accounts with a mere touch or a few taps. However, in the background of this straightforward procedure, there is a robust software program that ensures the safety and the smooth flow of everything.
A tried and tested method of looking at how these systems can be applied is through using UML diagrams. In this article, you will learn what a class diagram for ATM management is, its parts, examples, and how to make one in EdrawMax.
In this article
- What is a Class Diagram for ATM Management?
- Key Elements of an ATM Class Diagram
- How to Read and Use UML Symbols in Class Diagrams
- Examples of Class Diagrams for ATM Management
- Step-by-Step Tutorial to Create a Class Diagram for ATM Management in EdrawMax
- Best Practices for Designing ATM UML Diagrams
- Final Words
What is a Class Diagram for ATM Management?
A class diagram for ATM management is a type of UML diagram that shows how the parts of an ATM system work together. It provides one with an easy-to-visualize map of the system through the use of lines and boxes. This depicts classes and connections between the classes. Every one of these classes can represent an actual item of the real world, like the ATM, a customer, a bank account, or a card.
The class diagram of ATM depicts how the classes are related. As an example, the ATM links to the Bank, the Customer links to the Card, and the Account. This aids the designers and developers in knowing how the system is supposed to run before they construct it. It also reduces the effort in discovering flaws or gaps in design.
The objective of a class diagram is to represent the structure and the functions of each component in the system. Such diagrams are consulted by software engineers, system architects, and even testers. They use class diagrams for ATM management to ensure that the ATM is functioning as intended. Employing this diagram, teams can design a secure and reliable system that performs operations.
Key Elements of an ATM Class Diagram
A class diagram for ATM management is built with four main parts: classes, attributes, methods, and relationships. It helps simplify a complex system and make it visual so that anybody can comprehend it. All of them are important in demonstrating the action of the ATM system.
Classes
Classes are the principal construction blocks. The classes in an ATM system may include such things as ATM, Customer, Account, Card, or Transaction. Each of the classes covers one individual part of the system.
Attributes
Attributes explain the content of a type. A sample of attributes that the Account group may contain is account number, balance, and account type. A customer may consist of a name and PIN. These details demonstrate the information that the system retains
Actions
The actions or functions a class can do are known as methods. To illustrate, the ATM class can include such methods as checkBalance() or withdrawCash(). The transaction class can have recordTransaction(). Methods describe what each component of the system is capable of.
Relationships
Relationships depict the linkages between the classes. An example is that a Customer may possess numerous Accounts, and an ATM is communicating with the Bank. Such links render the diagram practical because they describe the interaction of various elements in real life.
A software engineer uses all these factors to form a clear step-by-step process of how an ATM works. Not only do they demonstrate the movement of actions, but they also bring to light the rules and boundaries of the system. When the entire picture is considered, teams can develop safer, faster, and more reliable ATM software.
How to Read and Use UML Symbols in Class Diagrams
To understand a class diagram for ATM management, you need to know the UML symbols used in it. The symbols are not hard to master, and after learning them, the diagram will be much more understandable.
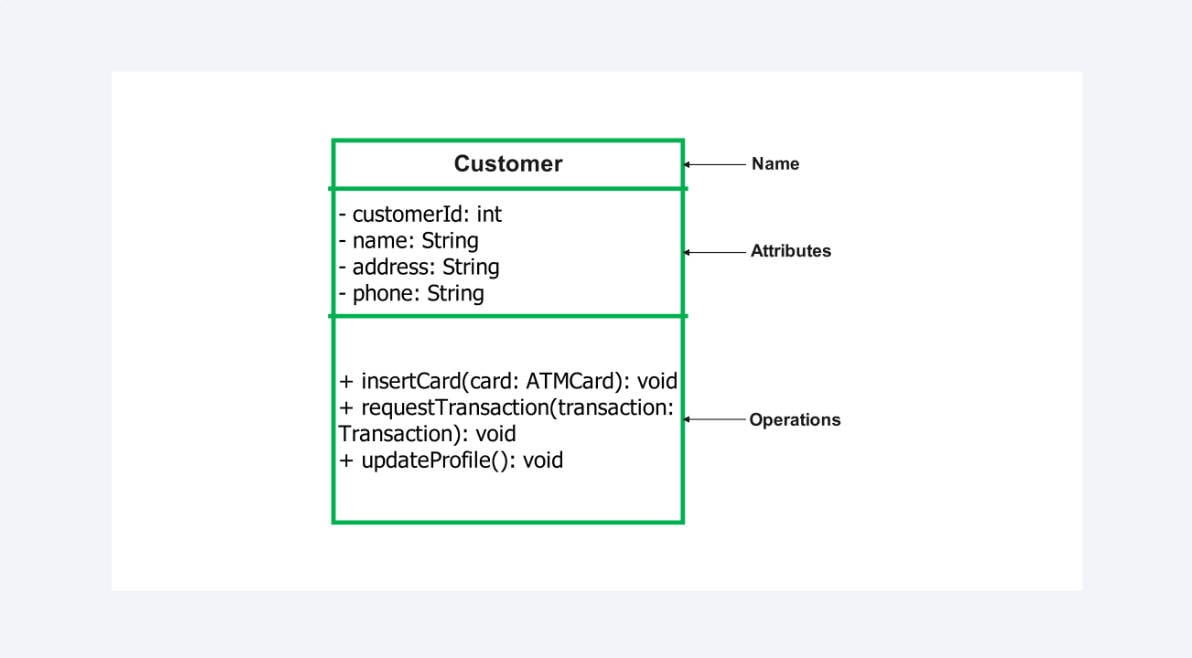
Rectangle
The rectangle designates a class. The figure inside the rectangle normally has three divisions. The upper part indicates the class name (ATM or Account). The middle enumerates such qualities as balance or PIN. Such methods as withdrawCash() or checkBalance() are listed at the bottom.
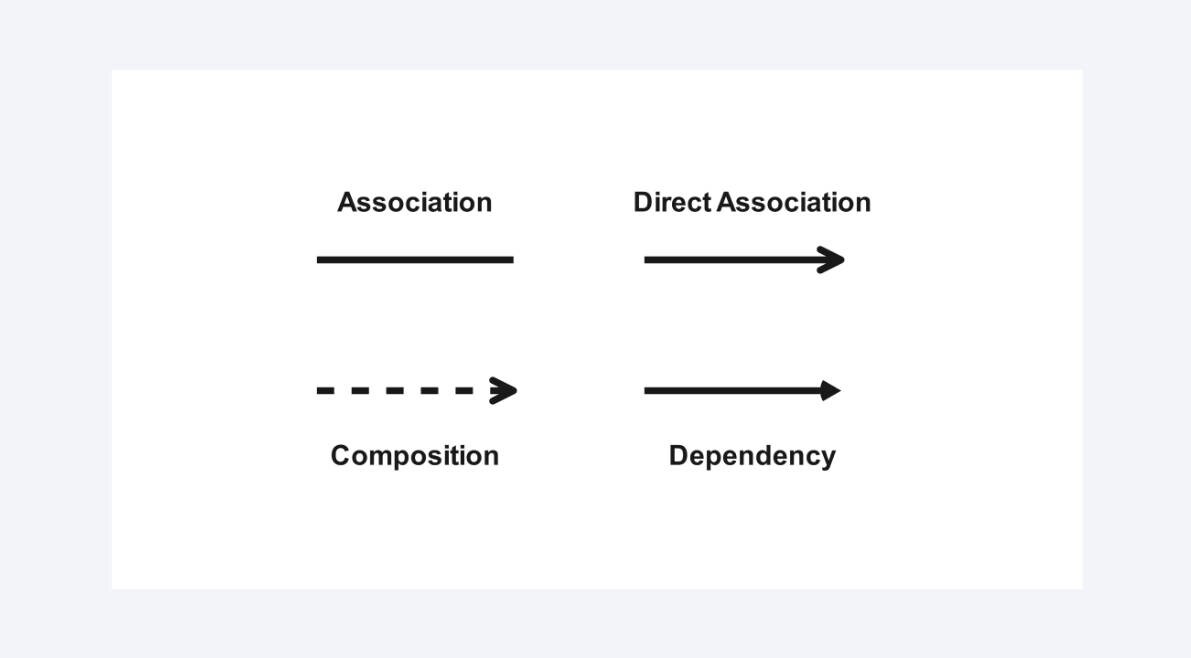
Arrows and Lines
And then there are the arrows and lines, which indicate relationships amongst classes. A simple line is a connection, as the relationship between a Customer and an Account. A generalization or inheritance is indicated by a line with a hollow triangle at one end. As an example, a SavingsAccount and a CheckingAccount can both be inherited from the primary Account. A dashed arrow indicates an interdependency, i.e., that one class needs another but is not so tightly coupled to it.
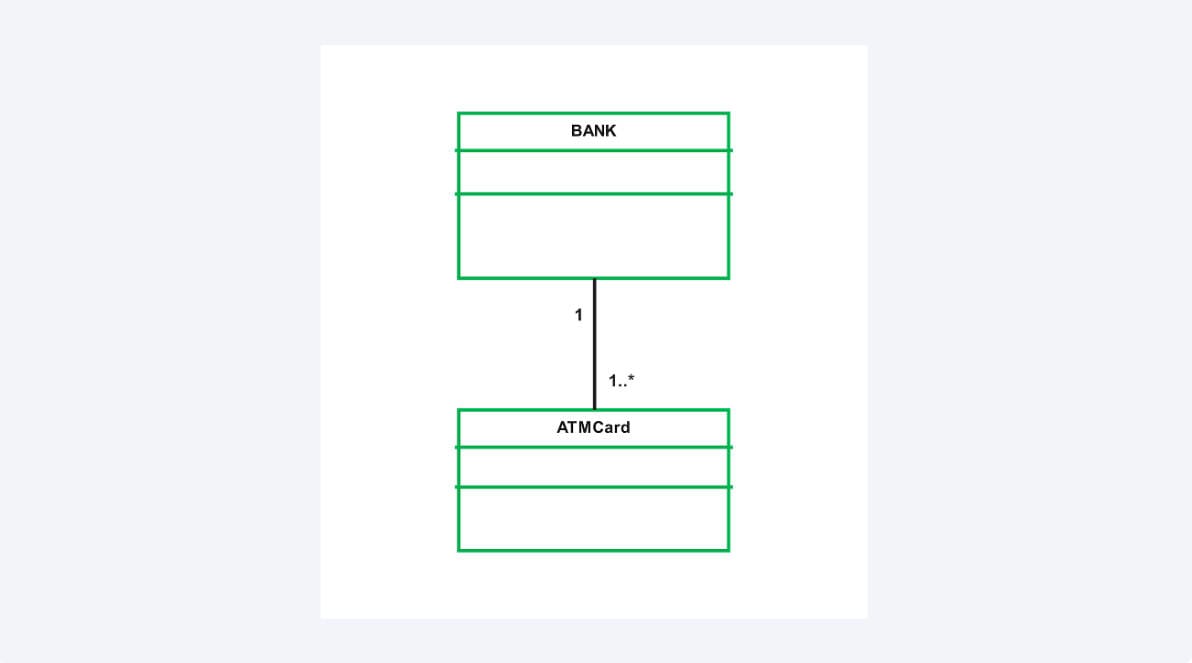
Multiplicity
The other important notation is multiplicity notation. You might encounter lines with such things as “1..” or “0..1” at the ends of lines. The figures demonstrate the number of objects of one type related to another. As an example, a customer may have numerous accounts, but an account is normally unique to a single customer.
When the individual learns such symbols, then he can easily read and comprehend UML diagrams. It is also easy to use tools such as EdrawMax that provide a complete UML shape library with all these symbols listed.
Examples of Class Diagrams for ATM Management
See how ATM systems are modeled as class diagrams by exploring real-life templates built in EdrawMax. These working illustrations demonstrate handy differences in format and design, and enable you to select the appropriate style and complexity in your own diagram work.
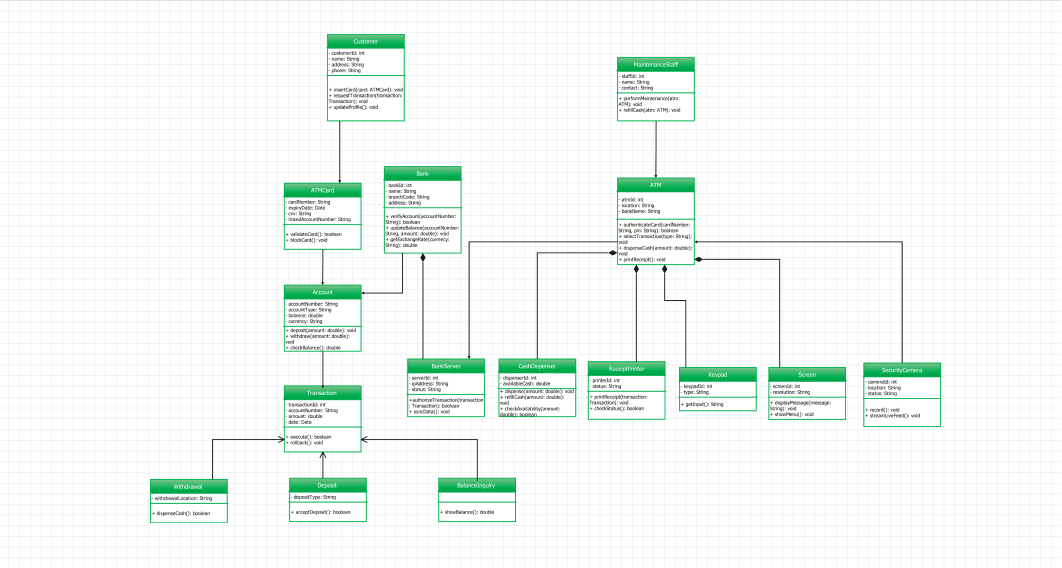
Example 1: Class Diagram ATM Management System
This template demonstrates such important entities as Customer, ATM Card, Account, Bank, ATM, and Transaction. It splits the transactions into subtypes Withdrawal, Deposit, and Balance Inquiry, and consists of hardware such as a Cash Dispenser and Keypad. It represents relationships by inheritance and composition, and also by backend support through Bank Server and Maintenance Staff.
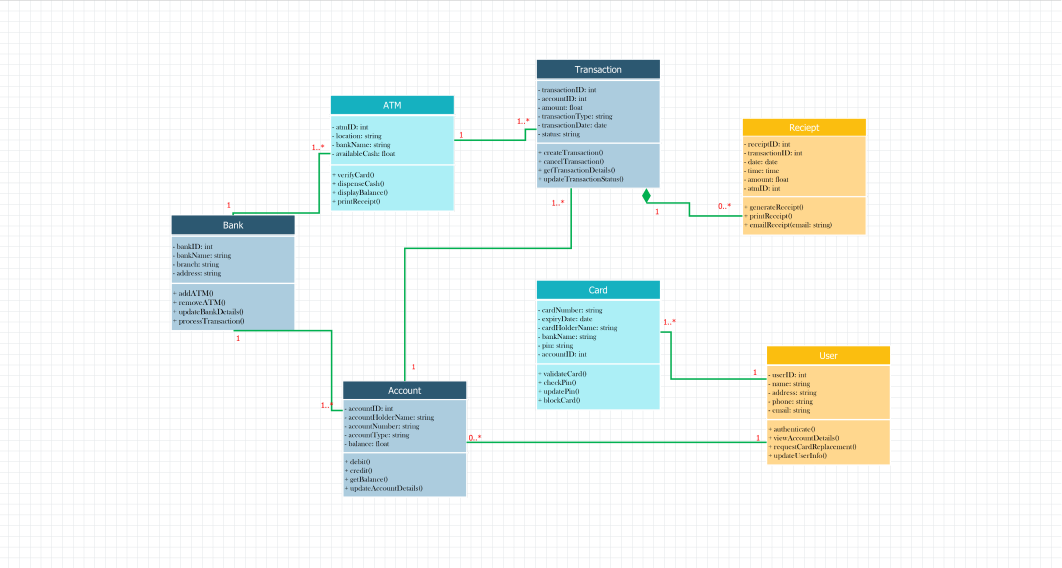
Example 2: Class Diagram ATM
This diagram is a simplified one, and the core classes it uses are User, Account, Card, ATM, Bank, Transaction, and Receipt. It visibly traces the way one Bank runs several ATMs, the way Cards relate to Accounts, and the way Transactions result in Receipts. The flow displays important system behaviors in a small layout.
Step-by-Step Tutorial to Create a Class Diagram for ATM Management in EdrawMax
A class diagram for ATM management is more than just a picture. It provides a good picture of the working of the system, illustrating structure and relationships. This assists teams in designing software that is secure, easy, and sound. Now it is easy to make such diagrams with a free online UML diagram maker like Wondershare EdrawMax. You can drag shapes, link classes, and format the diagram in just a few minutes. Sign up for EdrawMax now and begin to create your own ATM class diagram with ease.
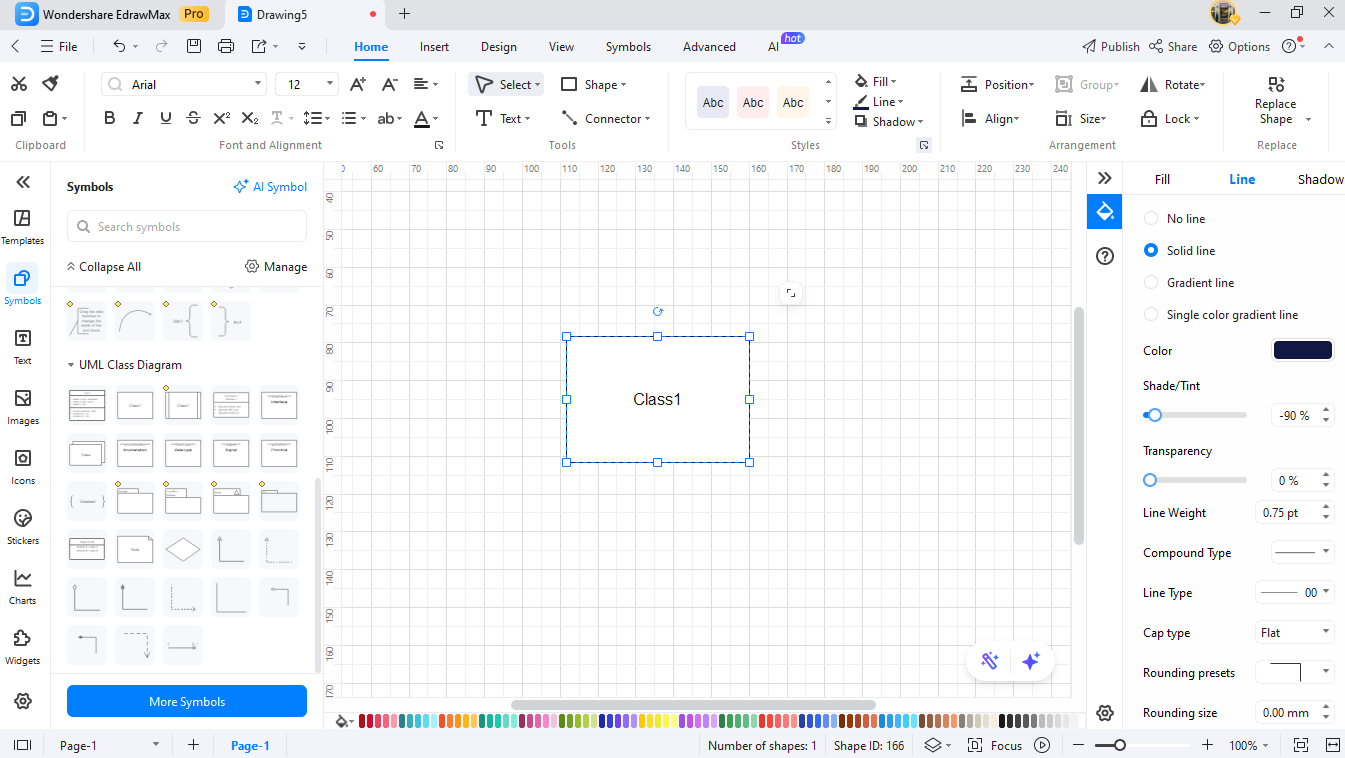
Step1Start With a Blank Canvas
Open EdrawMax on your computer.
- On the left panel, click New.
- From the menu, choose Blank Drawing to open a new canvas.

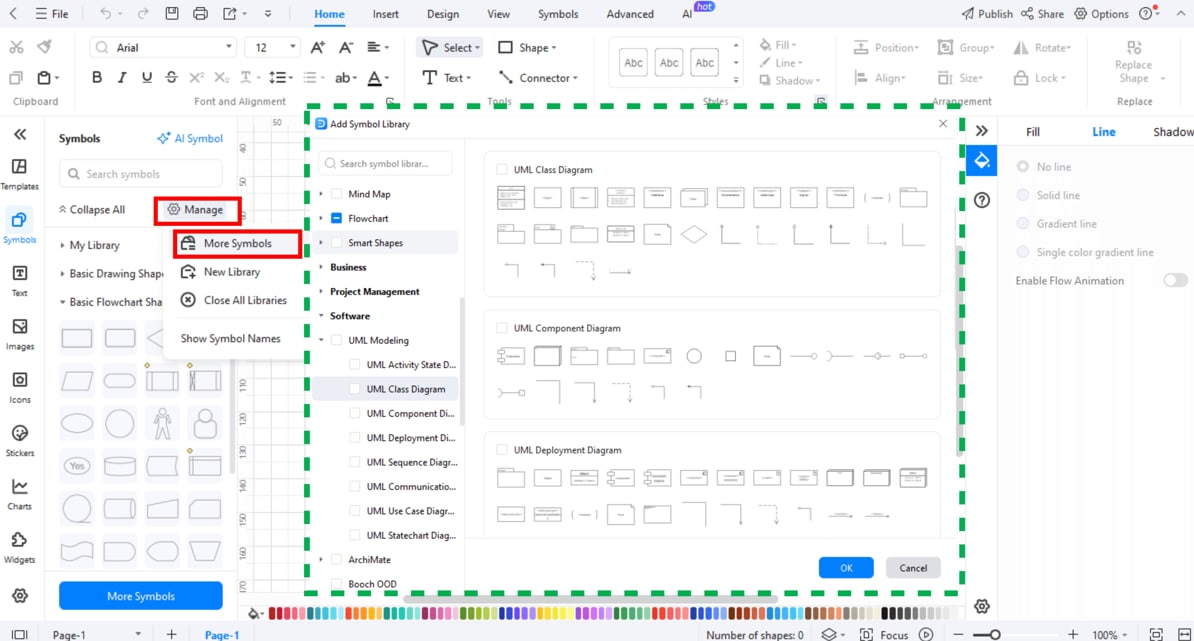
Step2Open the UML Shape Library
Go to the left menu and click on Symbols.
- Go to Manage and then Add More Symbols.
- In the pop-up window, find and enable UML Modeling.
This adds all the standard UML class diagram symbols to your workspace.
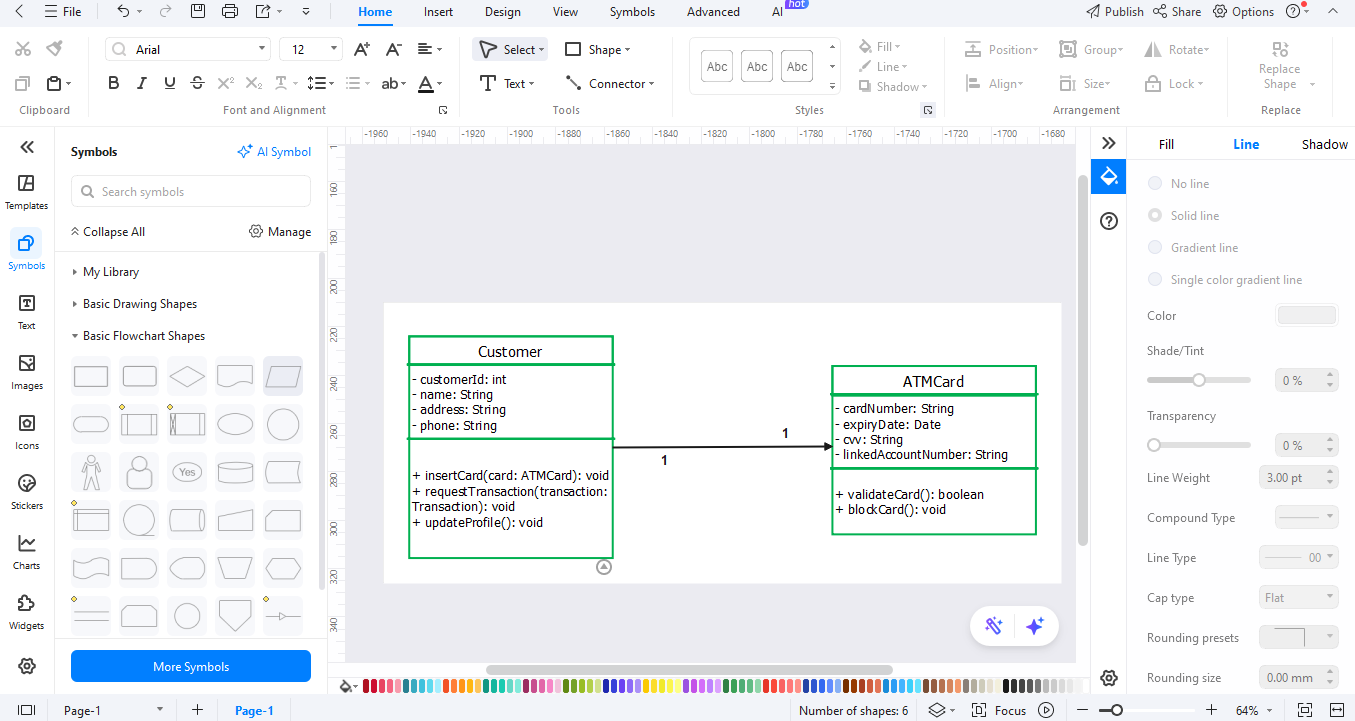
Step3Add Main ATM Classes
Drag rectangles from the UML library to the canvas.
- Add key classes such as ATM, Customer, Account, Card, Bank, and Transaction.
- Lay all the symbols in a way that they don’t overlap each other when making connections.
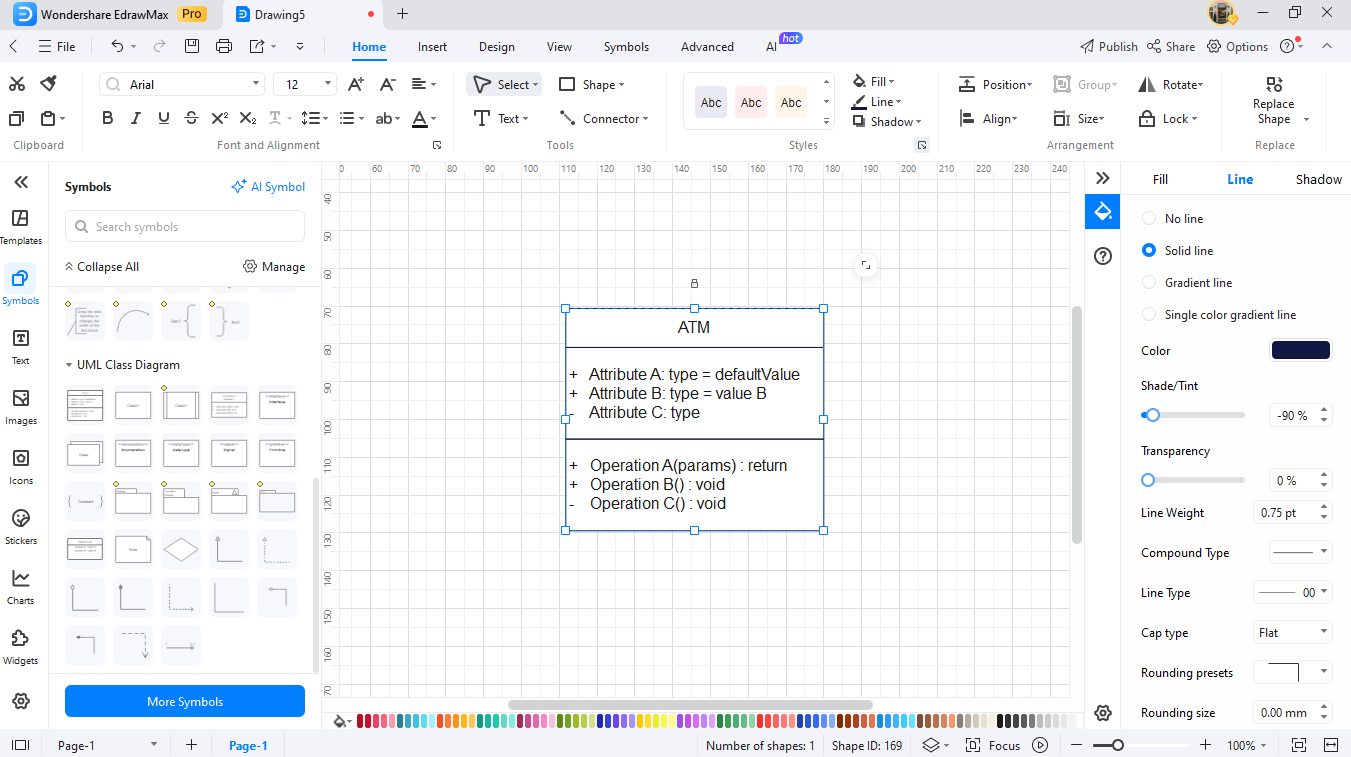
Step4Define Attributes and Methods
Click the set of class boxes twice to edit.
- The top section should include the name of the class (e.g., ATM).
- All the attributes (e.g., location, machineID, balance) are added in the middle.
- In the bottom section, list methods (e.g., withdrawCash(), depositCash(), checkBalance()).
Step5Connect Classes With Relationships
- Create association lines between Customer, Account, and Card.
- Draw an ATM to Bank line indicating that the ATM depends on the bank.
- Generalize (triangle arrow) when you would like to present types of accounts, including SavingsAccount and CheckingAccount.
- Add multiplicity (e.g., 1..*, 0..1) to indicate the number of objects that can be associated.
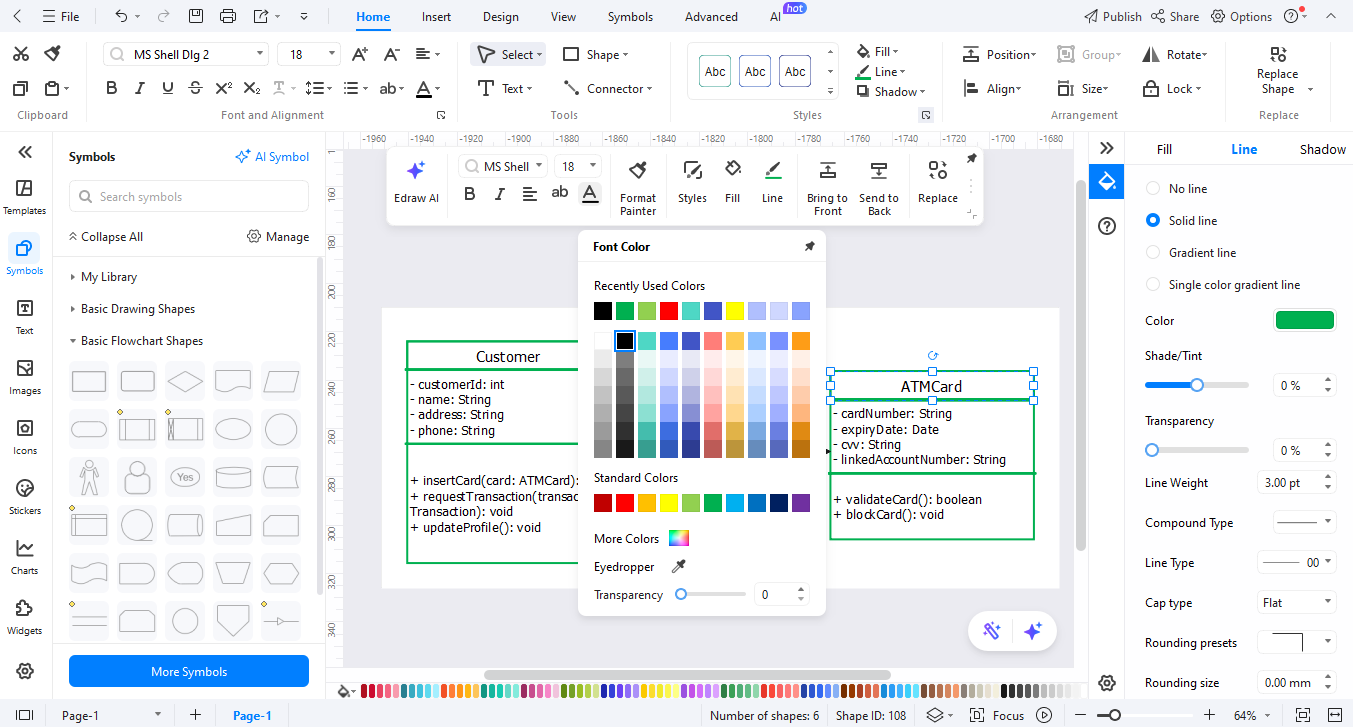
Step6Style and Organize the Diagram.
- Adjust font size and box colors for clarity.
- Keep classes in a clean grid and use alignment tools.
- Include labels where necessary to elucidate links.
- Look through the entire diagram and verify the correspondence with the real ATM processes.
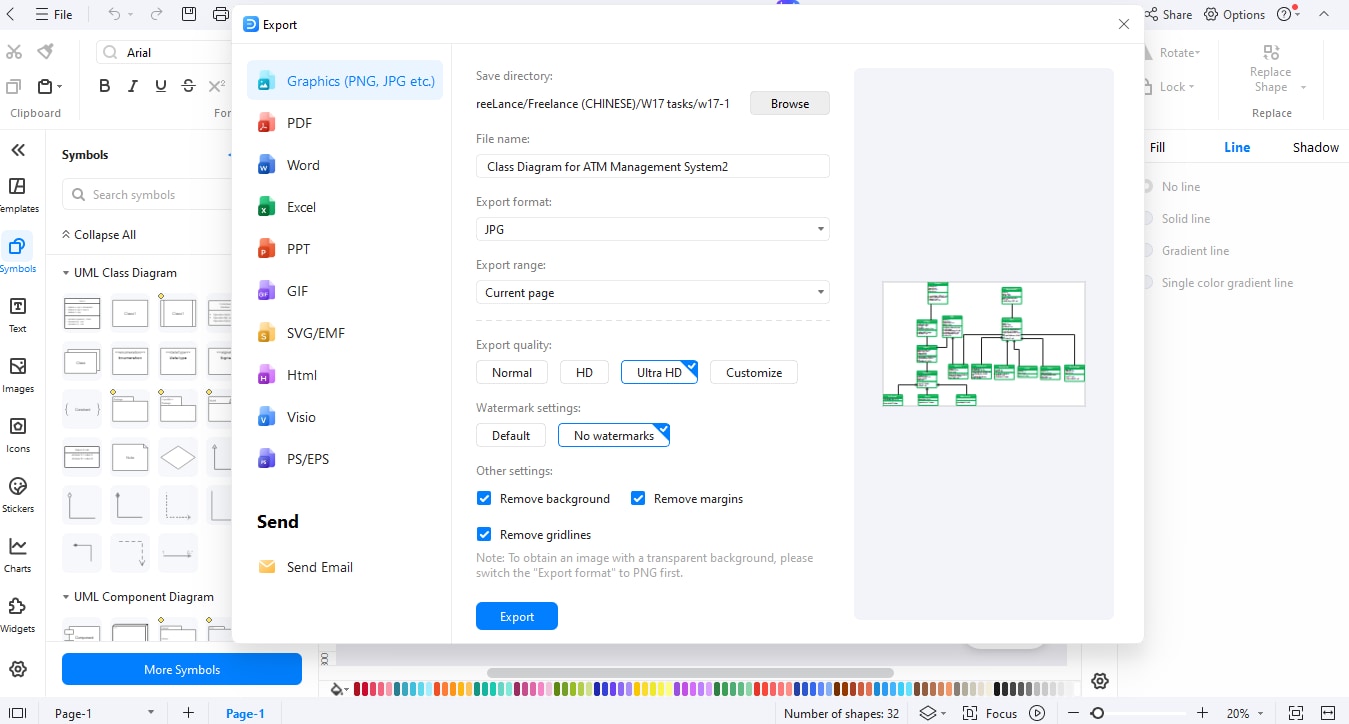
Step7Export Your Diagram
When this is completed, select Export from the top menu.
- Select a format JPG, PNG, PDF, Word or Visio.
- You can save the diagram and circulate it to your team or employ it in reports.
Best Practices for Designing ATM UML Diagrams
Designing a class diagram for ATM management works best when you follow a few simple rules. The following practices make your diagram convenient to read and easy to use by both developers and beginners.
First, make the layout simple. It is best not to cross the lines or bunch classes too closely together. A neat diagram is clearer to understand.
Second, be consistent in the names. To illustrate, avoid using a single term, which is Customer, but later on you use another term, which is User. Carefully chosen names exclude confusion.
Third, label with the proper multiplicity relationships. In case a Customer can have more than one Account, indicate the one with "1..*". This is what makes this diagram correct and realistic.
Lastly, organize group-related classes. Put the ATM, Bank, and Transaction classes close to one another so that a reader can trace the steps through the process.
These tips can help you keep your ATM UML diagram in a clean, uniform, and usable fashion, readying it for the real world.
Final Words
A class diagram for ATM management is more than just a picture. It provides a good picture of the working of the system, illustrating structure and relationships. This assists teams in designing software that is secure, easy, and sound.
Now it is easy to make such diagrams with a tool like EdrawMax. You can drag shapes, link classes, and format the diagram in just a few minutes. Sign up for EdrawMax now and begin to create your own ATM class diagram with ease.
AI Diagram Generator
Enter your prompt. Upload files if needed. Generate diagrams, charts, or slides instantly.


