


Most attempts to convert a 2D floor plan to 3D for free follow the same script. You find a promising tool, spend 20 minutes learning the interface, and then hit a paywall right before export. Or the output looks nothing like your actual plan.
I've tested enough of these workflows to realise the actual problem. The tools are built for workflows most people don't have.
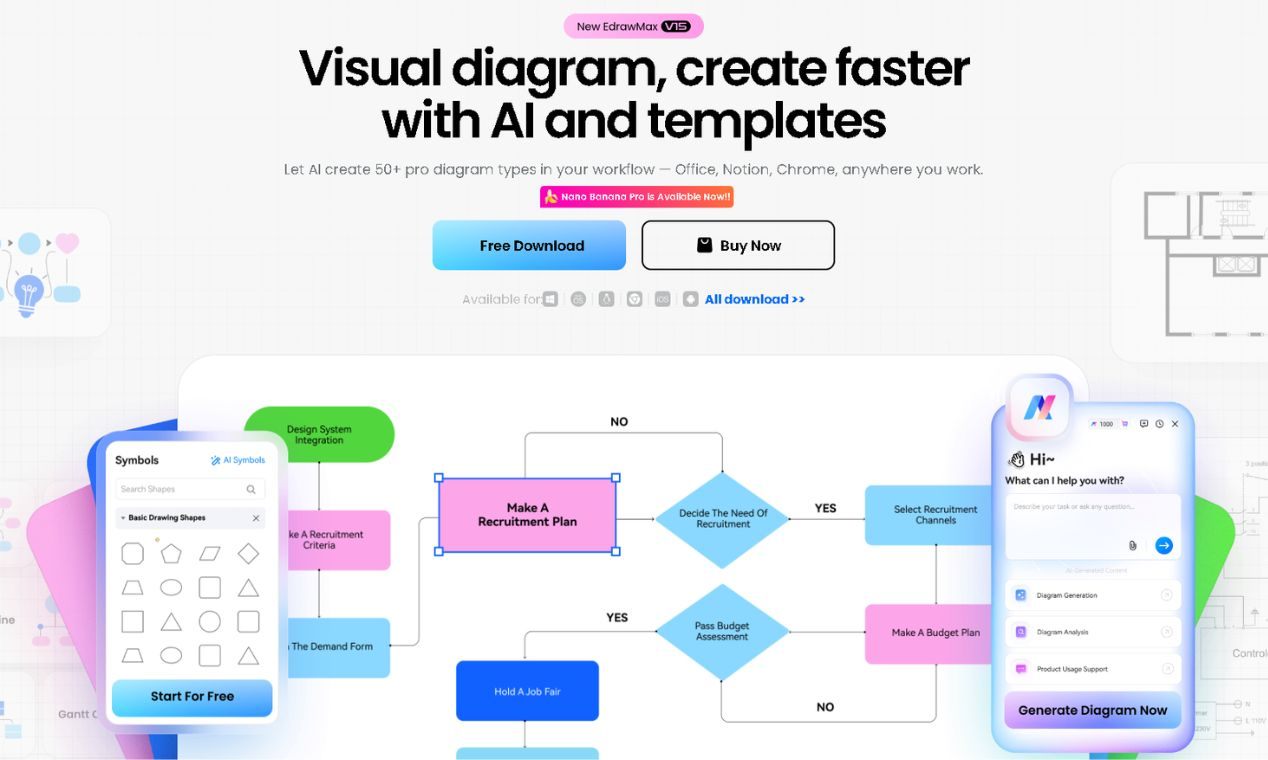
EdrawMax closes that gap completely with a dedicated Floor Plan to 3D feature. It reads your existing plan and generates a styled 3D view in a few clicks.
Here, I'll walk you through the entire process, from opening your plan to exporting a clean 3D result, in minutes.
In this article
2D vs. 3D Floor Plans
A 2D floor plan and a 3D view show the same room. Here’s what separates them:
| 2D Floor Plan | 3D Floor Plan | Key Differences |
| Top-down, flat layout drawn to scale | Perspective or isometric view with depth | 3D shows how a space feels; 2D shows how it's measured |
| Architects, engineers, trained professionals | Clients, homeowners, general audience | 3D removes the interpretation barrier |
| Walls, rooms, doors, windows, dimensions | Spatial layout, furniture scale, proportions | 3D reveals what tight layouts actually feel like |
| Architecture, construction, engineering | Homeowners, designers, & real estate | Different audiences, different stages of the same project |
| Permits, contractor drawings, technical docs | Client presentations, approvals, and renovation planning | Each serves a different audience and stage |
3D doesn't replace the 2D floor plan. It translates it for the people who need to approve it.
Why You Should Convert 2D Floor Plans to 3D
Knowing the difference between 2D and 3D is one thing. Feeling where it costs you is another.
Clients Approve What They Can't Picture
Most non-professionals can't read a technical drawing. I've seen a client nod through a full plan review, agree to everything, then walk the framed space and say it felt smaller than expected.
The plan was accurate. The communication wasn't.
A 3D view gives clients something real to react to before construction starts. Approvals move faster when the decision is based on something people can actually see.
Some Problems Only Show Up in 3D
I've caught door clearance issues in a 3D view that were invisible on the flat plan. Not because the dimensions were wrong, but because you can't feel tightness from overhead.
Catching it at the design stage costs nothing. After construction starts, it's a different conversation entirely.
You Can't Feel a Space From Above
Depth reveals what flat plans hide. Placement decisions, lighting positions, and traffic flow don't translate well from a top-down view. 3D makes the space available for that kind of practical thinking in a way a flat plan simply can't.
The Export Is the Presentation
Export as PNG or PDF, and it opens on any device. No CAD viewer, no compatibility question.
Send the file. You're done.
Traditional Way to Convert a 2D Floor Plan to 3D
The traditional workflow isn’t just complicated, but it’s slow, tool-heavy, and built for professionals.
Create a 2D Plan in CAD Software
The process starts in a CAD application like AutoCAD. You draw or import the floor plan, then clean up the geometry: closed wall segments, accurate dimensions, no overlapping lines. Any errors here compound at every step that follows.
Import 2D Plan into 3D Software
From there, the file moves into a separate 3D modeling environment like SketchUp or Revit. The file transfer isn't always clean. Transfers often introduce formatting issues that must be fixed before 3D work begins.
Extrude Walls and Add Structure
Extrusion converts each flat wall line into a standing wall, one at a time, adding hours even on a simple layout.
Add Doors, Windows, and Architectural Details
Every opening gets placed manually: sized, positioned, and oriented inside the modeling interface. Nothing carries over from the 2D plan.
Render and Export
Rendering converts the finished model into a viewable image. I worked through this once on a simple single-story layout. It took most of an afternoon.
Why Traditional Workflow Is a Problem for Most People
The barrier isn’t any single step. It’s the combination: two specialized applications, paid licenses, and months of skill development before the output is usable.
For architects, this workflow is routine. But anyone needing a client-ready 3D view quickly has no practical entry point.
How to Convert a 2D Floor Plan to 3D Free in EdrawMax
Why EdrawMax Works for Converting a 2D Floor Plan to 3D
The whole process stays inside one tool. That sounds like a minor convenience until you've spent time moving files between CAD and a modeling tool and fixing what broke in transit.
Built-In Floor Plan Templates
The 20,000+ templates cover residential layouts, office spaces, and commercial floor plans. I use the Home Plan section most often. Under a minute to find something close, adjust it, and get to the conversion step.
No starting from scratch unless you want to.
One-Click 2D to 3D Conversion
With your plan on the canvas, the Floor Plan to 3D button pops up. You just click it, and the conversion opens instantly. No extra windows, no file exports, no handoffs between tools.
That's exactly where the traditional workflow breaks. EdrawMax skips it entirely. The first time I tested it, the gap between "I have a 2D plan" and "I have something a client can actually look at" closed in under a minute.
Four 3D Style Options
Auto Match, Modern Minimalist, Natural Wood, and Refined Luxury. A contractor reviewing structural layout needs something clean and uncluttered. A homebuyer responds to warmth and furnished detail. You're not locked into one visual output for every audience.
Export Without Leaving the Canvas
PNG, JPG, PDF, Word, PPT, SVG, CAD (.dxf), and more, all from the same workspace. Nothing else required.
Steps to Convert a 2D Floor Plan to 3D in EdrawMax
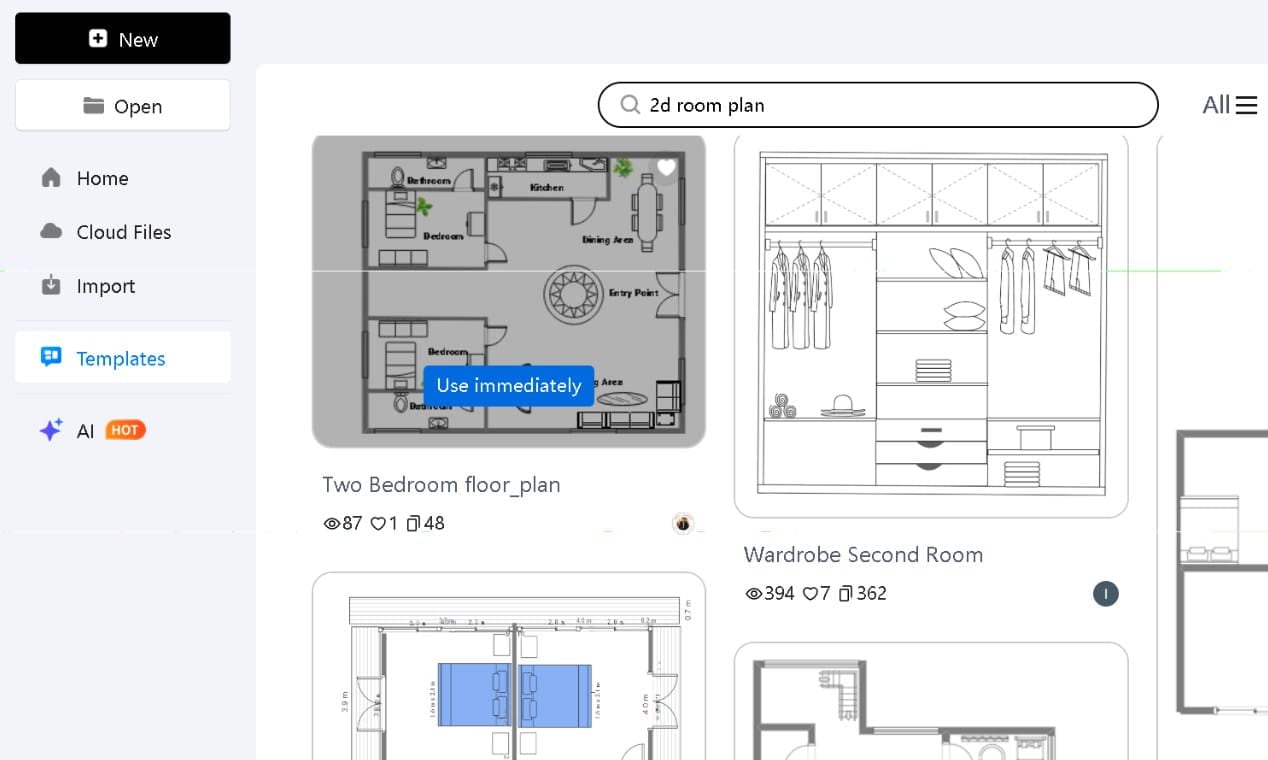
Step1 Open a Floor Plan or Choose a Template
- Search for “2d room plan” or a relevant key term in the Templates gallery
- Pick a suitable template and hit Use immediately
- or click New to start from scratch
- Already have a floor plan in EdrawMax? Open that file directly
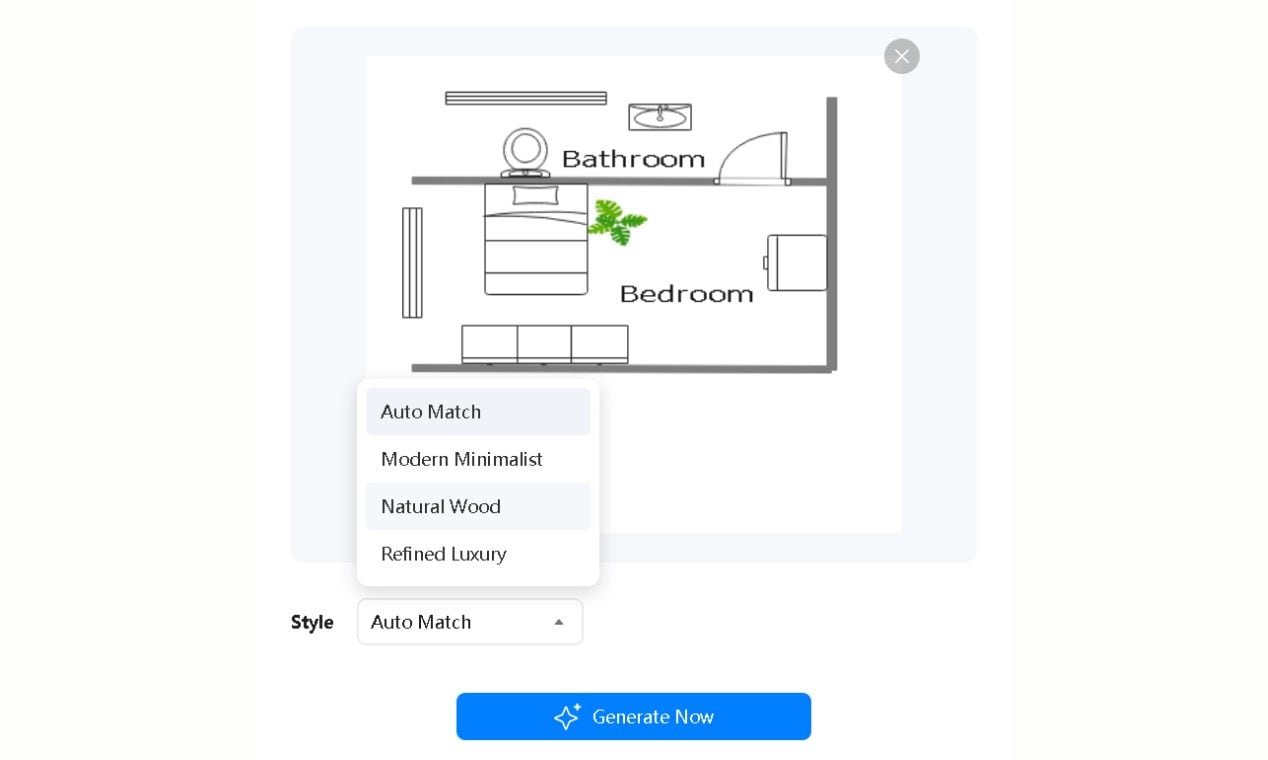
Step2 Choose Your Style and Generate
- On the canvas, select the area you want to convert to 3d version
- Click Floor Plan to 3D in the pop-up
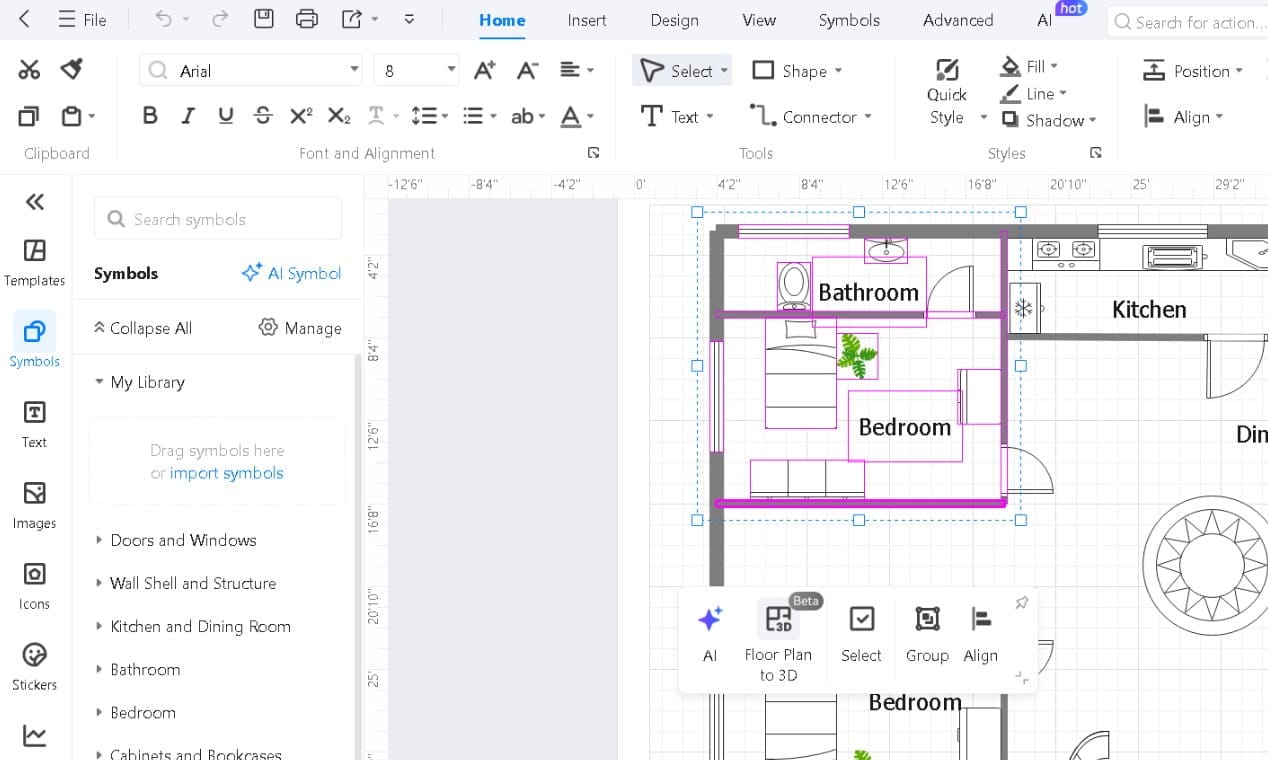
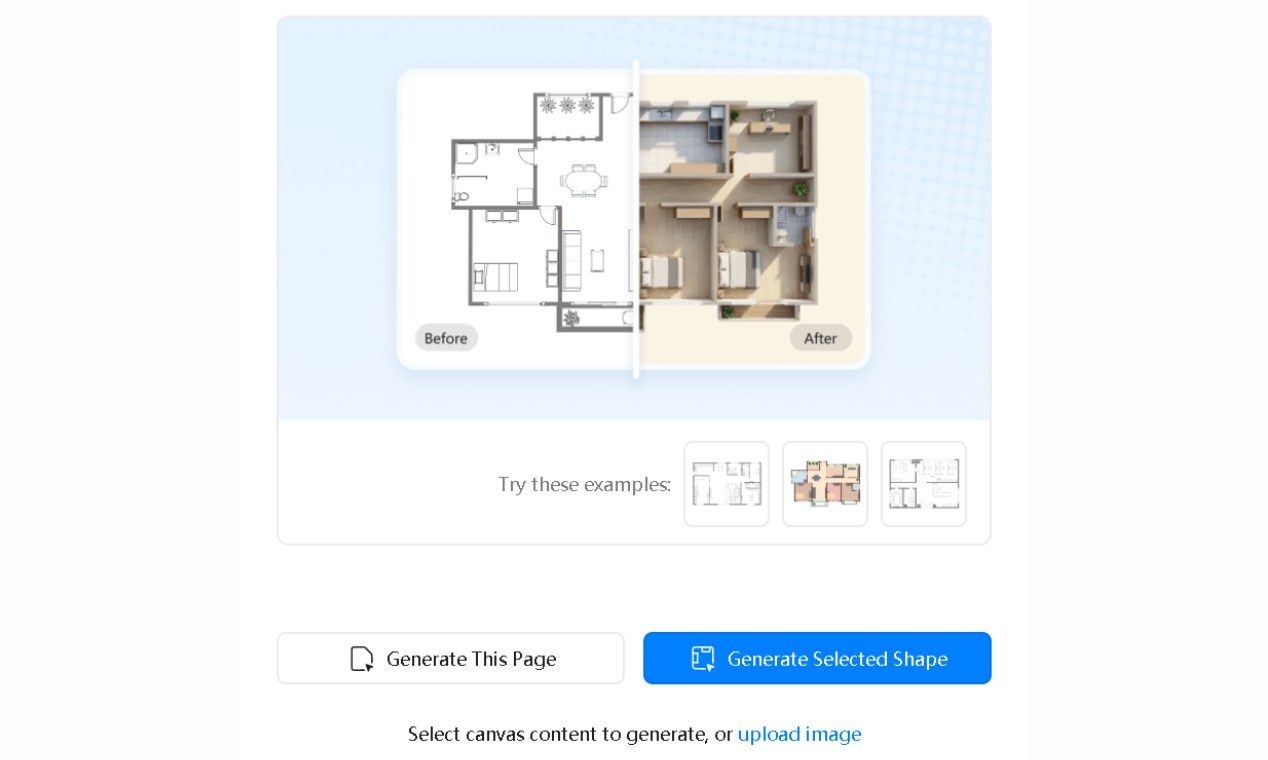
- A panel opens with a before/after preview
- Hit Generate This Page for the full canvas, or Generate Selected Shape for the selection you made
- Open the Style dropdown: Auto Match, Modern Minimalist, Natural Wood, or Refined Luxury
- Click the blue Generate Now button
I use Modern Minimalist for anything going to a contractor or planner, and Refined Luxury for client-facing residential work. The difference in how they land with different audiences is worth the extra second.
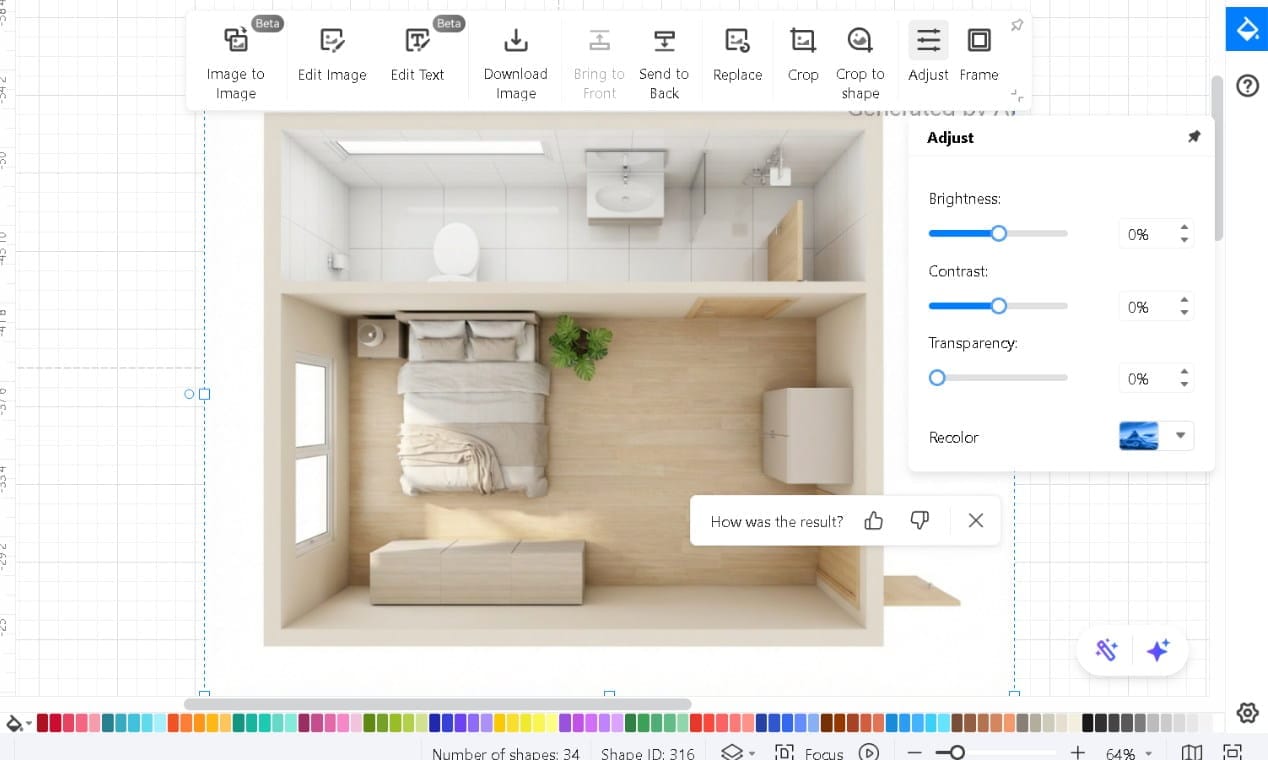
Step3 Review and Refine the Output
The result appears on the canvas labeled "Generated by AI." The image editing toolbar activates automatically when the image is selected.
- Use Adjust for brightness, contrast, and transparency
- Use Edit Image for background removal, object cleanup, and image enhancement
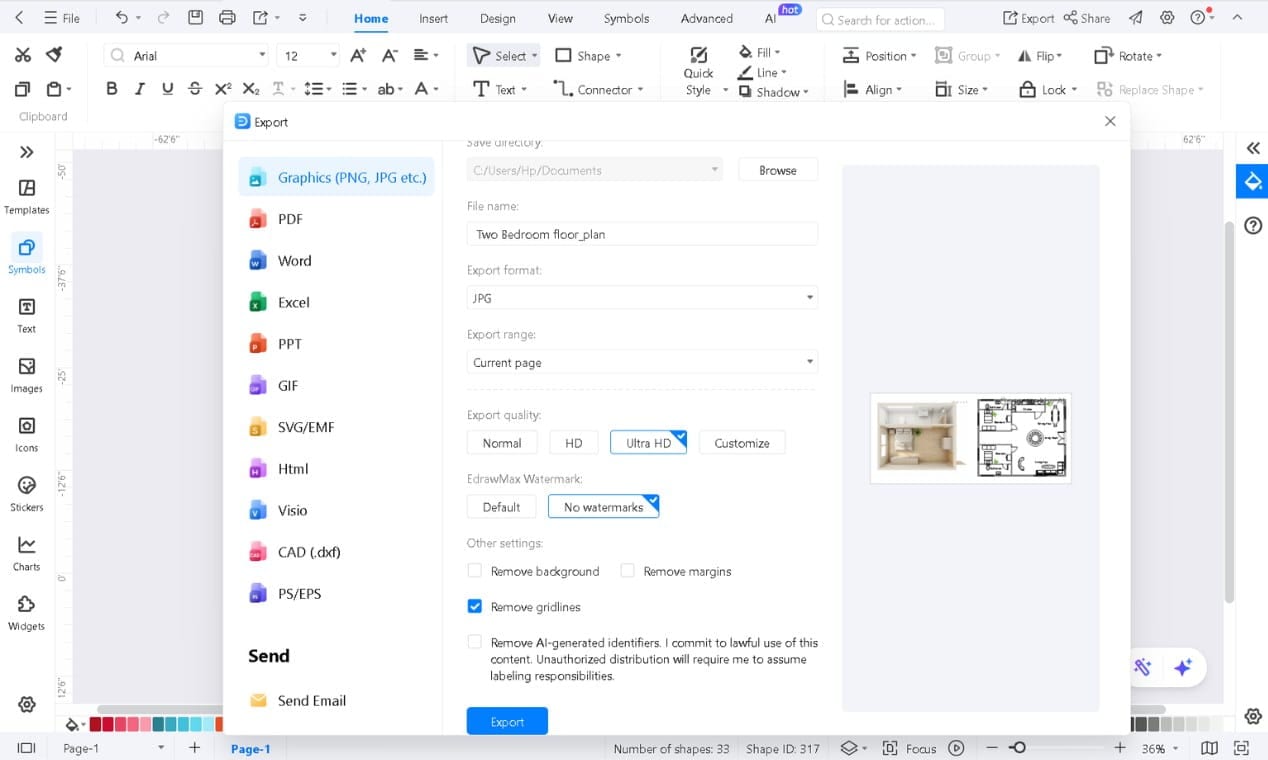
Step4 Export Your 3D Plan
- Once everything is in place, hit the Download Image button in the same pop-up menu to download the image only
- To export everything on the canvas, click the Export button in the top-right corner
- Choose your format: Graphics (PNG/JPG), PDF, Word, PPT, SVG/EMF, CAD (.dxf), and more
- Set quality to Normal, HD, or Ultra HD
- Click the blue Export button to download it
Expert Tips for Better 2D to 3D Conversions
Clean the 2D Before You Convert
The conversion reads your geometry directly. It doesn't interpret or correct.
Sometimes the problem in the output is obvious: a wall that didn't close properly renders as an open edge in 3D. Sometimes it's a subtle distortion that's genuinely hard to trace back to the source.
Either way, five minutes fixing the 2D is faster than debugging the generated result afterward.
Label Rooms Before You Hit Generate
Labels carry through to the 3D output automatically. Skip them on the 2D side, and you're placing text on a generated image afterward, which is slower and less precise than editing a clean canvas.
Two minutes up front. Do it before you click Generate Now.
Wall Height Has More Impact Than You'd Expect
Most floor plan tools default to standard residential ceiling height, around eight to nine feet. If your space isn't standard, that default makes the 3D look wrong in ways that are hard to place.
Adjust wall height before converting. Based on user feedback, that single change affects the output more visibly than any style selection does. Most people find this out on the second conversion, not the first.
Send the File. Skip the Presentation.
Export as PNG or JPG and send it directly. Clients open it on any device without software, plugins, or setup.
I've found that this changes the dynamic entirely. Instead of explaining what the plan shows, you're both looking at the room.
Irregular Layouts Need a Manual Pass
Auto-conversion handles rectangular rooms and standard residential geometry reliably. Angled walls, curved sections, and complex open-plan spaces are harder. The output is usually close, but not complete.
If your floor plan has unusual shapes, build editing time into the workflow. That's not a flaw; it's just where AI-generated output has natural limits.
Wrap-Up
Converting a 2D floor plan to 3D doesn't have to mean learning CAD, buying modeling software, and waiting for a render. That workflow exists for professionals who need it. Most people don't.
EdrawMax brings the whole process into one canvas: open your plan, click a button, pick a style, and export.
For me, the most useful part wasn't the 3D itself. It was having something I could hand a client without a presentation setup or a technical explanation.
I've worked around enough clunky multi-step processes in this space to notice when something actually delivers what it promises. And, EdrawMax does it really well. Try it on a plan you already have.
AI Diagram Generator
Enter your prompt. Upload files if needed. Generate diagrams, charts, or slides instantly.


