


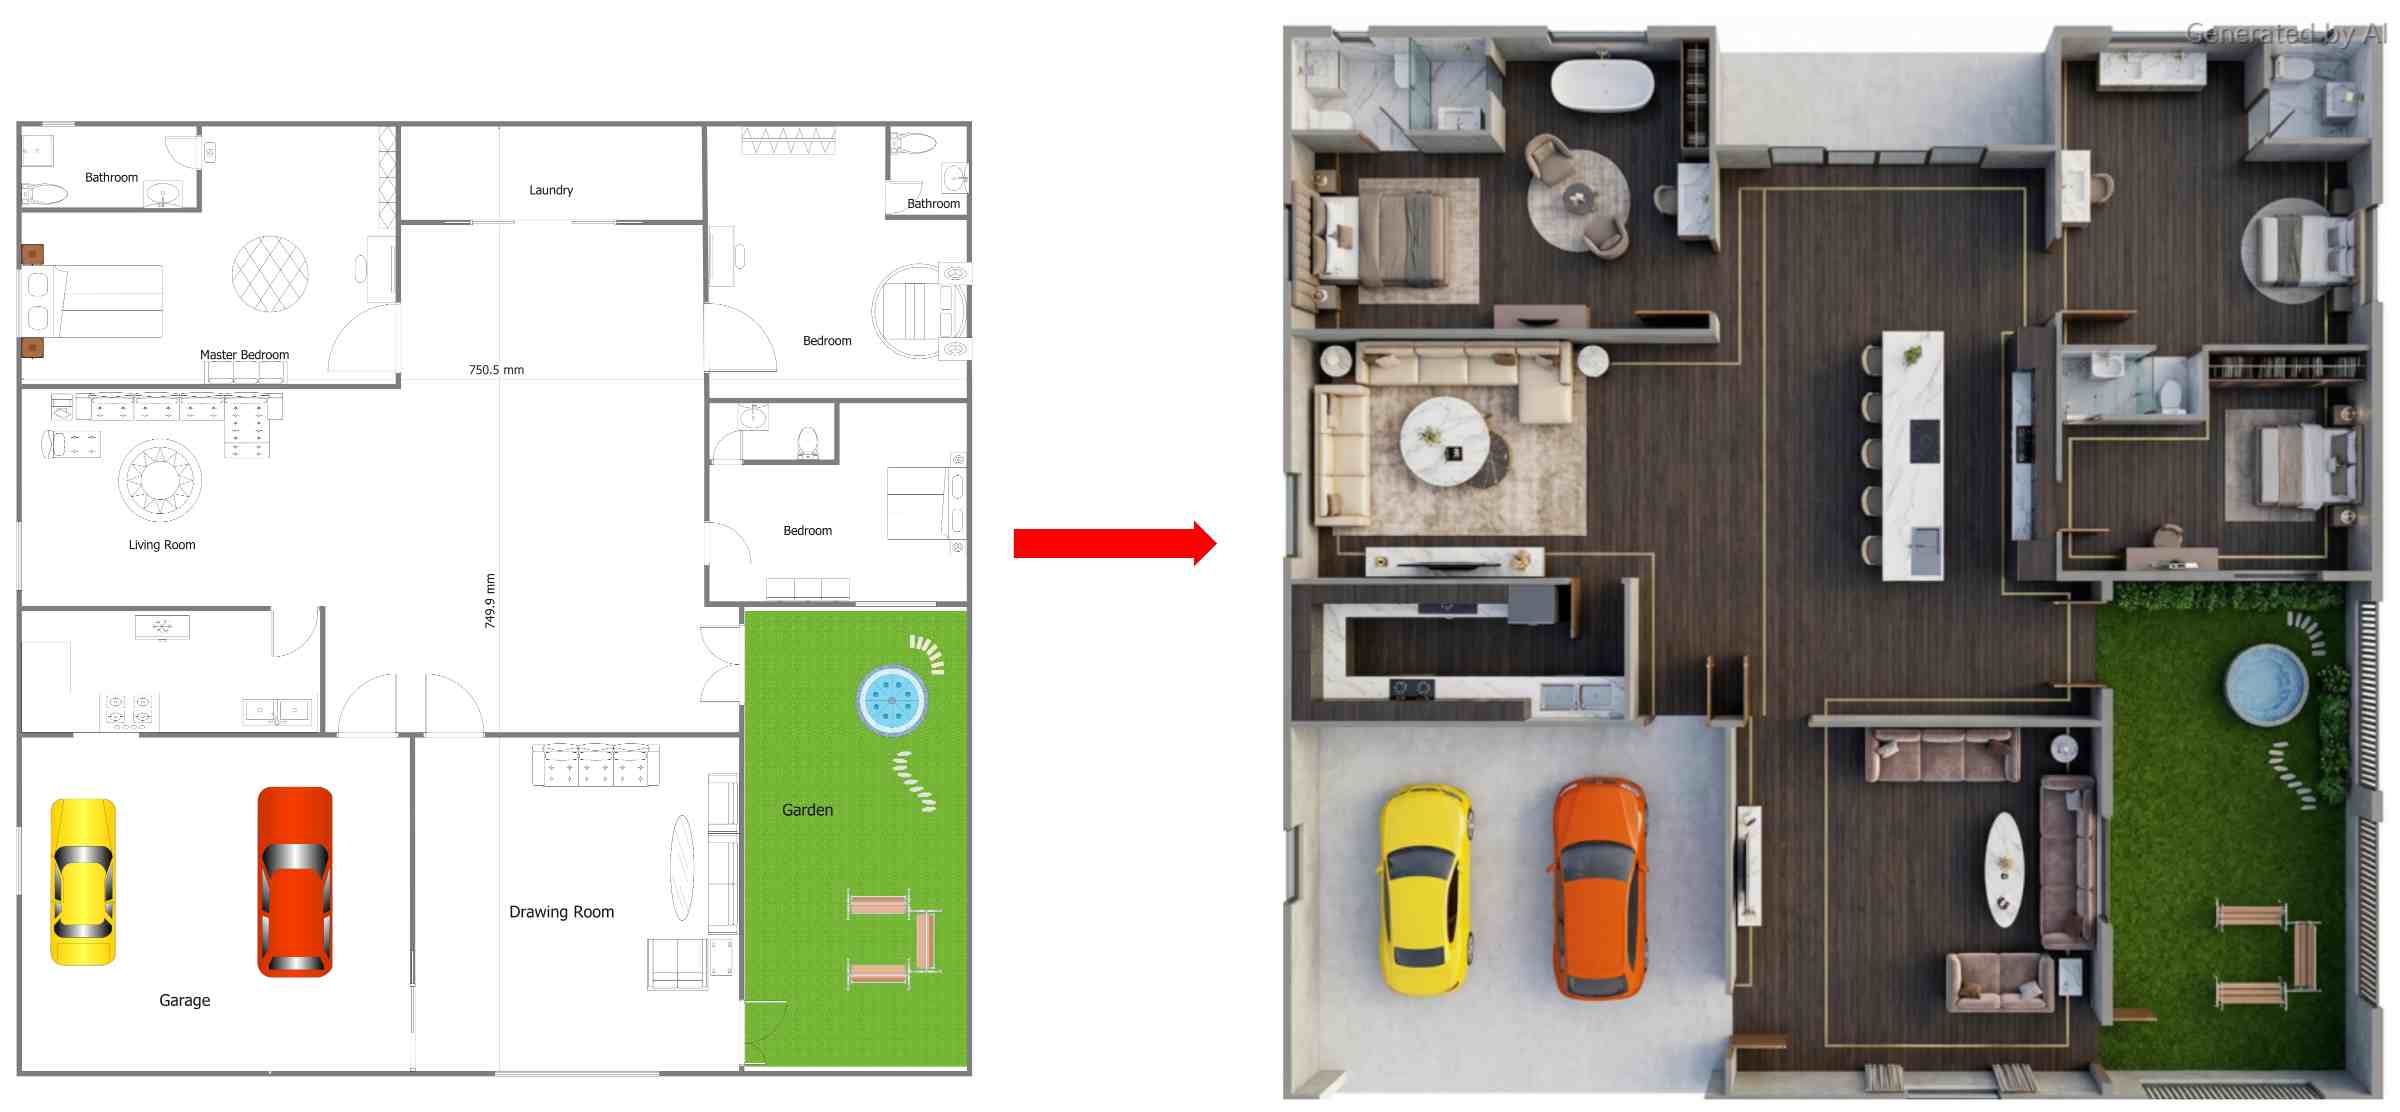
In recent years, users are moving towards 3D house and home design as opposed to 2D layouts. This shift is driven by the ability of 3D designs to provide a realistic and immersive view of spaces before construction even begins.
If you are building a new house or your house needs a makeover, a 3D house design will help you see each detail, including design and interior decorations. It enables more effective decision-making and reduces the number of expensive errors.
This article will teach you how to create a 3D house design using different methods, starting with sophisticated tools of the CAD program and ending with easy-to-use websites and even contracting professionals.
In this article
Why 3D House & Home Design is Essential for Your Project?
The reason why 3D House and Home Design is necessary is the fact that it bridges the gap between technical blueprints and human reality. It transforms the project on paper in an abstract line to the real, physical plan that eliminates guesswork.
Here is why it is an absolute necessity for any modern project:
- Better visualization: One of its biggest advantages is better visualization. It allows you to view your house realistically prior to a working day.
- Improves planning accuracy: It enhances the accuracy of planning, too. You can easily plan space, furnishings, and structure in a better way.
- Minimizes Errors: 3D design minimizes construction and renovation errors. It identifies potential problems during planning.
- Saves time and cost: It saves time as well as lowers the overall costs.
- Easier workflow and communication: As a whole, it makes the workflow smoother, the communication more understandable, and the final outcome more rewarding.
Method 1: How to Make a 3D House Design with CAD
Using CAD (Computer-Aided Design) software is a powerful method to create a 3D house design. Tools like AutoCAD, SketchUp, and Revit are popular because they are accurate and easy to use. These tools allow you to create detailed floor plans and convert them into realistic 3D models.
Here is how to make 3D house design using AutoCAD:
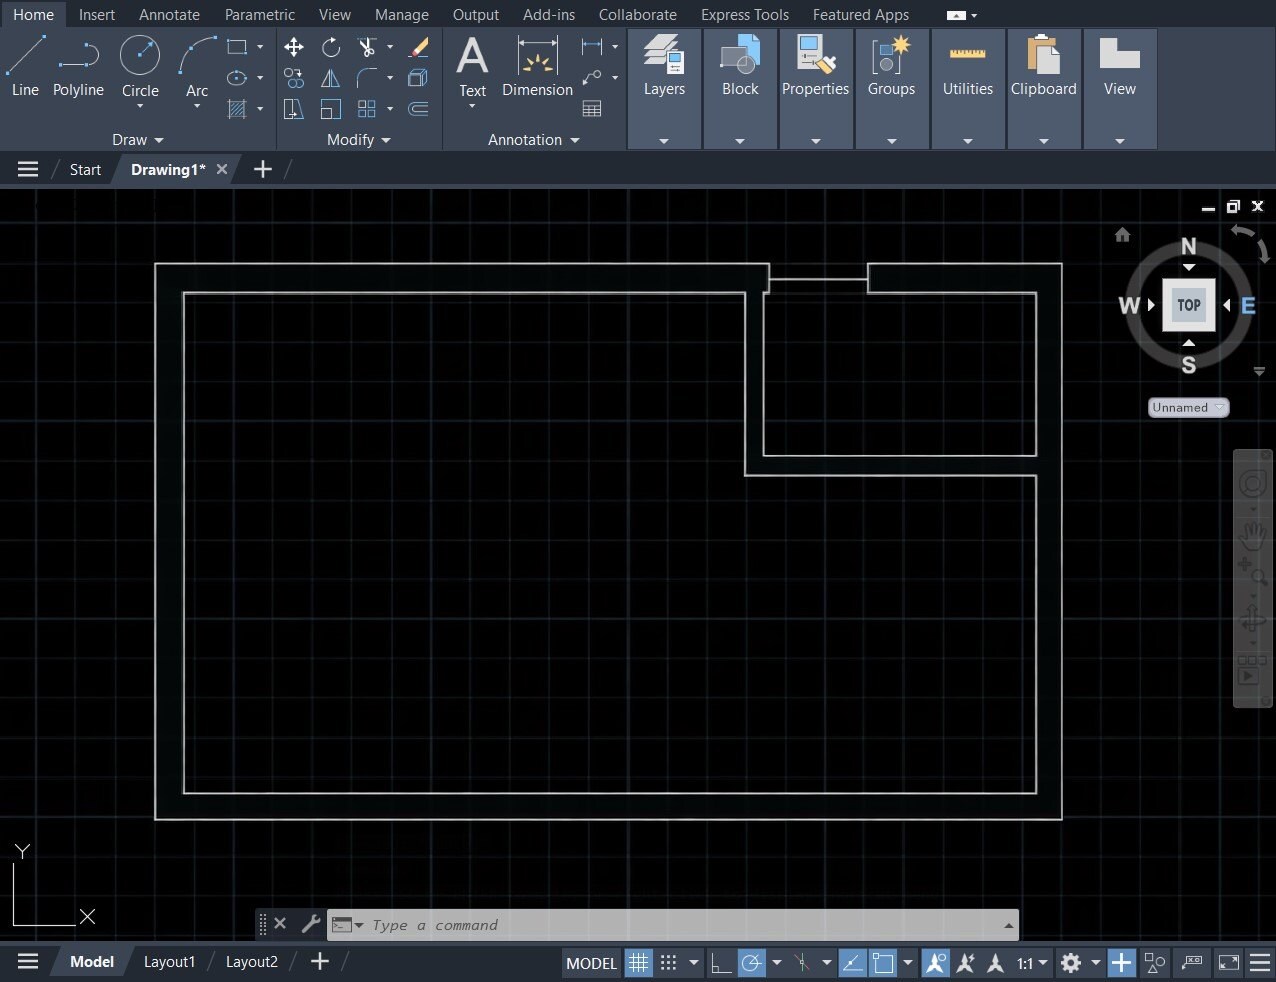
Step1 Draw the 2D wall layout
- Open AutoCAD and set your units to Architectural ('DDUNITS').
- Draw wall baselines and type 'REG', select all your wall lines, and press Enter.
- If it says "0 regions created," your lines don't meet at the corners, so fix the gaps and try again.
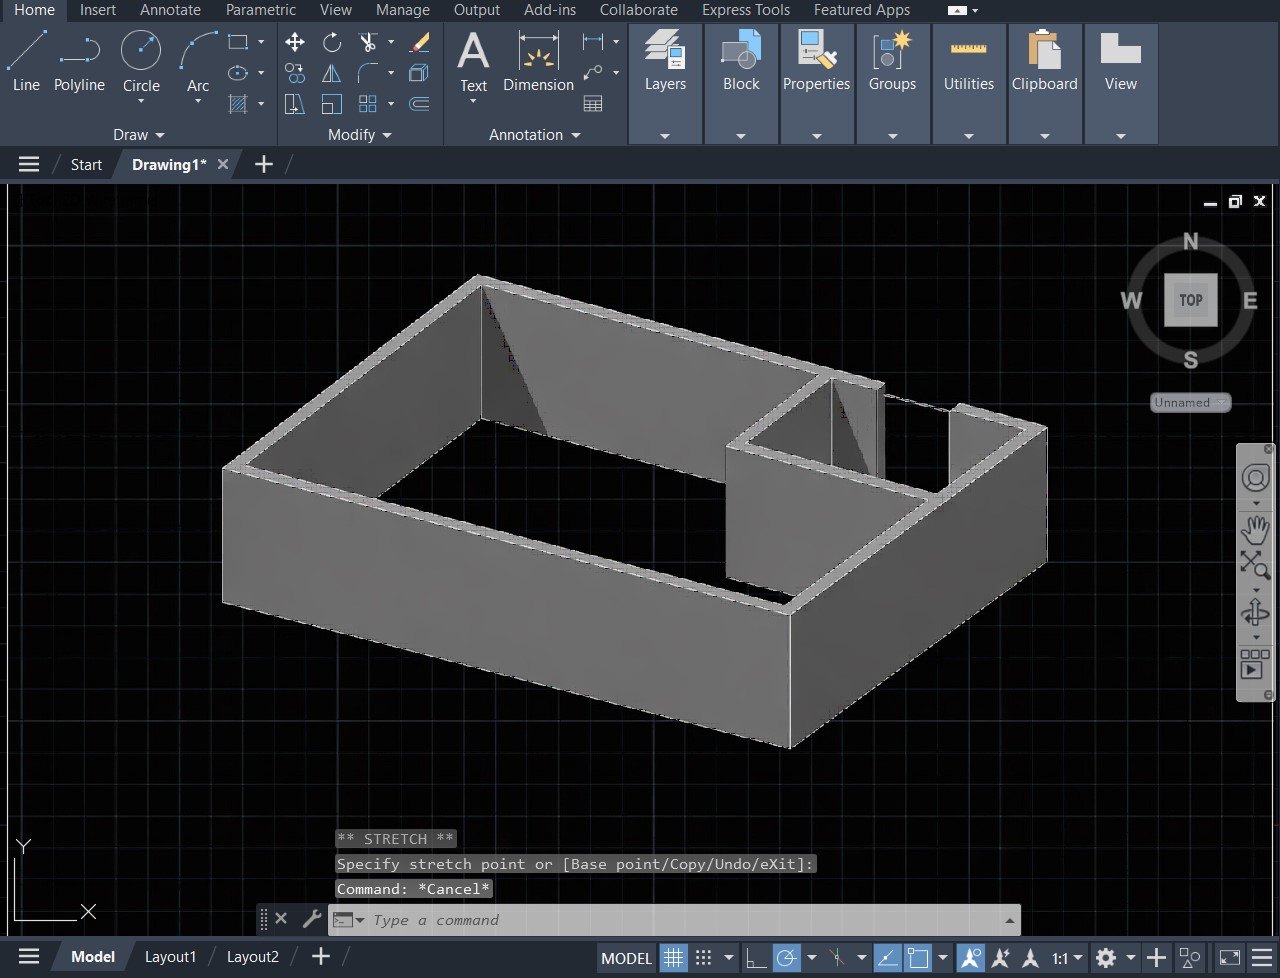
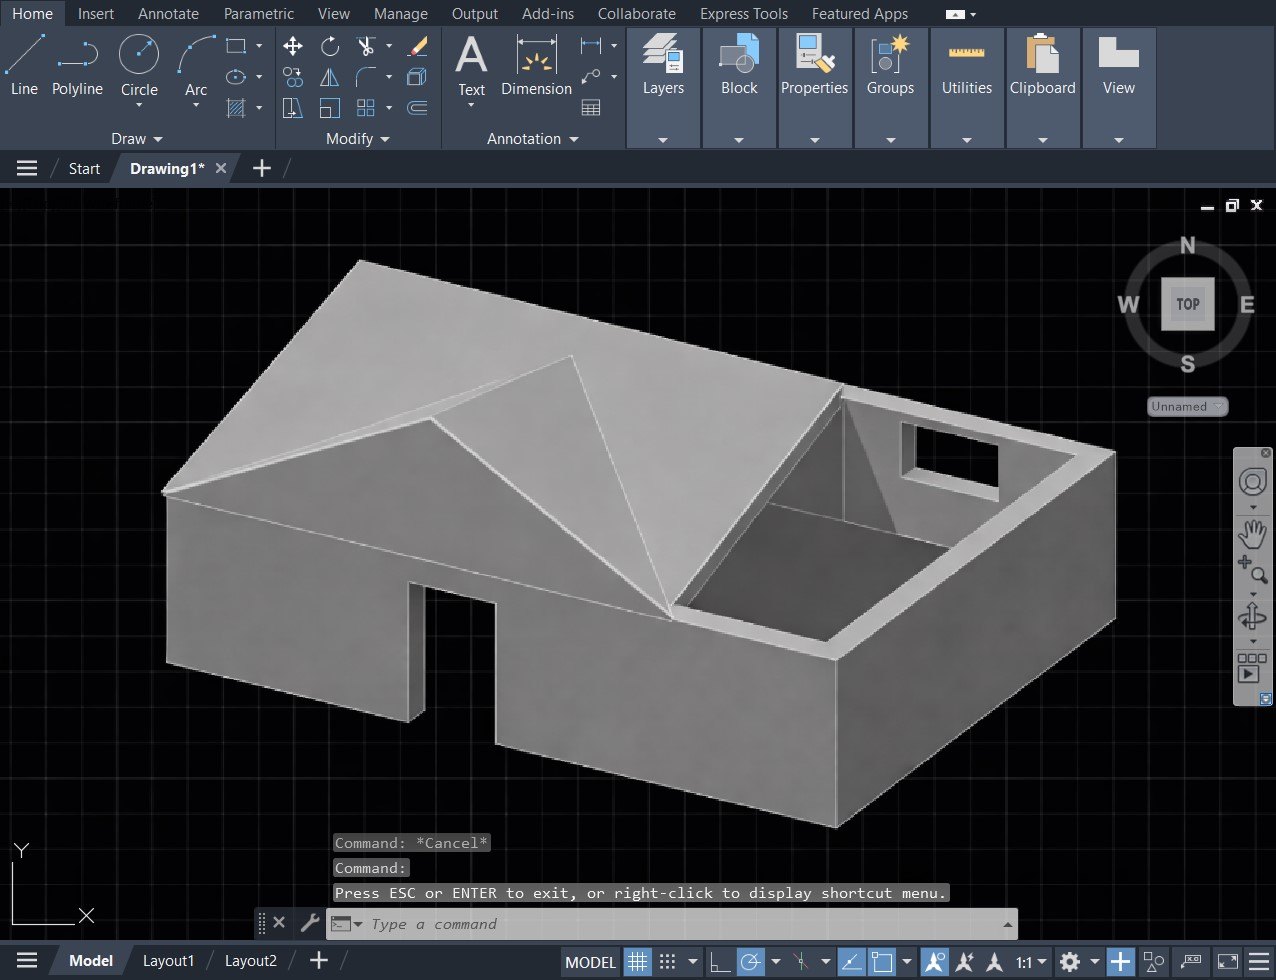
Step2 Extrude and subtract the walls
- Go to the SW Isometric view to see the 3D space.
- Type 'EXT' (Extrude), select your regions, and enter a standard height of 9'.
- To make the house hollow, use the 'SUBTRACT' command.
- First, click the big outer wall and press Enter.
- Then, click the smaller inside areas and you will get a solid wall shape.
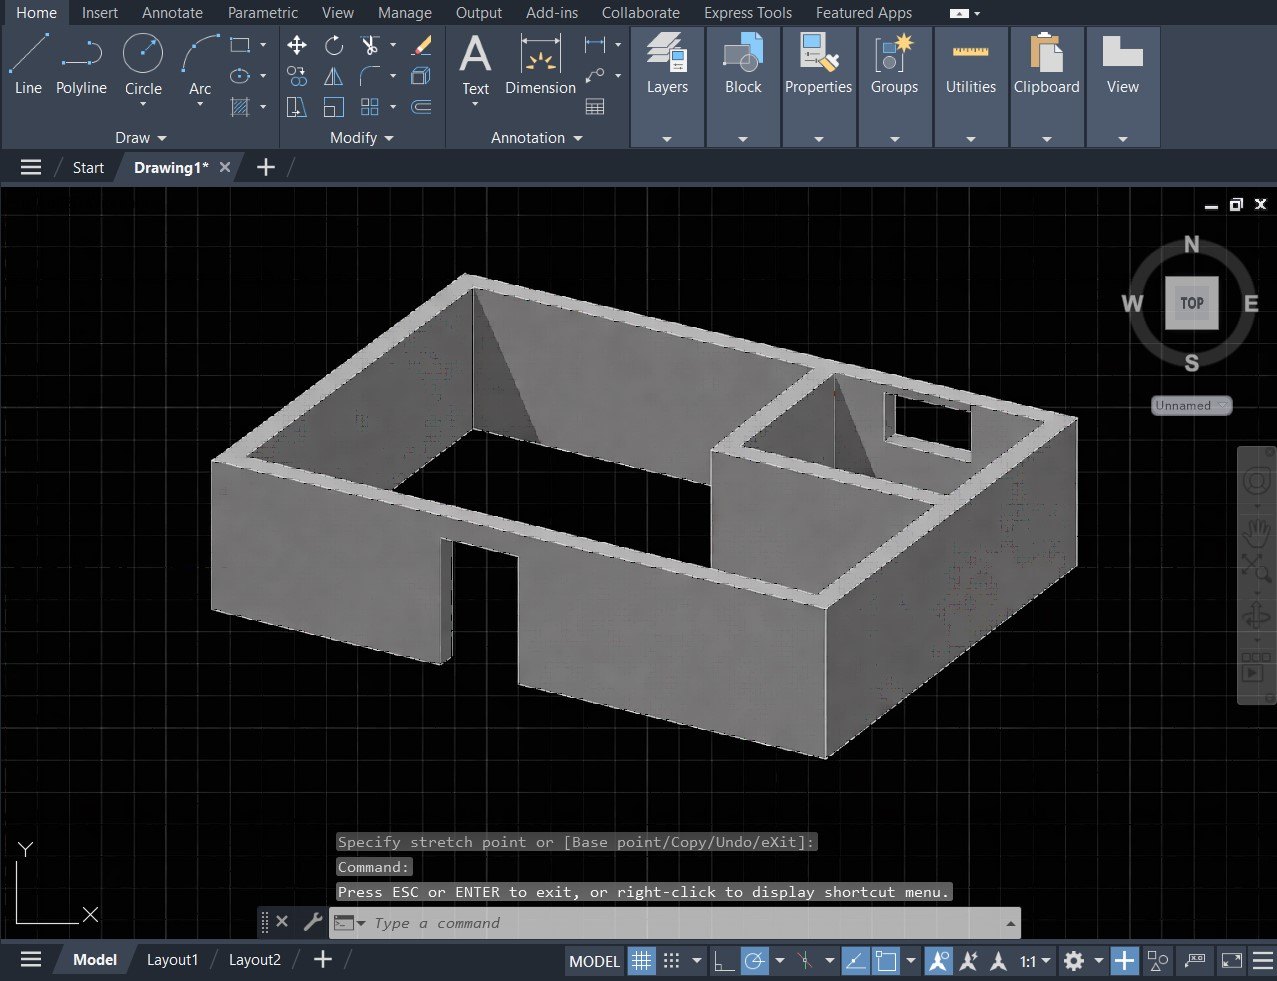
Step3 Create door and window openings
- Draw a Rectangle on the ground where a door or window should be.
- Extrude the rectangle to the height of the opening (e.g., 6'8" for a door).
- For windows, use the 'MOVE' command to lift the box up the Z-axis (e.g., '@0,0,3'8').
- Use the 'SUBTRACT' command to remove these boxes from the main wall, leaving a clean opening.
Step4 Build the roof pitch and gables
- Change your UCS (User Coordinate System) using the 3Point option.
- Click three corners of the side wall so your "grid" is now vertical on the side of the house.
- Draw the triangular shape for the gable and Extrude it across the building.
- Use the 'UNION' command to fuse the triangular top to the rectangular wall below it.
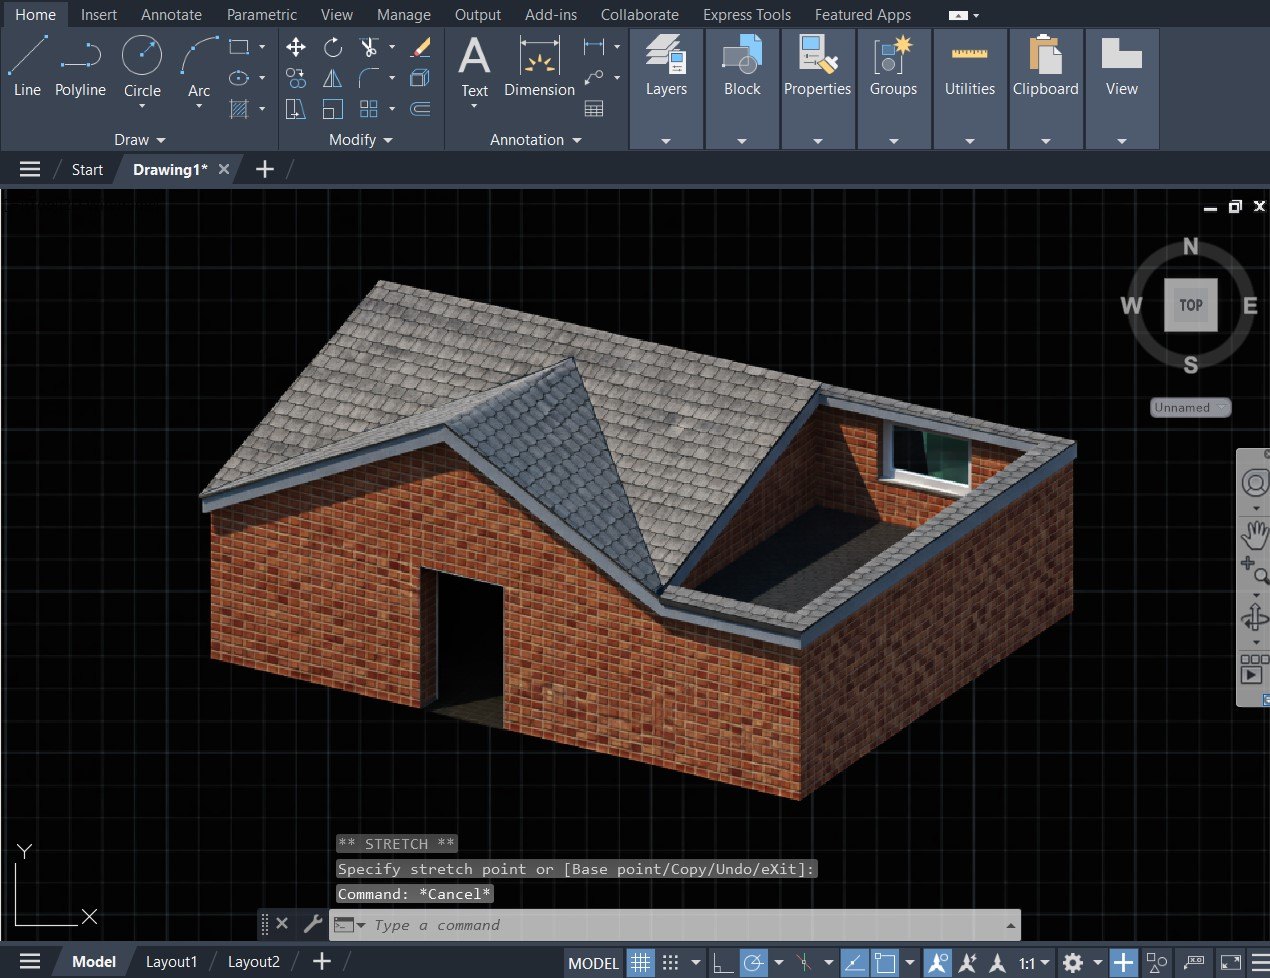
Step5 Apply materials and Render
- Open the Materials Browser (MAT) and drag textures like brick, glass, or roof slate onto your house parts.
- Once textured, type RENDER. A separate window will open and calculate the light and shadows to create a high-quality photograph of your 3D design.
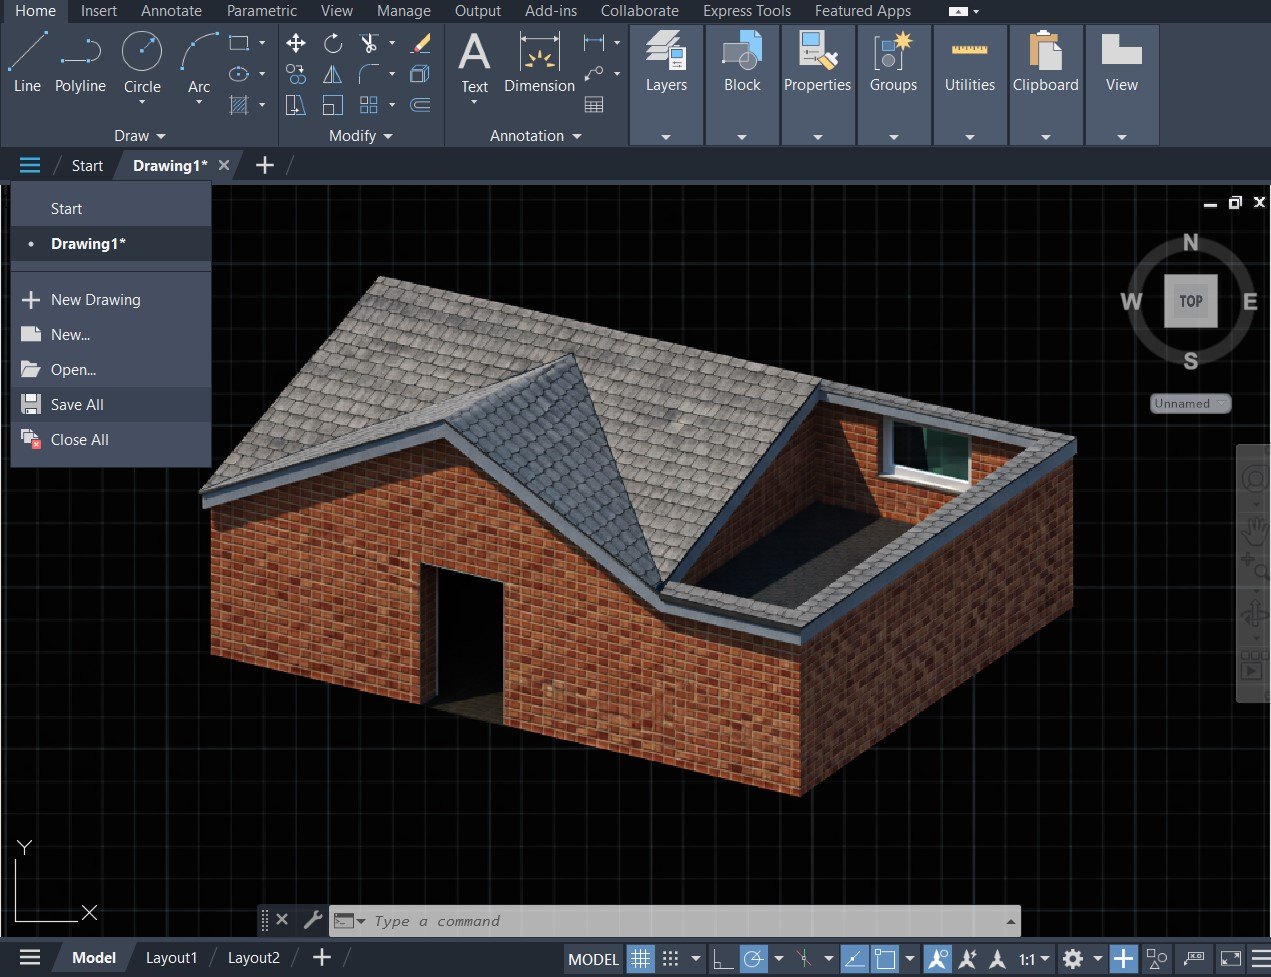
Step6 Save and Export your work
- To keep your project editable, type SAVEAS and save it as a .dwg file.
- To share your work with others, use the EXPORT command.
- You can choose PDF for easy viewing, or STL if you plan to send the file to a 3D printer.
Why CAD Is Hard for Beginners to Learn
CAD is an excellent tool for designing 3D houses, but beginners may face some challenges:
- Steep learning curve: CAD software has many tools and commands that take time to learn, especially for beginners.
- Professional-focused features: Most functions are designed for architects and engineers, which can feel technical and overwhelming.
- Limited free access: While some CAD programs offer free trials, advanced features usually require paid subscriptions.
Method 2: How to Create 3D Home Design with EdrawMax
EdrawMax is an excellent alternative for creating 3D home designs without the complexity of traditional CAD tools. It is especially suitable for beginners, homeowners, and even small-scale designers who want quick and visually appealing results.
Here is the easiest way to build your 3D home:
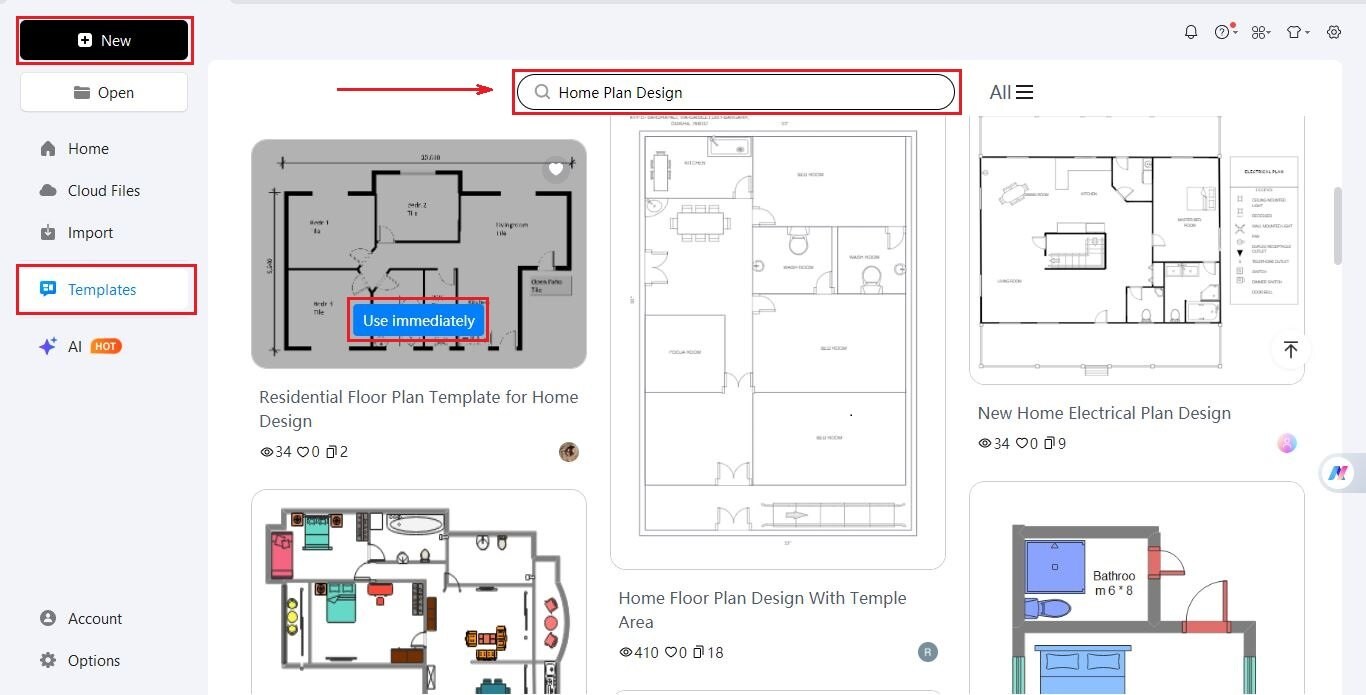
Step1 Login & pick a template
- Open EdrawMax and log in using your Wondershare ID or any social account.
- Go to Templates and search for Home Plan Design.
- Browse the options and click Use Immediately to start editing.
Step2 Customize your layout
- Drag walls, doors, and windows from the Symbols library onto the canvas.
- Search the library for furniture like sofas, tables, or kitchen sets. Drag them into your rooms.
- Use the menu bar on the screen to change the colors, adjust scale and size, etc., to match your project requirements.
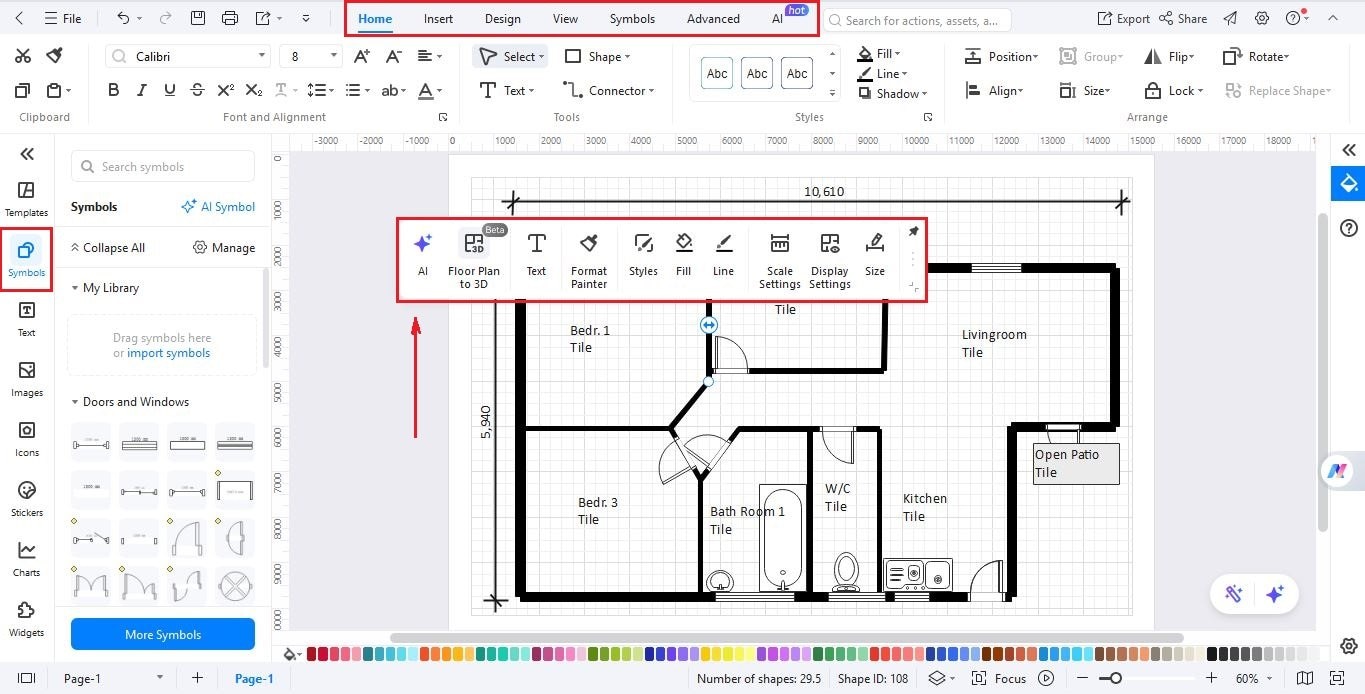
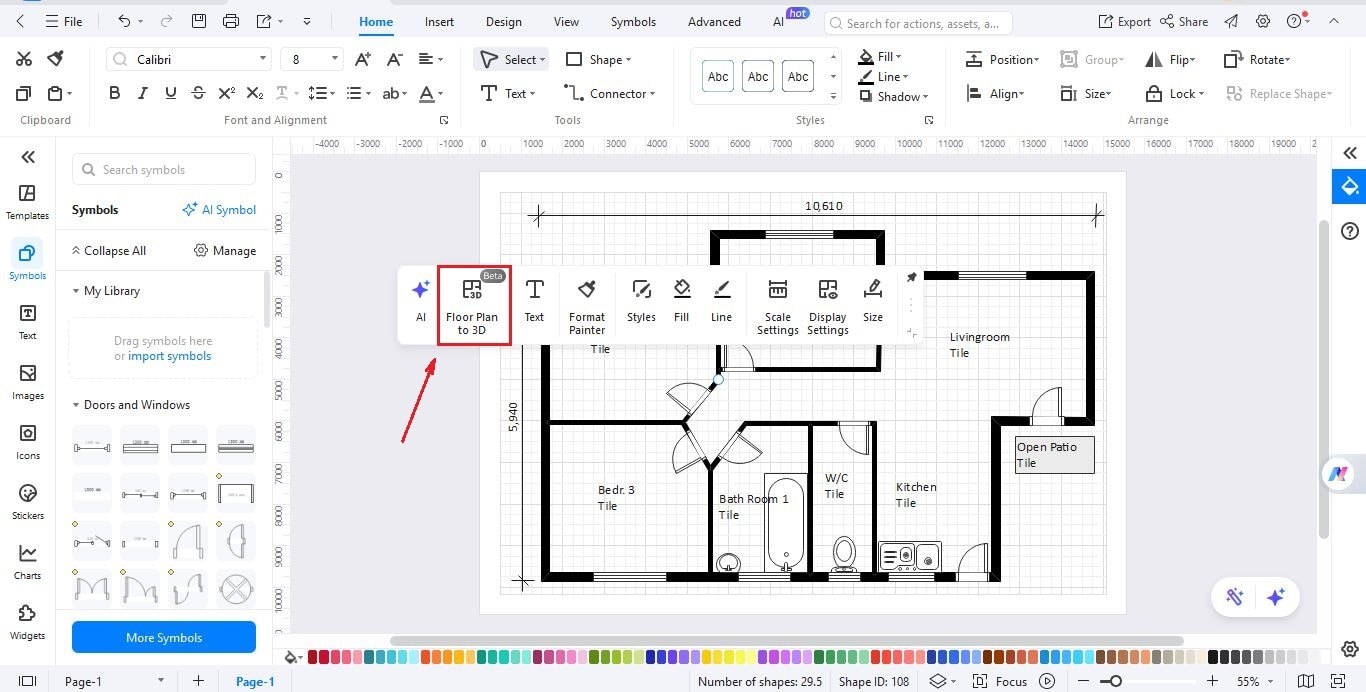
Step3 Convert the 2D plan into 3D
- Once your flat 2D plan is finished, click the Floor Plan to 3D button on the toolbar.
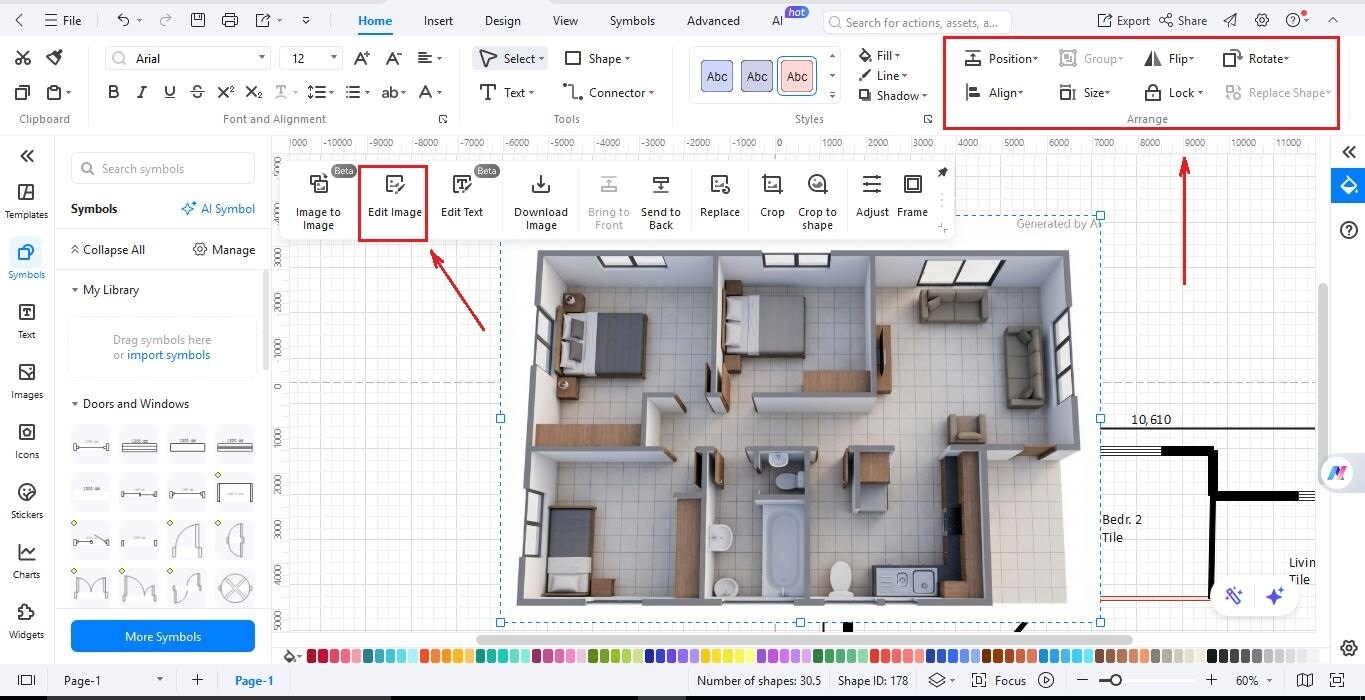
- Adjust the style, and click Generate Now, and EdrawMax will instantly transform your drawing into a 3D model.
Step4 Rotate and inspect
- Use your mouse or options in the top toolbar to rotate the design and look at it from every angle.
- Check for any mistakes and make changes to make the design perfect.
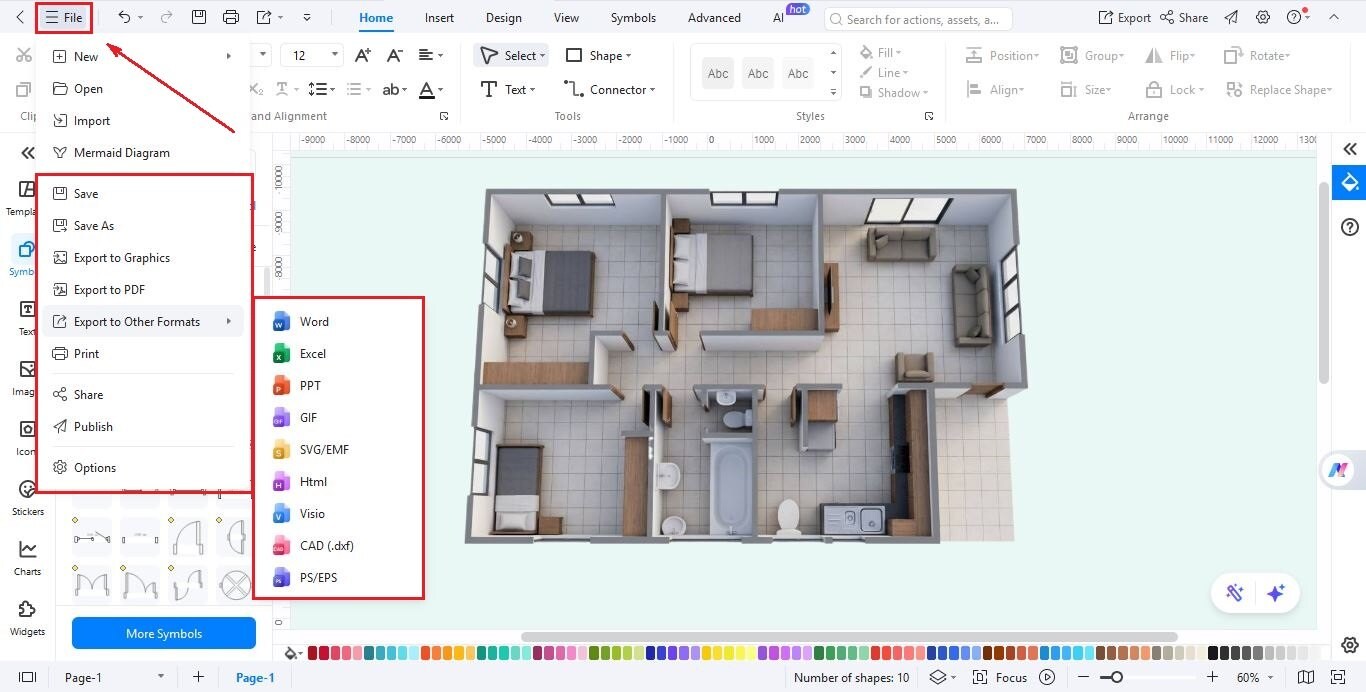
Step5 Save and export
- When you’re happy with the design, go to File > Save.
- To share it with others, click Export and choose a format like JPG, PDF, etc.
- You can also print the plan to show your builder exactly what you want.
Key Advantages of EdrawMax
- Simple interface: It is not complicated like CAD software, which means that it can be used by users with all levels of skills. The tools are straightforward, and most actions can be performed with simple clicks and drag functions.
- Massive library of symbols and templates: It has more than 26,000 symbols and 1,500 templates. You can add furniture, appliances, decorations, and walls to make your design look complete and detailed.
- Convert 2D plans into 3D: Select any 2D floor plan and convert it into a real 3D design with a single click. This will help you view how your space will appear in real life.
- Online access and collaboration: You can design directly in your browser without the need to install anything. You can save your work on the cloud and share it with others to get feedback on it.
- Works on any devices: EdrawMax works smoothly on laptops, tablets, or desktops. This means that you can create at any time and place without worrying about compatibility with a device.
- Simple export and sharing: You can export your designs in various formats, such as PDF, JPG, PNG, or SVG. It is simple to share them with clients, friends, or family.
Method 3: Hiring a Professional Designer
Another effective way to create a 3D home design is to hire a professional designer or architect. The professionals possess the experience and knowledge to provide you with quality, detailed, and personalized designs that suit your needs and preferences. They also apply hi-tech tools and industry expertise to make sure that they are accurate and functional.
Nonetheless, the approach does have some negative aspects. The greatest drawback is that it is costly since professional services may be costly based on the nature of the project. Also, repetitive communication, revision, and feedback cycles are frequently a part of the process and can be time-consuming.
Despite these challenges, hiring a professional is a great option if you want a polished, expert-level design without investing your own time in learning design tools.
Closing Thoughts
Designing a 3D house model helps you bring your home dream into reality. This is the most appropriate method of making sure that your home design and renovation project is smooth and efficient. It does not matter whether you are utilizing the complex CAD software, the easy-to-use EdrawMax software, or even a professional; there are plenty of benefits of 3D modeling.
EdrawMax is an ideal combination of accessibility and functionalities to start with, and professionals may take their 3D home designs to the next level. A 3D solution will save your time, minimize expensive errors, and help you build without hesitation.
AI Diagram Generator
Enter your prompt. Upload files if needed. Generate diagrams, charts, or slides instantly.


