




What is a Reflected Ceiling Plan?
Quick answer: A reflected ceiling plan (RCP) shows the ceiling as if it were reflected onto a horizontal plane below it.
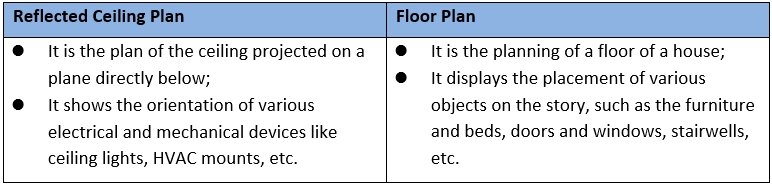
| RCP | Floor plan |
|---|---|
| ceiling elements | rooms, walls, doors, furniture |
1.1 Reflected Ceiling Plan Definition
A Reflected Ceiling Plan is a type of architectural drawing, where the plan of a ceiling gets projected on a flat plane placed directly below, displaying the orientation of various electrical or mechanical objects within the ceiling.
A Reflected Ceiling Plan is but a part of architectural drawings, showing the placement of various objects like sprinklers, smoke detectors, and any other mechanical or electrical objects on the ceiling.
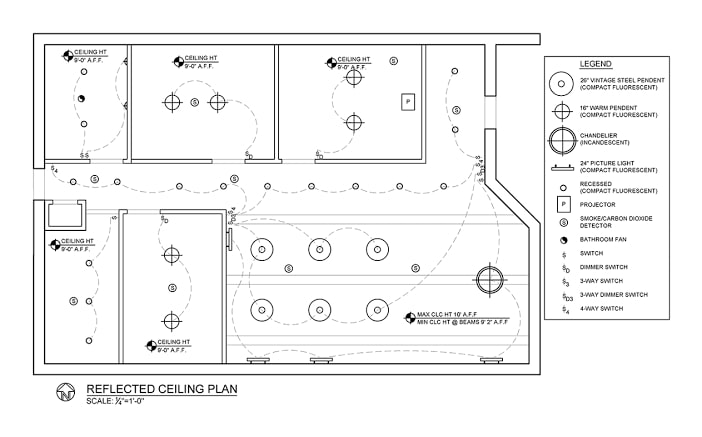
1.2 What Does an RCP Include?
A reflected ceiling plan shows components of the ceiling reflected on the floor using symbols and icons.
- Alarms
- Air vents
- Speakers
- Decorative accessories
- Lighting
- Air conditioning
- Sprinkler systems for safety
What is the Purpose of a Reflected Ceiling Plan?
As we can see from its definition, a Reflected Ceiling Plan or RCP is used to understand the orientation of various objects within the ceiling.
Symbols in a Reflected Ceiling Plan
Various symbols denote different electrical and mechanical objects in a Reflected Ceiling Plan.
1. Lighting Symbols
Includes different types of lights installed on the ceiling like Luminaire ceiling light, Wall lights, Down lights, etc.
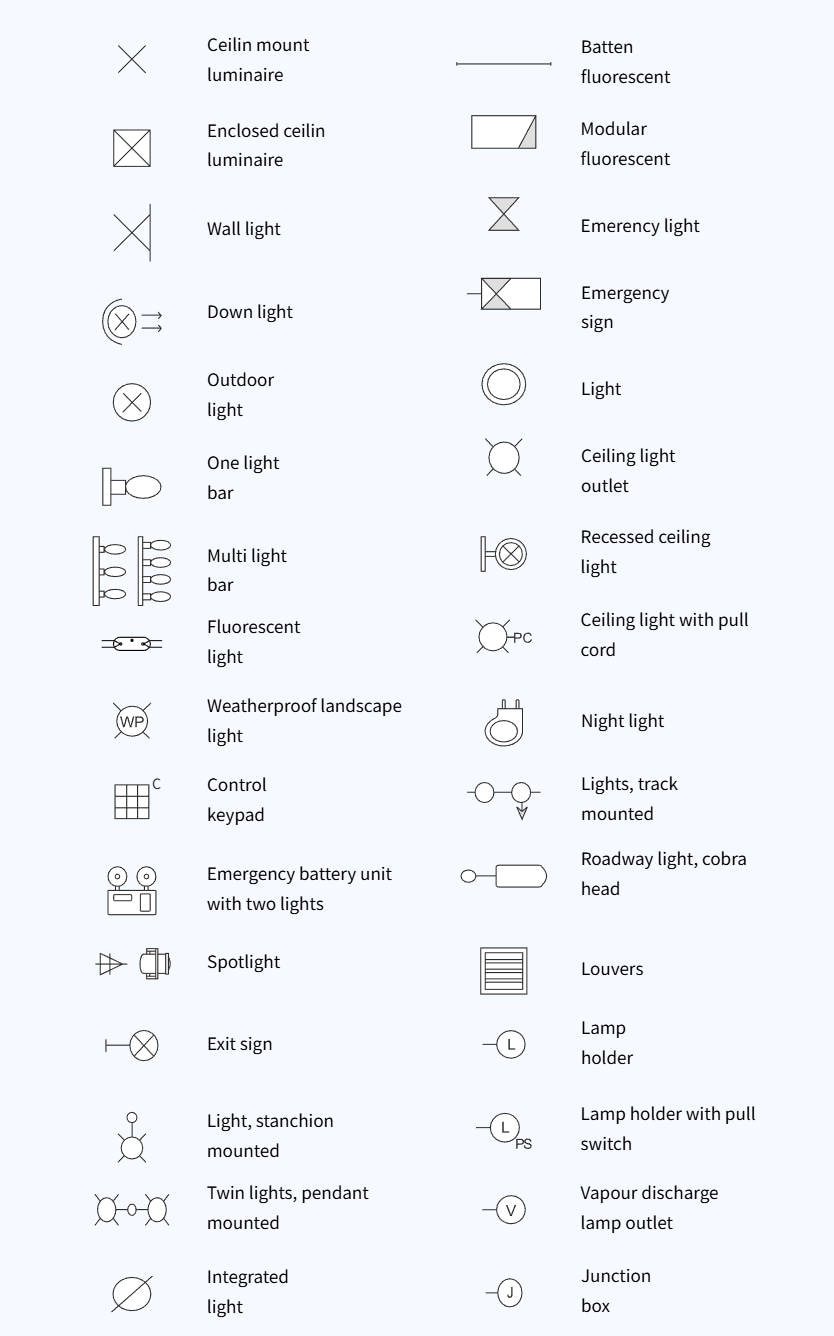
2. Electrical & Telecom Symbols:
Includes various electrical devices like Switches, Circuit breakers, etc.
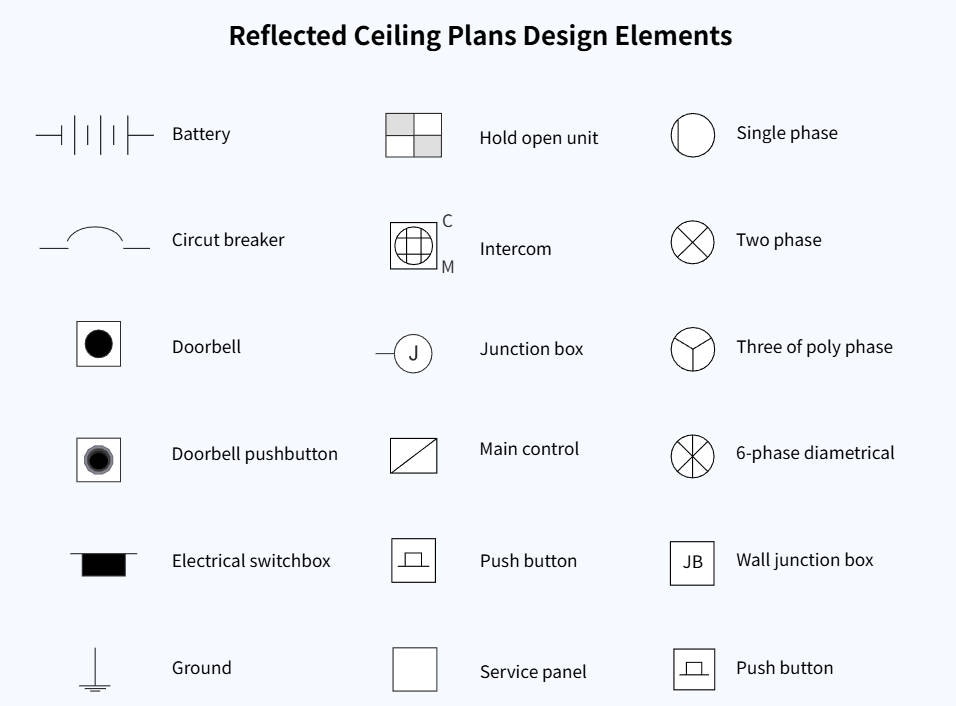
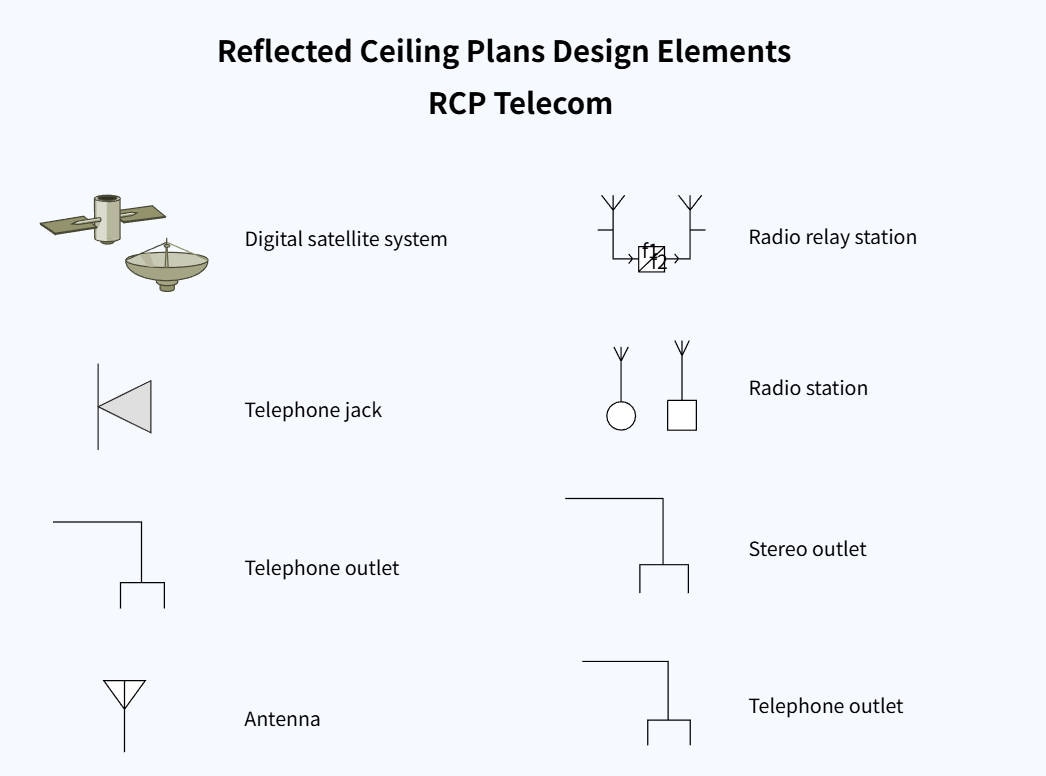
Reflected Ceiling Plan vs. Floor Plan
1. Misunderstandings about Reflected Ceiling Plans
As I said before, there are a few misunderstandings regarding Reflected Ceiling Plans.
1.1 A Reflected Ceiling Plan is not a part of a Floor Plan:
The simplest explanation as to why we use RCPs is to avoid over-congestion on Floor Plans.
1.2 A Reflected Ceiling Plan is not a mirrored reflection Floor Plan:
You may have heard designers and architects talking about the “floor-ceiling balance”; they are not talking about a reflection or reversal of the flooring.
2. Differences between Reflected Ceiling Plans & Floor Plans
Check out the table below to understand the differences between a Reflected Ceiling Plan & a Floor Plan:
Examples of Reflected Ceiling Plan
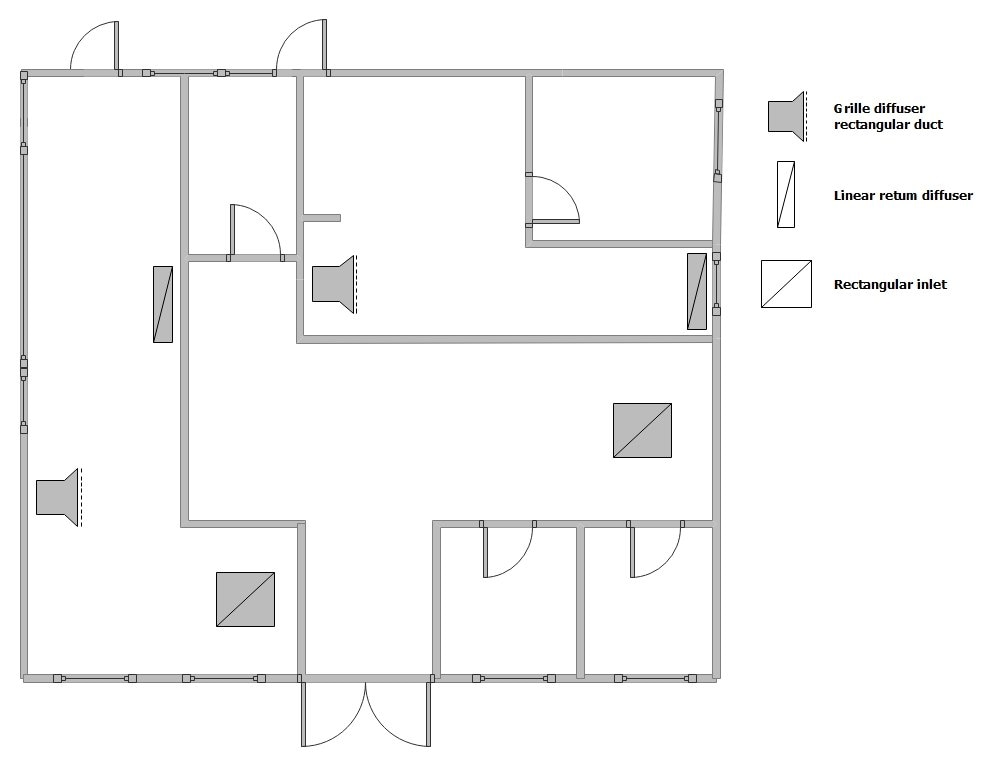
To make a reflected ceiling plan quickly, we can use a preset template.
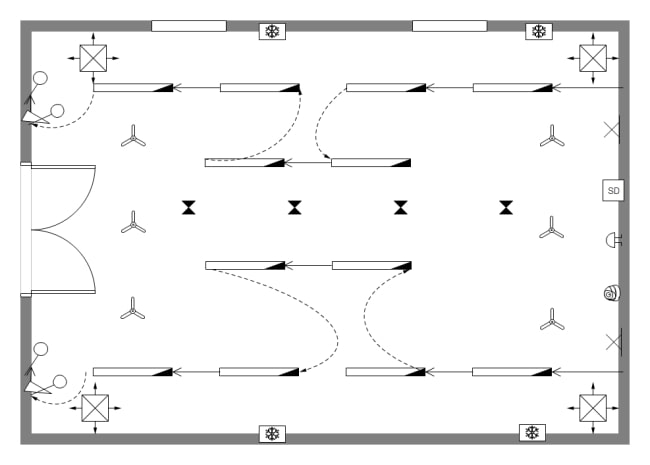
1. Office Reflected Ceiling Plan
The following image shows the Reflected Ceiling Plan for an office, more specifically, the conference room in an office.
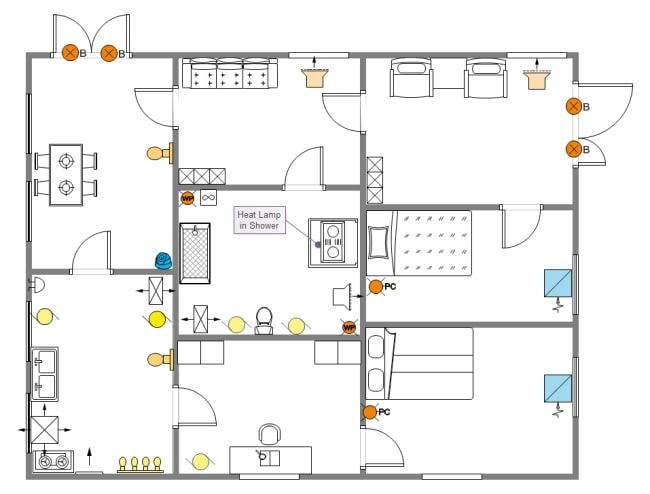
2. Home Reflected Ceiling Plan
The following image shows the Reflected Ceiling Plan of a house.
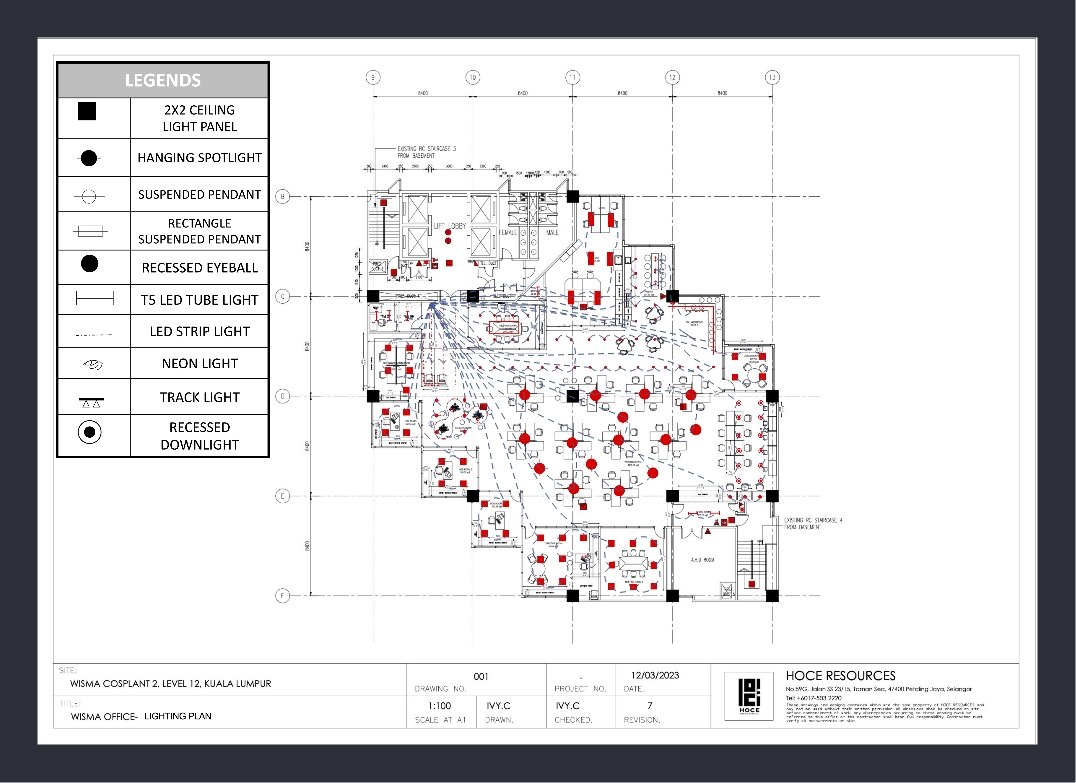
Reflected Ceiling Plan With Legend
If you want something a bit more detailed, here’s a good template of a reflected ceiling plan with legends.
Classroom Reflected Ceiling Plan
Lastly, here’s something a bit simpler. A classroom needs a few lights and electrical connections.
This is a great start if you don’t want to edit much from the template.
How To Create a Reflected Ceiling Plan
Alright, this is the part where we learn how to draw a Reflected Ceiling Plan.
Relax, there is an excellent diagramming tool with a variety of diagramming templates, EdrawMax .
Before you start drawing a Reflected Ceiling Plan, understand the concepts and components involved.
The next most important thing is to familiarize yourself with the diagramming tool you want to use.
Even though you will find a step-by-step guide just below, it is better to understand the interface and the positioning of the various drawing tools available to you.
 Get 500 free AI tokens
Steps tp make a reflected ceiling plan
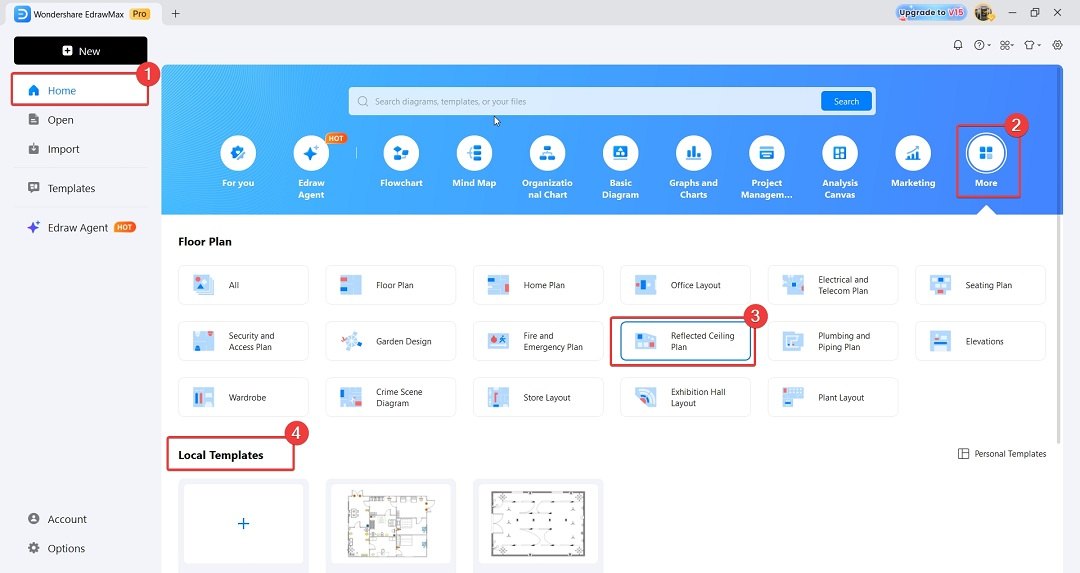
Step1 Launch and Open a New Template
Follow the steps below to begin creating a reflected ceiling plan with EdrawMax:
- Go to Home > More > Floor Plan
- Select the Reflected Ceiling Plan
- Choose from any of the Local Templates or create a Blank Drawing.
Step2 Add the Symbols and Form the Plan
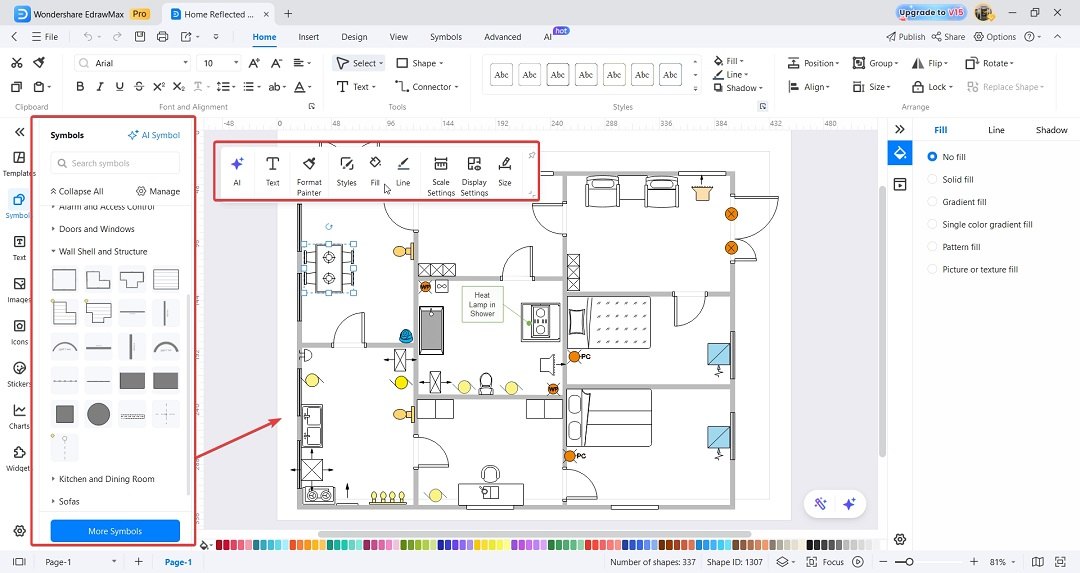
Once you’re in the canvas, there are several things you can perform:
- Drag icons from the Symbols panel from the left side
- Re-arrange icons by using the drag-and-drop function
- Edit texts by double-clicking on shapes or existing text boxes
- Click on an element to bring up context-specific customization options
Step3 Export and Share
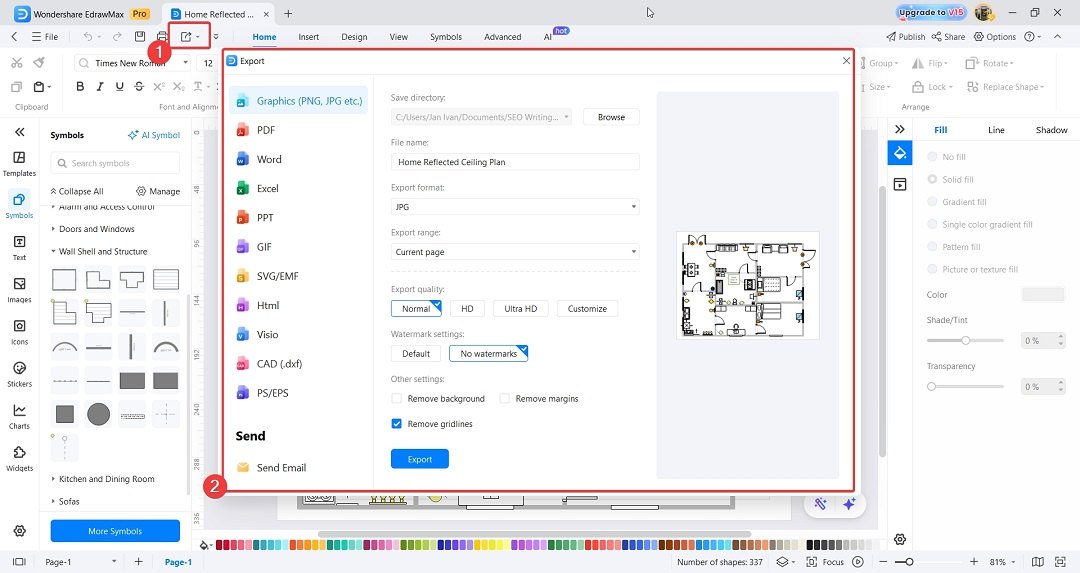
Once done customizing the reflected ceiling plan, you can now export your work:
- Click the Export button from the main ribbon.
- On the pop-up window, choose the file type (JPG, PDF, Word, CAD, etc.)
Tips on Making an Attractive Reflected Ceiling Plan
- Stay true to your budget because you do not need to renovate everything, few pieces at a time is the trick;.
- Innovative design is perfect, but one without any practicality is the worst;.
- Keep in mind that you choose the appropriate style along with the correct level of details in accordance to you or your client’s needs;.
- Always double-check your measurements; if it is off by so much as an inch then the whole thing gets disqualified, and you have to do the same task twice over;.
- Use the symb
AI Diagram Generator
Enter your prompt. Upload files if needed. Generate diagrams, charts, or slides instantly.


Why is it called a reflected ceiling plan?
The ceiling is drawn as though reflected onto a mirror placed on the floor, so viewers can read the overhead layout in the same orientation as the floor plan.What is the difference between an RCP and a floor plan?
A floor plan looks down at walls, doors, rooms, and fixtures. An RCP looks up and coordinates ceiling finishes, lighting, mechanical outlets, and other overhead components.



 (AI & Web)