


APUs serve as the backbone of modern gaming consoles, offering powerful yet compact computing solutions. These chips are highly efficient when it comes to reducing energy consumption and saving space. By integrating both the CPU and GPU on the same chip, APUs enable faster communication and seamless information transfer between the two components.
In this guide, we are going to discuss
- How APUs work
- Different methods to draw a block diagram for an APU
- The applications of an APU
In the end, you will be able to understand how these chips are helpful for use in most of our home devices and mobile phones, where space efficiency is achieved.
In this article
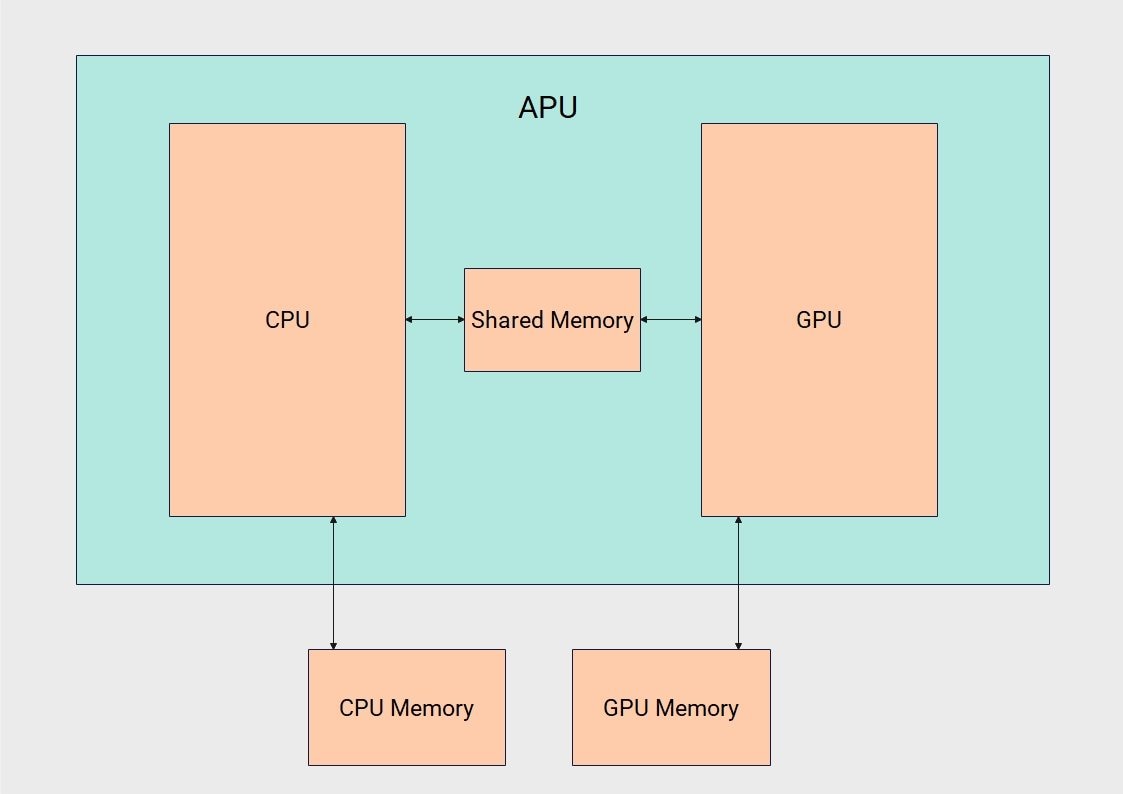
APU Block Diagram
The APU block diagram helps understand the basic structure and work principle of GPUs and CPUs. APU came into existence when GPUs were not performing at their full potential.
The data transfer between the GPU and CPU was delayed due to their longer distances. APU is just a computing chip that is used to bring CPUs and GPUs together on a single chip.
The basic working principle of an APU is quite simple. All you need to know is to have a little knowledge of the data transferring process between the GPUs and CPUs. Let's discuss the working principle of the APUs.
Integration
The integration process includes the combination of CPUs and GPUs on a single chip. The same chip concept is used to reduce the power consumption during data transfer between the CPU and GPU. The other factor was the time delay when these two processors are placed far from each other.
Shared Memory
The shared memory between the GPU and CPU provides faster communication between them. It eliminates the use of the motherboard data bus and reduces the energy consumption. The memory core is directly attached.
Individual Tasks for CPUs and GPUs
CPUs are used to perform the basic operations that are required to run your device. Without them, you will not be able to operate any system, as the CPU is the brain in a computing system. However, it doesn't work in parallel.
GPUs are built to better process graphics in your computing system. They work in parallelised operations to work collectively with the CPUs.
CPUs and GPUs help programmers work on the same chips, which reduces costs and simplifies parallel operations.
Applications of APU
There are a lot of applications of modern APUs, whether they are used alone or blended with AMD chips, and they help bring the power needed, keeping efficiency on the higher side. Let's discuss a few of the applications where APUs are being used.
Portable Devices and Laptops
Laptops and smart devices use APU chips where space Efficiency is required. They provide sufficient power to run a device with a compact design. They are also vital for running multimedia and web browsing for faster responses.
Most of the medical equipment using screens is filled with these devices. They provide quick image rendering by using CPUs and APUs together.
IoT
These APUs are best suited for AI systems where edge computing and a balance of power and Graphics are needed for data rendering. Most AI devices use these chips to attain maximum efficiency and performance due to their fast data exchange between the CPUs and GPUs.
Artificial Intelligence is taking over the world, and such chips are vital to have for faster responses, where data transfer becomes a necessity.
Gaming Industry and Content Creation
Modern APUs are good enough for streaming applications, providing maximum outputs. Although dedicated GPUs are far better options to have for such tasks, their costs are way higher than those of these APUs. So, these APUs help you match the compatibility of your devices and keep the efficiency on the higher side.
The latest technologies used in the APU are able to match the quality of high-grade GPUs as well. There will be significant cost cuts for these chips in the future as well.
How to Create an APU Block Diagram
Making a block diagram efficiently clears any doubts regarding a model. The APU block diagram is used to learn the basic concepts of its working and helps a number of people, including students, engineers, and researchers. But how do you start making these diagrams? The answer is simply the need for a specialised tool that offers extensive customisation tools.
EdrawMax, being one of the top diagramming tools, helps create comprehensive block diagrams. Let's check out a few of the features of EdrawMax.
- User-Friendly Interface: EdrawMax comes with a clean interface that even suits beginners. It provides a clean interface, drag and drop functionality, image addition, text formats, and much more.
- Huge Symbols Library: EdrawMax's Symbol library is vast, providing all the symbols, elements, and text formats you need to complete your block diagram.
- Customisation Tools: EdrawMax is full of tools that offer different colour schemes you need for your blocks, text formats, and themes. It provides connector tools to add relationships among the blocks.
- Templates Library: EdrawMax offers templates for each category, helping you complete your own design through these templates. You can use a template as it is if it fulfils your demands.
- Multiple Import and Export Options: EdrawMax is helpful for a wide audience, enabling them to import and export their block diagrams in different formats. You can import Visio files and directly edit them.
Now, let's check out how to create an APU Block diagram with the help of EdrawMax using different methods.
Method 1: Start from Scratch
EdrawMax, as a specialised diagramming tool, provides all the customization tools to start with. Here is a step-by-step guide for you to follow when starting from scratch.
Step1 Open EdrawMax and get started
- Open the tool to start with.
- Find the block diagram section and click it. The empty canvas will be opened, and you will find the relevant elements.
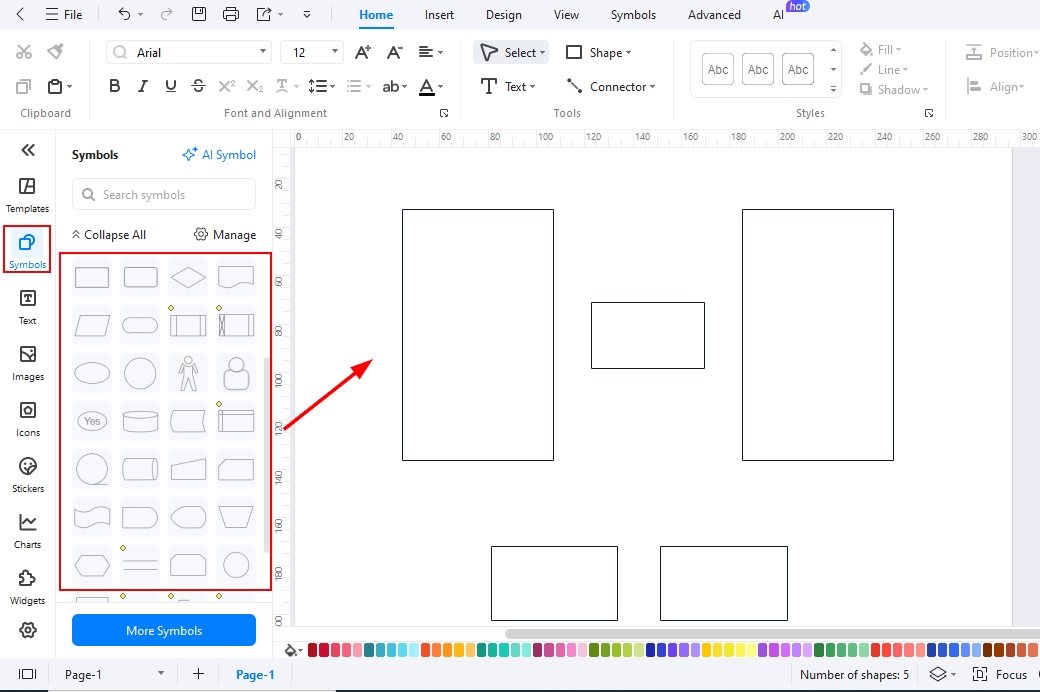
Step2 Drag and Drop Symbols, Elements on the canvas
- Go to the Symbols library and find the suitable blocks and symbols you need to use in your block diagram.
- Click an element or drag it directly to the canvas.
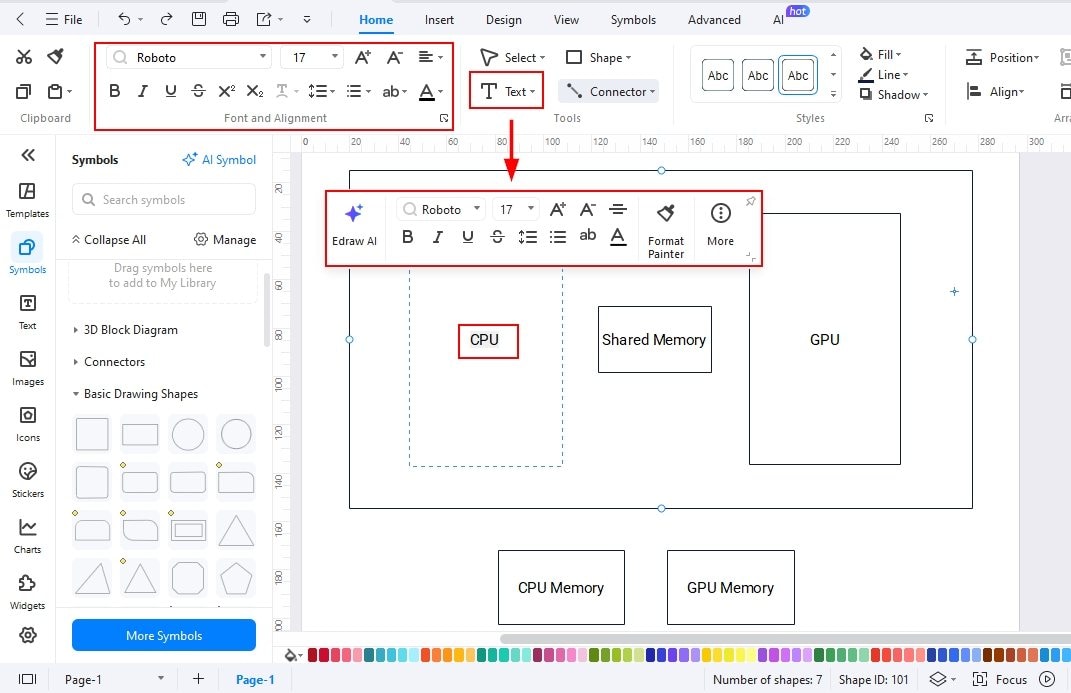
Step3 Add Text for each Block
- Arrange the sizes and place them to fit in your canvas
- Double-click the block to add text for each block.
Step4 Add Relationships/ Connections
- Use the arrow to present the relationships among the blocks.
- Use the connector tool to add a relationship.
- If you need arrows, you can also use the symbols library to find arrows of different shapes.

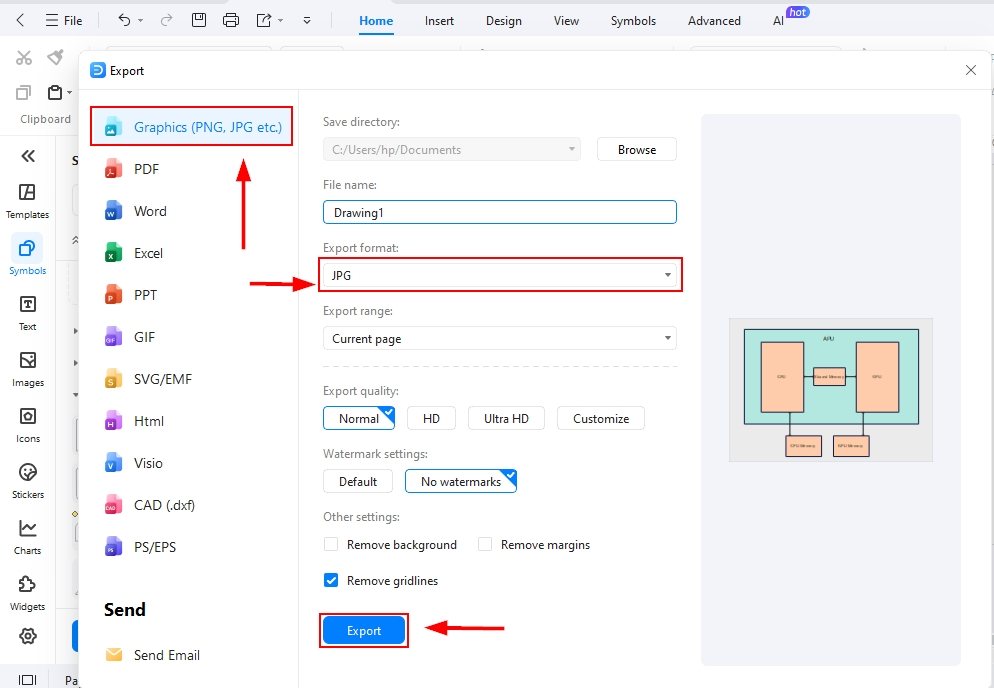
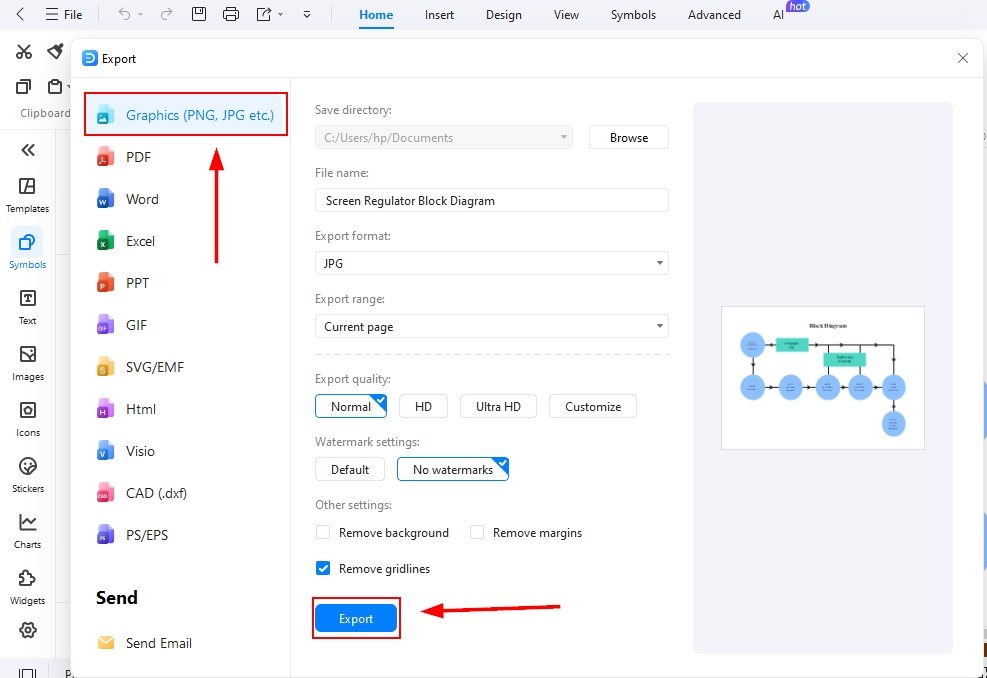
Step5 Export your Block Diagram
- After all the editing, it’s time to export your block diagram.
- Click the export button or File in the upper left corner of the screen and choose a format. Set all your preferences and click export to save the design.
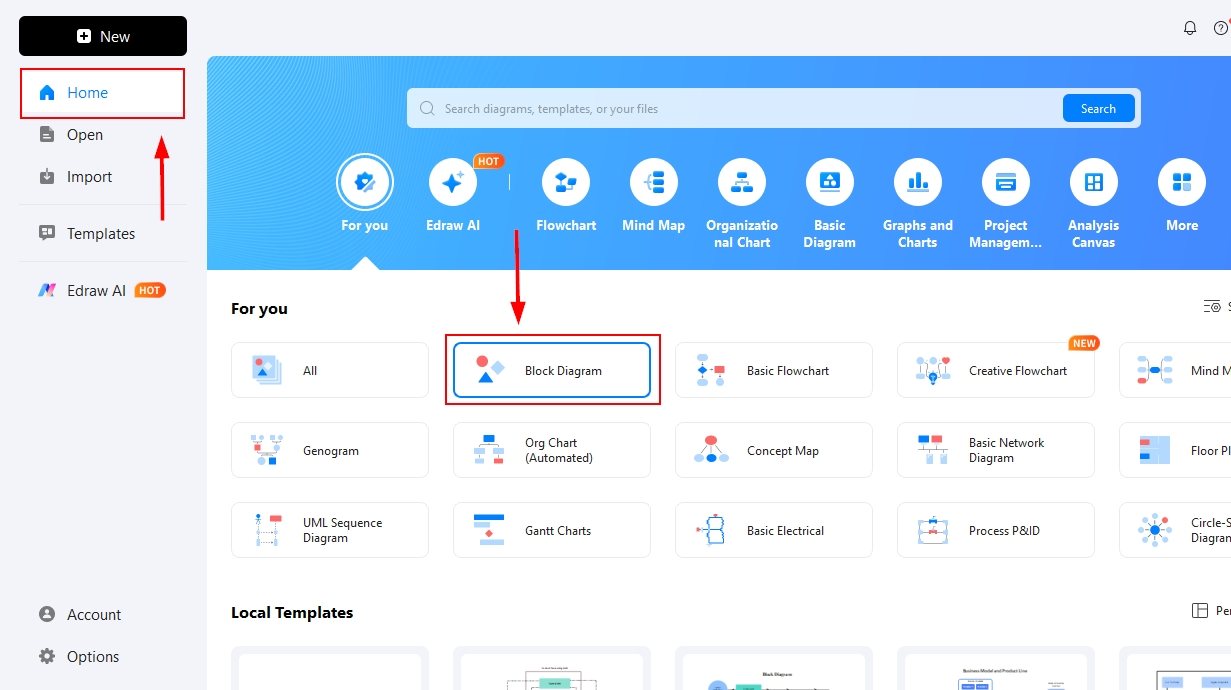
Method 2: Start with a Template
Using a readymade template saves time, reduces effort, and makes the design process much easier. With EdrawMax’s extensive template library, you can quickly customize pre-built diagrams to match your needs. Simply follow the step-by-step guide below to create your block diagram efficiently.
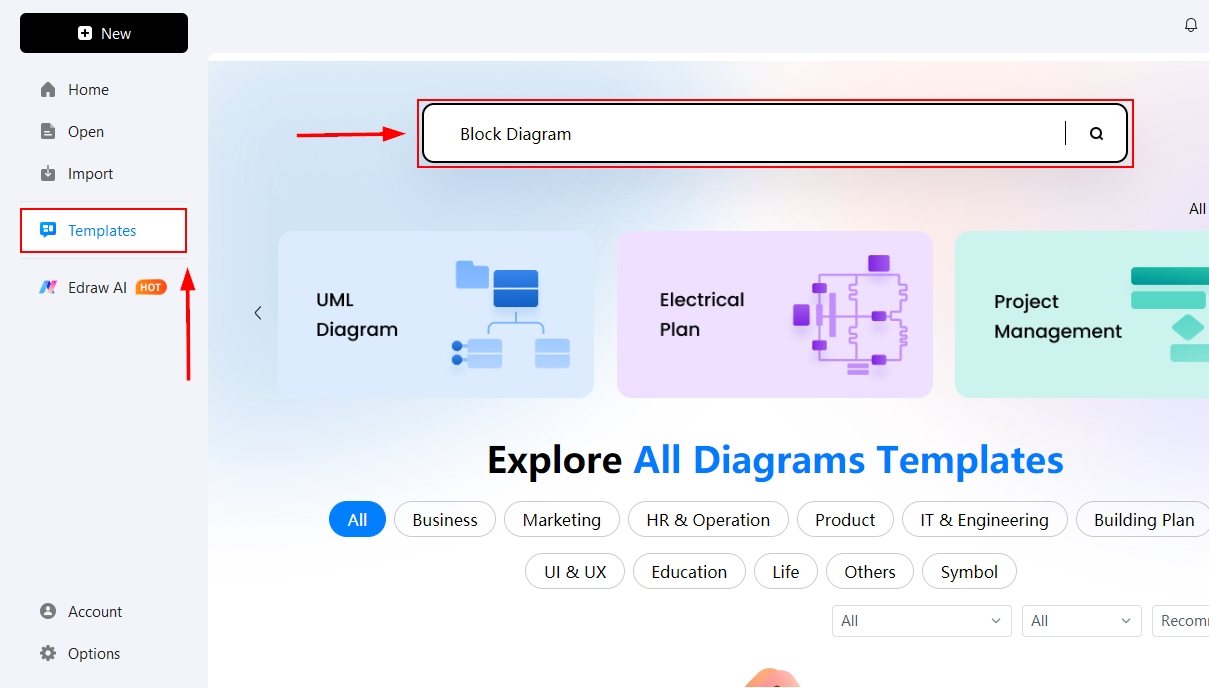
Step1 Open Templates Library
- Open EdrawMax Home Page and click templates on the left-hand side of the screen.
- Search for the block diagram templates available in the library using the search bar.
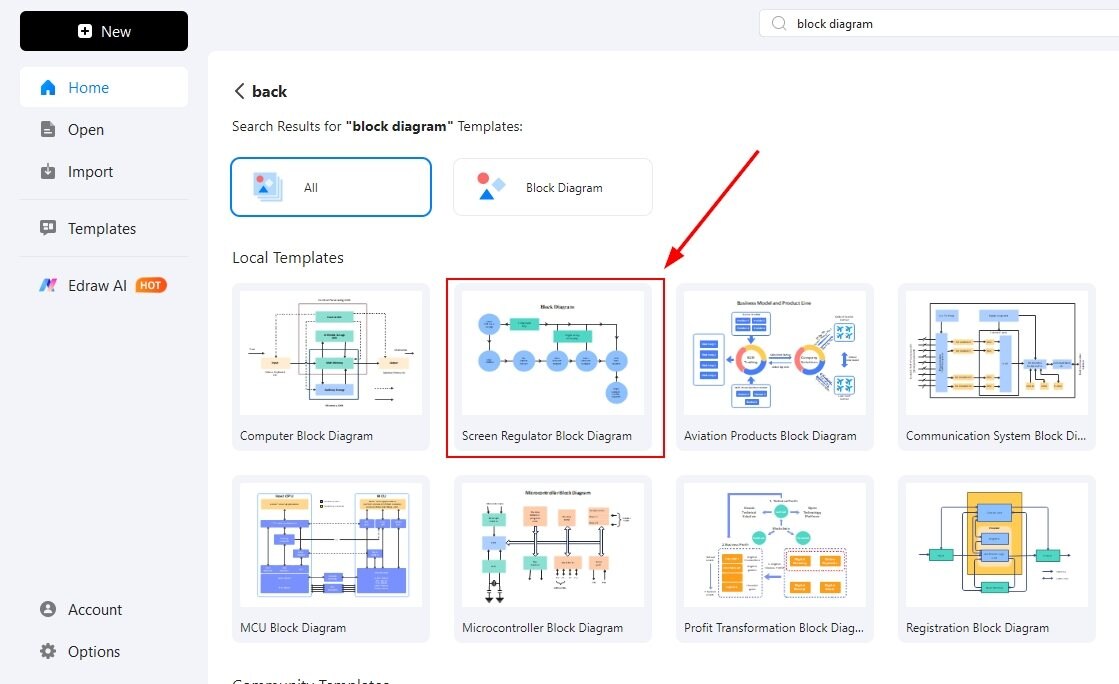
Step2 Select a Template and Click it
- Start looking for the template that is closest to your block diagram.
- Click it to bring it onto the canvas and start further editing.
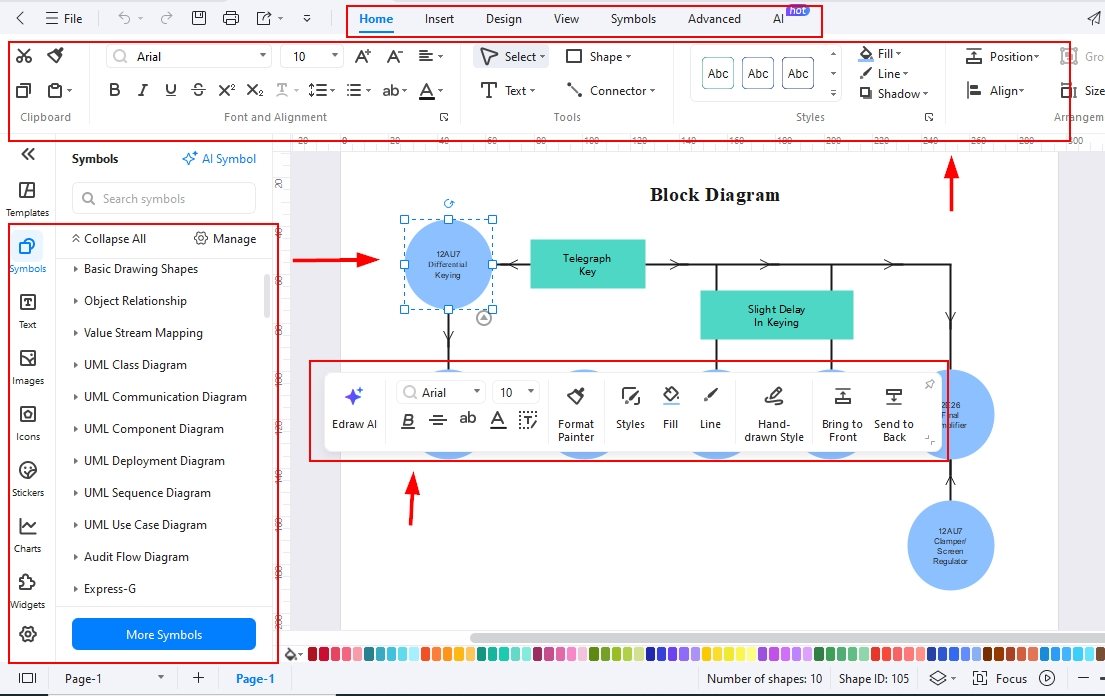
Step3 Edit the template
- Start editing the template on the canvas.
- Now, add or delete any shape needed. Use your own text to make your own block diagrams.
- You can change colours and themes for your block diagram here.
Step4 Export your file
- After all the edits, you need to export your design.
- Click the file and find the export option available, or use the export button available at the top of the menu bar and select a format to save it.
Final Thoughts
The APU block diagram illustrates the dual functionality of CPUs and GPUs working together on a single chip through shared memory. Such diagrams are highly valuable for enhancing learning across various sectors and driving advancements in systems that rely on APUs.
When it comes to designing these diagrams, EdrawMax proves to be a reliable solution. It not only simplifies the process but also offers versatility and powerful customization tools, saving both time and effort while ensuring professional results.
AI Diagram Generator
Enter your prompt. Upload files if needed. Generate diagrams, charts, or slides instantly.


