


Slopes, or Ramps, are crucial elements of every construction site. They provide a safe path for wheelbarrows to transport any material on the site. Not only this, but it also provides care for individuals who can’t climb stairs.
The slope has different criteria, such as angle and grade, that must be followed, and mistakes must be avoided when designing one. This article will explore how to design a slope, essential principles, and best practices.
In this article
Part 1: What is a Slope?
A slope is the inclination of a surface and is defined as the steepness of a line. It is a change of angle of the vertical direction (y-axis) over the horizontal direction (x-axis).
We are referring to the slope with the ramp, which is built as an alternative to stairs in buildings, homes, and other local public facilities. These ramps are primarily created to provide a comfortable pathway for wheelchair or stroller users. They provide accessibility for individuals with mobility impairments, strollers, carts, and bicycles.
However, if the slope is not built adequately, it may not provide a smooth path and will turn into a sharp ascent. Considering this, specific criteria are followed to ensure the quality of the slope.
These criteria are followed under the Building Standards Act and the Barrier Free Act:
Building Standards Act:
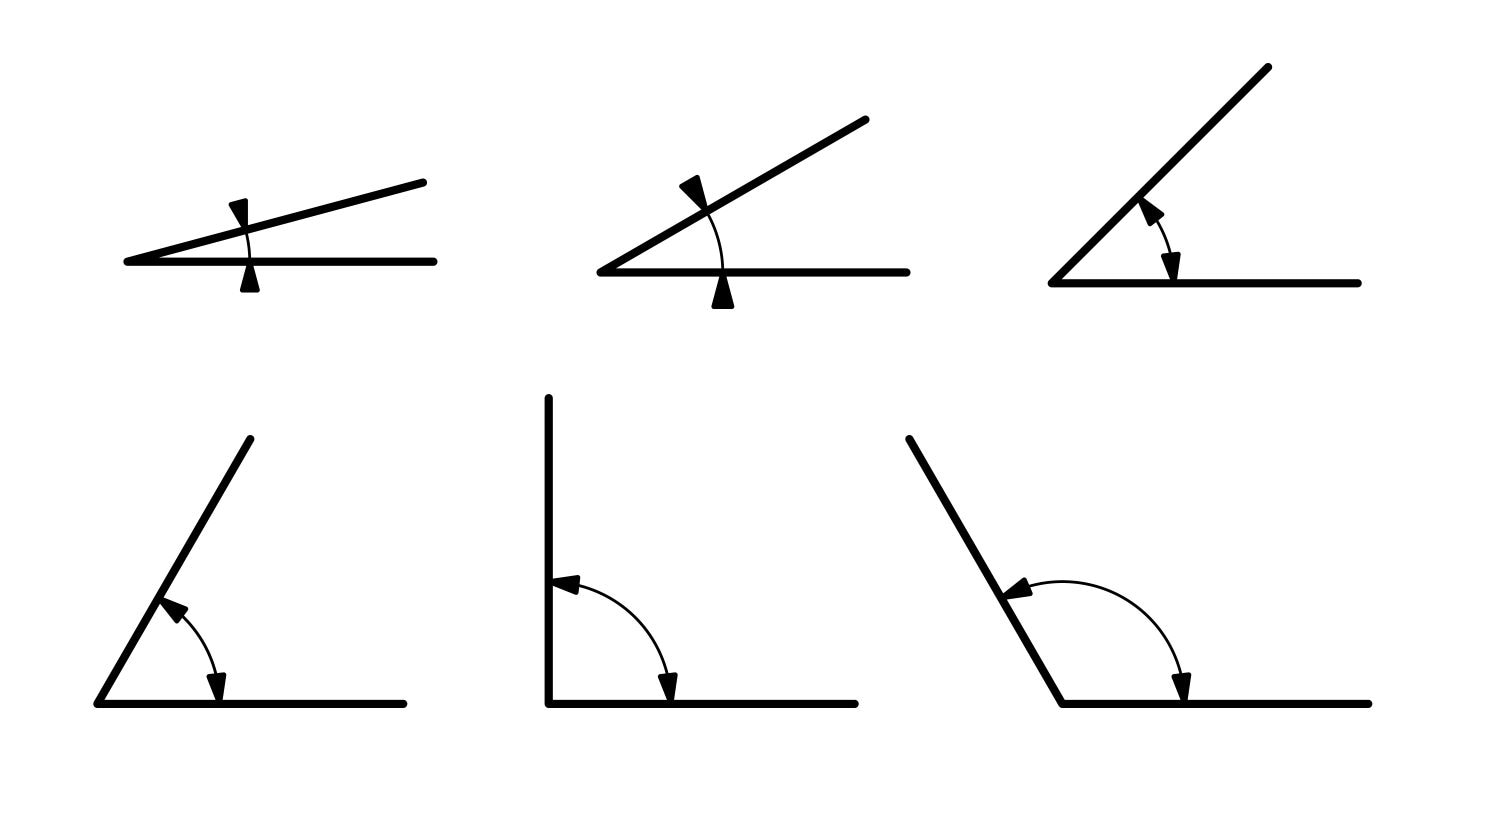
- The slope angle demanded by the Building Standards Act is 1/8, equal to 7.1 degrees. This means the slope is one meter in height over eight meters in length.
- The Act stipulates that the slope must be finished with rough or non-slip material.
The standards in this Act are logical but minimal, which will not be enough for a mobilized slope.
Barrier Free Act:
- According to the act, the Barrier-Free Act states that the slope should be four feet wide and has a gradient of 1:12. The gradient for outdoor slopes is 1:15 or less.
- Handrails on both sides of the rise exceed 6 inches, with a grip diameter of 1.25-2 inches.
The Barrier Free Act criteria are much more coherent and desirable, not making the slope steeper.
The slope significantly impacts the usability of the ramp. Therefore, we must pay attention before designing or building any slope for our desired location. Careful installation is necessary to ensure convenience.
Part 2: How to Design a Slope
In this section, we will explore creating a logical and less steep slope. The steps are discussed below.
Find the Location of the Slope for Designing
Before designing the slope, it is essential to choose the location. There are several factors to consider when selecting an area, such as:
- Space availability: Make sure your chosen location has sufficient space for building a slope. Identify the ramp and handrail length.
- Structural Support: Ensure the ramp's ground or foundation is robust enough to support the weight.
Gradient of the Ramp
Consider the gradient according to the user's needs. The standard slope for commercial and public facilities is 1:12 (in inches), equivalent to approximately a 5-degree incline. Also, make sure the ramp does not obstruct vehicle movement.
Once the gradient is finalized, it’s time to make the slope.
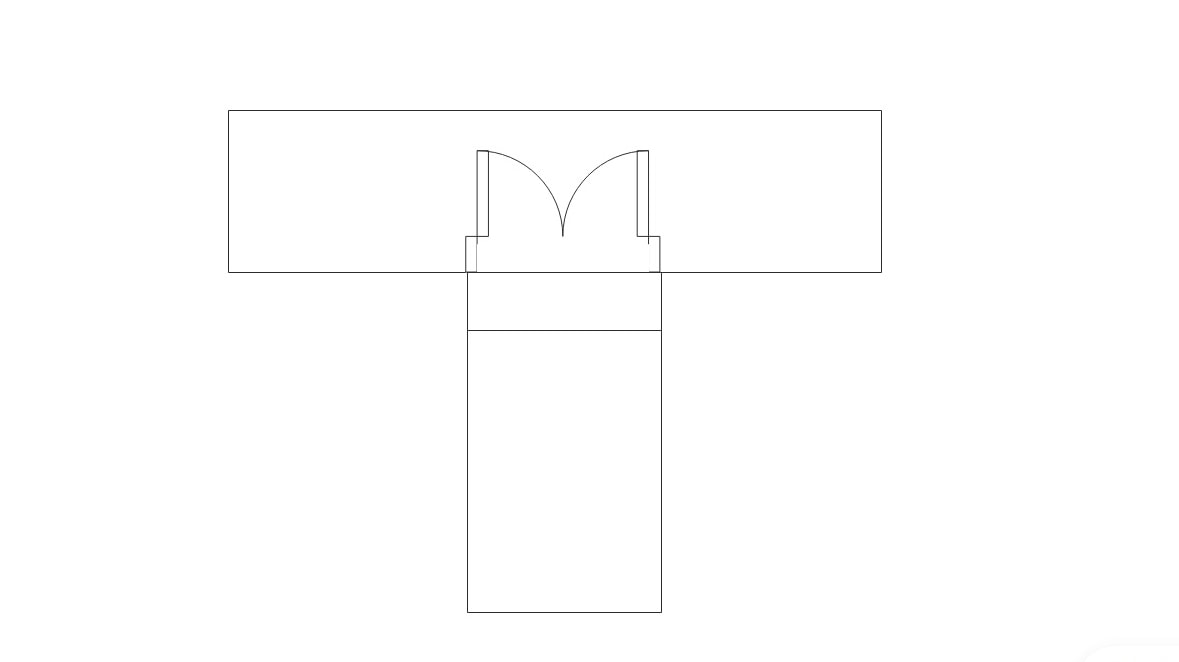
Draw a Slope Shape on the Floor Plan
Ramps are usually constructed near the entrance door. When everything is decided, add the slope shape. Make sure you keep the size, width, and length in mind.
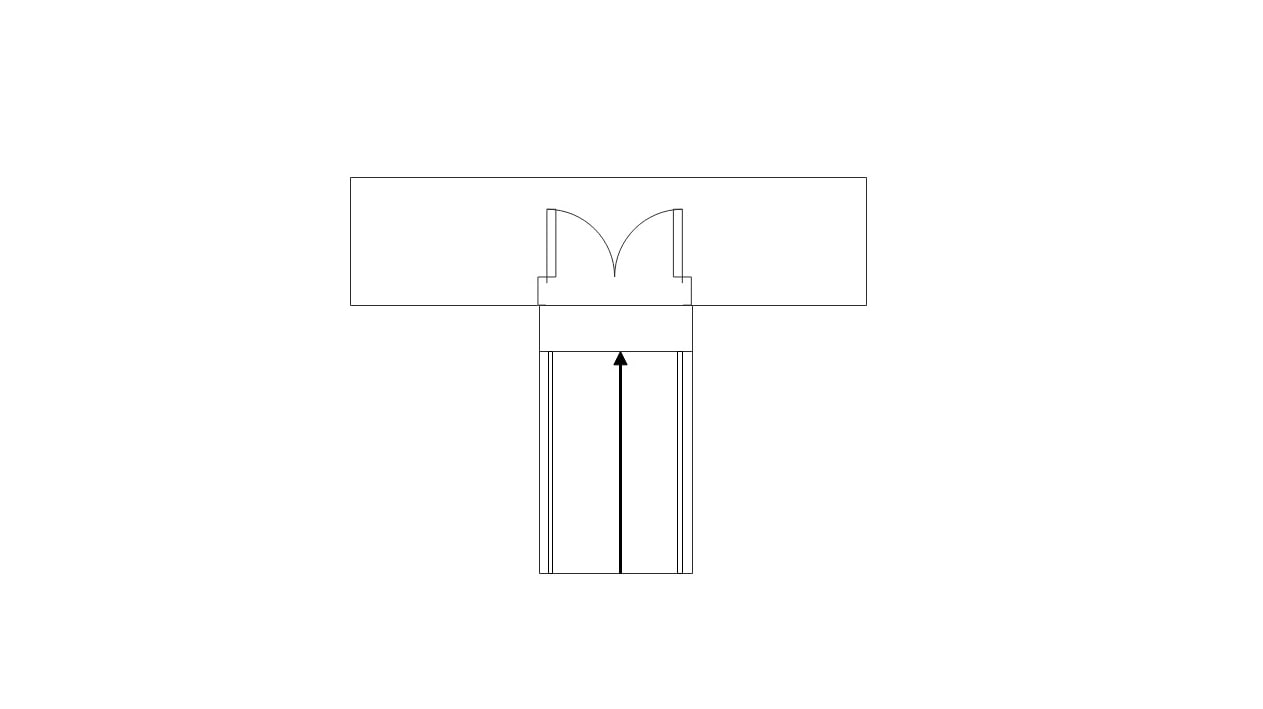
Starting and Ending Point of Slope
Once you have drawn the slope shape like we did above, add an arrow at the center of the shape. This arrow indicates the slope's starting and ending points.
Add Handrail
It’s time to add a handrail to the ramp. Handrails provide support and balance to wheelchair users, neglecting the risk of falling.
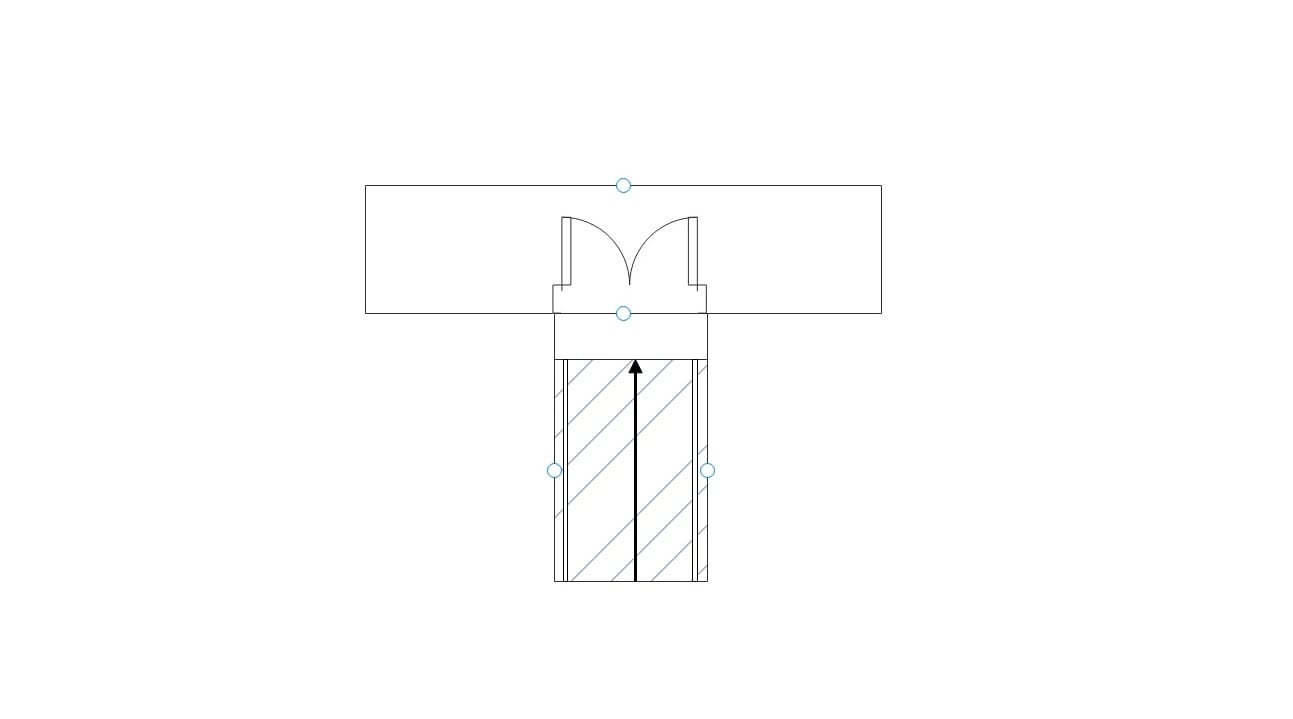
Add Finishing of the Ramp
Once you have added the handrail, fill the slope with hatching that matches your finishing material. Make sure the material is of adequate quality and appropriate for the finish. You can use tiles or mortar.
Add Dimensions
Provide the key dimensions of the ramp, including its length, width, and height. Specify details such as the slope gradient, handrail placement, and surface materials for traction and durability.
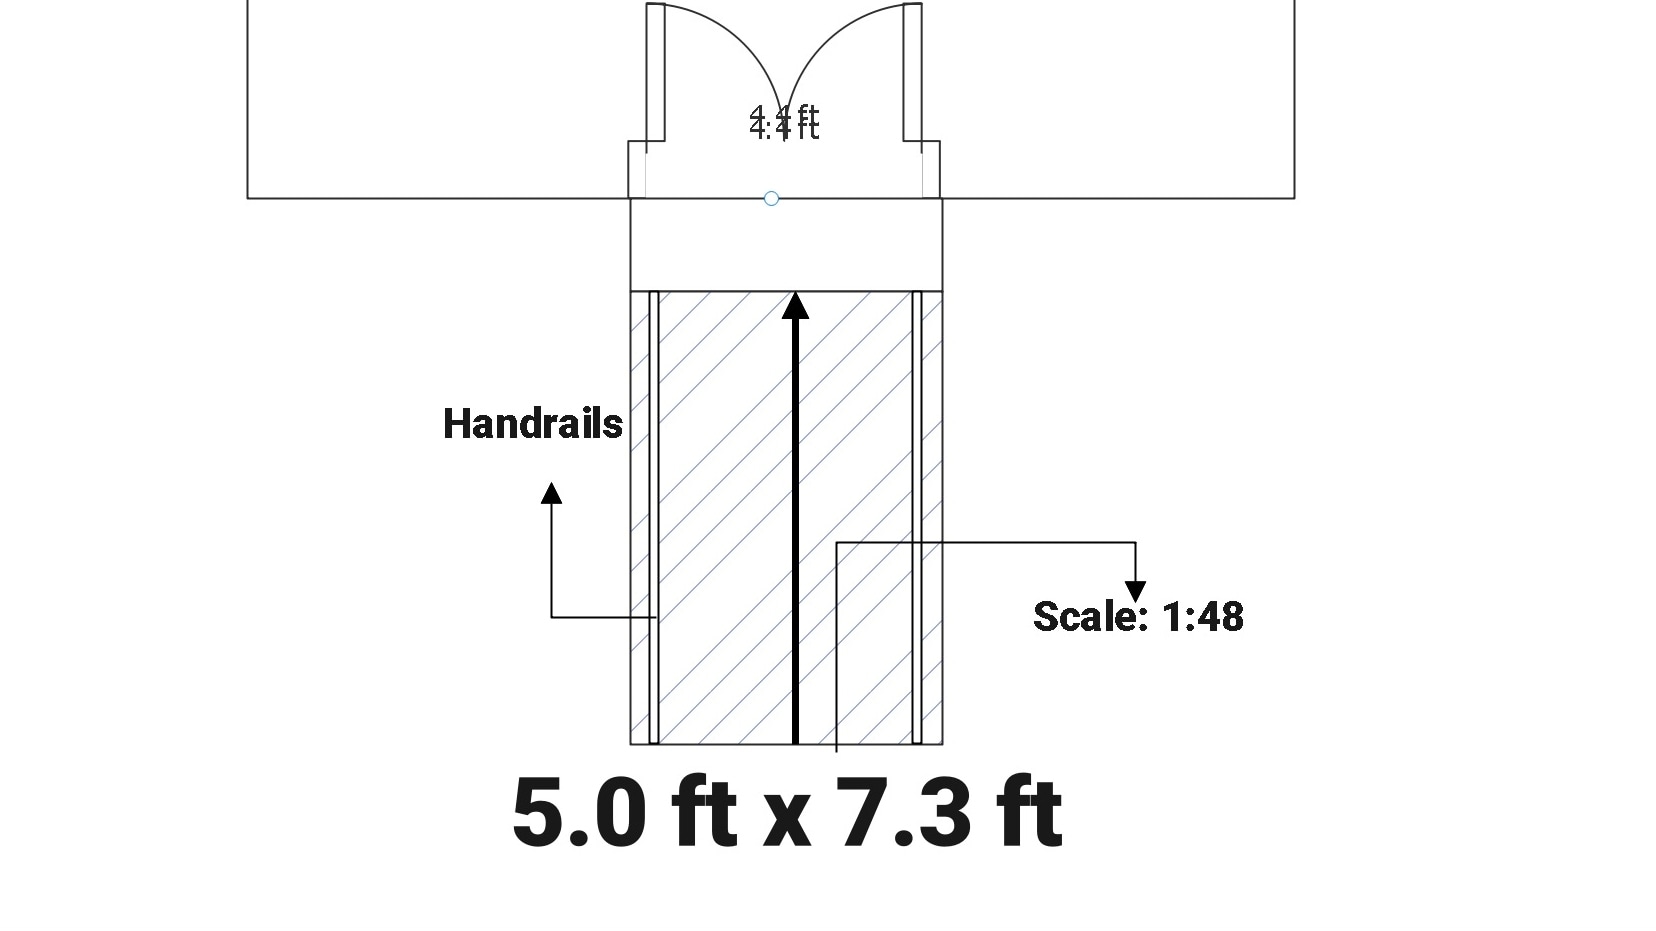
Ensure the plan clearly illustrates the ramp’s incline, making it recognizable and understandable for viewers. Pay attention to clarity and accuracy so that the slope plan effectively conveys the intended design and functionality.
Part 3: Tips to Create and Design a Slope
When installing a ramp, it is essential to acknowledge the crucial points and avoid mistakes. A ramp requires careful planning and execution to ensure safety, accessibility, and compliance with relevant standards.
Here are the essential points to note when installing a ramp for your location.
Measurement and Slope Calculation
Following the gradient described in the Building Standards Act and the Barrier-Free Act is vital. A common standard of 1:12 slope gradient should be followed when installing a ramp. Moreover, the ramp's measurement should be noted down. Measure the height from the ground to the entry point of the slope to ensure proper measurement. Inaccurate measurements lead to the ramp's failure.
Proper Materials
Choose a reliable material for finishing the ramp. The material should be durable and according to the environment. Ensure the ramp surface is slip-resistant to prevent accidents, especially in wet conditions.
Safety Features
If the ramp riser height exceeds 6 inches, install a sturdy handrail on both sides for safety. Furthermore, guardrails should be installed on each side of the ramp. This will prevent wheelchairs from slipping off the slides.
Location of the Ramp
Note that the location of the ramp matters a lot. The ramp requires more space than the installation of the stairs. Therefore, for an appropriate ramp, select an area where you can provide more space for installation.
Mistakes to Avoid:
The points mentioned above should be noted when installing a ramp. However, some mistakes should be acknowledged as well. Here are some errors that commonly occur during the installation of ramps:
Inappropriate Drainage
During wet and rainy conditions, the water flows from the high to the low point. Drainage is often ignored during the installation of ramps. Therefore, a proper drainage plan should be considered for ramps.
Improper Landings
Proper landings are efficient for longevity and safety, and they provide rest areas for the ramp. Constructing landings at incorrect intervals makes the ramp unsafe and non-compliant. For example, if the ramp is longer than 6.2 feet, it should have a gradient of 1:14, and the landing intervals should not surpass 9 meters.
Poor Quality Materials
Compromising the ramp quality impacts the longevity and leads to rapid deterioration. Therefore, we advise you to invest in durable, weather-resistant materials suitable for your environment.
Inadequate Maintenance
If not properly maintained, ramps can lose quality over time. They can develop issues like surface wear, loose handrails, or structural damage.
Part 4: Use A Tool for Slope Plan Drawing
EdrawMax is a cost-effective and premium drawing tool that is also great for planning and drawing slopes.
It has many features that allow you to draw any plan or diagram easily. Some of the features of EdrawMax are briefly described below:
EdrawMax has various templates available, allowing you to save time and edit customizable slope diagrams and templates. It has over 1500+ pre-built templates and 26,000+ shapes.

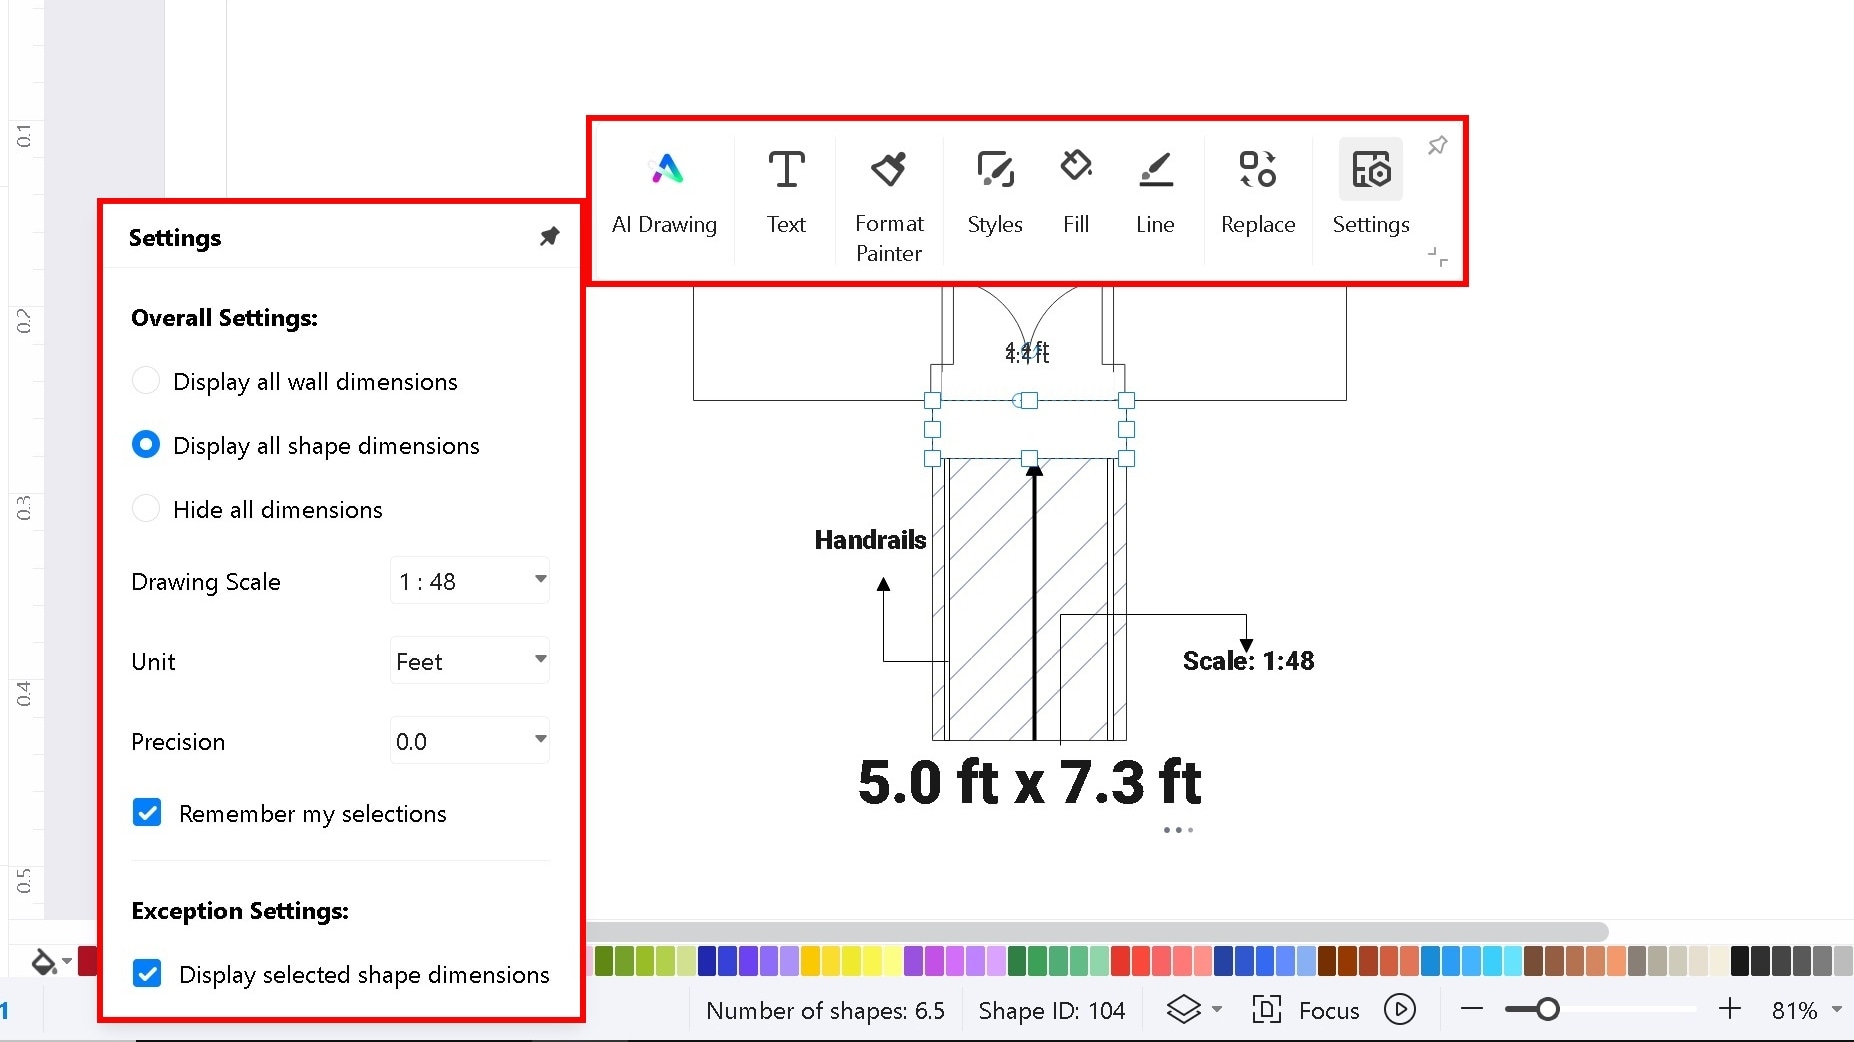
Leverage precise settings of the symbols and shapes for slopes. Click on any shape, go to settings, and choose any scale. It also allows you to add dimensions.
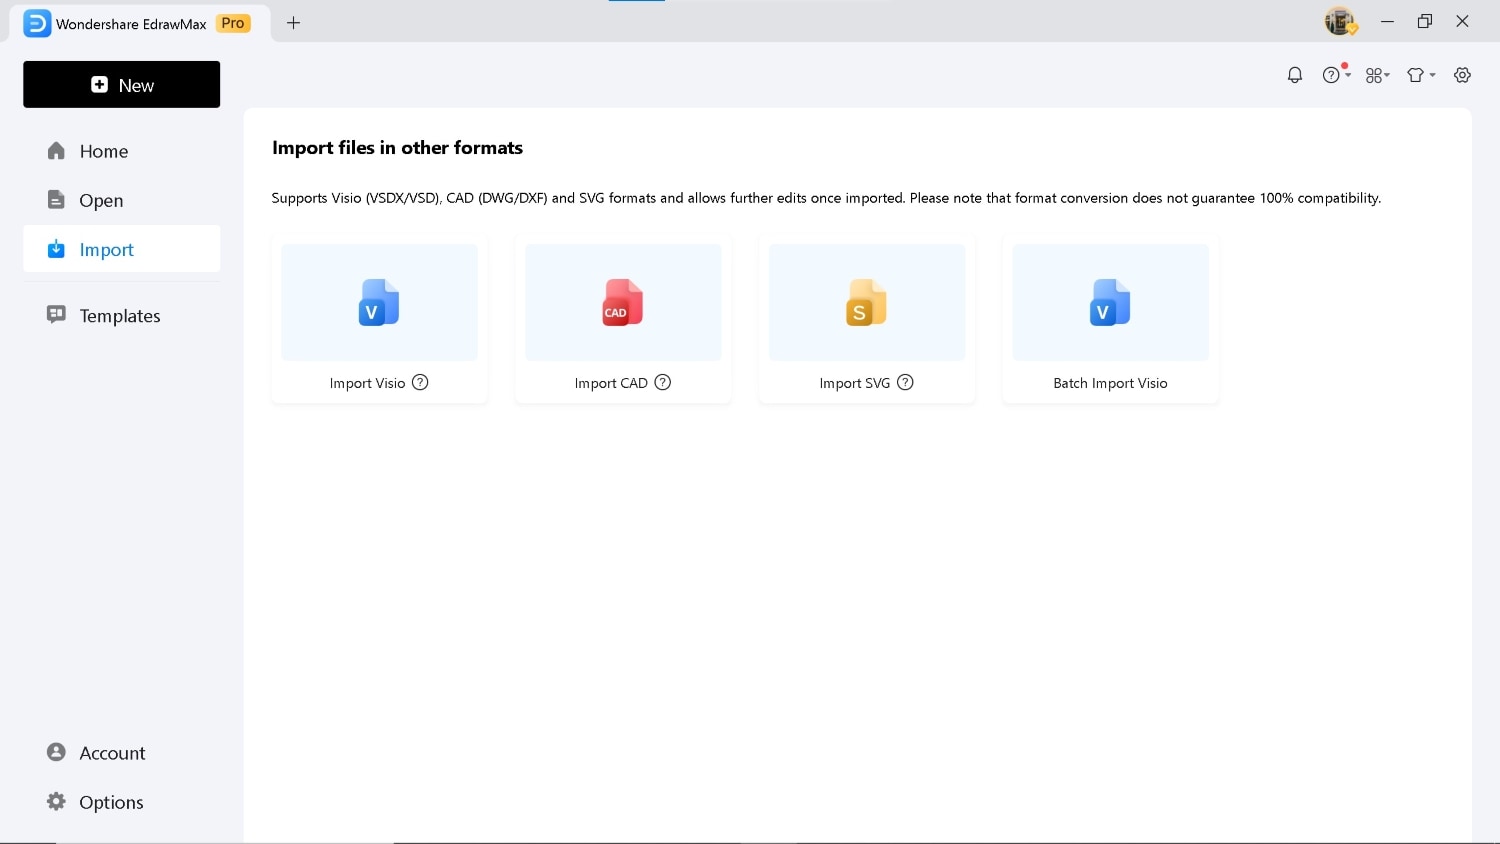
EdrawMax allows you to import different file formats such as CAD, Visio, and SVG.
Most of the features on EdrawMax are free, which makes it an ideal choice if you are looking for a cost-effective drawing software tool.
These were some of the features of EdrawMax. You can explore more by downloading the software and start publishing your diagrams to help others.
Ending Notes
Installing ramps for wheelchair users involves meeting specific standards. Avoiding errors is key to ensuring a high-quality ramp.
In this article, we’ve covered all the details—from key considerations to designing slopes using software. With this, you can create a safe, practical, and accessible ramp for everyone.
AI Diagram Generator
Enter your prompt. Upload files if needed. Generate diagrams, charts, or slides instantly.


