Mind maps are a great way to visualize ideas for brainstorming for a project, planning content, or outlining a concept. But traditional mind-mapping tools often come with a catch: you have to drag and drop every node manually. Also, sharing or editing them later can be a pain.
That's where PlantUML shines. To make a mind map in PlantUML, we use text-based syntax like coding. This makes your mind map:
- Easy to edit: Update text, not boxes and lines.
- Version-control friendly: Perfect for Git and collaboration.
- Documentation-ready: Works inside tools like Markdown, Confluence, or wikis; no screenshots are needed.
On top of that, PlantUML takes care of the layout automatically. You don't need to worry about positioning nodes or aligning arrows. Just write your ideas, and let PlantUML do the heavy lifting.
Here's what a basic PlantUML mind map looks like:
@startmindmap
+ Core Topic
++ Main Idea 1
+++ Detail A
+++ Detail B
++ Main Idea 2
@endmindmap
That's it; no clicking around. Just a few lines of text, and your structure comes to life. In the following sections, you'll learn how to build, style, and scale mind maps using this format.
In this article
How to make a mind map with PlantUML Syntax
Before diving into advanced features, you can start with the building blocks. These are the basic syntax rules you'll need to create mind maps using PlantUML. Once comfortable with these, you can build, edit, and extend your mind maps without looking up examples.
Here's a breakdown of the core elements:
Root Node
Every mind map begins with a root node—the central topic from which your ideas will branch out. Think of it as the nucleus of your thoughts. To define the root, use a single "*" sign. This is the starting point for everything that follows. As you can see below, you have a single node called "Root Topic".
We will build upon this as we go through the other core elements.
@startmindmap
* Root Topic
@endmindmap

Adding Subtopics
Subtopics are how you start branching out your ideas. Just like an outline, you nest topics by increasing the number of * signs:
- ** creates a main branch
- *** adds a detail under that branch
You can go deeper as needed, so for a subtopic under a subtopic, add more "*" symbols.
This will help you build a mind map with complex ideas, processes, or structure breakdowns. Let's see this in action:
@startmindmap
* Programming Languages
** Python
*** Easy Syntax
*** Great Libraries
** JavaScript
*** Frontend
*** Backend (Node.js)
@endmindmap

In this example, here are the key ideas you can see and how they were made as subtopics:
- "Programming Languages" is the core idea (+)
- "Python" and "JavaScript" are the main branches (++)
- Under each, we've added specific characteristics or use cases (+++)
Left/Right-Sided Nodes
By default, mind maps grow outward from the root. But if you want more control over layout, like placing some branches on the left and others on the right, use the following symbols instead of the standard "*":
- "-" to place the nodes to the left
- "+" to place the nodes to the right
It's a bit complicated to understand at first, but it will all make sense once you try to jot it down in the PlantUML editor.
Check out how it works here:
@startmindmap
+ Root
++ Right Branch
+++ Sub-idea 3
-- Left Branch
--- Sub-idea 1
--- Sub-idea 2
@endmindmap

Once you've mastered these basics, you'll be ready to add color, icons, and styling to take your diagrams to the next level. But for now, focus on getting comfortable with the structure. Practice with some basic examples, and work on familiarizing yourself with the basic syntax.
How to make a complex mind map with PlantUML
Once familiar with the basic syntax, it's time to level up. PlantUML's mind map feature isn't just about plain text trees. You can style nodes, add emojis, and even control large diagrams with collapsible sections. These advanced tools help you make mind maps that are functional, visually organized, and presentation-ready.
This section will help you explore creative options or tackle more complicated structuring options, giving you the freedom to make your mind map the way you want it to appear.
Styling Nodes
You can customize the color of each node to make sections stand out. This is useful for highlighting key ideas, grouping similar topics, or making your mind map easier to read. This simple touch can dramatically improve the clarity of your map. Think green for goals, red for blockers, blue for information, etc.
To apply color, use [#ColorName] right after the + or * symbol:
@startmindmap
+[#Orange] Core Topic
++[#Green] Main Idea 1
+++[#Yellow] Detail A
++[#Blue] Main Idea 2
@endmindmap

Icons & Emoji Support
PlantUML also supports emojis and icons. And yes, they work inside mind maps! You can use them to visually reinforce meaning, add personality, or make things more fun. Each node becomes instantly recognizable and fun. All you have to do is use the OpenIconic emoji names under the syntax "<&emojiname>"
Here's an example of the openmoji icons in action:
@startmindmap
* <&home> Smart Home System
** <&wifi> Network
*** <&globe> Internet Connection
*** <&phone> Mobile App
** <&lightbulb> Lighting
*** <&sun> Bright Mode
*** <&moon> Night Mode
@endmindmap

Tip: To see all the OpenIconic icons available and their names, use the special syntax below:
@startuml
listopeniconic
@enduml
Fold/Unfold Nodes (for Large Maps)
Large mind maps can become overwhelming. While PlantUML has no way to collapse sections with simple syntax, you can simulate it manually, although the actual collapsing behavior depends on your rendering tool. In any case, this pattern helps you visually hint at more detail without overwhelming the diagram. It's beneficial for overview-style maps or documentation summaries.
You can represent hidden or folded branches with ellipses (...) like this:
@startmindmap
+ Root
++ Branch 1
+++ Sub-branch A
+++ Sub-branch B
+++ [...]
++ Branch 2
@endmindmap

How to Edit Mind Map Layout & Structure in PlantUML
By default, PlantUML does a good job laying out your mind map, but with a few minor tweaks, you can take control of the structure and improve readability, especially for larger or more complex maps.
This section walks you through how to:
- Switching layout direction
- Managing long text
- Adding clickable hyperlinks
Let's get into it below:
Change Direction (Horizontal/Vertical)
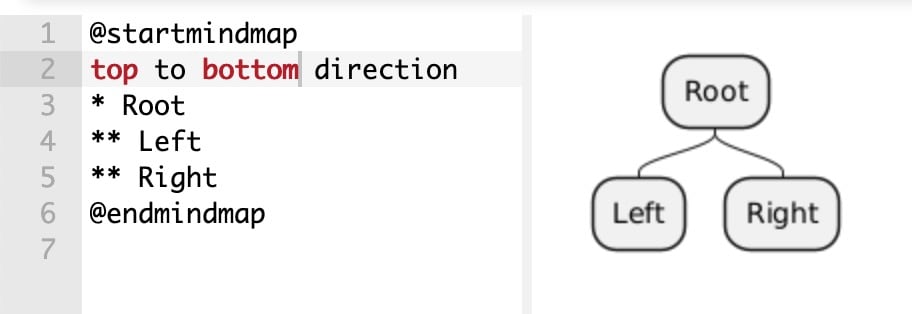
PlantUML mind maps are rendered horizontally by default, but sometimes, a top-down layout works better, especially if you want to add more content to a mind map. For this purpose, you can use the "top to bottom direction" syntax right after the "@startmindmap".
Don't worry, as the involved syntax will be the same:
@startmindmap
top to bottom direction
* Root
** Left
** Right
@endmindmap
Adjust Node Width
Got a long-node label? PlantUML automatically wraps text, but you can control how wide a node can stretch before it wraps. The root node text will wrap once it hits 50 characters wide in this example. This keeps your diagram neat and compact, even when your topics have detailed titles. Just add this line before your mind map starts:
skinparam maxwidth 50
@startmindmap
+ A very long topic name that wraps nicely
++ Sub-idea
@endmindmap

Hyperlink Support
Need to link to documentation, tools, or resources? You can turn any node into a clickable hyperlink using PlantUML's double-bracket syntax. Now, when someone clicks on that node in the rendered diagram, they'll be taken to the URL you specified. This is perfect for creating interactive documentation or knowledge maps.
Here's how it works:
@startmindmap
+ [[https://plantuml.com PlantUML Docs]]
++ [[https://example.com Reference Link]]
@endmindmap

These structural tips may seem small, but they add a ton of polish and usability to your mind maps. Whether you're planning a project or building internal docs, these tweaks help you control your diagrams' flow, format, and functionality.
PlantUML Mind Map Examples
Now that you've seen the syntax, layout options, and advanced features, it's time to assemble everything. Below are real-world examples of PlantUML mind maps you might create for planning, organizing, or documenting complex ideas.
Each highlights a different use case, from personal learning goals to product planning and team organization.
Learning Path: Web Development
This mind map outlines a beginner's roadmap to becoming a web developer. It's structured by skill category, uses colors to separate sections, and goes several layers deep to include specific technologies.
@startmindmap
+[#lightblue] Learn Web Development
++ HTML/CSS
+++ Flexbox/Grid
++ JavaScript
+++ React
+++ Node.js
++ Backend
+++ Databases
++++ SQL
++++ MongoDB
@endmindmap

Team Structure: Department Roles
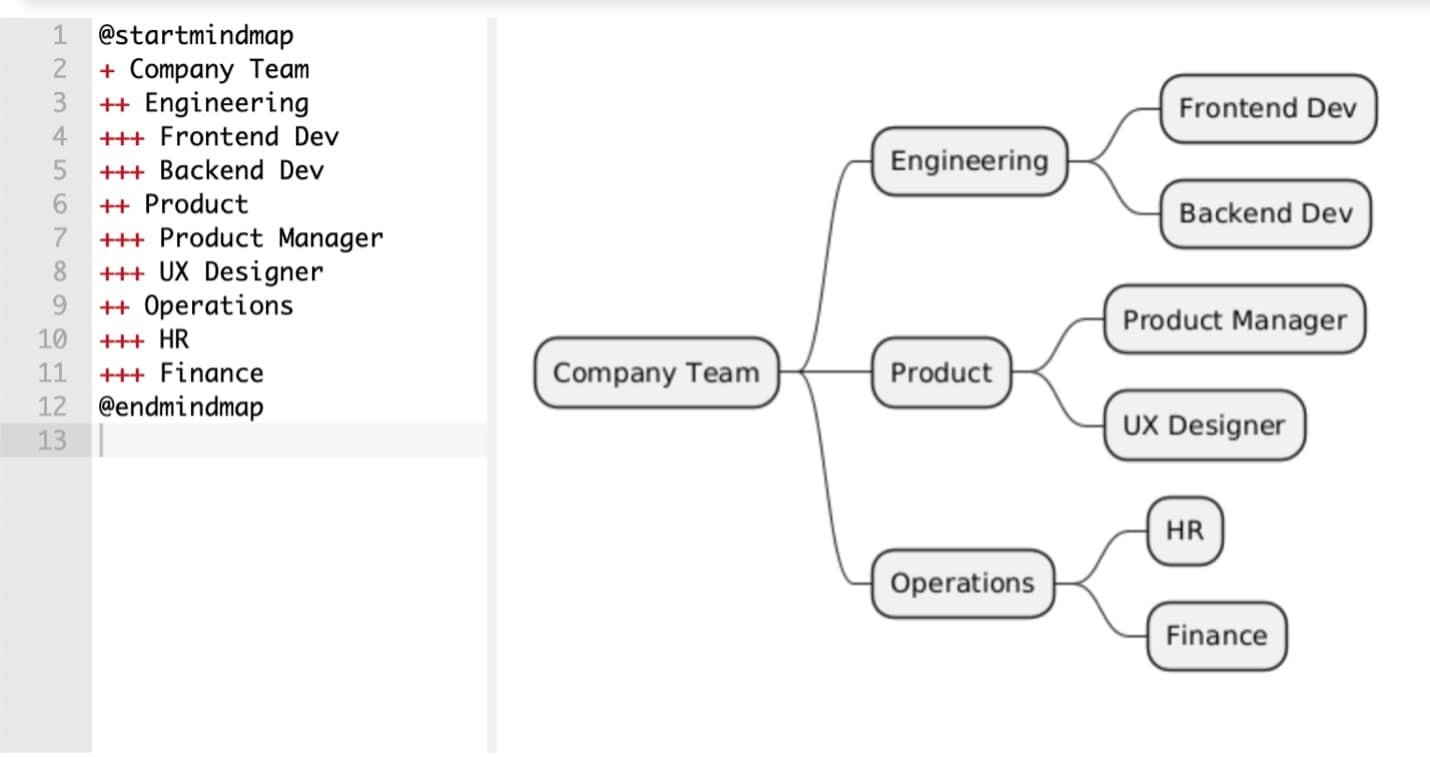
This mind map shows how a company might break down teams and roles. It uses clean labels and simple nesting and can be expanded easily for larger organizations.
@startmindmap
+ Company Team
++ Engineering
+++ Frontend Dev
+++ Backend Dev
++ Product
+++ Product Manager
+++ UX Designer
++ Operations
+++ HR
+++ Finance
@endmindmap
Project Planning: Startup Launch Checklist
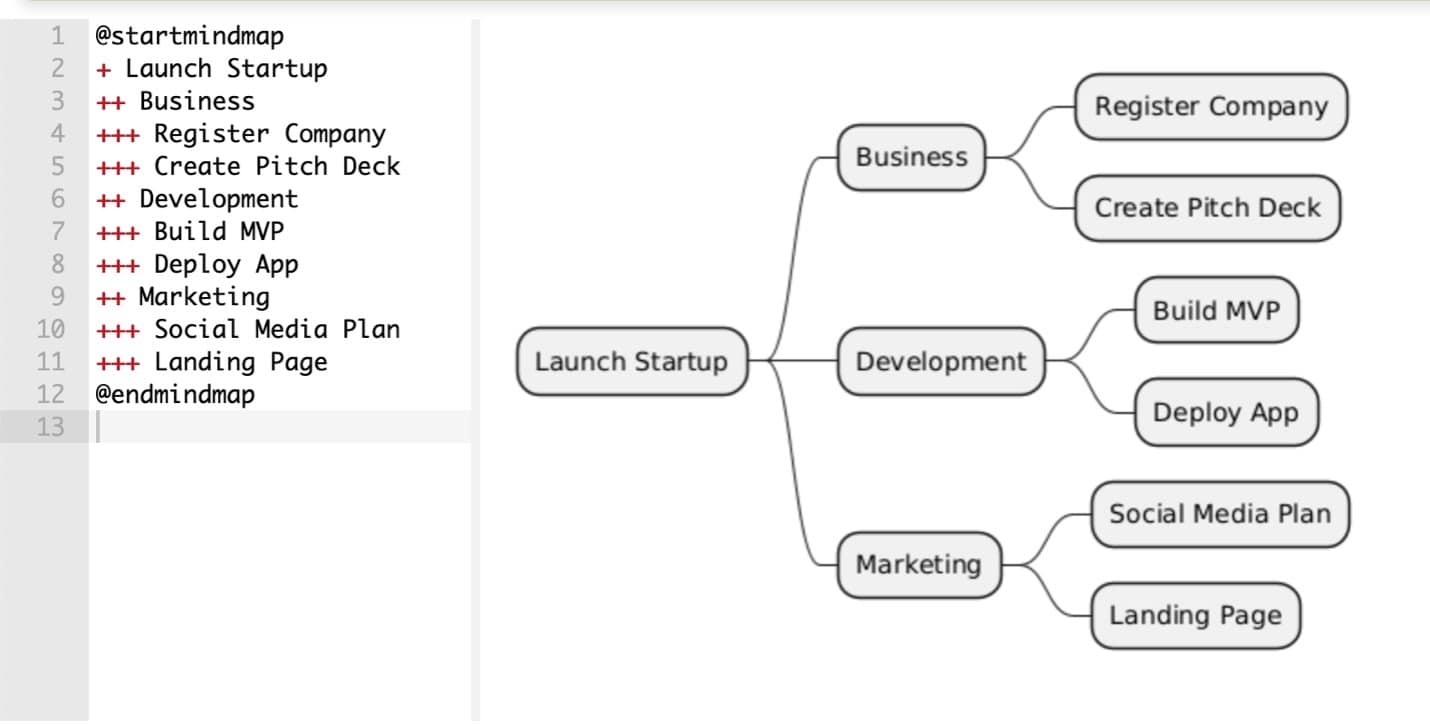
Here's a mind map for launching a startup or product MVP. Each branch is a department or phase, with tasks nested beneath. This example uses emojis for quick scanning and clarity.
@startmindmap
+ Launch Startup
++ Business
+++ Register Company
+++ Create Pitch Deck
++ Development
+++ Build MVP
+++ Deploy App
++ Marketing
+++ Social Media Plan
+++ Landing Page
@endmindmap
Common Mistakes & Fixes of PlantUML Mind Map
Even though PlantUML makes mind maps simple to write, a few common mistakes can quickly turn your clean diagram into a cluttered mess. The good news? Each problem has a quick fix that improves both readability and presentation.
Here are the top issues beginners run into and how to solve them:
Mistake 1: Too Many Nested Nodes
Deeply nested ideas are sometimes unavoidable, but if you keep drilling down into +++ and ++++ levels, your mind map can become overwhelming and hard to follow. Thus, instead of rendering every detail, collapse less-important layers with ellipses: This keeps your map clean while hinting that there's more underneath.
Mistake 2: Unbalanced Left/Right Branches
Mixing too many branches on one side makes your diagram lopsided and visually confusing. Thus, you should set a clear direction. As mentioned earlier, you can use the top-down format with the "top to bottom direction" syntax."
Mistake 3: Long Text Breaks Layout
When node labels are too long, PlantUML may try to stretch them or misalign branches. Use skinparam maxwidth 40 to wrap long text gracefully. This keeps your diagram compact and readable, even with descriptive labels.
PlantUML Alternatives: More Methods to Make a Mind Map
PlantUML is powerful, flexible, and fits seamlessly into text-based workflows. But it's not the perfect tool for every team or situation. Knowing when to use it—and when to reach for something else—can save time and frustration.
PlantUML Limitations
While developers often love the code-like feel of PlantUML, it can present challenges for other users:
- Steep learning curve for non-developers. Writing diagrams in plain text isn't second nature for everyone. Designers, managers, or stakeholders might prefer seeing and dragging nodes visually.
- Manual layout tweaks. Although PlantUML handles basic layouts well, more complex mind maps often require manual styling (like setting directions, wrapping long text, or collapsing branches) to look polished.
- Rendering is not always WYSIWYG (What You See Is What You Get). Since diagrams are generated from code, what you type may not always appear exactly as you imagine, especially with long or overlapping nodes.
Let's say your team is preparing a client-facing roadmap; the text-based version might not be the best choice if the client needs to move things around visually or edit the map live to show you what they want to happen with the mind map or diagram.
GUI Tool Options
For teams who prefer a visual-first approach, consider GUI mind mapping tools. These are especially helpful when aesthetics or rapid collaboration are more important than version control.
Tools like EdrawMax offer the following benefits:
- Rich template libraries to get started quickly
- Drag-and-drop editing, no syntax to remember
- Live collaboration for teams and stakeholders
- Flexible export options (PDF, image, interactive web view)
These tools shine when working with clients, conducting workshops, or creating presentation-ready visuals.
Overview and Key Features of EdrawMax
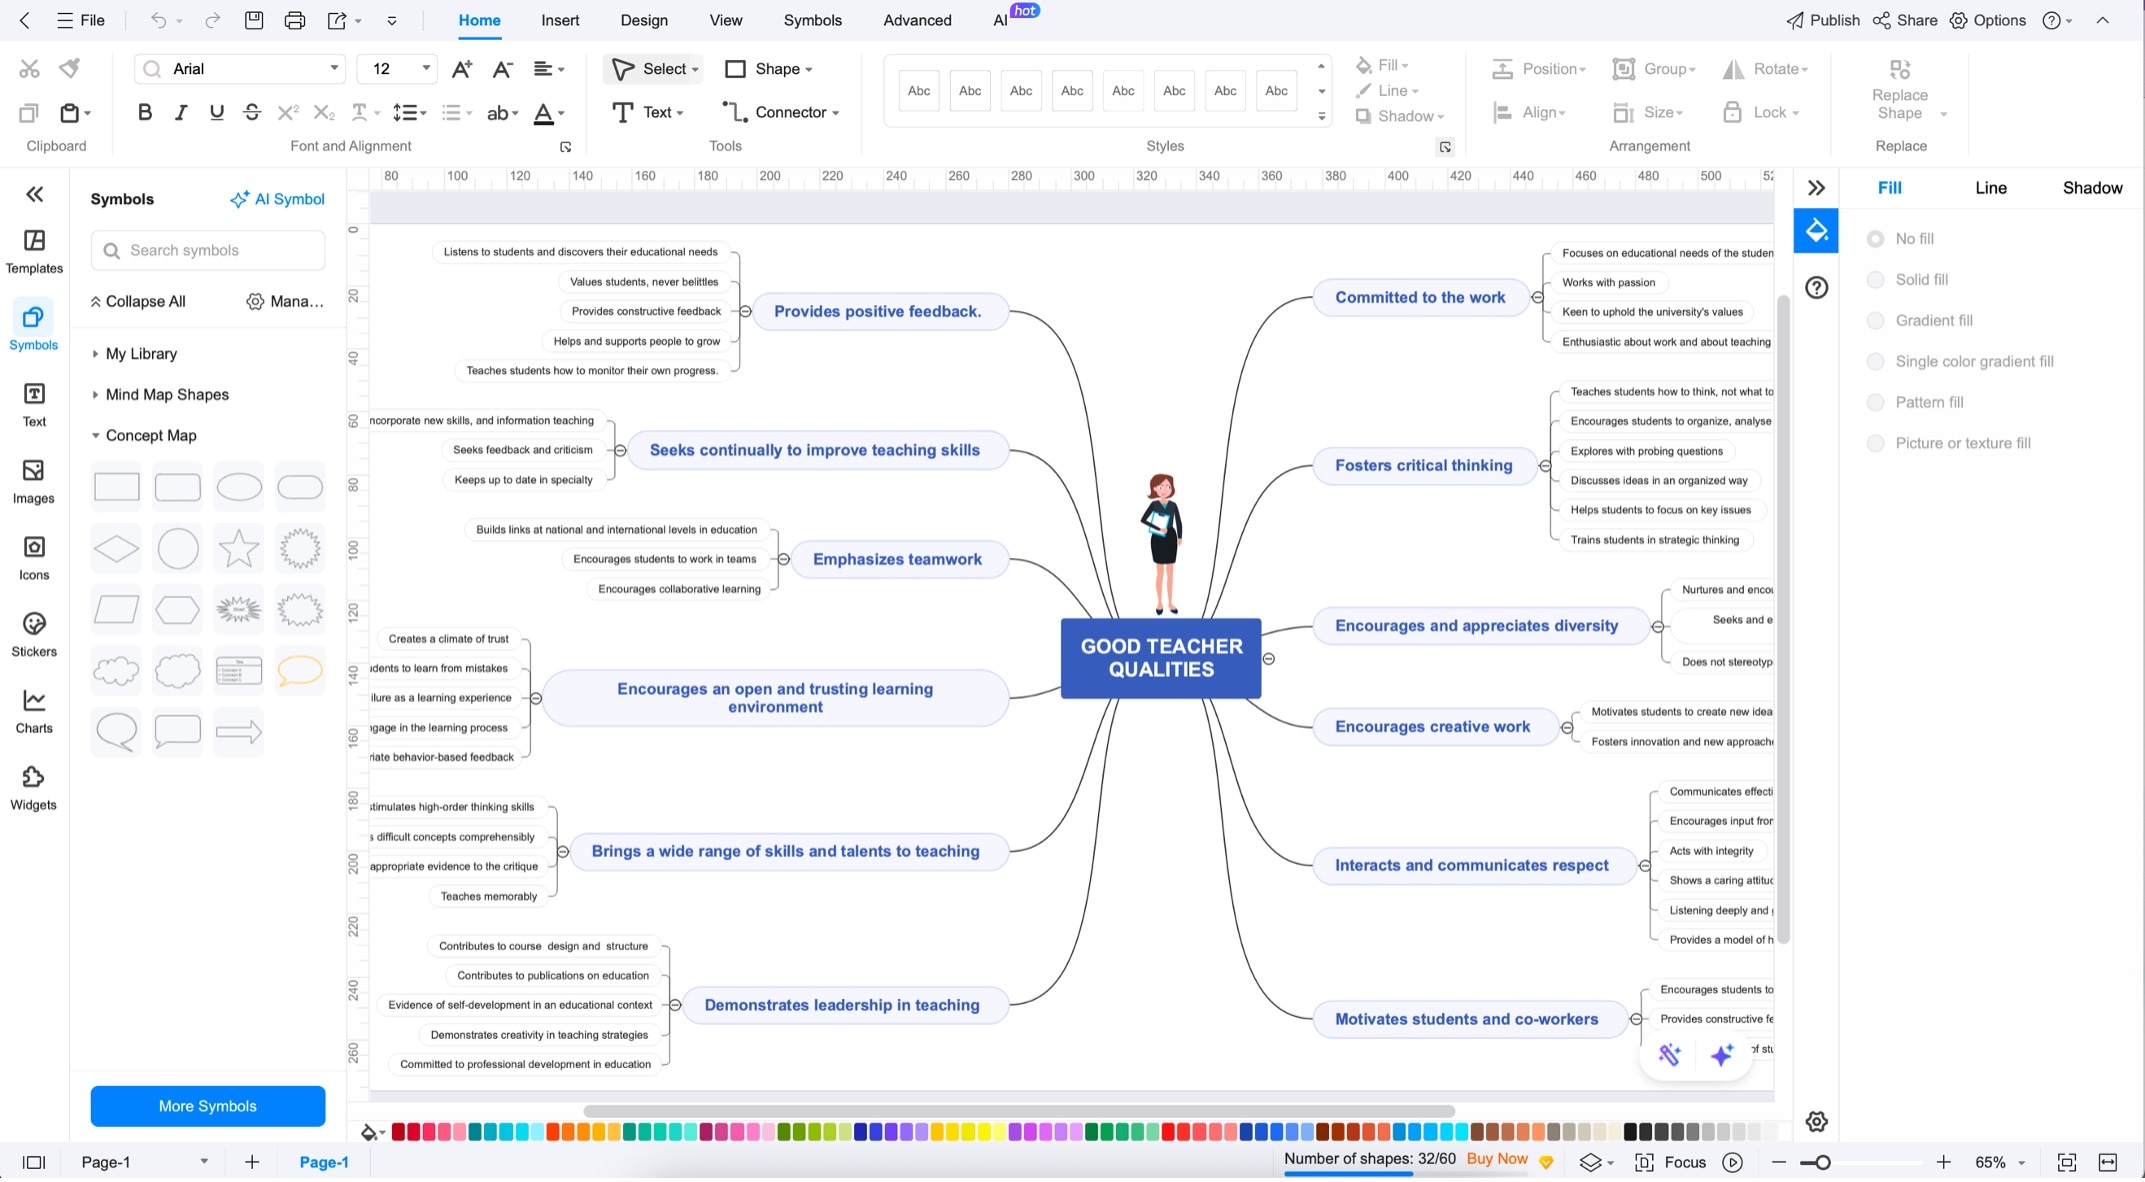
If you scour the internet for GUI-based diagramming tools available today, you'll find that Wondershare EdrawMax is a top choice. It is a flexible, all-in-one platform for creating diagrams, including mind maps. It is designed for users of different skill levels, with a natural drag-and-drop interface and a collection of templates and customization options.
So, whatever you're planning to make a mind map, Gantt chart, or any other diagram, make sure to rely on EdrawMax.
Here are some of its most useful features:
- Template library. You can quickly get started using pre-designed mind map templates or switch to other diagram types without starting from scratch.
- Drag-and-drop editing. As mentioned, you can also add branches, shapes, and more with the easy drag-to-drop interface.
- Rich styling options. You can customize colors, fonts, and layouts to match your brand or presentation needs, helping create diagrams that are both informative and polished.
- Export and sharing. You can also export your charts in various formats like PDF, PNG, Word, and Excel or share diagrams via links and cloud storage for real-time collaboration.
- Multi-diagram support. You can create mind maps, flowcharts, timelines, and organizational charts all in one workspace. It's ideal for teams working across multiple documentation types.
- AI tools. You can also benefit from EdrawMax's AI tools, which include a mind map generator, copywriter, translator, and more.
Conclusion
PlantUML is a powerful option for creating clean, version-controlled mind maps, especially in developer-centric workflows where text-based tools shine. It's fast, repeatable, and integrates seamlessly into Markdown or documentation systems.
However, GUI tools can be a better fit for non-technical collaborators or when visual speed matters. Evaluate GUI alternatives based on your team's goals for stakeholder presentations, rapid prototyping, or drag-and-drop convenience. Use the right tool for the right audience, and you'll get both worlds. Just make sure to practice your PlantUML mind maps for the right purposes.


