




A remodel floor plan should answer one question before construction starts: what stays fixed, what moves, and how will the new layout work at full scale? Drawing the existing conditions first helps you catch conflicts between doors, cabinets, appliances, plumbing, stairs, and circulation while changes are still easy to test.
For a useful remodel plan, measure the room shell and openings, mark fixed structural and utility elements, add the proposed changes on a separate version, and annotate the dimensions your contractor will need to verify on site.
This guide shows how to measure an existing space and create a remodel floor plan online, with separate checks for kitchens, bathrooms, basements, garage conversions, and other projects where layout decisions interact with structure or local requirements.
In this article
Quick answer: For a remodel, draw the existing conditions first, duplicate the plan for the proposed layout, mark fixed structural and utility elements, and compare the versions before construction decisions are finalized.
Why Should Every Remodel Start with a Floor Plan?
A remodel plan gives every proposed change a measurable location. It helps you compare alternatives before demolition and gives contractors a shared reference for dimensions, existing conditions, and the scope that still needs field verification.
Avoid Layout Mistakes Before Construction
Standing in a room, you can picture a new kitchen island roughly where you want it. What you can't picture as easily is whether the fridge door will clear it when it's open, or whether the walkway behind it still meets code once cabinets are in. A floor plan drawn to scale catches this before it becomes a problem. Skip the plan, and you find out about it the day the island gets delivered.
The same goes for anything structural. Plenty of remodels stall mid-project because a wall someone assumed was just a partition turns out to be load-bearing, or a doorway swing turns out to clip a fixture that wasn't measured. A scaled plan surfaces these issues on a screen, where fixing them costs a few clicks, instead of on-site, where fixing them costs a change order.
Communicate Clearly with Contractors
Contractors quote off what they can measure, not off what you describe. Tell a contractor you want "an open kitchen with more counter space" and you'll get a rough guess. Hand them a plan with real wall lengths, door widths, and marked plumbing lines, and you'll get an accurate bid the first time.
This matters even more once multiple trades are involved. An electrician needs to know where outlets move. A plumber needs to know where the sink relocates relative to the existing stack. A plan that shows all of this at once means every trade is working from the same information, instead of three different mental pictures of your project.
Compare Multiple Remodel Options Before Spending Money
The cheapest place to test an idea is on a plan, not in your house. Once you have a base layout, duplicate it and try two or three versions, move a wall in one, keep it in another, relocate the bathroom door in a third. Looking at them side by side makes the tradeoffs obvious in a way that imagining each option separately never does.
Skip this step and you're testing ideas with your actual budget instead. A wall that comes down and then needs to go back up, a fixture that gets installed and then relocated, these cost real money and real time. A duplicated plan costs neither.
How to Measure Your Existing Space?
Every remodel plan starts with numbers, not impressions. "The kitchen feels small" doesn't help a contractor. "The kitchen is 11 feet by 9 feet with a 32-inch doorway" does. Go room by room with a tape measure before you draw anything.
Walls, Doors, Windows, and Ceiling Height
Measure every wall length corner to corner. Do the same for every door and window: width, height, and sill height off the floor. Door swings matter more than people expect, since a swing can eat 2 to 3 feet of usable floor space once it's drawn to scale.
Measure ceiling height directly, don't guess it. If you're finishing a basement into living space, most codes require a minimum of 6'8" from the finished floor to the underside of the joists. Measure at the lowest point in the room, since ductwork or beams can drop clearance below what the rest of the ceiling suggests.
Plumbing, Electrical, and Load-Bearing Constraints
Mark every plumbing stack, drain line, and electrical panel on your plan before deciding where anything new goes. Moving a sink or toilet a few feet can mean rerouting a drain line under the slab.
For load-bearing walls: if a wall sits in the exact same spot on the floor above, it's likely part of the load path. Exterior walls are almost always load-bearing. A wall running parallel to the floor joists isn't automatically safe to remove either, since it can still carry a beam or a concentrated load from above. Confirm with a contractor or structural engineer before removing anything, this only tells you what to check, not a final answer.
Furniture, Appliance, and Cabinet Dimensions
Measure the actual furniture and appliances going into the space, not catalog averages. A refrigerator needs room for its door to swing fully open. A dishwasher needs room for its door to drop and stay down while loading. A bed needs space on at least one side to make it.
Measure each piece before finalizing the layout. It takes a few minutes and prevents a plan that works on paper from failing once the furniture is actually in the room.
How to Draw a Remodel Floor Plan Online
Draw the existing space first and save it as the baseline. Duplicate that plan for each remodel option so the original measurements remain intact while you compare walls, fixtures, doors, storage, and circulation.
Step 1: Open a new Floor Plan
Launch EdrawMax.
Log in or sign up.
Once launched, click New in the top left corner, then select Floor Plan from the diagram categories.
Step 2: Go to Wall, Shell, and Structure
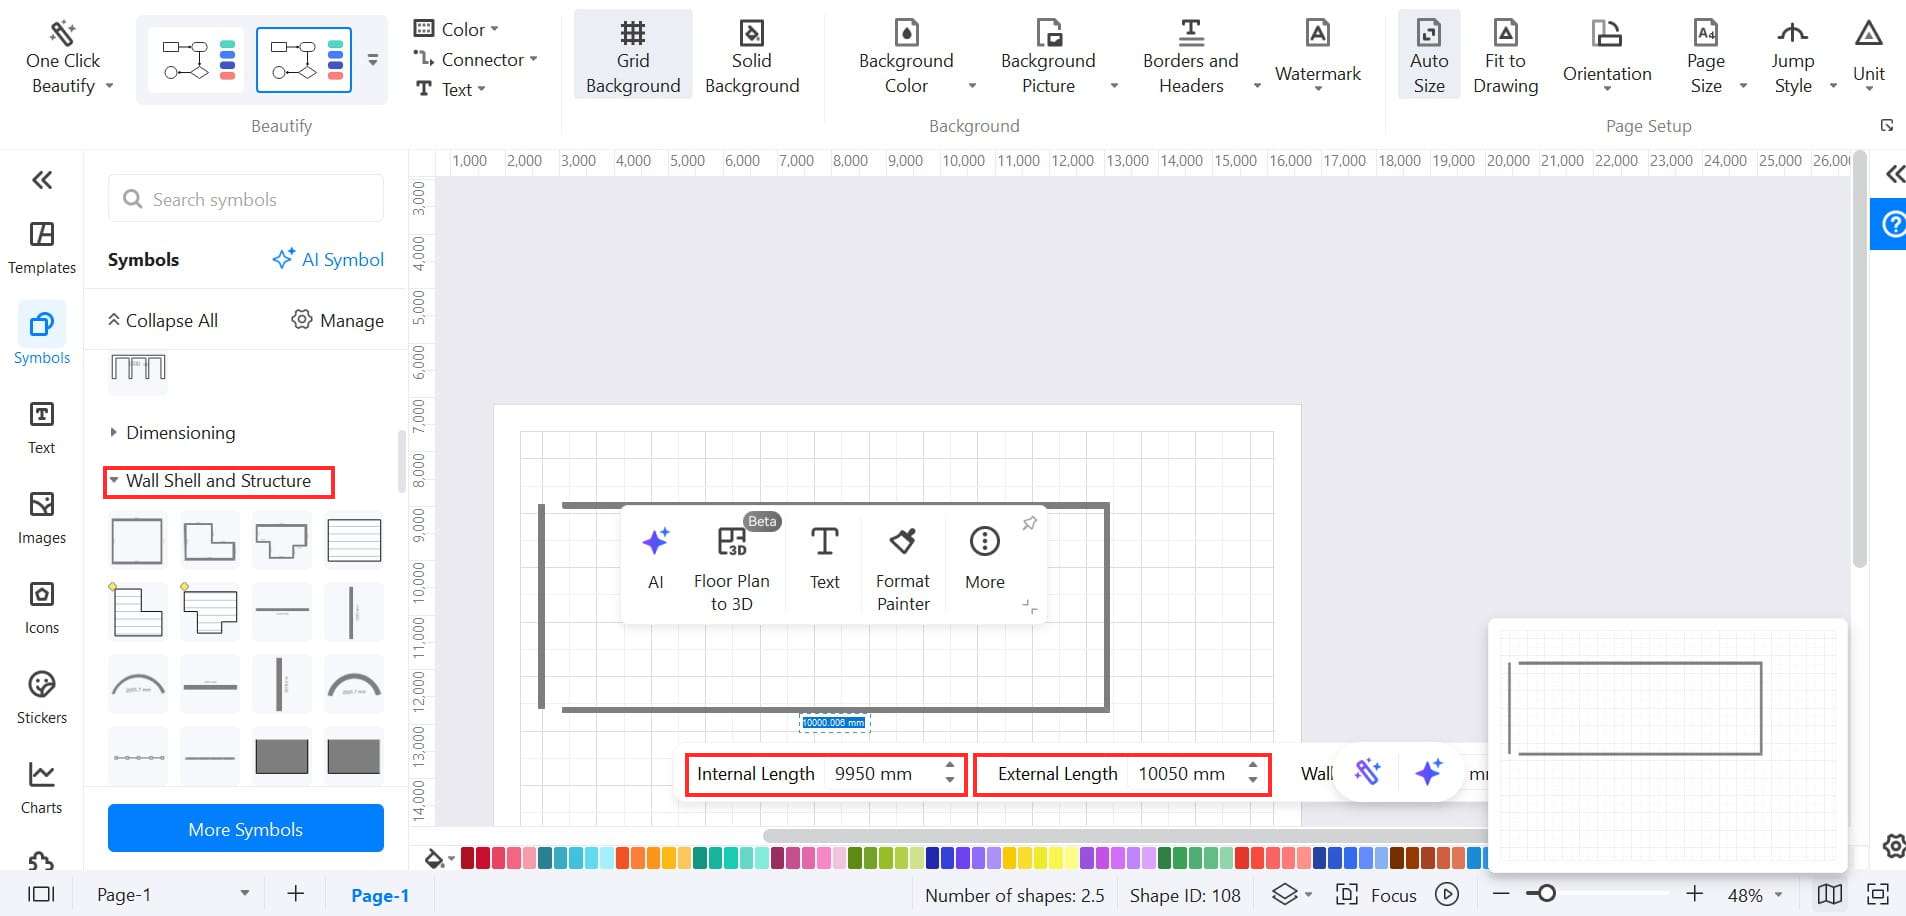
Once inside the floor plan editor, open Wall, Shell, and Structure from the symbol library to access wall and room shapes.
Step 3: Set your scale to match your real measurements
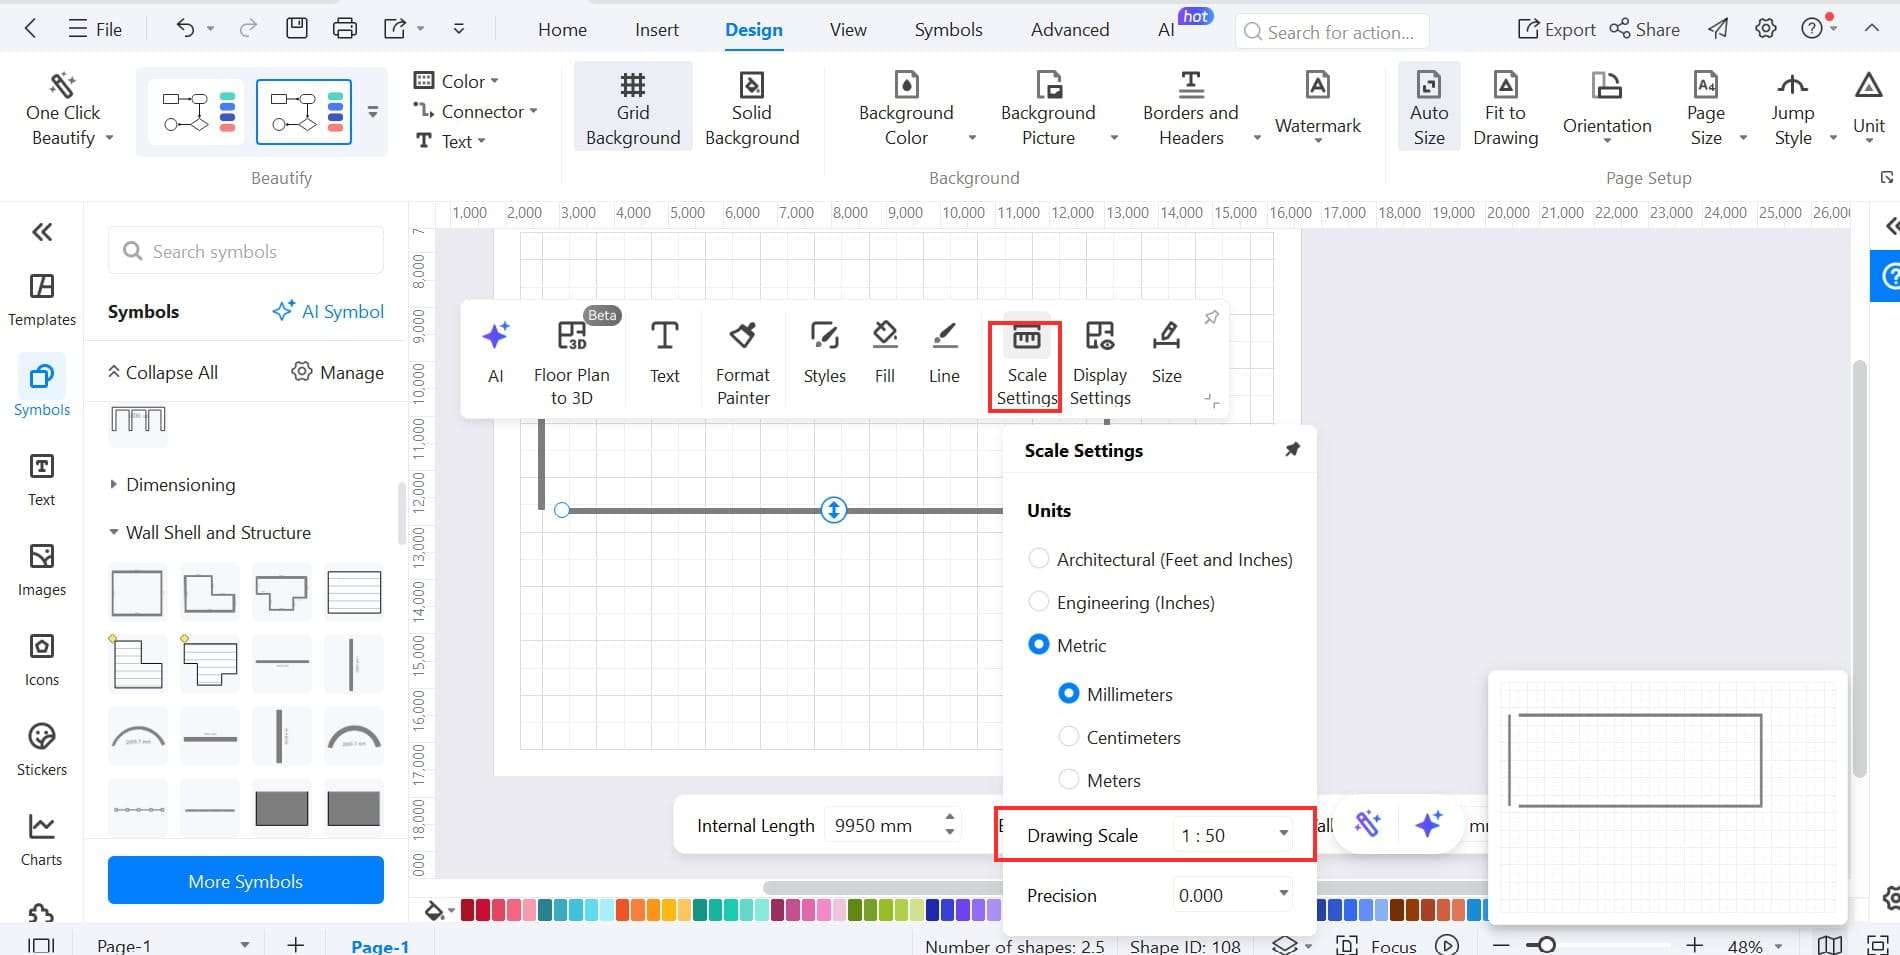
Click Scale Settings and set the drawing scale to match the actual measurements you took from your space, so every wall and room you place afterward stays accurate to real dimensions.
Step 4: Draw your exterior walls
Drag wall shapes from the Wall, Shell, and Structure panel onto the canvas to trace the outline of your space.
Type your measured wall lengths directly into the Internal Length and External Length fields as you go, shown in Step 2 above, instead of drawing by eye.
Step 5: Add interior walls and room divisions
Drag additional wall segments to divide the space into rooms, matching your measured wall lengths the same way.
Step 6: Place doors, windows, and fixtures
Open Doors and Windows in the symbol library and drag the correct symbols onto each wall opening, resizing them to match your actual measurements.
Add fixtures and furniture from the relevant symbol libraries the same way.
Step 7: Label and annotate for your contractor
Use the Text tool to add dimension labels, notes on load-bearing walls, or plumbing/electrical markers directly on the plan.
Step 8: Save and export
Use File → Save As to keep an editable EdrawMax project file
Click File → Export to save a JPG or PDF version to share with your contractor or permit office.
Several other export options are available like PPTX, Word, and many others.
Remodel Scenarios to Plan Carefully
Kitchen Remodel Floor Plans
Kitchen layouts still get planned around the classic work triangle: the path between the sink, stove, and refrigerator. No single leg of that triangle should run longer than 9 feet, and the total perimeter shouldn't exceed 26 feet. Go past either number and you're walking farther than you need to every time you cook.
Walkway width decides whether that triangle actually works in daily use. Aim for at least 32-inch-wide work aisles, measured counter edge to counter edge, and 36-inch-wide passageways for a single-cook kitchen. If two people regularly cook together, widen that clearance to 48 inches, or you'll spend half of every meal stepping around each other.
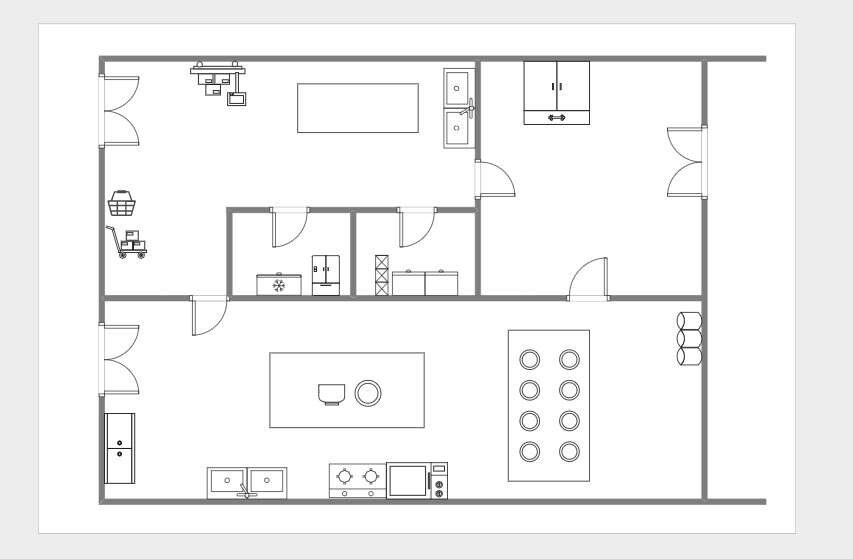
kitchen remodel floor plan


Bathroom Remodel Floor Plans
Bathroom layouts answer to plumbing code more than personal preference. A toilet can't sit closer than 15 inches from its center to any side wall or vanity, and needs at least 21 inches of clear space in front of it, per the International Residential Code most US jurisdictions follow. Treat these as the absolute floor, not a target. A toilet at exactly 15 inches passes inspection and still feels cramped in daily use.
Check the door swing against that front clearance before you finalize anything. A large share of bathroom remodels fail inspection because the door clips the toilet by an inch or two, a mistake that only shows up once someone measures the swing arc, not just the open doorway.
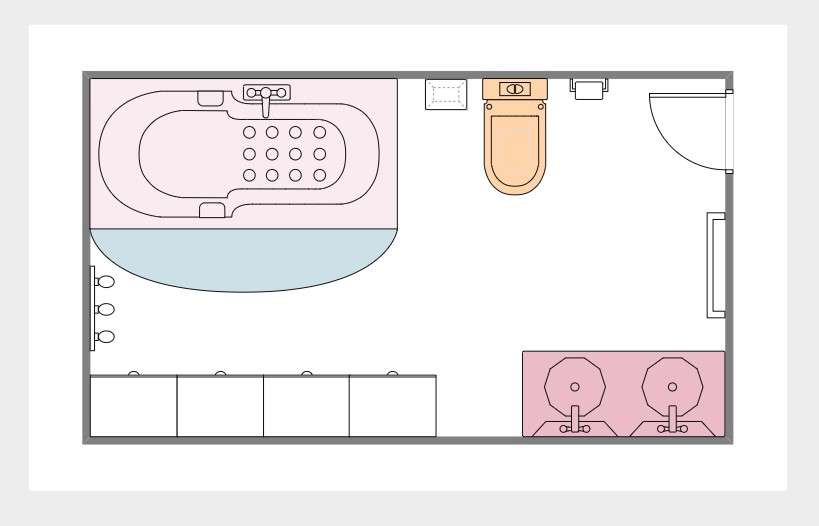
small bathroom remodel floor plan
Basement Finishing Layouts
Finishing a basement into livable space, especially a bedroom, makes egress non-negotiable. Egress windows need at least 5.7 square feet of openable area, a minimum openable width of 20 inches and height of 24 inches, and a sill no higher than 44 inches above the finished floor. No walkout door or exterior stairwell means the window is the only legal way out, and inspectors will require one in any room used for regular habitation, not just a bedroom.
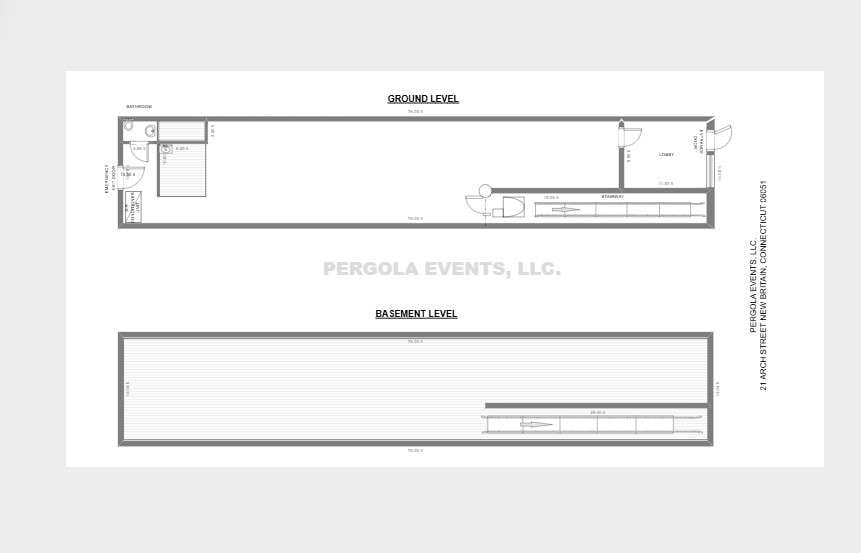
basement remodel floor plan
Garage Conversion and ADU Planning
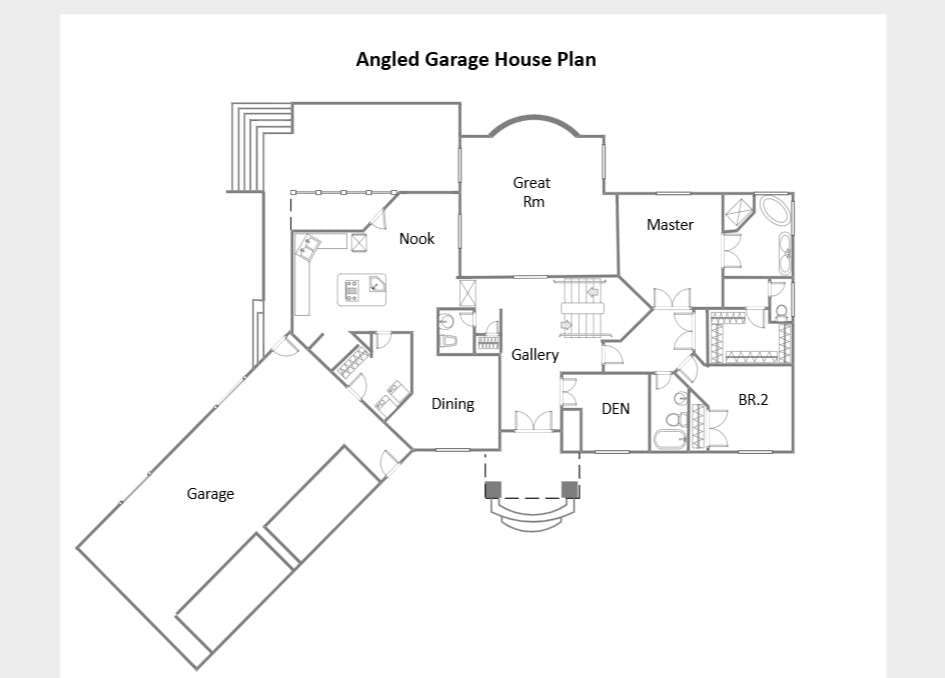
Turning a garage into an ADU comes with rules a standard remodel doesn't. The garage door has to come out entirely, replaced with real walls, windows, and trim that match the rest of the structure. Most jurisdictions set a minimum ADU size around 150 square feet, so a very small garage may not qualify without an addition. Every ADU also needs its own kitchen sink, separate from the bathroom, and every bedroom inside it needs the same 5.7 square foot egress window a basement conversion requires.
garage conversion and house plan
The risk generic floor plan advice skips:
Every scenario above looks like a layout problem until you check what's hidden behind the walls. A kitchen plan that ignores where the drain stack actually runs. A bathroom plan that assumes the toilet can move freely. A basement plan that checks average ceiling height instead of the lowest point in the room.
Each one looks correct on paper and fails once a contractor or inspector gets involved. Before finalizing any remodel floor plan, confirm three things a drawing alone won't show you: your plumbing vent stack location, your electrical panel's spare capacity for new circuits, and your actual ceiling height at its lowest point, not its average.
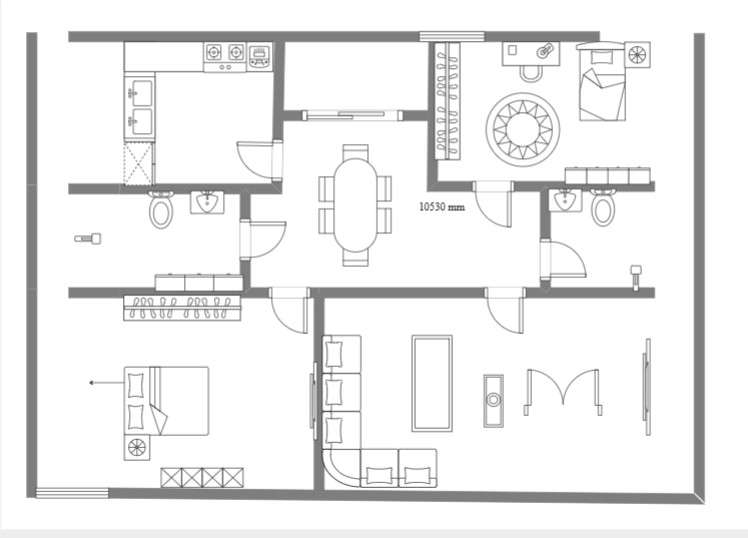
Once these scenario-specific risks are checked, the fastest way to test whether a layout actually works is to see it drawn to scale, not just described. The example below shows what a full whole-house plan looks like once it moves past the sketch stage, every room, doorway, and fixture placed correctly instead of estimated.
home remodel floor plan example
If your remodel spans more than one room, starting from a template like this saves you from placing every wall and fixture manually, and gives you something concrete to hand a contractor instead of a description.
Home Remodel Floor Plan Checklist
Before any plan goes to a contractor or a permit office, run it through these three checks. Most remodel problems trace back to one of these getting skipped.
Traffic Flow, Storage, Natural Light, and Privacy
Walk your plan the way you'll actually walk the finished room, not the way it looks sitting flat on a screen. Does the path from the kitchen to the dining area cross through a doorway swing? Does a new bathroom door open straight into a hallway that's already narrow? These are easy to miss on paper and impossible to ignore once the room is built.
Check storage against how the space gets used, not how it looks empty. A closet that fits neatly into a floor plan diagram can still be the wrong depth for what's actually going in it. Natural light and privacy deserve the same scrutiny: a bathroom door that opens directly opposite a living area, or a bedroom window that faces a shared wall, are layout problems no amount of good planning elsewhere fixes after the fact.
Code, Permit, HOA, and Inspection Questions
Confirm exactly what your remodel needs before any work starts, not after a contractor is already scheduled. Removing a load-bearing wall almost always requires a building permit, and in most areas, a temporary support structure during construction. Finishing a basement requires a permit in virtually every US city, since it touches framing, electrical, plumbing, and mechanical work at once. Garage-to-ADU conversions typically need a separate ADU permit path on top of standard building permits, often with a pre-construction inspection before framing begins.
If your property has an HOA, check its rules separately from city code. HOAs can restrict exterior changes, like removing a garage door for an ADU conversion, more strictly than the municipality itself.
Free Remodel Floor Plan Templates and Resources
Once you've confirmed the zoning, code, and layout questions above, the fastest way to test a plan is to draw it before committing to it on paper or with a builder. EdrawMax works as a simple floor plan creator for exactly this, with free, editable templates built for remodel projects, including layouts for kitchens, bathrooms, basements, and garage conversions.
Start from a template close to your room type, plug in the measurements you already took, and use it as the working plan you bring to your contractor or permit office. It's a faster starting point than a blank page, and it catches problems, like a door that clips a fixture or a hallway that's narrower than it looked, before they show up in construction.
Conclusion
A remodel floor plan is most valuable before the first irreversible decision. Capture the existing conditions accurately, separate fixed constraints from proposed changes, test more than one option, and use annotations to make contractor conversations concrete. Treat the drawing as a planning and communication tool until the project-specific structural, utility, and permit details are verified.
FAQs for Design Floor Plan Free
Can I really design a floor plan for free, or does it lock behind a paywall eventually?
Most floor plan creators, including EdrawMax, let you build and edit a basic plan for free. Paid tiers usually unlock extras like advanced 3D rendering, larger template libraries, or export in certain formats, but a standard remodel floor plan with measurements and notes is achievable on the free tier.
Do I need CAD experience to create an accurate floor plan?
No. An easy floor plan creator handles scale, wall symbols, and fixture placement for you, so you're dragging and resizing shapes instead of drafting from scratch. You still need accurate measurements from your actual space, but the drawing itself doesn't require CAD training.
What information do I need before I start drawing?
Wall lengths, door and window dimensions with swing direction, ceiling height at the lowest point, and the location of plumbing stacks and electrical panels. Skipping any of these is the most common reason a finished plan doesn't match reality.
Can I use a floor plan creator app free on my phone, or do I need a desktop?
Most floor plan tools, including EdrawMax, work across desktop and mobile. A phone app is useful for quick sketches or reviewing a plan on-site with a contractor, but detailed measurement entry and multi-room layouts are usually easier on a larger screen.
Is a free floor plan tool accurate enough for a contractor to quote from?
Yes, as long as the measurements you enter are accurate and the plan includes real dimensions, not just a rough sketch. Contractors quote off the numbers on the plan, not the software used to make it, so a free tool with correct measurements works the same as a paid one.
How do I know if a floor plan creator is simple enough for a beginner?
Look for template-based tools rather than blank-canvas CAD software. A simple floor plan creator with pre-built room templates, drag-and-drop symbols, and preset wall thicknesses gets you to an accurate plan without a learning curve, which matters most if this is your first remodel project.
AI Diagram Generator
Enter your prompt. Upload files if needed. Generate diagrams, charts, or slides instantly.





 (AI & Web)