EdrawMax User Guide for Desktop
-
Get Started with EdrawMax
-
User Interface
-
Basic Operations
-
Advanced Operations
-
Shape Operations
-
Drawing Tools
-
Formatting and Styling
-
Text Operations
-
Symbol and Library
-
Insert/Add Objects
-
Page Settings
-
Presentation Mode
-
AI Features
- How to Make a Diagram with Edraw AI
- AI Slides
- AI Infographics Generator
- AI Copywriting
- AI Stickers
- AI Symbols
- AI Analysis
- AI Drawing
- AI OCR
- AI Diagram Generator
- AI Framework Generator
- AI Floating Ball
- AI Chatbot
- AI Flowchart
- AI Mind Map
- AI Timeline
- AI Table
- AI List
- AI SWOT Analysis, PEST Analysis, and Lean Canvas
- AI User Profile
-
How to Make a Flowchart
-
How to make an Org Chart
-
How to make a Gantt Chart
-
How to Make a Mind Map
-
More examples
Background and Layer
In EdrawMax, the Background and Layer feature helps users enhance the visual appeal of diagrams and organize the shapes within them. To add background and create new layers, refer to the guide below:
Background
Backgrounds play a role in defining the overall look of your diagram canvas or page. To give your diagram context or style by selecting different backgrounds, follow these instructions:
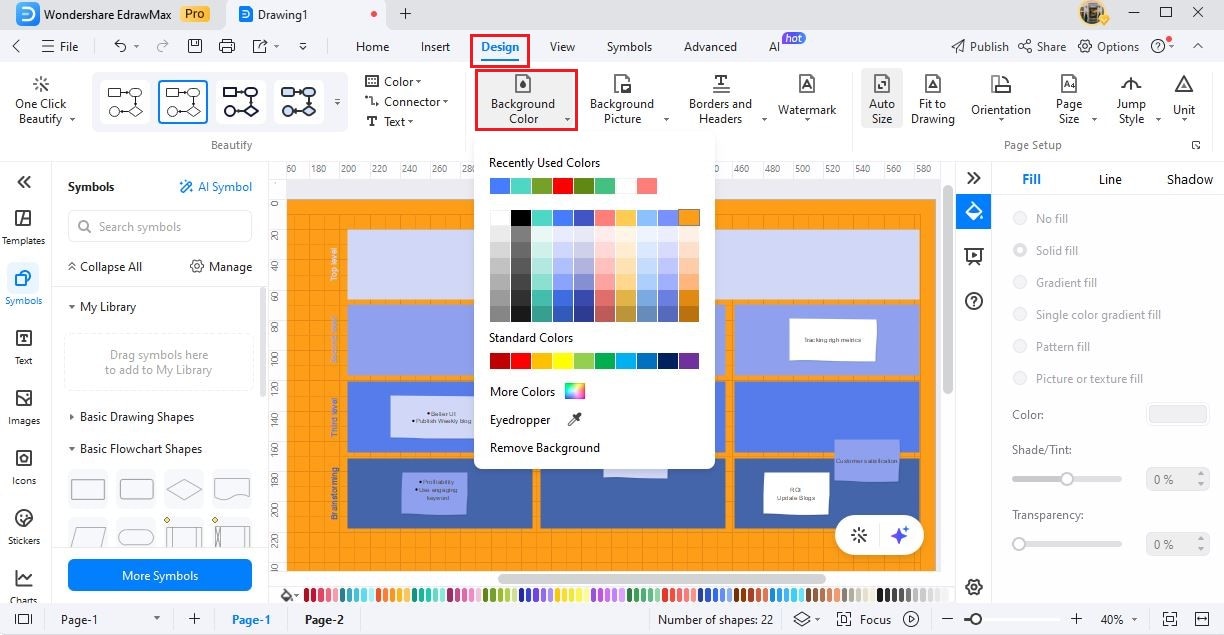
Step 1: To add only one color to the background color on your document, go to the Design tab and click Background Color. Choose the color you desire for your background.
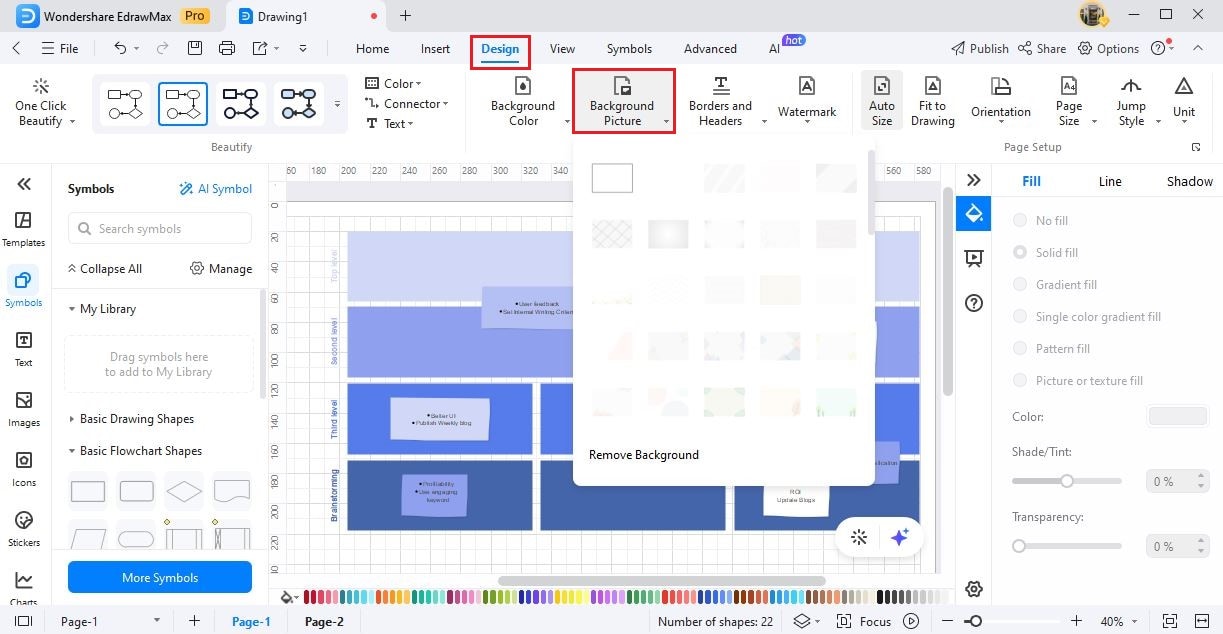
Step 2: To add a background picture, navigate the Design tab and click Background Picture. Hover your mouse and choose the background picture you desire from the options.
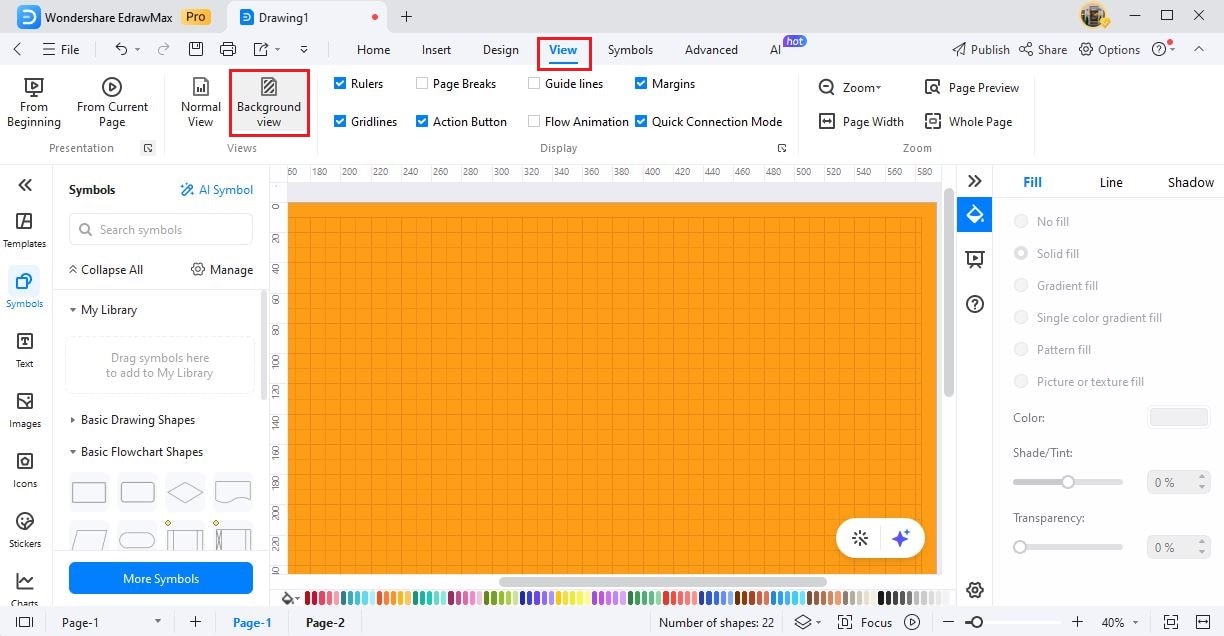
Step 3: To edit the predefined or blank backgrounds, click Background View in the View tab.
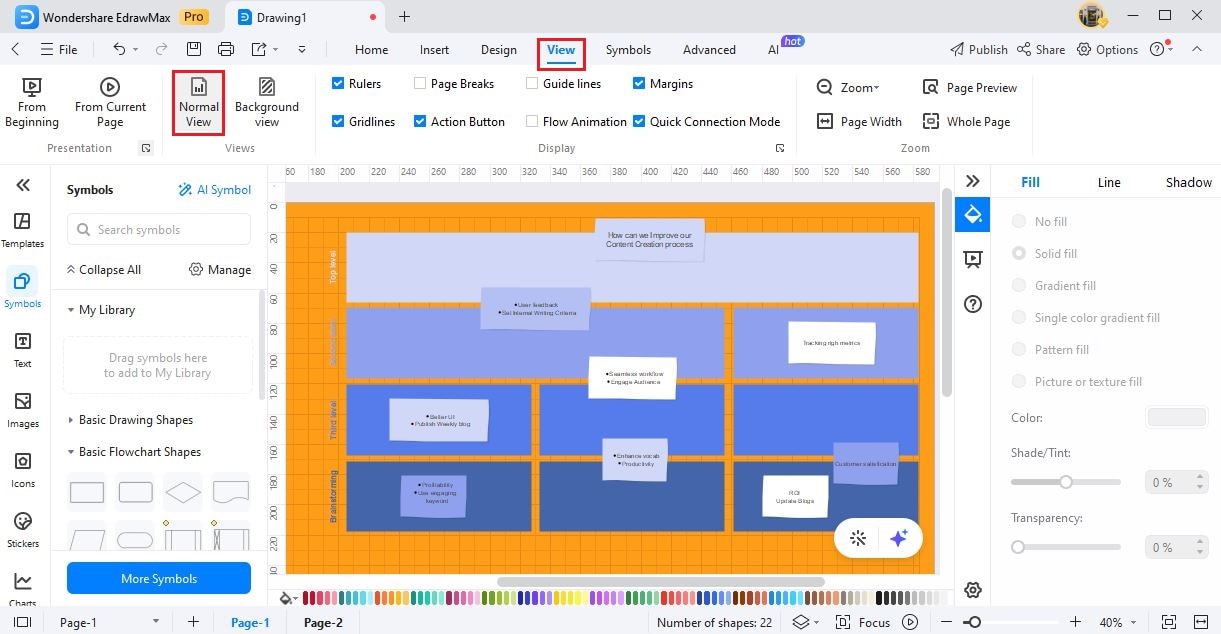
Step 4: After editing, click the Normal View button to switch to the normal view.
Layers
Layers serve the purpose of organizing and handling the components within your diagram. To manage how different objects are displayed and layered, you can use the following steps:
Step 1: Click the Layers icon on the right bottom sidebar to open the layers pane.
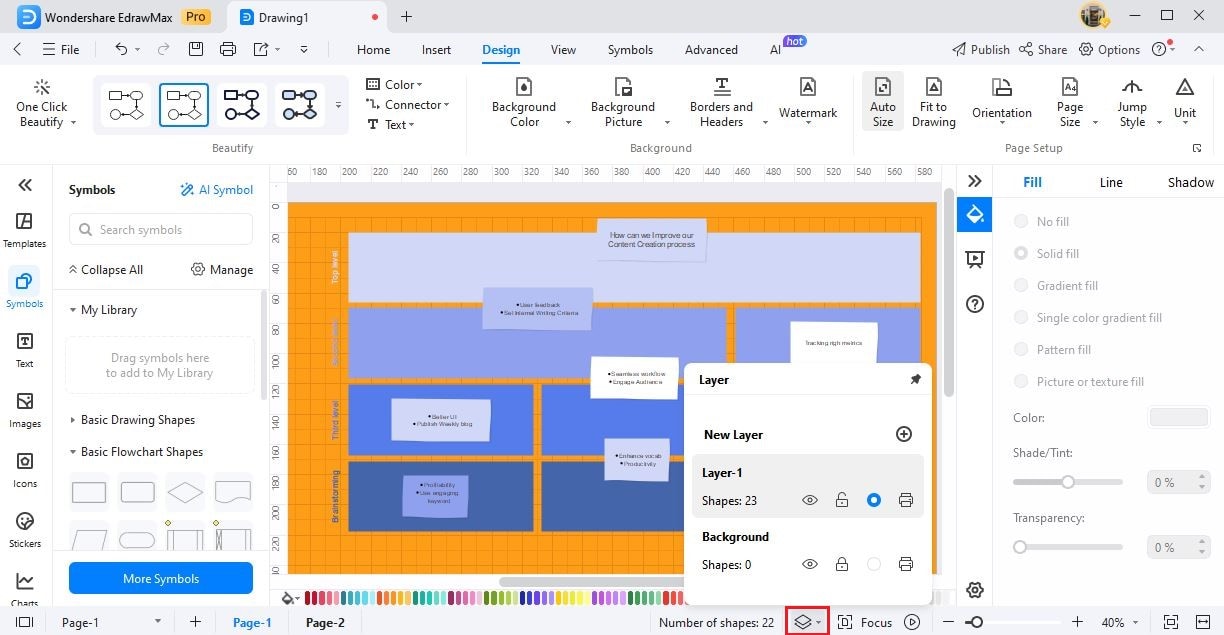
On the layer pane, you can also:
- Click the New button on the top of the pane to create a new layer.
- Click the eye icon to hide the shapes in a layer.
- Click the lock icon to prevent selecting or editing shapes in a layer.
- Click the active icon to add shapes to the current layer.
- Click the print icon to prevent printing shapes in a layer.
- Click the pen icon to change the layer names.