EdrawMax User Guide for Desktop
-
Get Started with EdrawMax
-
User Interface
-
Basic Operations
-
Advanced Operations
-
Shape Operations
-
Drawing Tools
-
Formatting and Styling
-
Text Operations
-
Symbol and Library
-
Insert/Add Objects
-
Page Settings
-
Presentation Mode
-
AI Features
- How to Make a Diagram with Edraw AI
- AI Slides
- AI Infographics Generator
- AI Copywriting
- AI Stickers
- AI Symbols
- AI Analysis
- AI Drawing
- AI OCR
- AI Diagram Generator
- AI Framework Generator
- AI Floating Ball
- AI Chatbot
- AI Flowchart
- AI Mind Map
- AI Timeline
- AI Table
- AI List
- AI SWOT Analysis, PEST Analysis, and Lean Canvas
- AI User Profile
-
How to Make a Flowchart
-
How to make an Org Chart
-
How to make a Gantt Chart
-
How to Make a Mind Map
-
More examples
Edit Gantt Chart Data
EdrawMax's allows users to tailor their project plans according to their requirements, guaranteeing that the Gantt chart remains up-to-date and accurately represents the project's ongoing status. To edit your Gantt Chart data, follow the steps below:
Tasks
Step 1: When you select a task in your Gantt Chart, it will become orange. Press the Ctrl key and click another task to select multiple tasks. The context menu will pop up, and choose whether to move the task or add a subtask.
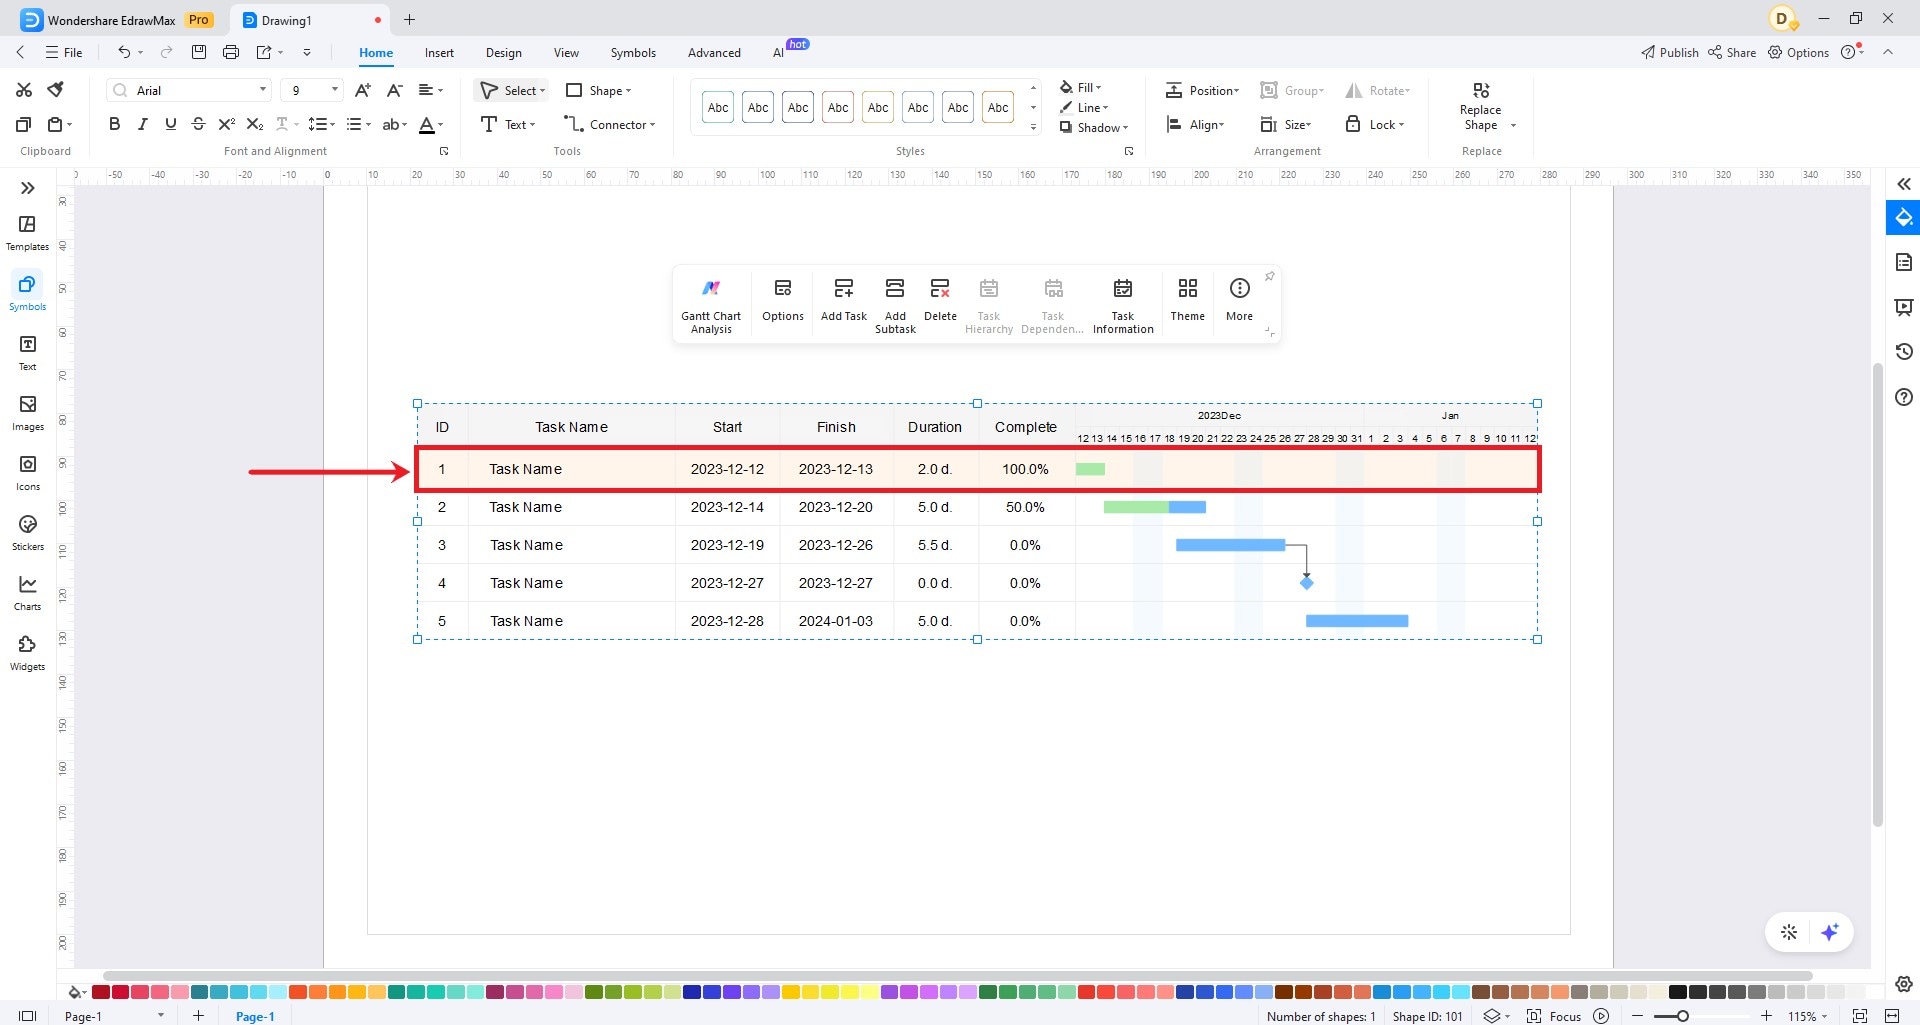
The following guide shows how to set the operations:
- Change a task name: Double-click the cell in the Task Name column and input the new name you want.
- Change task start or finish date: Double-click the cell in the Start/Finish column and input the new date. Ensure that the new data format is the same as the rest of the chart.
- Change task duration: Double-click the cells in the Duration column and type the new value.
- Change task complete percentage: Click on the left margin of the taskbar, then drag and drop it to your desired date.
- Add a new task: Right-click the task and select Add Task Before or Add Task After. Alternatively, select the task and click Add Task in the floating toolbar.
- Delete a task: Right-click the task and select Delete from the context menu. Alternatively, select a task and click Delete in the floating toolbar.
- Change task style: Pick one or more tasks, then select Theme from the floating toolbar.
Milestones
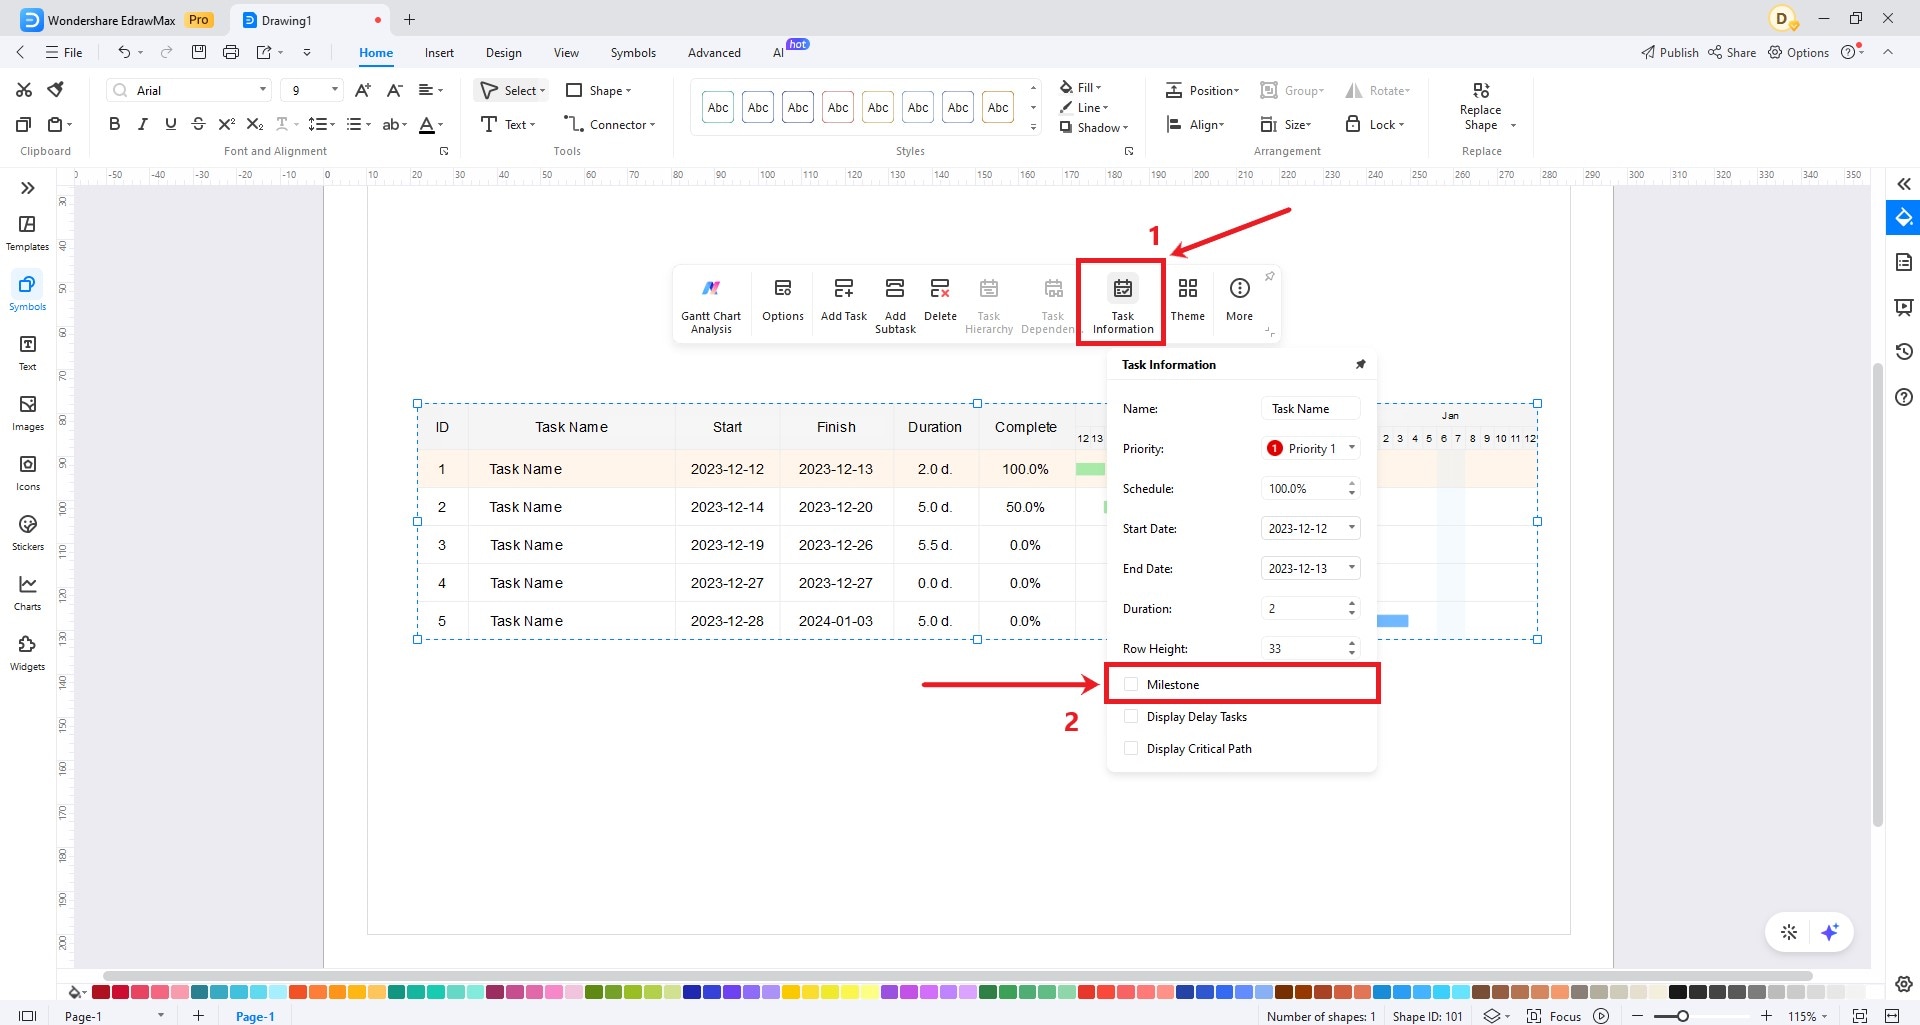
- Transform a taskbar to a milestone: Set the finish date to match the start date or indicate it as a milestone. Select a task and click Task Information in the floating toolbar. Click the checkbox with a Milestone label.
- Delete a milestone: Uncheck the Milestone option on the floating toolbar or delete the task.
Summary Task
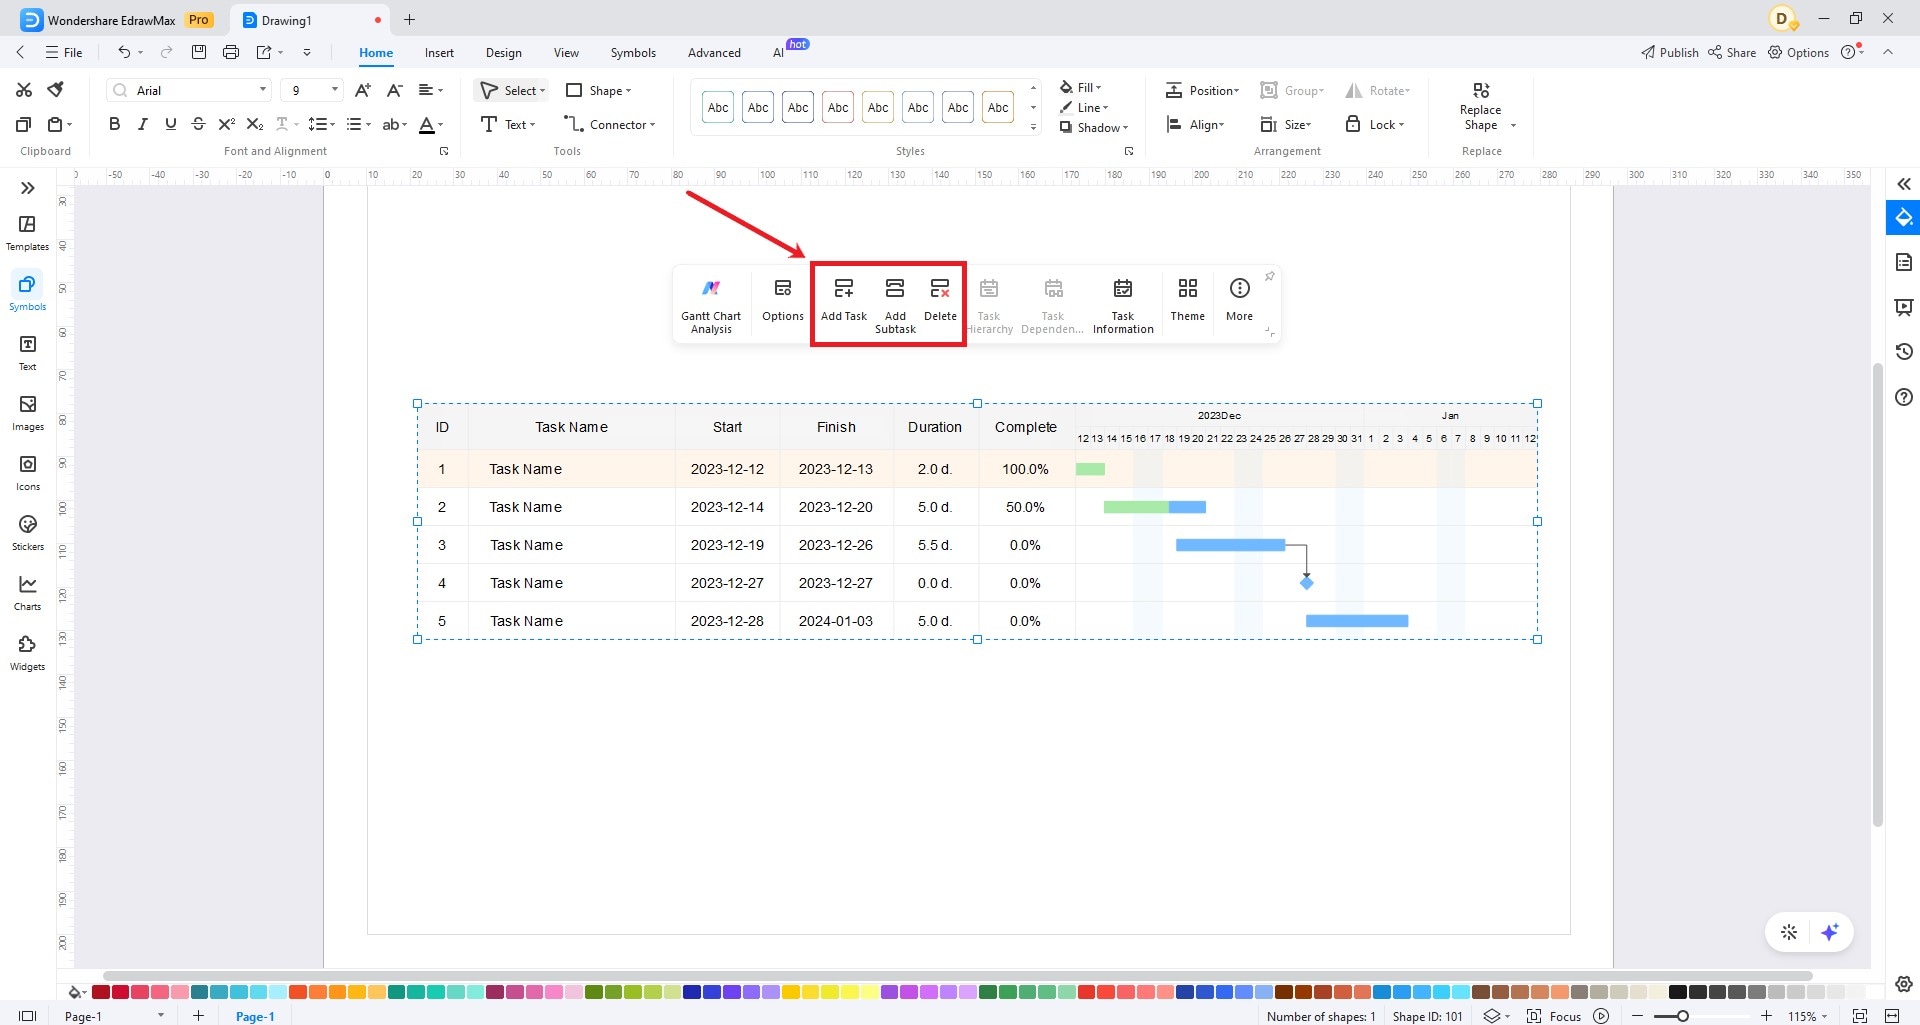
- Add a subtask: Select a task and click Add Subtask in the floating toolbar.
- Remove a subtask: Select a subordinate task and click Delete in the floating toolbar.
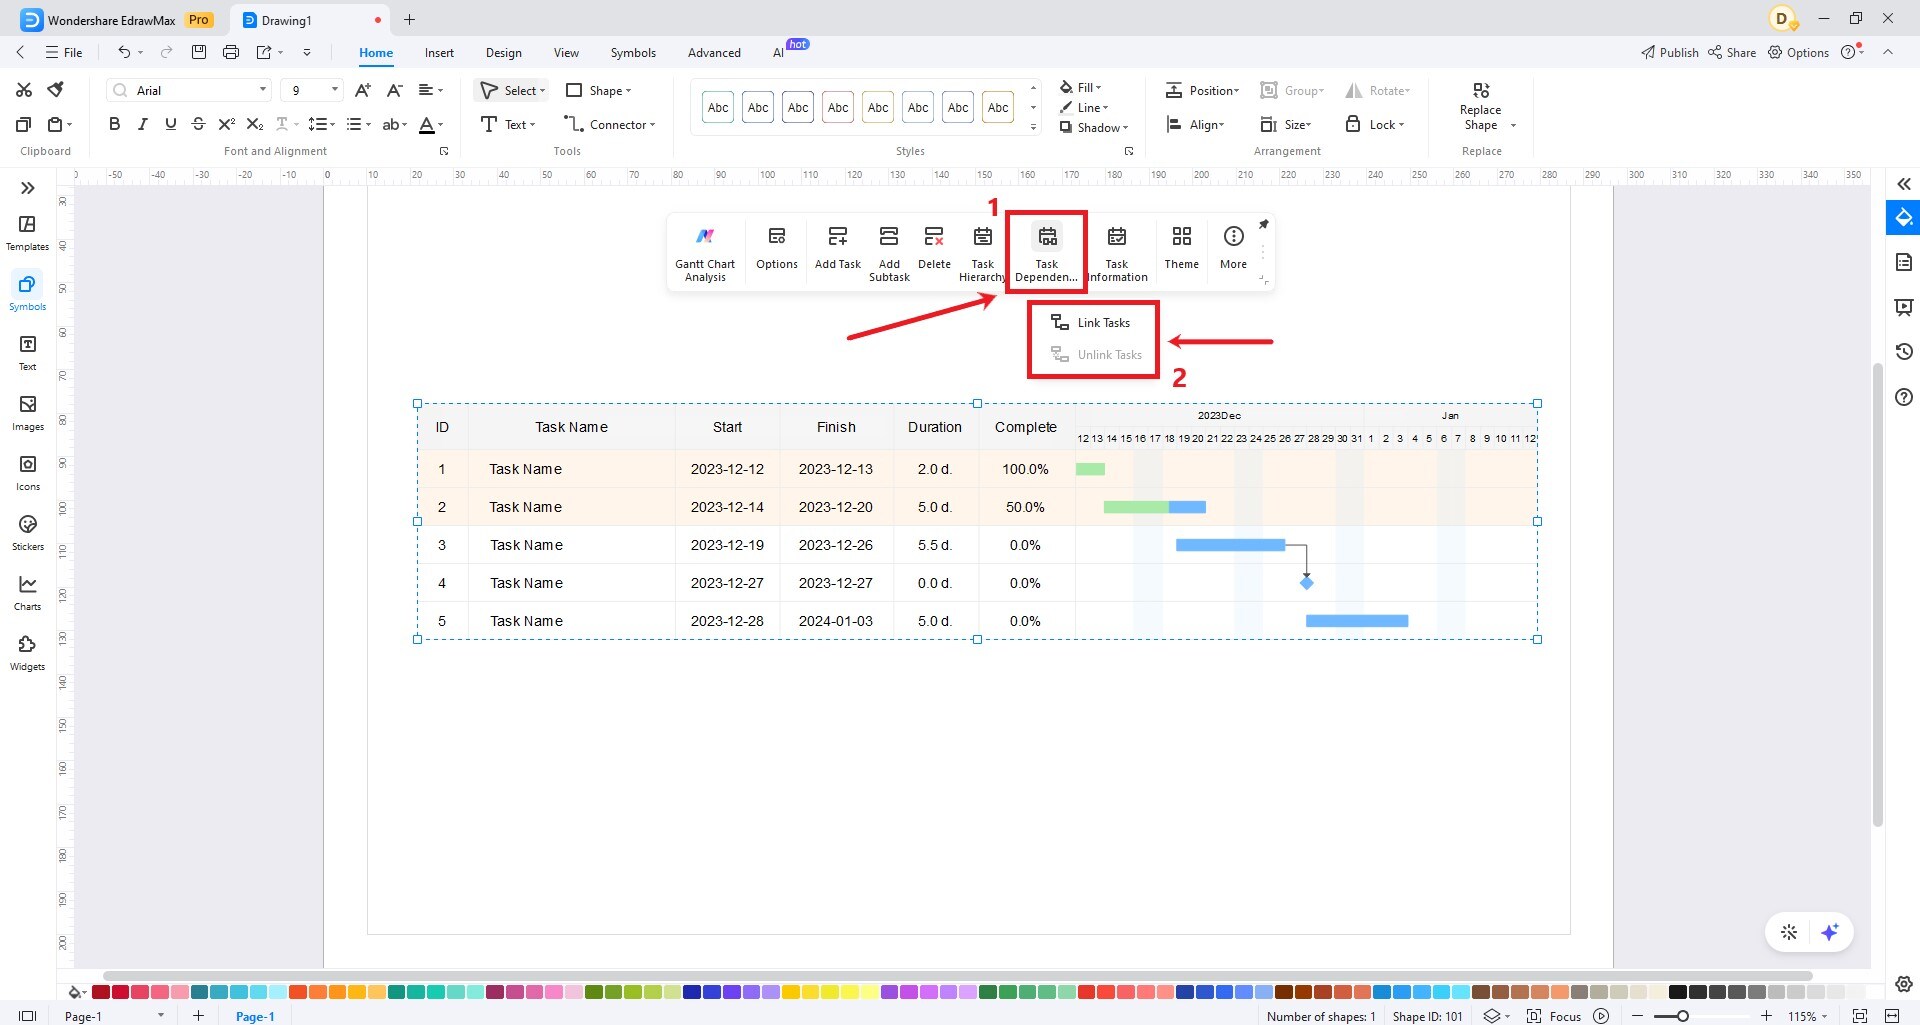
Task Dependencies
- Link tasks: Select tasks and click Task Dependencies in the floating toolbar. Click Link Tasks from the options.
- Unlink tasks: Select the linked tasks and click Task Dependencies in the floating toolbar. Click Unlink Tasks from the options.
Task Label
Step 1: For more task details, you can add text labels to the taskbar. Select the task and right-click, then choose whether Add Left Label or Add Right Label.

Step 2: Edit label text by double-clicking and adjusting label placement.
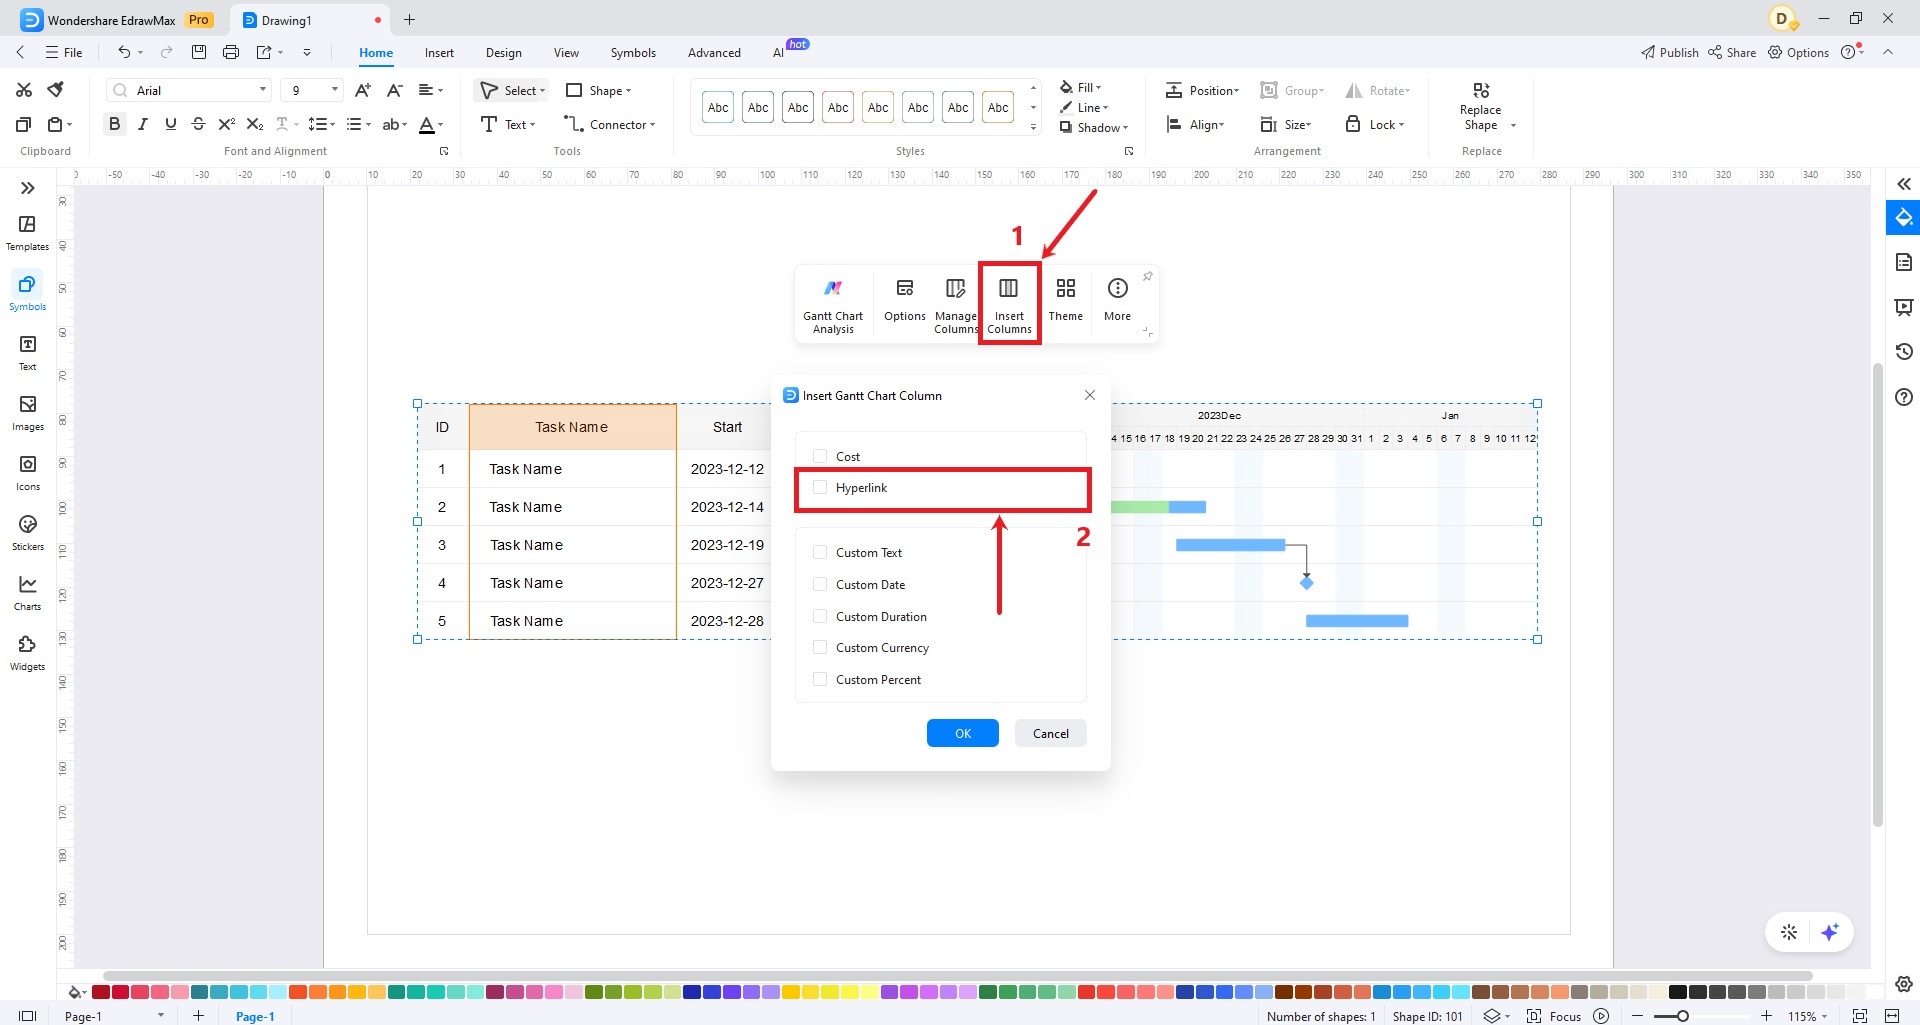
Task Hyperlink
Step 1: Select the column name and click Insert Columns in the floating toolbar. Check the Hyperlink and click OK. Alternatively, right-click the column name, select Insert Columns, and check the Hyperlink.
