EdrawMax User Guide for Desktop
User Guide for Desktop
-
Get Started with EdrawMax
-
User Interface
-
Basic Operations
-
Advanced Operations
-
Shape Operations
-
Drawing Tools
-
Formatting and Styling
-
Text Operations
-
Symbol and Library
-
Insert/Add Objects
-
Page Settings
-
Presentation Mode
-
AI Features
- How to Make a Diagram with Edraw AI
- AI Slides
- AI Infographics Generator
- AI Copywriting
- AI Stickers
- AI Symbols
- AI Analysis
- AI Drawing
- AI OCR
- AI Diagram Generator
- AI Framework Generator
- AI Floating Ball
- AI Chatbot
- AI Flowchart
- AI Mind Map
- AI Timeline
- AI Table
- AI List
- AI SWOT Analysis, PEST Analysis, and Lean Canvas
- AI User Profile
-
How to Make a Flowchart
-
How to make an Org Chart
-
How to make a Gantt Chart
-
How to Make a Mind Map
-
More examples
For Desktop
For Mobile
Create a Document
Creating and opening a document is one of the first steps that you will need to perform once you have activated your EdrawMax license. EdrawMax lets you draw from scratch or by accessing the Blank Drawing. You can also check the built-in Template community to get inspiration for your diagrams.
Create Blank Drawing
Step 1: Select Diagram Type
- From the EdrawMax homepage, find your desired diagram type
- Example: For Gantt Chart, go to Business > Quality Management > Gantt Charts
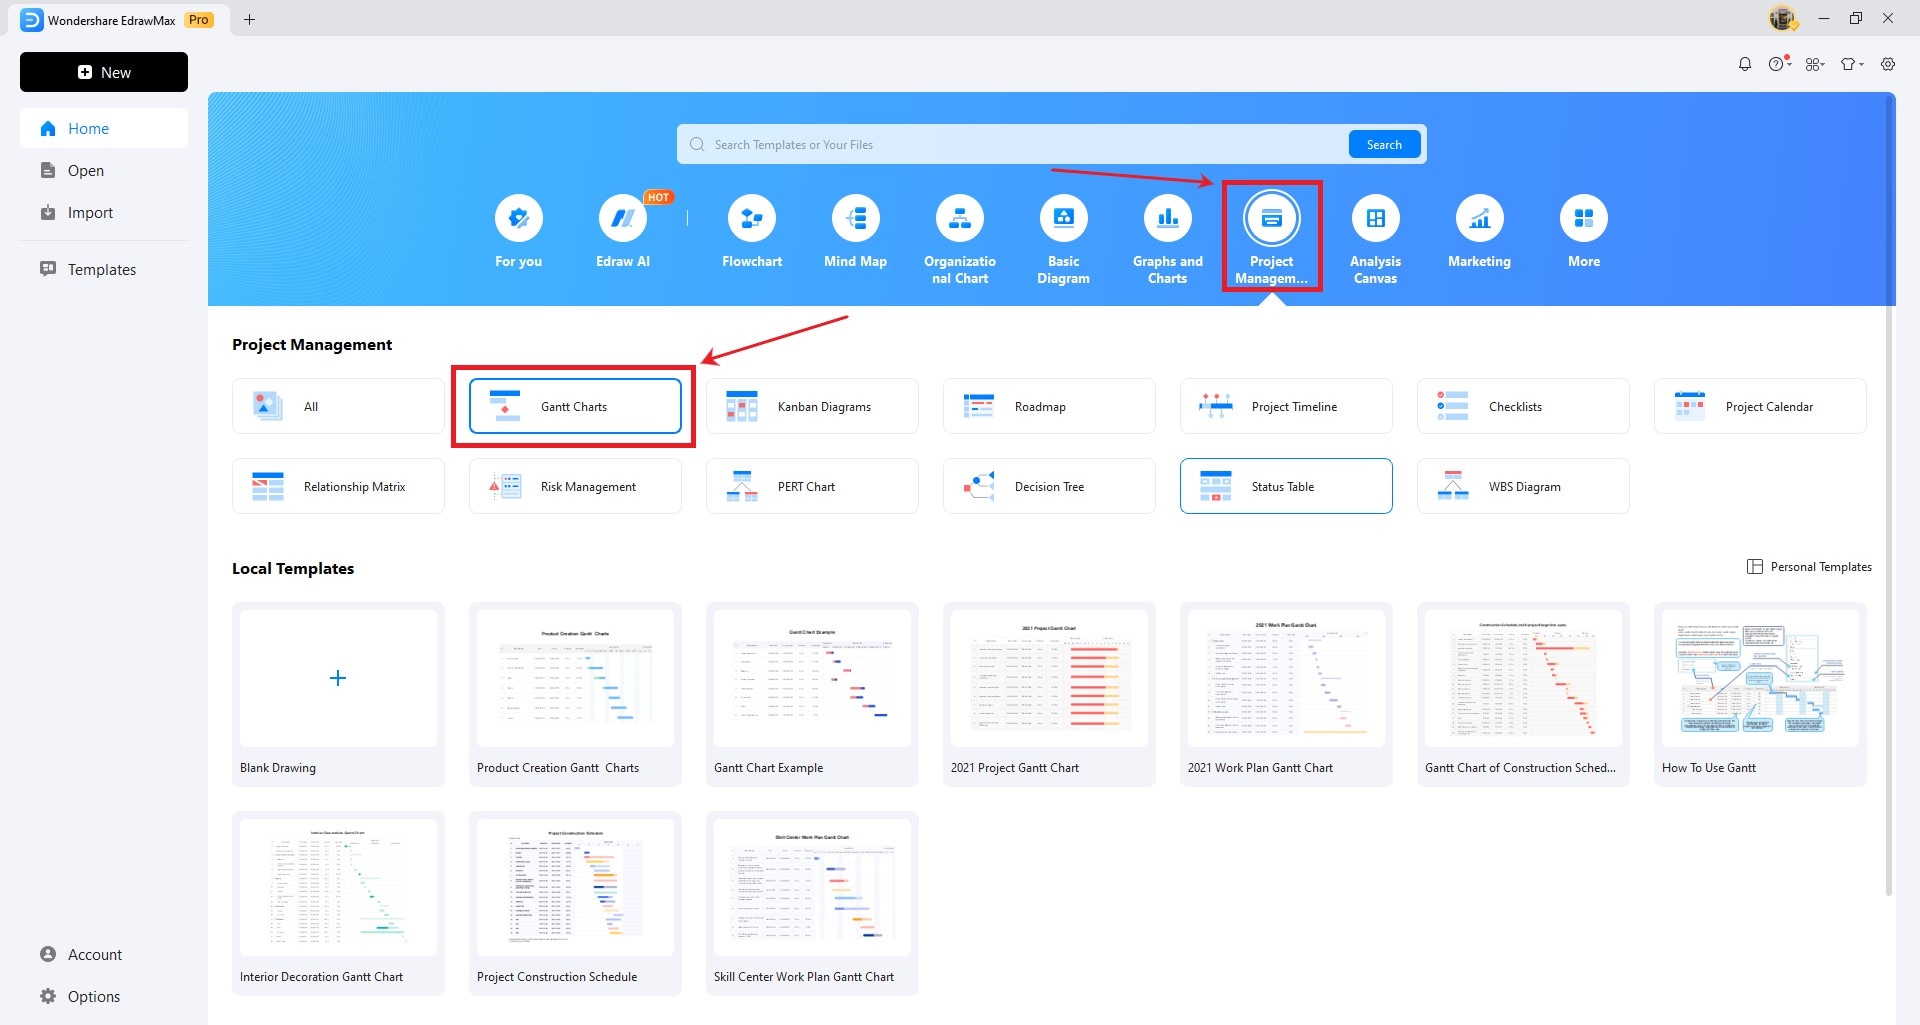
Diagram type selection menu
Step 2: Start Drawing
- Click Blank Drawing or the large '+' sign
- Alternative: Use New icon on Quick Access Toolbar
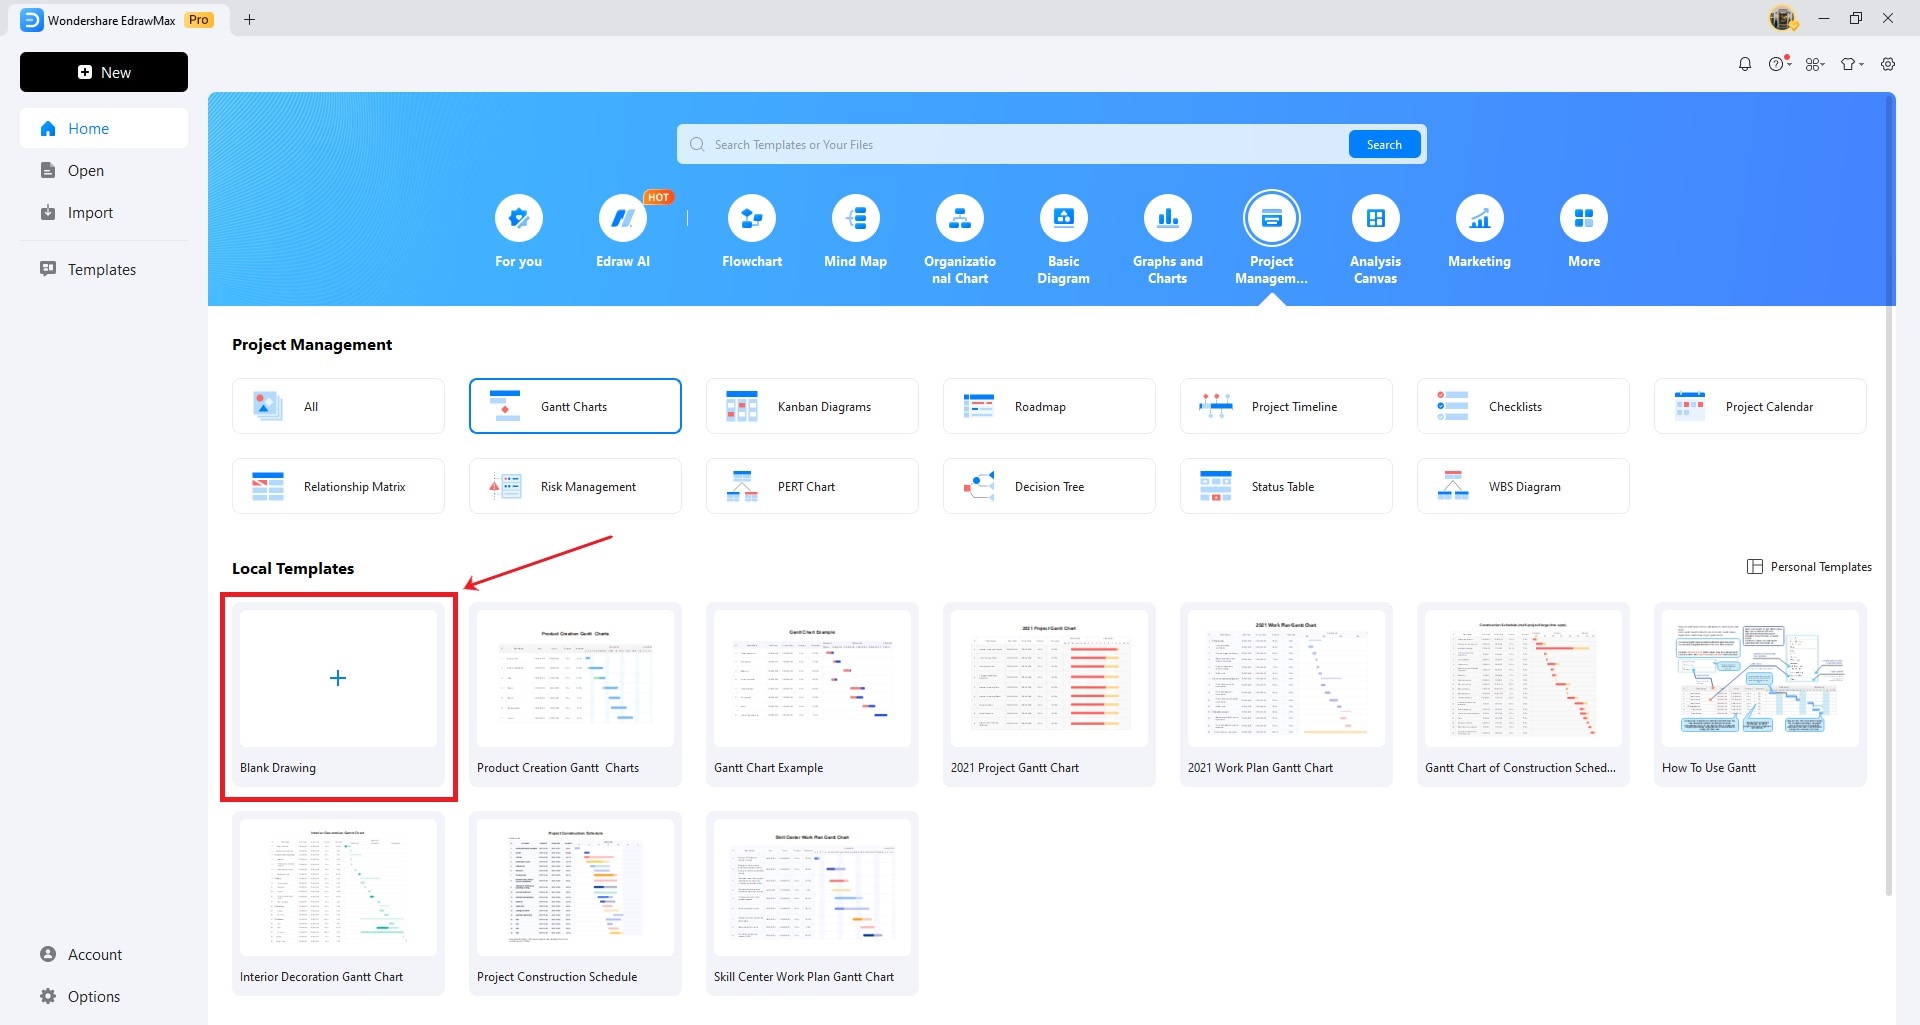
Blank drawing creation options
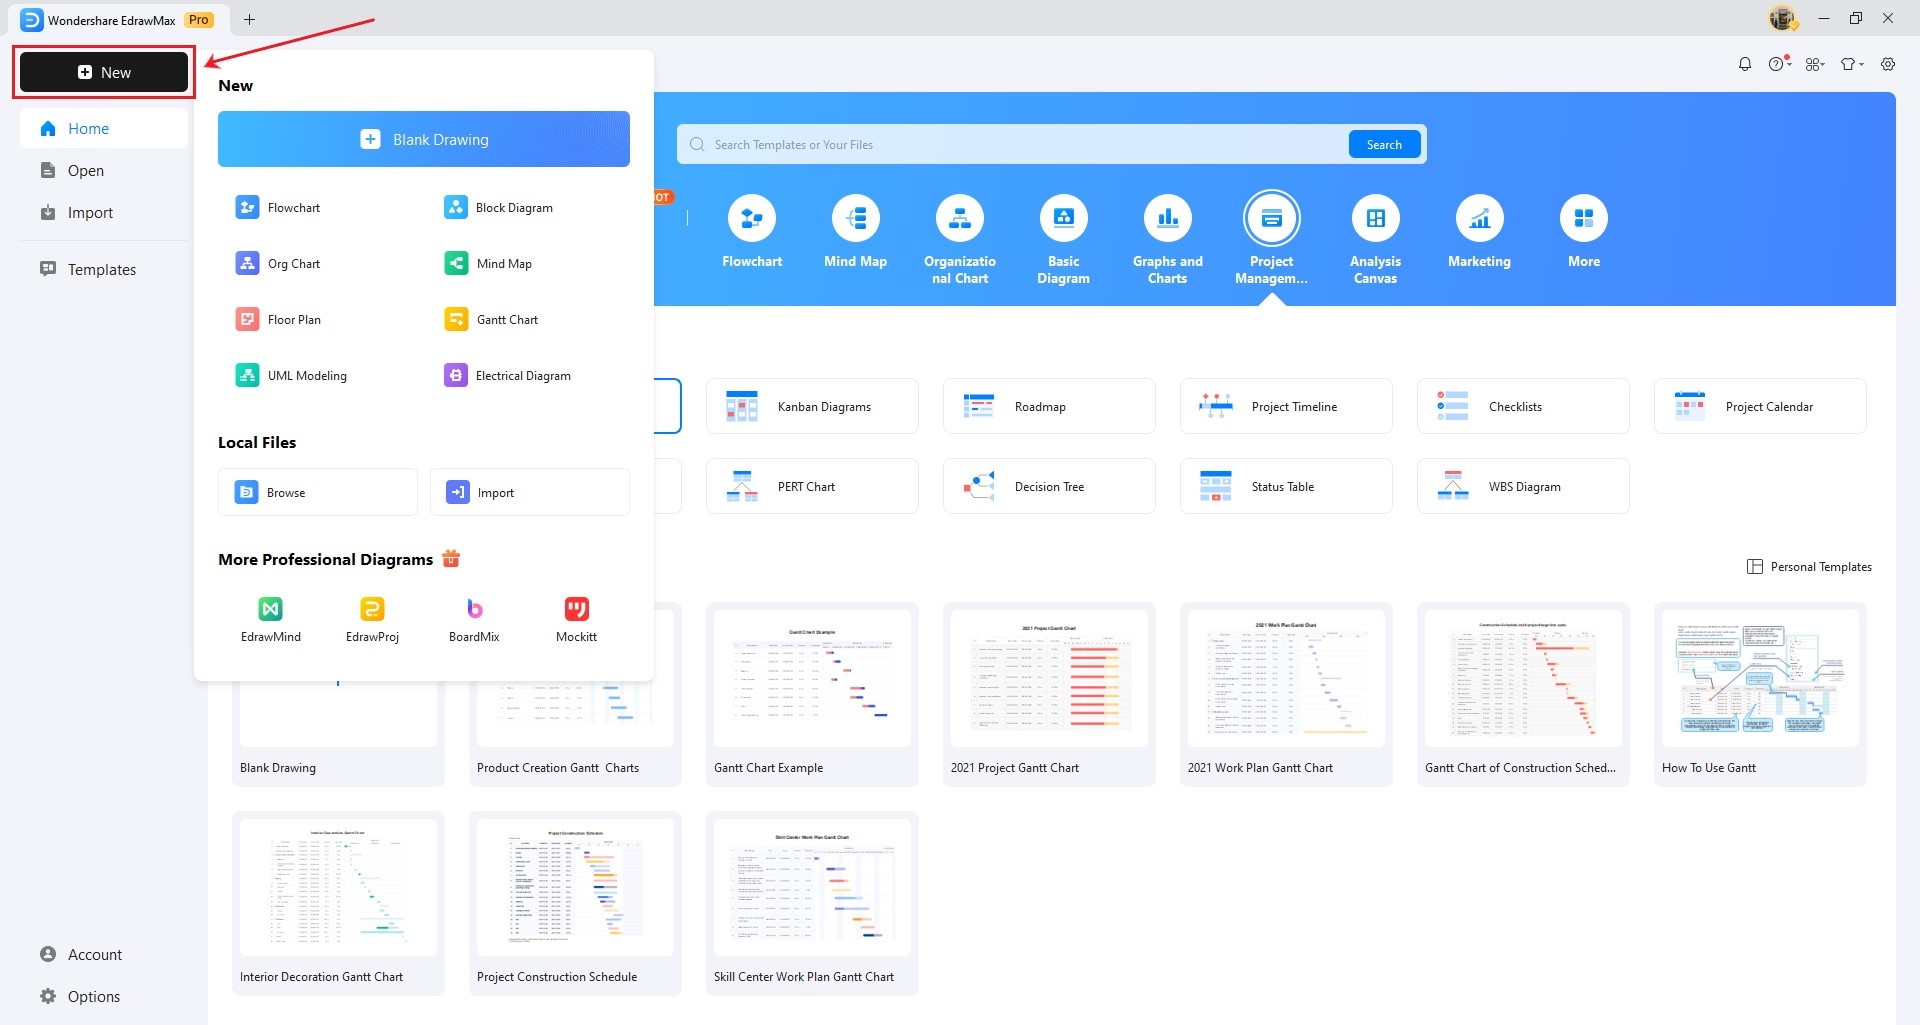
Quick Access Toolbar new document options
Create from Templates
Step 1: Access Templates
- Click Templates from the left sidebar
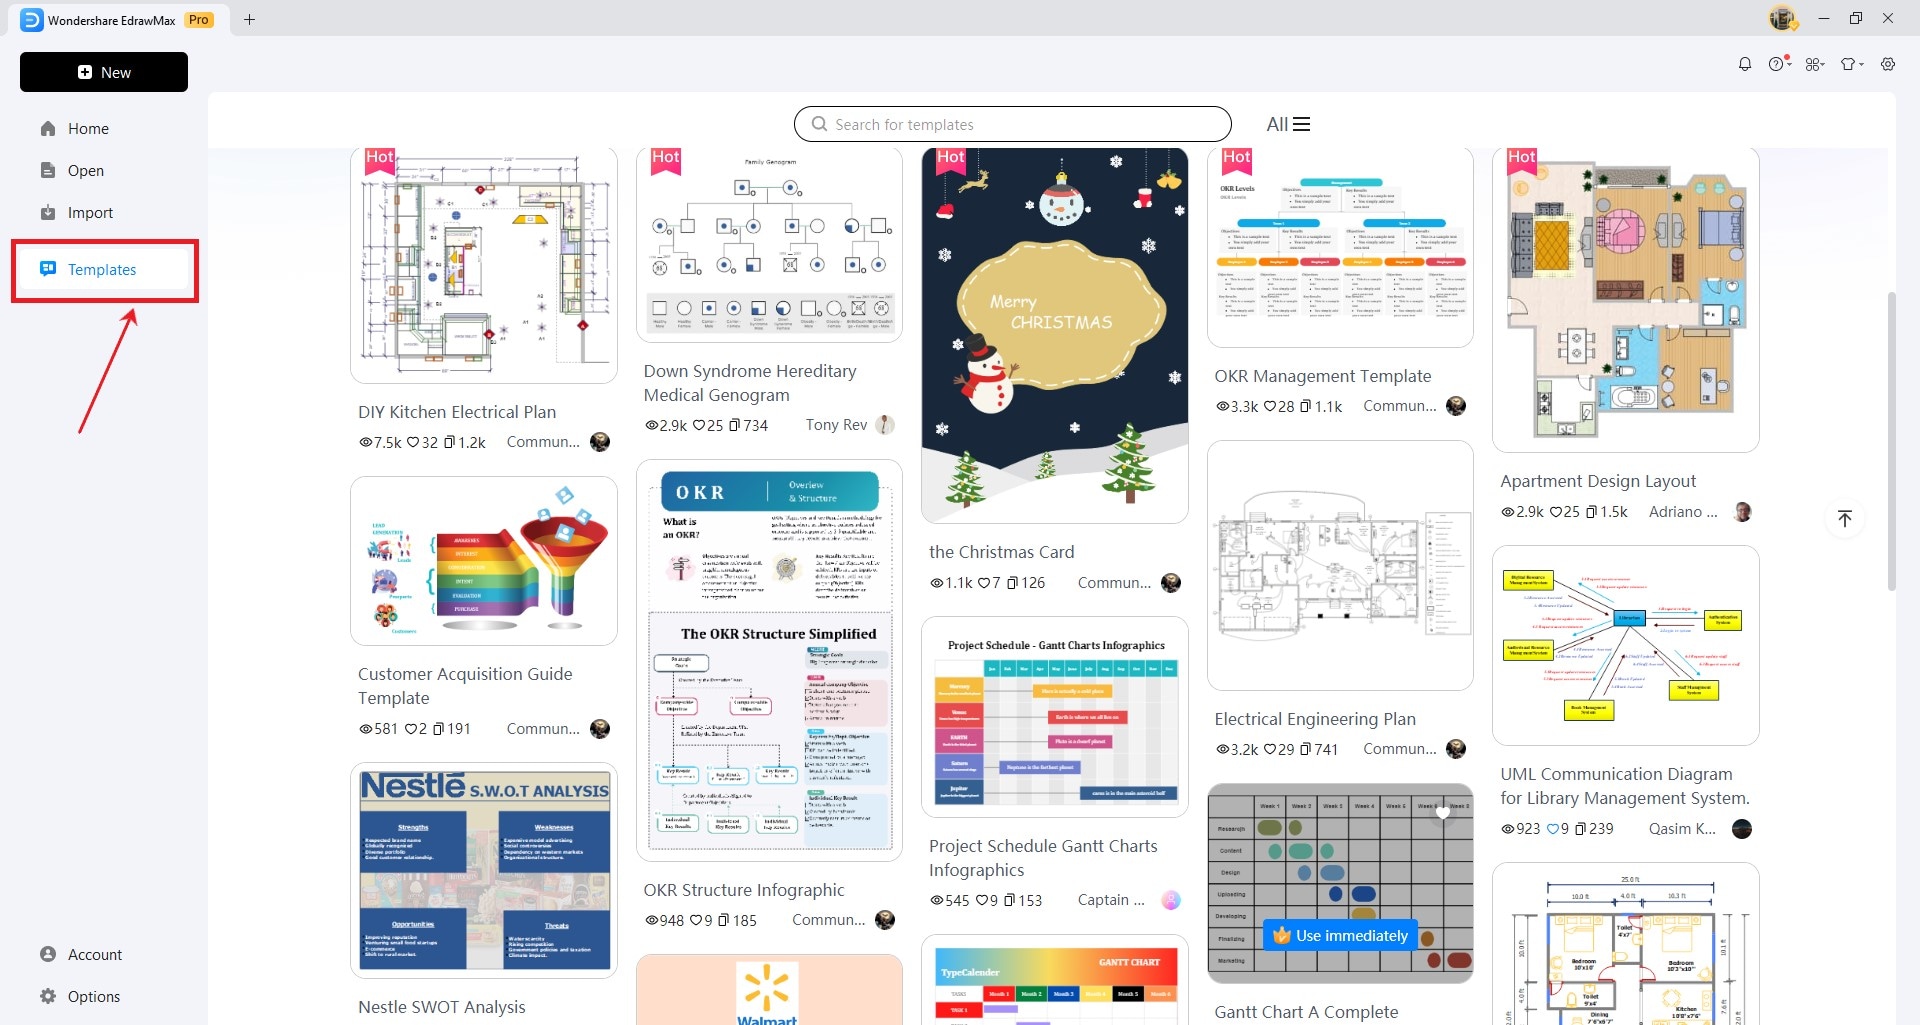
Template library access point
Step 2: Search Templates
- Type your diagram type in Search for Templates
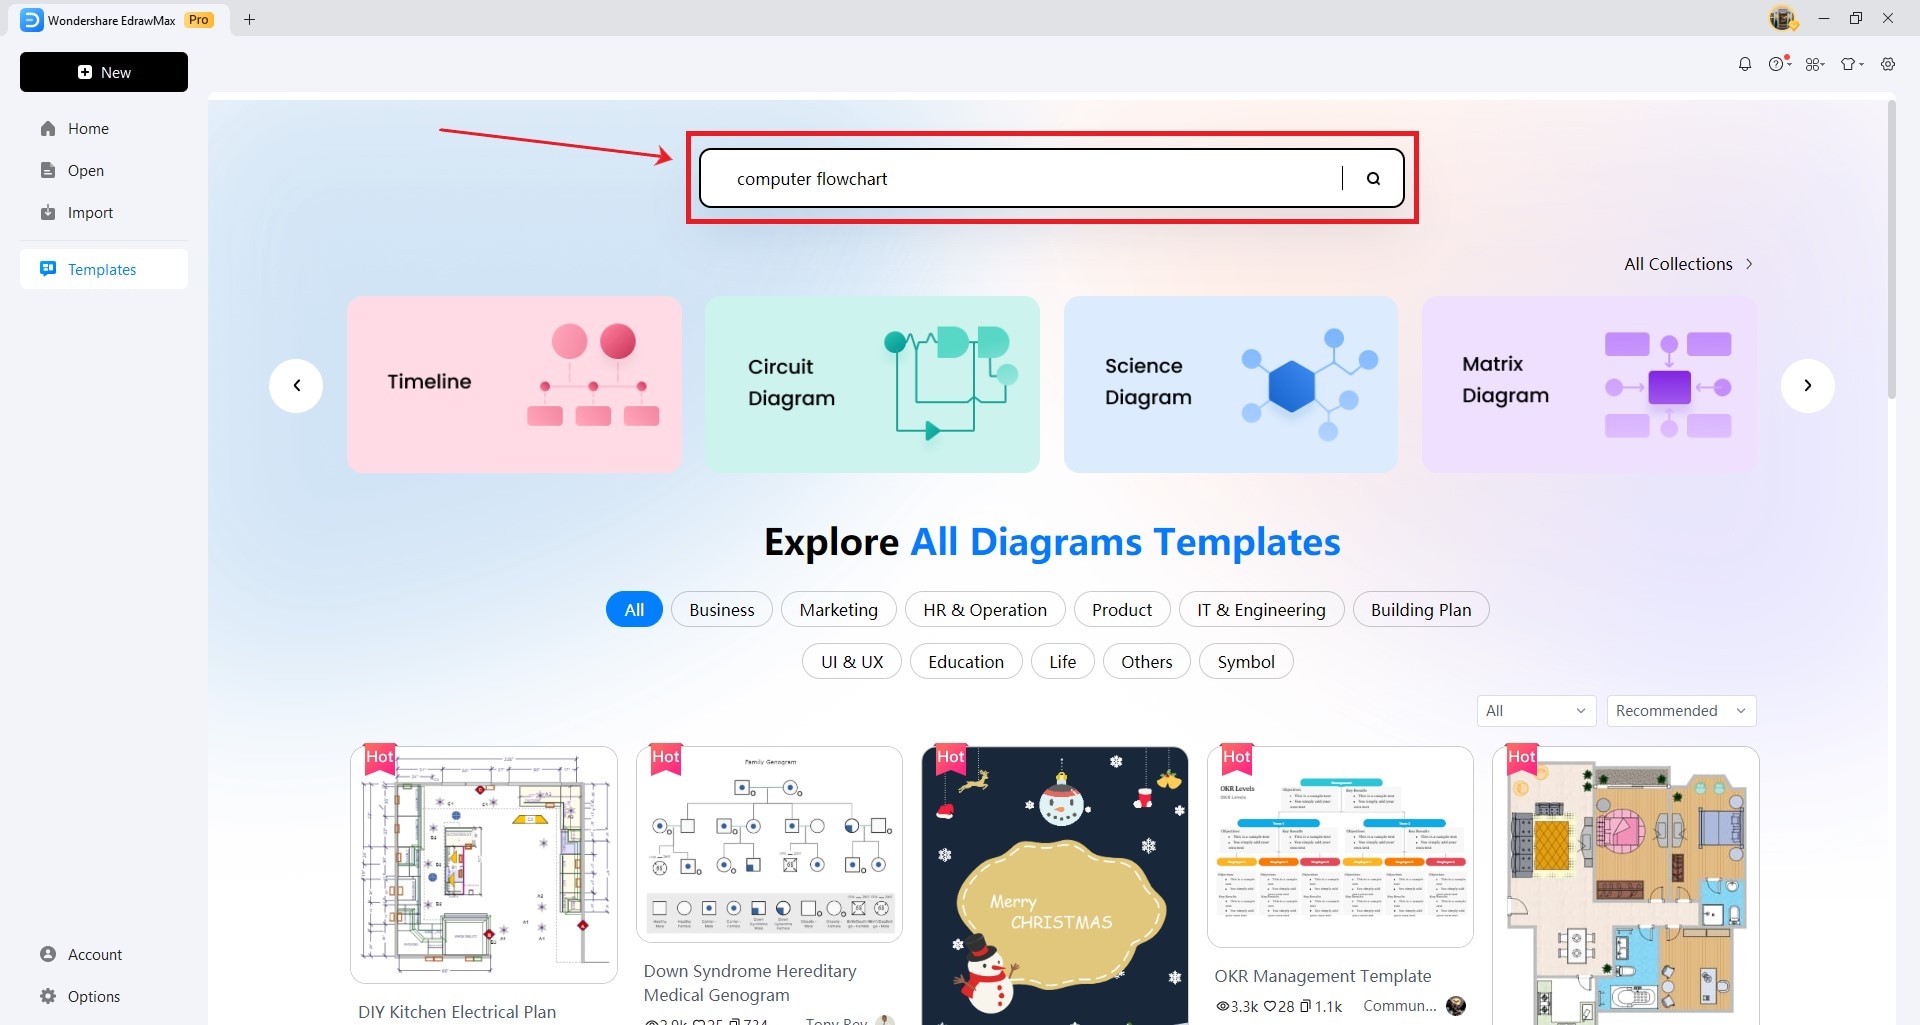
Template search functionality
Step 3: Use Template
- Click Use Immediately to apply template
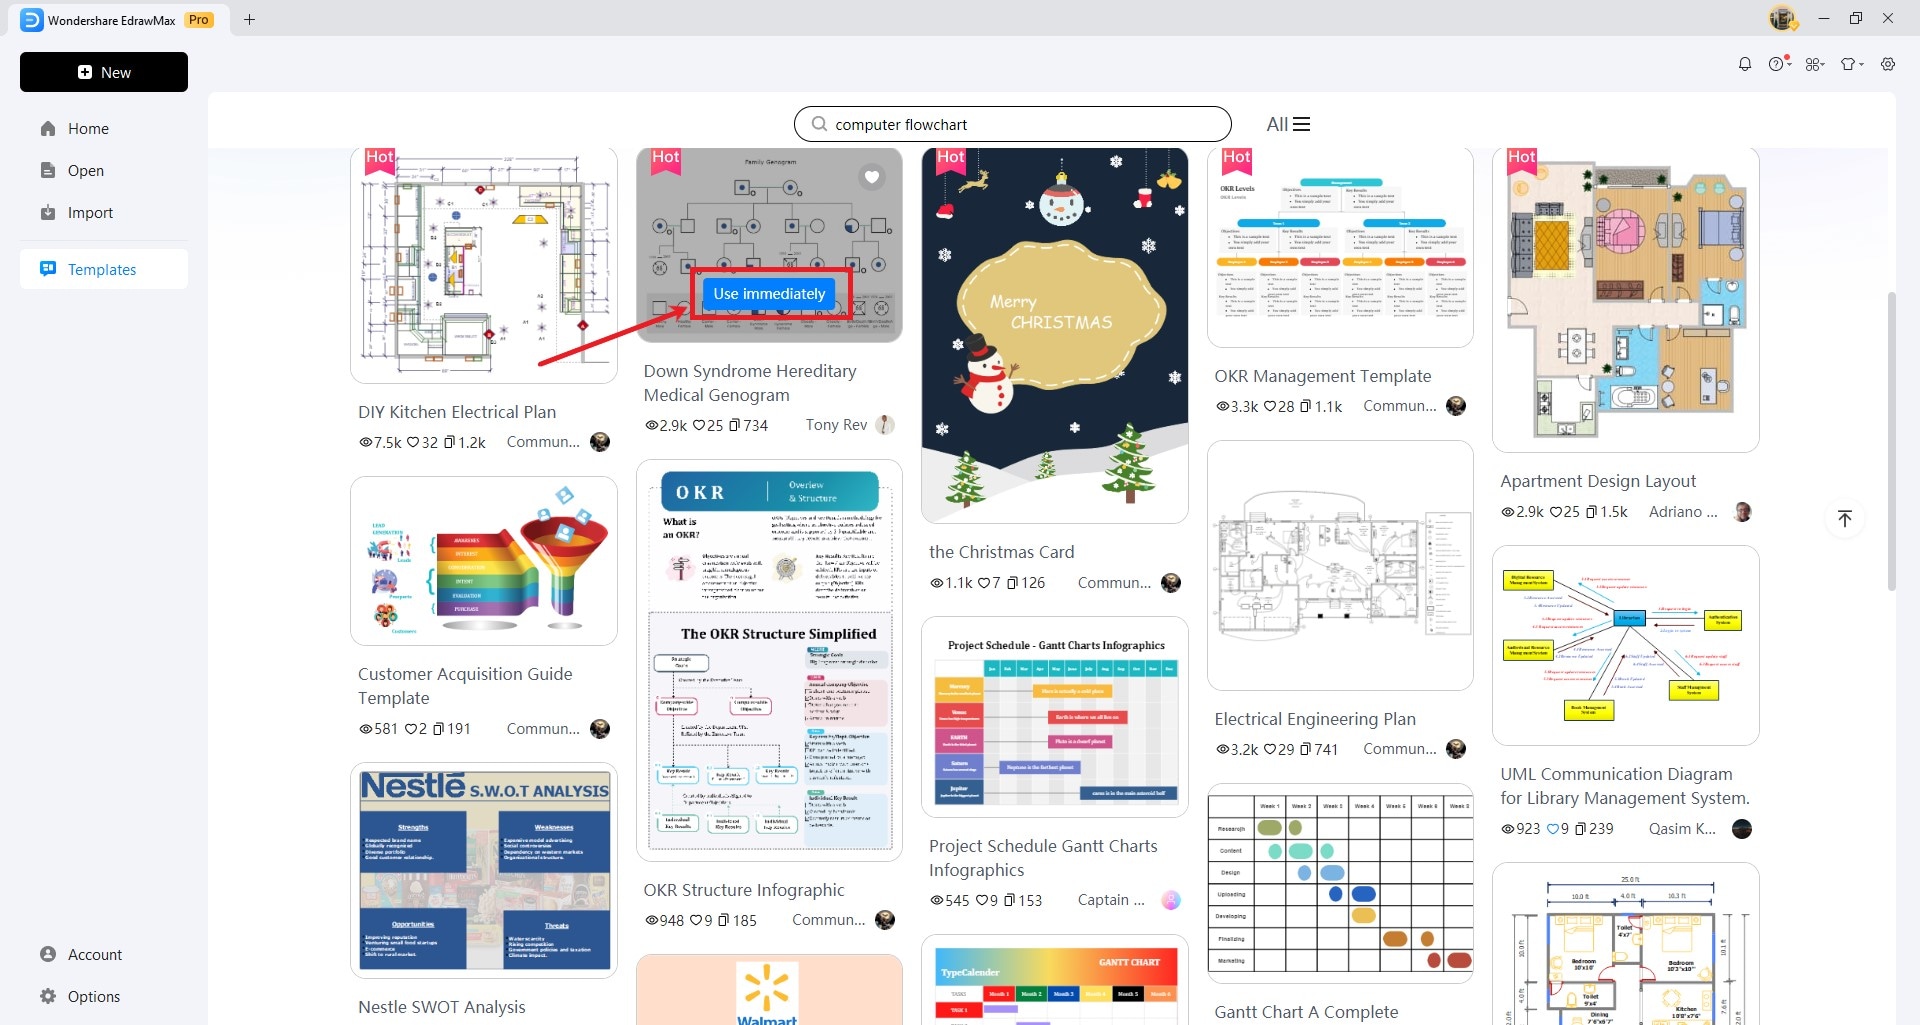
Template application process
Open a Document
Step 1: Initiate Open
- Click Open icon on Quick Access Toolbar
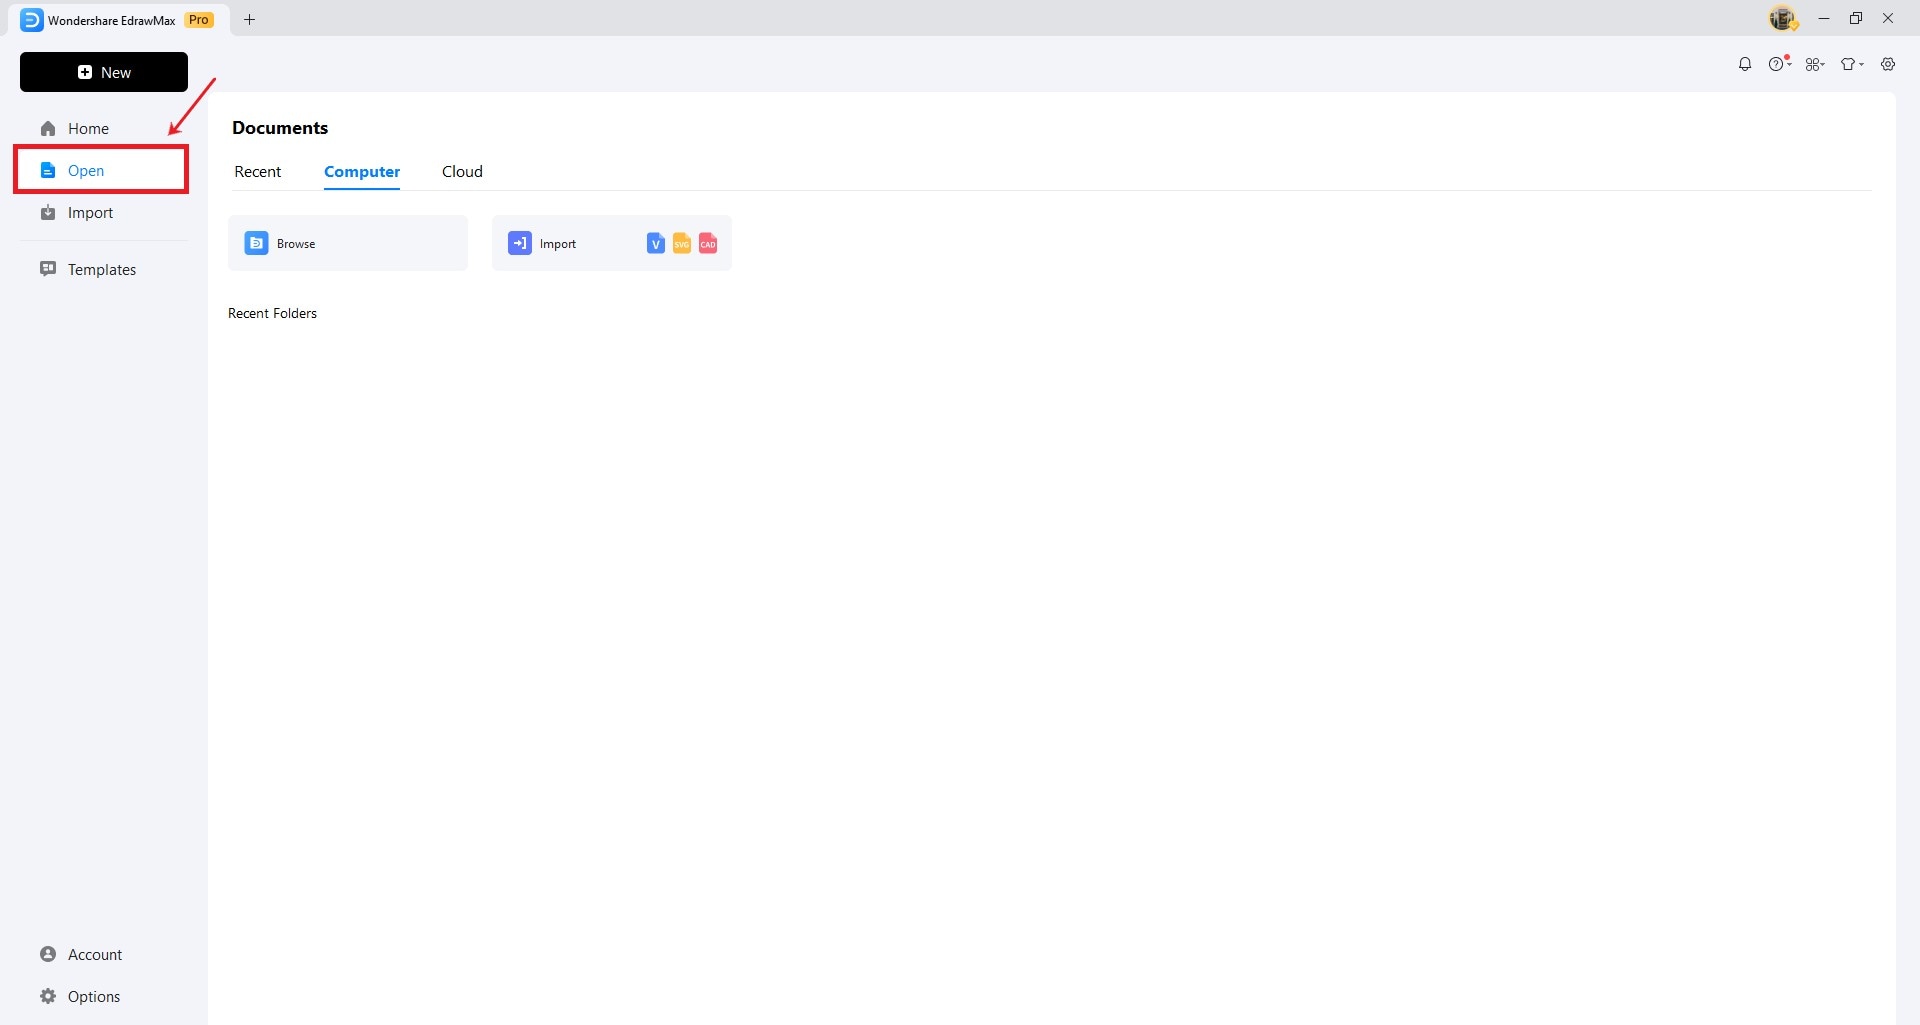
Document open interface
Step 2: Select Source
- Choose between Recent, Computer, or Cloud
Recent Option
- Shows recently accessed files
- Click any .EDDX file to open
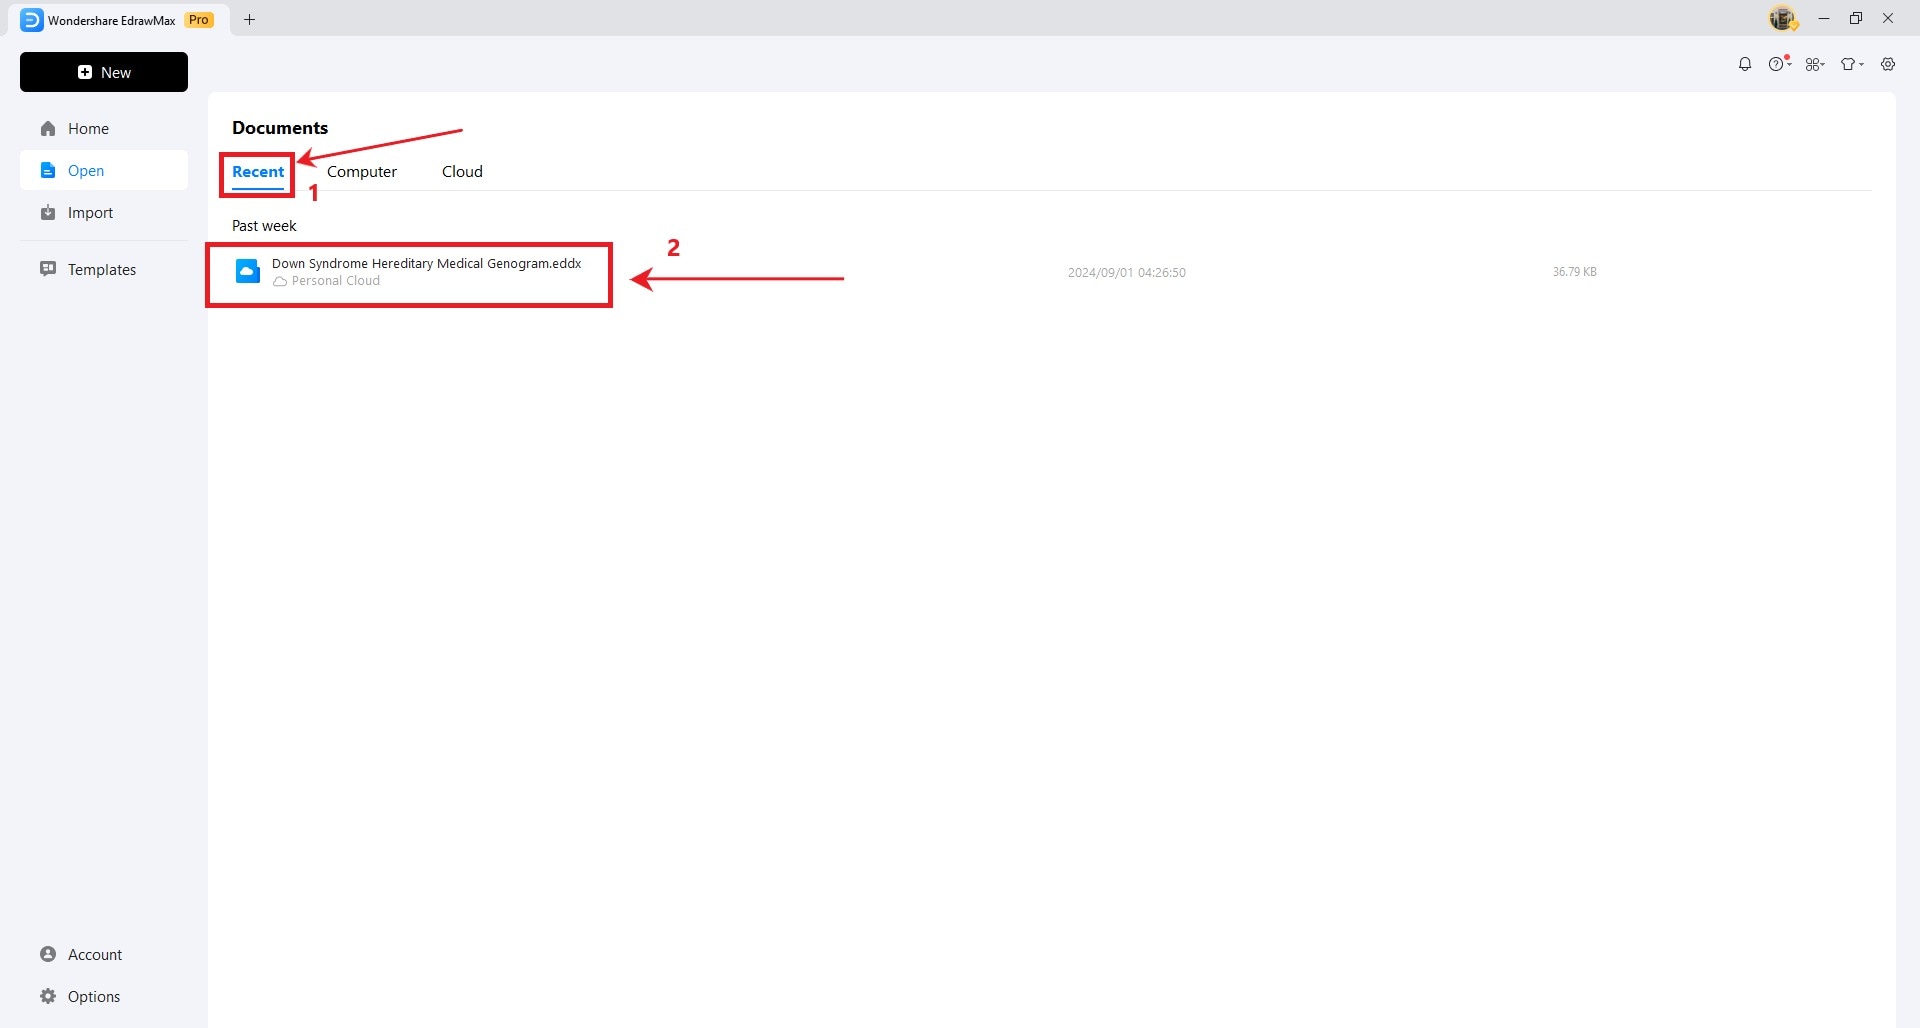
Recent files display
Computer Option
- Path: Open > Computer > Browse or Recent Folders
- Browse: Locate file manually
- Recent Folders: Access previously used folders
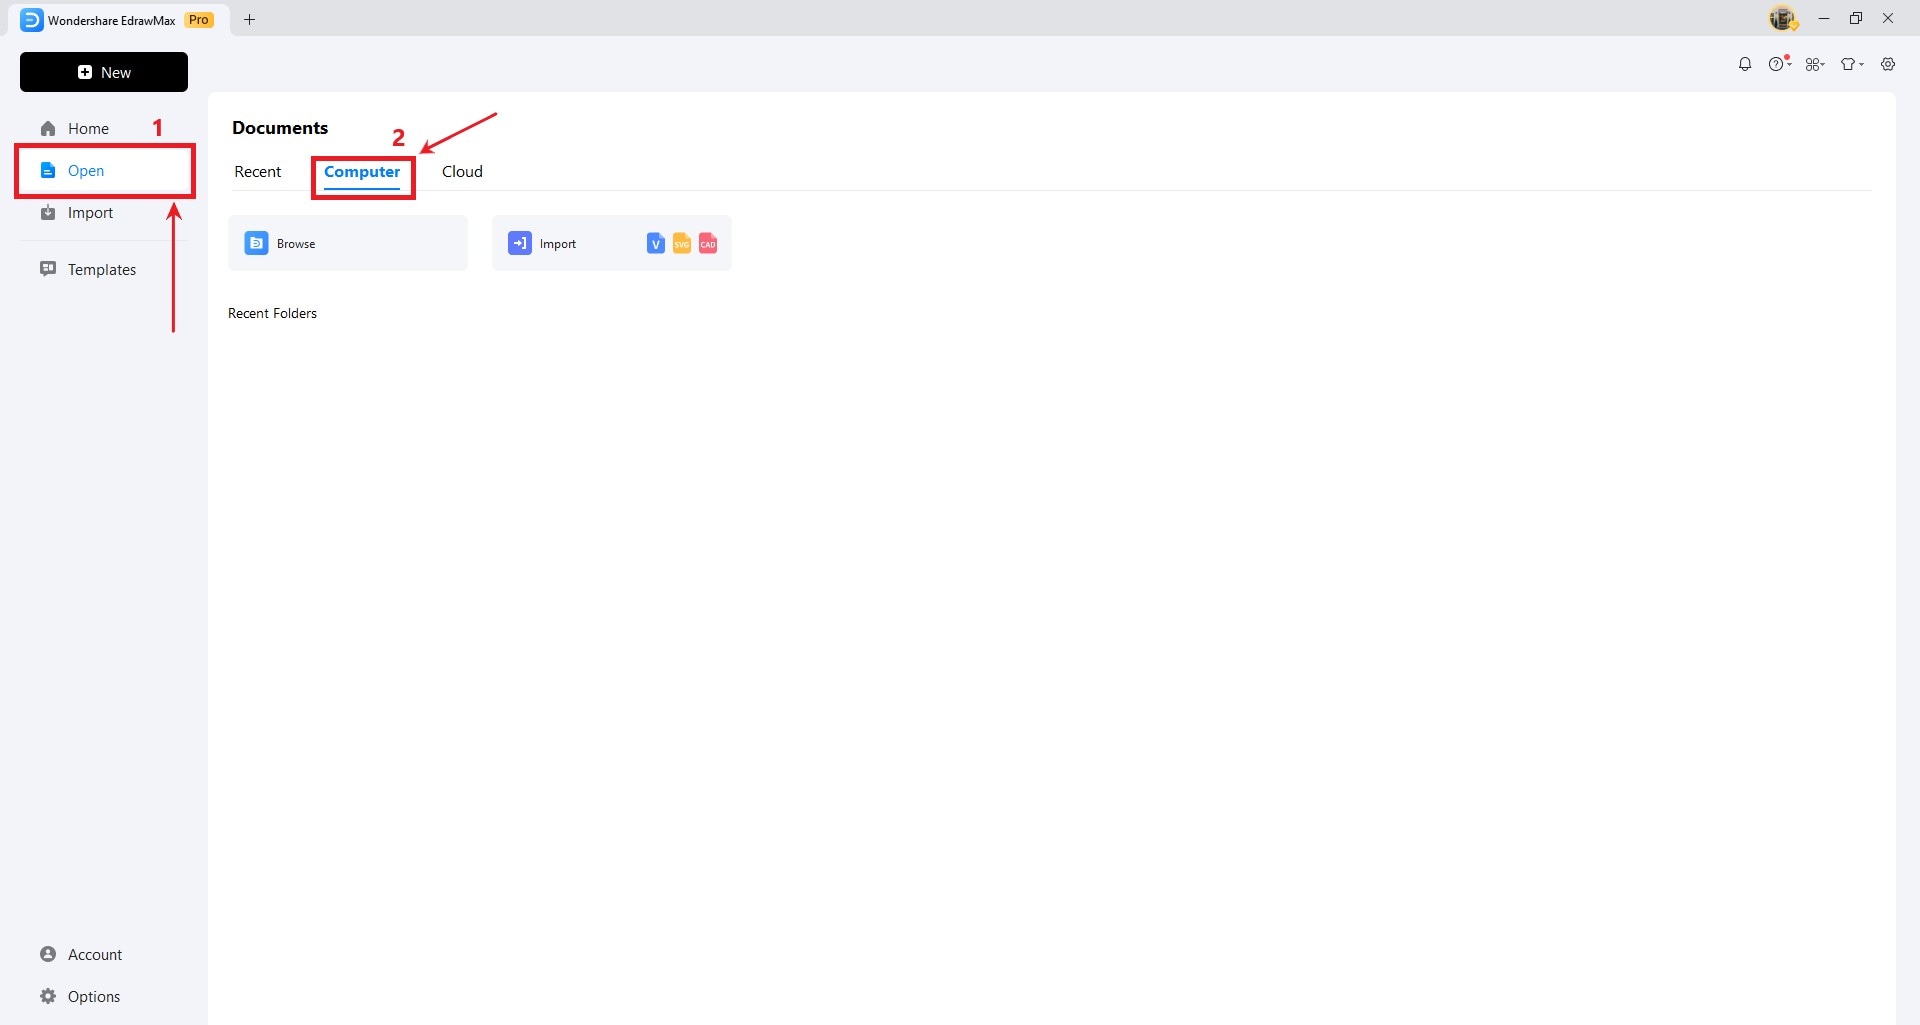
Computer file access options
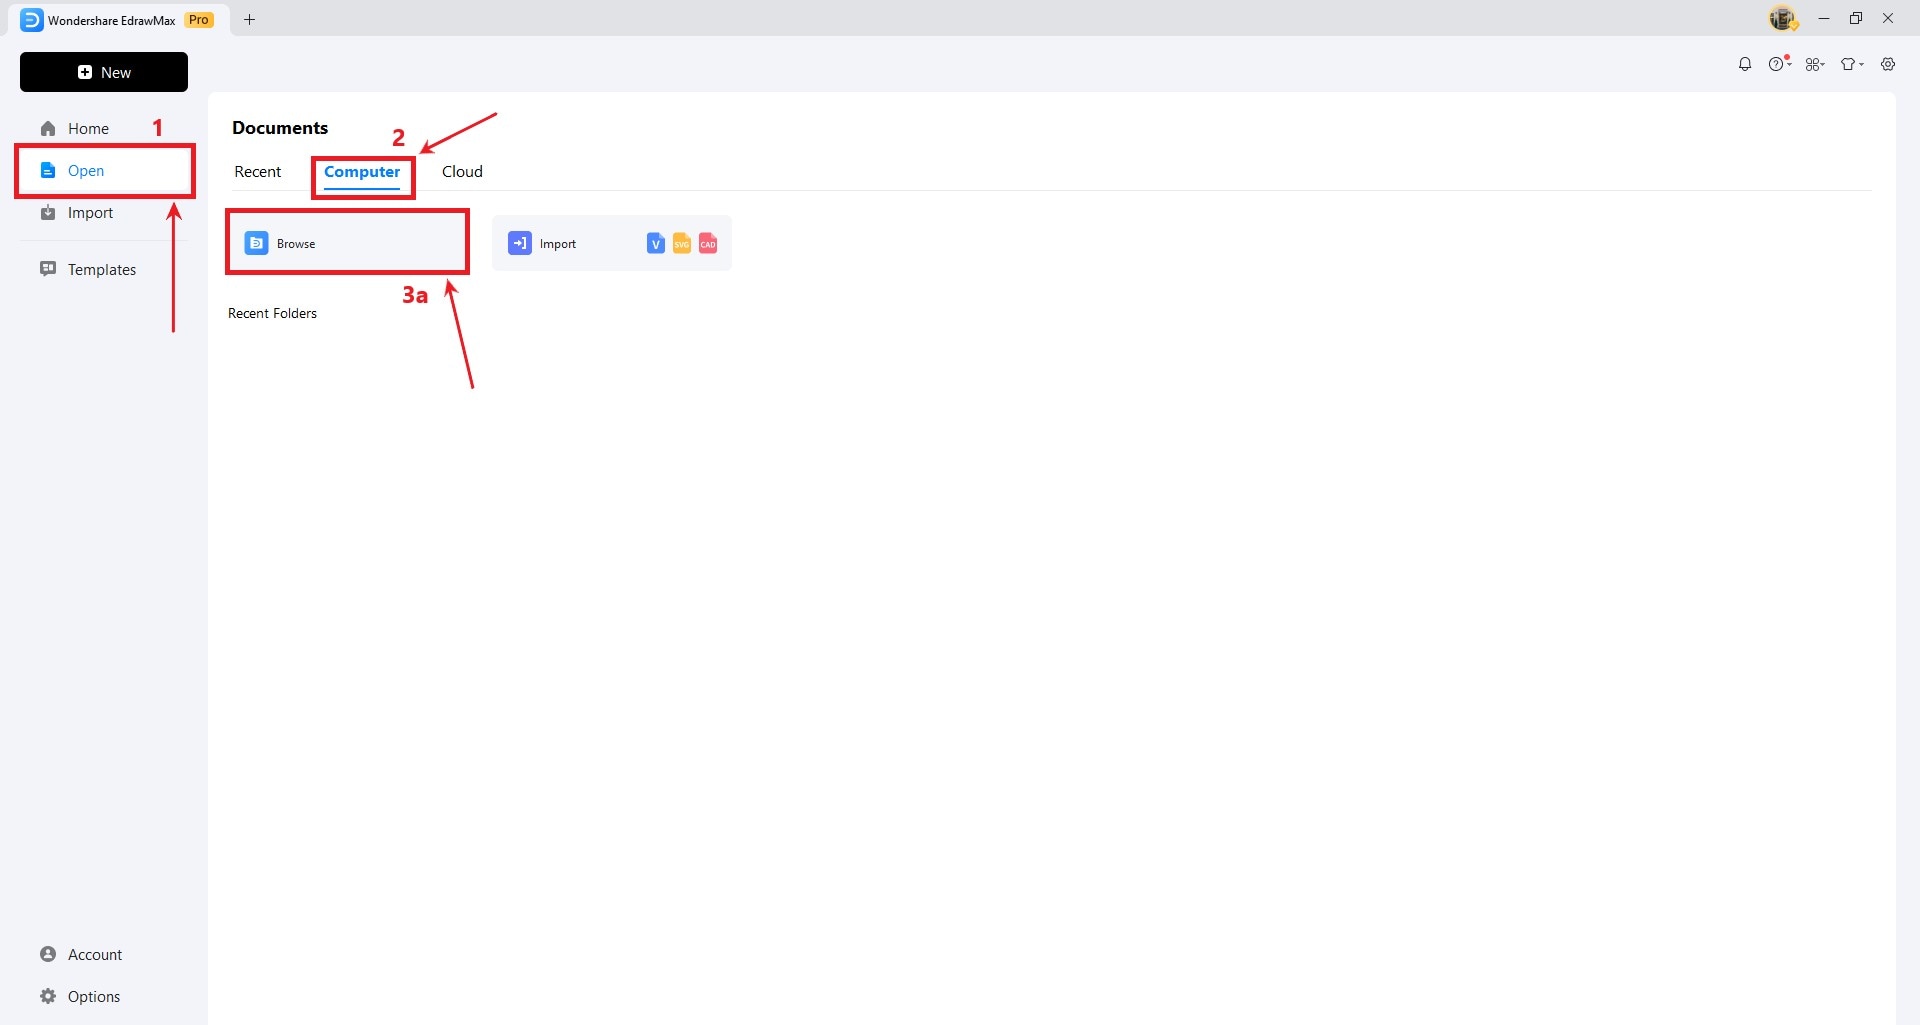
File browsing interface
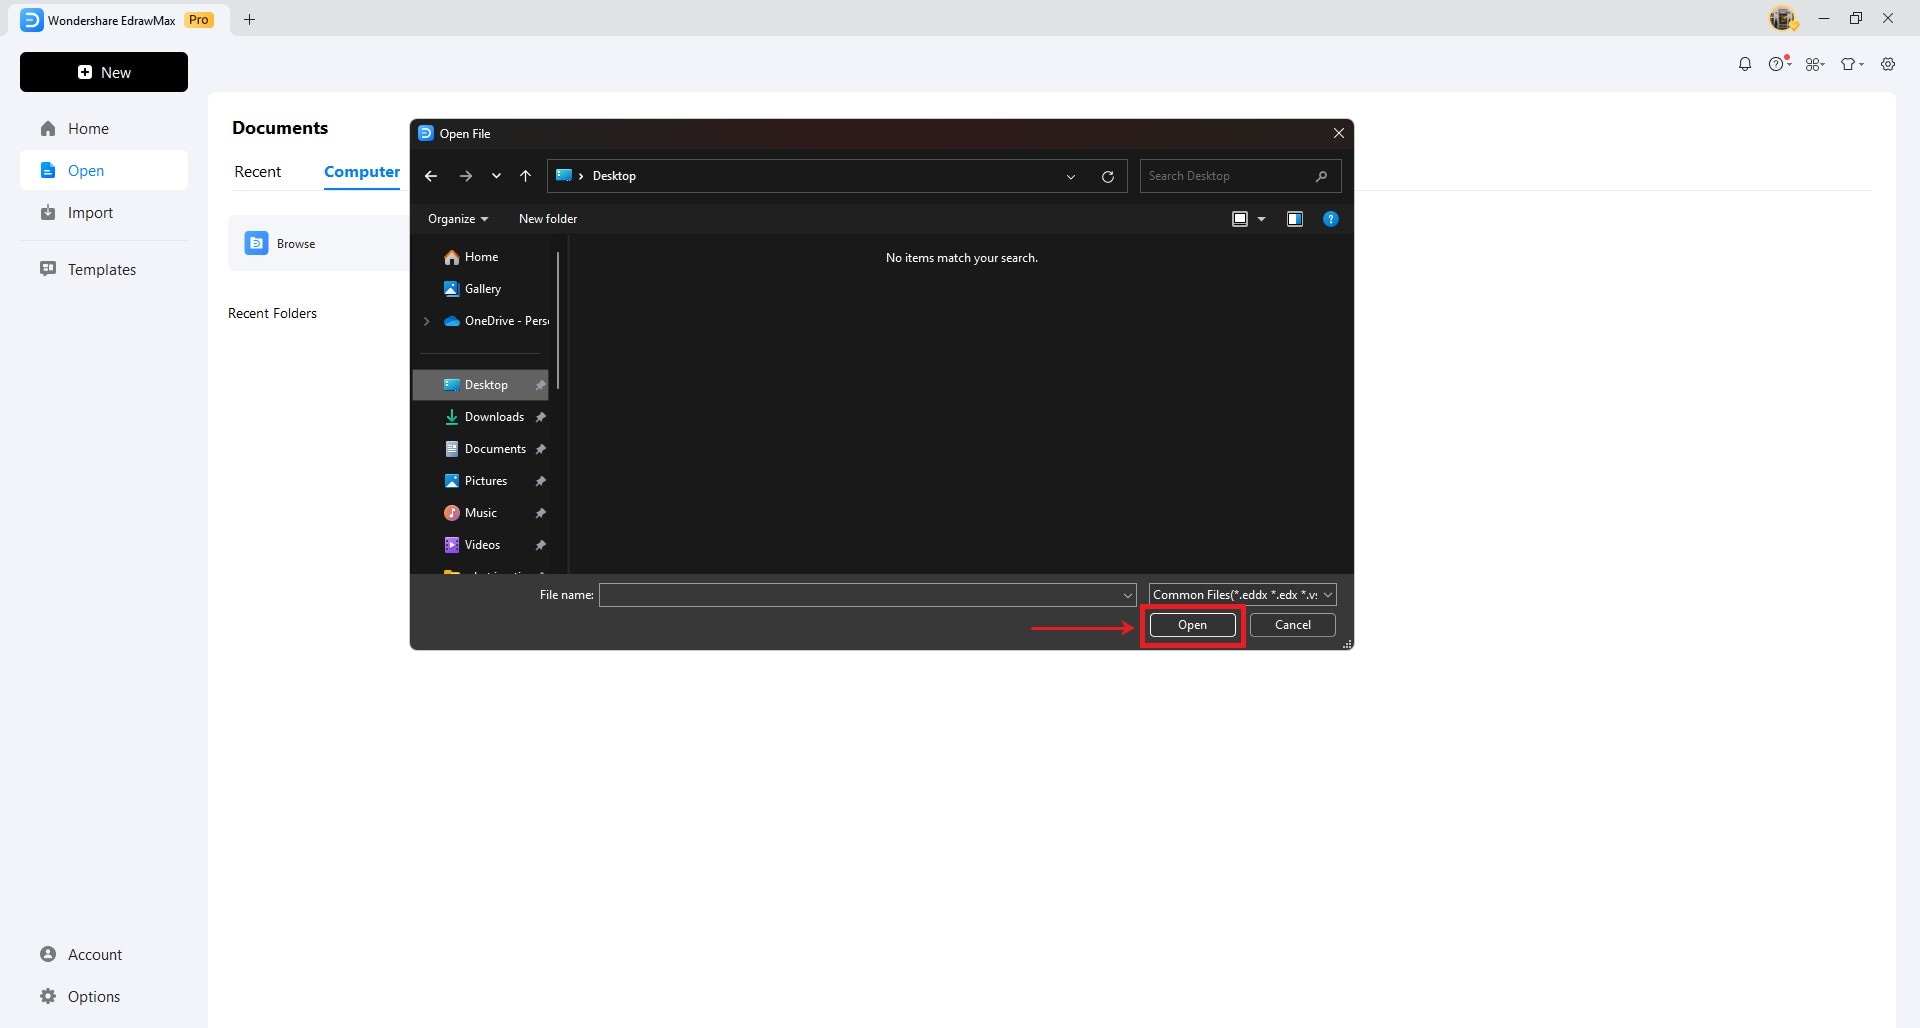
File selection dialog
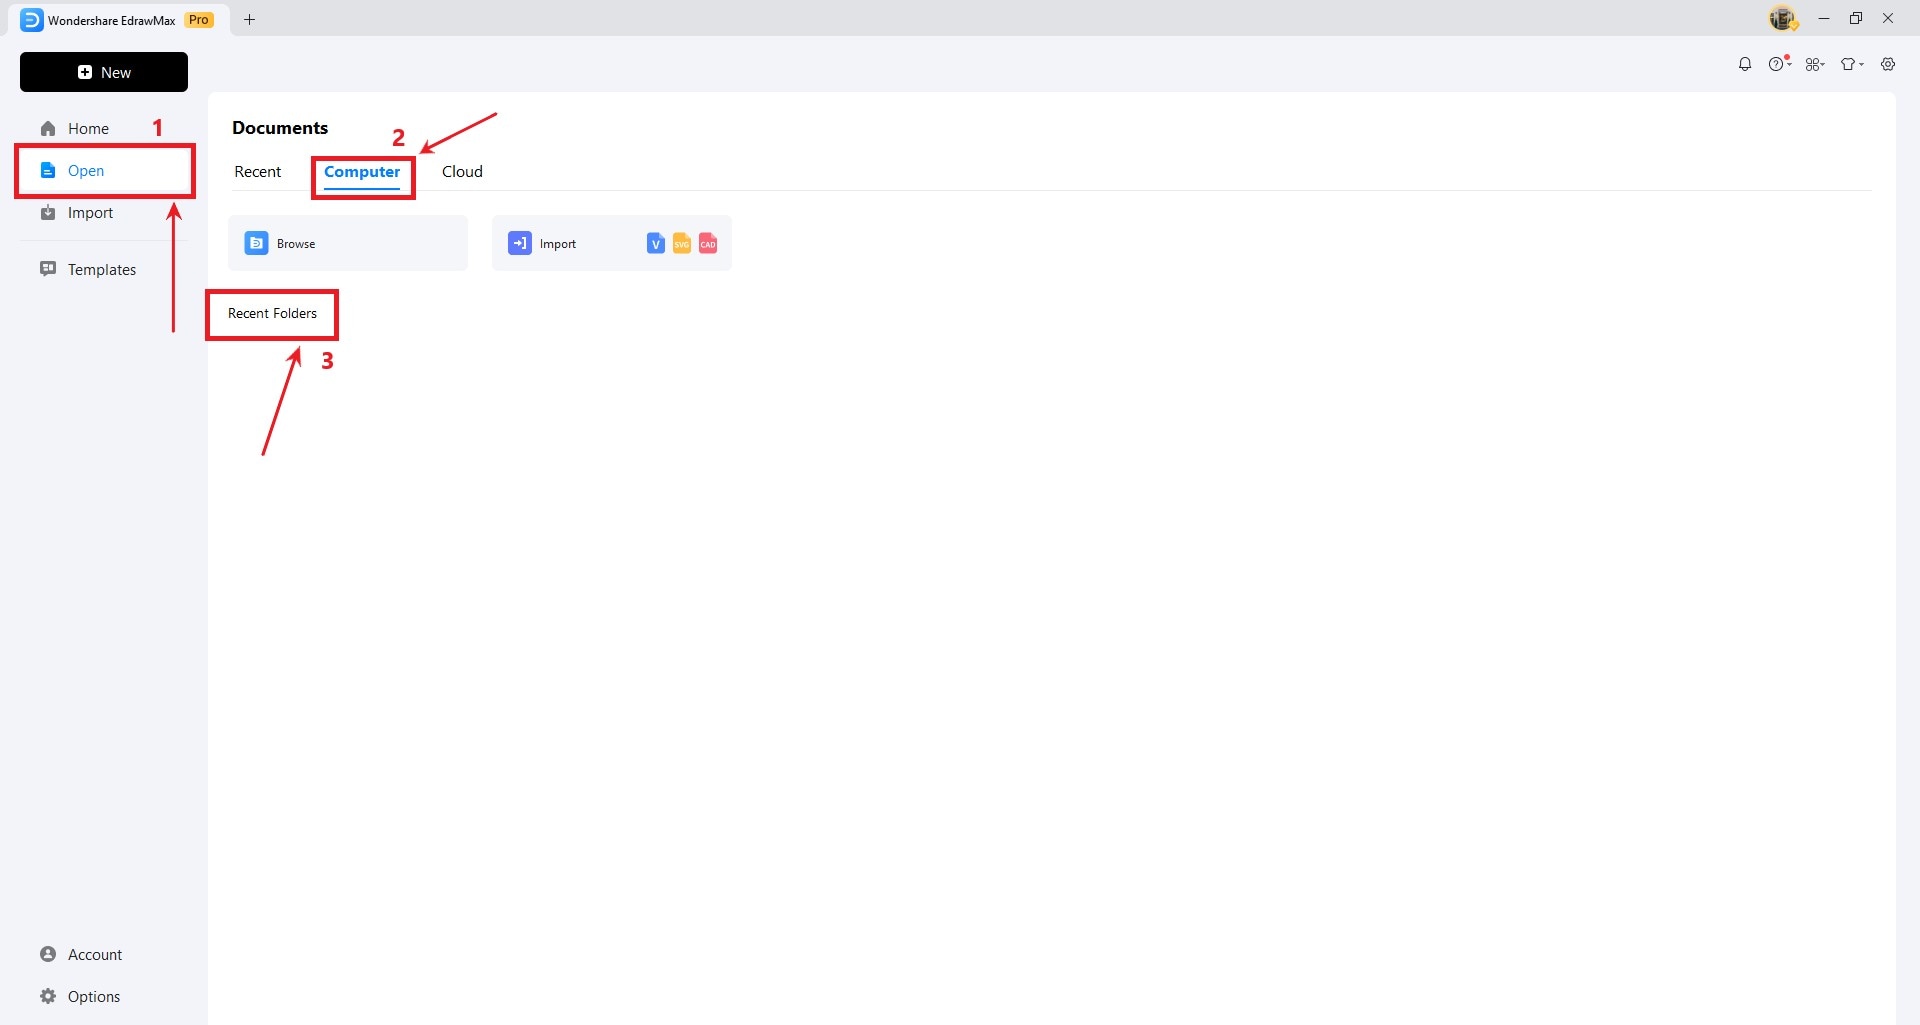
Recent folders display
Note:
If you have moved the location of the folders, the system will give you an error and instantly remove the folder from the Recent Folders location.
Cloud Option
- Path: Open > Cloud
- Access 100MB free cloud storage
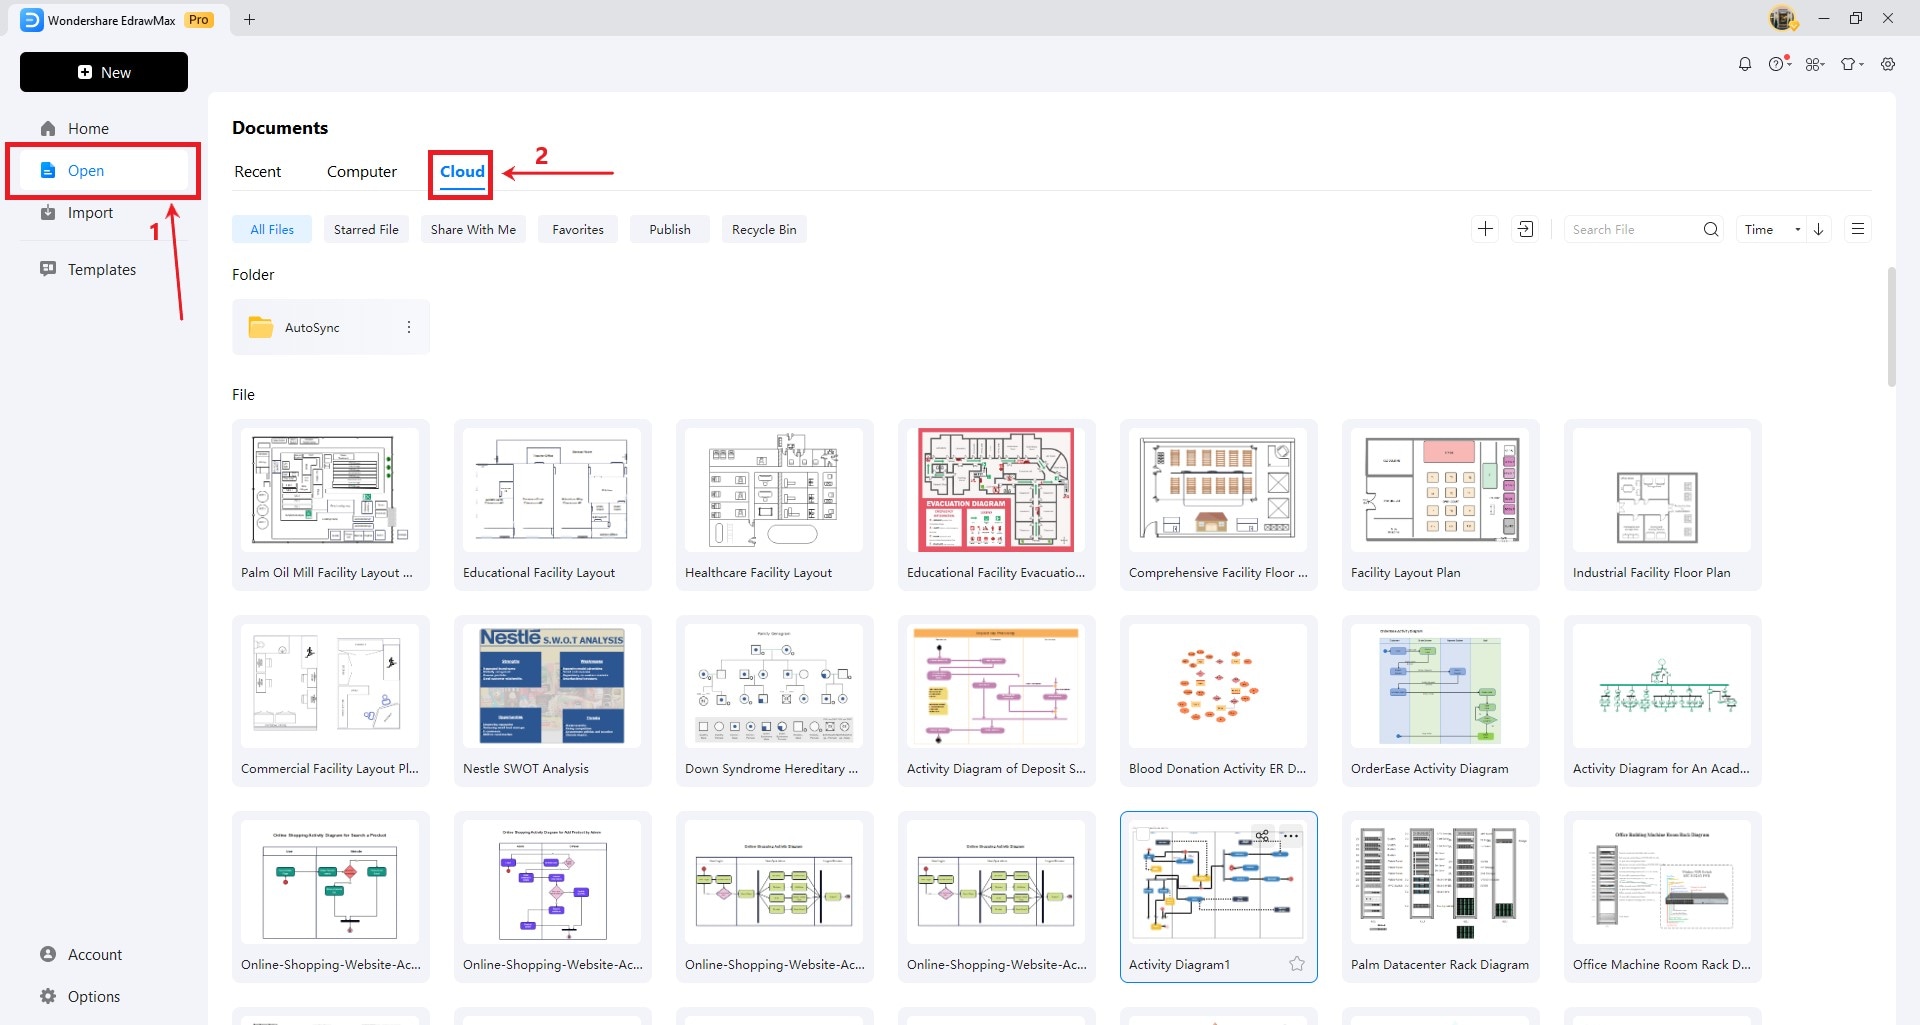
Cloud storage interface
Step 3: Cloud Management
- Path: Cloud > New > Folder or File
- Folder: For project organization
- File: For individual documents
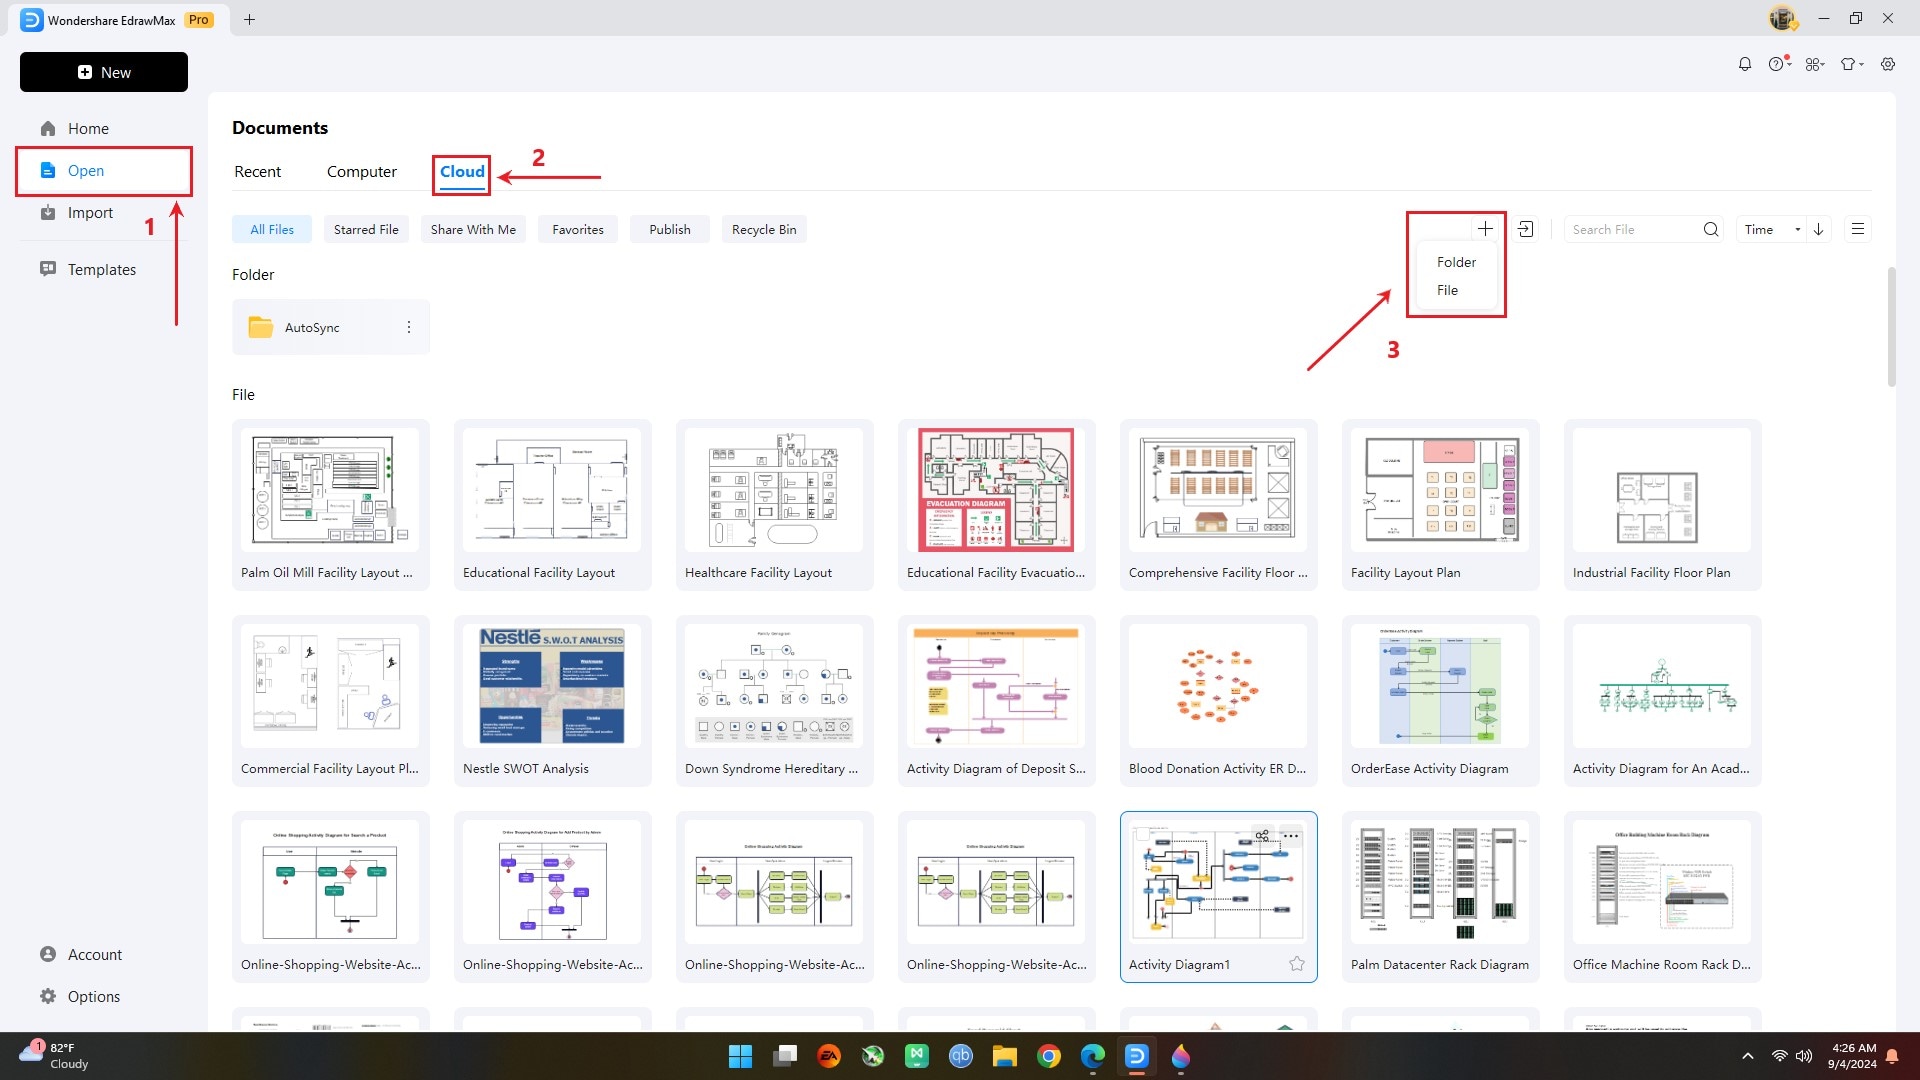
Cloud new item creation
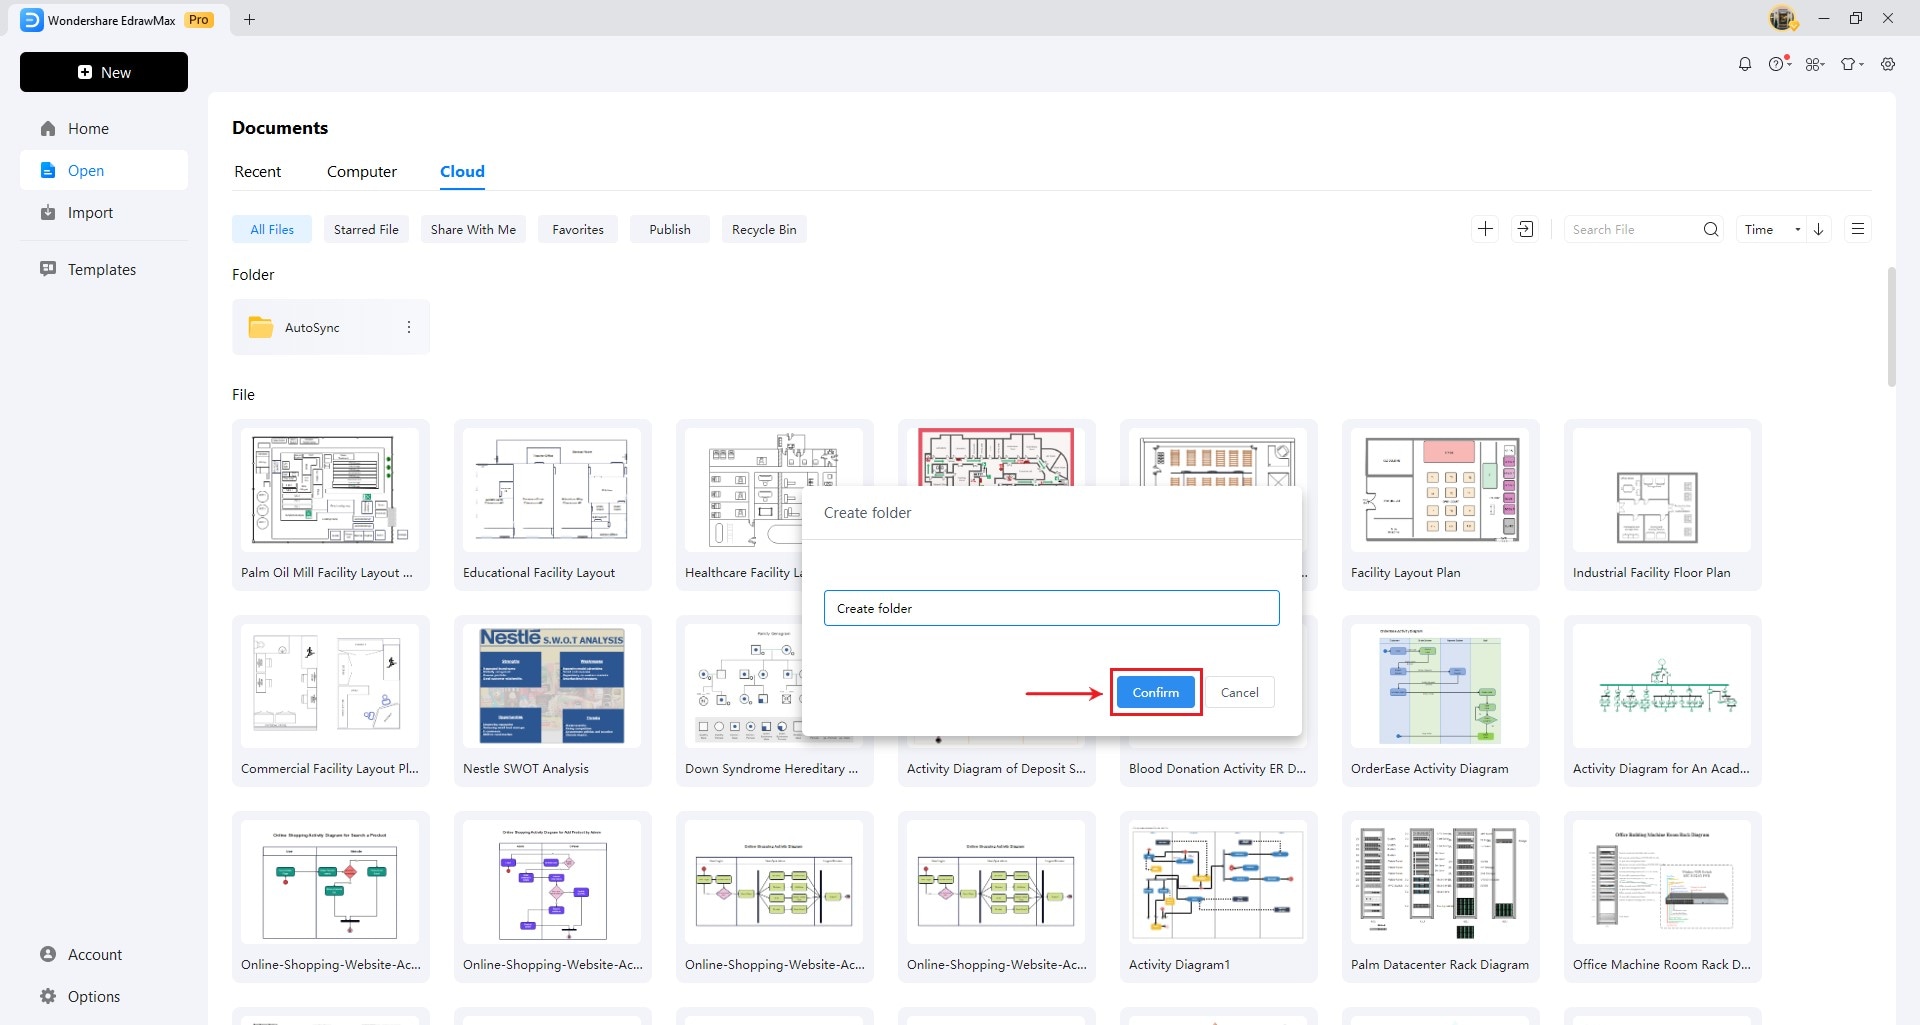
Folder creation dialog
Step 4: Import Files
- Supports .VSDX and .VSD formats
- Path: Open > Cloud > Import > Upload File
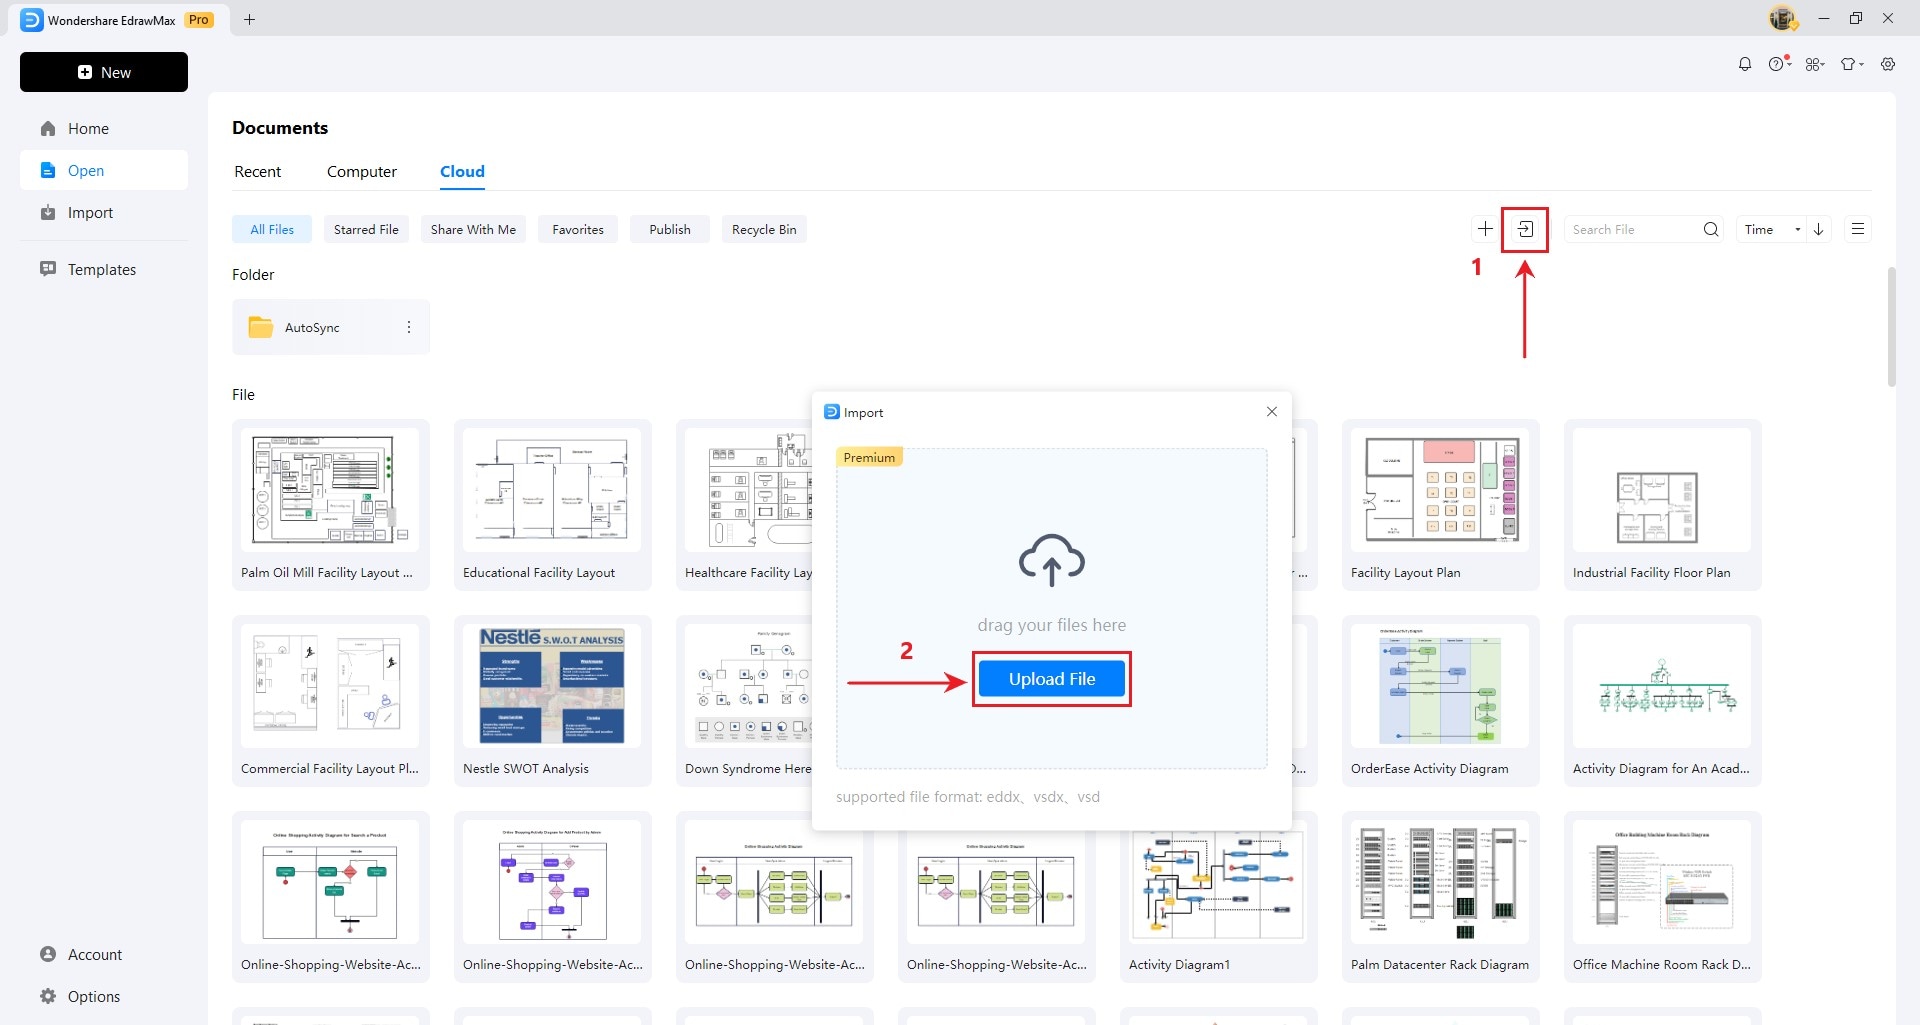
File import interface
Note:
This is a premium feature, and for this, you will need to Buy EdrawMax's subscription.
In the Cloud space, you also find all the previously stored files that you can easily access. Additionally, you can access the previously created folder that you can Rename, Delete, Download, Move to, and Copy to.