EdrawMax User Guide for Desktop
User Guide for Desktop
-
Get Started with EdrawMax
-
User Interface
-
Basic Operations
-
Advanced Operations
-
Shape Operations
-
Drawing Tools
-
Formatting and Styling
-
Text Operations
-
Symbol and Library
-
Insert/Add Objects
-
Page Settings
-
Presentation Mode
-
AI Features
- How to Make a Diagram with Edraw AI
- AI Slides
- AI Infographics Generator
- AI Copywriting
- AI Stickers
- AI Symbols
- AI Analysis
- AI Drawing
- AI OCR
- AI Diagram Generator
- AI Framework Generator
- AI Floating Ball
- AI Chatbot
- AI Flowchart
- AI Mind Map
- AI Timeline
- AI Table
- AI List
- AI SWOT Analysis, PEST Analysis, and Lean Canvas
- AI User Profile
-
How to Make a Flowchart
-
How to make an Org Chart
-
How to make a Gantt Chart
-
How to Make a Mind Map
-
More examples
For Desktop
For Mobile
Shadow Format
With EdrawMax, you can now create shadows for your objects. This will come in handy when you have placed a 3D object on the canvas and want to give it a more realistic feel. The shadow format gives the viewer a sense that there is some depth to the given object.
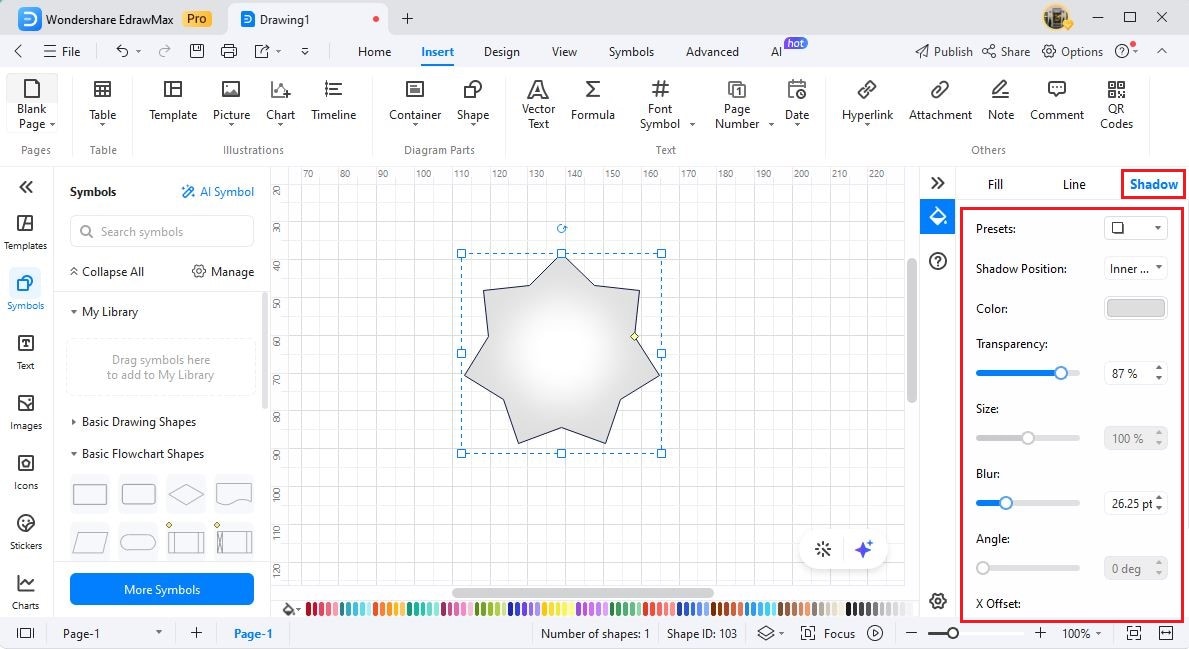
On the right sidebar, click the Style icon to open the Shadow pane.

Here, you will get a series of options that help you modify the shadow of the selected object and shape.
- Presets: Start by checking the Presets It helps you to choose the desired shadow style (Drop, Inner, and Perspective) or No Shadow for the selected shape.
- Shadow Position: EdrawMax offers four Shadow Position options: No Shadow, Drop Shadow, Inner Shadow, and Perspective Shadow. Choose from these predefined Shadow Positions as per your preference.
- Color: Click on the Color option to choose a desired shadow color. From this section, you get a wide range of color options menu for the selected shape.
- Transparency: Click on the Transparency option to choose a required shadow transparency layer for the selected shape. You can move the slider or enter the number in the designated space.
- Size: Click on the Size option to specify how large you want the shadow of your object. Kindly note that this Size option is unavailable for the Inner shadow style.
- Blur: Click on the Blur option to set the radius of the blur on the selected shape's shadow by moving the slider or input numbers. The larger the radius of the blur is, the blurrier the shape will be.
- Angle: Click on the Angle option to correctly specify the angle at which you want the shadow of the object to show. You can use the slider or enter the number at the designated space. Kindly note that the Angle option is only available if you have selected the Perspective shadow style from the Presets.
- X/Y Offset: Click on X-Offset or Y-Offset to set the distance between the shadow and the shape on the X-axis and Y-axis, respectively. Use Angle and Offset options to place the shadow anywhere relative to the selected shape.
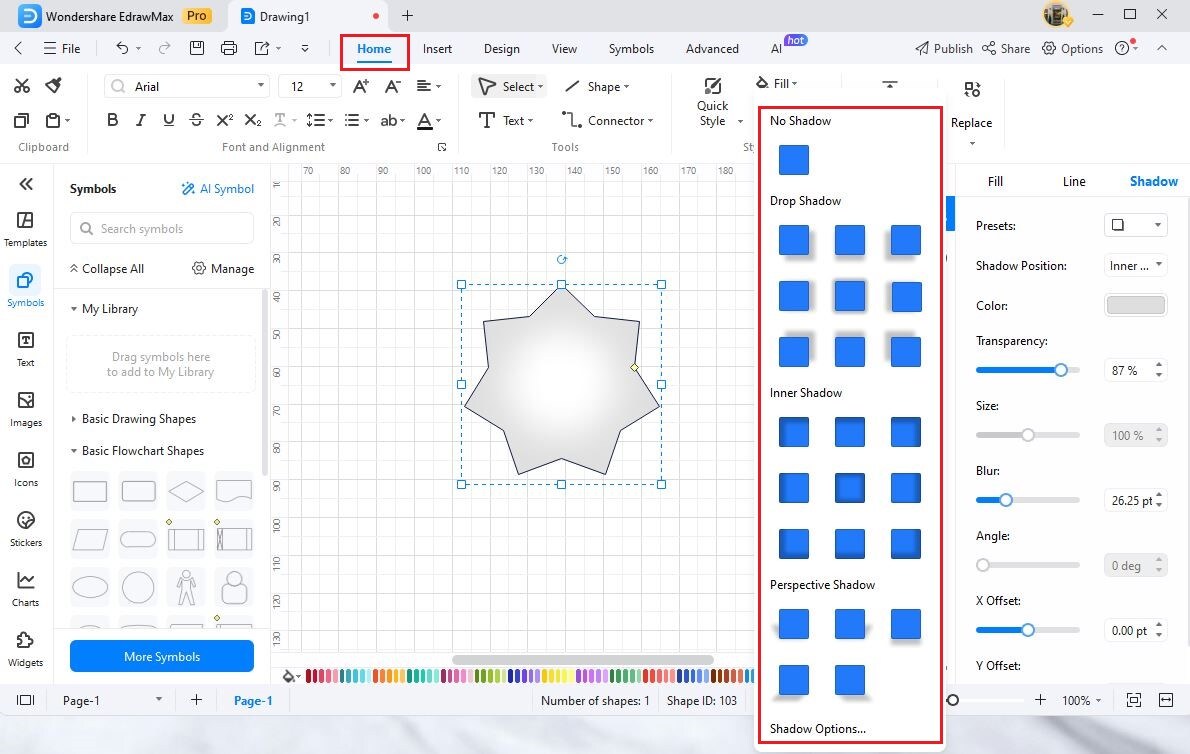
Quick Shadow Format
If you quickly wish to add Shadow options, click on Home > and then click on Shadow that comes under the Styles ribbon. Here, you get multiple Shadow options, like No Shadow, Drop Shadow, Inner Shadow, Perspective Shadow, and Shadow Options.
