EdrawMax User Guide for Desktop
User Guide for Desktop
-
Get Started with EdrawMax
-
User Interface
-
Basic Operations
-
Advanced Operations
-
Shape Operations
-
Drawing Tools
-
Formatting and Styling
-
Text Operations
-
Symbol and Library
-
Insert/Add Objects
-
Page Settings
-
Presentation Mode
-
AI Features
- How to Make a Diagram with Edraw AI
- AI Slides
- AI Infographics Generator
- AI Copywriting
- AI Stickers
- AI Symbols
- AI Analysis
- AI Drawing
- AI OCR
- EdrawMax Quotation Tool
- AI Diagram Generator
- AI Framework Generator
- EdrawMax AI Copilot
- AI Chatbot
- AI Flowchart
- AI Mind Map
- AI Timeline
- AI Table
- AI List
- AI SWOT Analysis, PEST Analysis, and Lean Canvas
- AI User Profile
-
How to Make a Flowchart
-
How to make an Org Chart
-
How to make a Gantt Chart
-
How to Make a Mind Map
-
More examples
For Desktop
For Mobile
How to Make an ER Diagram on EdrawMax
This section will walk you through creating an ER Diagram with EdrawMax. It outlines the steps to map entities, attributes, and relationships.
Step ❶ Open EdrawMax
- Launch EdrawMax and click More on the Home Screen
- Select Database Modeling > Entity Relationship Diagram (ERD)
- Choose Blank Drawing to start from scratch
- A new canvas will open with ER diagram symbols on the left panel
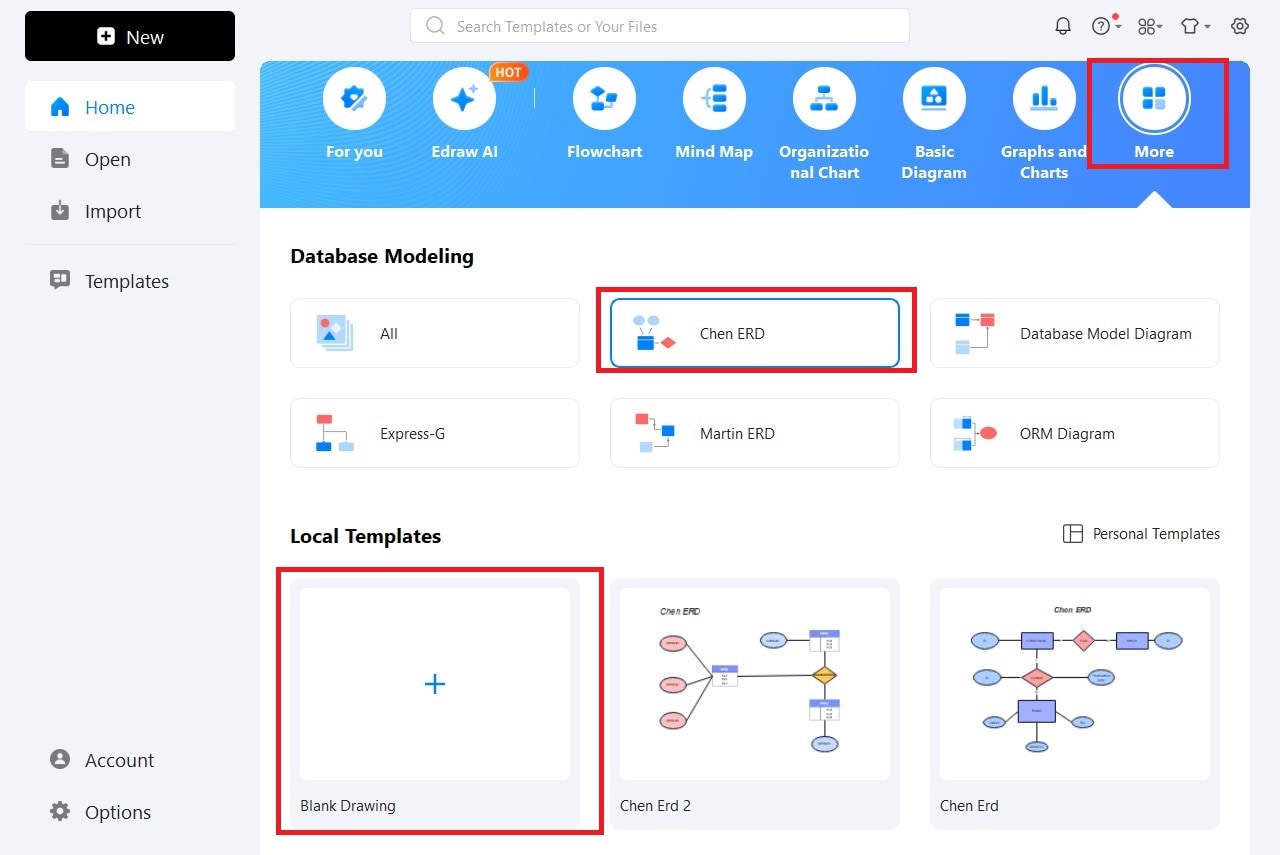
Selecting ER Diagram template
Step ❷ Drag and Drop ER Diagram Symbols
- Drag an Entity symbol onto the canvas (represents database tables)
- Double-click to rename entities (e.g., "Customer", "Order")
- Add Attribute symbols for fields/properties
- Connect entities with Relationship symbols
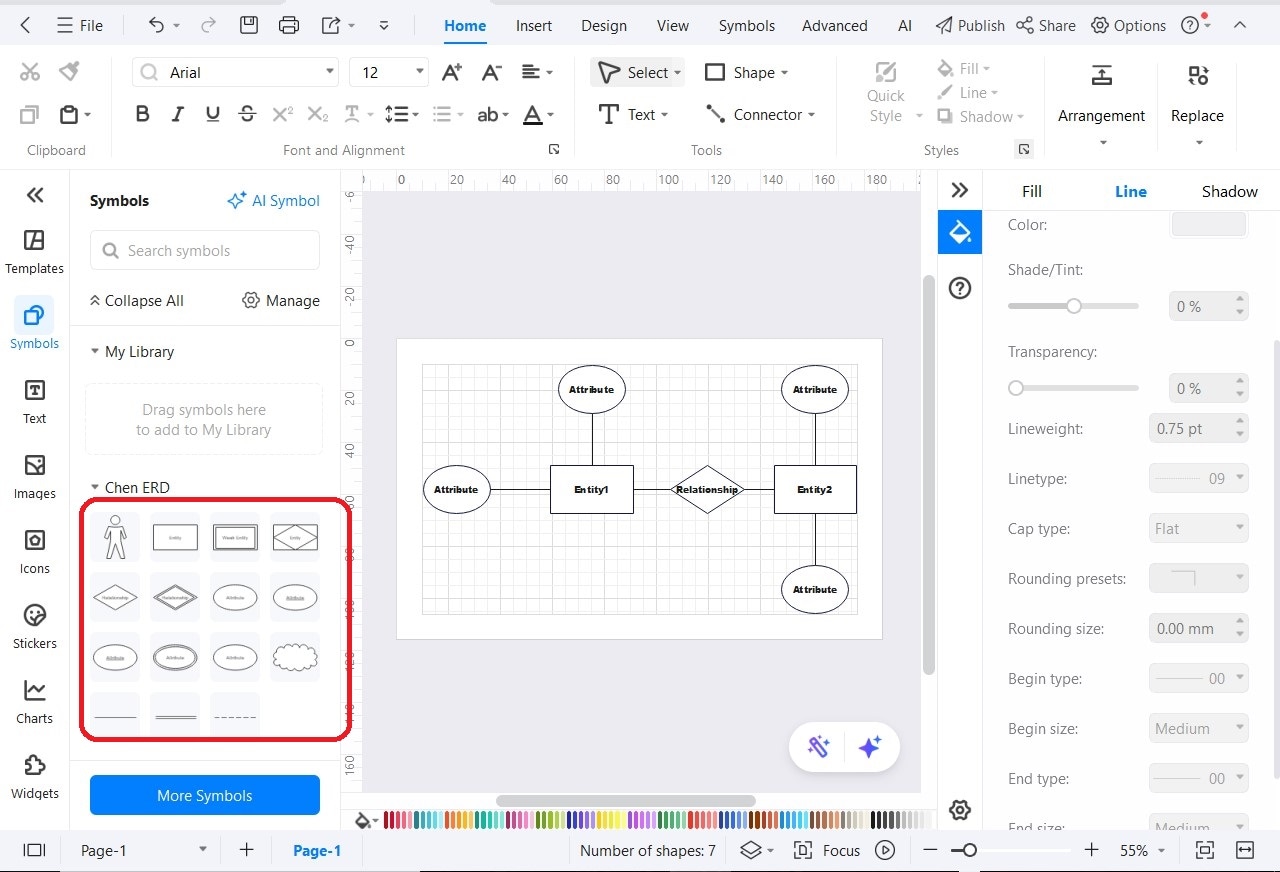
Building the ER diagram structure
Step ❸ Set Primary and Foreign Keys
- Label attributes as PK (Primary Key) or FK (Foreign Key)
- Primary keys uniquely identify records (e.g., CustomerID)
- Foreign keys establish relationships between tables
Database Tip:
Primary keys are underlined in standard ER notation.
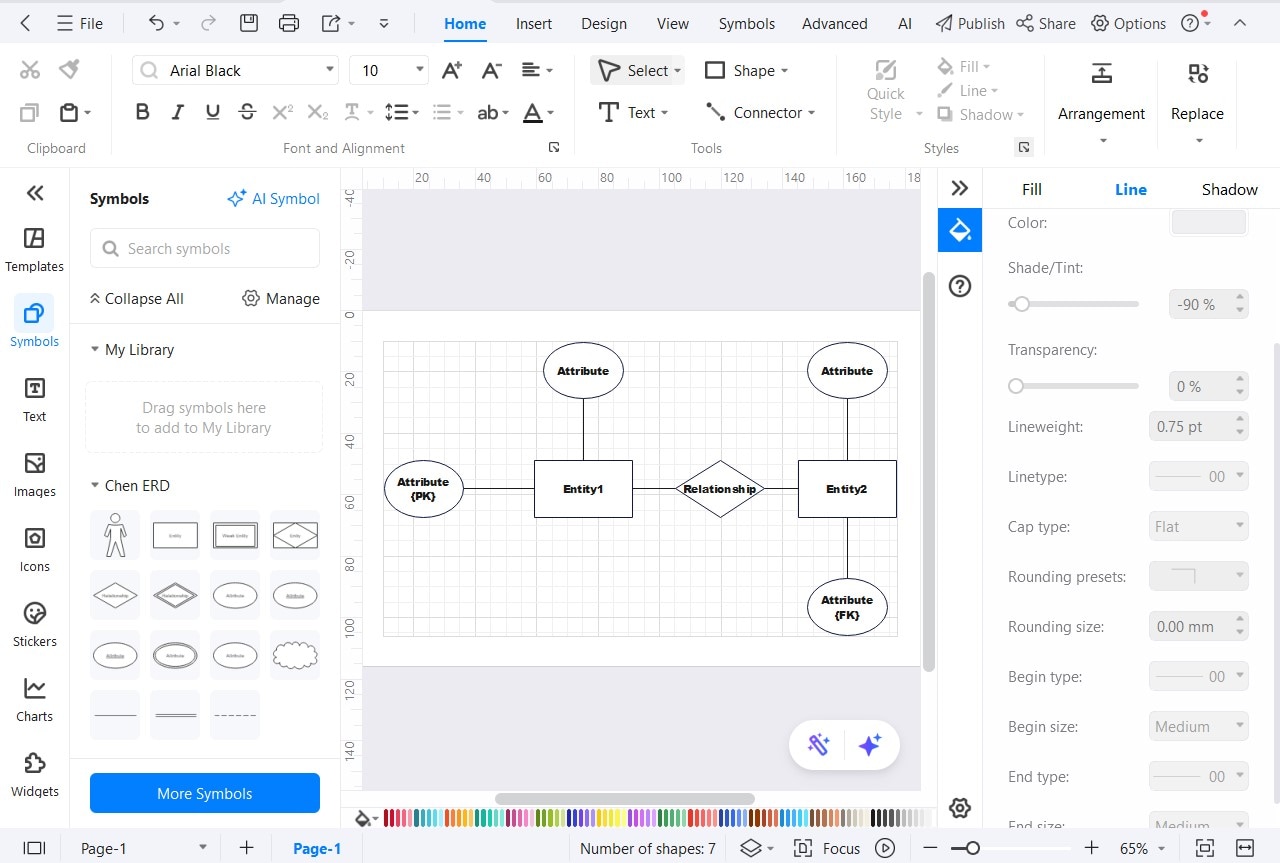
Defining primary and foreign keys
Step ❹ Customize the Diagram
- Use the formatting toolbar to adjust:
- Text size, font, and color
- Line styles and connector types
- Shape colors and effects
- Group related elements for better organization
- Add background shapes to highlight sections
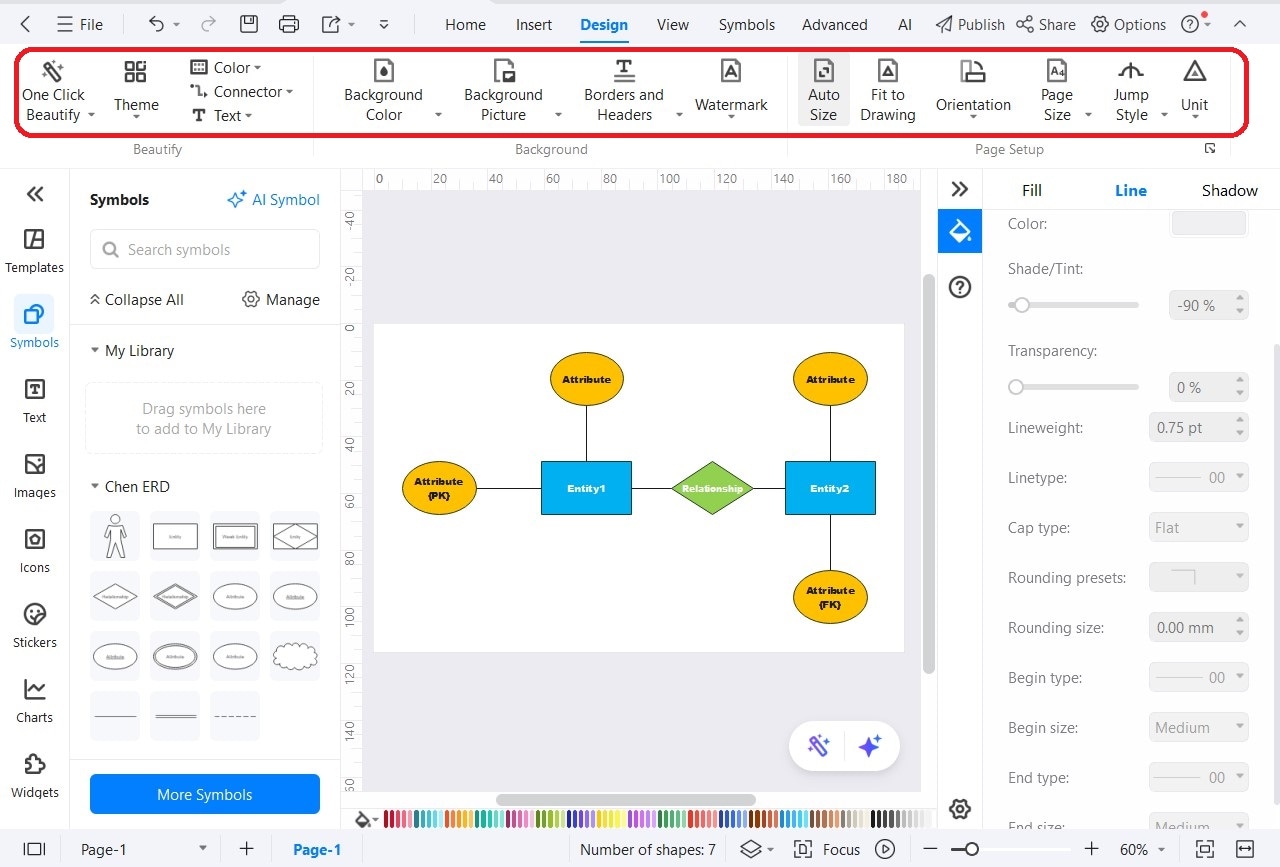
Formatting tools for ER diagrams
Step ❺ Save or Export Your Diagram
- Save: File > Save As (EDDX format for future editing)
- Export: File > Export to share in:
- PDF (for documentation)
- PNG (for presentations)
- Word/Visio (for collaboration)
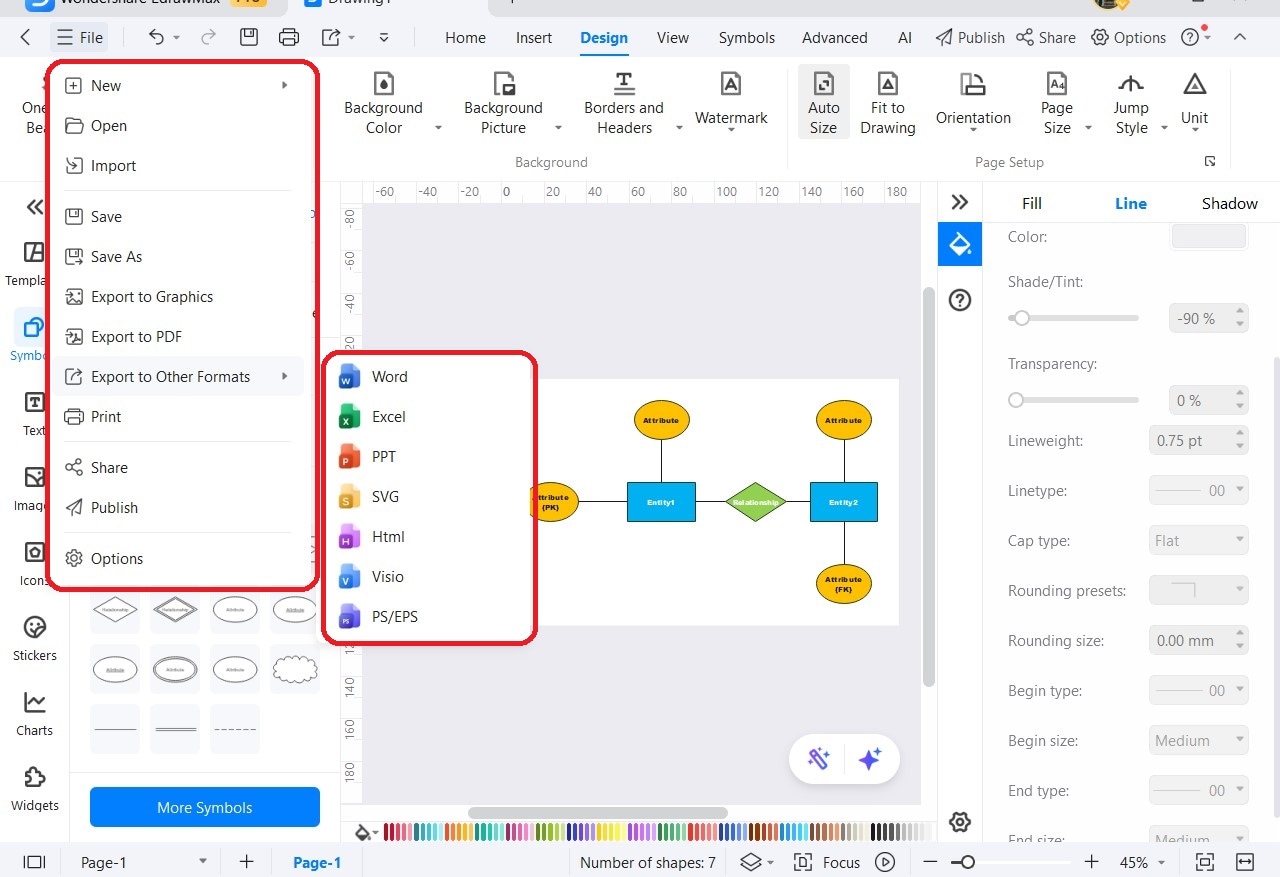
Export formats available