EdrawMax User Guide for Desktop
-
Get Started with EdrawMax
-
User Interface
-
Basic Operations
-
Advanced Operations
-
Shape Operations
-
Drawing Tools
-
Formatting and Styling
-
Text Operations
-
Symbol and Library
-
Insert/Add Objects
-
Page Settings
-
Presentation Mode
-
AI Features
- How to Make a Diagram with Edraw AI
- AI Slides
- AI Infographics Generator
- AI Copywriting
- AI Stickers
- AI Symbols
- AI Analysis
- AI Drawing
- AI OCR
- AI Diagram Generator
- AI Framework Generator
- AI Floating Ball
- AI Chatbot
- AI Flowchart
- AI Mind Map
- AI Timeline
- AI Table
- AI List
- AI SWOT Analysis, PEST Analysis, and Lean Canvas
- AI User Profile
-
How to Make a Flowchart
-
How to make an Org Chart
-
How to make a Gantt Chart
-
How to Make a Mind Map
-
More examples
Create a Flowchart from Scratch
EdrawMax allows users to create a flowchart from scratch and customize it in a certain way. Refer to the tutorial below to help you get started in easy steps.
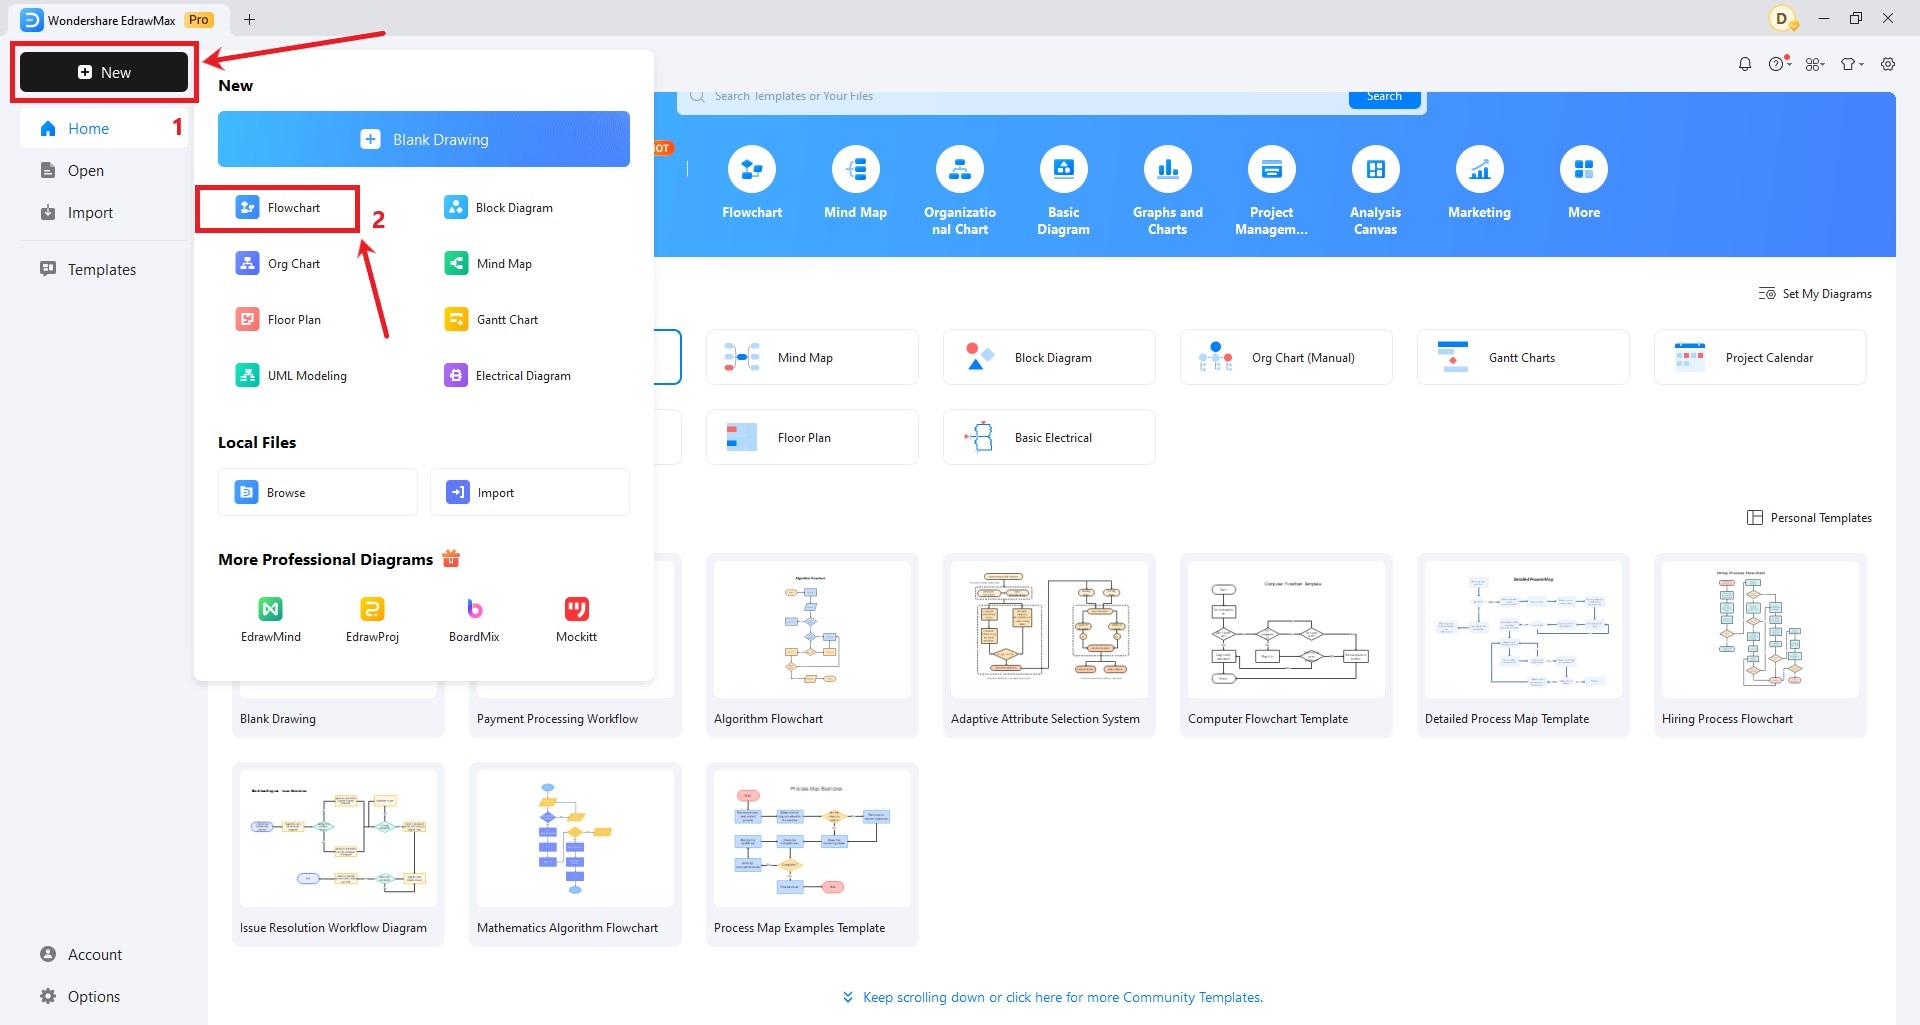
Step 1: Click New at the top-left corner of the EdrawMax homepage. Then, select Flowchart from the expanded menu.

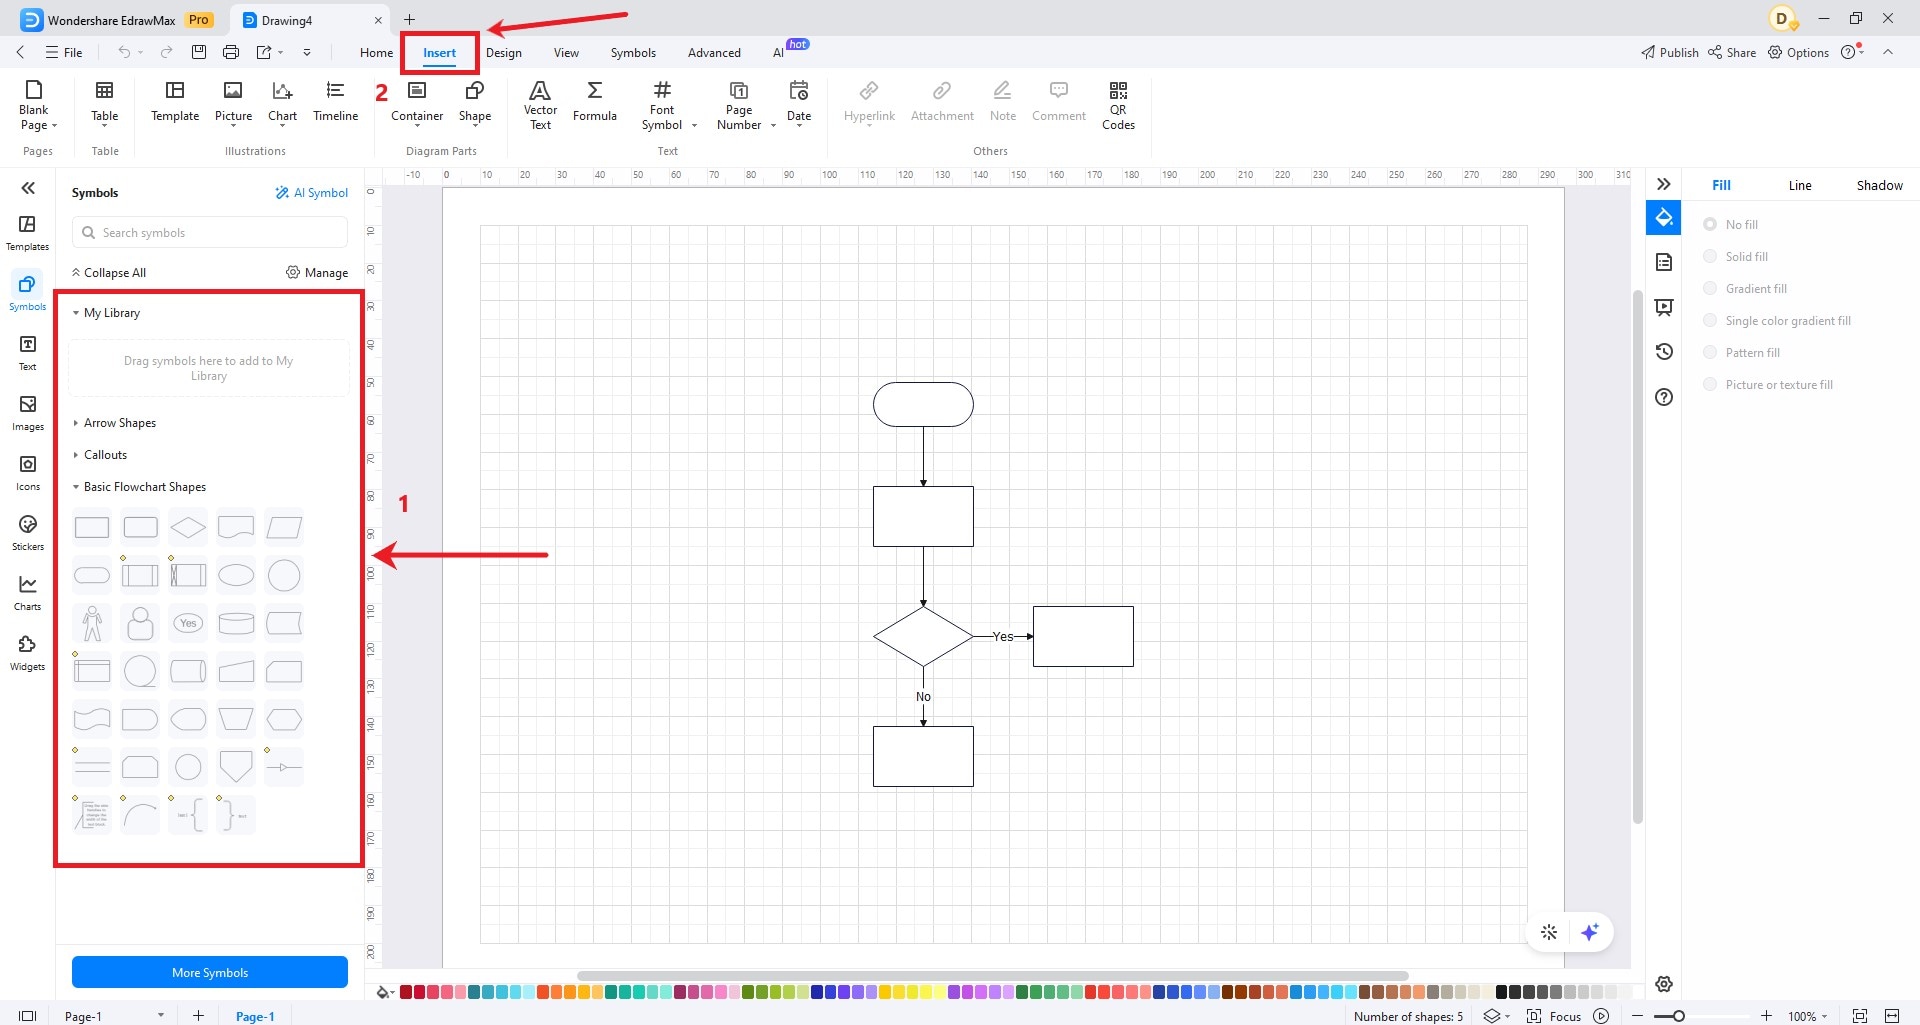
Step 2: Navigate the left-side panel to access the flowchart symbols. Choose Arrow, Callout, and Shape from the available choices. Drag them one by one to the canvas. Alternatively, click the Insert tab on the top menu bar to find and use other graphical characters.

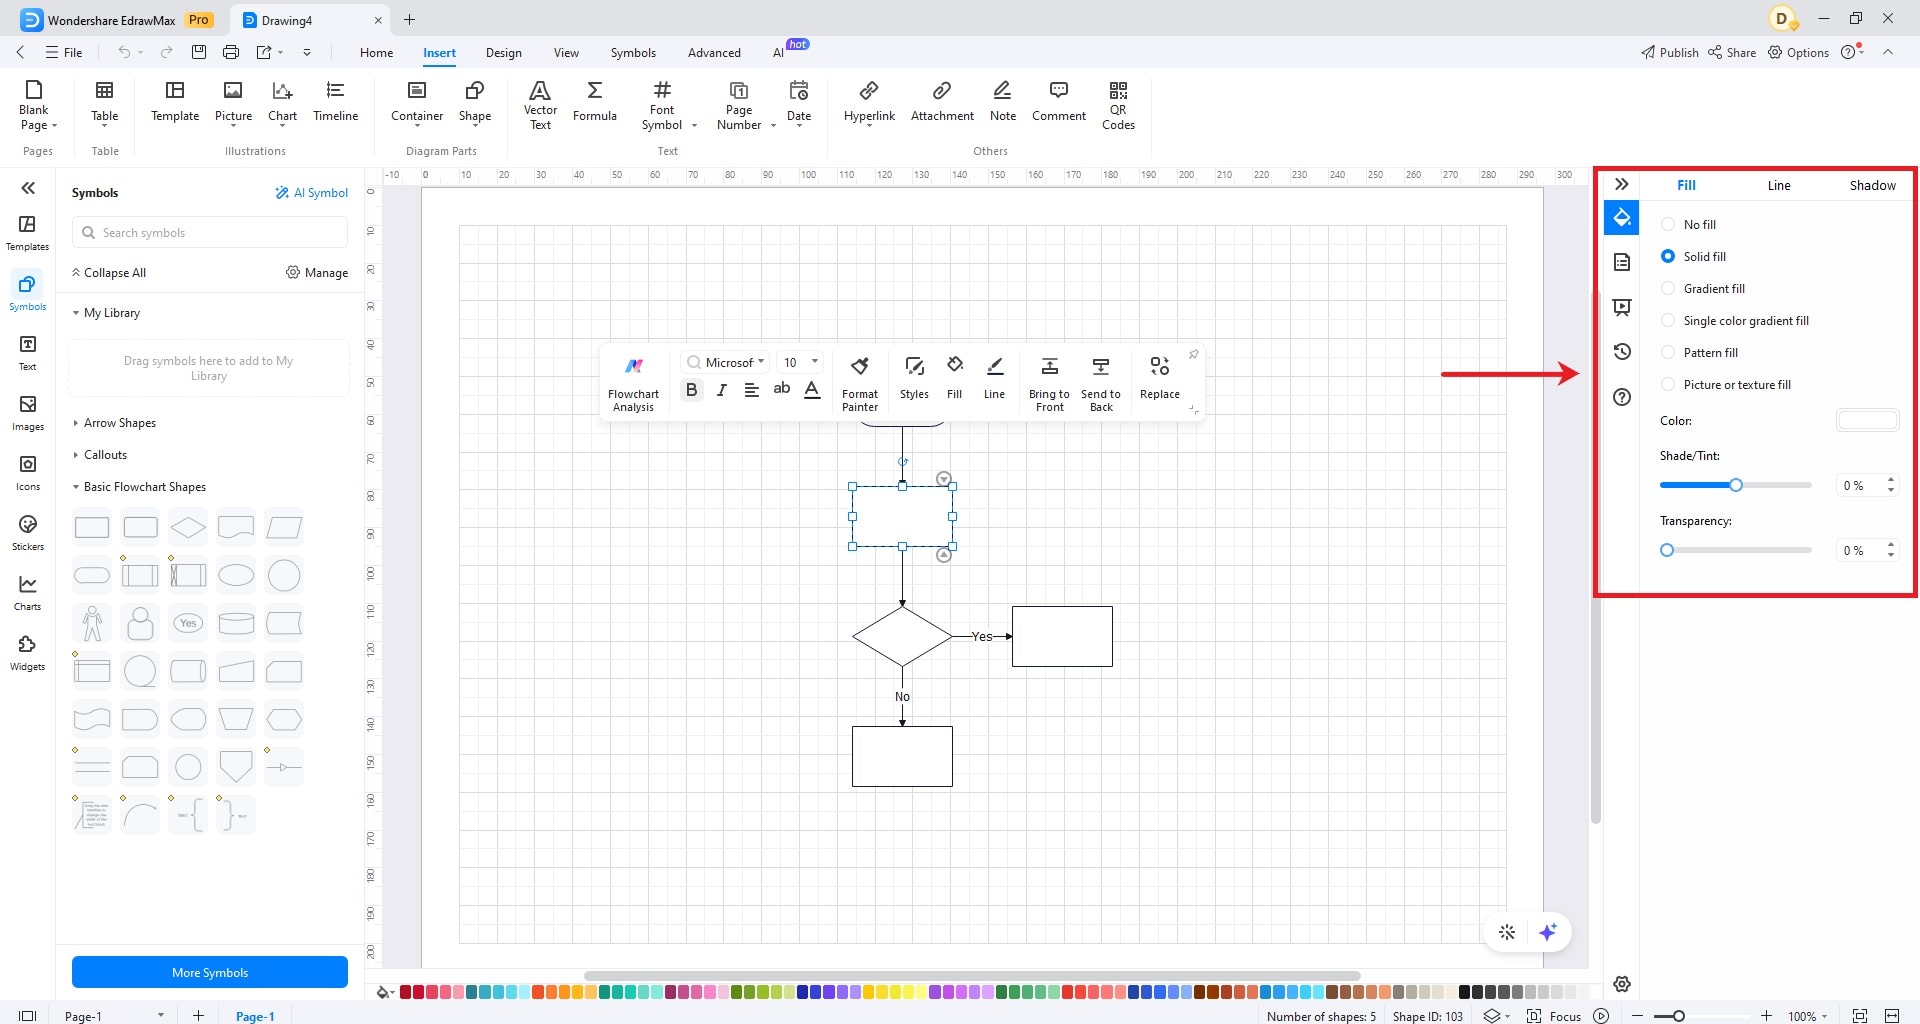
Step 3: Customize the shapes, connecting arrows, and other symbols in the canvas based on your preferences. Go to the right-side panel and configure the provided settings accordingly.

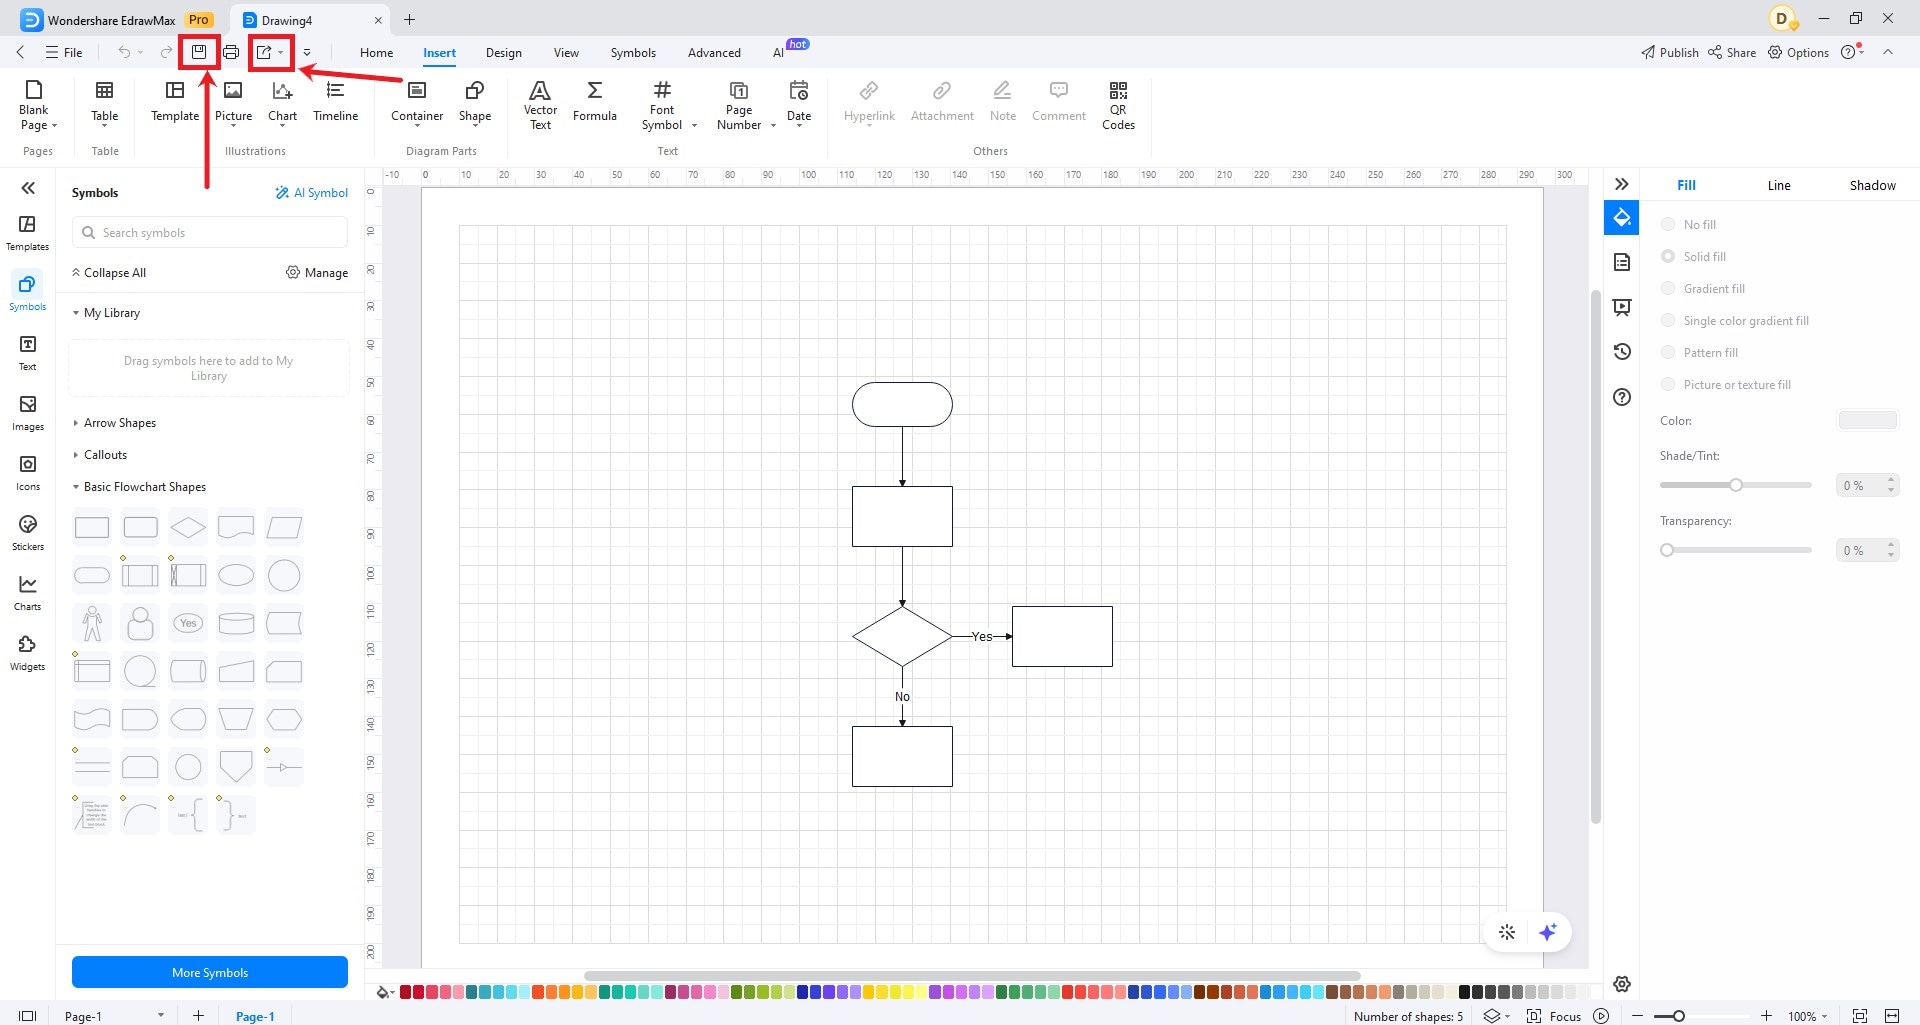
Step 4: Once you’re done designing the flowchart, click the Save or Export button on the Quick Access Toolbar.
