EdrawMax User Guide for Desktop
-
Get Started with EdrawMax
-
User Interface
-
Basic Operations
-
Advanced Operations
-
Shape Operations
-
Drawing Tools
-
Formatting and Styling
-
Text Operations
-
Symbol and Library
-
Insert/Add Objects
-
Page Settings
-
Presentation Mode
-
AI Features
- How to Make a Diagram with Edraw AI
- AI Slides
- AI Infographics Generator
- AI Copywriting
- AI Stickers
- AI Symbols
- AI Analysis
- AI Drawing
- AI OCR
- AI Diagram Generator
- AI Framework Generator
- AI Floating Ball
- AI Chatbot
- AI Flowchart
- AI Mind Map
- AI Timeline
- AI Table
- AI List
- AI SWOT Analysis, PEST Analysis, and Lean Canvas
- AI User Profile
-
How to Make a Flowchart
-
How to make an Org Chart
-
How to make a Gantt Chart
-
How to Make a Mind Map
-
More examples
Create a Mind Map with a Template
EdrawMax simplifies the process of visually structuring and presenting complex ideas or information. Refer to the guide to create a mind map with a template:
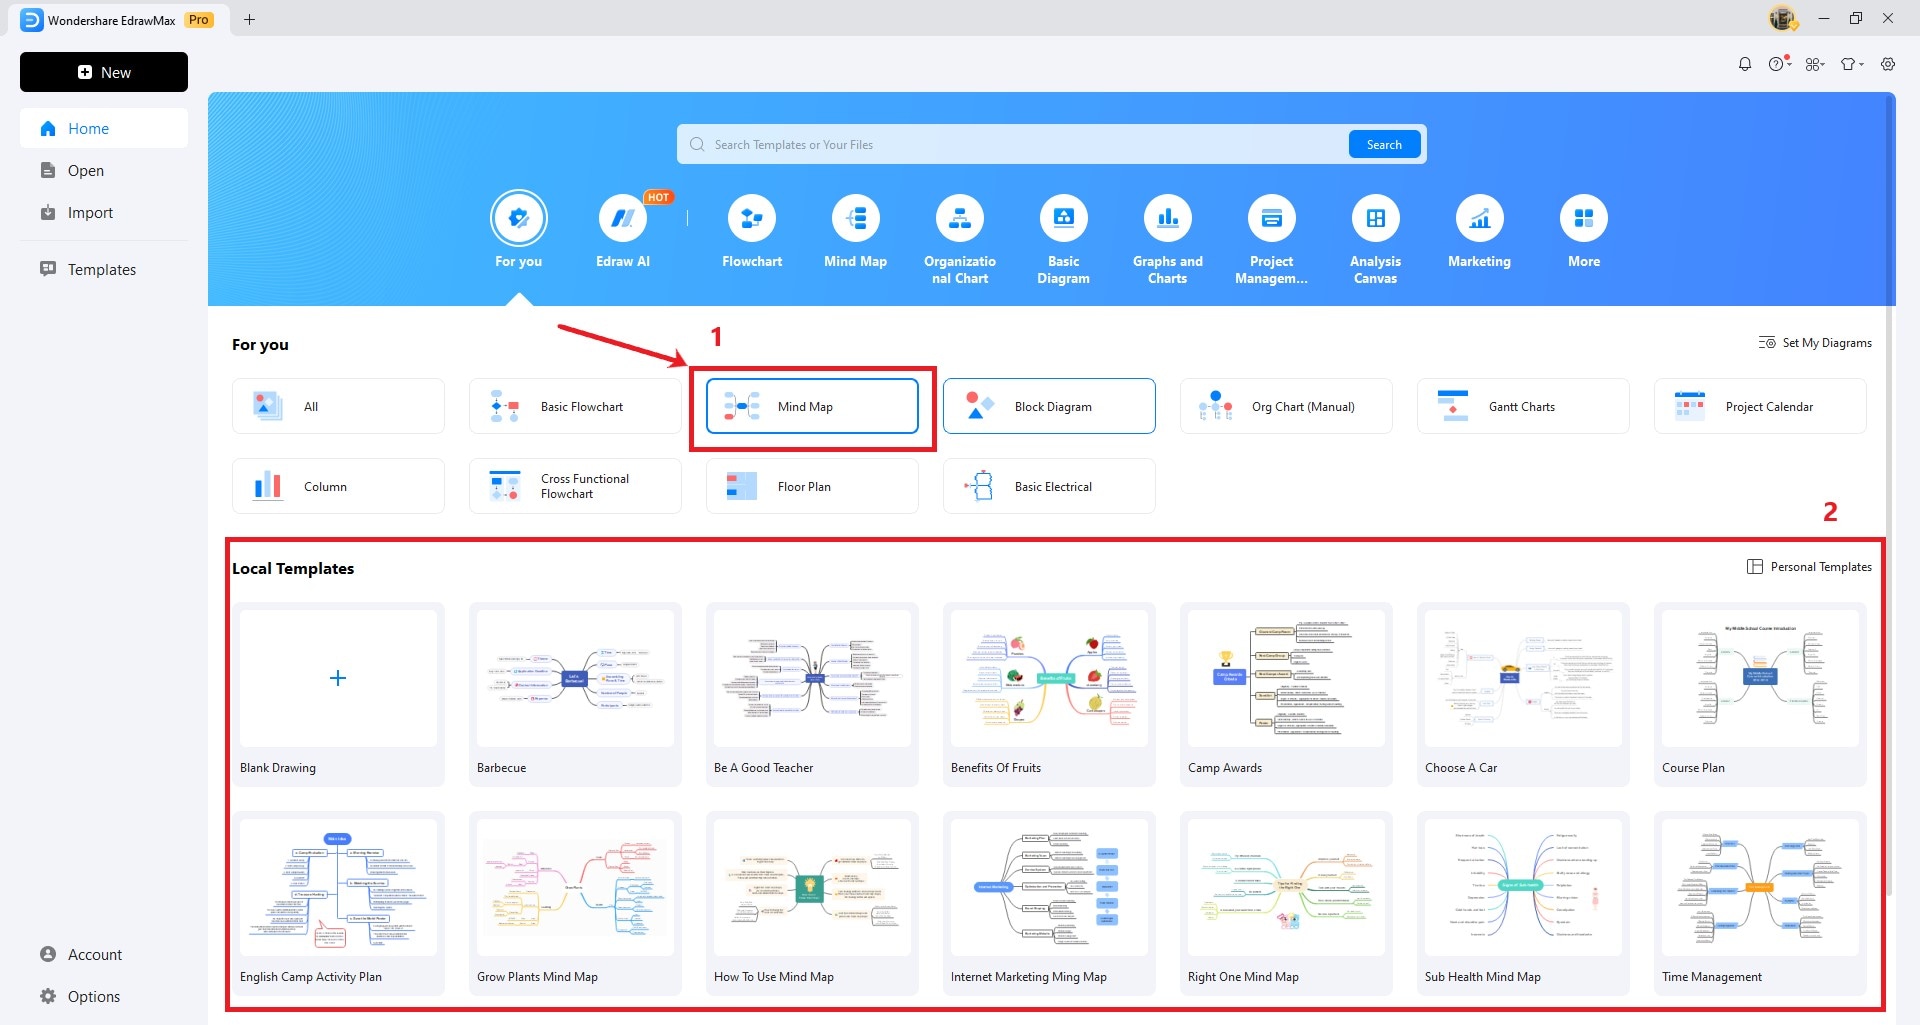
Step 1: Go to the Home page of the EdrawMax. Now, select Mind Map under the For You section. Pick the template you want to use from the Local Templates section.

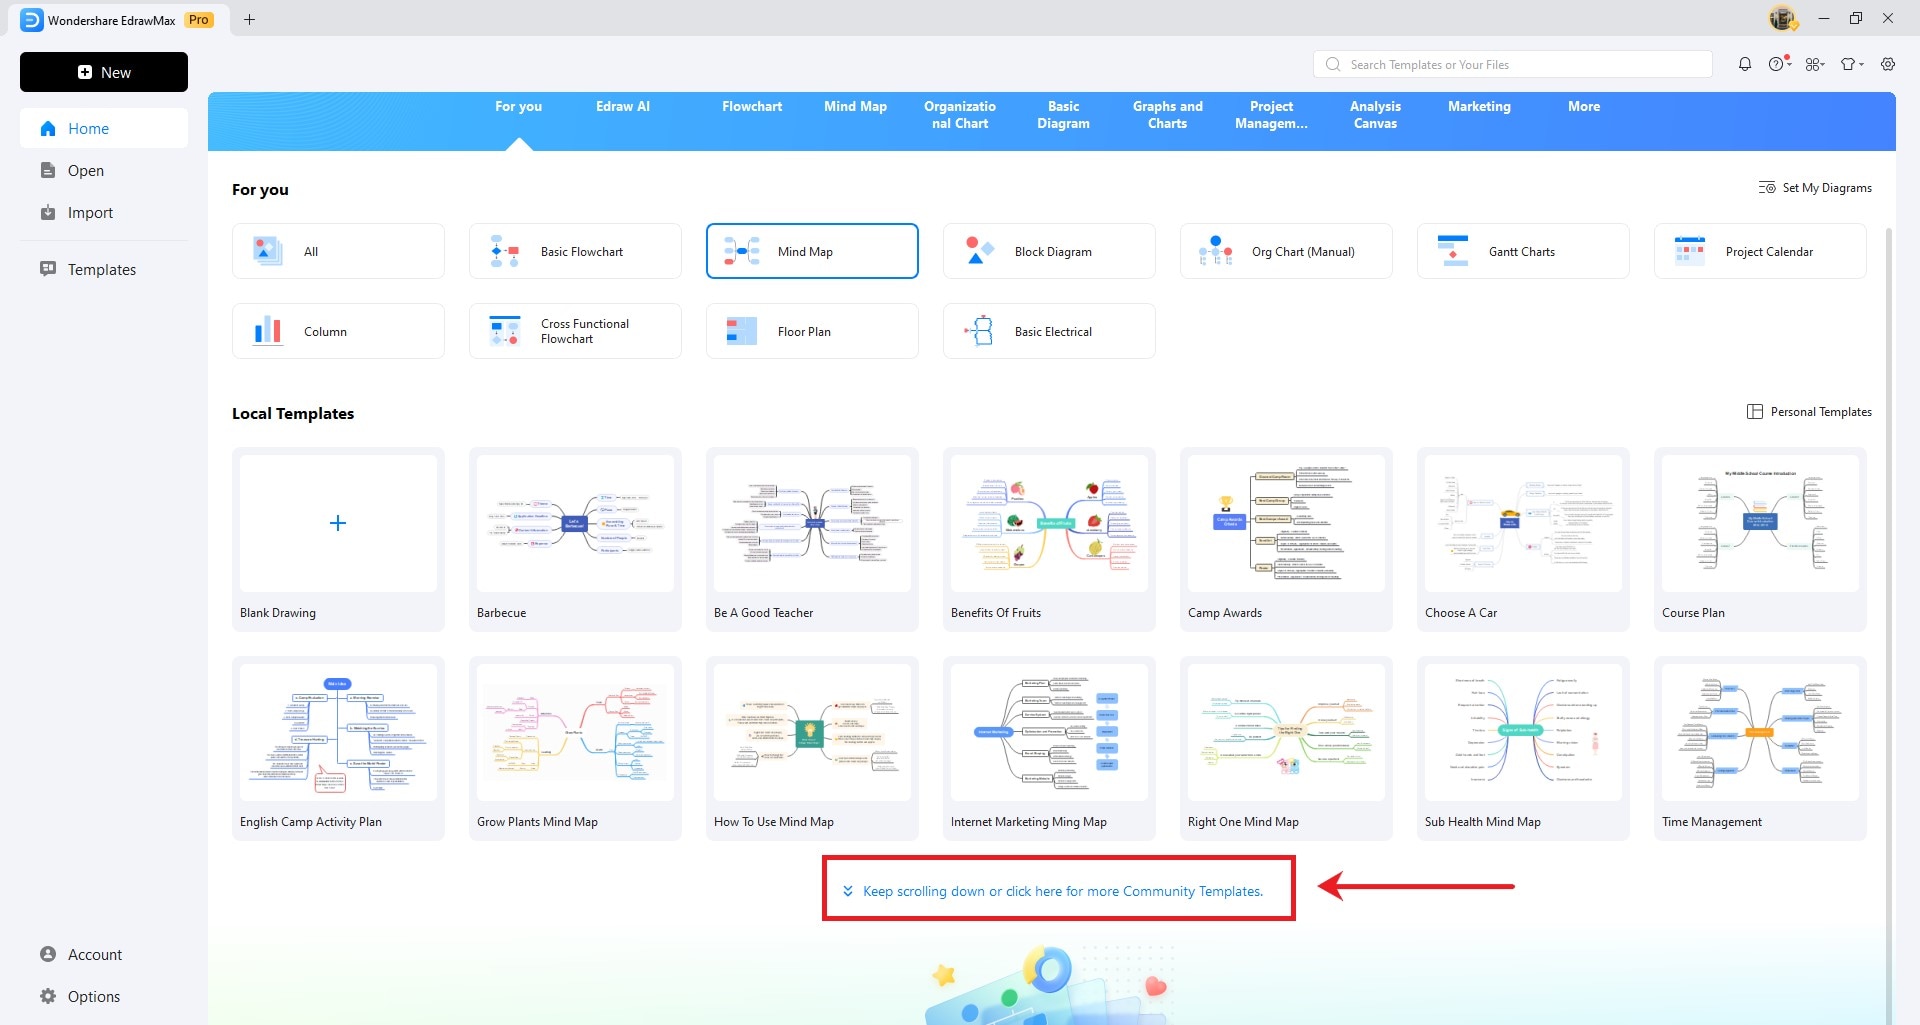
Step 2: Select any template from the Local Templates. Or, scroll down to navigate to the Template Community for more options.

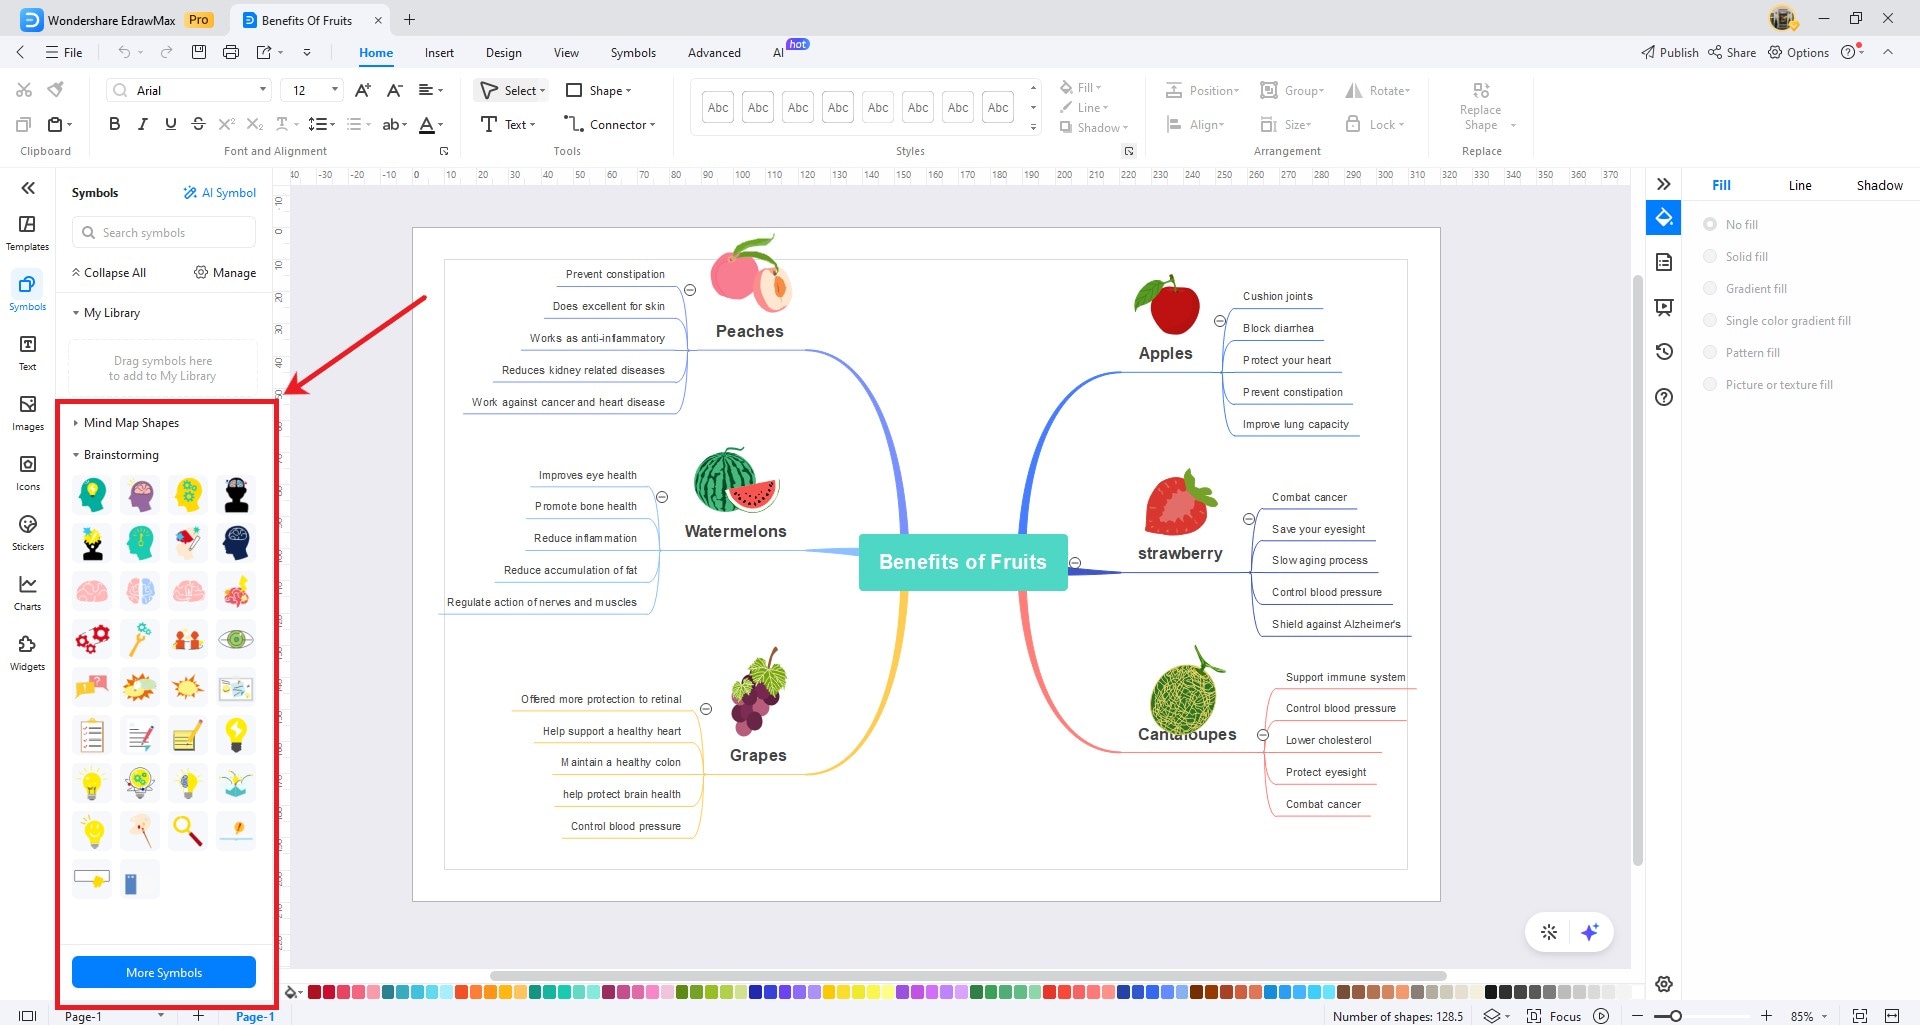
Step 3: After the template is open on the drawing page, you can now customize the mind map based on your preferences. You can select elements from the Mind Map Shapes or Brainstorming left-side panel and drag them into the canvas.

Step 4: For further customization, select the mind map, and you will notice a floating toolbar.

From the options in the floating toolbar, you can:
- Click the Topic and Subtopic button to create and organize the main ideas and their associated sub-ideas within the mind map.
- Click the Relationship button to connect and visually represent the connections or associations between different ideas or topics in the mind map.
- Click the Summary button to provide concise descriptions or explanations for individual topics or subtopics.
- Click the Boundary button to group related topics or subtopics together, providing visual organization and clarity within the mind map.
- Click the Add Symbol button to include symbols or icons to represent specific concepts or themes.
- Click the Insert button to add additional elements, such as images, hyperlinks, notes, or attachments, to enrich the mind map with supplementary information.
- Click the Shape button to customize the appearance of topics, subtopics, and other elements in the mind map by choosing from various shapes and styles.
- Click the Beautify button to enhance the visual appeal of the mind map by adjusting colors, fonts, and other design elements to make it more aesthetically pleasing.
- Click the Format Painter button to copy the formatting (e.g., fonts, colors) from one element in the mind map and apply it to another.