EdrawMax User Guide for Desktop
-
Get Started with EdrawMax
-
User Interface
-
Basic Operations
-
Advanced Operations
-
Shape Operations
-
Drawing Tools
-
Formatting and Styling
-
Text Operations
-
Symbol and Library
-
Insert/Add Objects
-
Page Settings
-
Presentation Mode
-
AI Features
- How to Make a Diagram with Edraw AI
- AI Slides
- AI Infographics Generator
- AI Copywriting
- AI Stickers
- AI Symbols
- AI Analysis
- AI Drawing
- AI OCR
- EdrawMax Quotation Tool
- AI Diagram Generator
- AI Framework Generator
- EdrawMax AI Copilot
- AI Chatbot
- AI Flowchart
- AI Mind Map
- AI Timeline
- AI Table
- AI List
- AI SWOT Analysis, PEST Analysis, and Lean Canvas
- AI User Profile
-
How to Make a Flowchart
-
How to make an Org Chart
-
How to make a Gantt Chart
-
How to Make a Mind Map
-
More examples
Create an Org Chart from Excel
Say goodbye to manual data entry. Streamline creating an organizational chart by importing data from an excel file. Here is how to do it.
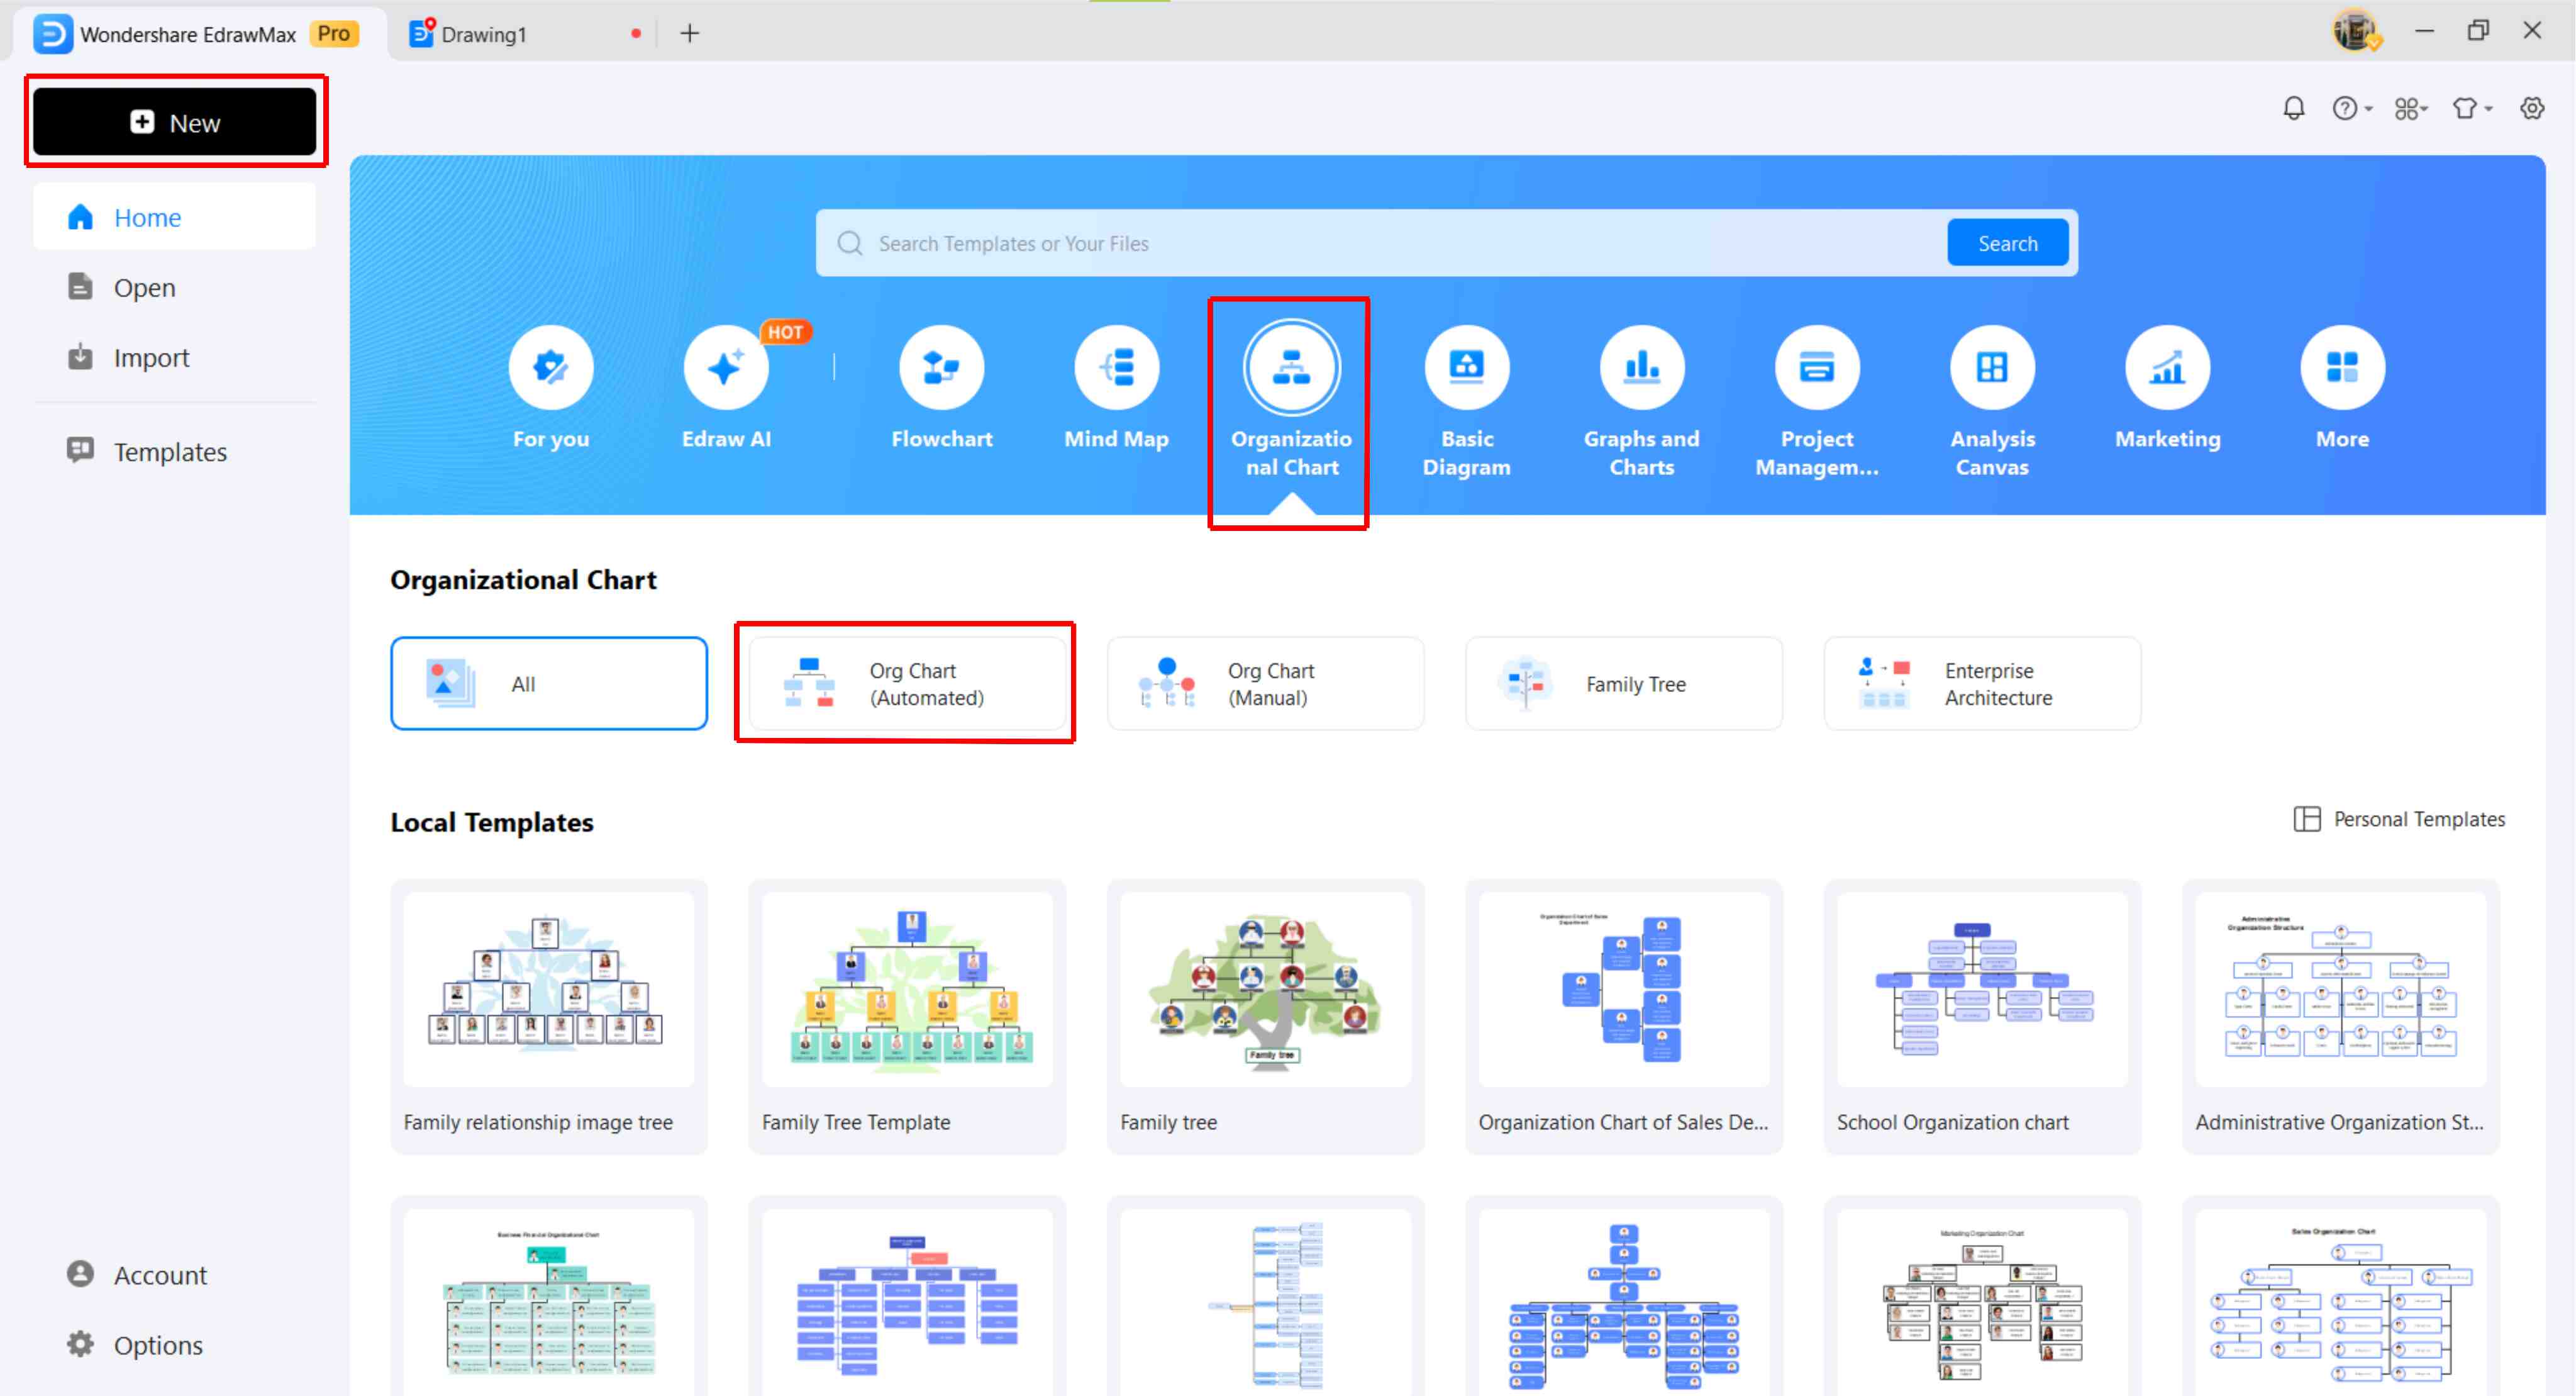
Step 1
Navigate to the New button from the dashboard. Choose an Org Chart from the dropdown menu to start modifying. Alternatively, directly select Org Chart > Org Chart (Automated) from the dashboard.
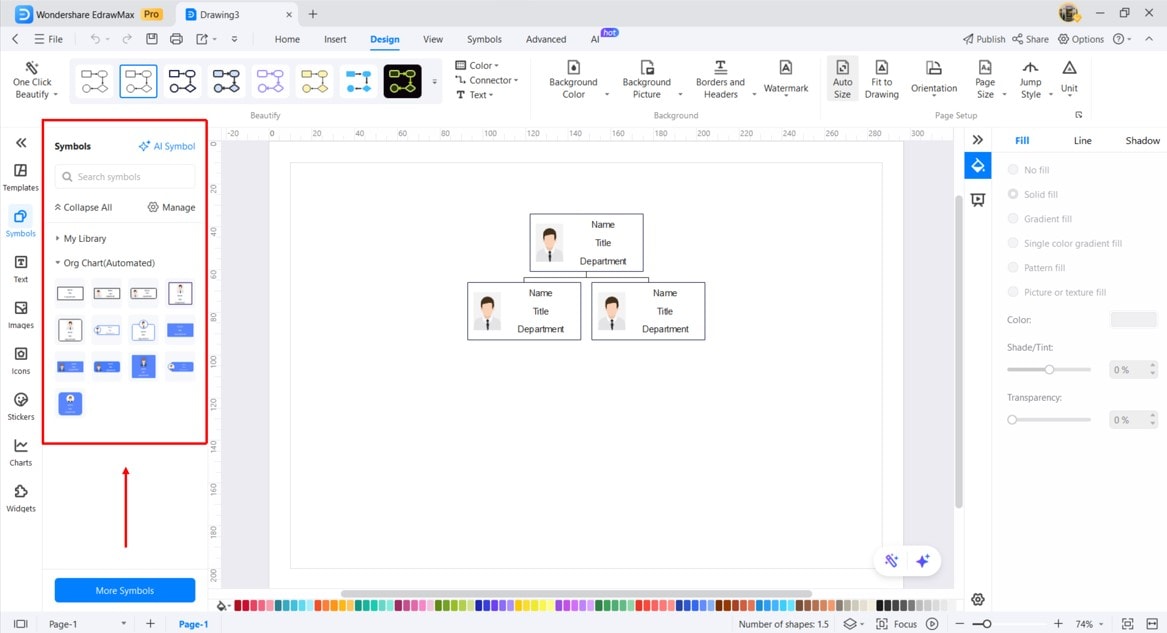
Step 2
Access symbols for your organizational charts from the left side library. Click More Symbols > Org Chart, and drag desired shapes onto the canvas to modify them according to your needs.
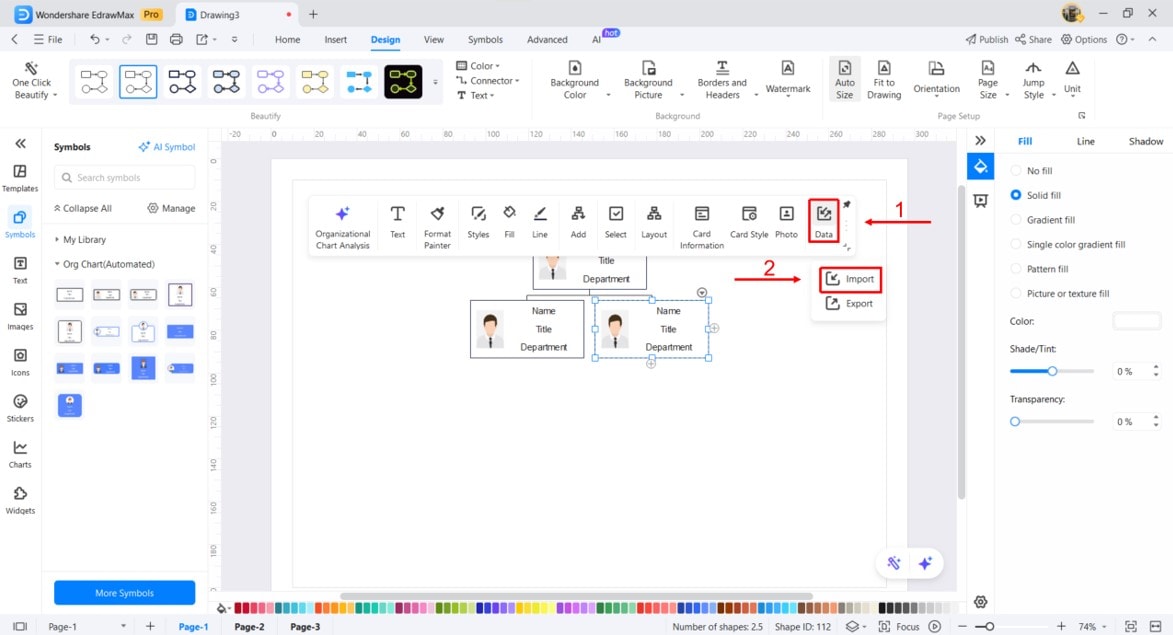
Step 3
Now, you can import data from an XSL file. For this, select the first shape of your org chart structure and click Data > Import from the on-screen prompt.
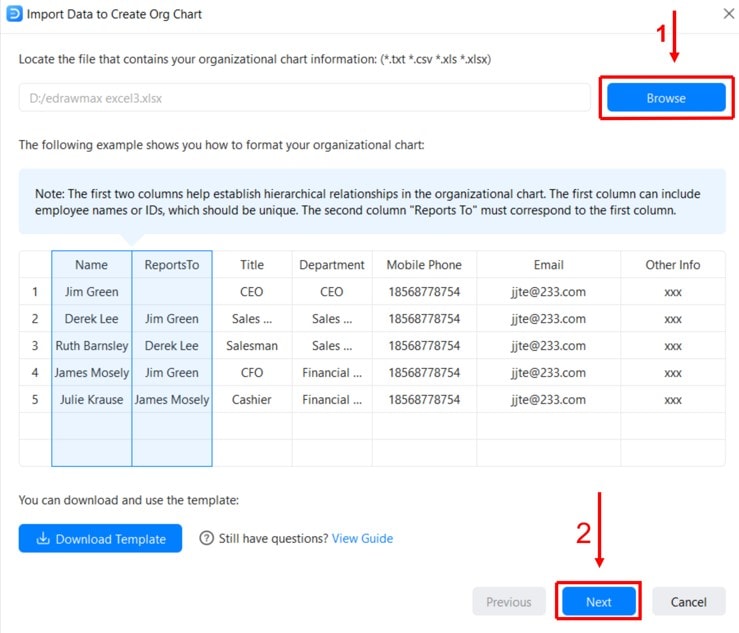
Step 4
Click Browse to find your file, select a data file of employee information from your device, and click Next.
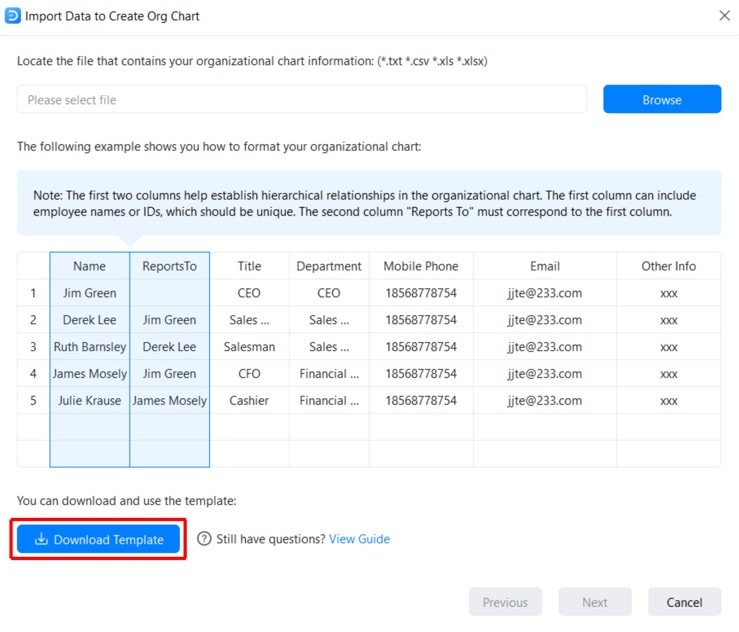
Step 5
You can also Download a Template to ease data entry for later.
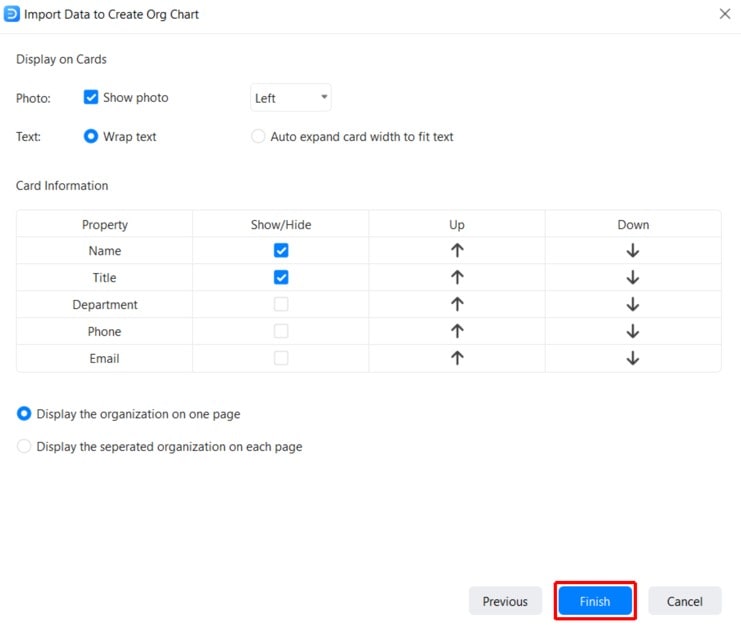
Step 6
Customize the organizational chart data according to your needs and click Finish to view your organizational chart on the canvas.
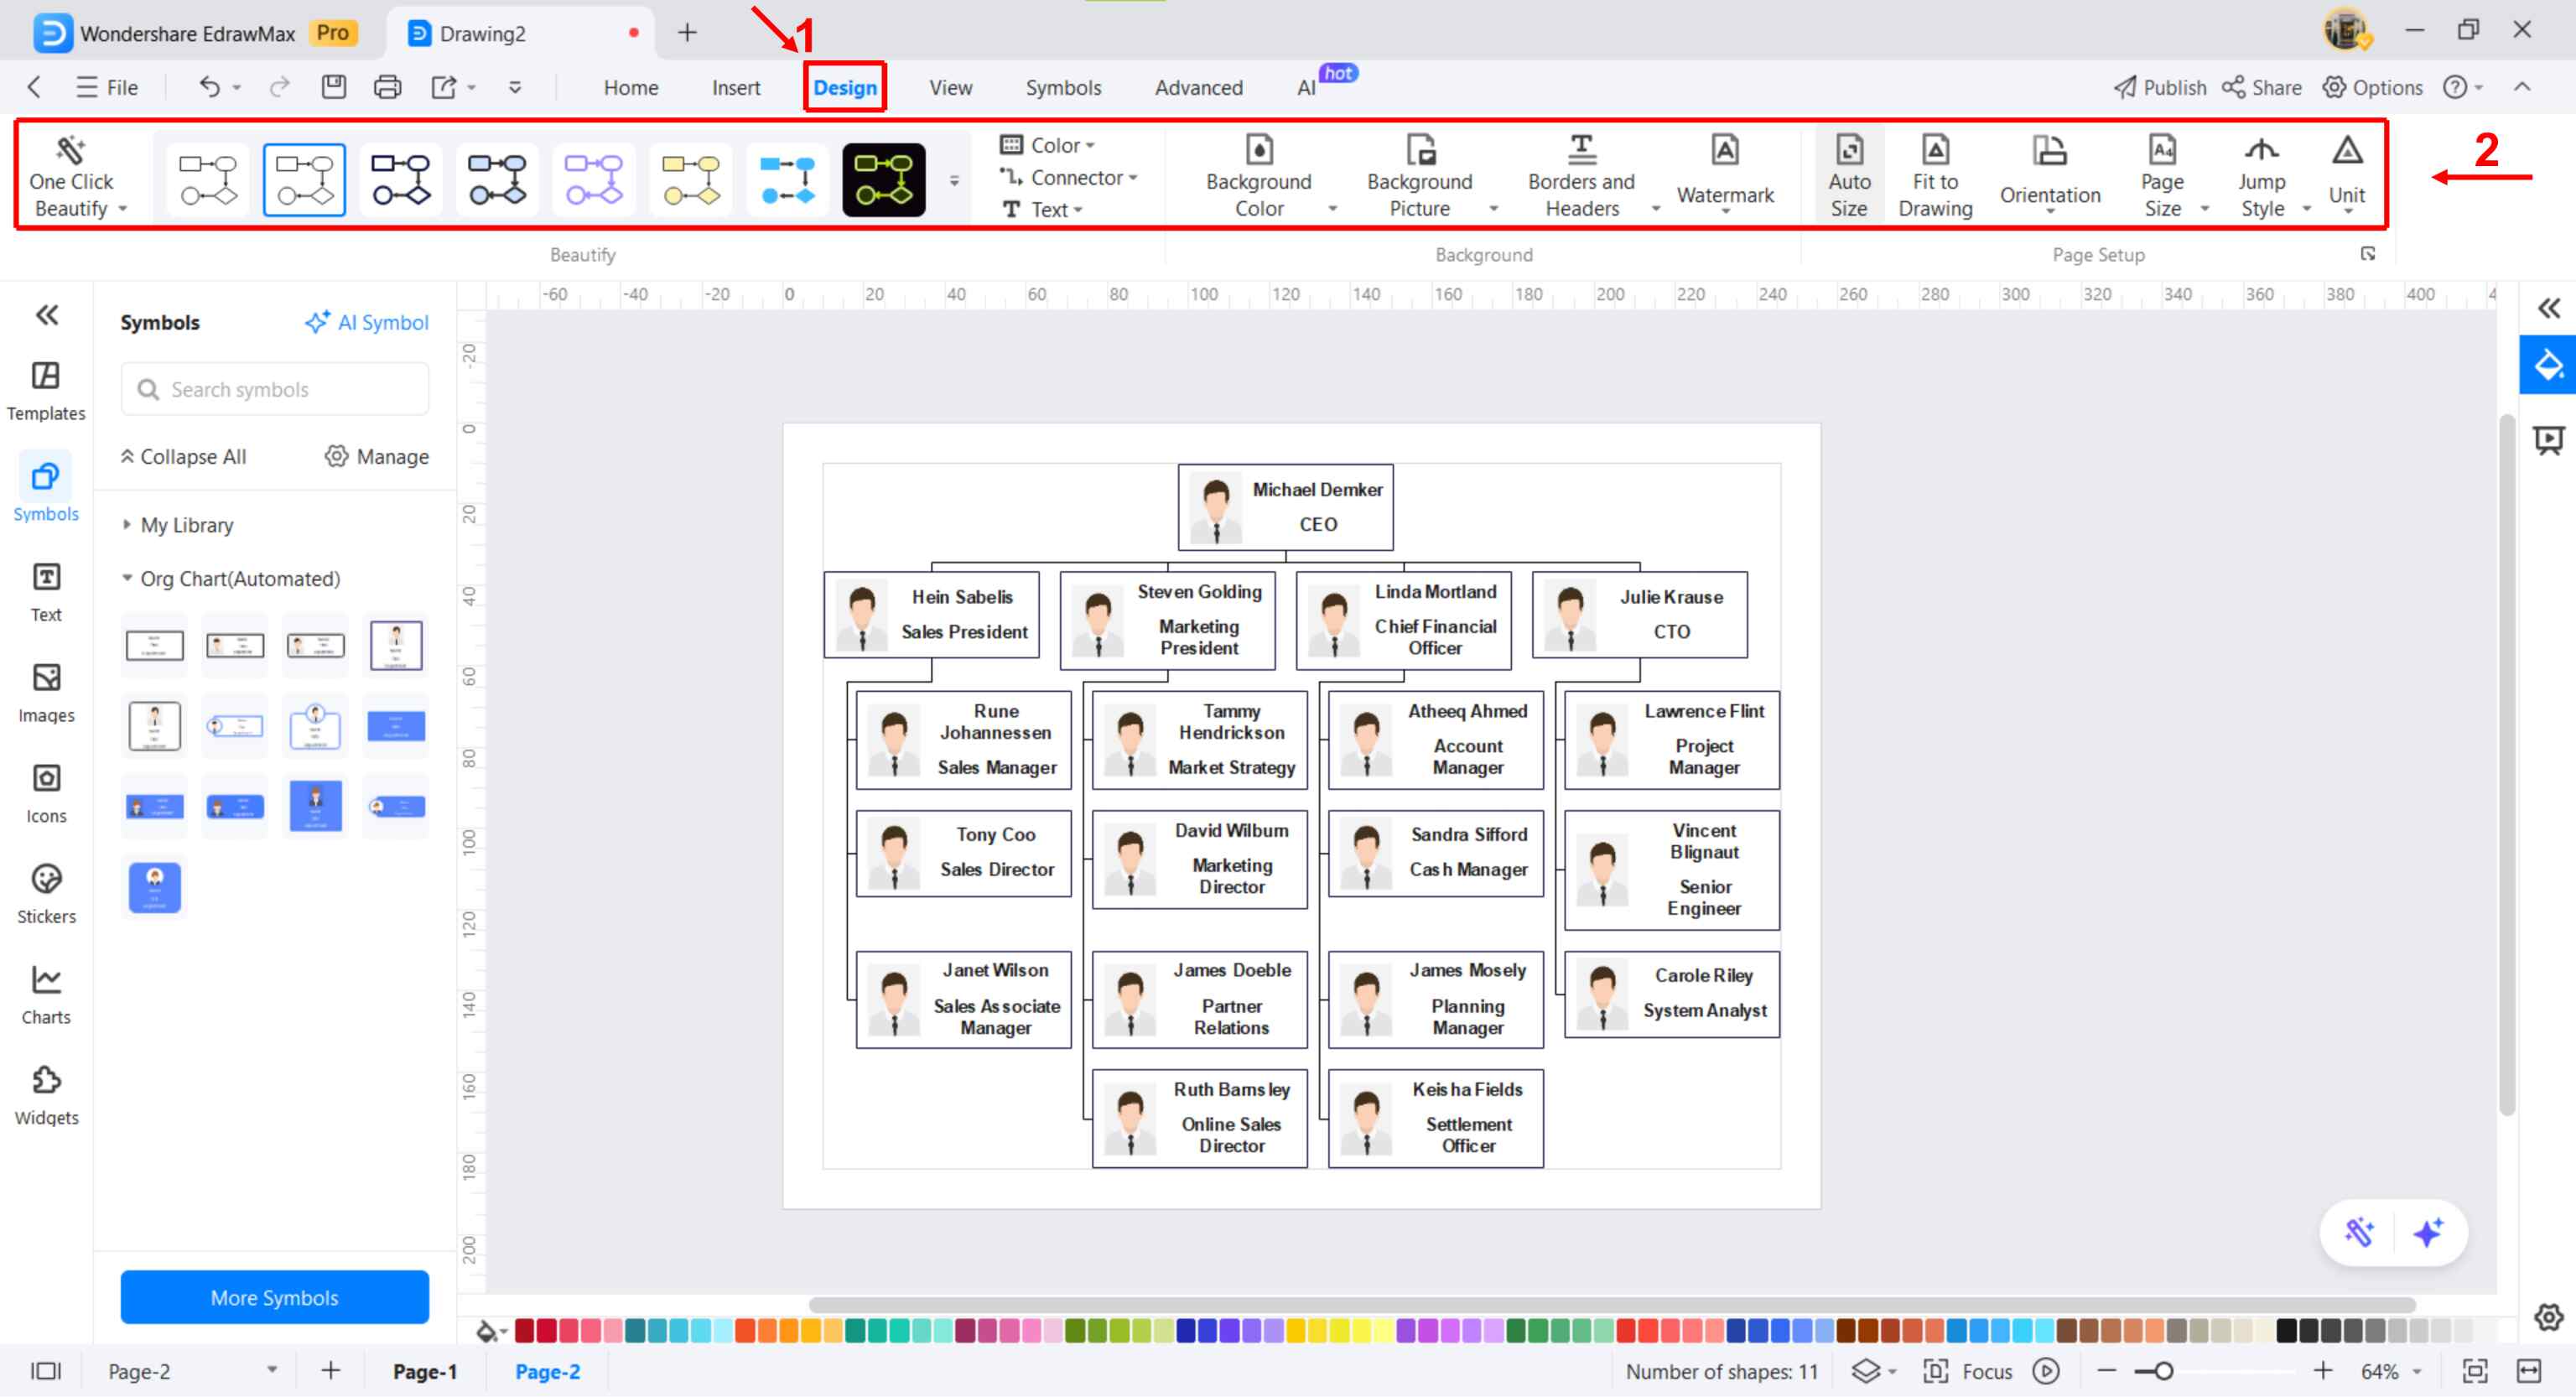
Step 7
Customize your organizational chart from the Design Layout. Change the Layout, adjust color scheme, or replace the background image to get a polished look.
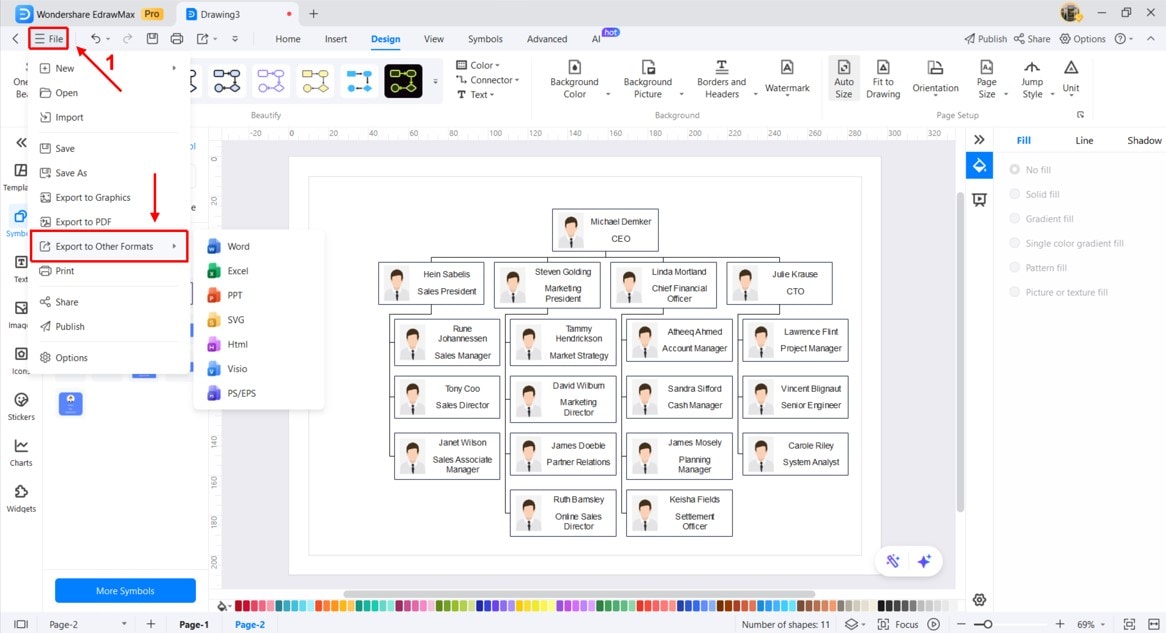
Step 8
Once done, download your org chart. Visit the File menu from the top-left corner and select Export > Desired Format to export your organizational chart in your desired format
Step 9
You can share a link to your organizational chart with your team members. Click the File menu from the top-left corner and choose Share. Edit permission to who can view or edit your diagram.
