EdrawMax User Guide for Desktop
-
Get Started with EdrawMax
-
User Interface
-
Basic Operations
-
Advanced Operations
-
Shape Operations
-
Drawing Tools
-
Formatting and Styling
-
Text Operations
-
Symbol and Library
-
Insert/Add Objects
-
Page Settings
-
Presentation Mode
-
AI Features
- How to Make a Diagram with Edraw AI
- AI Slides
- AI Infographics Generator
- AI Copywriting
- AI Stickers
- AI Symbols
- AI Analysis
- AI Drawing
- AI OCR
- EdrawMax Quotation Tool
- AI Diagram Generator
- AI Framework Generator
- EdrawMax AI Copilot
- AI Chatbot
- AI Flowchart
- AI Mind Map
- AI Timeline
- AI Table
- AI List
- AI SWOT Analysis, PEST Analysis, and Lean Canvas
- AI User Profile
-
How to Make a Flowchart
-
How to make an Org Chart
-
How to make a Gantt Chart
-
How to Make a Mind Map
-
More examples
New
Launching a new file sets the stage for diagram creation, empowering you to effectively communicate your ideas through visual means. The “New” feature provides a fresh workspace where you can begin laying out the elements of your diagram.
Step 1: Click + New on the upper-left navigation pane.
Step 2: In the New section, click + Blank Drawing to start from a blank canvas. If you have a specific diagram type in mind, select it from the available options. It will provide a starting point and access to relevant shapes and symbols from the built-in More Symbols library.
Step 3: Create a diagram by adding shapes, symbols, and other project details.

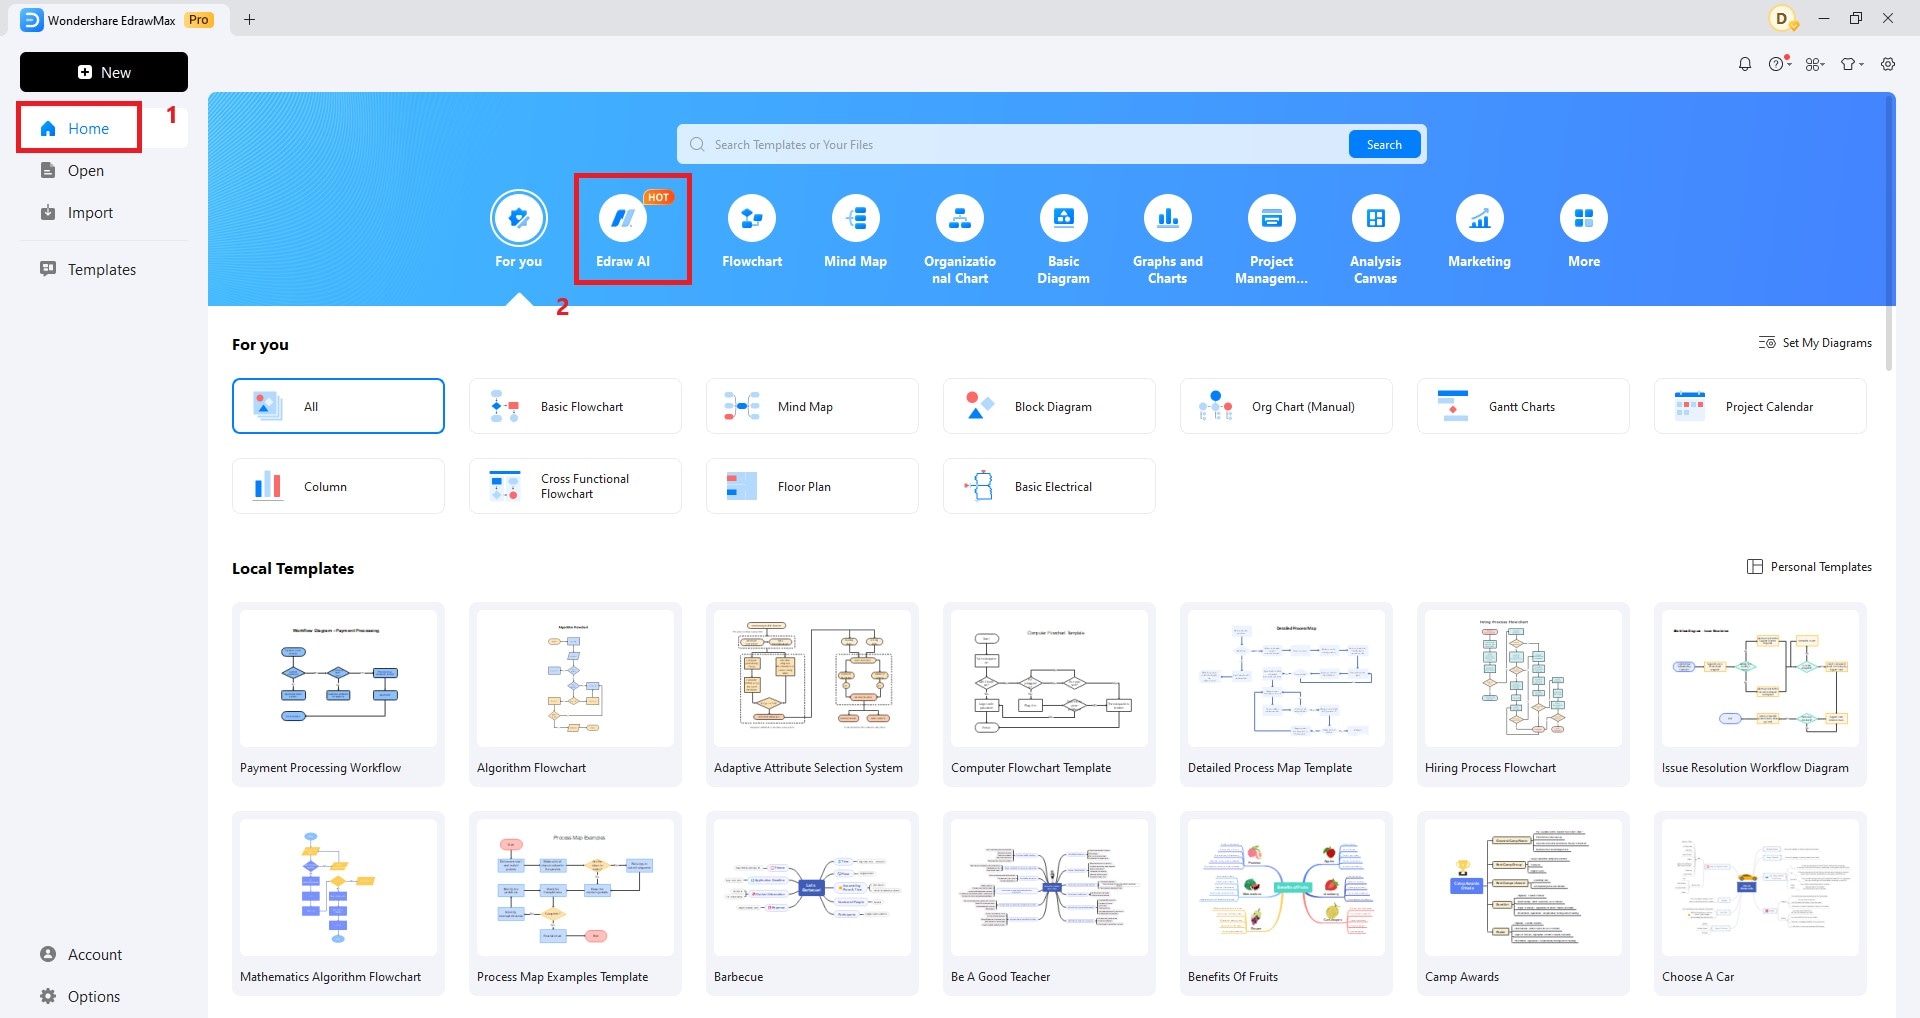
Home
Experience the ease and efficiency of AI-powered features like AI Chat, AI Drawing, and AI Diagramming, all seamlessly integrated into the EdrawMax Home page.
Step 1: On the Home page, go to Edraw AI in the top navigation pane.
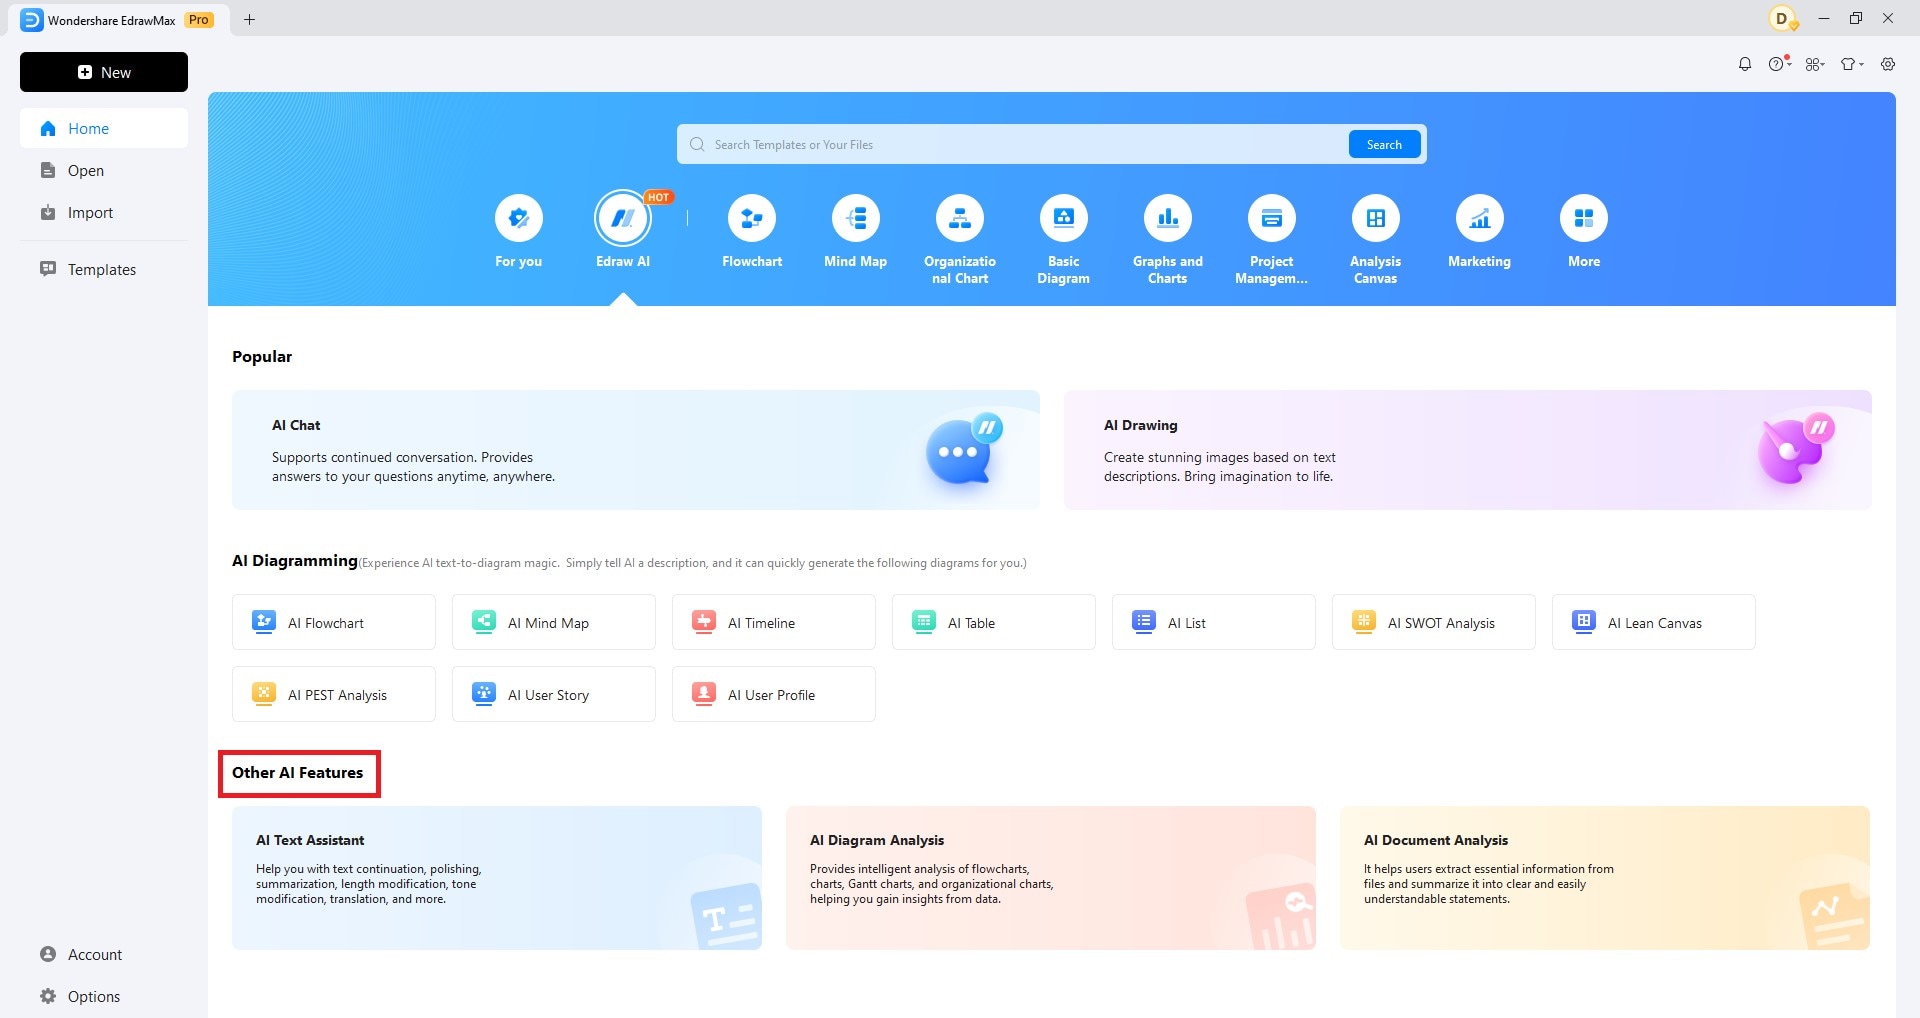
Step 2: Select an AI feature depending on your needs. Get help with your projects from popular AI features like AI Chat if you need answers related to your projects or AI Drawing to create images based on text prompts.
Step 3: Scroll down to discover more AI features like AI Diagram Analysis and AI Document Analysis. They offer advanced capabilities for extracting deeper insights from your data and documents.
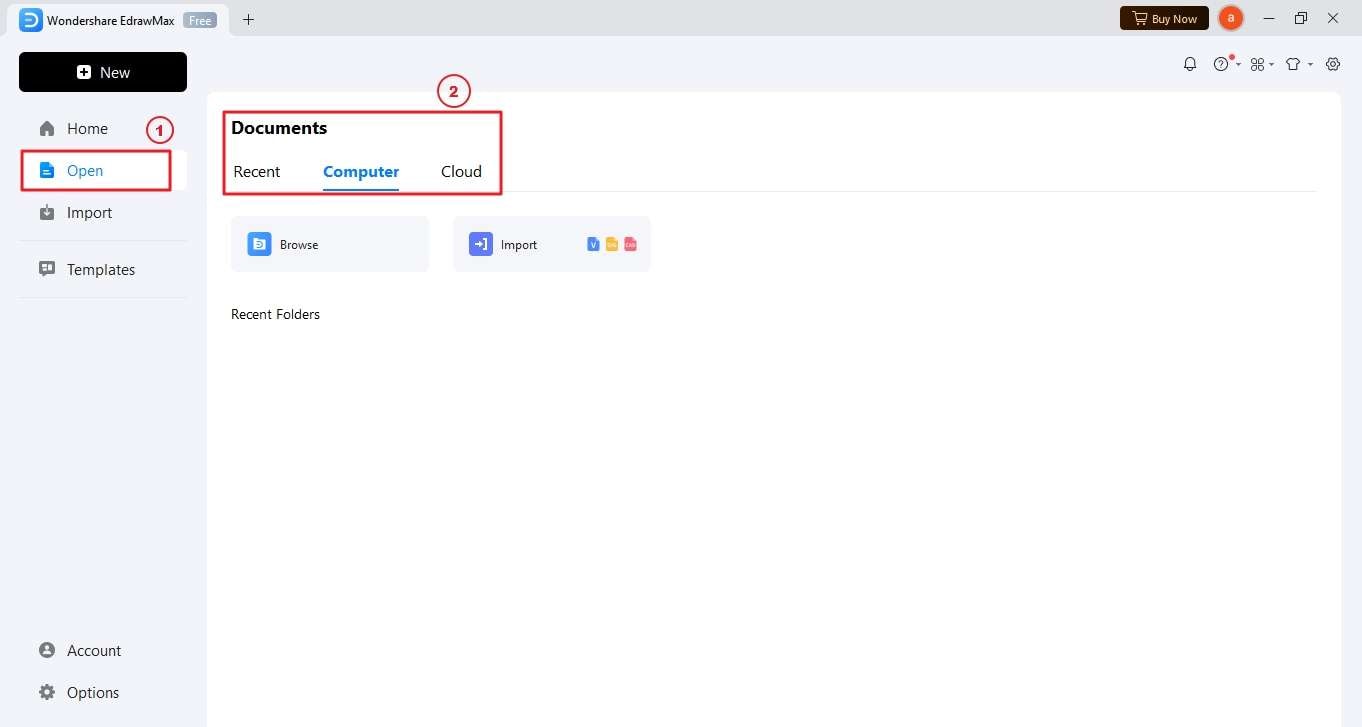
Open
Opening existing diagram files empowers you to pick up where you left off effortlessly, ensuring seamless project continuation and enhanced efficiency.
Step 1: Click Open in the left-side navigation pane.
Step 2: In the Documents section, access recent files from your local storage or import them directly in the Computer tab bar. Alternatively, retrieve files from the Cloud tab bar.
Step 3: Select the file to resume editing.
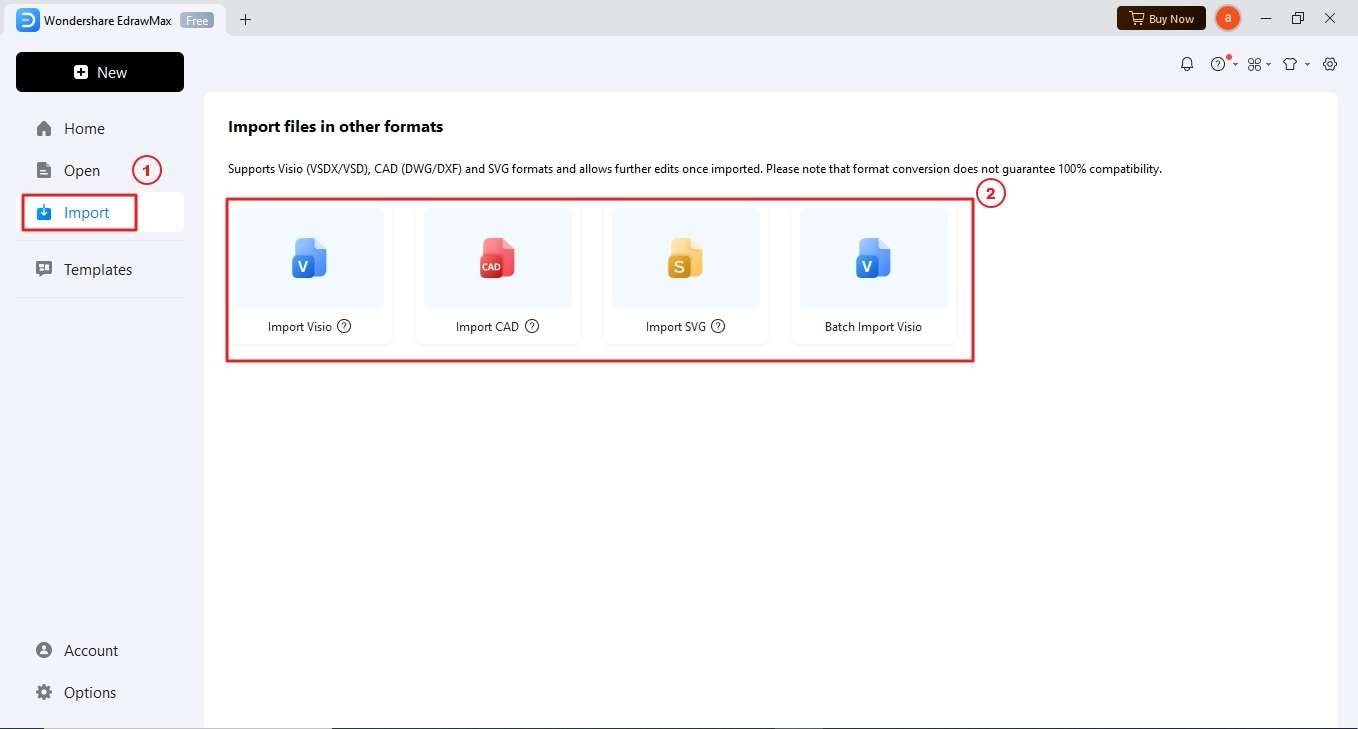
Import
Importing diagrams from other formats allows you to combine existing work into your current project easily.
Step 1: Click Import in the left-side navigation pane.
Step 2: Select the appropriate file format in the Import files in other formats section, then browse your local storage.
Step 3: Upload the chosen file, such as Visio, CAD, or SVG.
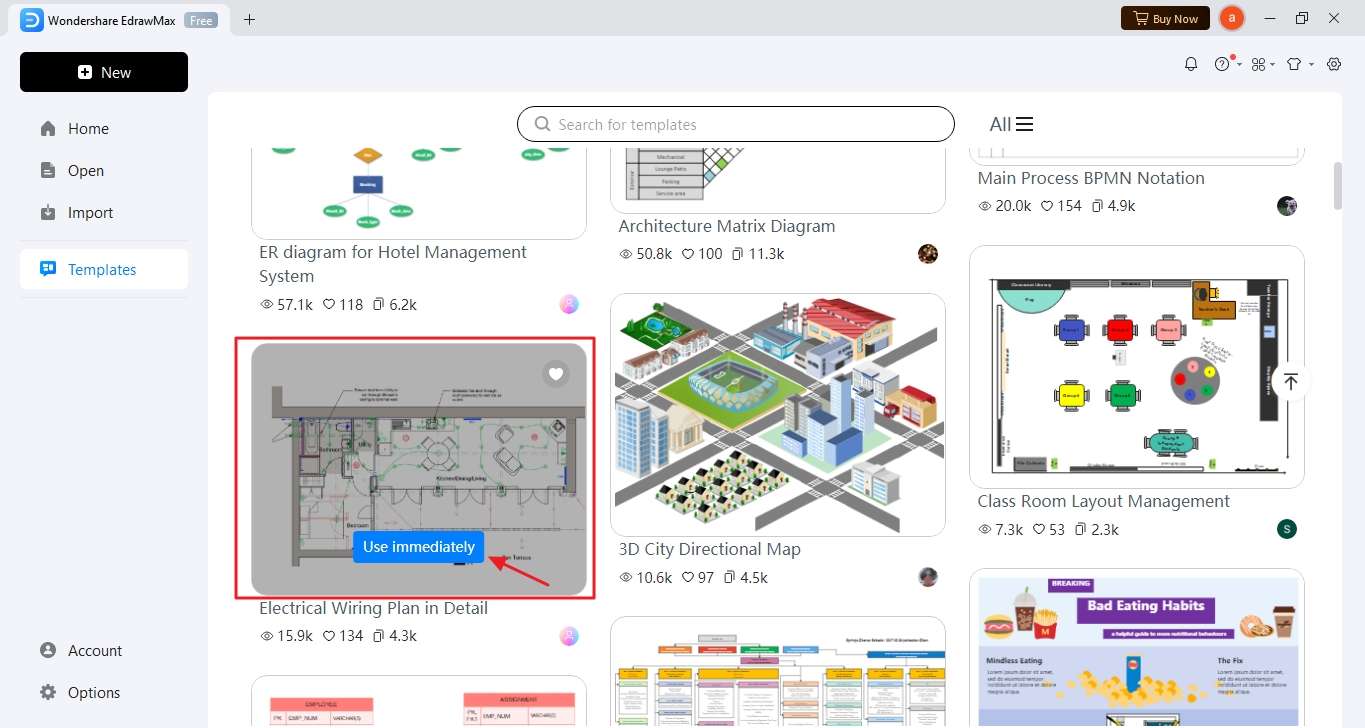
Templates
Templates serve as a valuable resource, offering a variety of pre-designed layouts to suit various diagram types.
Step 1: Click Templates on the left-side navigation page.
Step 2: Use the search bar to find specific diagram templates or browse by category to discover a wide range of options.
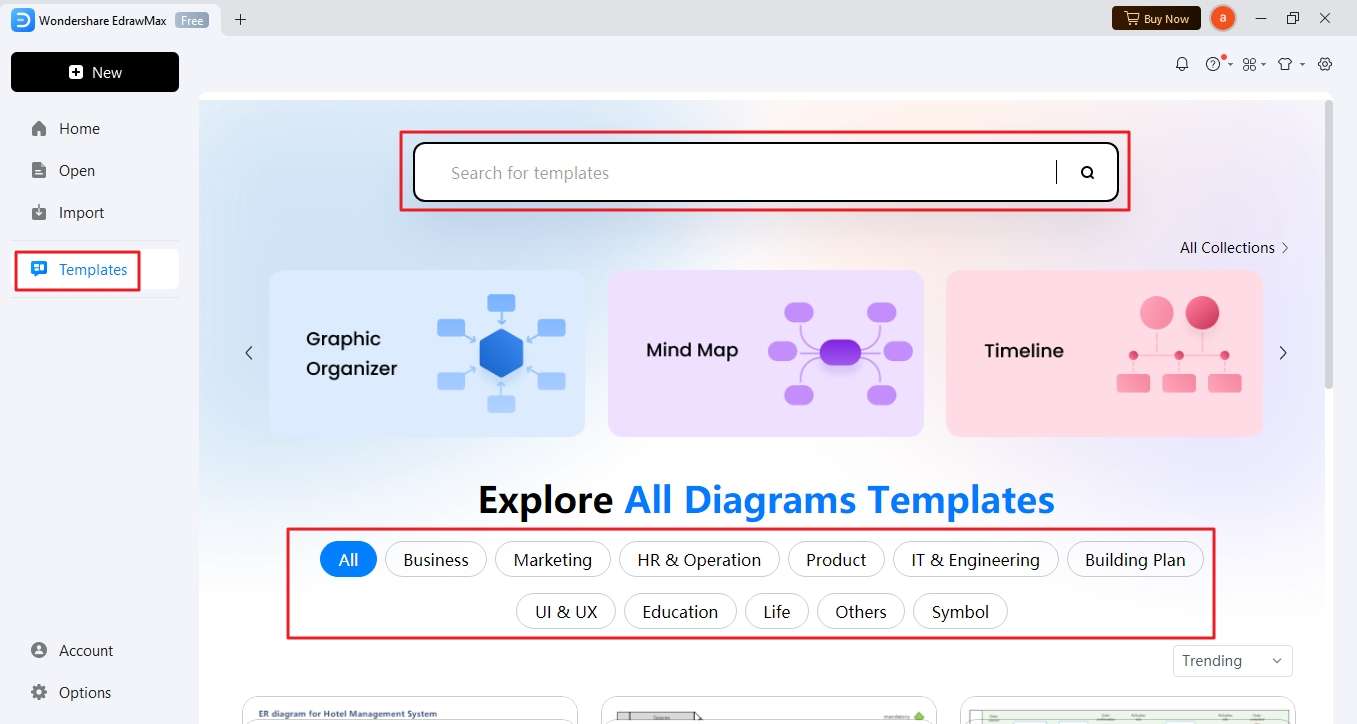
Step 3: Click Use Immediately to select and edit the pre-designed template.