EdrawMax User Guide for Desktop
How to Adjust a Shape
Proper positioning of shapes in your diagrams helps convey spatial relationships accurately. You can indicate proximity, adjacency, and spatial connections, which is significant in flowcharts, floor plans, network diagrams, and more.
Move a Shape
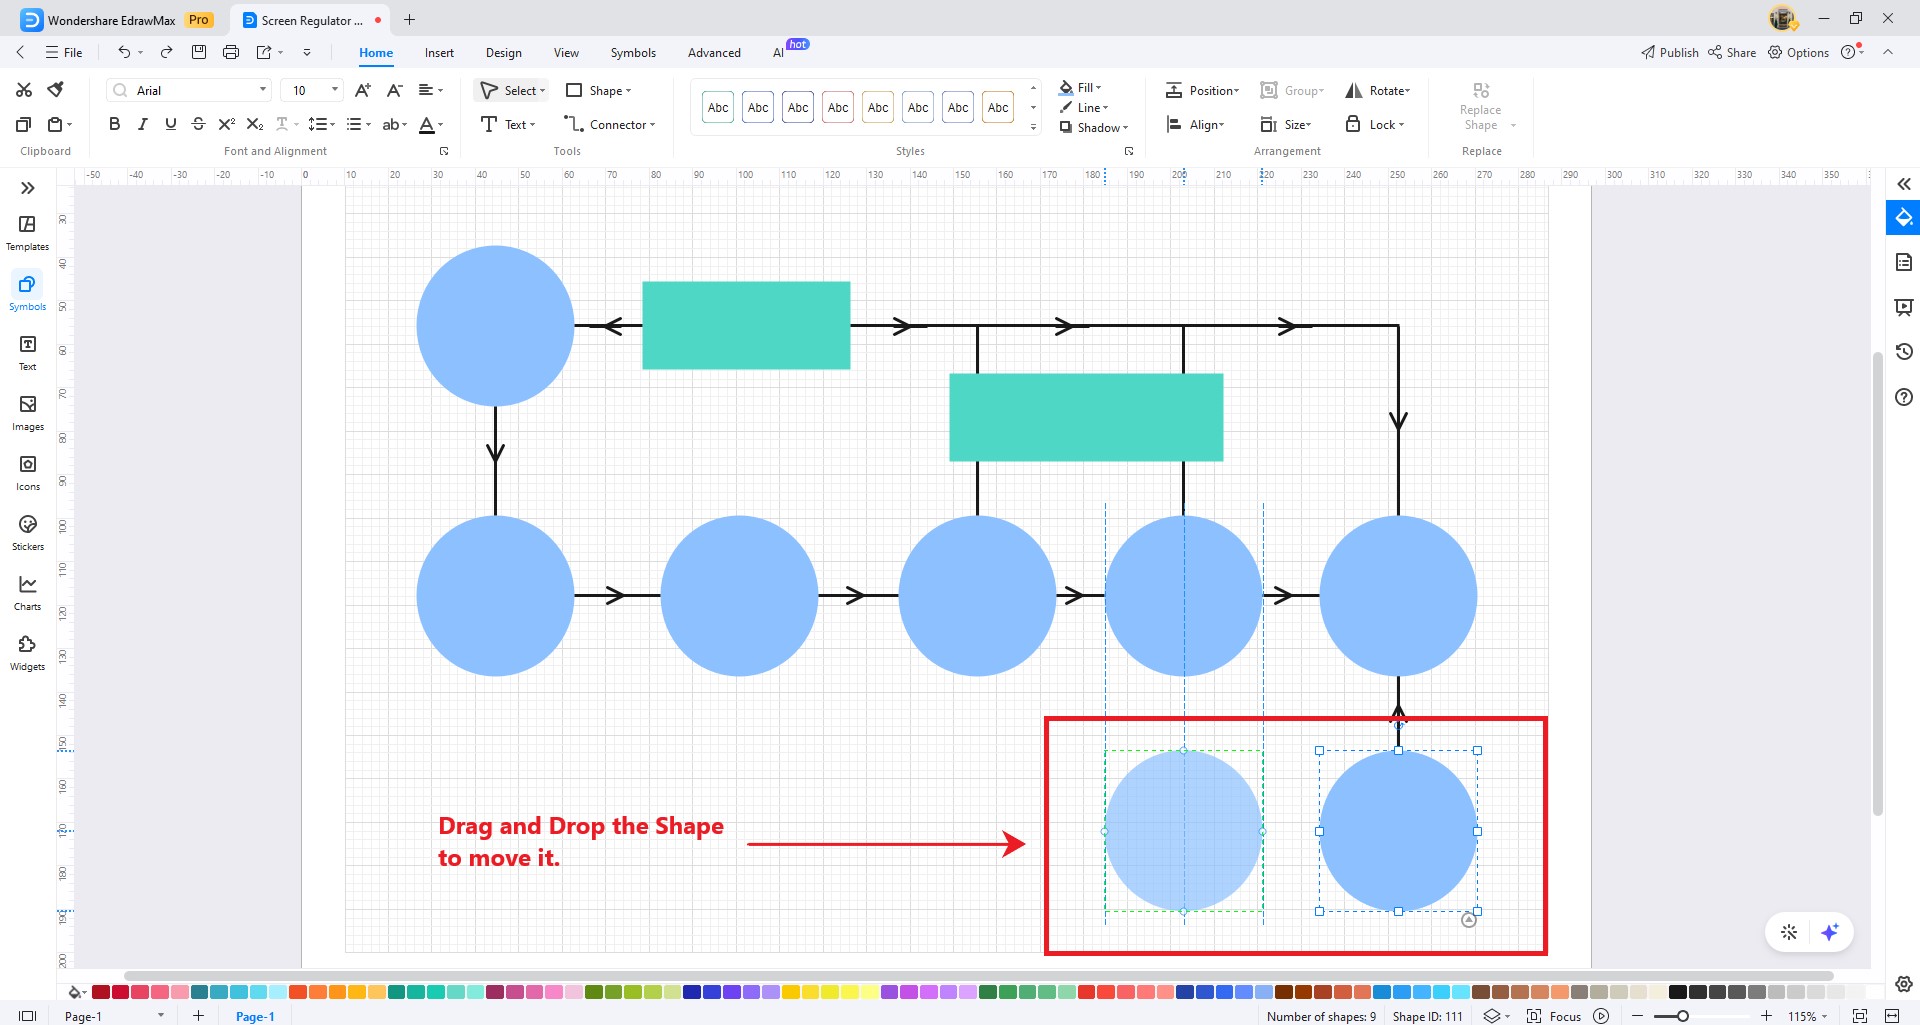
Moving shapes allows you to group related elements, reducing clutter and enhancing clarity. It is valuable in diagrams with multiple components or complex structures. Here are the steps on how to move a shape anywhere on the canvas:
Step 1: Select the shape you want to move.
Step 2: There are several ways to move a shape on the canvas.
Method 1: Drag and Drop. Click and drag the shape to your desired area on the canvas, then release the mouse button.
Method 2: Arrow Keys. You can use the arrow keys on your keyboard to nudge a selected shape pixel by pixel in the direction of the arrow key pressed. It allows for precise adjustments.
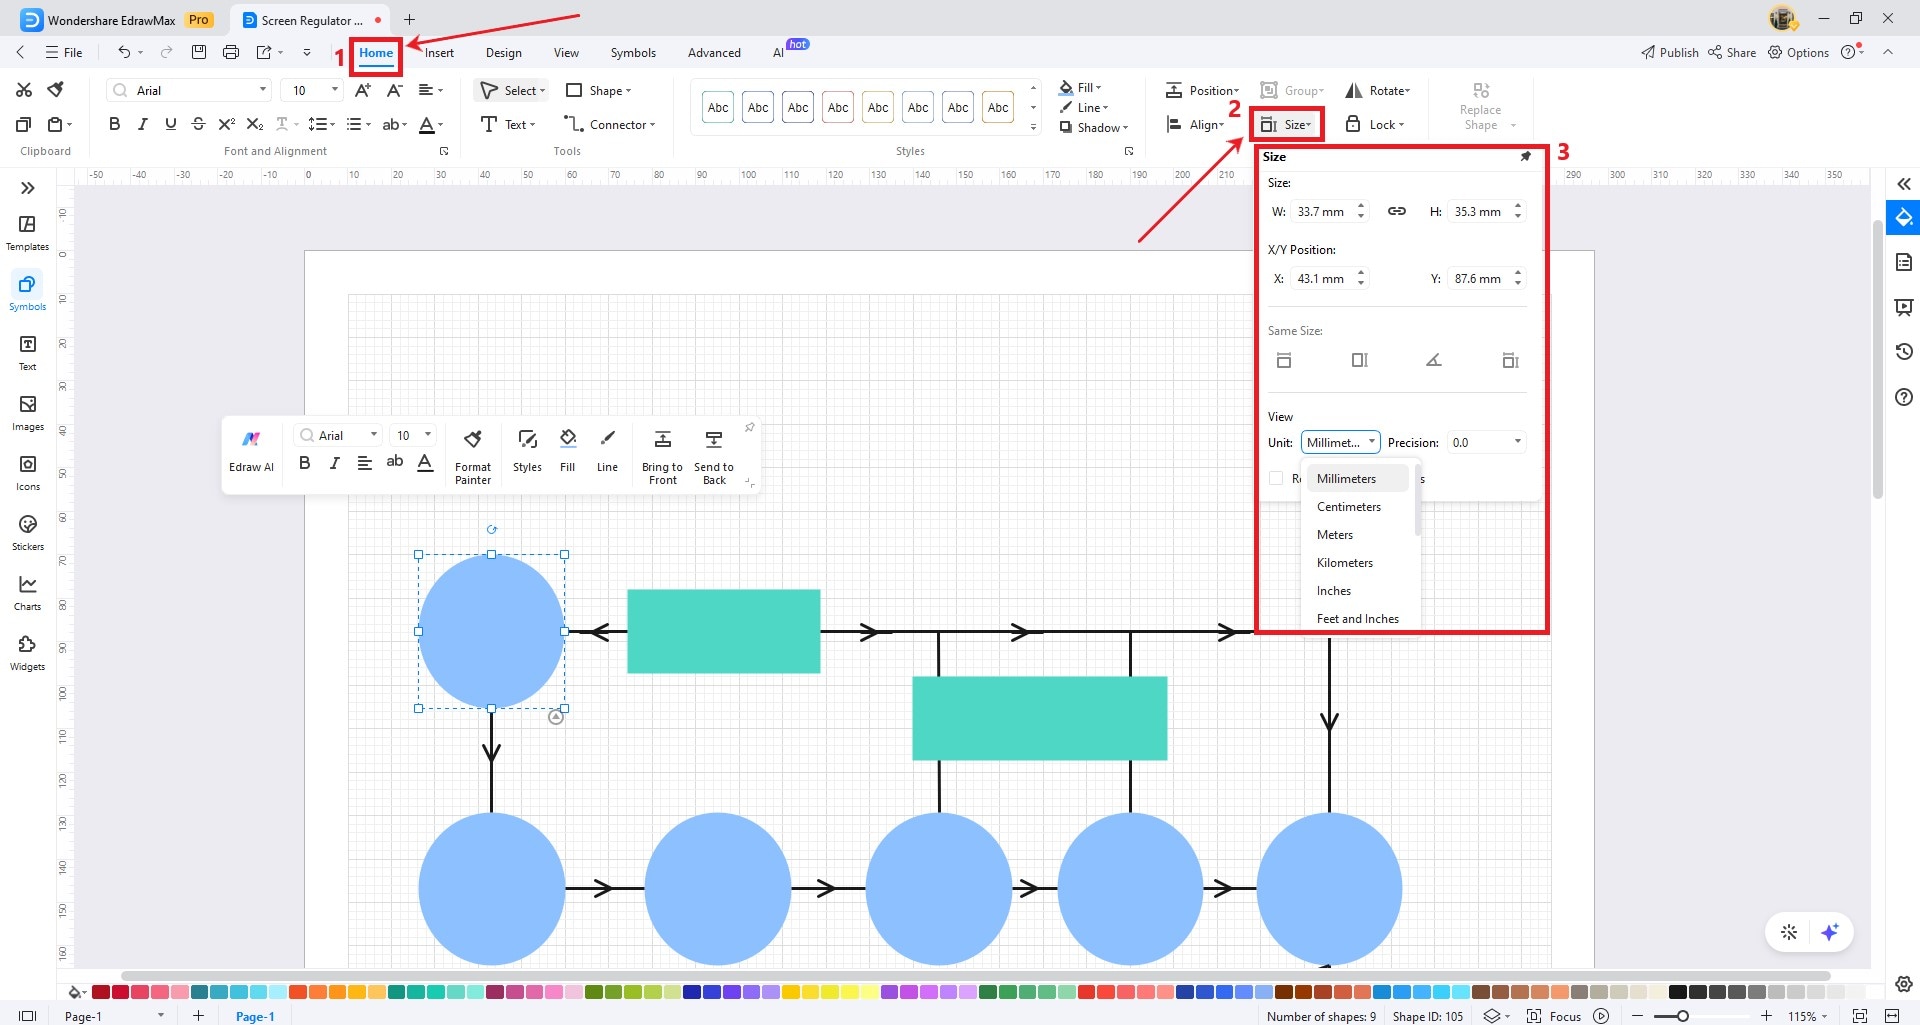
Method 3: X/Y Position. EdrawMax also allows you to input precise unit measurements for a shape's position.
To do so, select a shape in your diagram, then go to the Home tab in the upper navigation pane. In the Arrangement group, click the Size drop-down menu. Next, in the X/Y Position section, enter a value in the X and Y input field or use the stepper to adjust. In the View section, select an option in the Unit drop-down list.
Note:
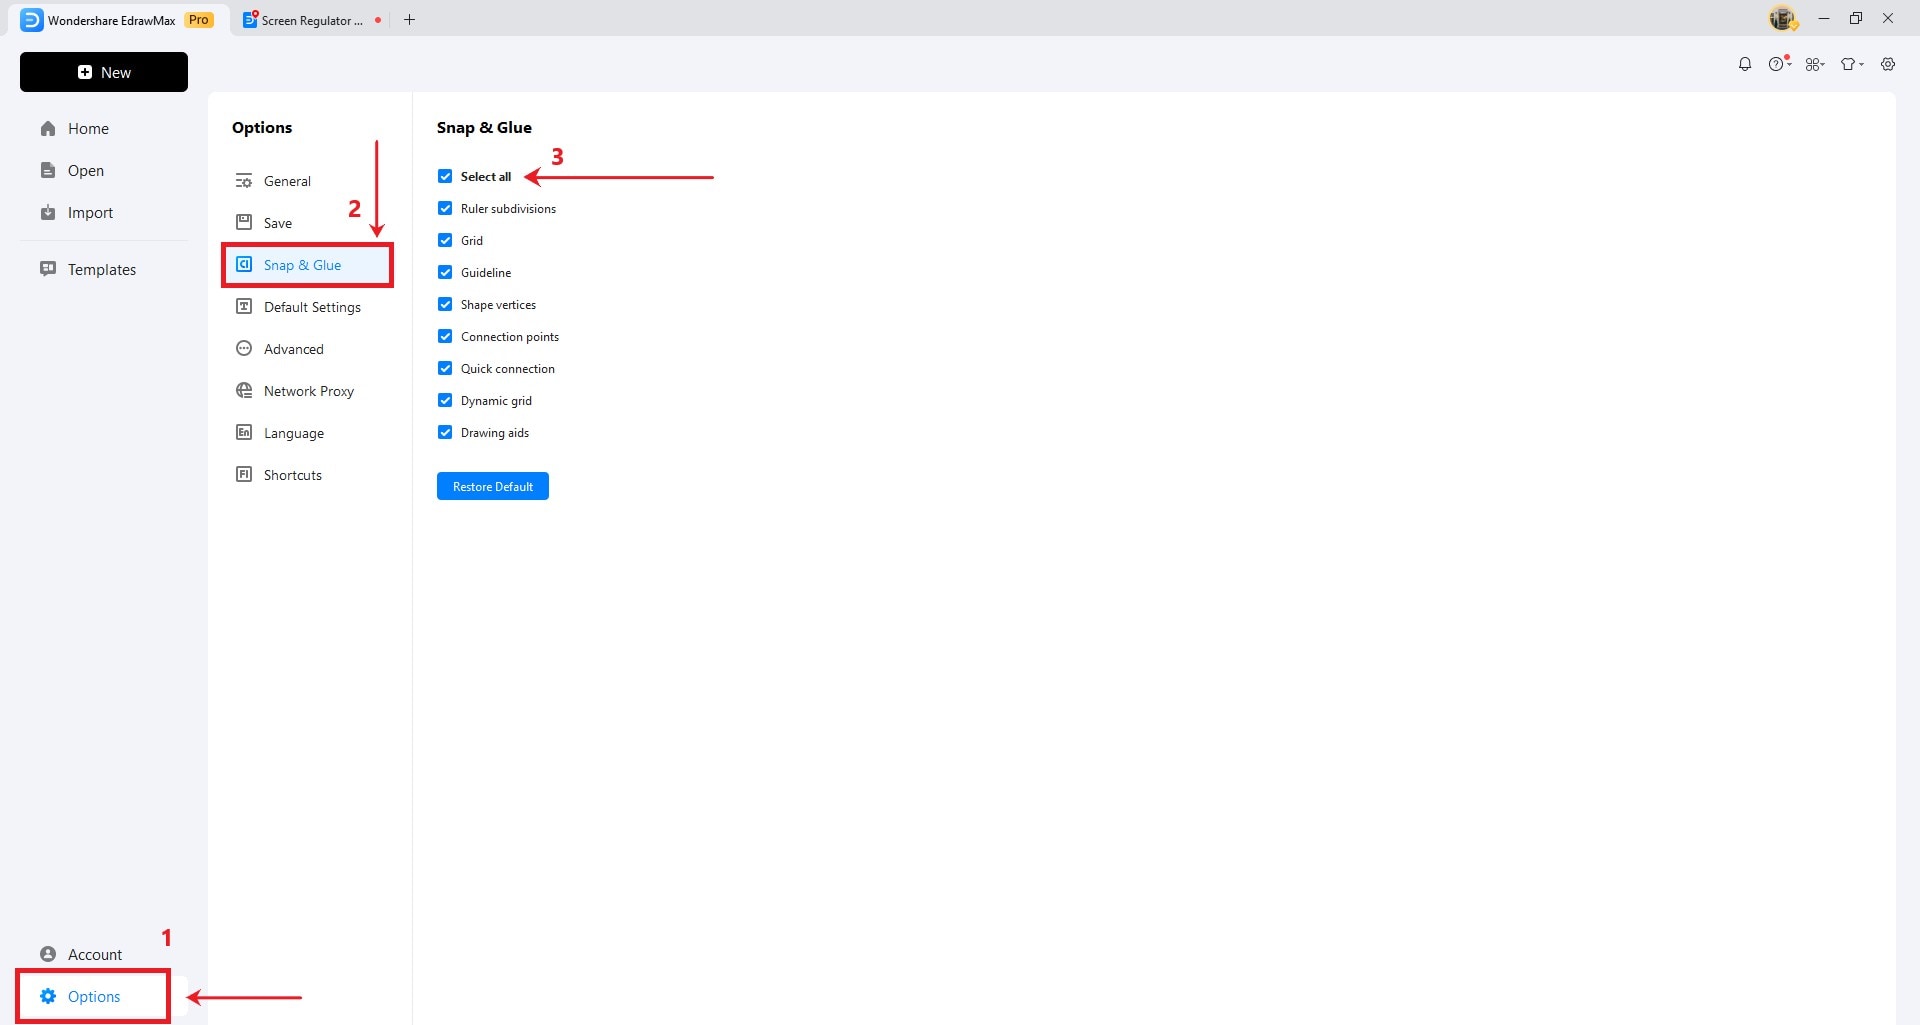
EdrawMax diagramming tool provides a visual guide for aligning shapes and objects precisely. It ensures that elements within your diagram are evenly spaced, properly aligned, and consistently positioned. Go to the Homepage tab in the upper navigation pane, choose Options>Snap & Glue, and mark the Select All checkbox to enable it.
Resize a Shape
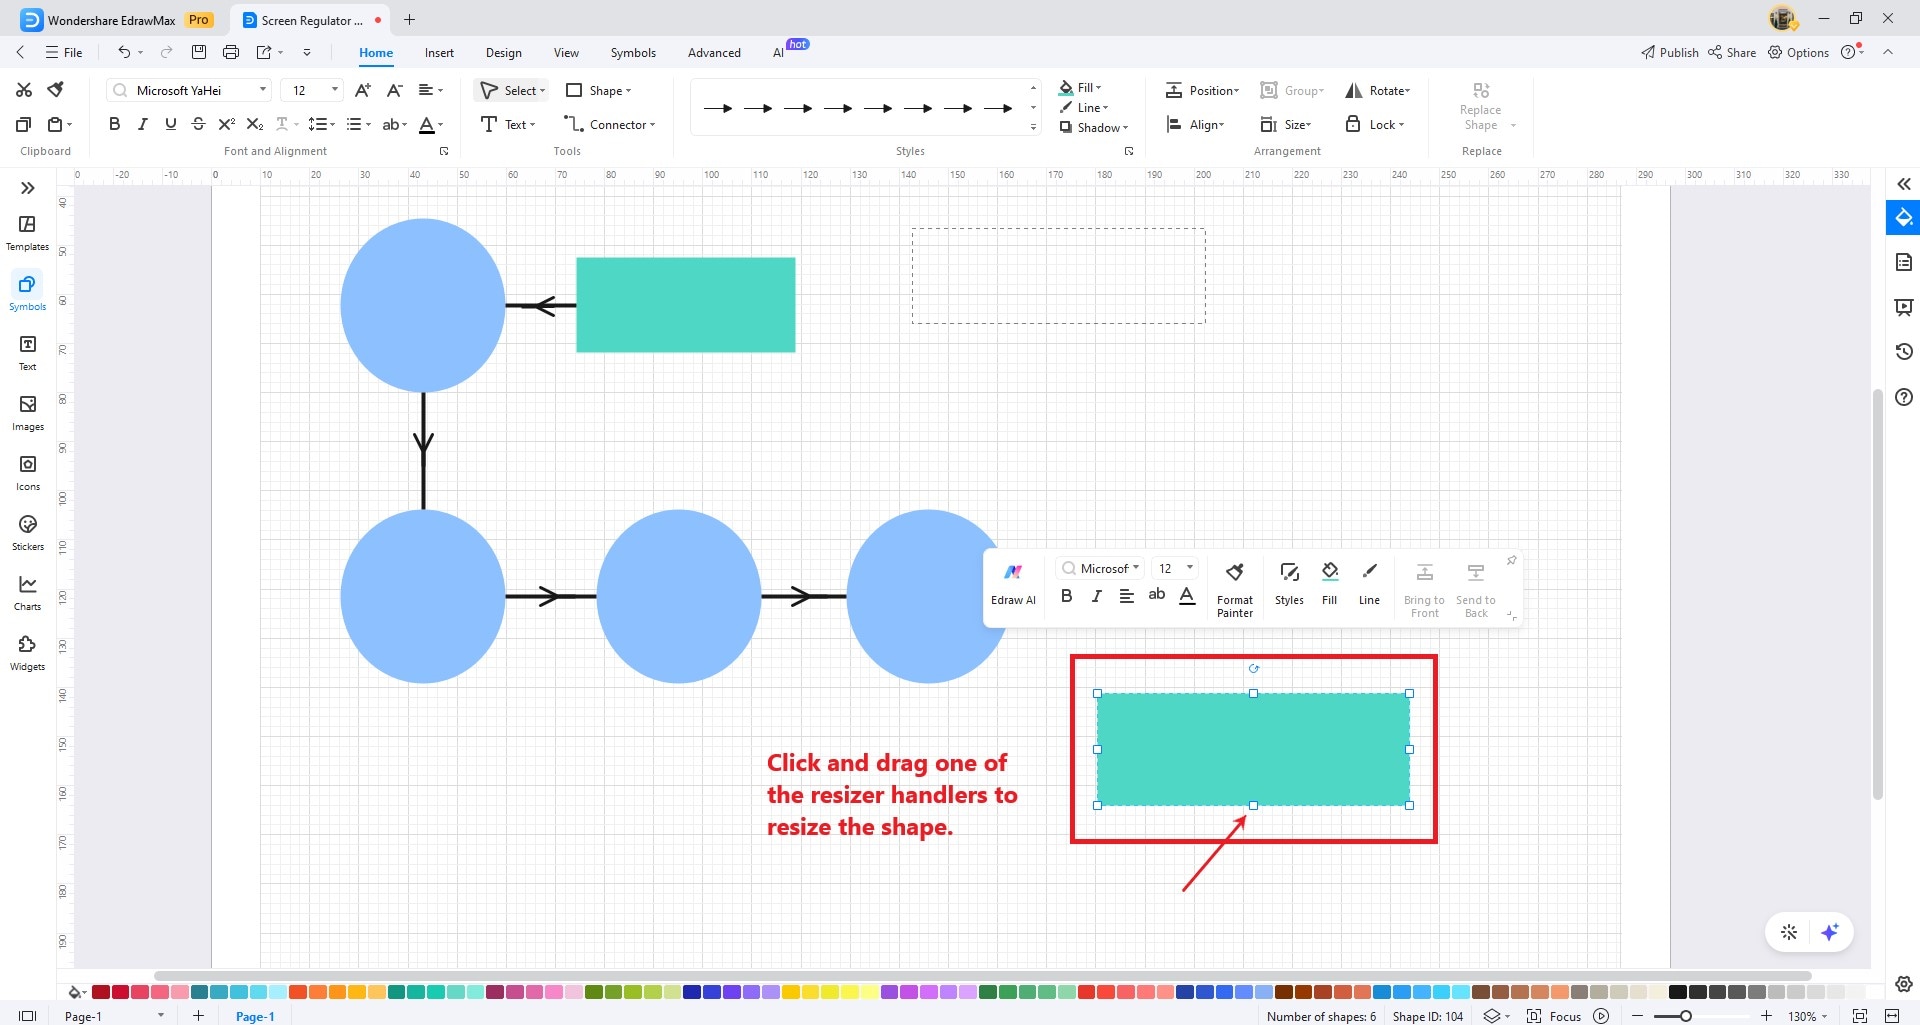
Sometimes, the default size of a shape may not be the best proportion for the diagram. You can resize a shape to make it larger or smaller to improve the visual appeal of the diagram. Here are the steps on how to resize a shape on the canvas:
Step 1: Click on the shape you want to resize to select it.
There are two ways to resize the shape in your diagram:
Step 2: Click and drag one of the selection handles. Your choice of resizer handle dictates the resizing direction. For example:
- Dragging a corner handle resizes the shape proportionally.
- Dragging a side handle resizes the shape in one dimension (width or height) while keeping the other dimension constant.
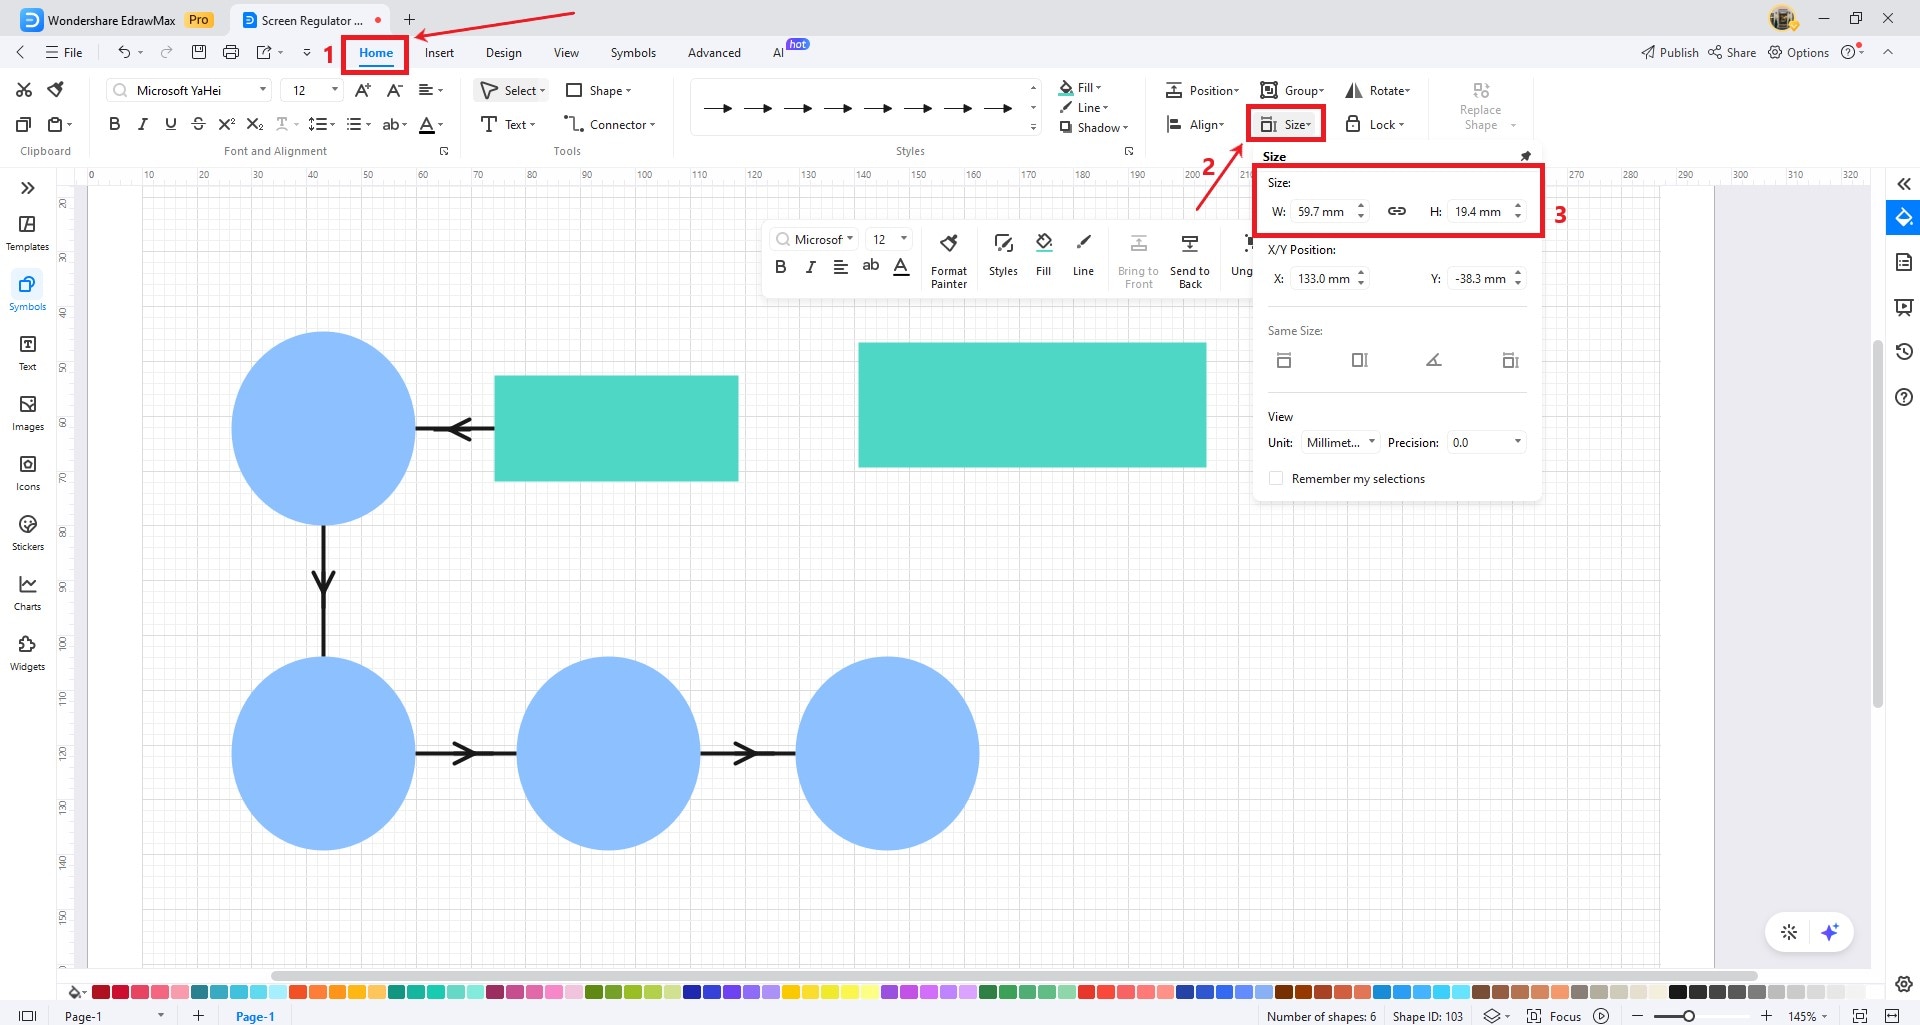
- Go to the Home tab in the upper navigation pane, then click the Size drop-down menu on the right side. In the Size section, enter a specific dimension in the W and H input fields or use the stepper to adjust. You can also click the aspect ratio lock icon to keep the proportions the same when resizing in one dimension.
Tips:
Here are some suggestions for you when resizing a shape:
- Zoom in to better see the selection handles on a shape.
- Hold down the Ctrl key to resize the selected shape while maintaining a fixed center point.
- Hold the Shift key to ensure proportional resizing of the selected shape.
Rotate a Shape
Rotating shapes allow you to represent real-world orientations or positions. It is crucial when creating diagrams to depict objects or scenarios with specific angles. Here is a guide on how to rotate a shape:
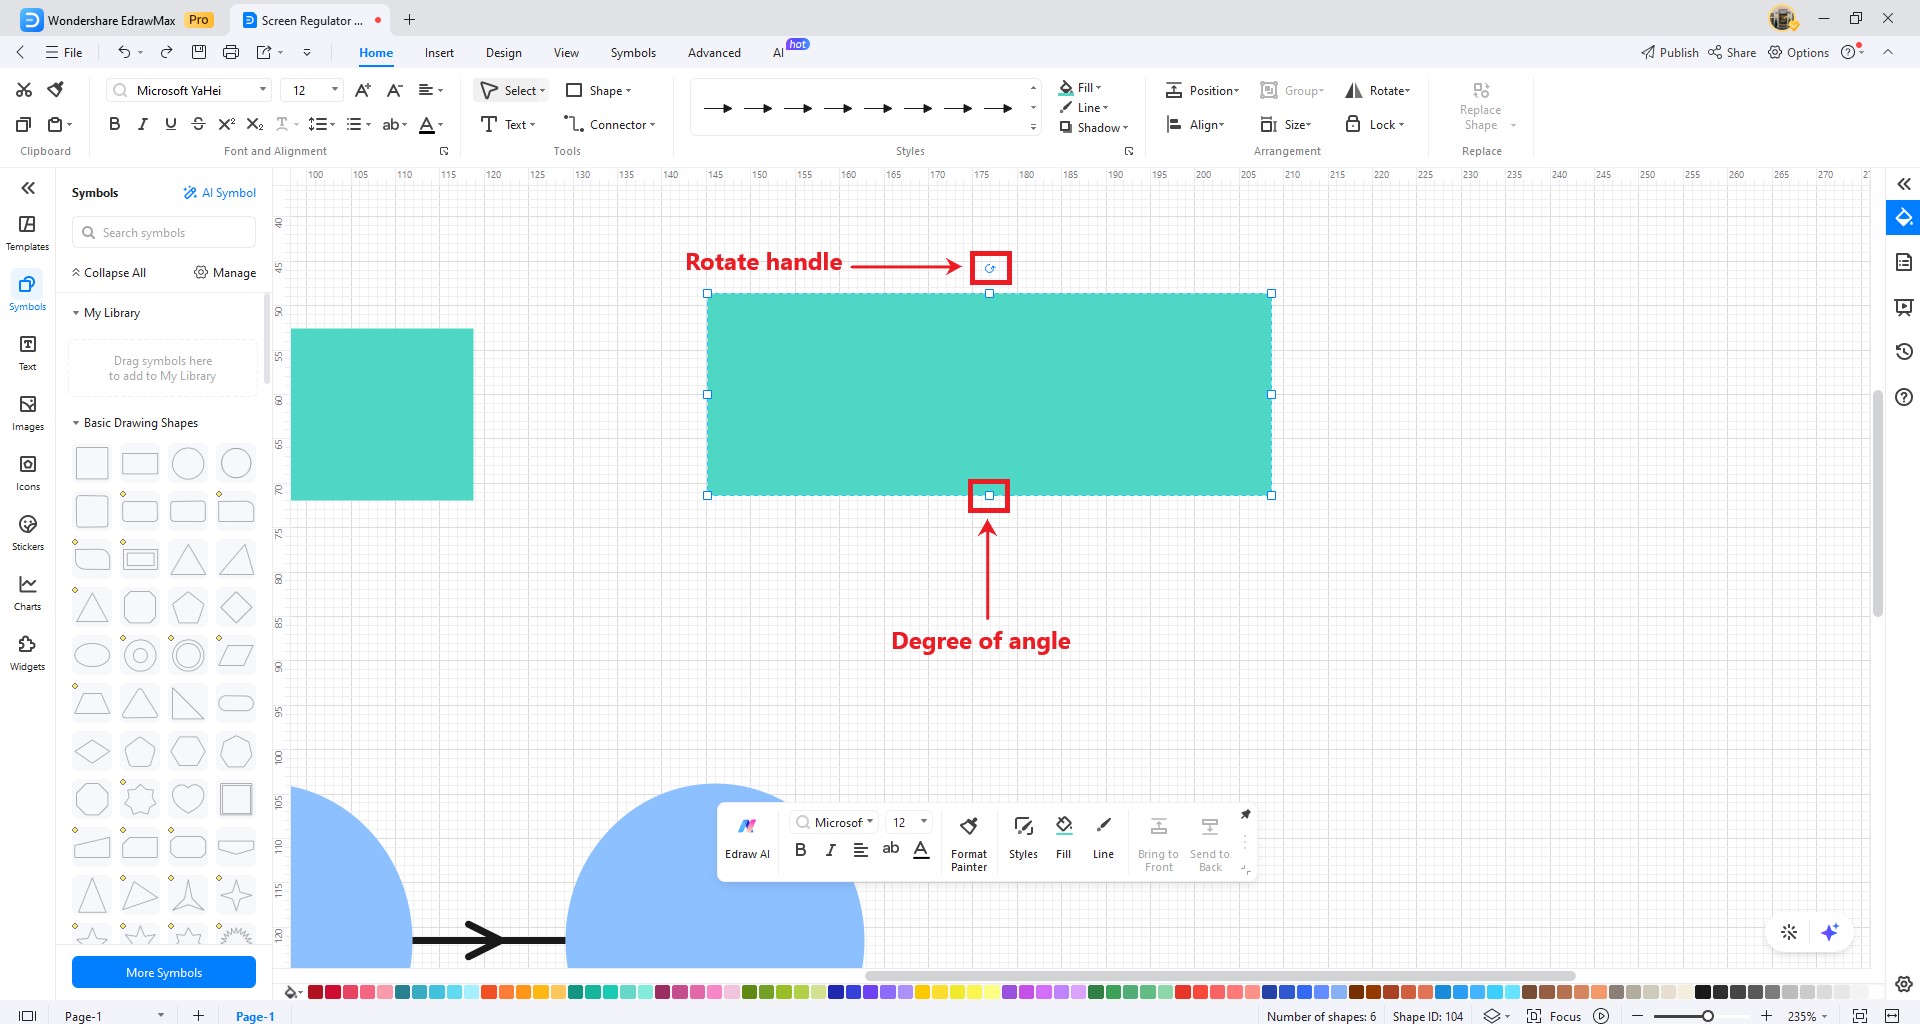
Step 1: Click on the shape you want to rotate to select it.
Step 2: There are two ways to rotate a shape in EdrawMax:
Method 1: Rotate at a Random Angle. Look for a rotation handle, usually depicted as a small circle or dot outside the shape's boundary. Hover over the rotation handle until the cursor changes to a circular arrow. Then, click and drag the rotation handle in the direction you want to rotate the shape.
Note:
While rotating a shape, the degree of the angle will also become visible.
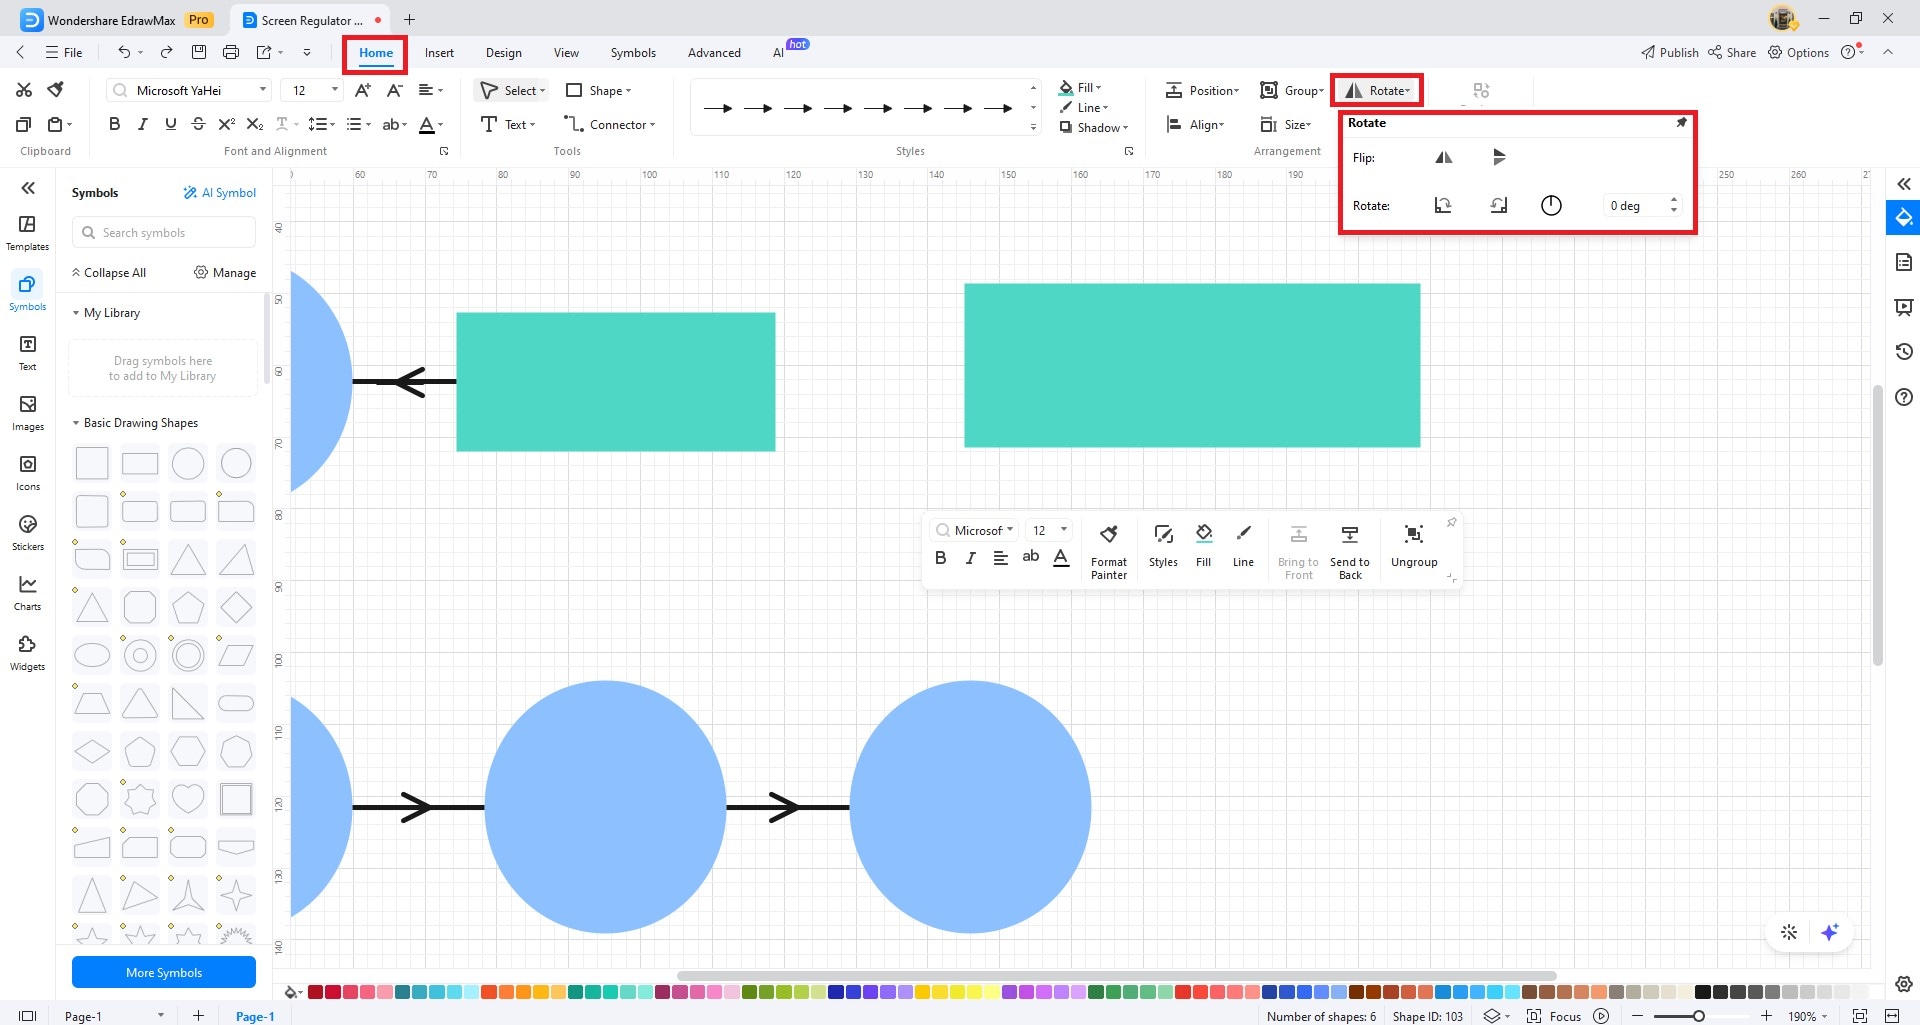
Method 2: Rotate at a Precise Angle. Go to the Home tab in the upper navigation pane, then click the Rotate drop-down menu. Next, enter a degree angle in the Rotate input field or use the stepper to adjust. You can also select the Rotate 90º clockwise or Rotate 90º counterclockwise icon.
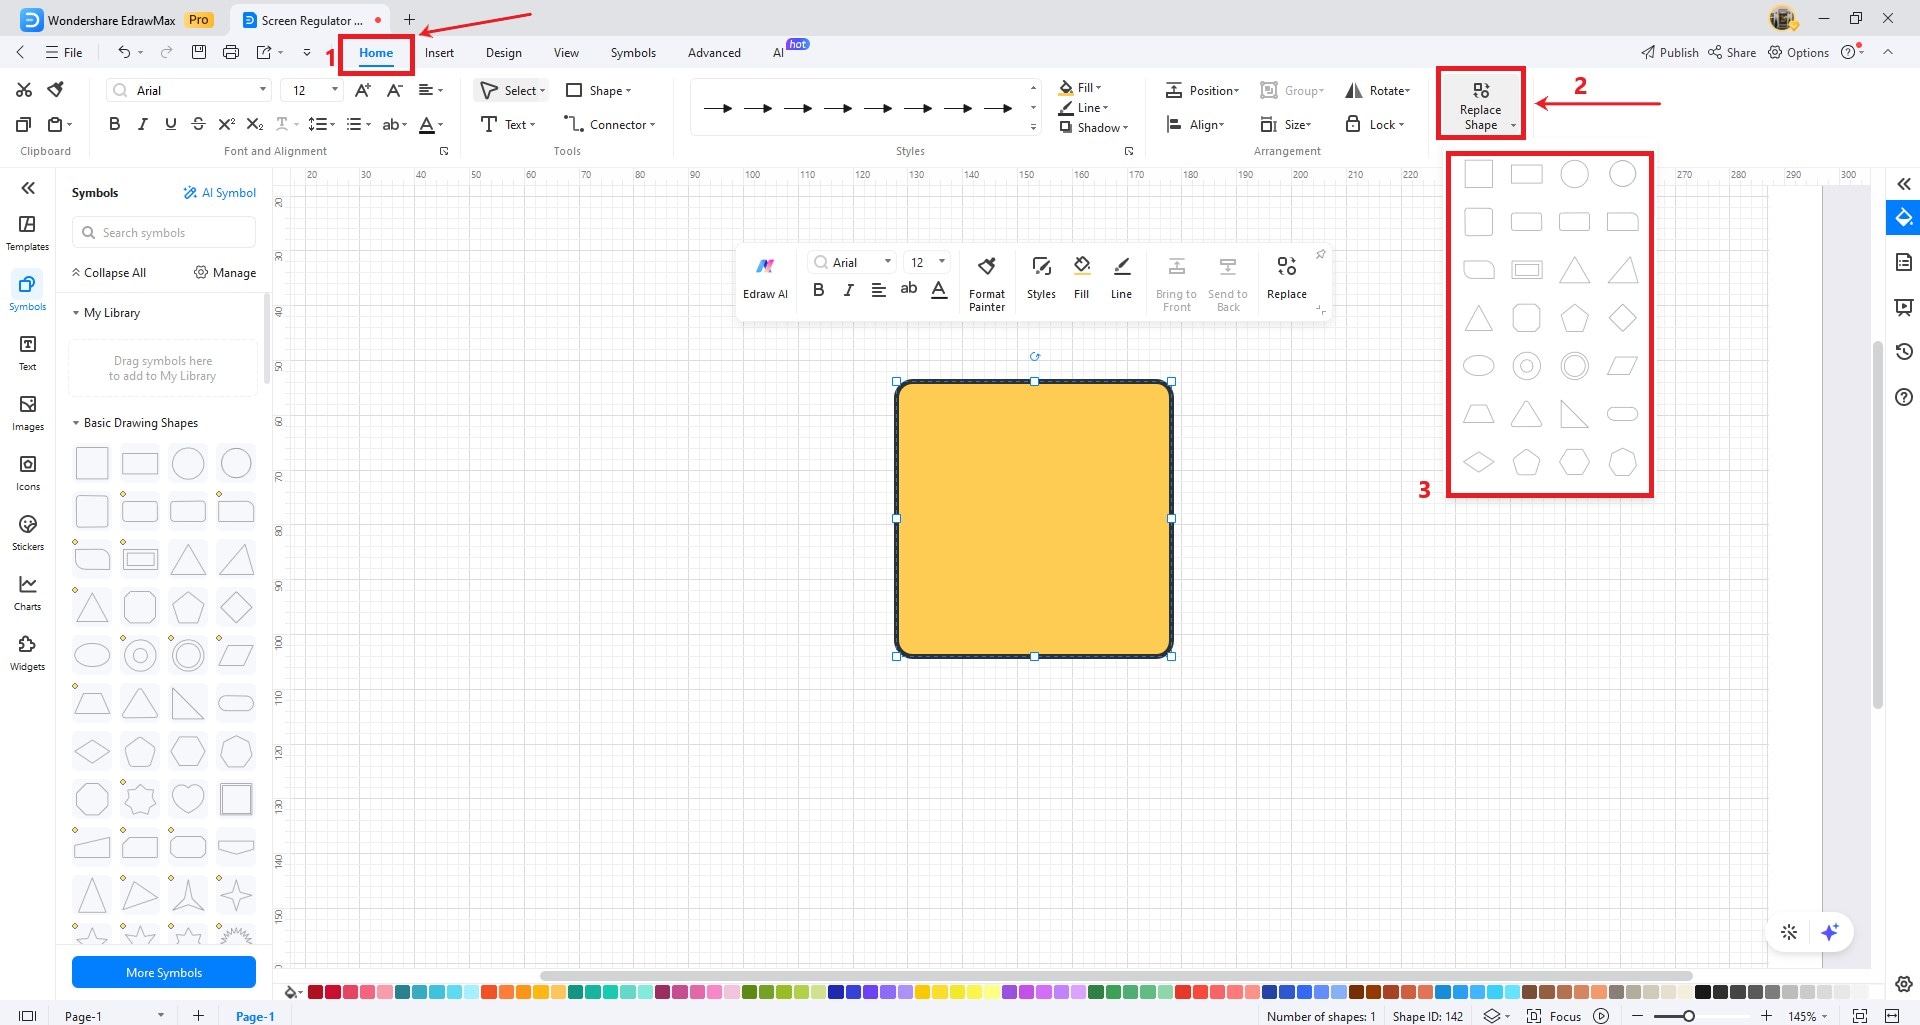
Replace a Shape
Diagrams created in EdrawMax often represent dynamic content such as workflows, organizational structures, or data trends. Replacing shapes enables you to reflect changes in the content. Here are the steps on how to replace a shape in your diagram:
Step 1: Select the shape you want to replace.
Step 2: Go to the Home tab in the upper navigation pane, then select a new shape in the Replace Shape drop-down list.