EdrawMax User Guide for Desktop
User Guide for Desktop
-
Get Started with EdrawMax
-
User Interface
-
Basic Operations
-
Advanced Operations
-
Shape Operations
-
Drawing Tools
-
Formatting and Styling
-
Text Operations
-
Symbol and Library
-
Insert/Add Objects
-
Page Settings
-
Presentation Mode
-
AI Features
- How to Make a Diagram with Edraw AI
- AI Slides
- AI Infographics Generator
- AI Copywriting
- AI Stickers
- AI Symbols
- AI Analysis
- AI Drawing
- AI OCR
- AI Diagram Generator
- AI Framework Generator
- AI Floating Ball
- AI Chatbot
- AI Flowchart
- AI Mind Map
- AI Timeline
- AI Table
- AI List
- AI SWOT Analysis, PEST Analysis, and Lean Canvas
- AI User Profile
-
How to Make a Flowchart
-
How to make an Org Chart
-
How to make a Gantt Chart
-
How to Make a Mind Map
-
More examples
For Desktop
For Mobile
Change Mind Map Layout
To change the mind map layout, follow the steps outlined below:
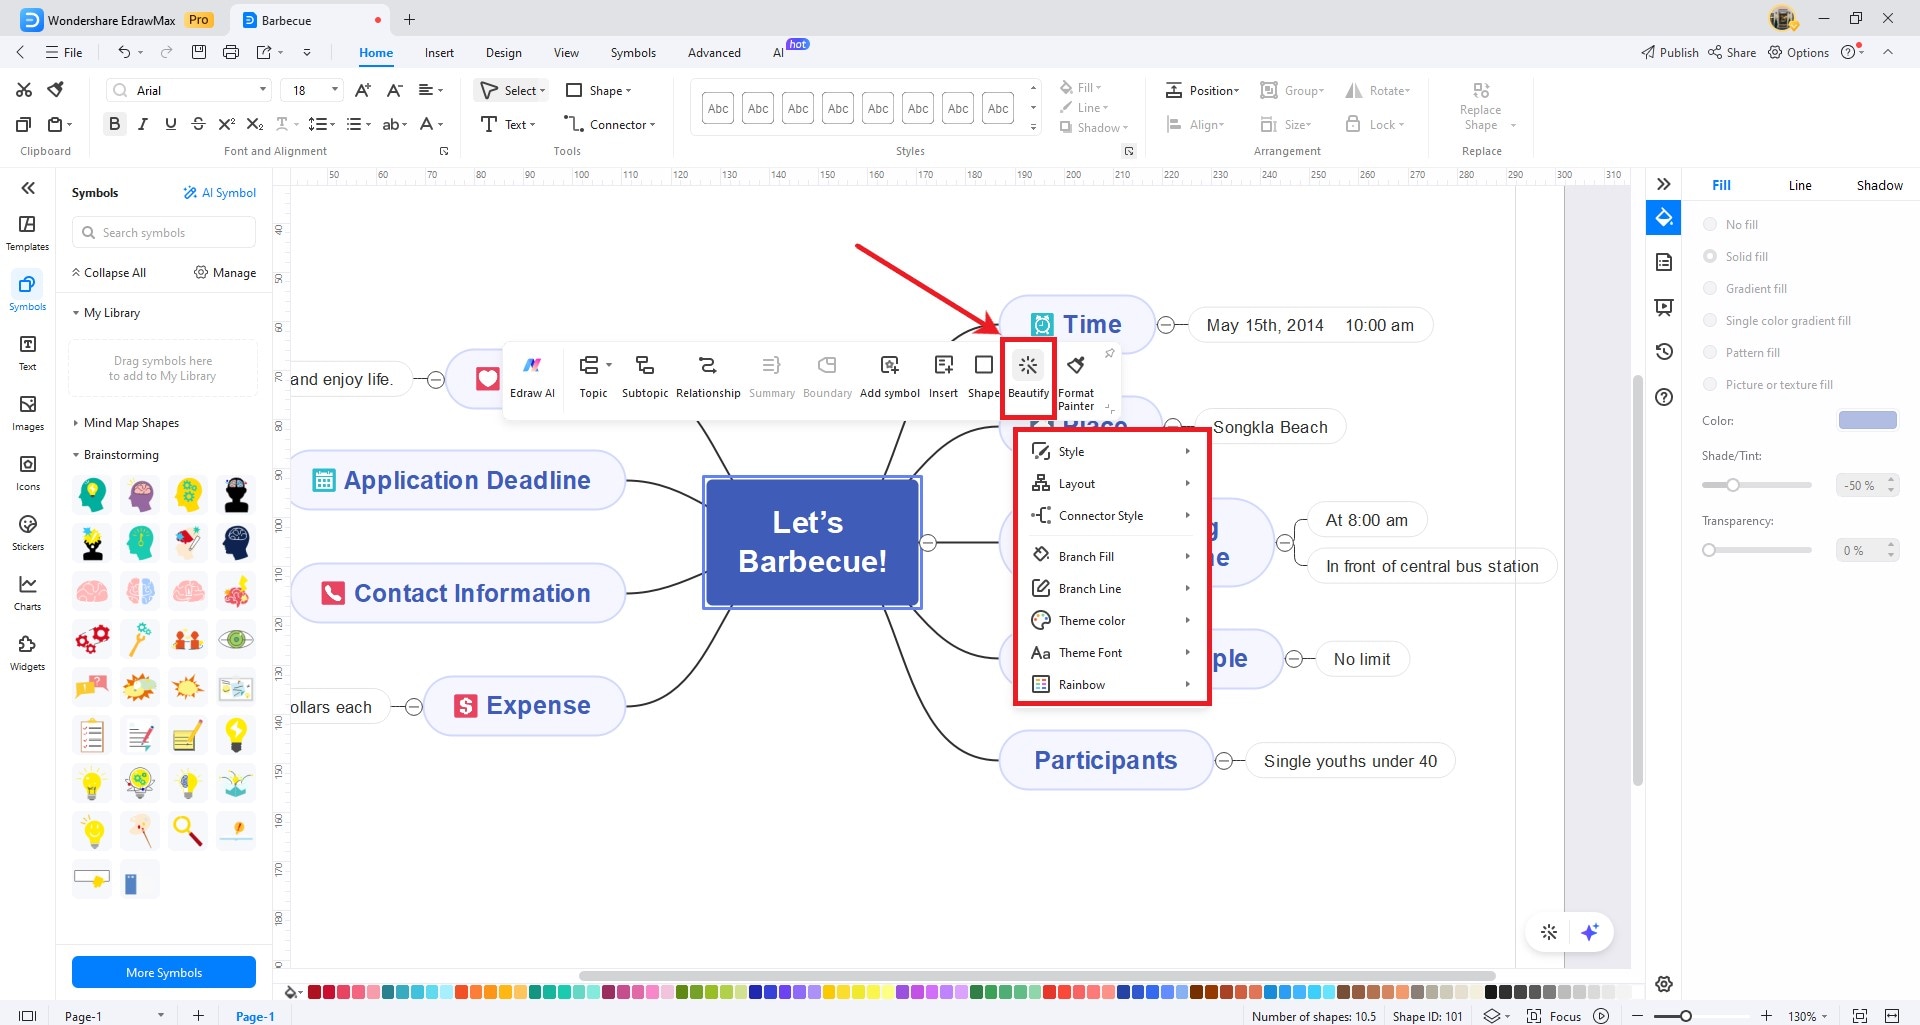
Step 1: To modify the mind map layout, select the mind map, and a floating toolbar will appear. Click the Beautify option.

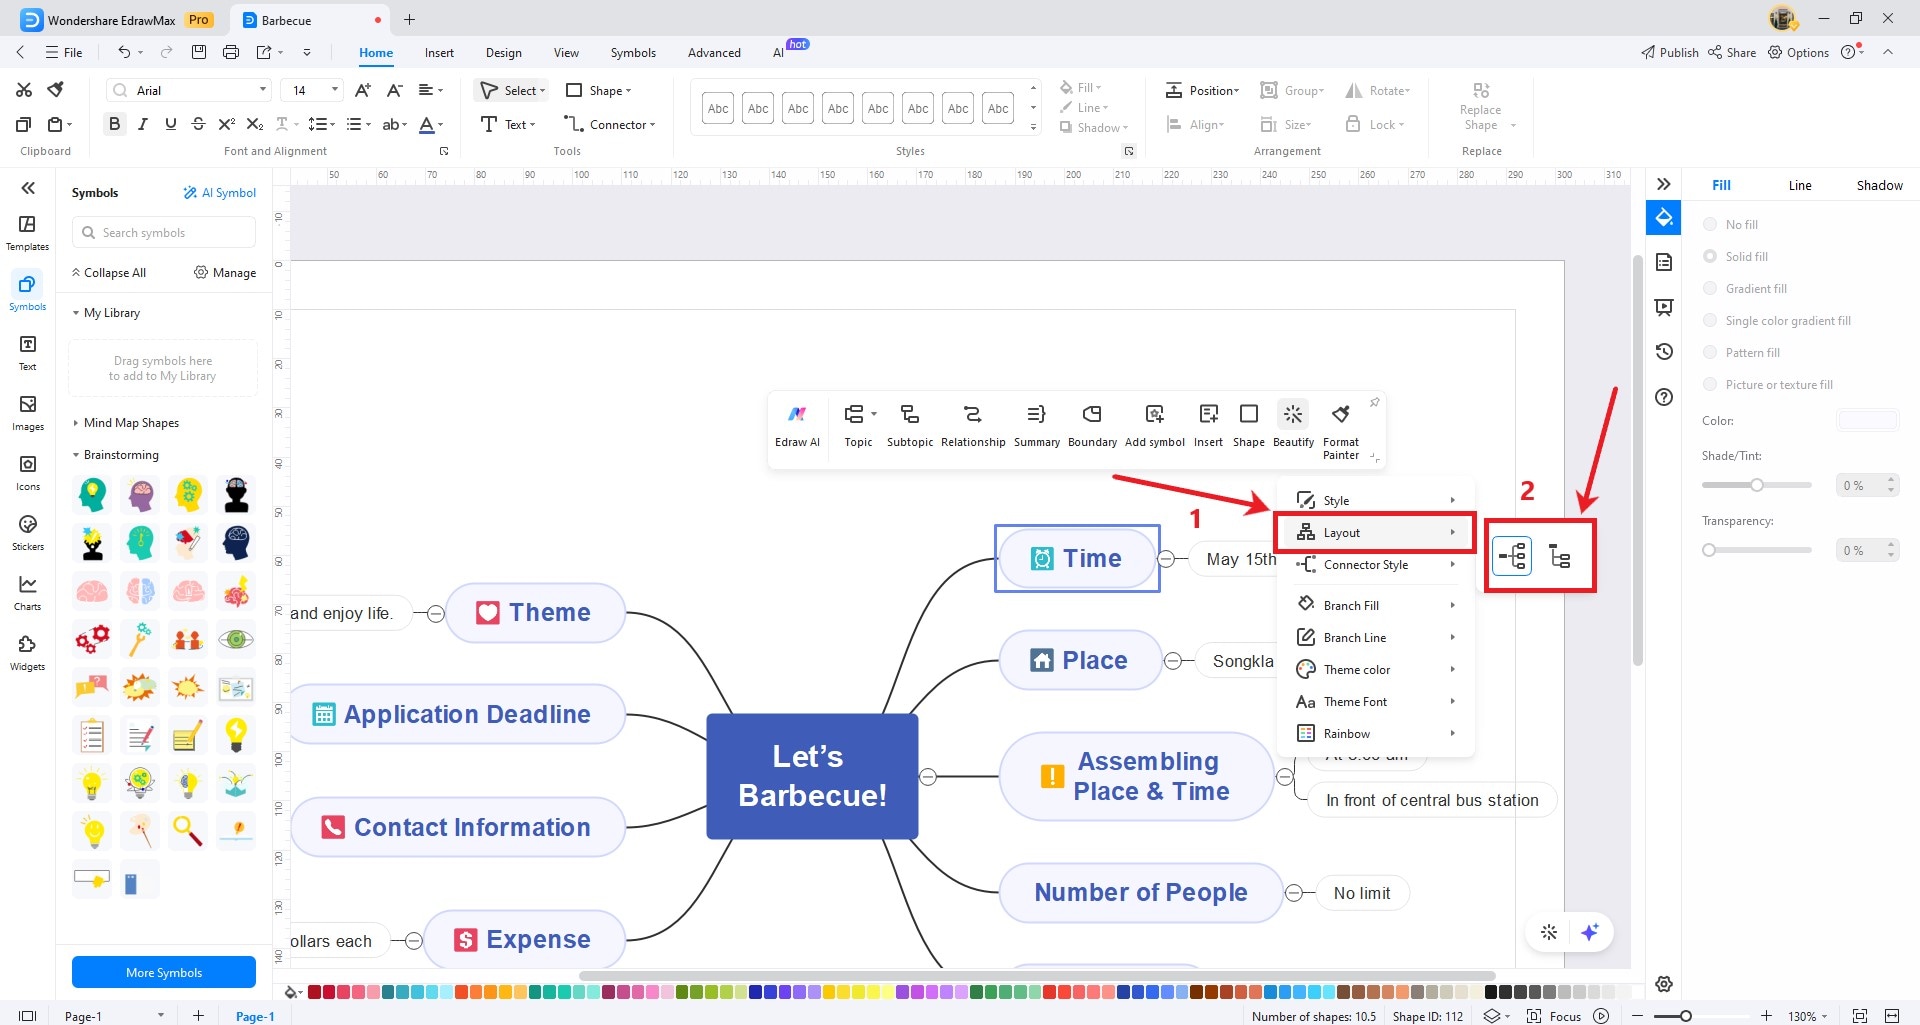
Step 2: Click the Layout option and select the layout that suits your mind map preferences.

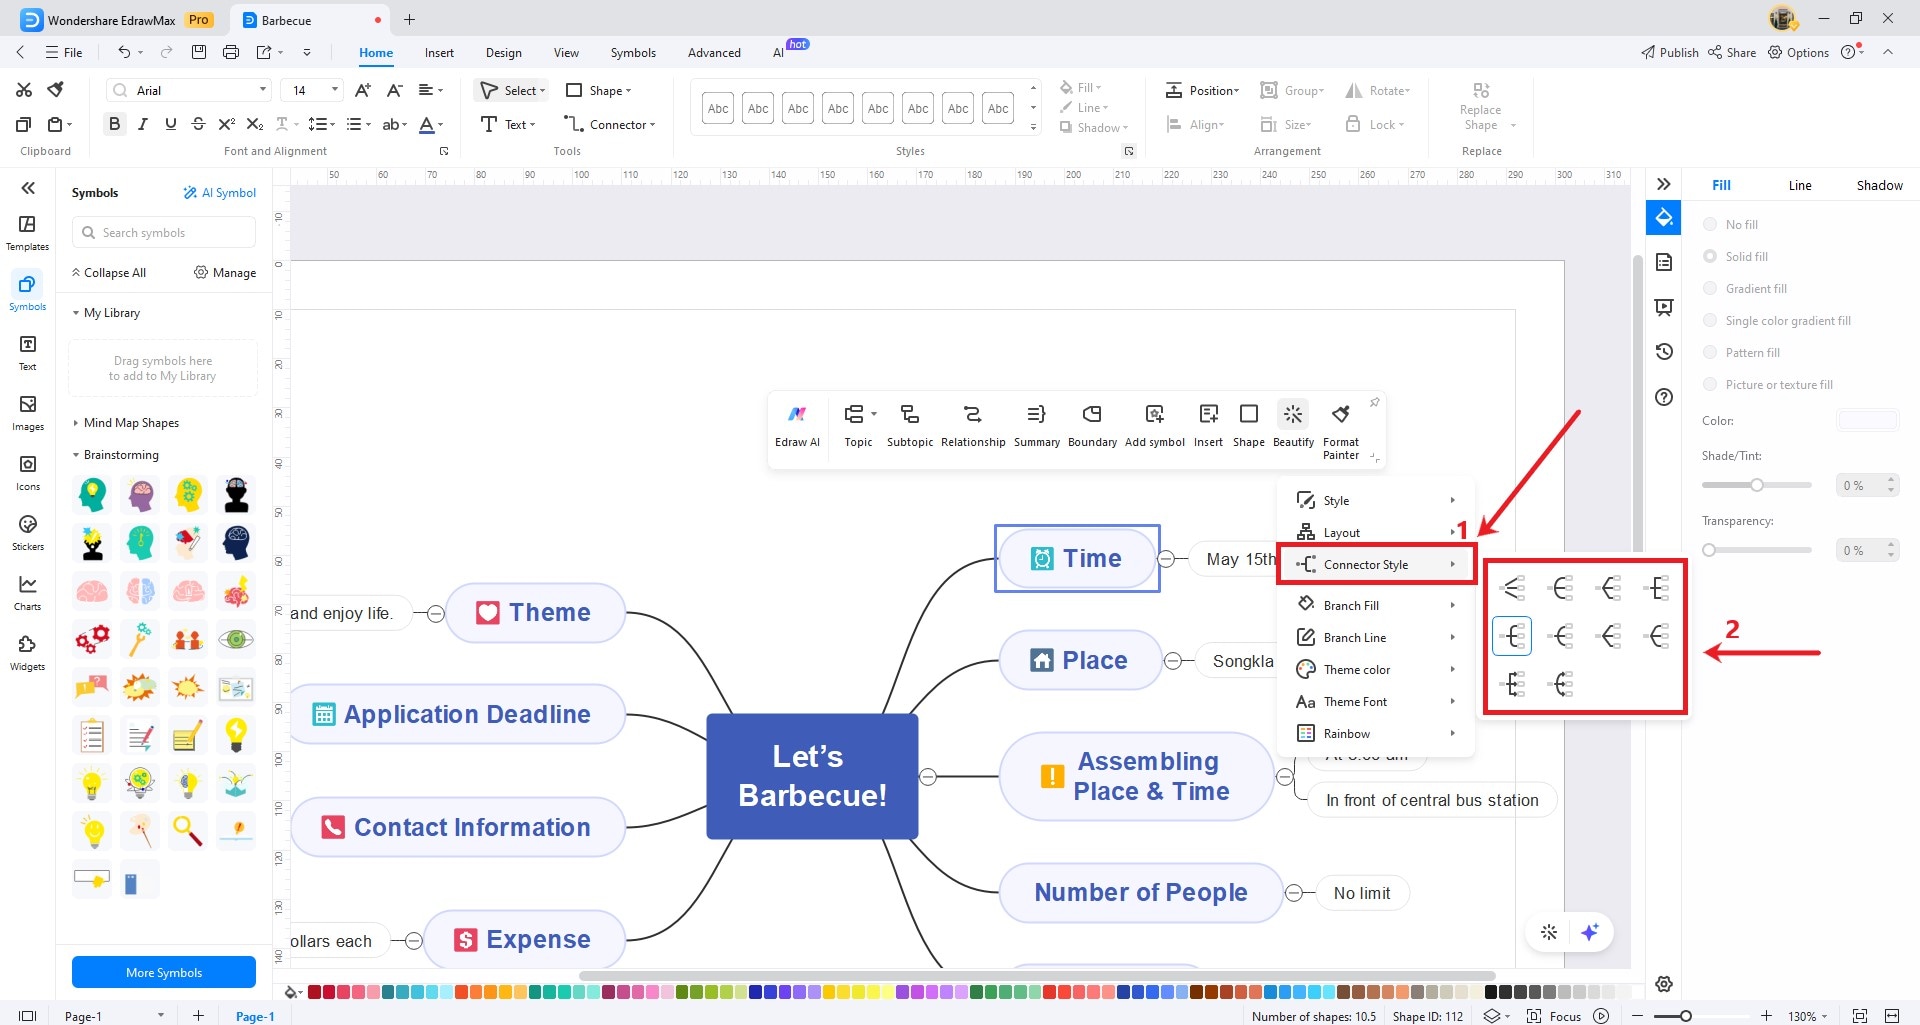
Step 3: To change the layout of a specific branch, select the topic or subtopic and choose your desired connector style from the Connector Style option.

In the floating toolbar option, you can also:
- Click Branch Fill to color the background of individual branches or topics in your mind map.
- Click Branch Line to connect topics in a mind map. You can customize the style, color, and thickness of branch lines to enhance the overall visual appeal and clarity of your mind map.
- Click Theme Color to quickly change the color scheme of your entire mind map if needed.
- Click Theme Font to enhance readability and ensure a polished and professional look for your mind map.
- Click Rainbow to create a gradient effect in your mind map's branch lines or connectors.