EdrawMax User Guide for Desktop
How to Use EdrawMax
Wondershare EdrawMax is a powerful diagramming tool that lets you create 210+ types of diagrams with ease. With built-in templates, vector-enabled symbols, AI-powered tools, and flexible customization options, EdrawMax helps you create diagrams ranging from flowcharts and network diagrams to HVAC layouts, floor plans, infographics, 3D maps, organizational charts, quality management diagrams, and more.
 Get 500 free AI tokens
When you launch EdrawMax on your computer, you will be presented with a dynamic window that offers a wide range of options, such as New, Open, Import, and Templates.

On the homepage, you will find diagrams categorized by type. You can also use the Search diagrams bar to quickly find the diagram type you need.

Once you search for a diagram type or select a diagram category from the home window, EdrawMax will display the available diagrams under that category. You can then start with a Blank Drawing or choose from built-in templates to enter the EdrawMax Workspace.

EdrawMax Workspace
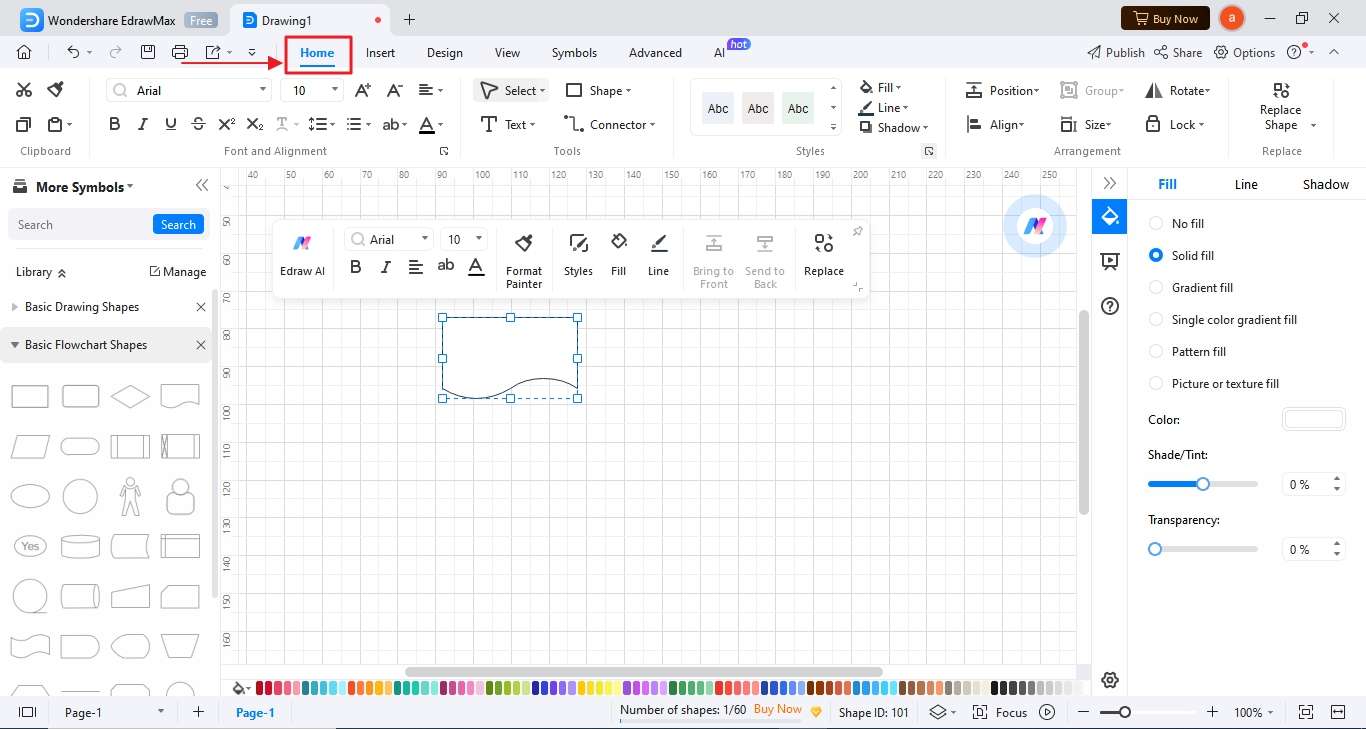
The EdrawMax Workspace provides an intuitive environment for creating and editing diagrams. On the top navigation bar, you will find options such as Home, Insert, Design, View, Symbols, Advanced, and AI. These provide quick access to commonly used functions and diagramming tools.
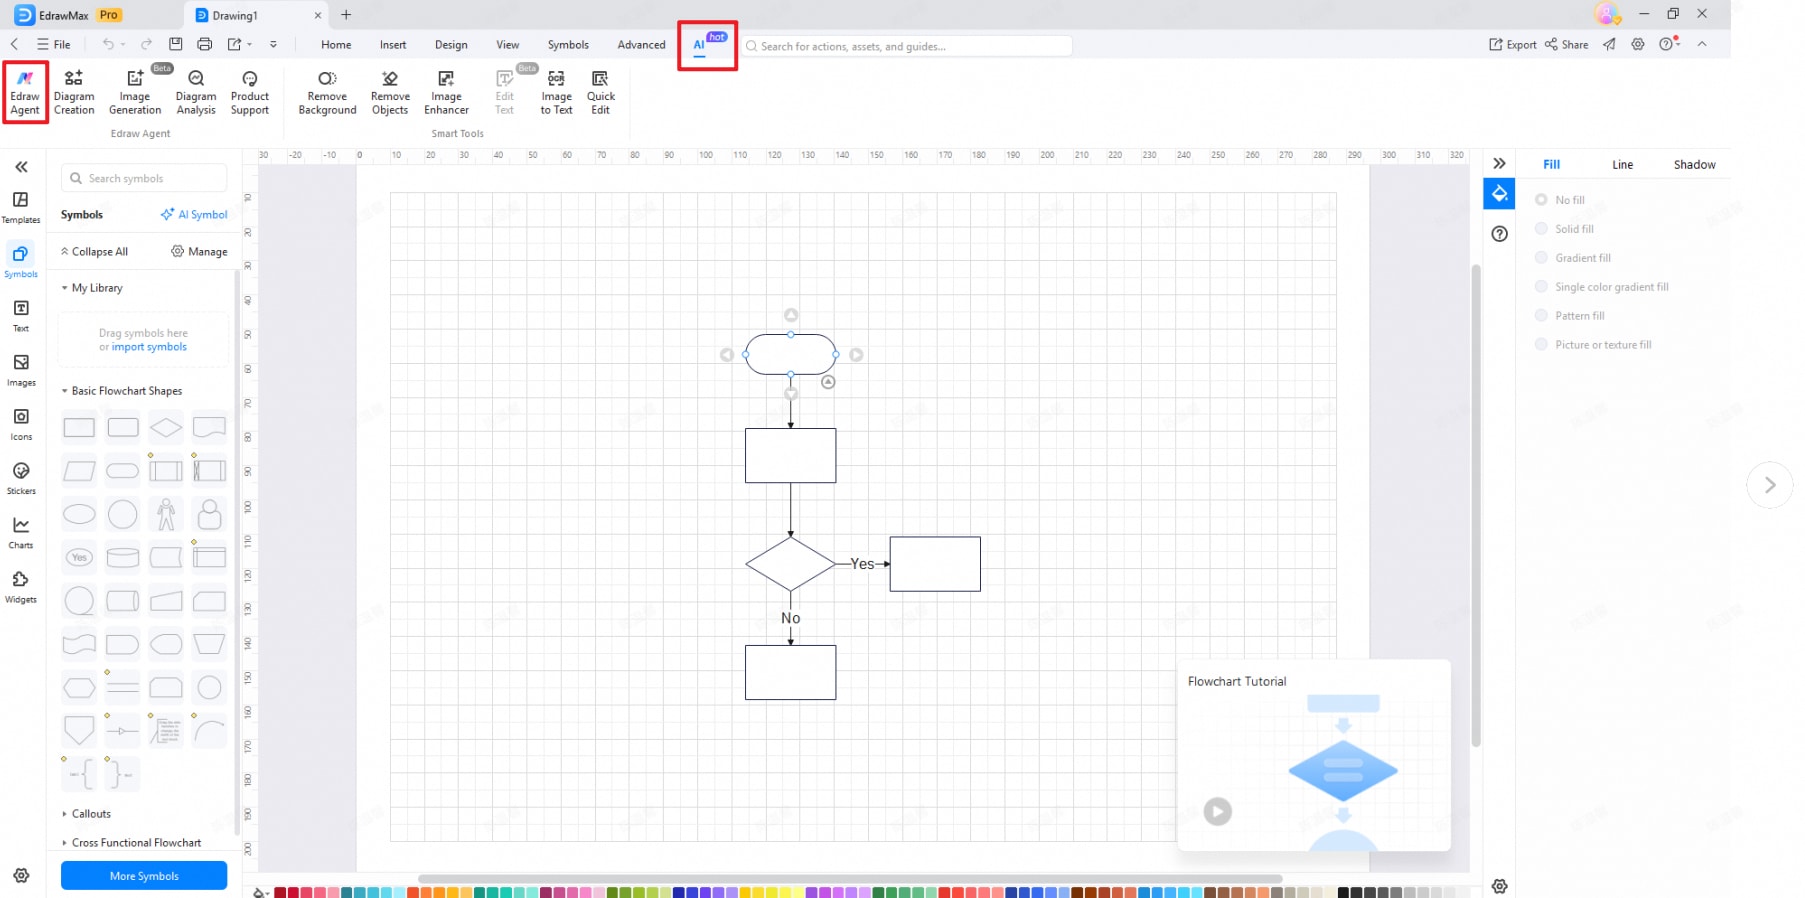
On the Quick Access Toolbar, you will find the AI option at the right end. Click it to access AI Chat, AI Drawing, AI diagram generators, and diagram analysis tools.
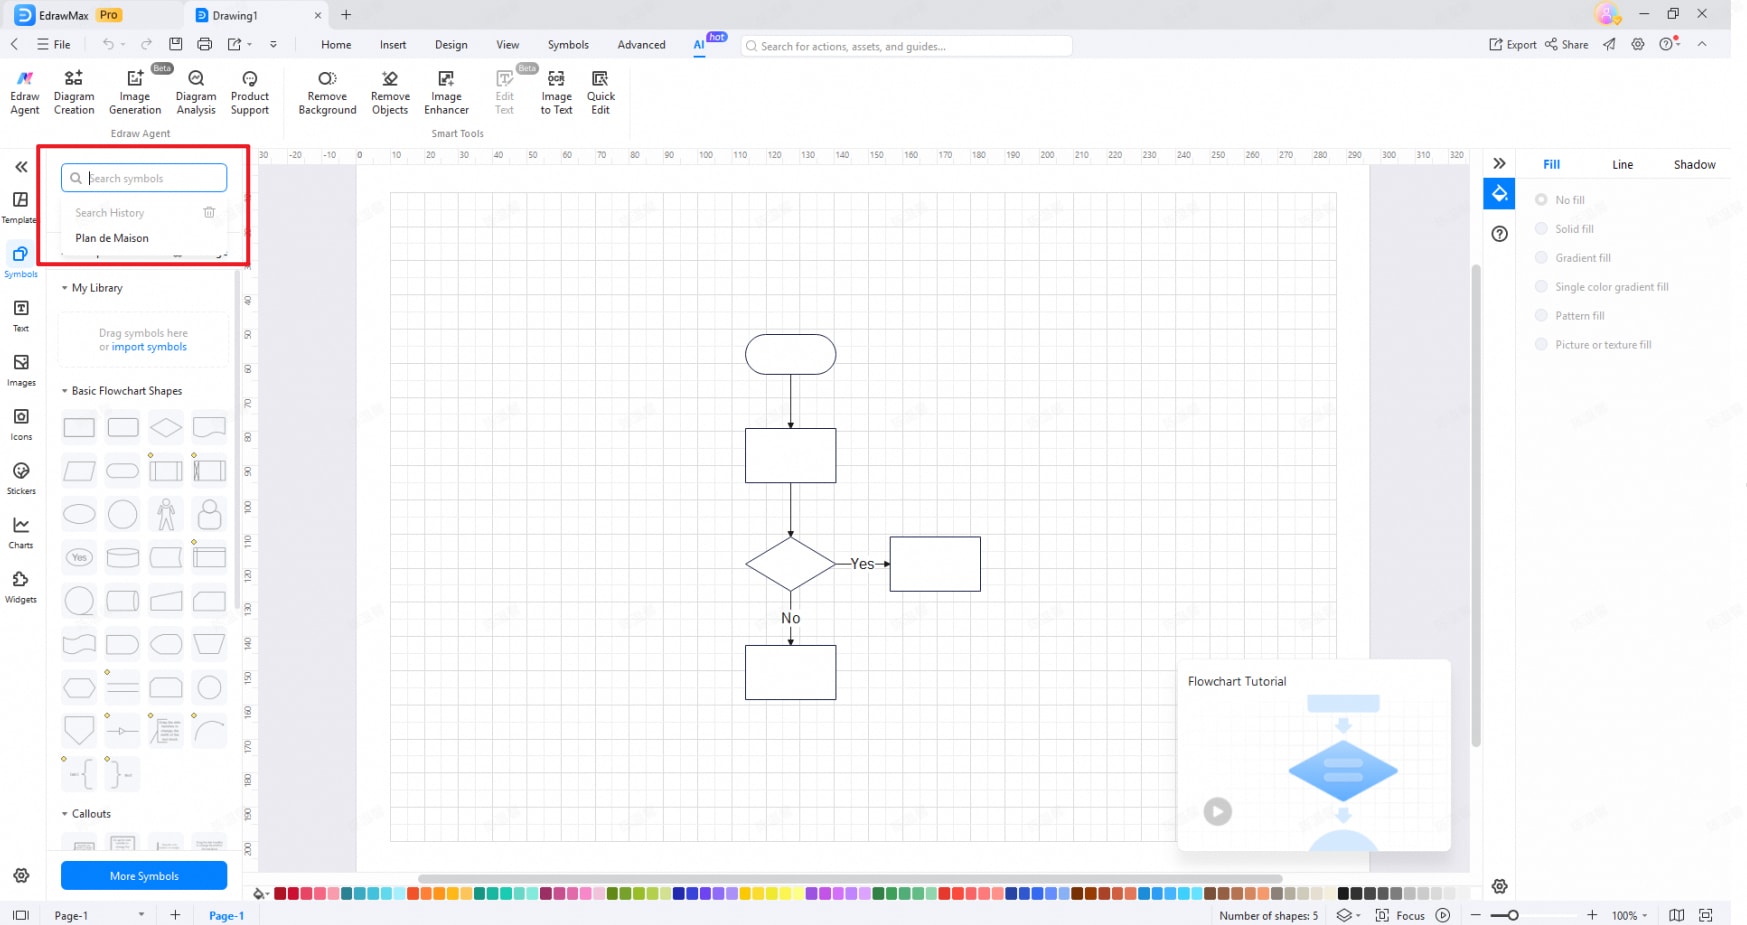
On the left side of the EdrawMax Canvas, you will find symbol libraries related to the selected diagram type, along with the My Library section. You can add personalized symbols and access them at any stage of diagram creation.
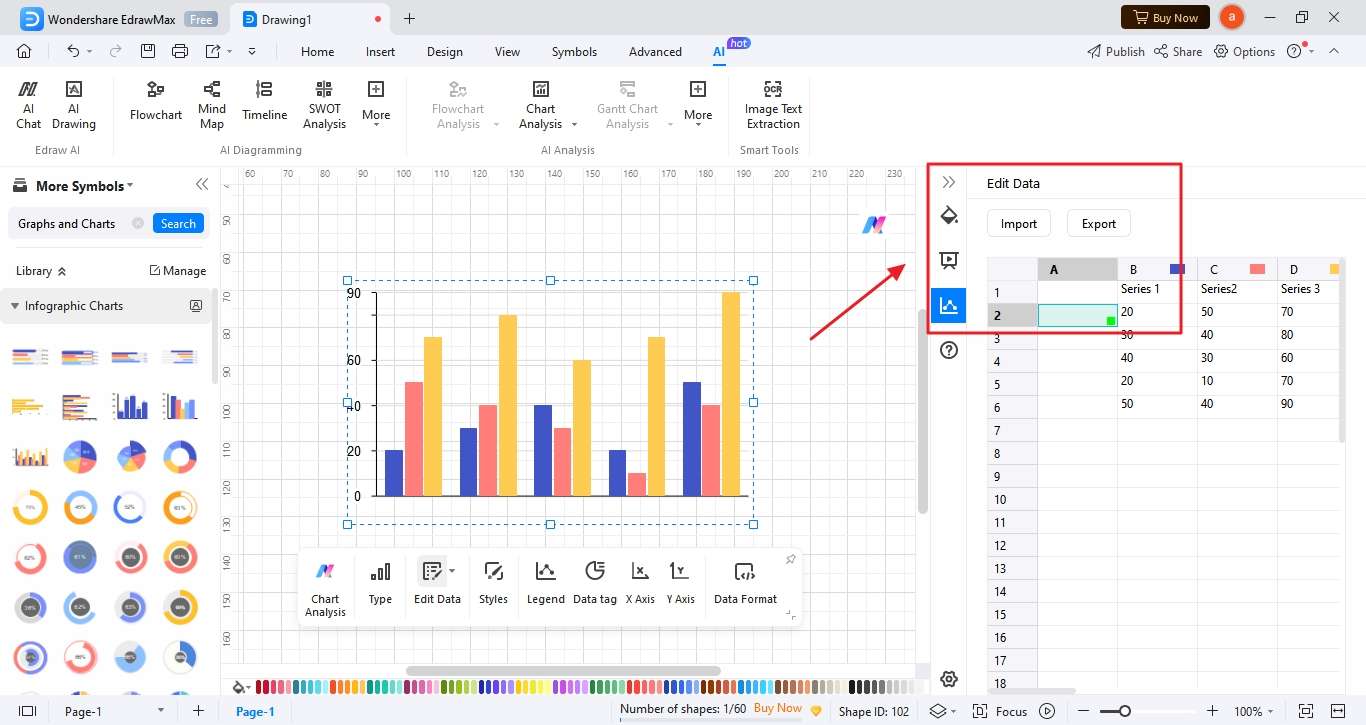
On the right side of the EdrawMax Canvas, the Context Pane provides customization options such as Fill, Line, and Shadow. For supported chart elements, you can also use the Chart option to edit data manually or import data from a CSV file.
At the bottom of the EdrawMax Canvas, you will find options such as Add Page, Layers, Focus, Slideshow, Zoom, Whole Page, and Page Width. These tools help you manage pages and control how the diagram is displayed on the canvas.
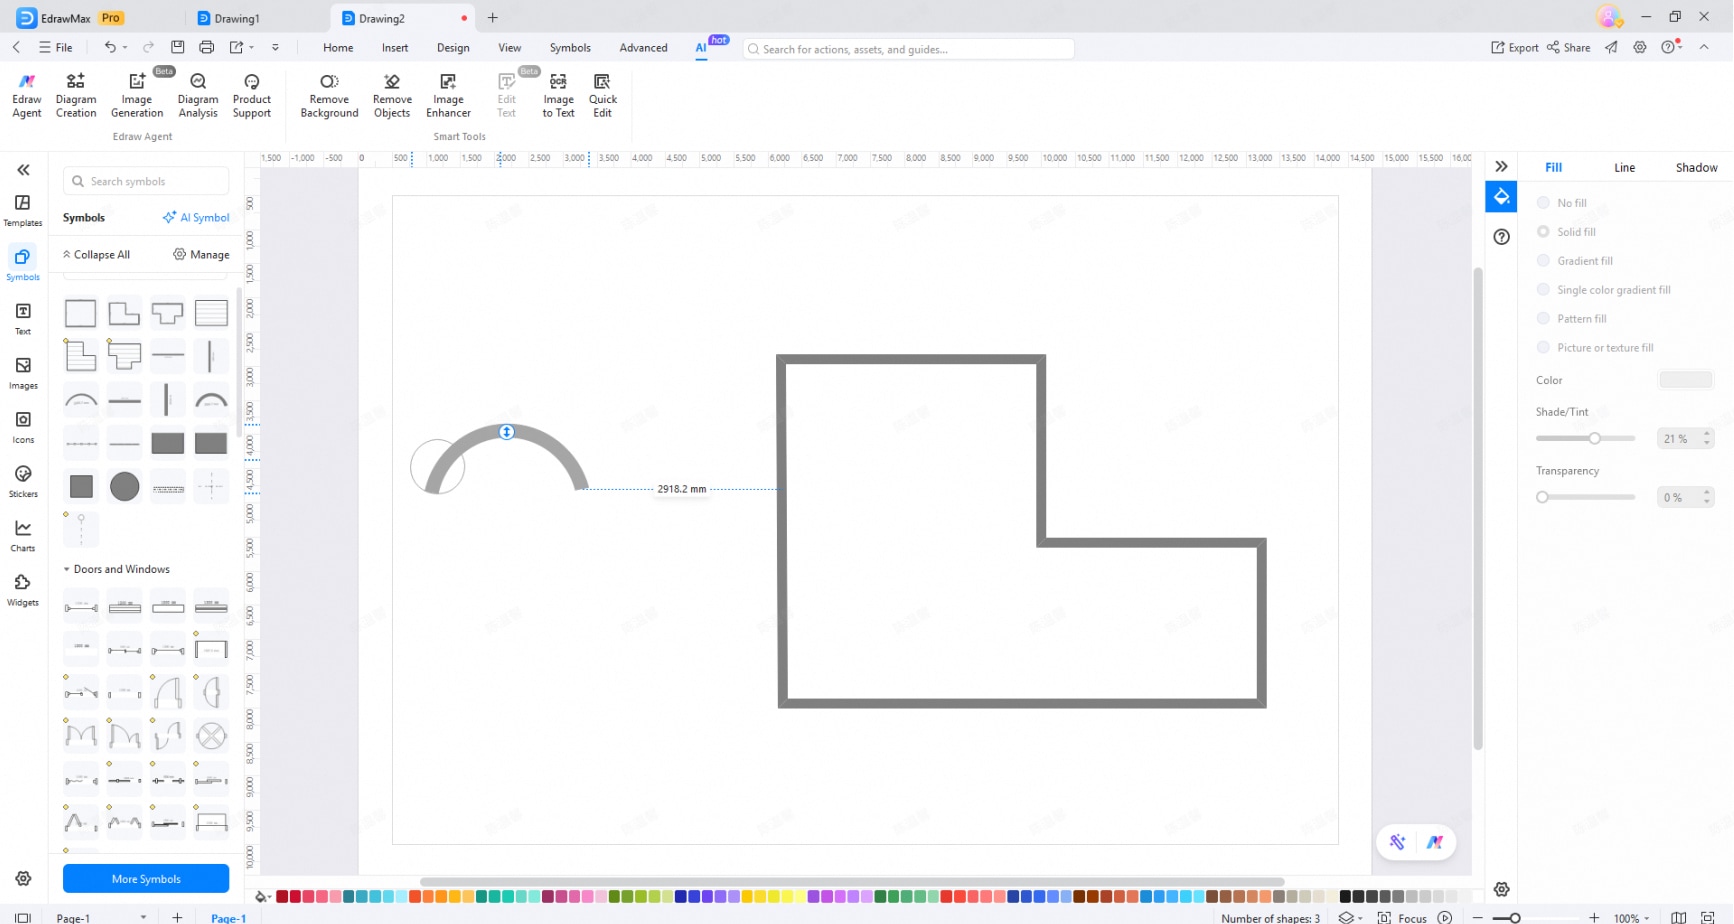
How to Make a Floor Plan in EdrawMax
EdrawMax provides dedicated floor plan symbols and precision drawing tools to help you create professional house layouts and other floor plans. You can draw walls, set precise wall measurements, adjust wall thickness, add dimension lines, and create detailed floor plan layouts.
1. Start a Floor Plan
From the EdrawMax homepage, search for Floor Plan or select the corresponding diagram category. You can start with a blank floor plan or choose a ready-made template to create your layout more quickly.
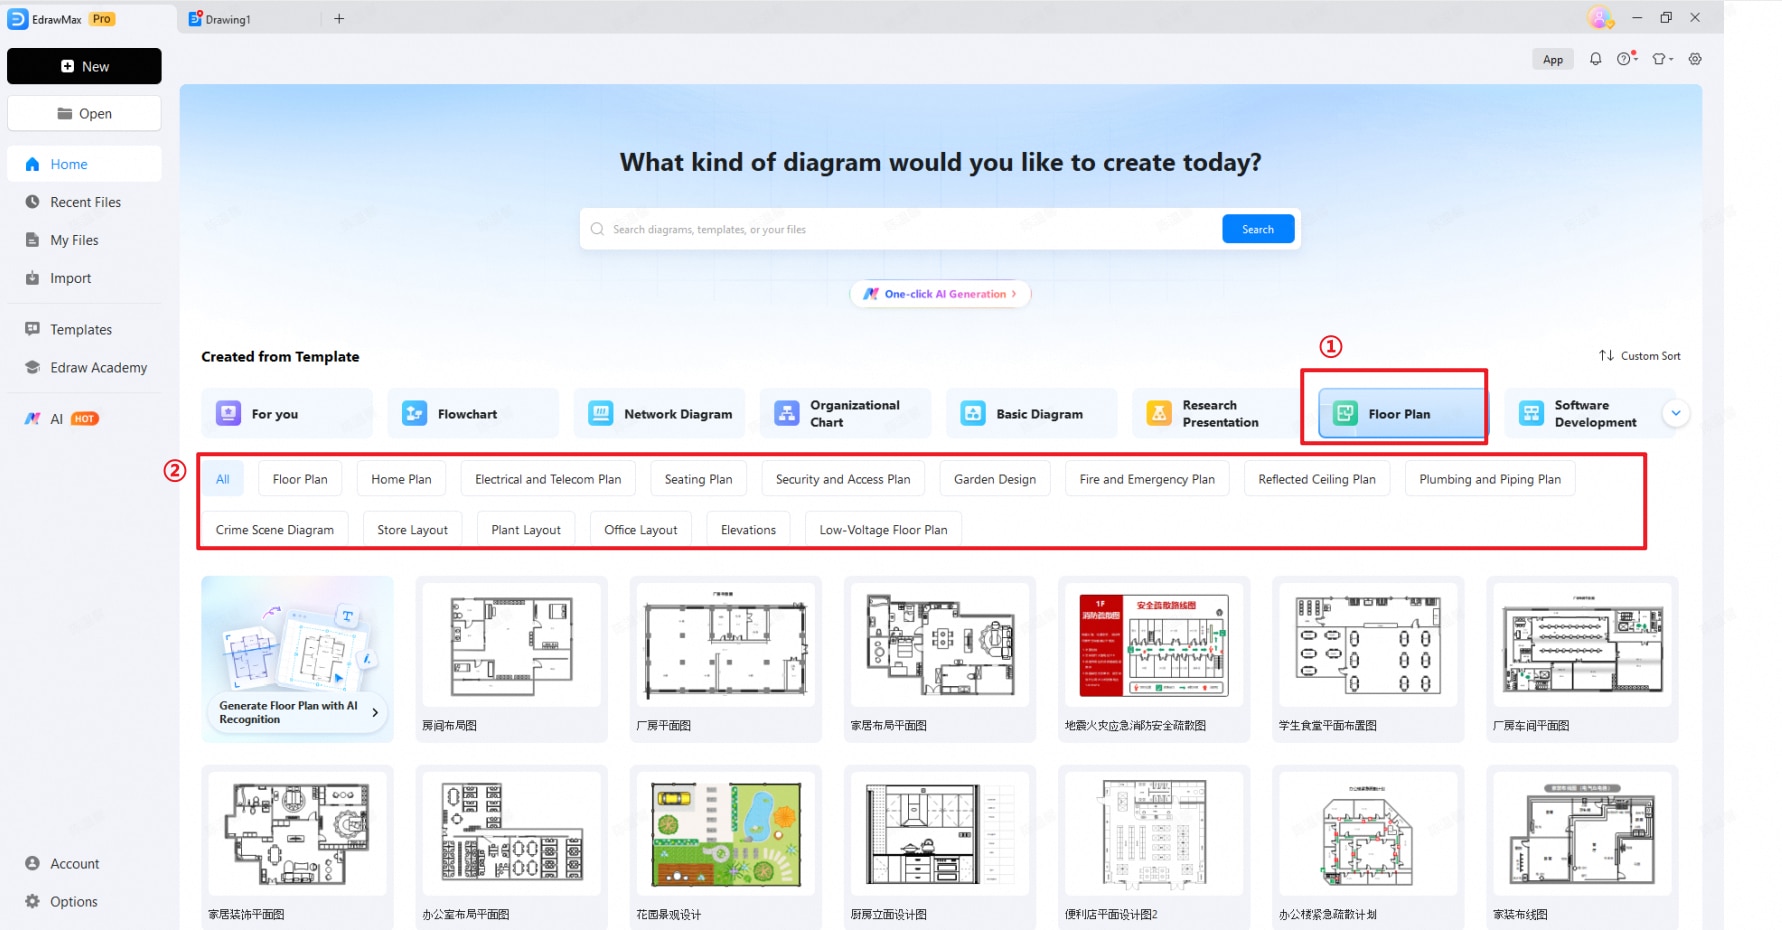
2. Add and Draw Walls
Open the floor plan symbol library on the left side of the workspace and locate Wall, Shell and Structure. You can add walls by dragging wall symbols onto the canvas or use the wall drawing tools to create a custom layout.
Drag Walls from the Symbol Library
Select a wall symbol from Wall, Shell and Structure, drag it onto the canvas, and place it where needed. You can then reposition or adjust the wall according to your layout.
Draw Connected Walls
To create connected walls more efficiently, select the Draw Wall tool. Click on the canvas to set the starting point, move the pointer in the desired direction, and click again to set the endpoint. Continue drawing additional wall segments as needed, then press Esc when you finish.
For more precise layouts, you can enter an exact wall length while drawing instead of adjusting the wall manually afterward.
Continue Drawing from an Existing Wall
You can also extend a floor plan directly from an existing wall. Select the wall and use the + control at its endpoint to continue drawing a connected wall from the existing structure.
3. Set Wall Length and Thickness
For accurate floor plans, EdrawMax allows you to set precise wall measurements. Select a wall on the canvas to access its available wall settings.
Enter the required wall length in the corresponding measurement field to adjust the wall precisely. You can also set the Wall Thickness to match your floor plan requirements.
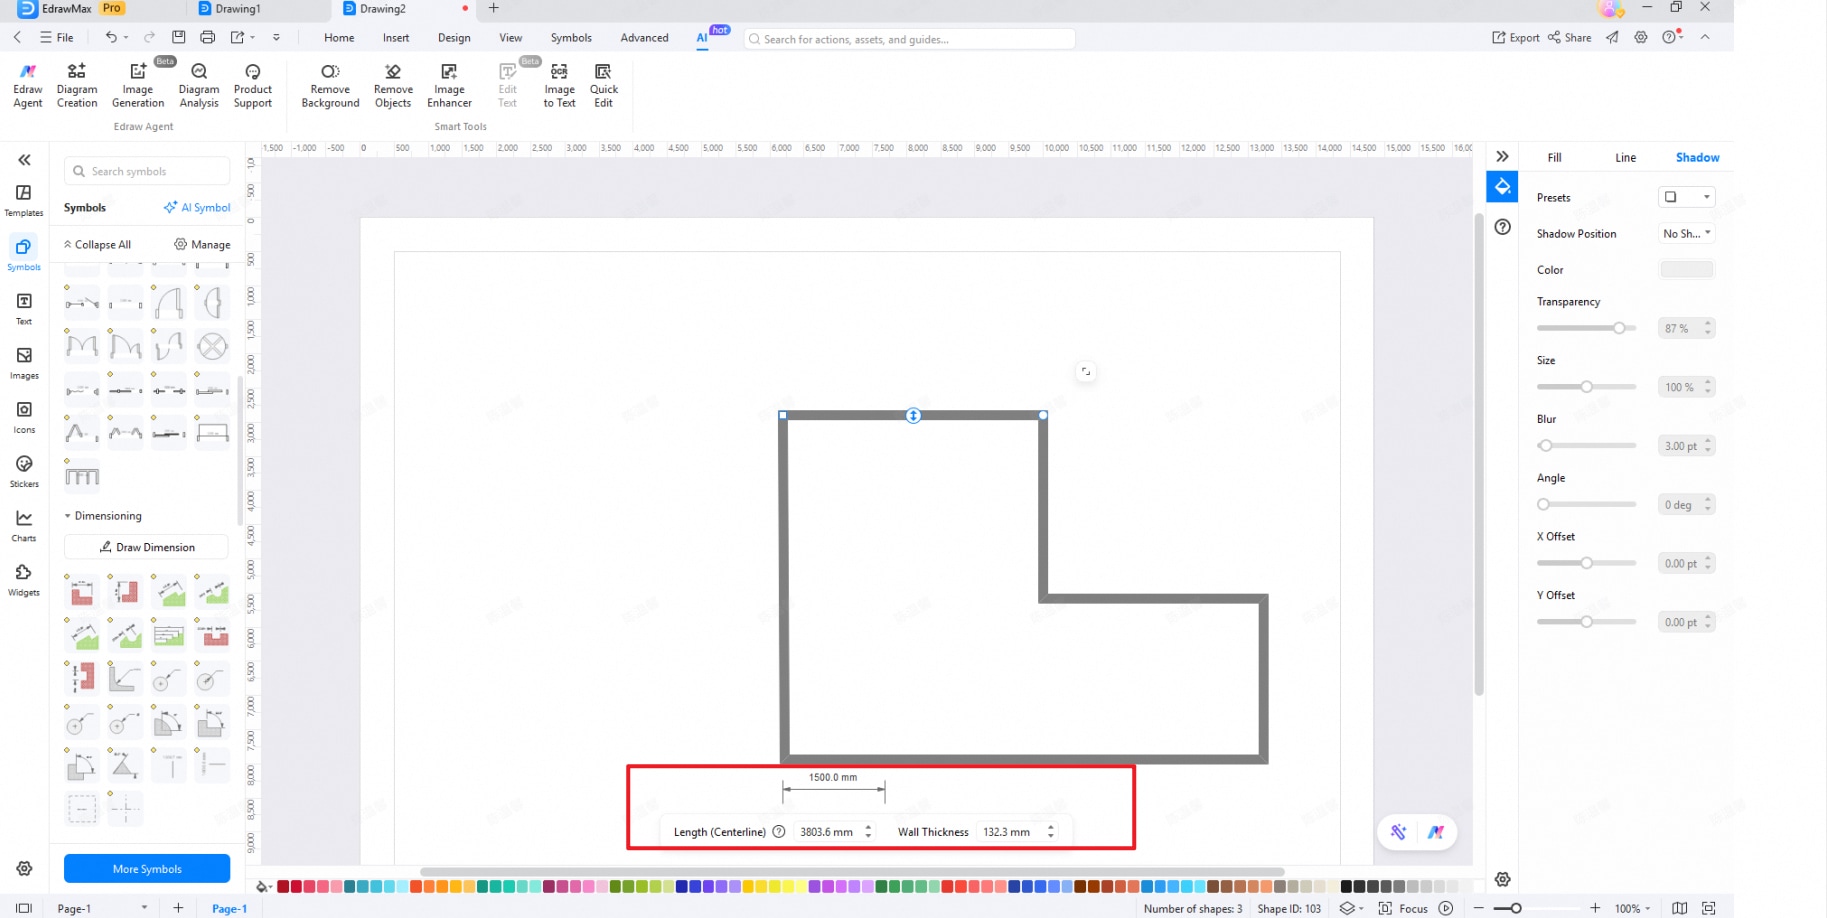
4. Add Dimensions to Your Floor Plan
To show precise measurements on your floor plan, open the Dimensioning section in the Symbols panel and click Draw Dimension.
Place the dimension line along the wall or area you want to measure. EdrawMax displays the measurement directly on the canvas, making it easier to review distances and dimensions throughout your floor plan.
5. Display Room Area
EdrawMax can automatically calculate and display the area of enclosed rooms. Enable the available room area display option to show the calculated area directly on the floor plan.
Once a room is completely enclosed by connected walls, EdrawMax can identify the enclosed space and display its area on the canvas. If you adjust the surrounding walls, the room area will update accordingly.
Note: Room area can only be calculated for spaces that are completely enclosed by connected walls.
6. Complete Your Floor Plan
Once the main wall structure is ready, you can add doors, windows, furniture, appliances, labels, and other floor plan symbols from the symbol libraries. Adjust the layout and formatting as needed, then save, export, or share your completed floor plan.
Customize EdrawMax Settings
In Wondershare EdrawMax, you can change the UI theme to suit your preferences. Available appearance options may include Auto, Light, and Dark. Open the Options menu and select the preferred appearance setting.
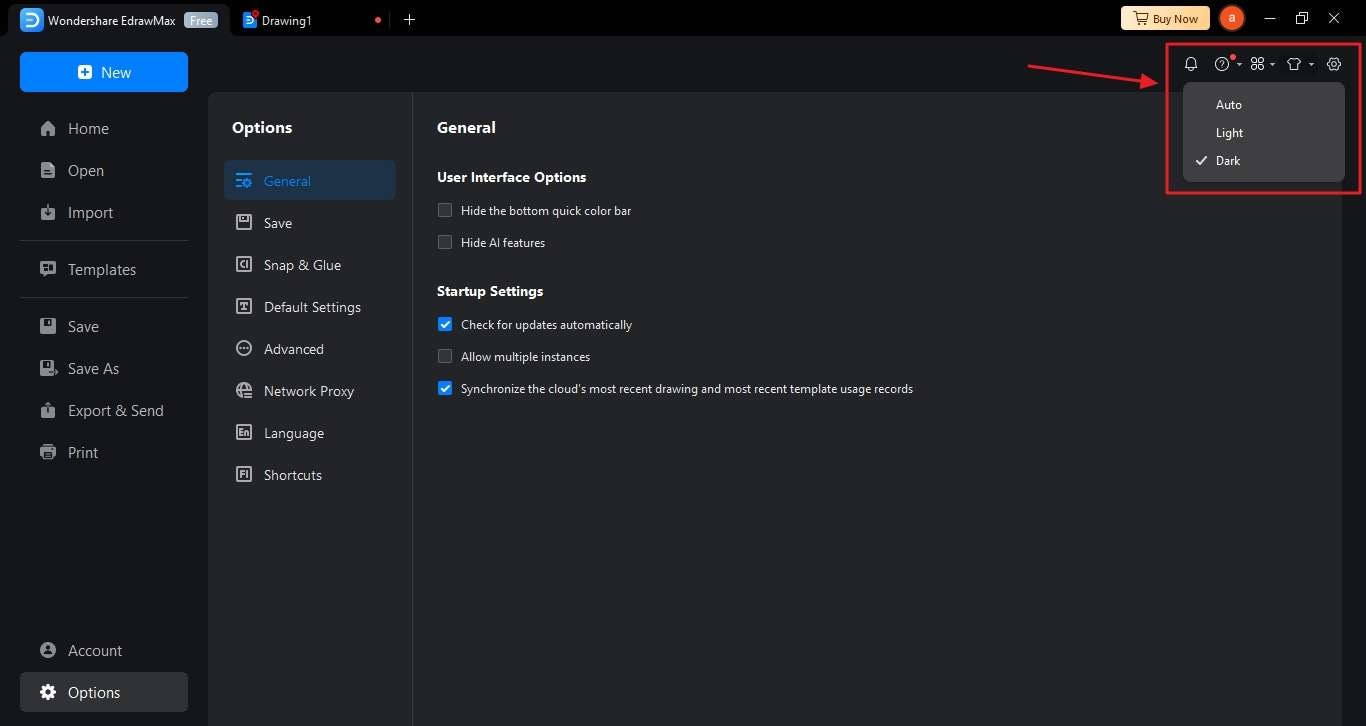
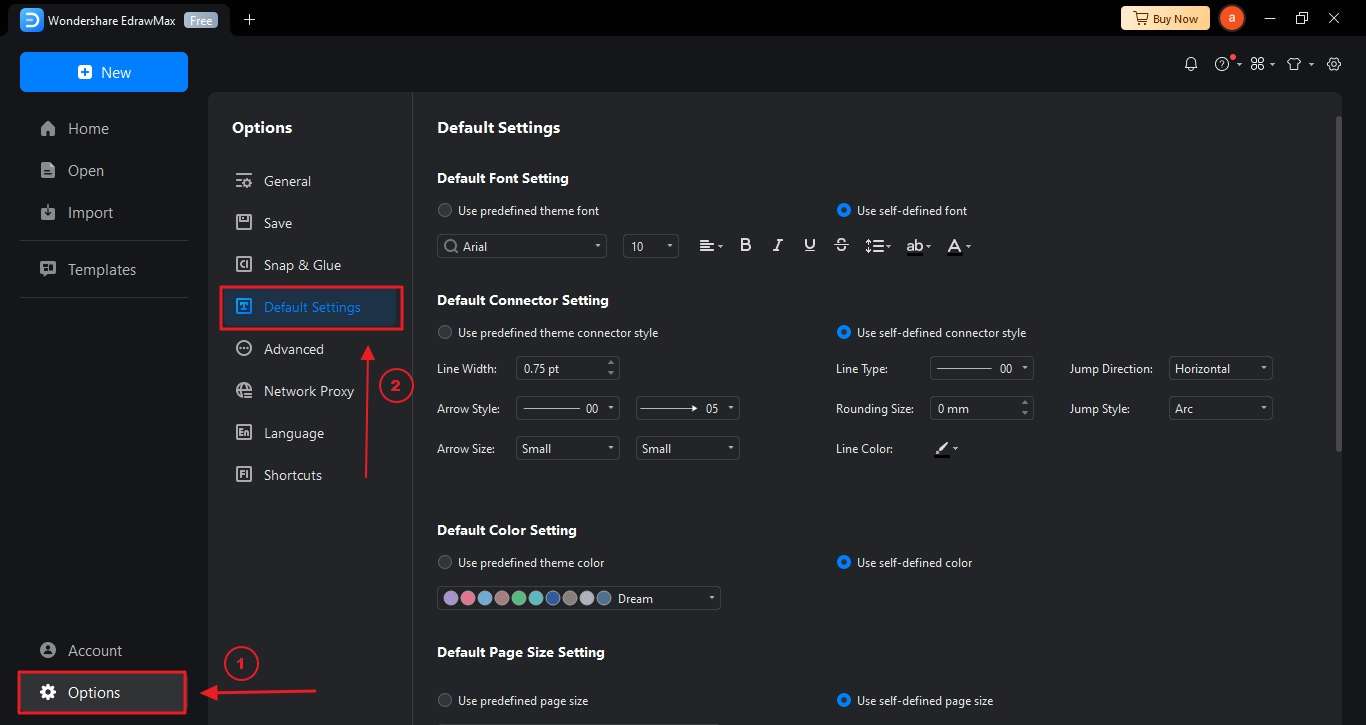
To make diagramming more efficient, EdrawMax also provides default format settings for shapes and documents. Go to the relevant Options or Default Settings section to customize fonts, connectors, colors, page size, orientation, date format, units, and other preferences.
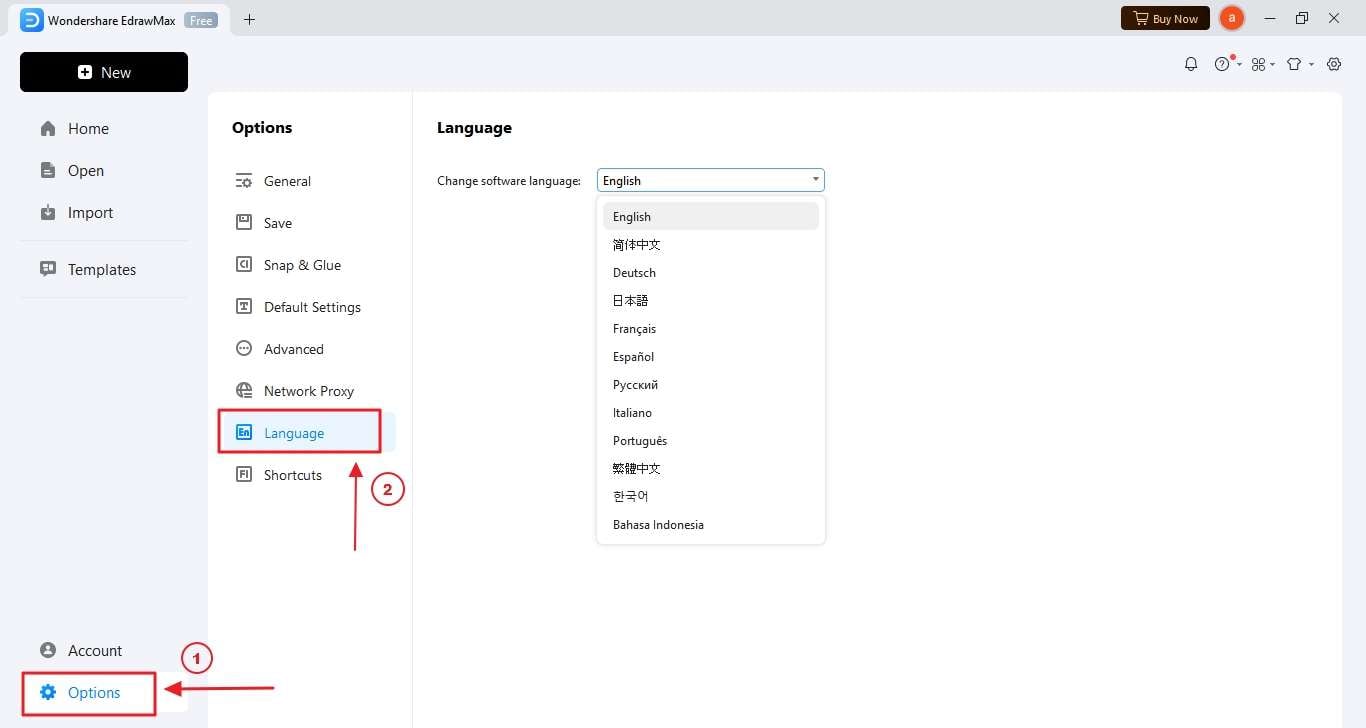
You can also change the software display language from the Language section in the Options menu.
 (AI & Web)